|
|
|
Porsche, and the Porsche crest are registered trademarks of Dr. Ing. h.c. F. Porsche AG.
This site is not affiliated with Porsche in any way. Its only purpose is to provide an online forum for car enthusiasts. All other trademarks are property of their respective owners. |
|
|

  |

| cary |
 Nov 4 2018, 08:49 AM Nov 4 2018, 08:49 AM
Post
#141
|
|
Advanced Member  Group: Members Posts: 3,900 Joined: 26-January 04 From: Sherwood Oregon Member No.: 1,608 Region Association: Pacific Northwest |
John it comes off with lacquer thinner. But I'll leave that up to the painter.
I'm going to try and get a hold of Rod Emory and see what he does on his projects. He buys the stuff by the pallet. |
   |

 
|
| cary |
Nov 4 2018, 08:54 AM
Post
#142
|
|
Advanced Member Group: Members Posts: 3,900 Joined: 26-January 04 From: Sherwood Oregon Member No.: 1,608 Region Association: Pacific Northwest |
Started Saturday with getting Jack set up create a couple more pairs of suspension ties.
1st. our cleaned off partial upper long for test fitting. 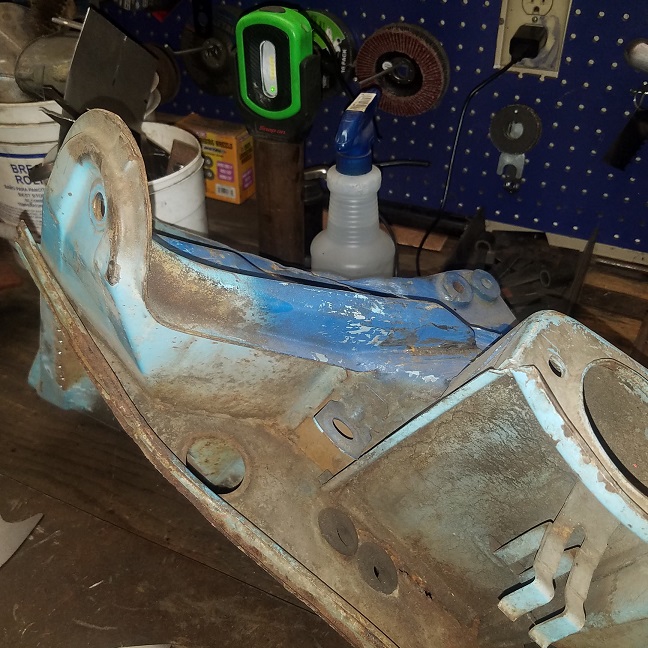 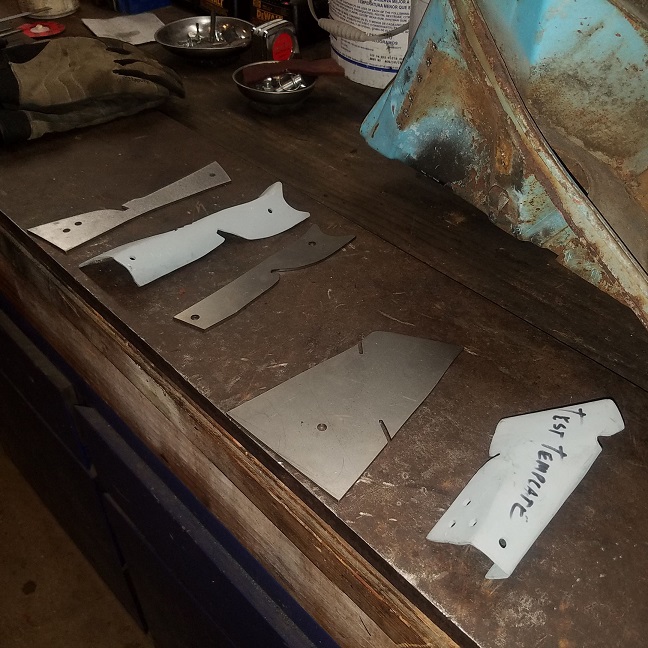 Got the 1st weld together piece just about ready.  |
|
|
|
| cary |
Nov 4 2018, 09:53 AM
Post
#143
|
|
Advanced Member Group: Members Posts: 3,900 Joined: 26-January 04 From: Sherwood Oregon Member No.: 1,608 Region Association: Pacific Northwest |
Here's a couple links of getting to the install task.
http://www.914world.com/bbs2/index.php?sho...p;#entry2537320 http://www.914world.com/bbs2/index.php?s=&...t&p=2536585 |
|
|
|
| cary |
Nov 4 2018, 10:54 AM
Post
#144
|
|
Advanced Member Group: Members Posts: 3,900 Joined: 26-January 04 From: Sherwood Oregon Member No.: 1,608 Region Association: Pacific Northwest |
QUOTE(raynekat @ Nov 3 2018, 10:41 AM)  Looking good there on all that fine rust repair work. Thank You, fine sir ................ |
|
|
|
| cary |
Nov 16 2018, 09:59 PM
Post
#145
|
|
Advanced Member Group: Members Posts: 3,900 Joined: 26-January 04 From: Sherwood Oregon Member No.: 1,608 Region Association: Pacific Northwest |
Back to work on Taylor's car.
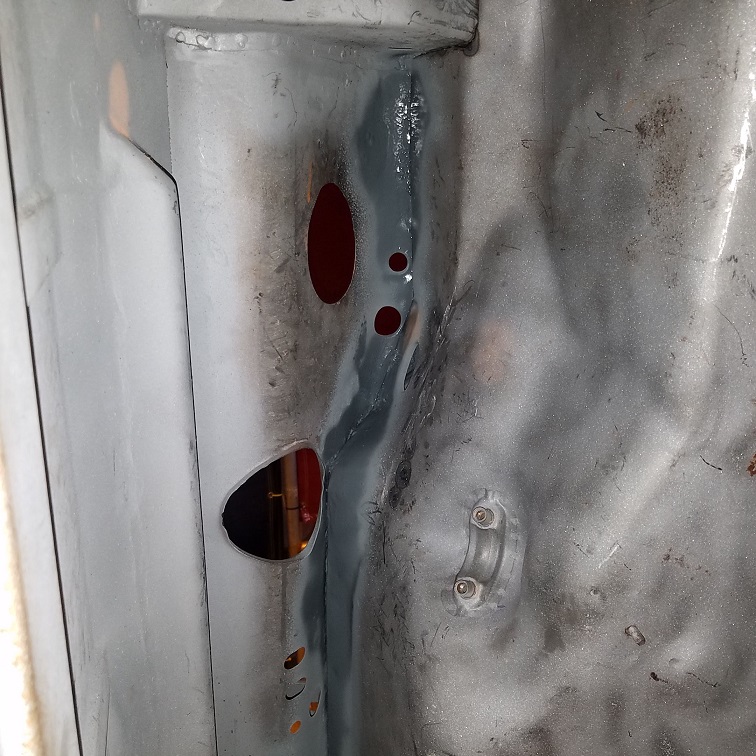
Friday task #1. Weld in the cut outs from the clutch tube repair. Job one is creating copper backers for the middle cut out. That one has the tubes laying right on the bottom of the tunnel................ (IMG:style_emoticons/default/sad.gif) I use an old piece of copper pipe to create the backers. Cut into three 1" sections and a 3" section. On Doug's car I tried to make them removal. Not. They're jammed in too tight. So they'll be there for eternity. But they'll be hidden under the green Eastwood Encapsulator that will be applied in the future. 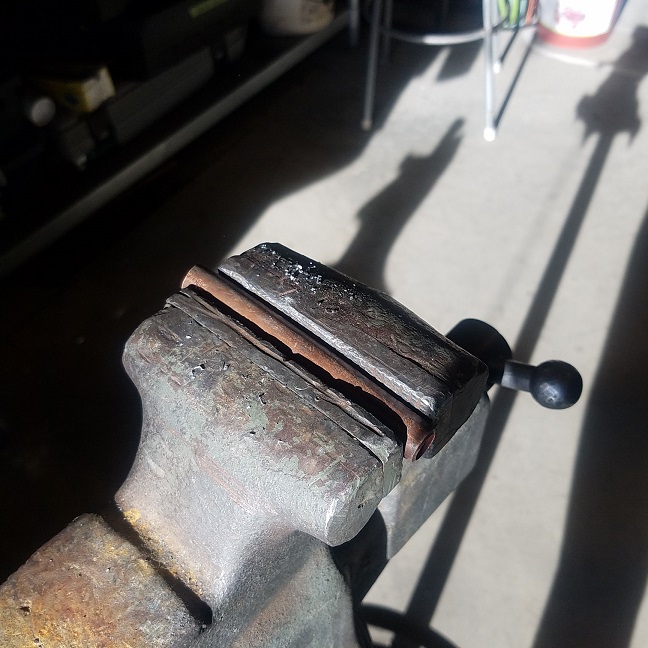 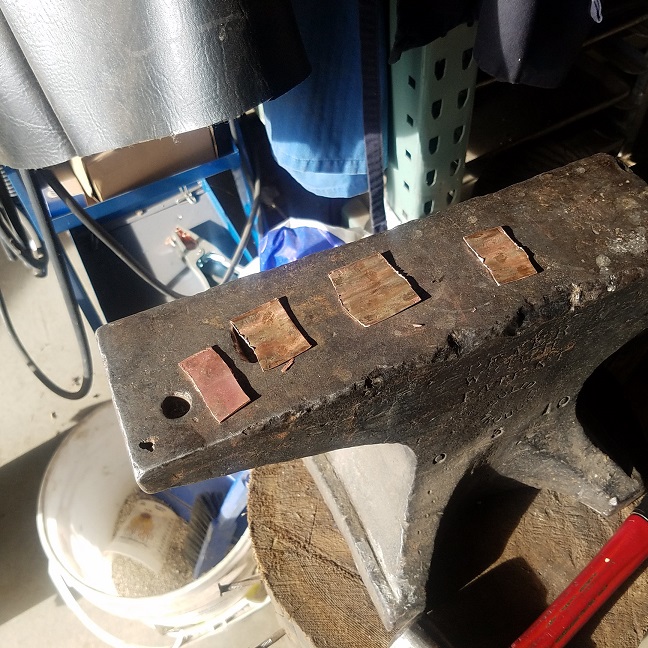 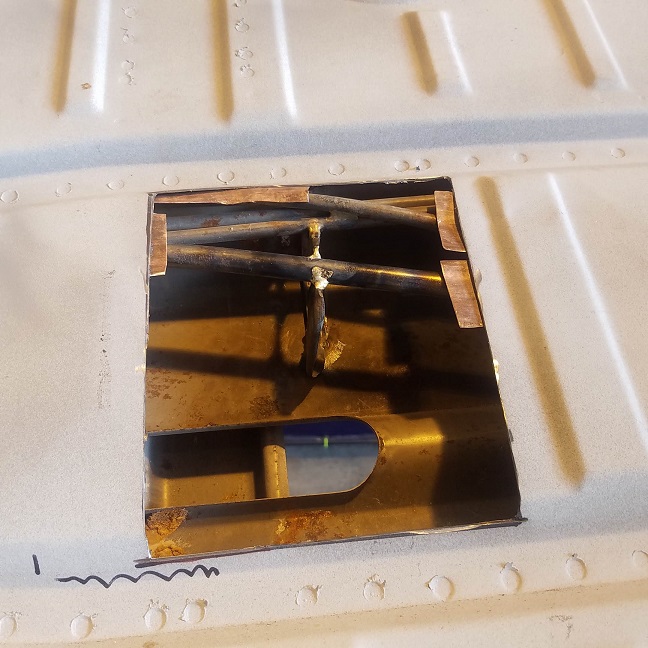 All covered up. Not going to over finish the welds. The car is going to be totally undercoated. 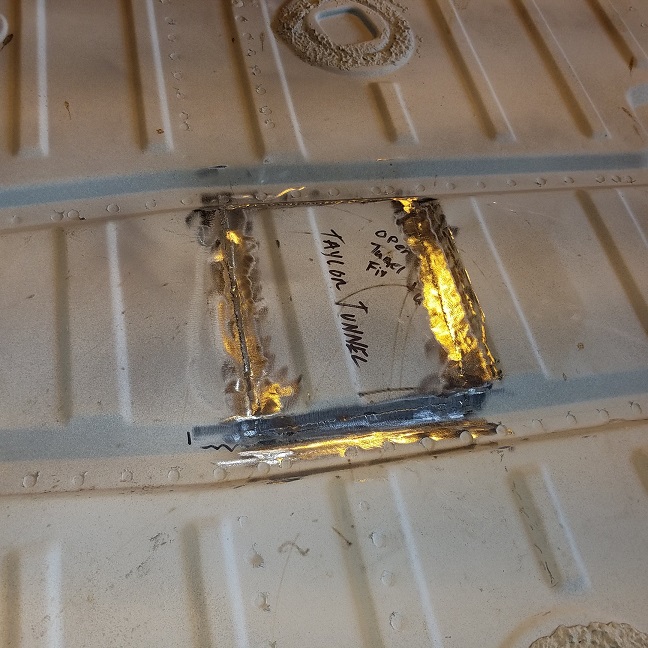 |
|
|
|
| cary |
Nov 16 2018, 10:07 PM
Post
#146
|
|
Advanced Member Group: Members Posts: 3,900 Joined: 26-January 04 From: Sherwood Oregon Member No.: 1,608 Region Association: Pacific Northwest |
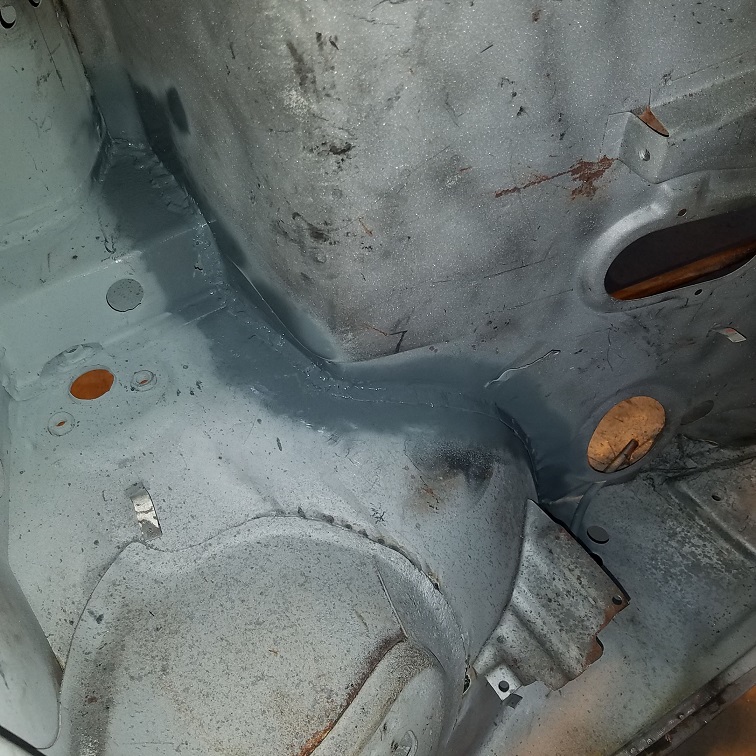
Job #2. Weld in the suspension mount tie plates. Took Super In Law another 4 hours to get the tight fit I was looking for.
 He's creating 2 more sets of rights and one left. Running my MillerMatic 141 at Warp Factor 10. Capn I'm giving it all I got .... 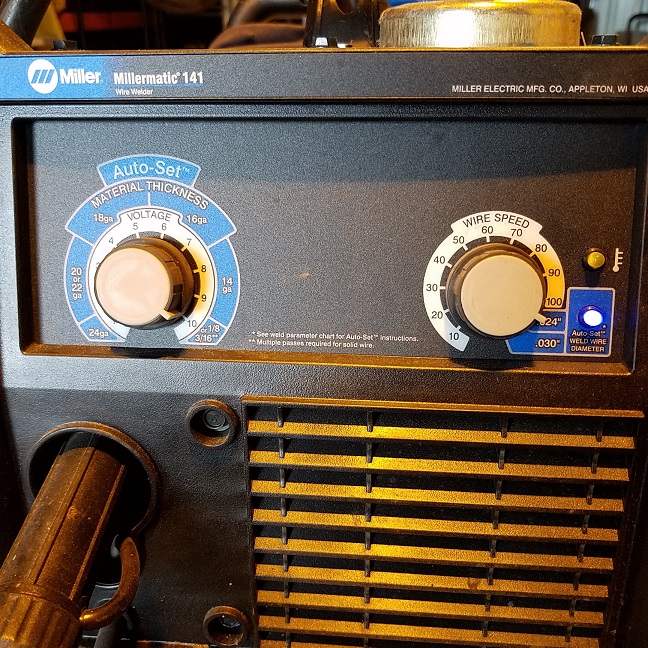 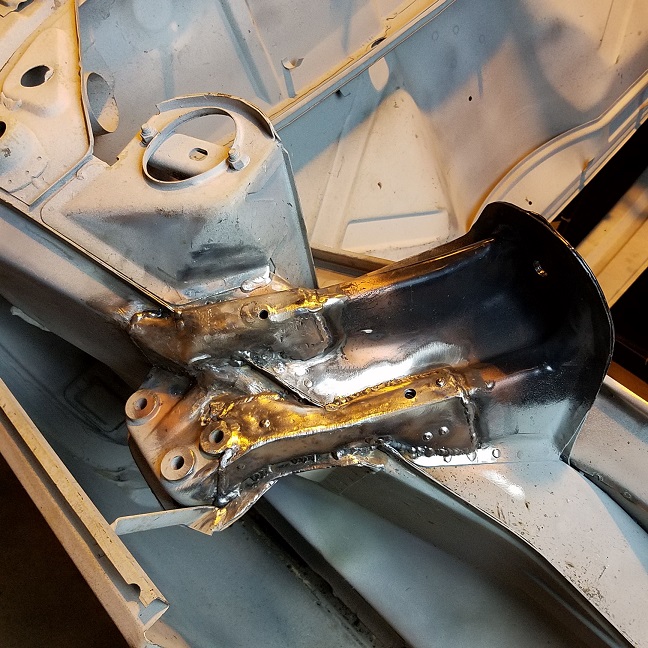 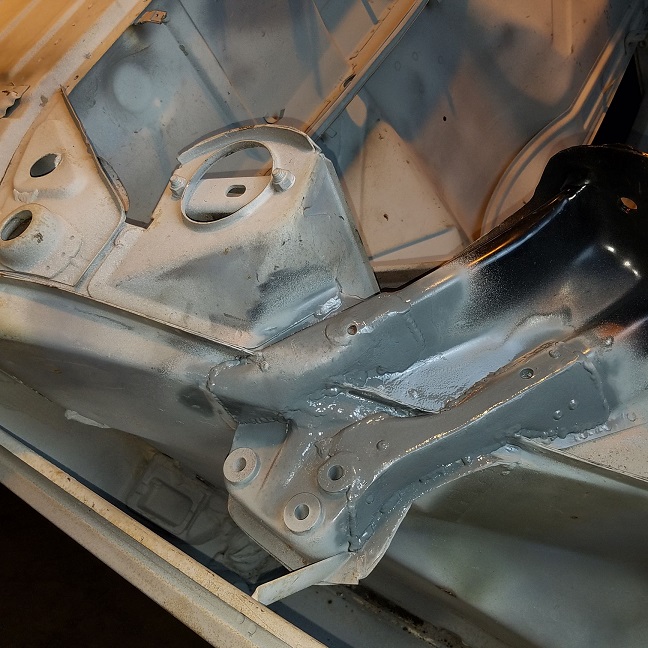 Gooder than new .................... |
|
|
|
| cary |
Dec 14 2018, 09:00 AM
Post
#147
|
|
Advanced Member Group: Members Posts: 3,900 Joined: 26-January 04 From: Sherwood Oregon Member No.: 1,608 Region Association: Pacific Northwest |
All the flanges aren't repaired, but I did a bulkhead test fit on Taylor's car on Tuesday. A little tight in a couple spots, will need some scalpel work. But all in all pretty pleased that it would slip right in.
  If it warms up and stops raining we'll getr blasted along with the tail light panel Taylor brought over. |
|
|
|
| cary |
Feb 12 2019, 01:29 PM
Post
#148
|
|
Advanced Member Group: Members Posts: 3,900 Joined: 26-January 04 From: Sherwood Oregon Member No.: 1,608 Region Association: Pacific Northwest |
Finally getting back to Taylor's car after a getting Mick's car up and running and solid month at Rothsport.
Job #1, strip paint off donor part. 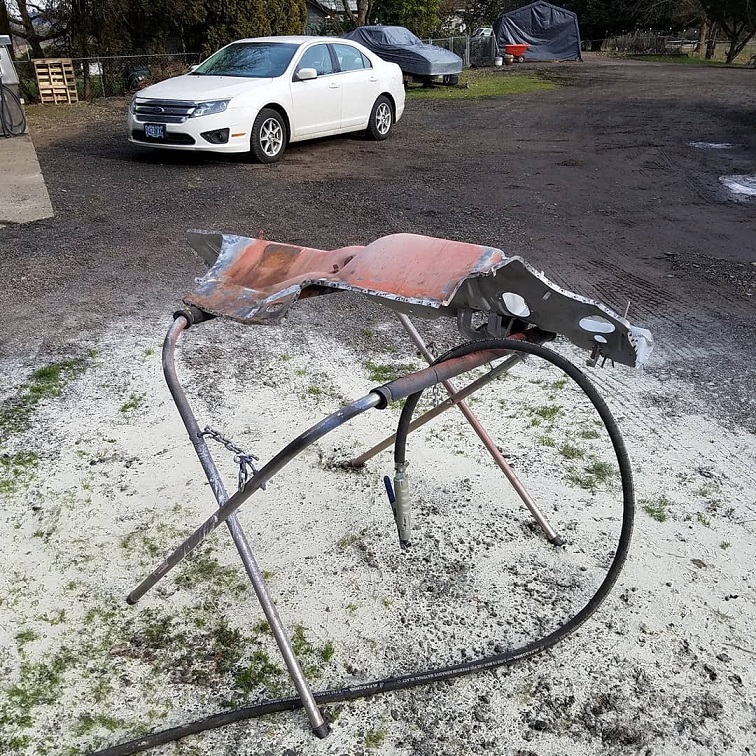 Ready to go.  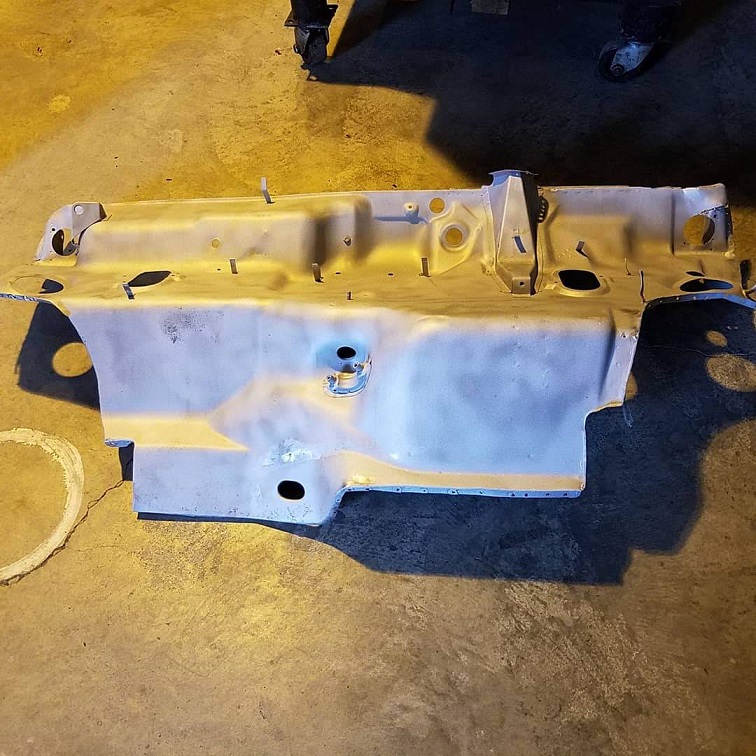 Work continues. In and out, In & out to get it to fit correctly. Almost there. In a conversation with Bruce Stone sounds someone in Europe is thinking of taking on this crazy task. Not for the faint of heart. |
|
|
|
| cary |
Mar 7 2019, 01:32 PM
Post
#149
|
|
Advanced Member Group: Members Posts: 3,900 Joined: 26-January 04 From: Sherwood Oregon Member No.: 1,608 Region Association: Pacific Northwest |
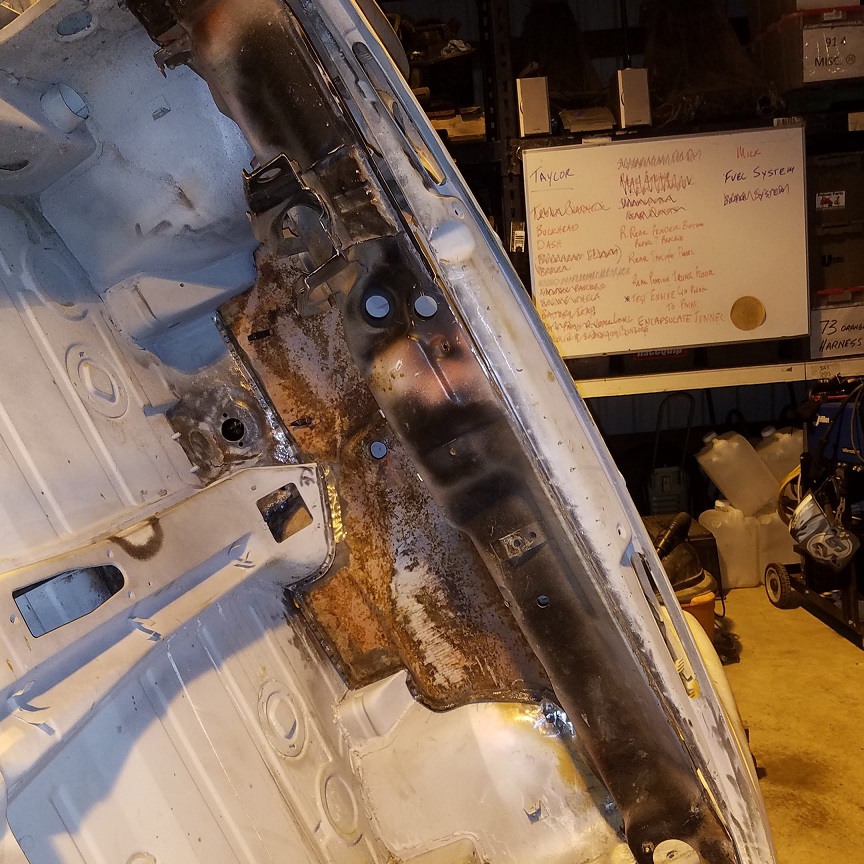
Time to get back on the horse. Beginning the welding in of the bulkhead. Because of all the angles, bends and flanges they'll still be a little bit trimming and patching of the upper part after the lower portion is welded in.
     Like I've said before, this piece really isn't supposed to be removed without first removing the cowl/windshield frame. |
|
|
|
| cary |
Mar 7 2019, 01:42 PM
Post
#150
|
|
Advanced Member Group: Members Posts: 3,900 Joined: 26-January 04 From: Sherwood Oregon Member No.: 1,608 Region Association: Pacific Northwest |
The left corner / vent hole will have to be re created. Got pretty tore up during the harvesting of the donor part.
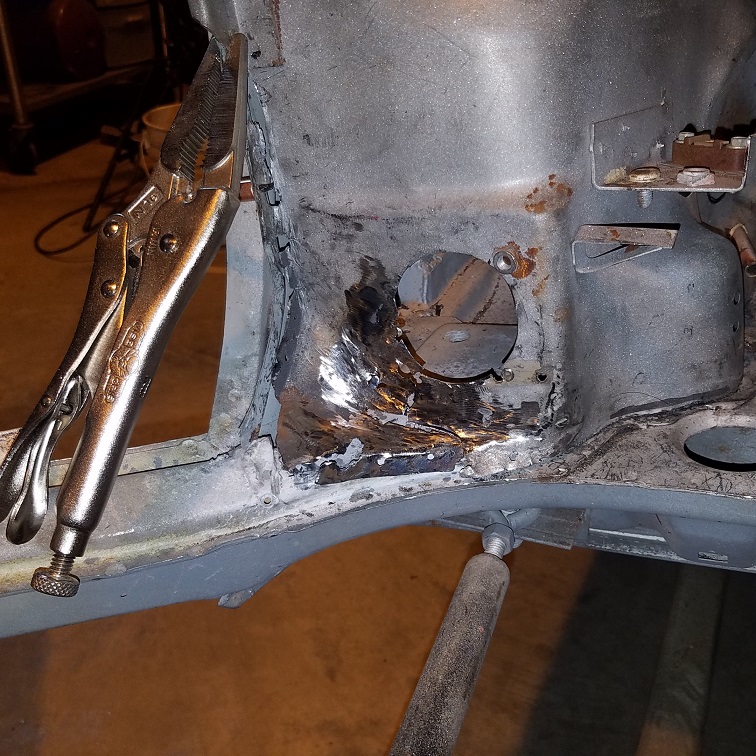 Wouldn't be a MiddleMotors post without a couple tool shots.   |
|
|
|
| bbrock |
Mar 7 2019, 05:37 PM
Post
#151
|
|
914 Guru Group: Members Posts: 5,269 Joined: 17-February 17 From: Montana Member No.: 20,845 Region Association: Rocky Mountains |
I am in absolute awe of this bulkhead patch. Love seeing the progress. Thanks for posting. (IMG:style_emoticons/default/smiley_notworthy.gif)
|
|
|
|
| cary |
Mar 8 2019, 11:54 AM
Post
#152
|
|
Advanced Member Group: Members Posts: 3,900 Joined: 26-January 04 From: Sherwood Oregon Member No.: 1,608 Region Association: Pacific Northwest |
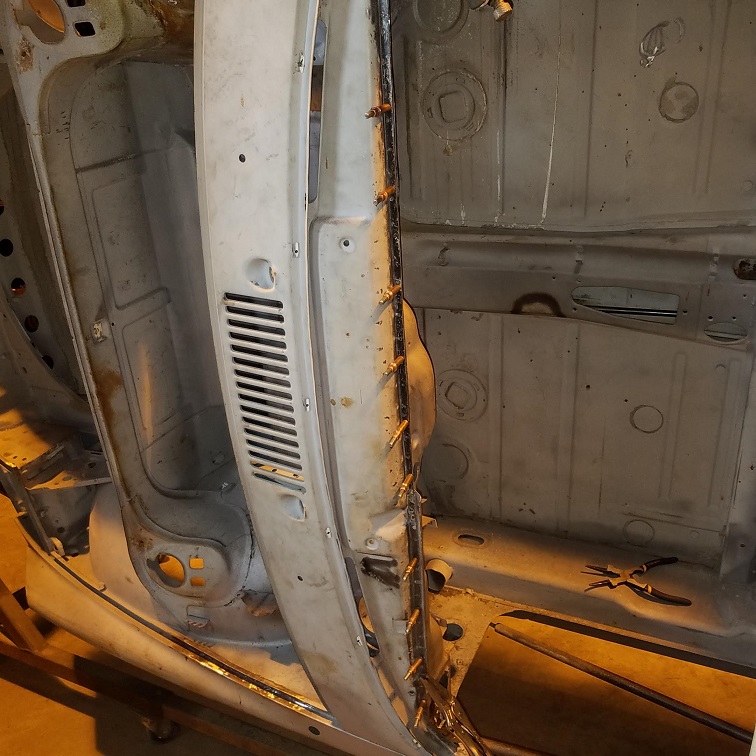
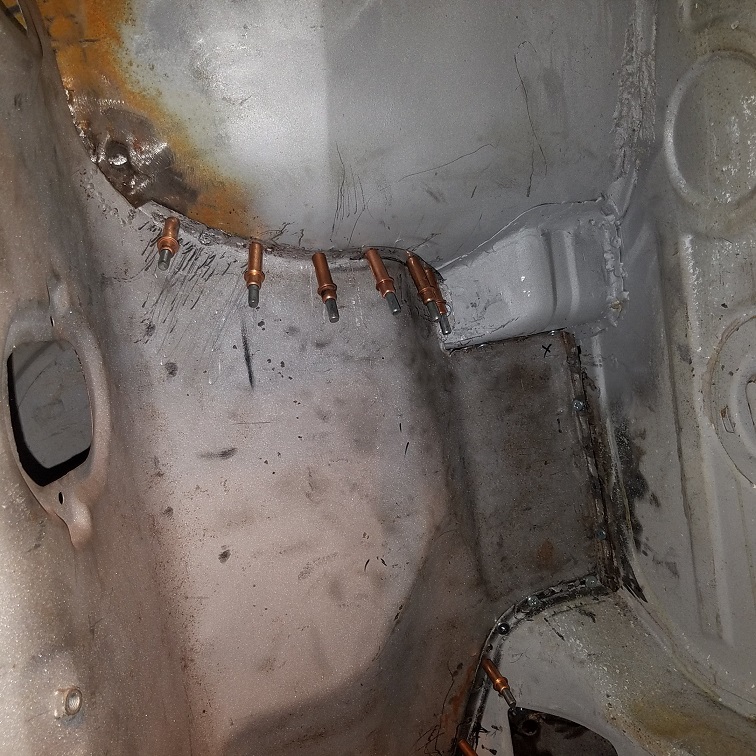
Let the welding begin.
Series shows 1/8 Cleco hole. Then outer layer enlarged with sheet metal cutter. Then rosette welded. 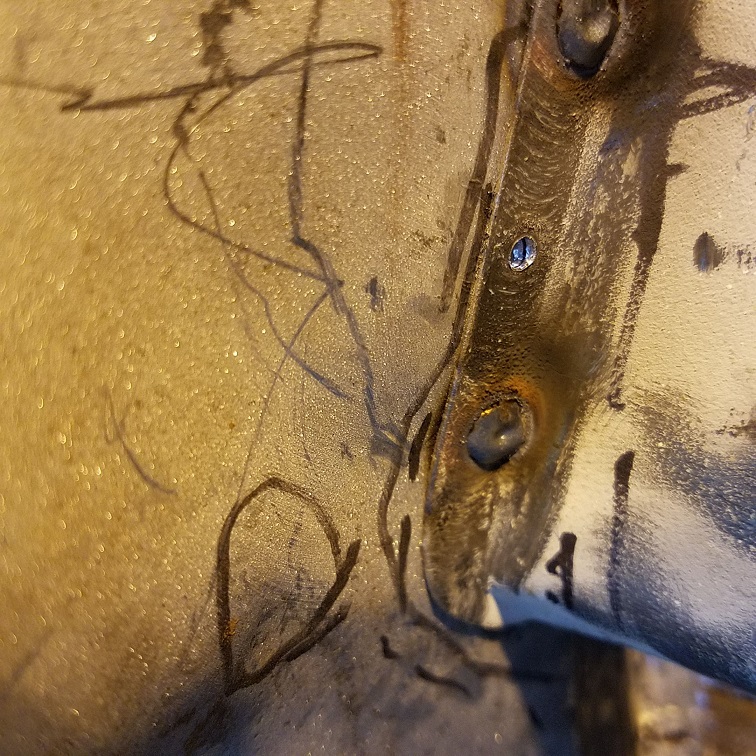 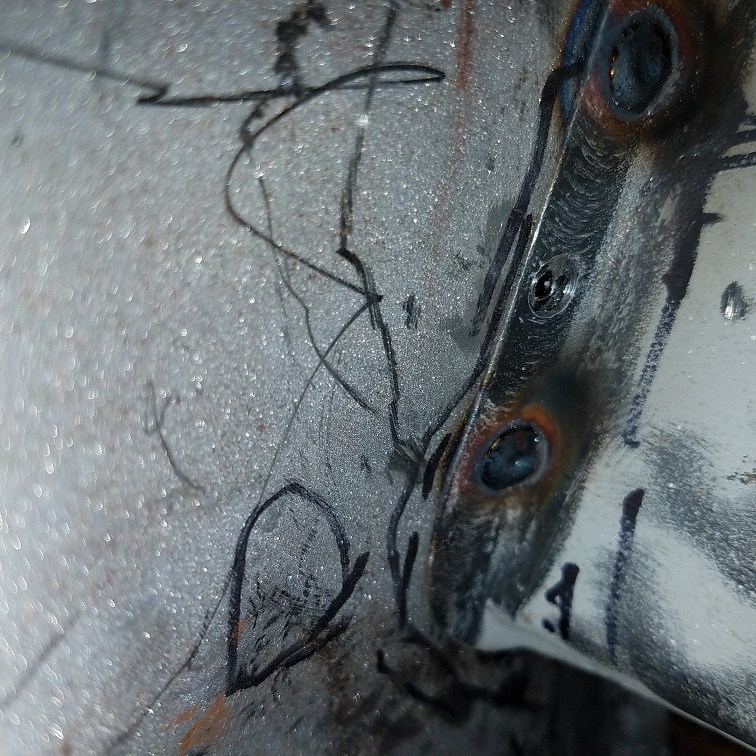  A couple more rosettes. 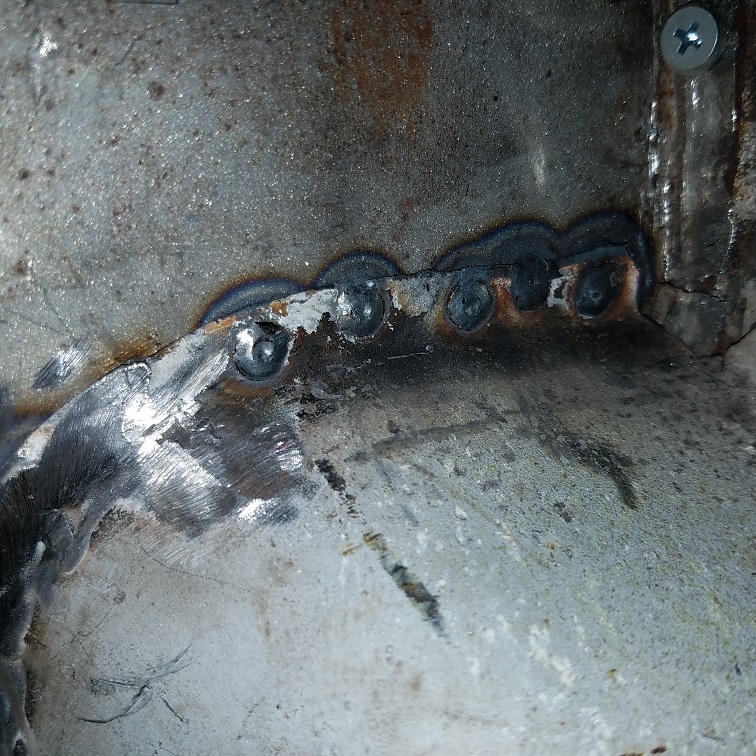 Still need to back off the trigger 1/4 to 1/2 second sooner. Some day I'll get it. Bottom welded, finished up and galvanized. 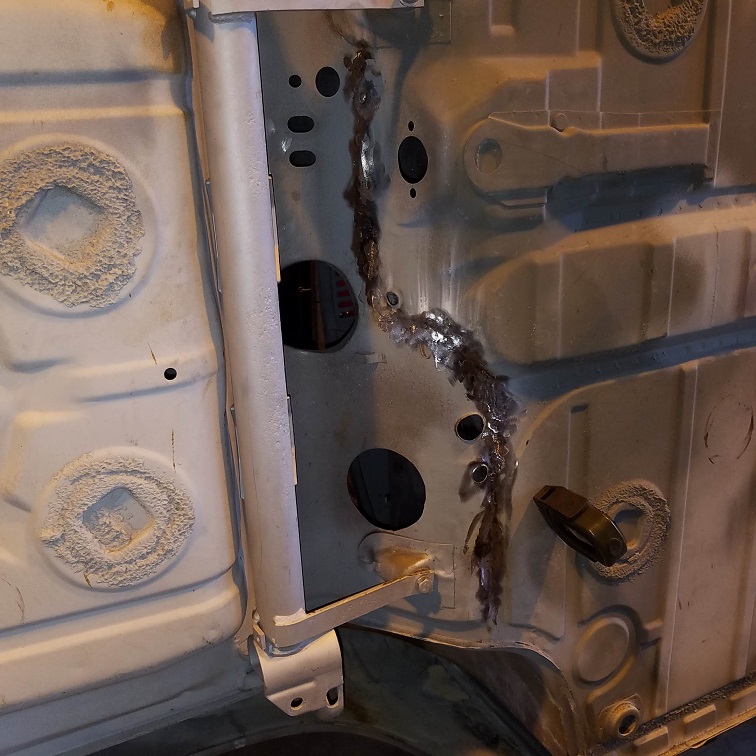  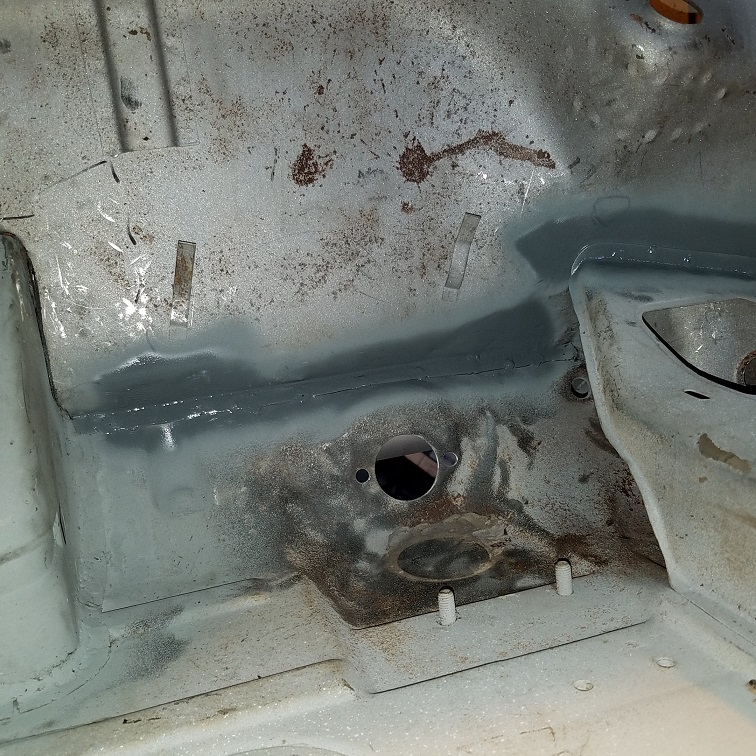 Selfie  |
|
|
|
| cary |
Mar 9 2019, 10:55 AM
Post
#153
|
|
Advanced Member Group: Members Posts: 3,900 Joined: 26-January 04 From: Sherwood Oregon Member No.: 1,608 Region Association: Pacific Northwest |
Slow going. 36 degrees and raining in Forest Grove. So only out there 6 hours a day.
Dash welded back to the bulkhead. 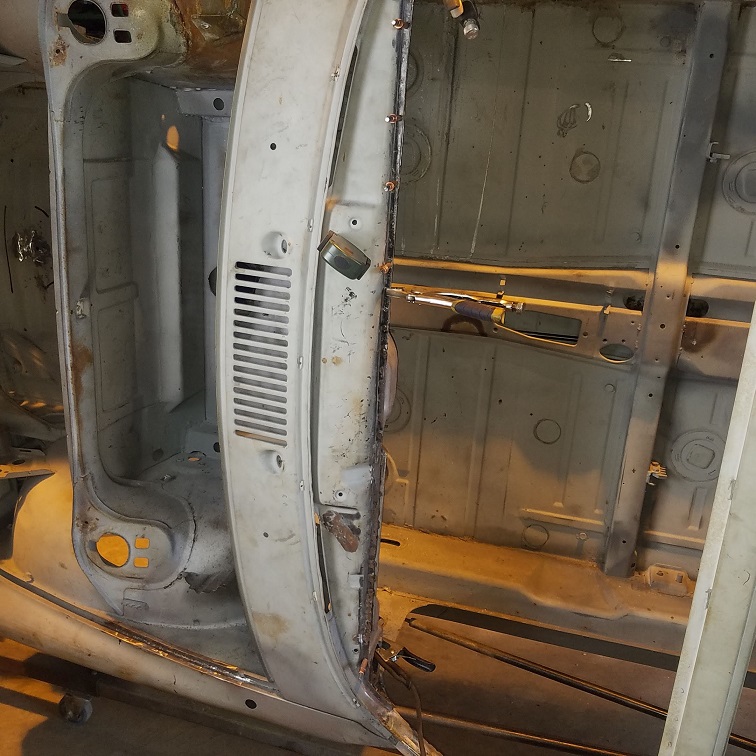 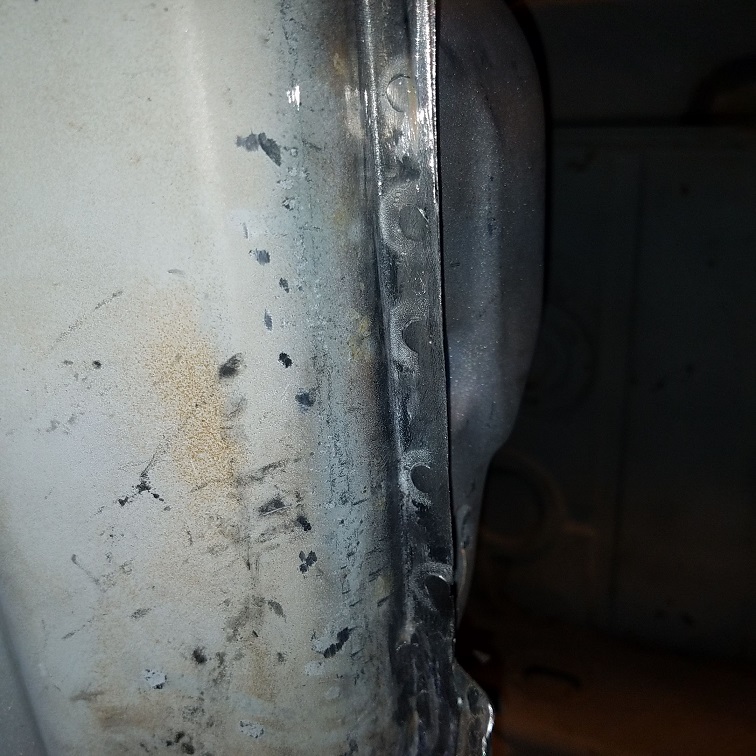 Steering column support welded back on. Removed to aid in the flexibility of the bulkhead. 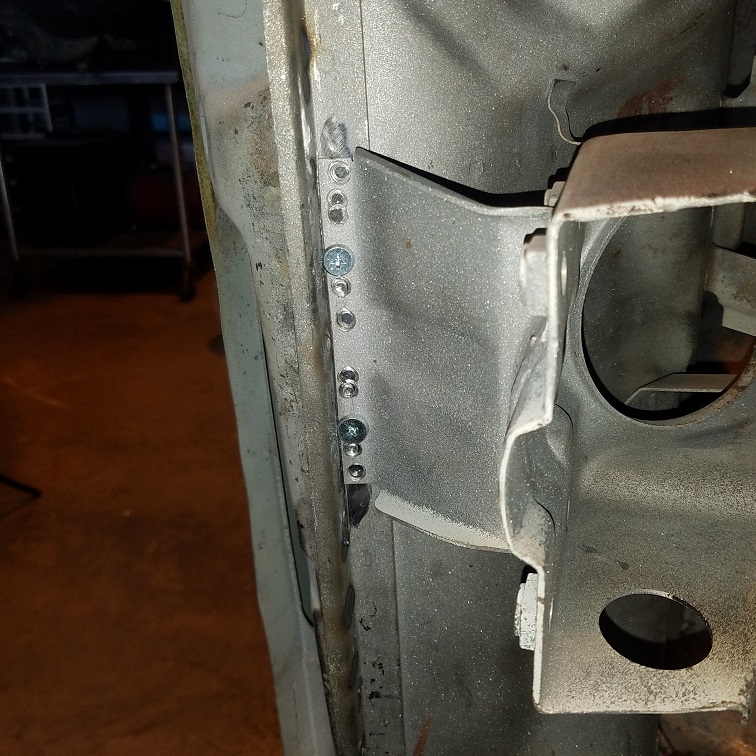 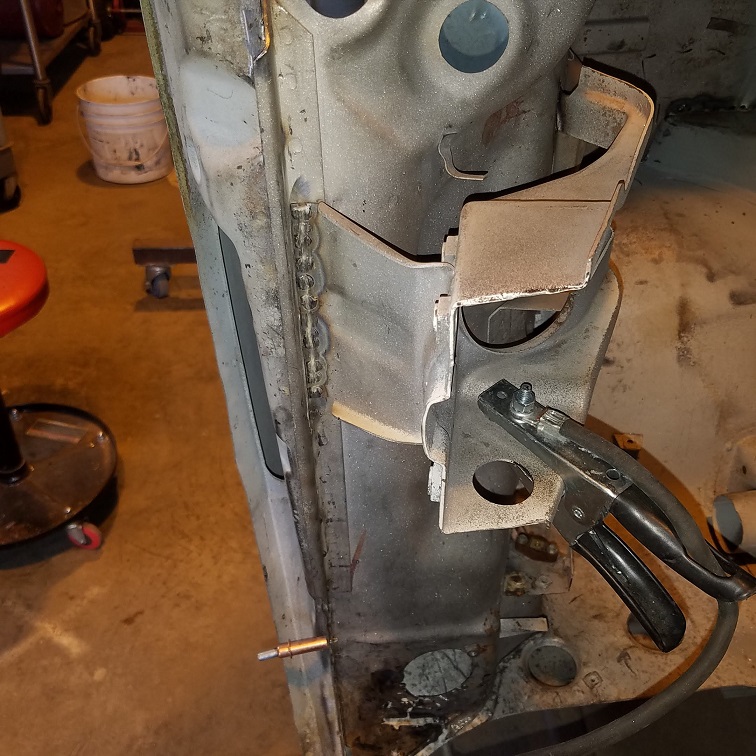 It takes a pile of tools to get the fit and finish I want. 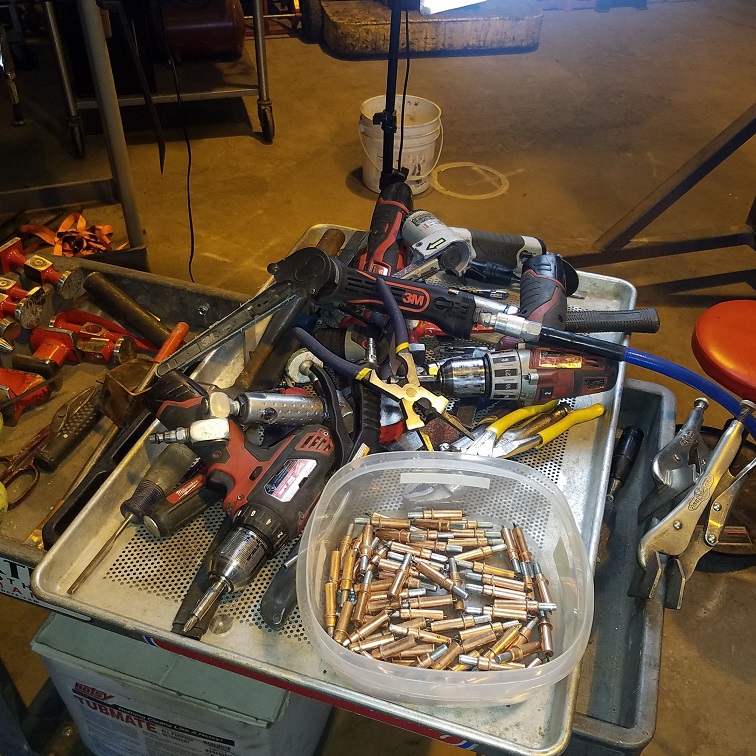 |
|
|
|
| cary |
Mar 9 2019, 11:00 AM
Post
#154
|
|
Advanced Member Group: Members Posts: 3,900 Joined: 26-January 04 From: Sherwood Oregon Member No.: 1,608 Region Association: Pacific Northwest |
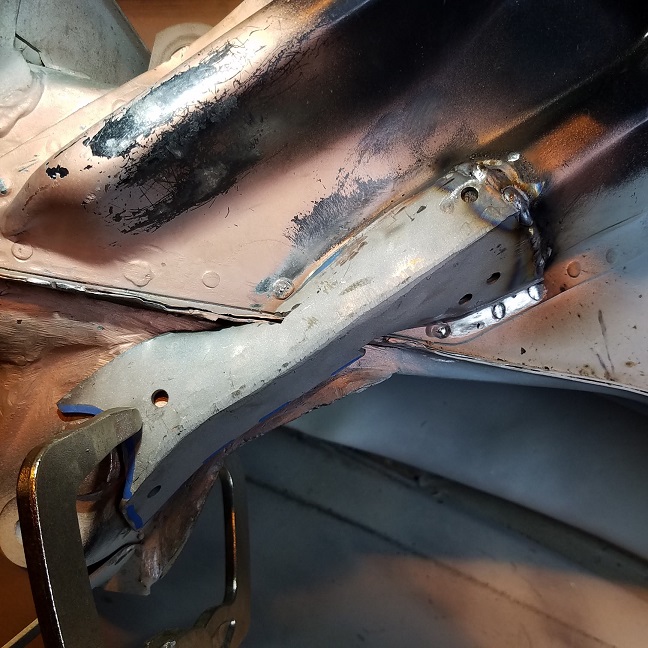
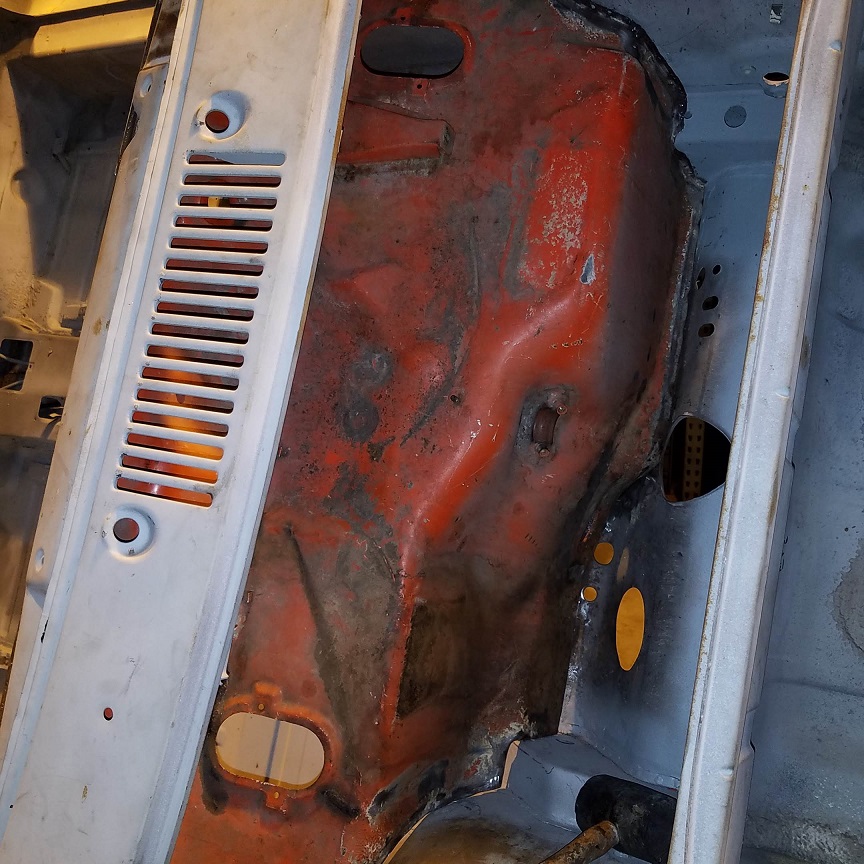
Next on to the right inner fender and fuel tank cavity.
   That lower section tough to fit. And tough to weld. Next onto the air vent holes to the cowl/door frame. Right will get a new piece all together. |
|
|
|
| cary |
Mar 10 2019, 09:50 AM
Post
#155
|
|
Advanced Member Group: Members Posts: 3,900 Joined: 26-January 04 From: Sherwood Oregon Member No.: 1,608 Region Association: Pacific Northwest |
Left side air vent sheet metal is just about worthless so out it comes.
Super In Law is creating the 2 piece large patch. 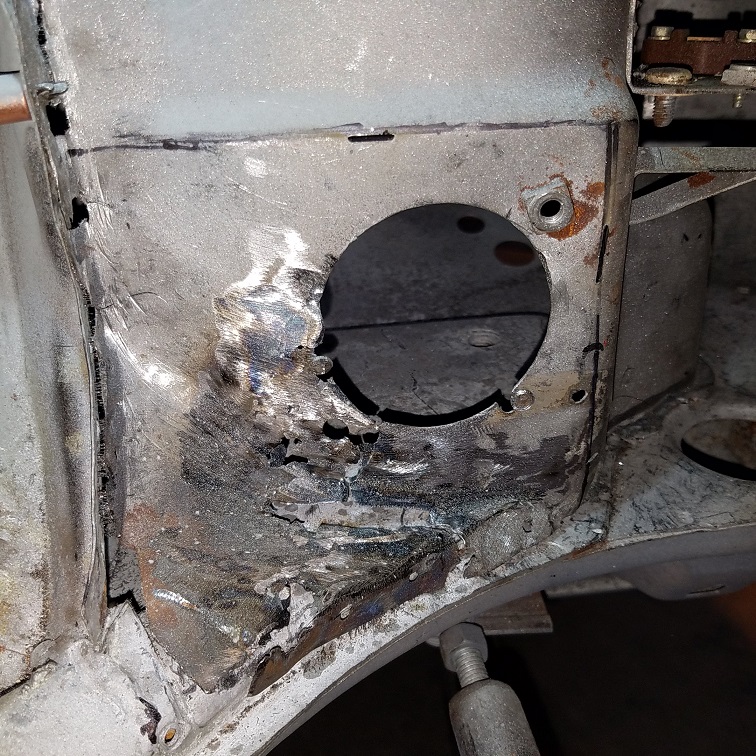 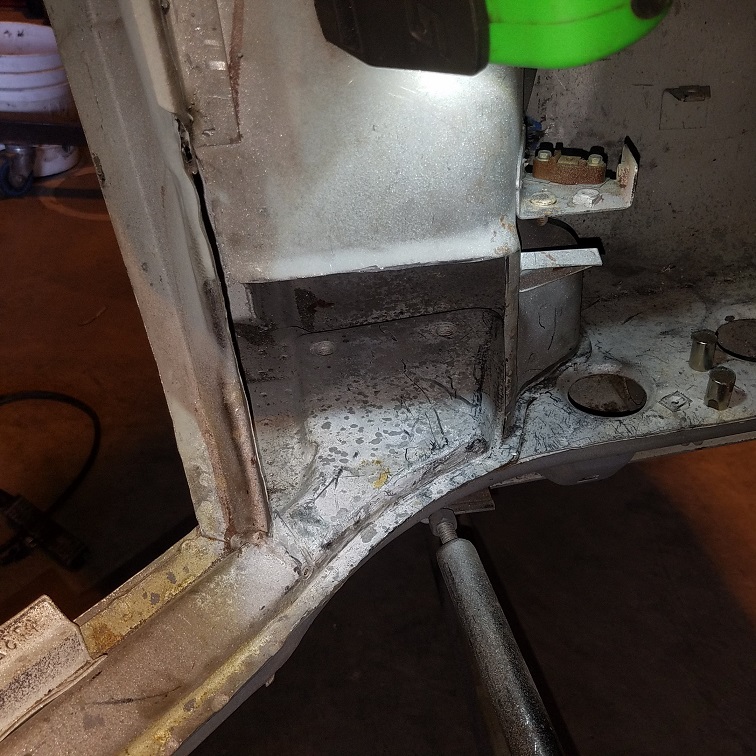 I start by cutting out a section that was a little short. 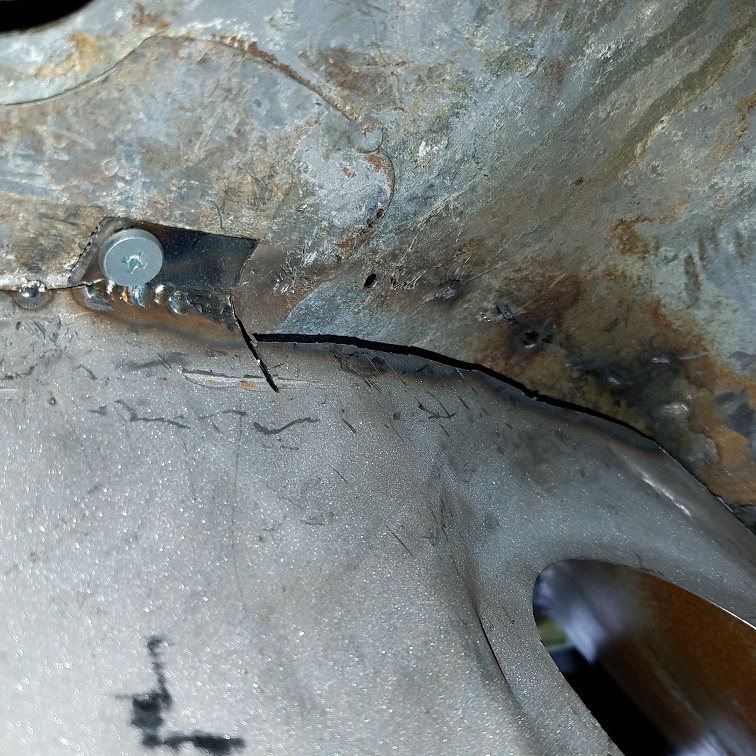 Bottom 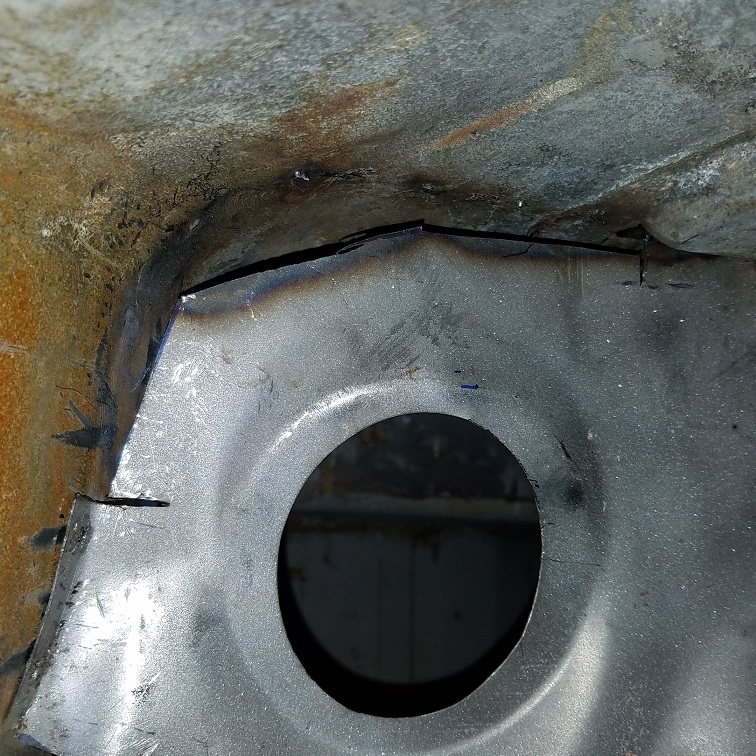 Top Then on to repairing the left side. 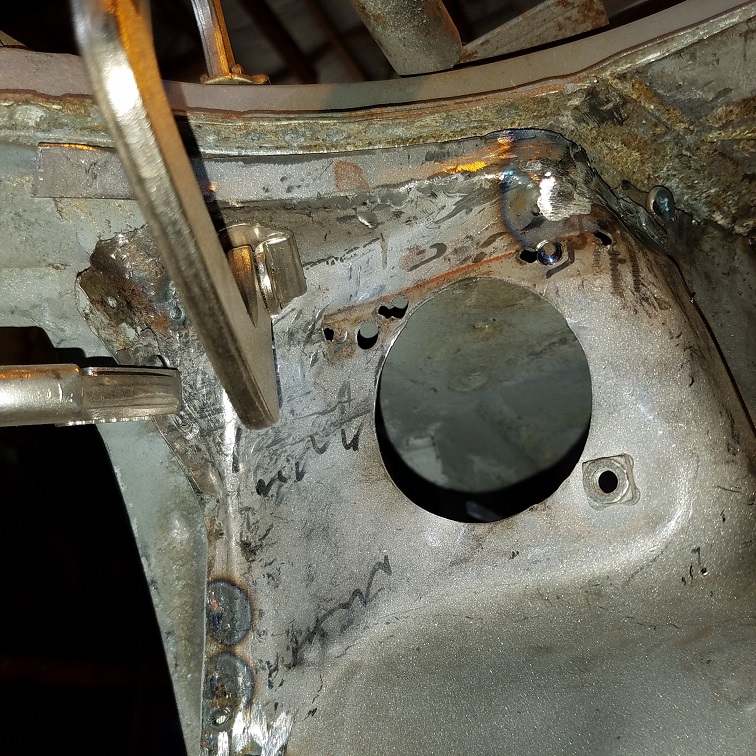 Patch #1 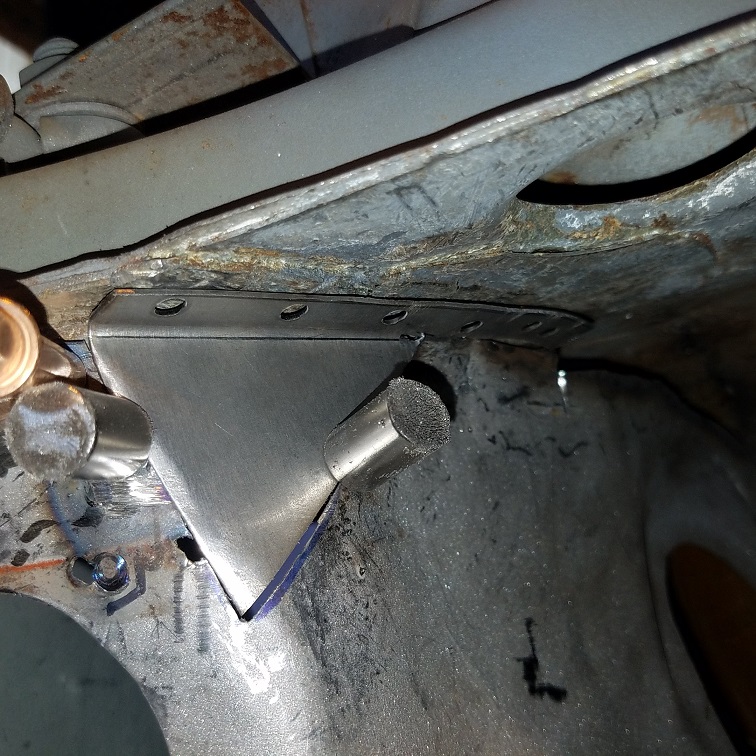 Patch #2, a little tougher, curved in the middle. 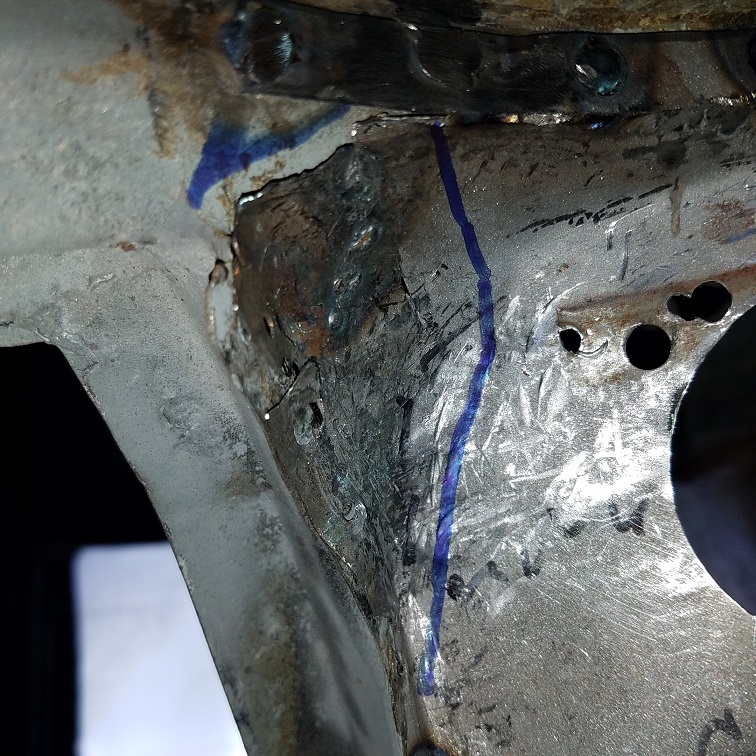 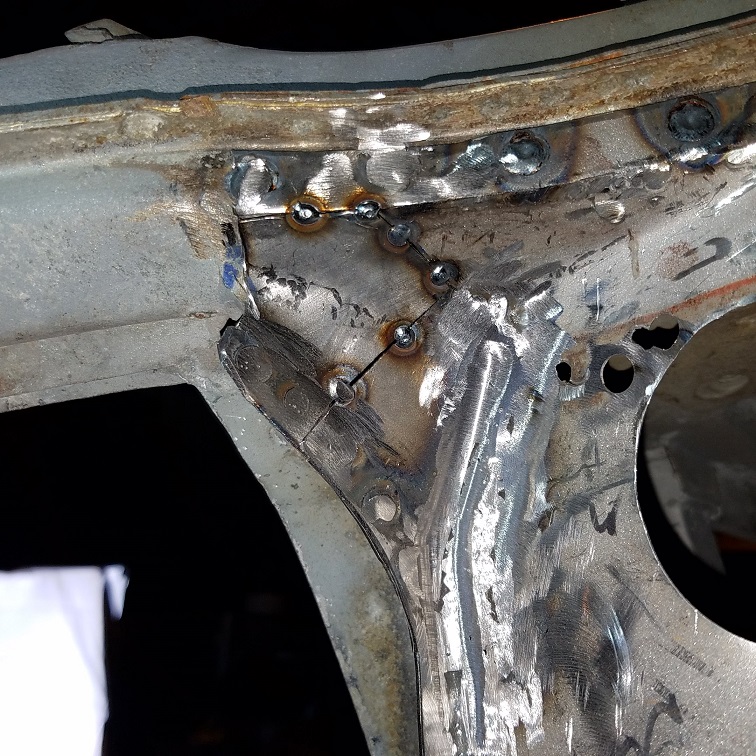 Had to make in 2 pieces, too small to create in the beater bag. Bent the flange with the hammer on a RR rail piece. 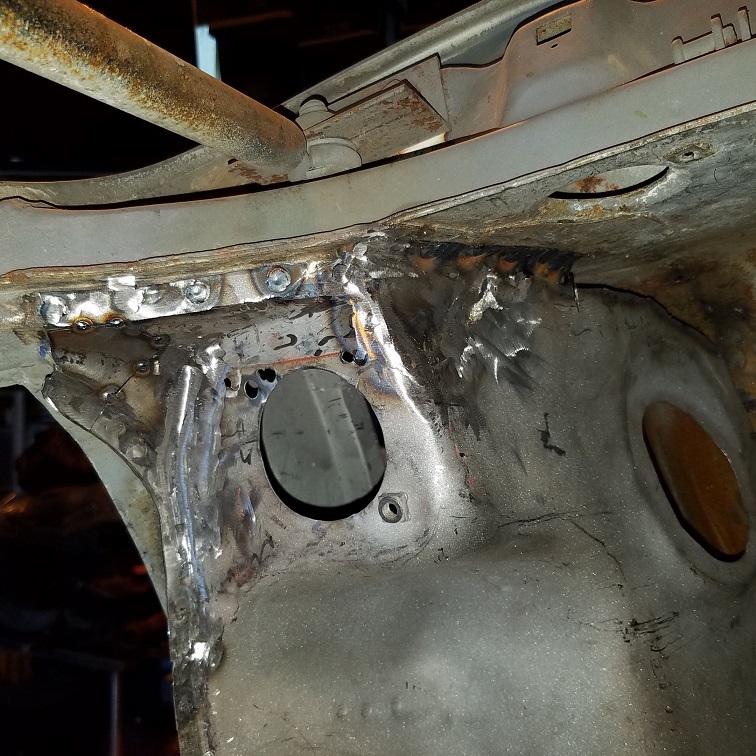 Time to go home. I need a bigger hammer. https://www.trick-tools.com/Scotchman_50514...r_50514_CM_1886 |
|
|
|
| euro911 |
Mar 12 2019, 03:13 AM
Post
#156
|
|
Retired & living the dream. God help me if I wake up! Group: Members Posts: 8,937 Joined: 2-December 06 From: So.Cal. & No.AZ (USA) Member No.: 7,300 Region Association: Southern California |
The monstrous tasks you hard-core metal guys take on and complete is absolutely amazing (IMG:style_emoticons/default/aktion035.gif)
... but it also make me feel good about the near rust-free cars I've been fortunate to own (IMG:style_emoticons/default/happy11.gif) Keep up the good work (IMG:style_emoticons/default/popcorn[1].gif) |
|
|
|
| cary |
Jul 6 2019, 07:36 AM
Post
#157
|
|
Advanced Member Group: Members Posts: 3,900 Joined: 26-January 04 From: Sherwood Oregon Member No.: 1,608 Region Association: Pacific Northwest |
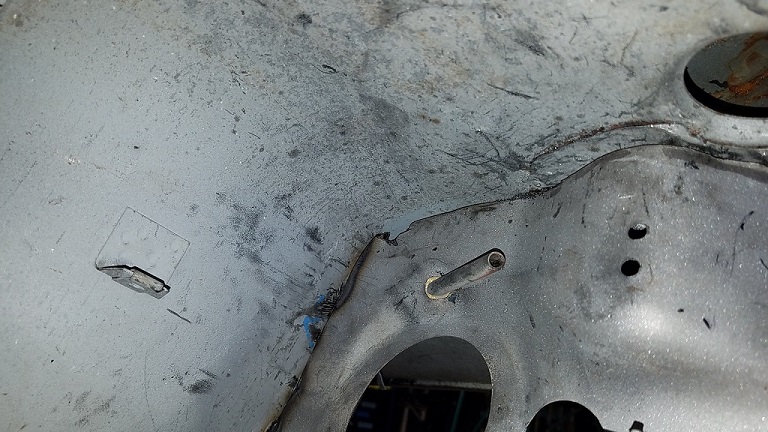
Been a while. Been working on mechanical projects.
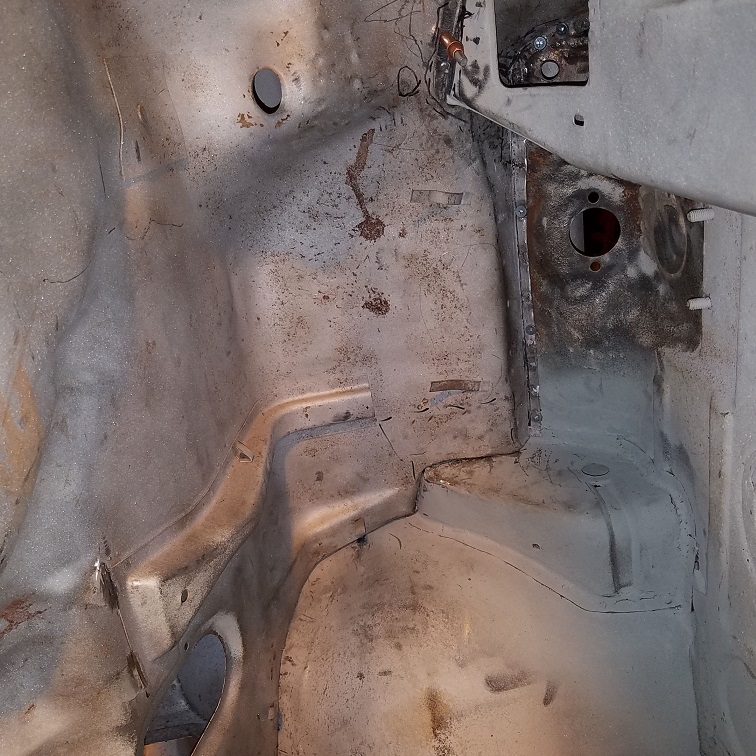
Back to finishing up the welding in of front chassis bulkhead. Corners up against the hinge pillar got pretty tore up during harvesting. Finishing up the right side. 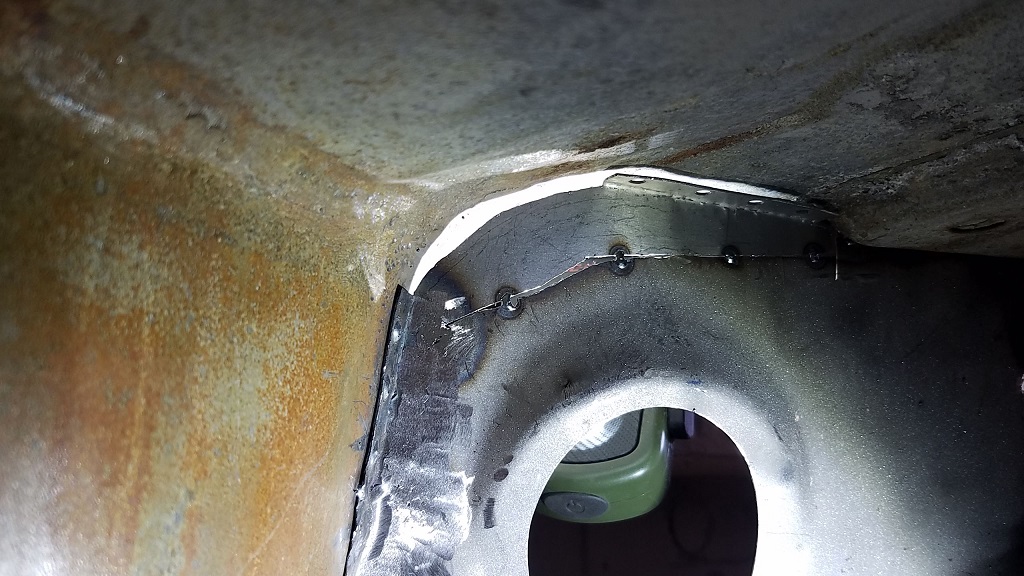 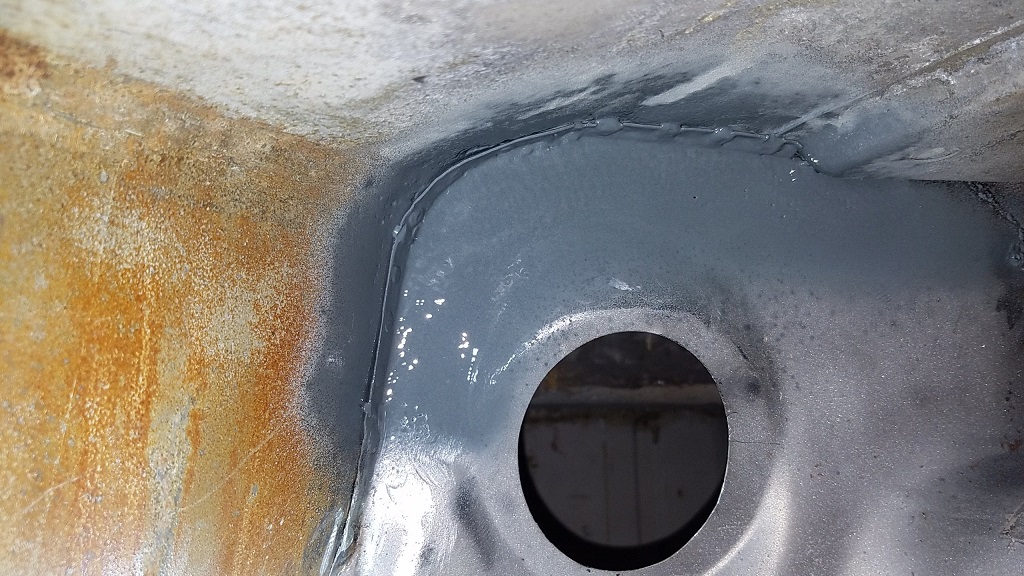 Inside the fuel tank cavity  Above the passengers knees 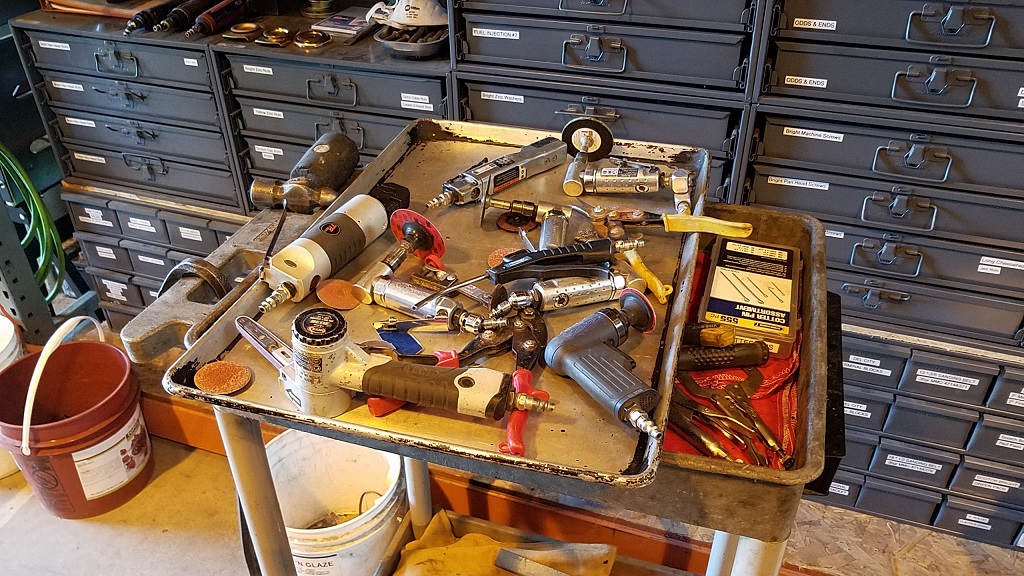 Tray was empty when I started. (IMG:style_emoticons/default/welder.gif) |
|
|
|
| cary |
Jul 6 2019, 07:42 AM
Post
#158
|
|
Advanced Member Group: Members Posts: 3,900 Joined: 26-January 04 From: Sherwood Oregon Member No.: 1,608 Region Association: Pacific Northwest |
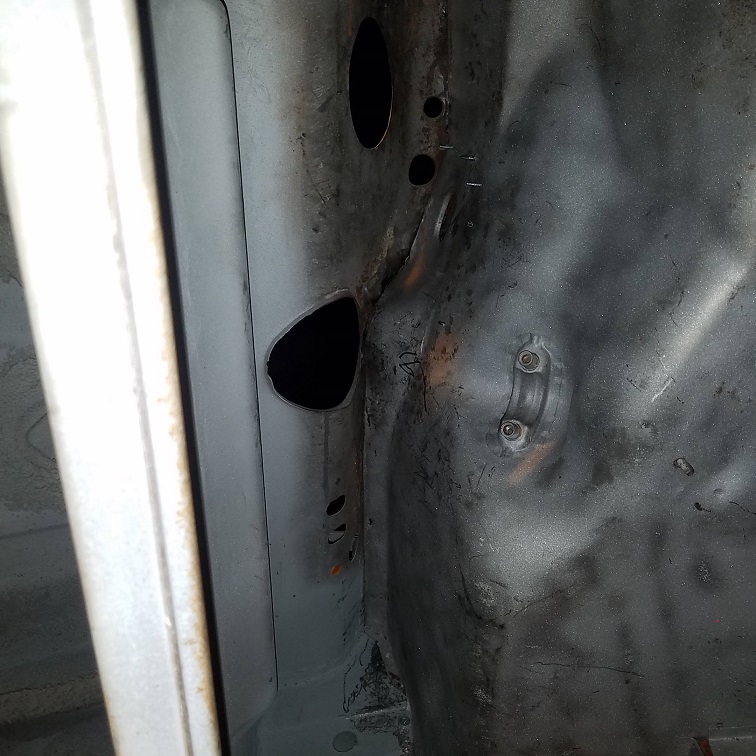
On to the left side that has its own set of challenges.
 No flange   Vent section didn't survive. |
|
|
|
| cary |
Jul 19 2019, 08:43 AM
Post
#159
|
|
Advanced Member Group: Members Posts: 3,900 Joined: 26-January 04 From: Sherwood Oregon Member No.: 1,608 Region Association: Pacific Northwest |
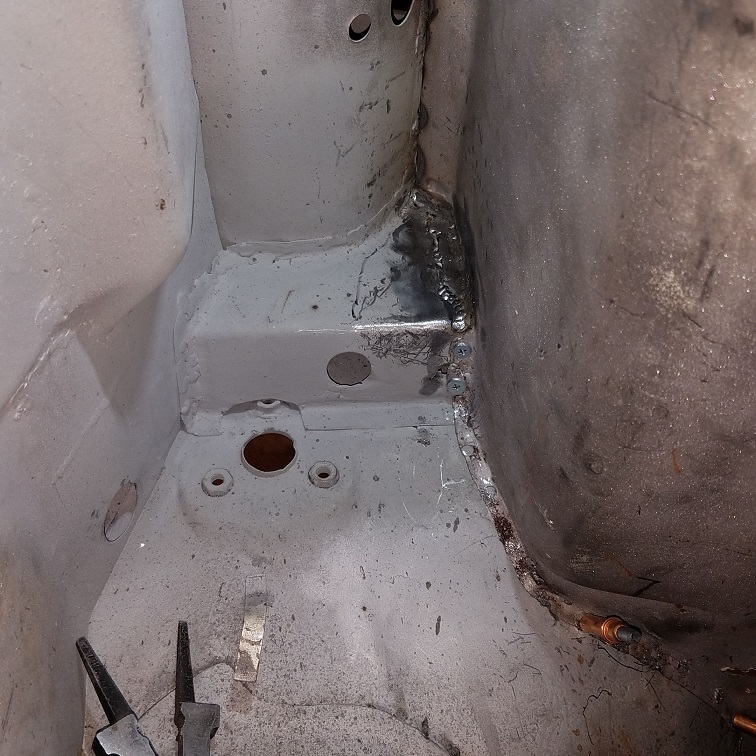
Time for a little catch up on Taylor's car.
The bulk head is finally finished. 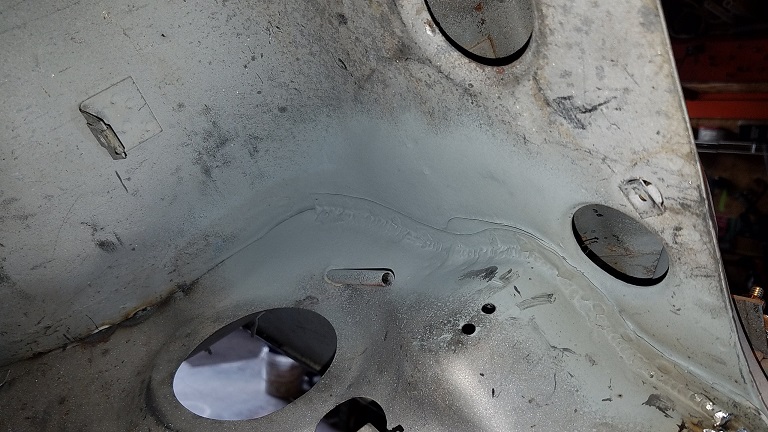 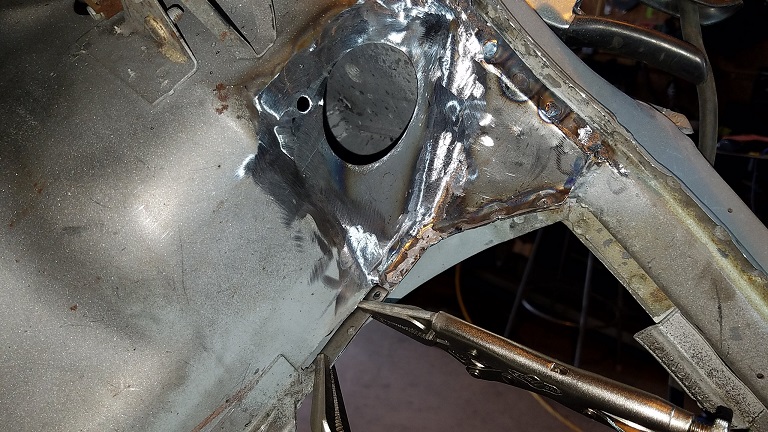 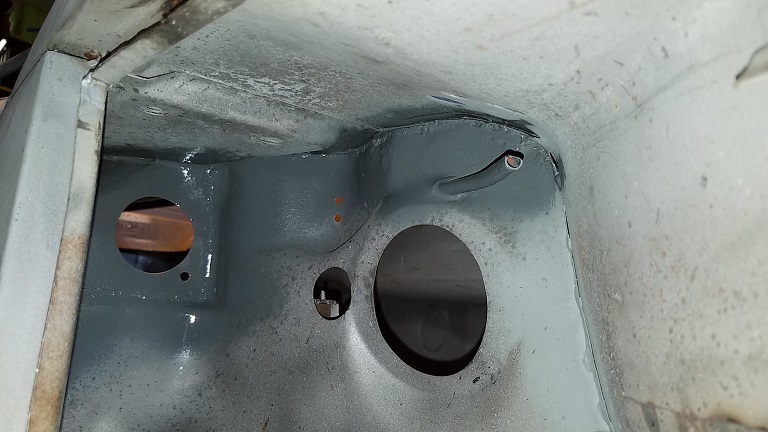 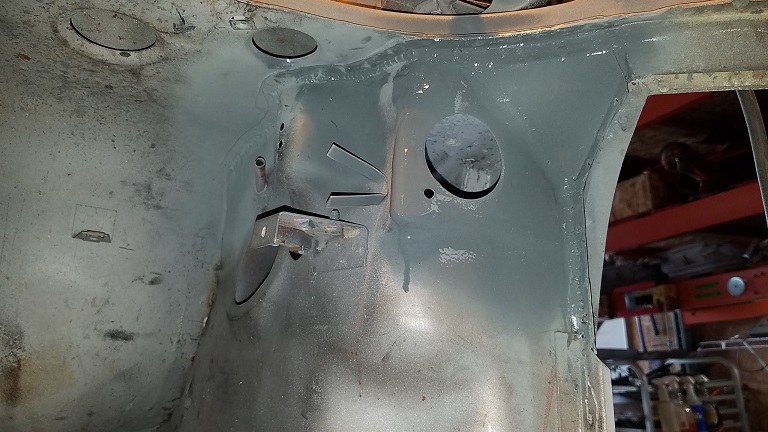 Now the question lies. Will I attempt to save another bulkhead from the parts car outside ? Would I ever want to do another one ? |
|
|
|
| bbrock |
Jul 19 2019, 08:53 AM
Post
#160
|
|
914 Guru Group: Members Posts: 5,269 Joined: 17-February 17 From: Montana Member No.: 20,845 Region Association: Rocky Mountains |
QUOTE(cary @ Jul 19 2019, 08:43 AM) Now the question lies. Will I attempt to save another bulkhead from the parts car outside ? Would I ever want to do another one ? I wouldn't have the guts to do the first one so whatever you decide, you are a far better man than I. Unbelievable work there. (IMG:style_emoticons/default/beerchug.gif) |
|
|
|
|
1 User(s) are reading this topic (1 Guests and 0 Anonymous Users)
0 Members:

|
Lo-Fi Version | Time is now: 23rd June 2026 - 10:02 PM |
Invision Power Board
v9.1.4 © 2026 IPS, Inc.