|
|
|
Porsche, and the Porsche crest are registered trademarks of Dr. Ing. h.c. F. Porsche AG.
This site is not affiliated with Porsche in any way. Its only purpose is to provide an online forum for car enthusiasts. All other trademarks are property of their respective owners. |
|
|

  |

| bbrock |
 Mar 7 2019, 05:37 PM Mar 7 2019, 05:37 PM
Post
#151
|
|
914 Guru  Group: Members Posts: 5,269 Joined: 17-February 17 From: Montana Member No.: 20,845 Region Association: Rocky Mountains |
I am in absolute awe of this bulkhead patch. Love seeing the progress. Thanks for posting. (IMG:style_emoticons/default/smiley_notworthy.gif)
|
   |

 
|
| cary |
Mar 8 2019, 11:54 AM
Post
#152
|
|
Advanced Member Group: Members Posts: 3,900 Joined: 26-January 04 From: Sherwood Oregon Member No.: 1,608 Region Association: Pacific Northwest |
Let the welding begin.
Series shows 1/8 Cleco hole. Then outer layer enlarged with sheet metal cutter. Then rosette welded. 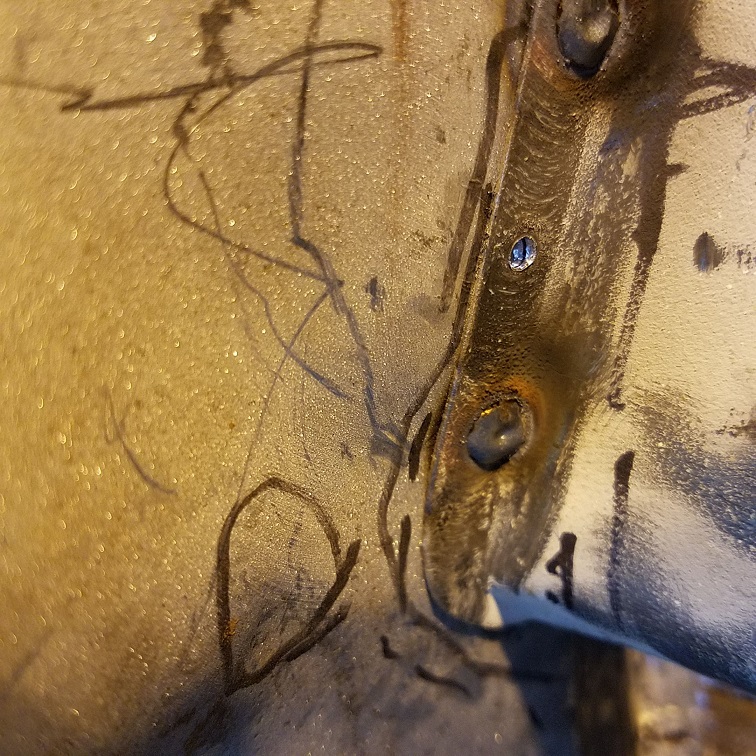 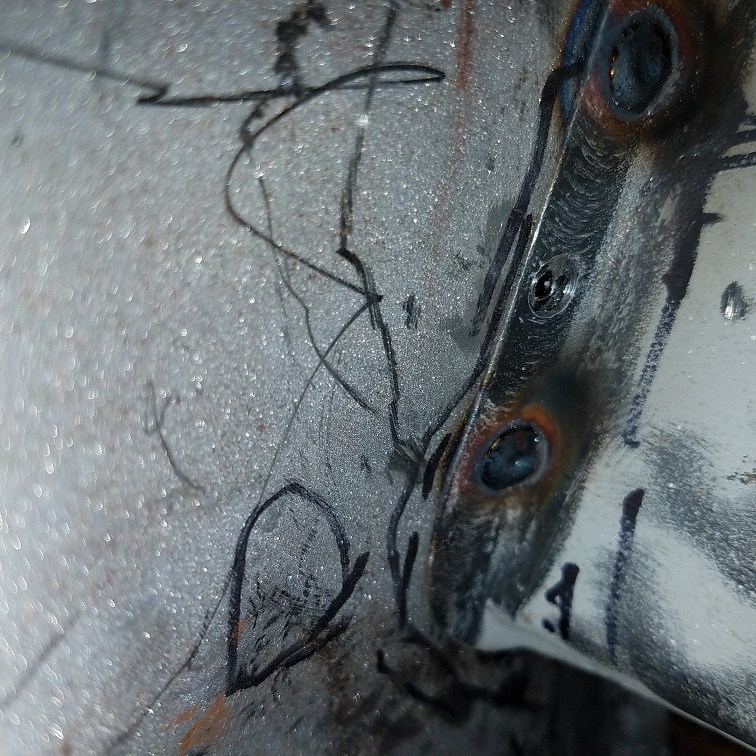  A couple more rosettes. 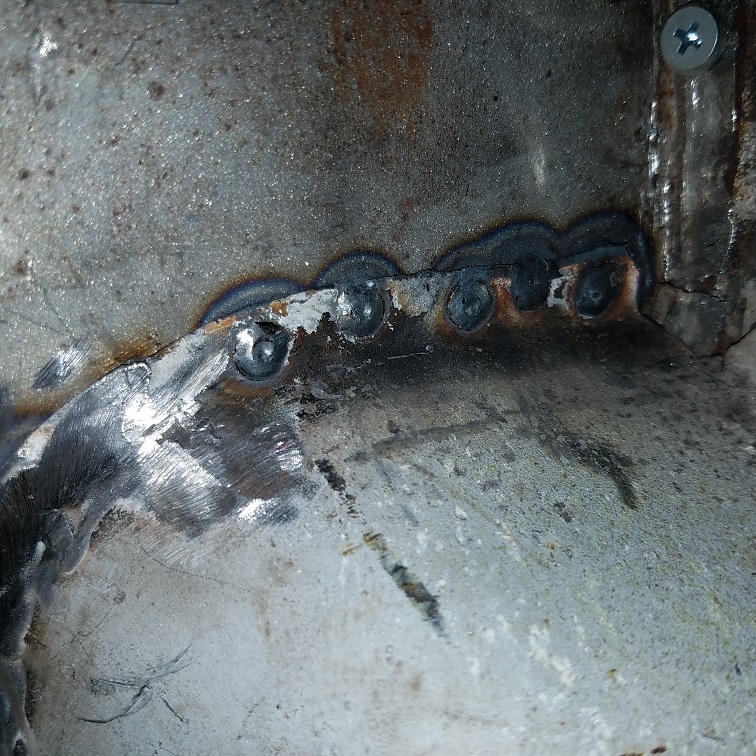 Still need to back off the trigger 1/4 to 1/2 second sooner. Some day I'll get it. Bottom welded, finished up and galvanized. 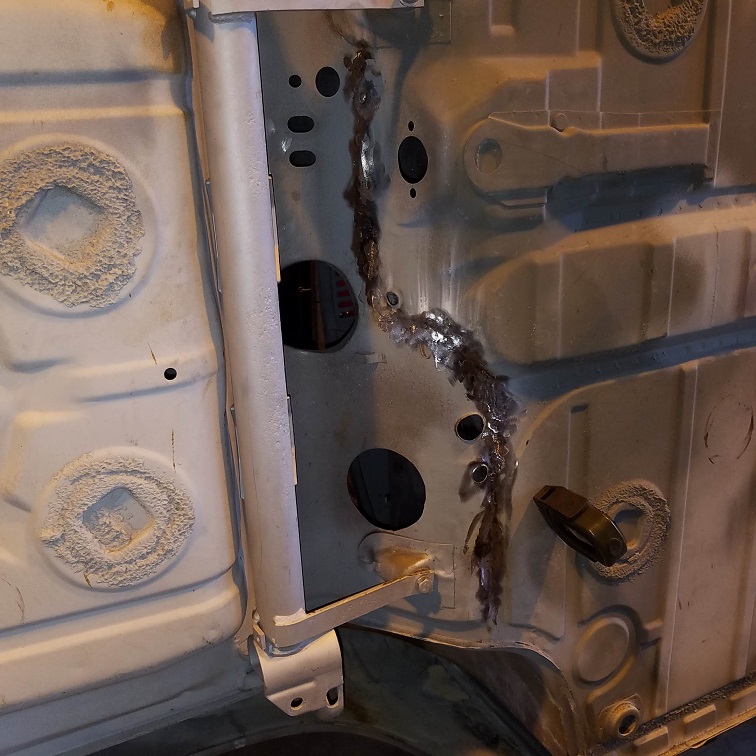  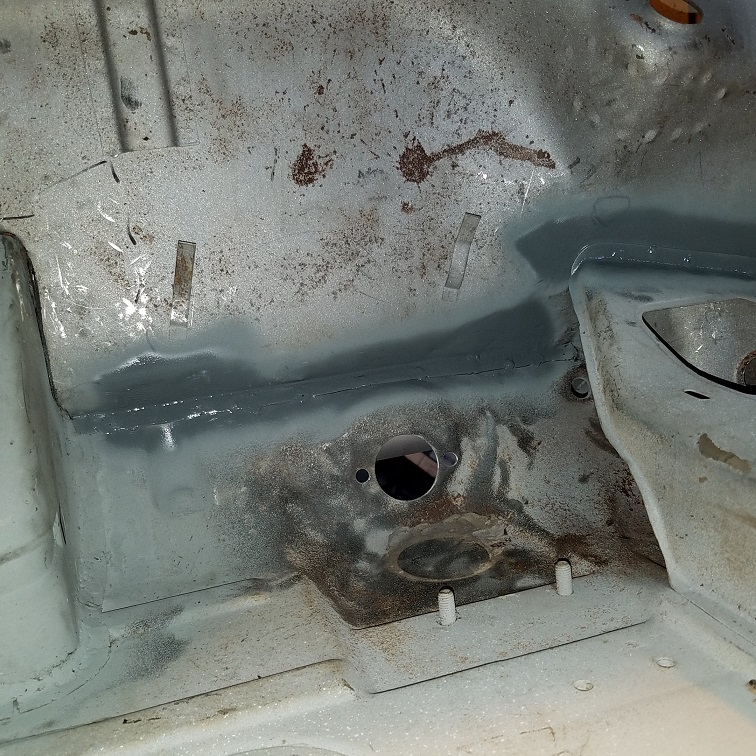 Selfie  |
|
|
|
| cary |
Mar 9 2019, 10:55 AM
Post
#153
|
|
Advanced Member Group: Members Posts: 3,900 Joined: 26-January 04 From: Sherwood Oregon Member No.: 1,608 Region Association: Pacific Northwest |
Slow going. 36 degrees and raining in Forest Grove. So only out there 6 hours a day.
Dash welded back to the bulkhead. 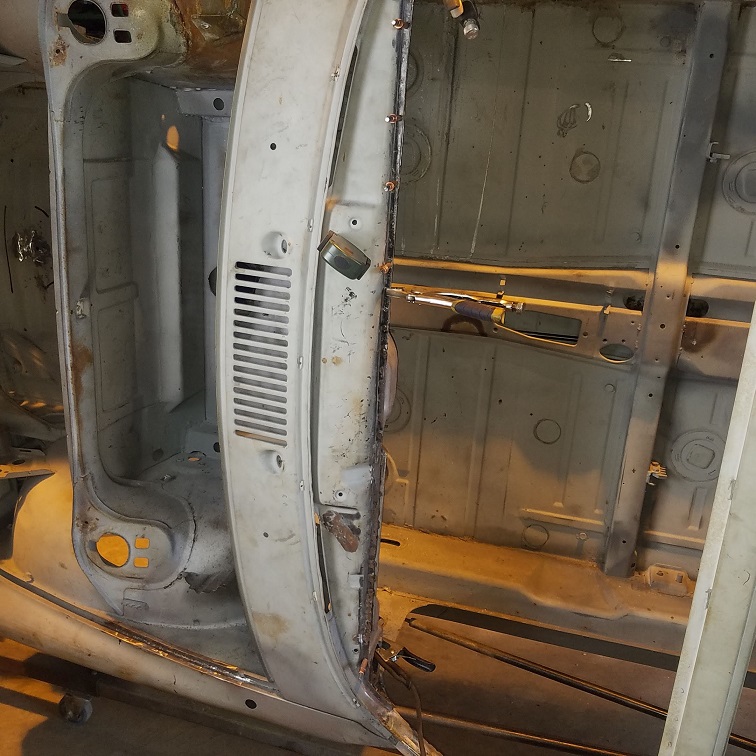 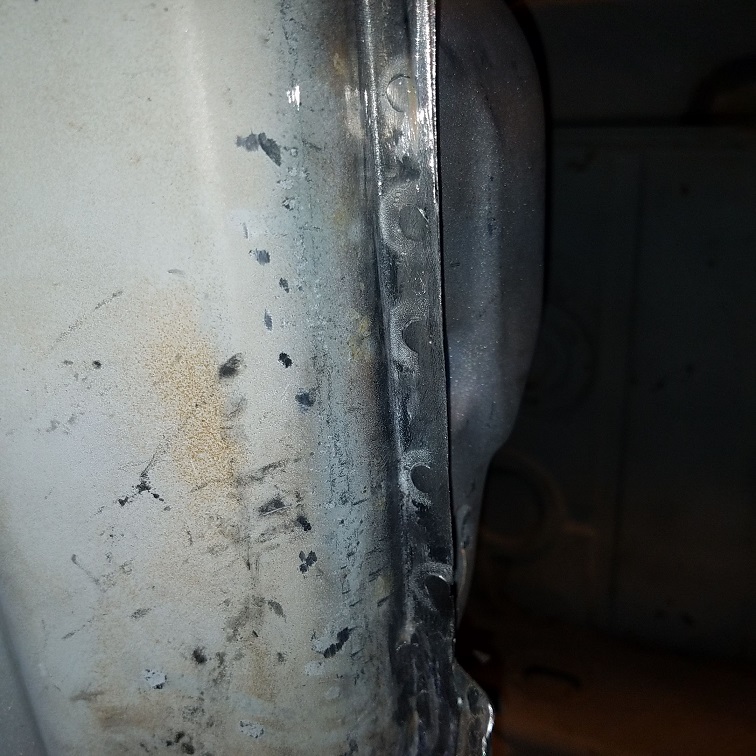 Steering column support welded back on. Removed to aid in the flexibility of the bulkhead. 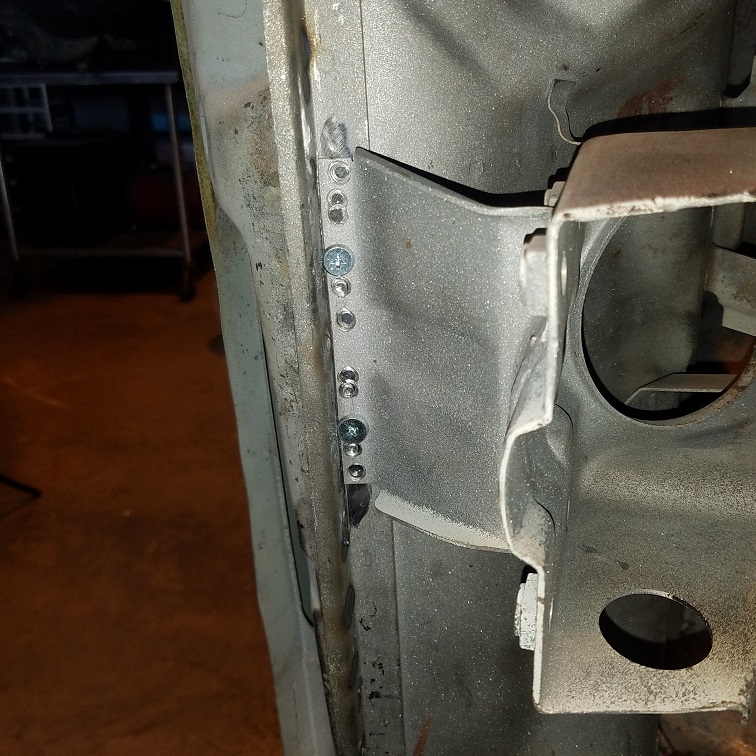 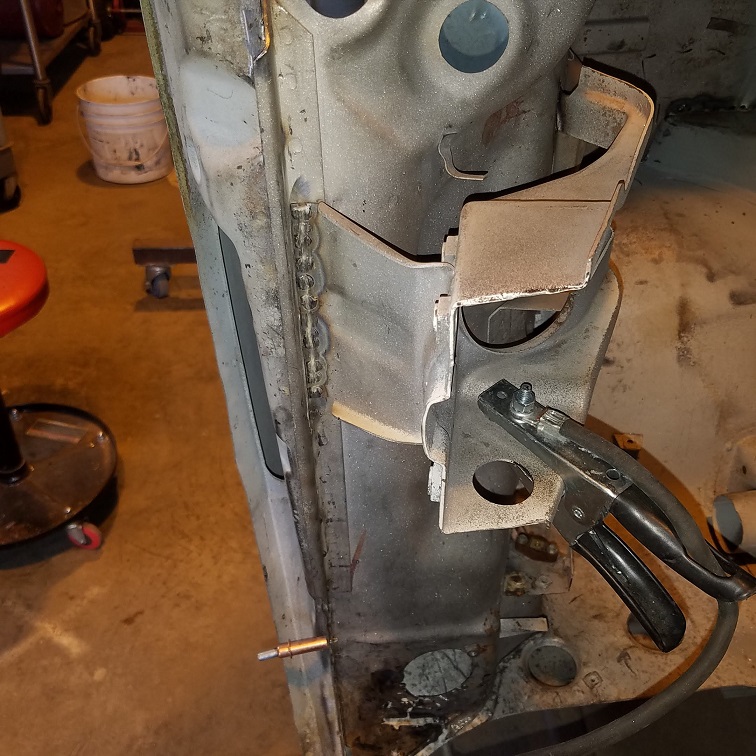 It takes a pile of tools to get the fit and finish I want. 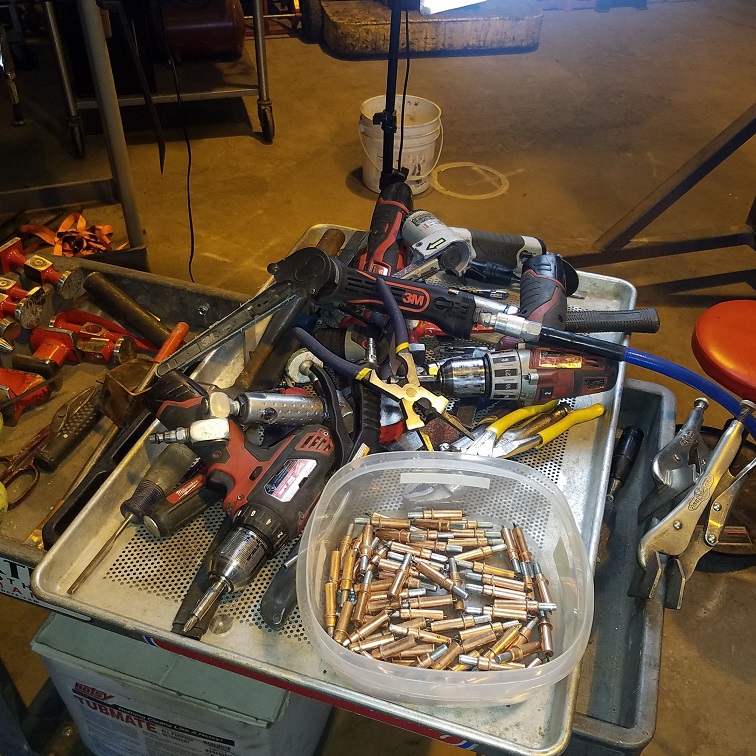 |
|
|
|
| cary |
Mar 9 2019, 11:00 AM
Post
#154
|
|
Advanced Member Group: Members Posts: 3,900 Joined: 26-January 04 From: Sherwood Oregon Member No.: 1,608 Region Association: Pacific Northwest |
Next on to the right inner fender and fuel tank cavity.
 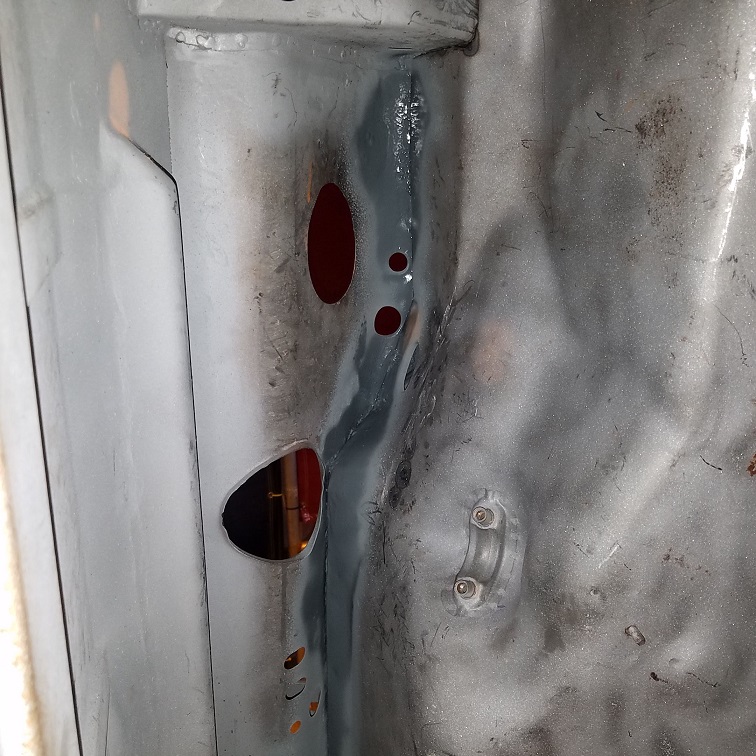  That lower section tough to fit. And tough to weld. Next onto the air vent holes to the cowl/door frame. Right will get a new piece all together. |
|
|
|
| cary |
Mar 10 2019, 09:50 AM
Post
#155
|
|
Advanced Member Group: Members Posts: 3,900 Joined: 26-January 04 From: Sherwood Oregon Member No.: 1,608 Region Association: Pacific Northwest |
Left side air vent sheet metal is just about worthless so out it comes.
Super In Law is creating the 2 piece large patch. 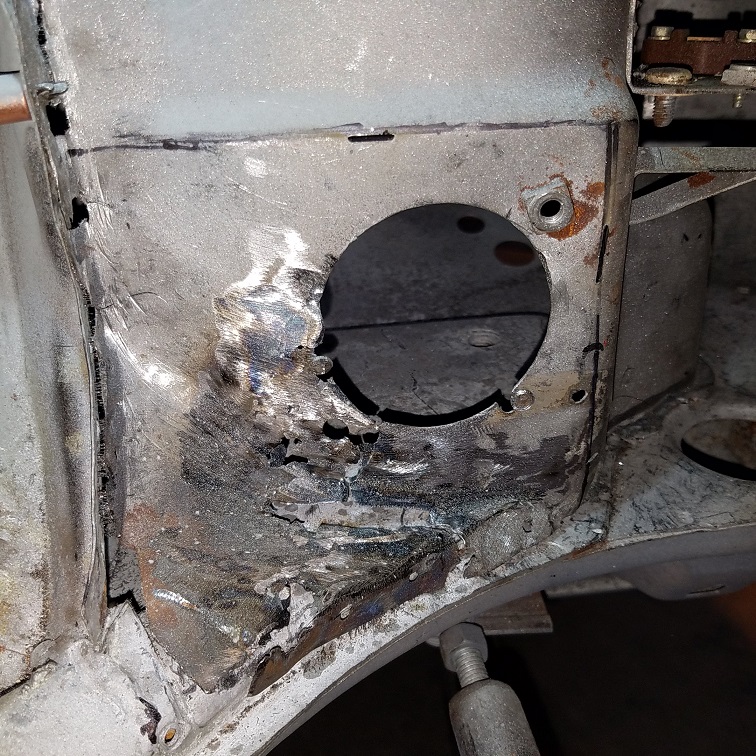 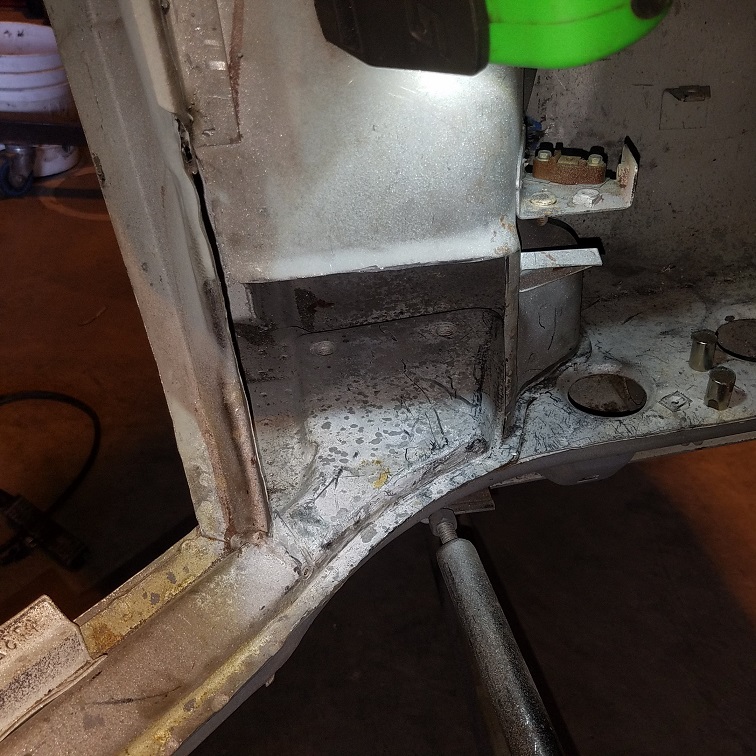 I start by cutting out a section that was a little short. 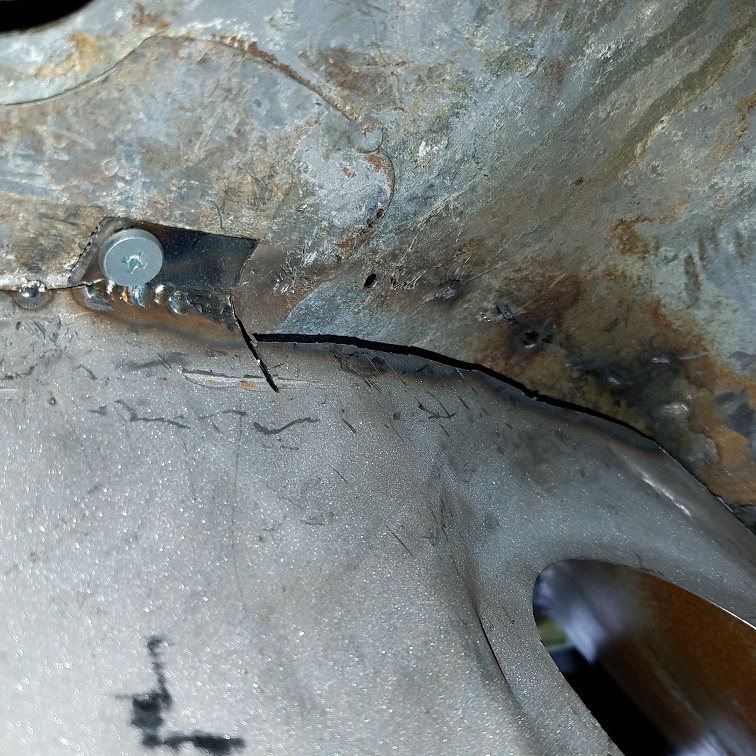 Bottom 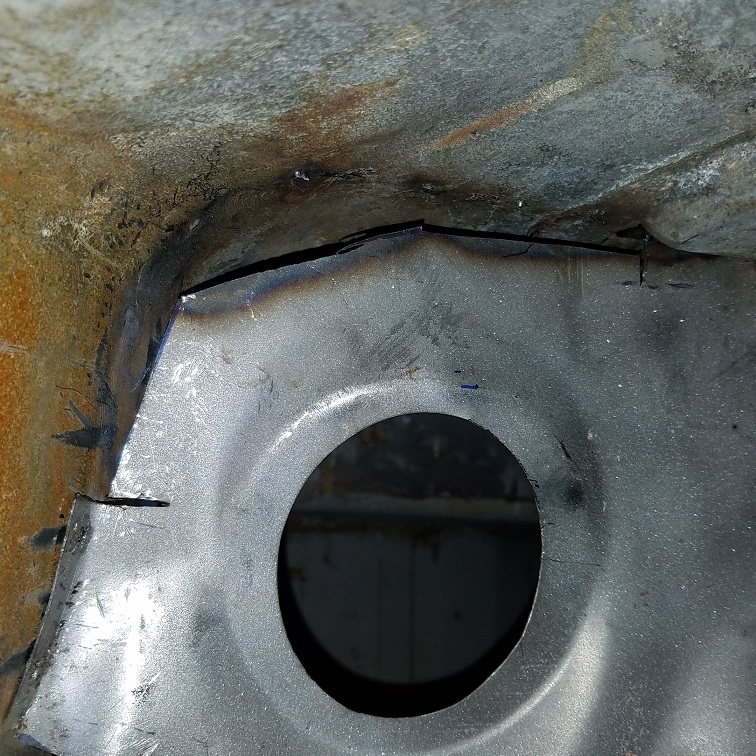 Top Then on to repairing the left side. 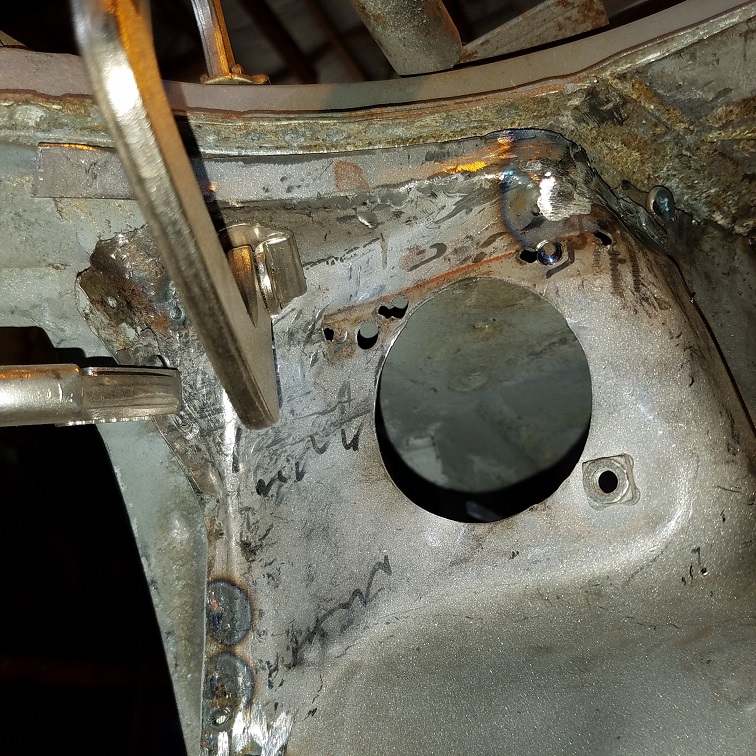 Patch #1 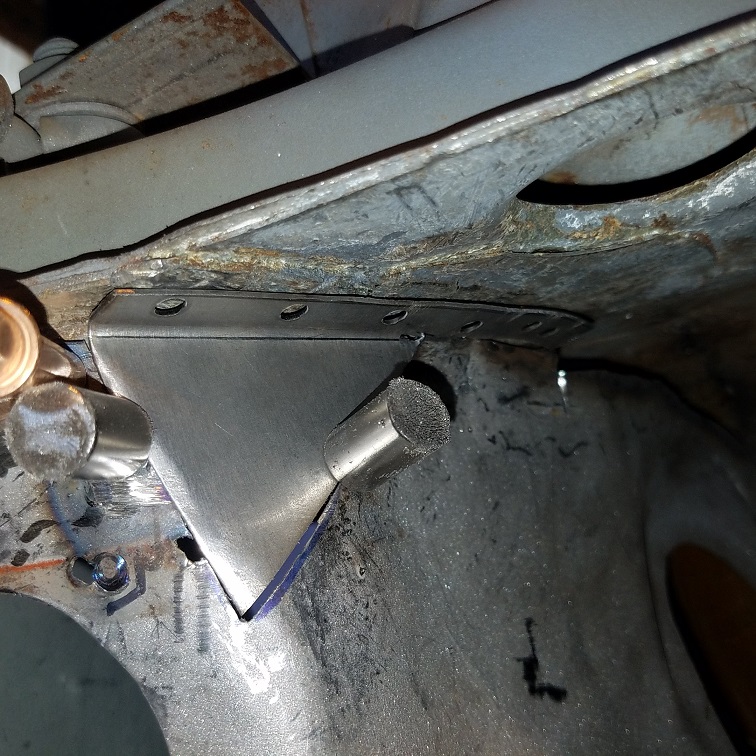 Patch #2, a little tougher, curved in the middle. 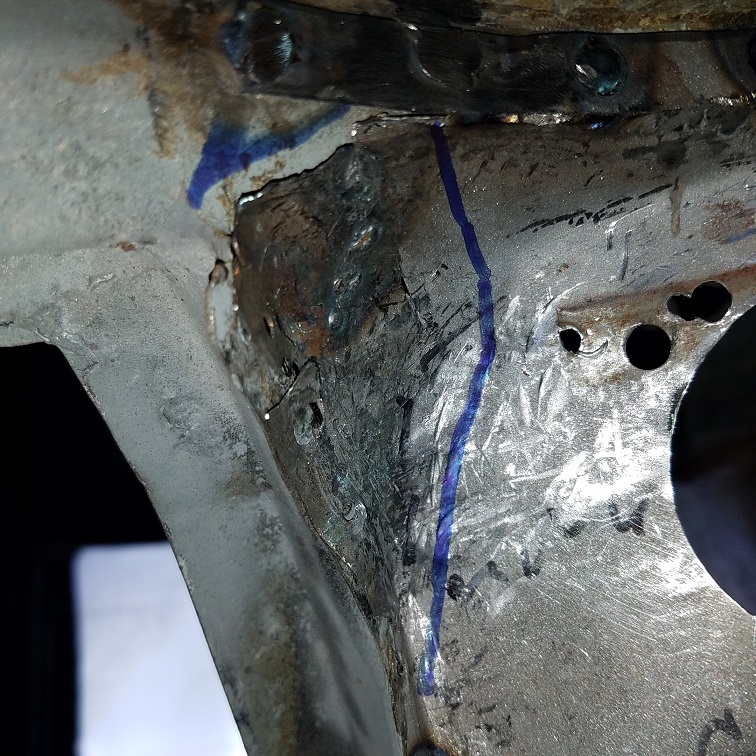 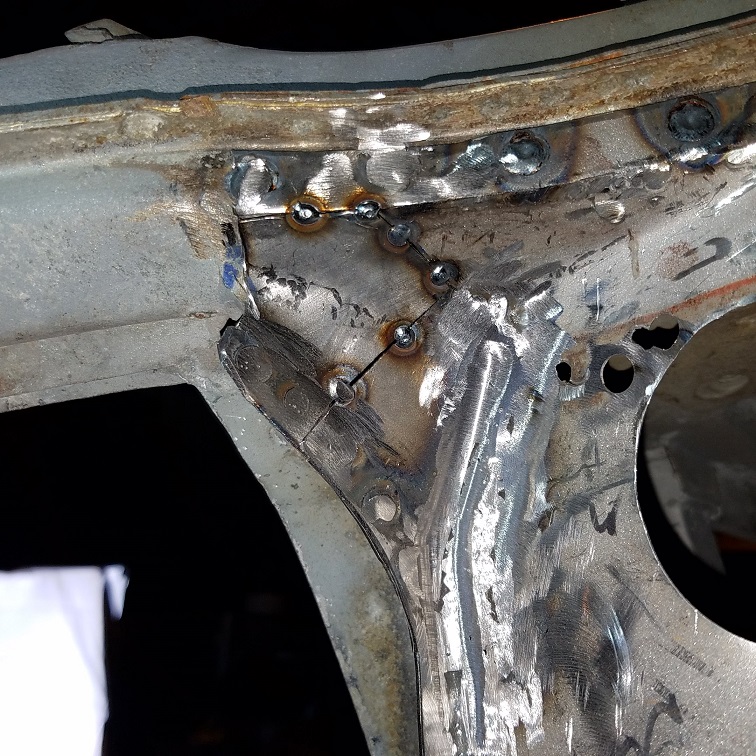 Had to make in 2 pieces, too small to create in the beater bag. Bent the flange with the hammer on a RR rail piece. 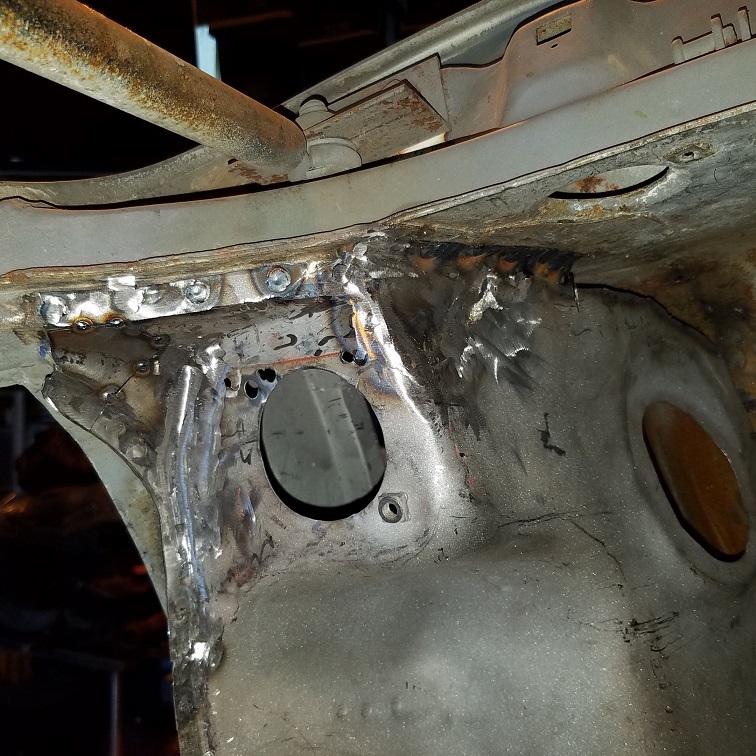 Time to go home. I need a bigger hammer. https://www.trick-tools.com/Scotchman_50514...r_50514_CM_1886 |
|
|
|
| euro911 |
Mar 12 2019, 03:13 AM
Post
#156
|
|
Retired & living the dream. God help me if I wake up! Group: Members Posts: 8,848 Joined: 2-December 06 From: So.Cal. & No.AZ (USA) Member No.: 7,300 Region Association: Southern California |
The monstrous tasks you hard-core metal guys take on and complete is absolutely amazing (IMG:style_emoticons/default/aktion035.gif)
... but it also make me feel good about the near rust-free cars I've been fortunate to own (IMG:style_emoticons/default/happy11.gif) Keep up the good work (IMG:style_emoticons/default/popcorn[1].gif) |
|
|
|
| cary |
Jul 6 2019, 07:36 AM
Post
#157
|
|
Advanced Member Group: Members Posts: 3,900 Joined: 26-January 04 From: Sherwood Oregon Member No.: 1,608 Region Association: Pacific Northwest |
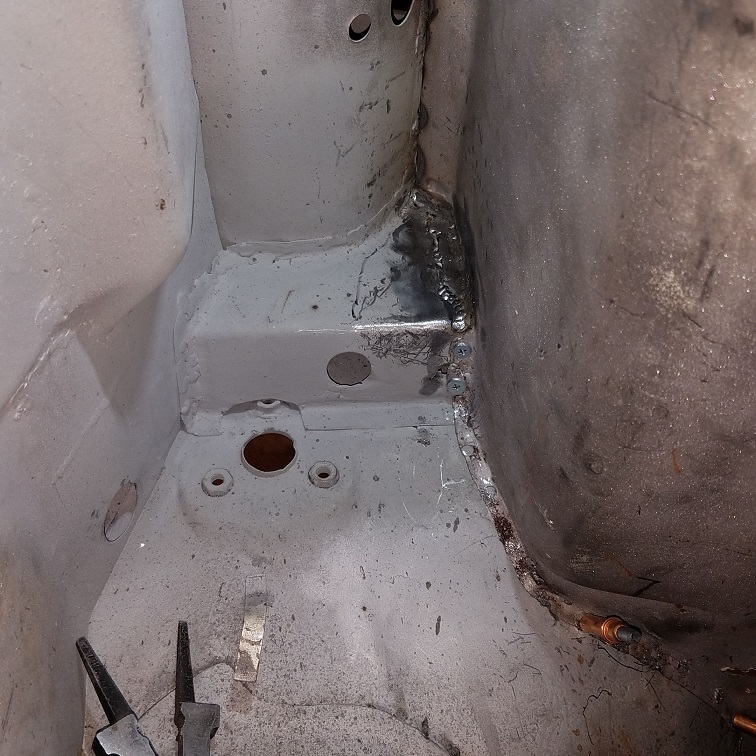
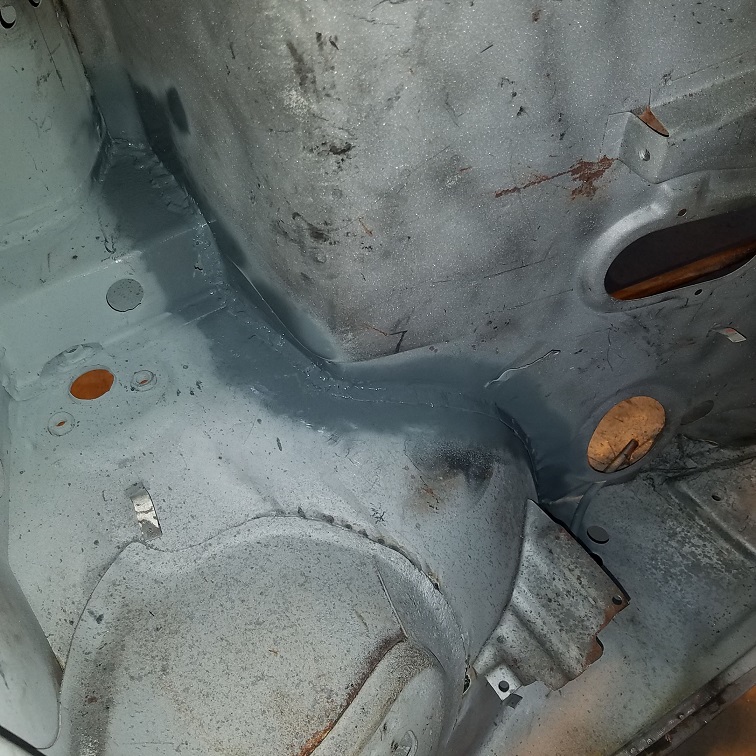
Been a while. Been working on mechanical projects.
Back to finishing up the welding in of front chassis bulkhead. Corners up against the hinge pillar got pretty tore up during harvesting. Finishing up the right side. 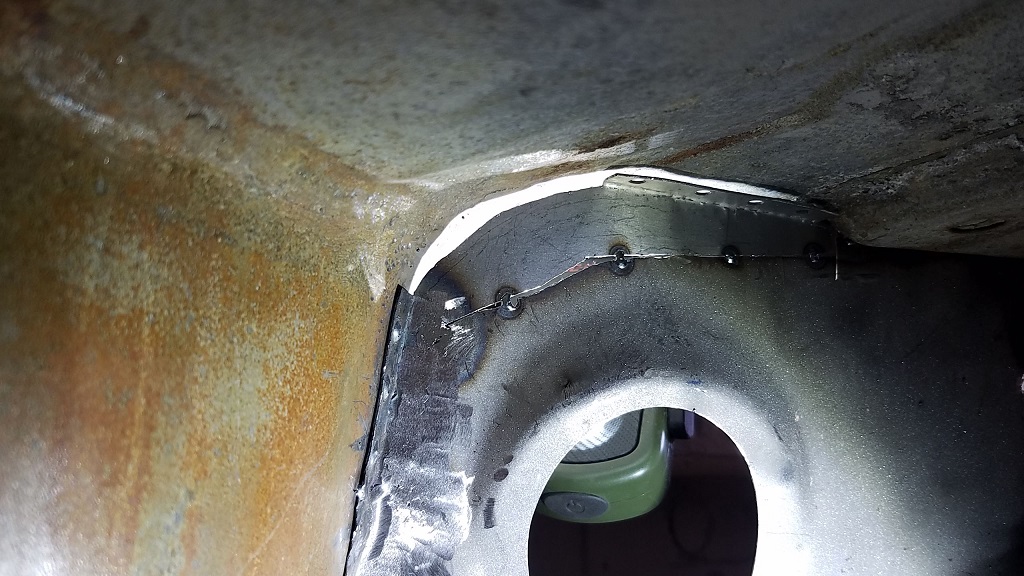 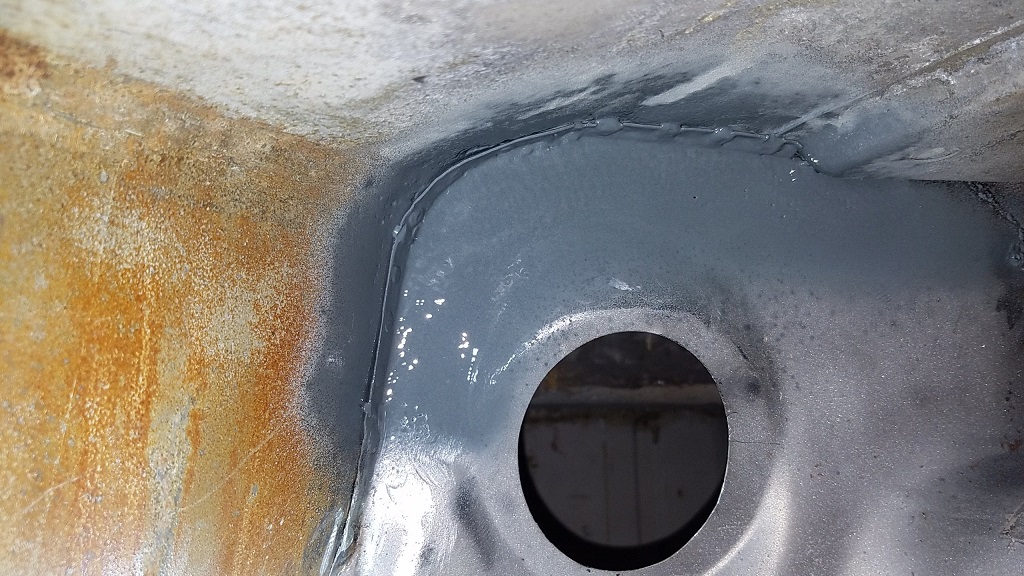 Inside the fuel tank cavity  Above the passengers knees 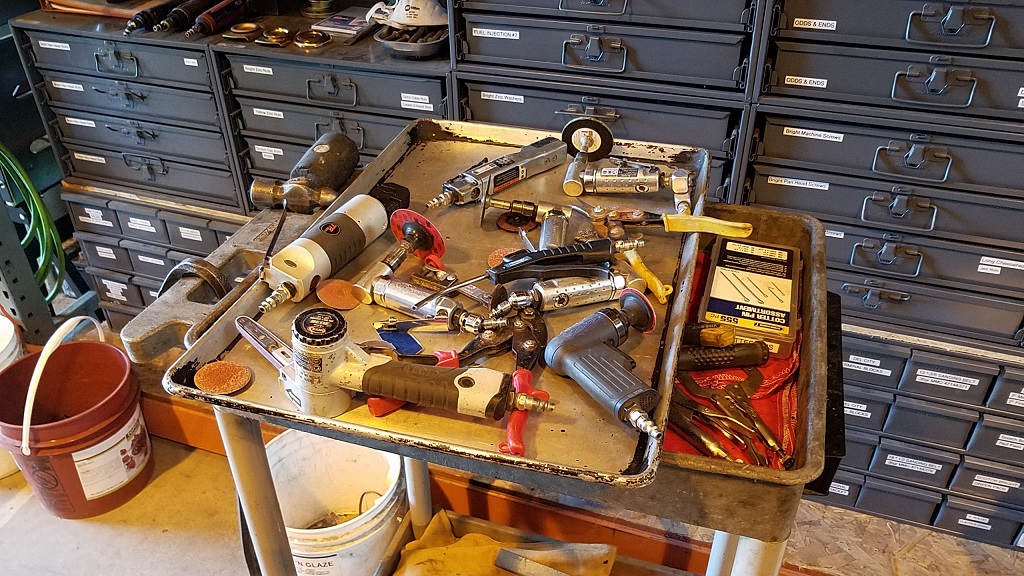 Tray was empty when I started. (IMG:style_emoticons/default/welder.gif) |
|
|
|
| cary |
Jul 6 2019, 07:42 AM
Post
#158
|
|
Advanced Member Group: Members Posts: 3,900 Joined: 26-January 04 From: Sherwood Oregon Member No.: 1,608 Region Association: Pacific Northwest |
On to the left side that has its own set of challenges.
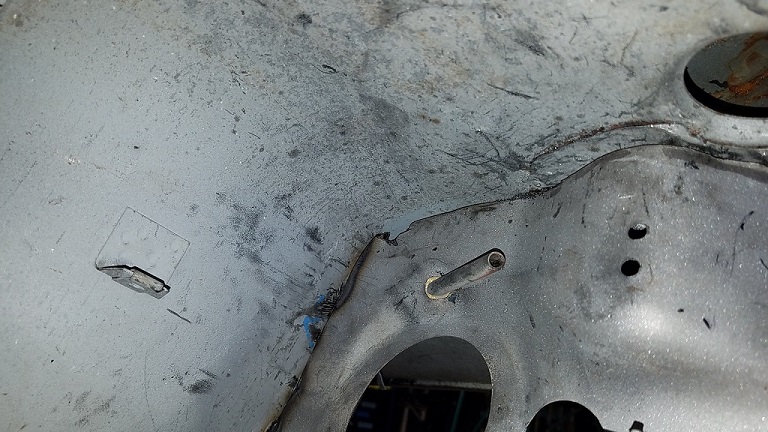 No flange   Vent section didn't survive. |
|
|
|
| cary |
Jul 19 2019, 08:43 AM
Post
#159
|
|
Advanced Member Group: Members Posts: 3,900 Joined: 26-January 04 From: Sherwood Oregon Member No.: 1,608 Region Association: Pacific Northwest |
Time for a little catch up on Taylor's car.
The bulk head is finally finished. 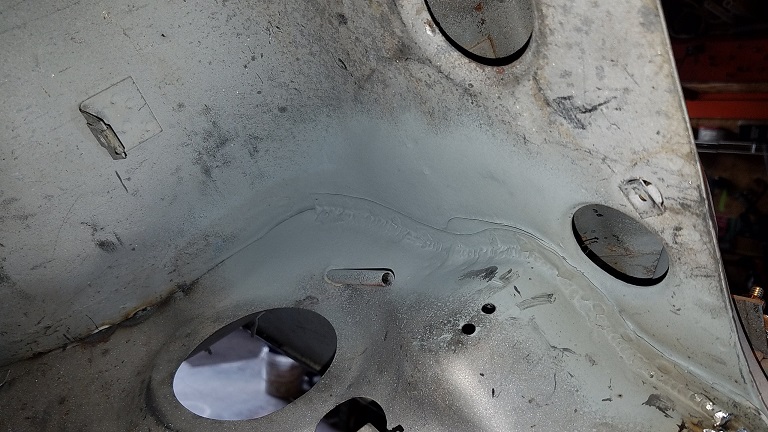 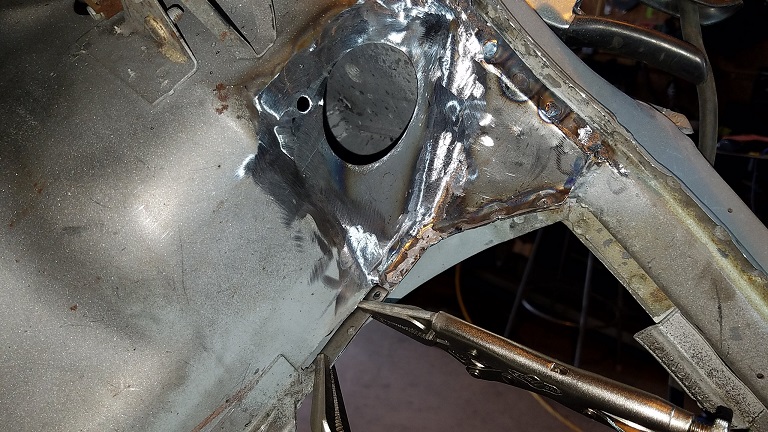 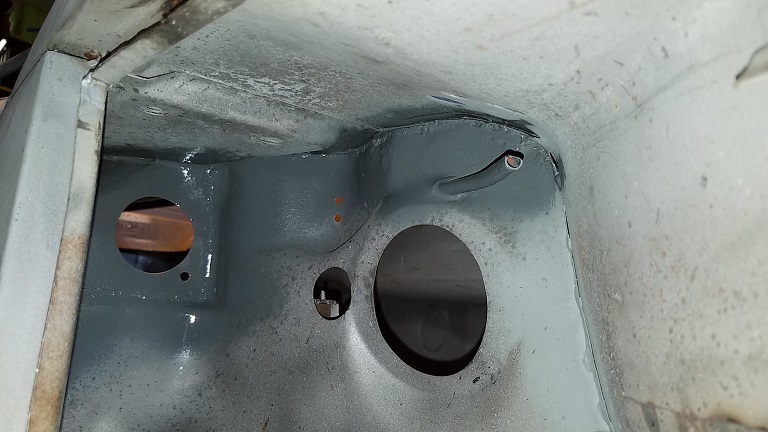 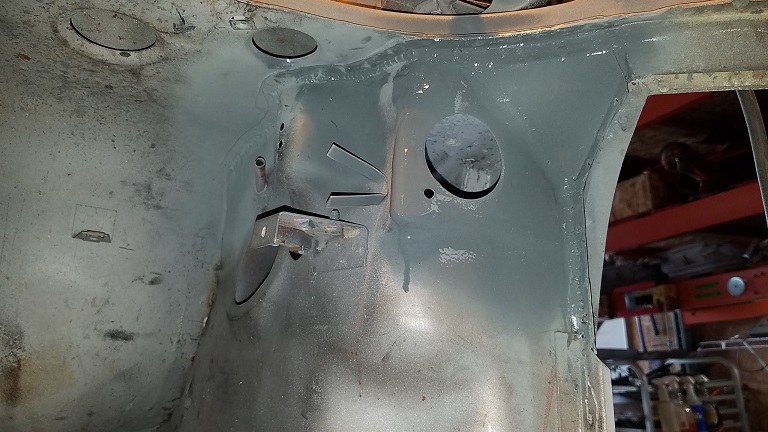 Now the question lies. Will I attempt to save another bulkhead from the parts car outside ? Would I ever want to do another one ? |
|
|
|
| bbrock |
Jul 19 2019, 08:53 AM
Post
#160
|
|
914 Guru Group: Members Posts: 5,269 Joined: 17-February 17 From: Montana Member No.: 20,845 Region Association: Rocky Mountains |
QUOTE(cary @ Jul 19 2019, 08:43 AM)  Now the question lies. Will I attempt to save another bulkhead from the parts car outside ? Would I ever want to do another one ? I wouldn't have the guts to do the first one so whatever you decide, you are a far better man than I. Unbelievable work there. (IMG:style_emoticons/default/beerchug.gif) |
|
|
|
| cary |
Jul 19 2019, 09:18 AM
Post
#161
|
|
Advanced Member Group: Members Posts: 3,900 Joined: 26-January 04 From: Sherwood Oregon Member No.: 1,608 Region Association: Pacific Northwest |
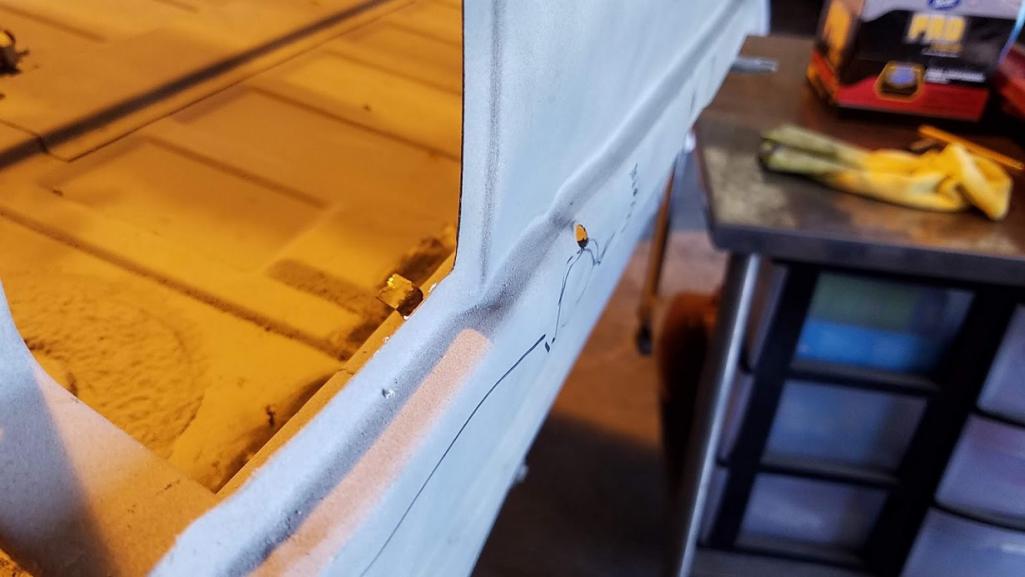
With the bulkhead completed its time to address the tail light panel.
Lots of owees. 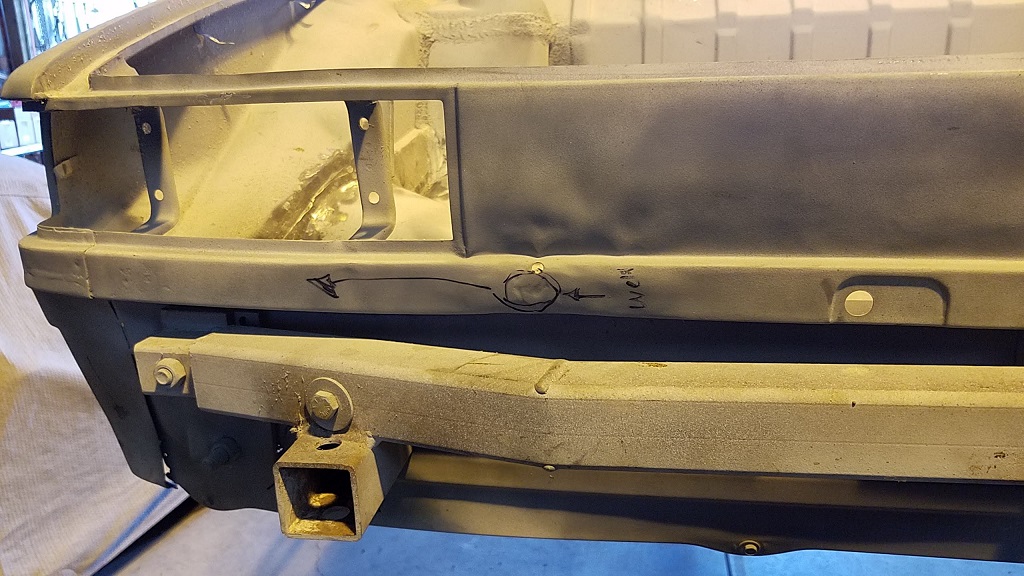 Looks like some one made an attempt to remove the tow hook. Or its a half ass attempt to remove the stress from collision damage. 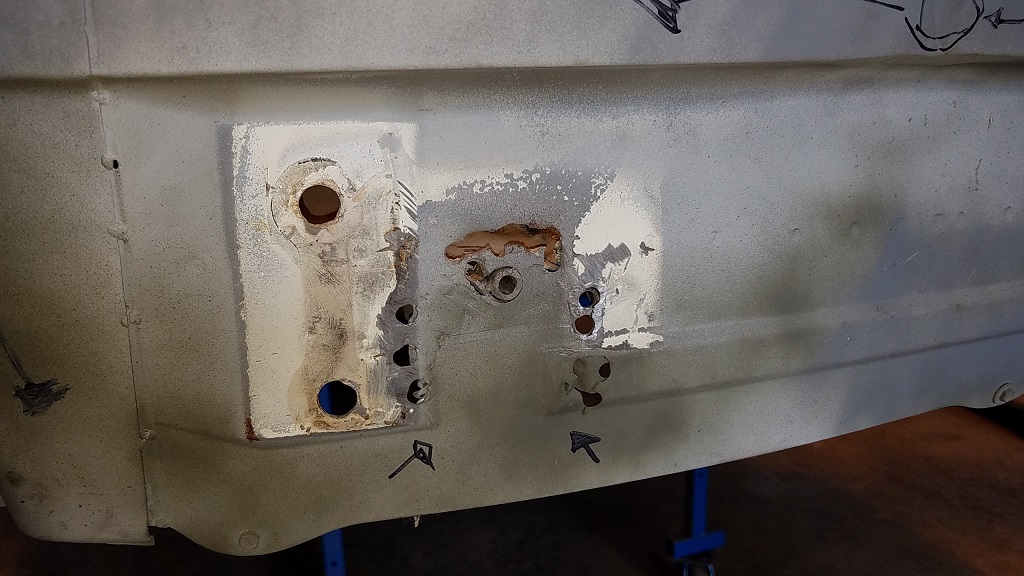 Plus it looks like it was backed over something. That corner already has been patched. 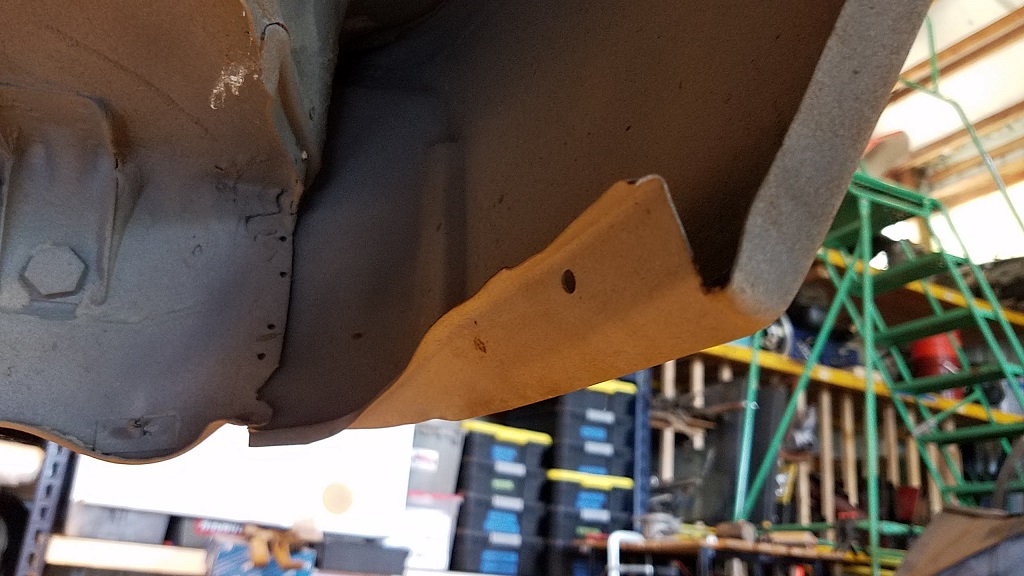 |
|
|
|
| cary |
Jul 19 2019, 09:32 AM
Post
#162
|
|
Advanced Member Group: Members Posts: 3,900 Joined: 26-January 04 From: Sherwood Oregon Member No.: 1,608 Region Association: Pacific Northwest |
But in order to work on the tail light panel it has to come off the rotisserie.
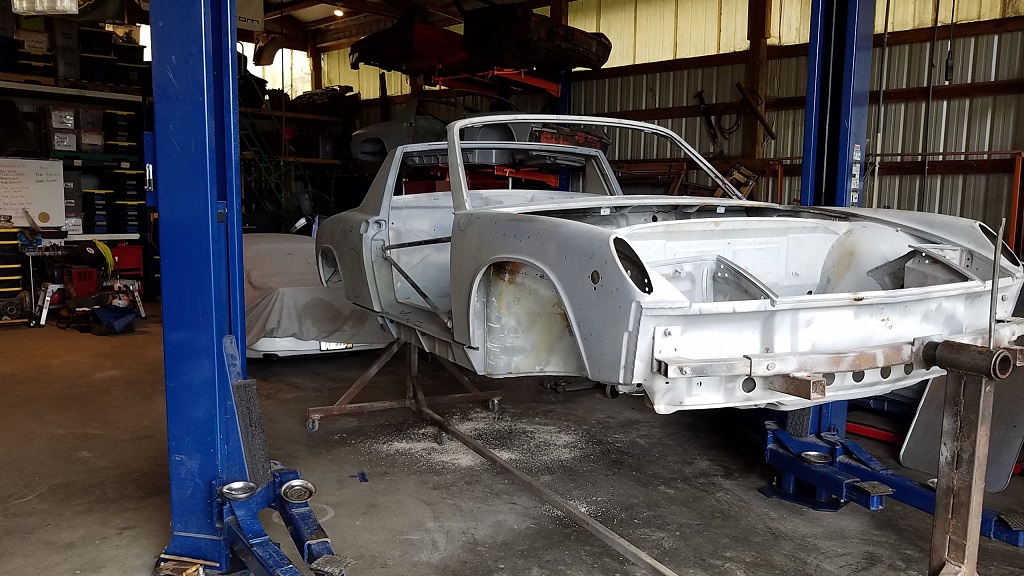 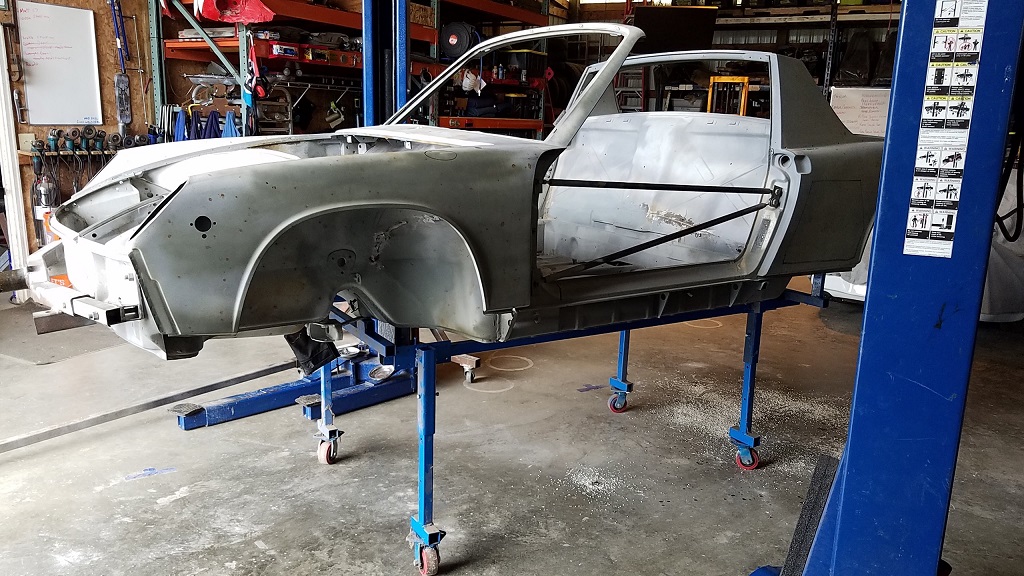 But on a positive note, like I mentioned on Instagram. The chassis dolly is actually our old chassis jig converted into a dolly. Other than a couple taps with a hammer it bolted straight in. So from the trailing arm mounts to the rear steering rack she's 5 * 5. Another shot of the panel. Mark has a used one that I'll attempt to use after its stripped. 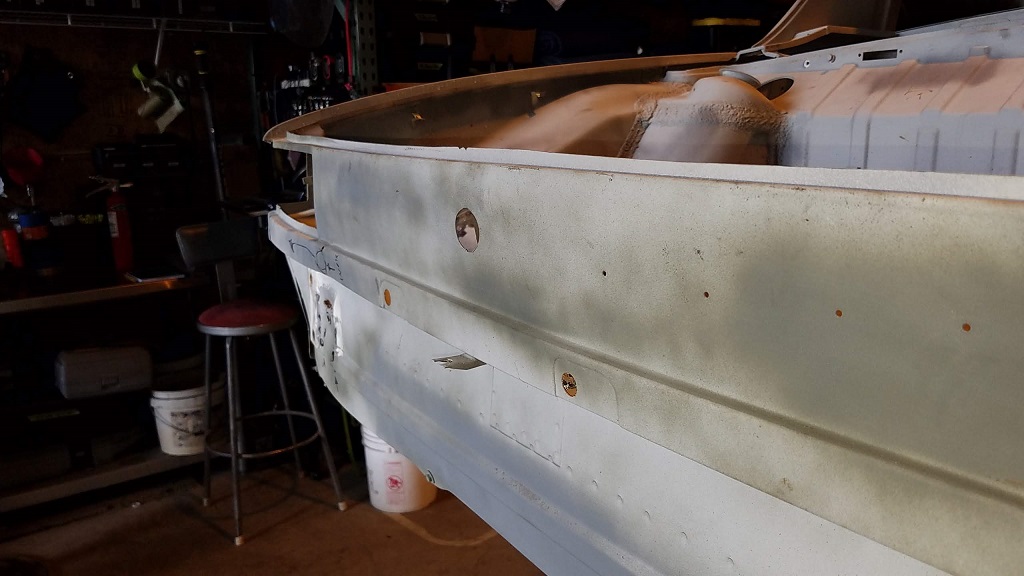 Surgery center all set up for my return in a couple weeks. Vacation with wife. 8 day commitment at Rothsport 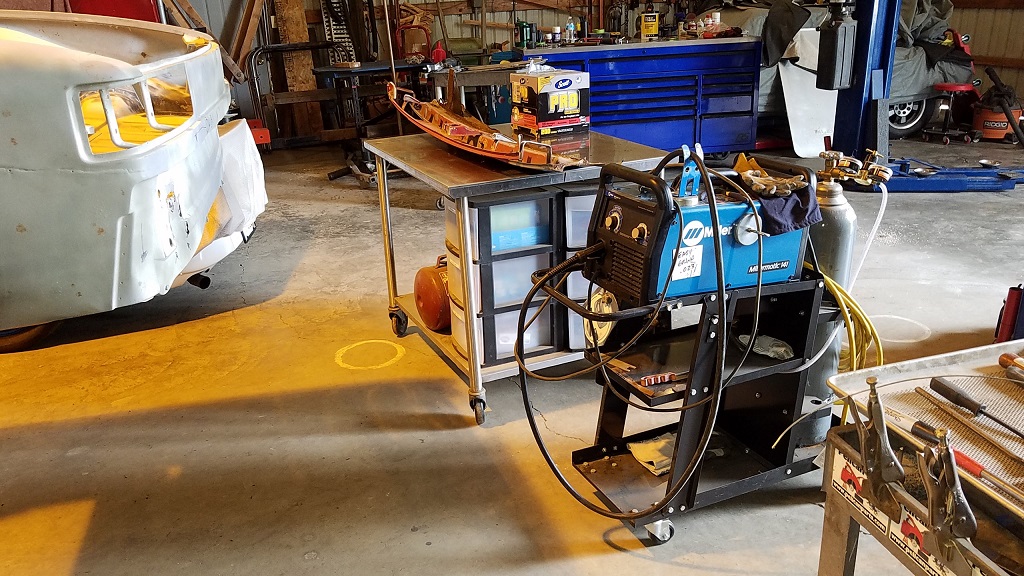 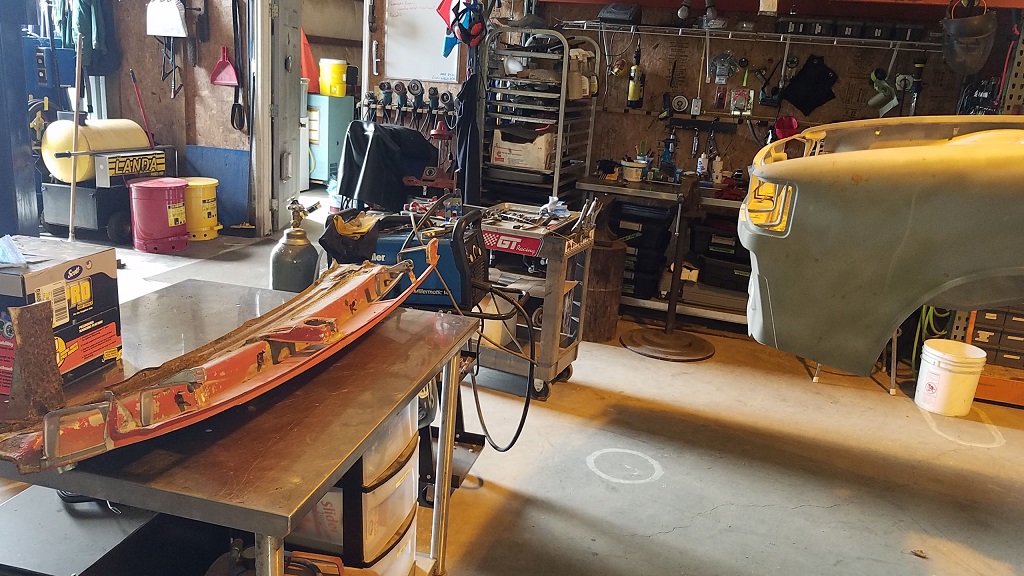 |
|
|
|
| cary |
Aug 7 2019, 08:14 AM
Post
#163
|
|
Advanced Member Group: Members Posts: 3,900 Joined: 26-January 04 From: Sherwood Oregon Member No.: 1,608 Region Association: Pacific Northwest |
Labor of love .................
Super In Law straightening the folded over qtr. corner . 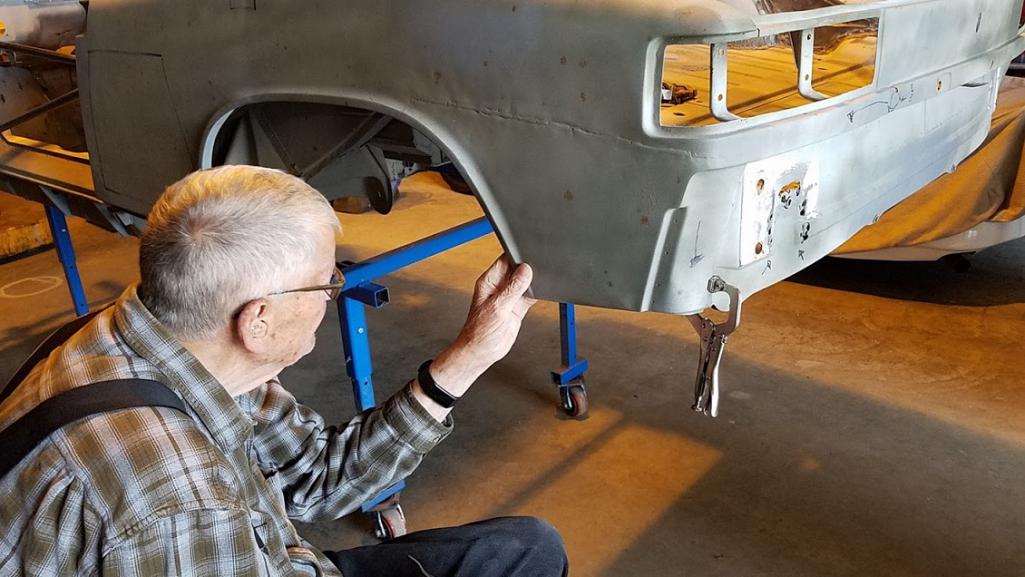 |
|
|
|
| cary |
Aug 7 2019, 05:11 PM
Post
#164
|
|
Advanced Member Group: Members Posts: 3,900 Joined: 26-January 04 From: Sherwood Oregon Member No.: 1,608 Region Association: Pacific Northwest |
Last couple issues before it heads home or to the body shop for mud and paint.
 Trunk for too bad. It has some PO cuts and holes that can be patched or filled. But the left side of the tail light looks like it was beaten too death. In the essence of time I only cut out the beat to death section. 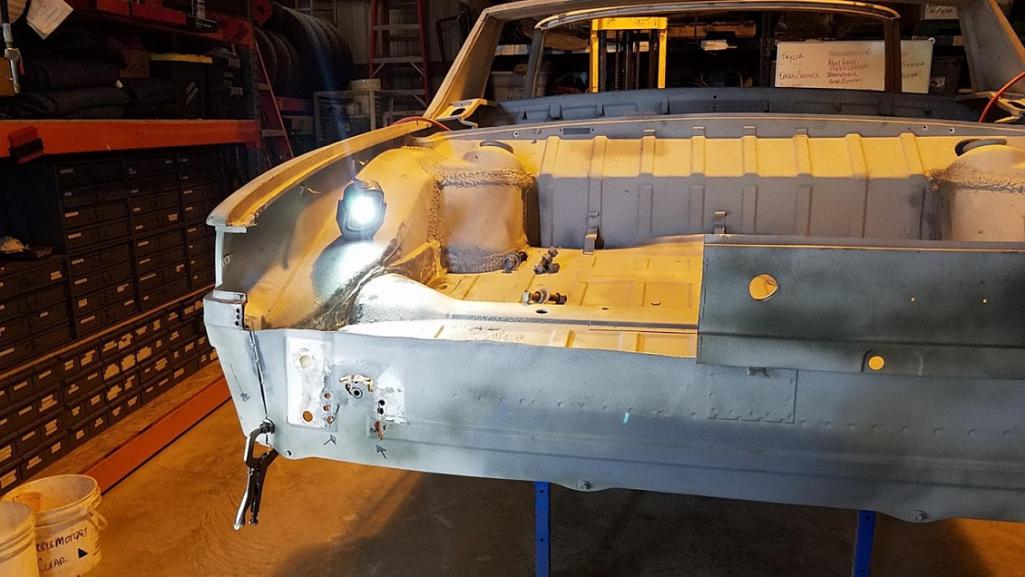 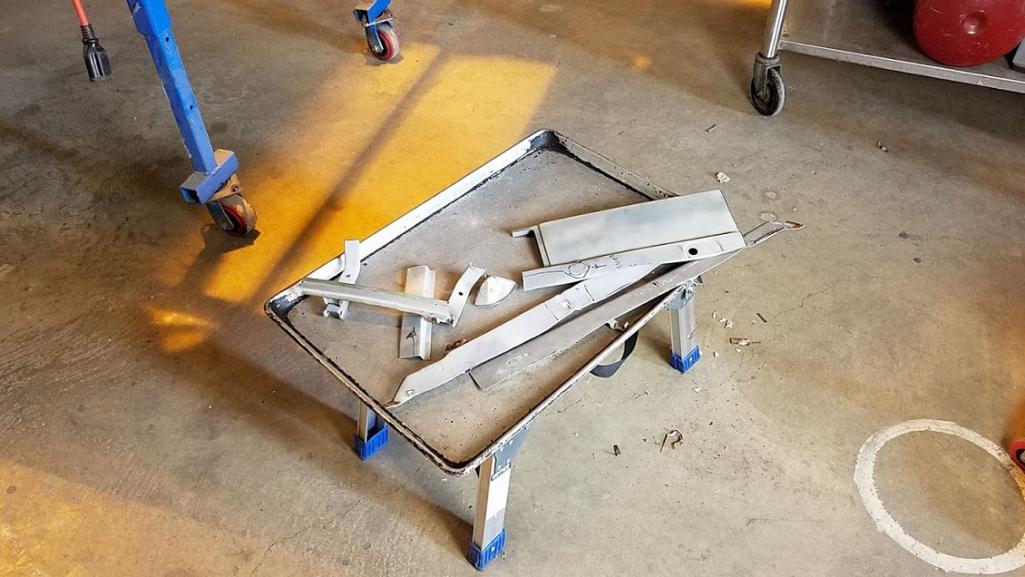 Out it came and in in went ................  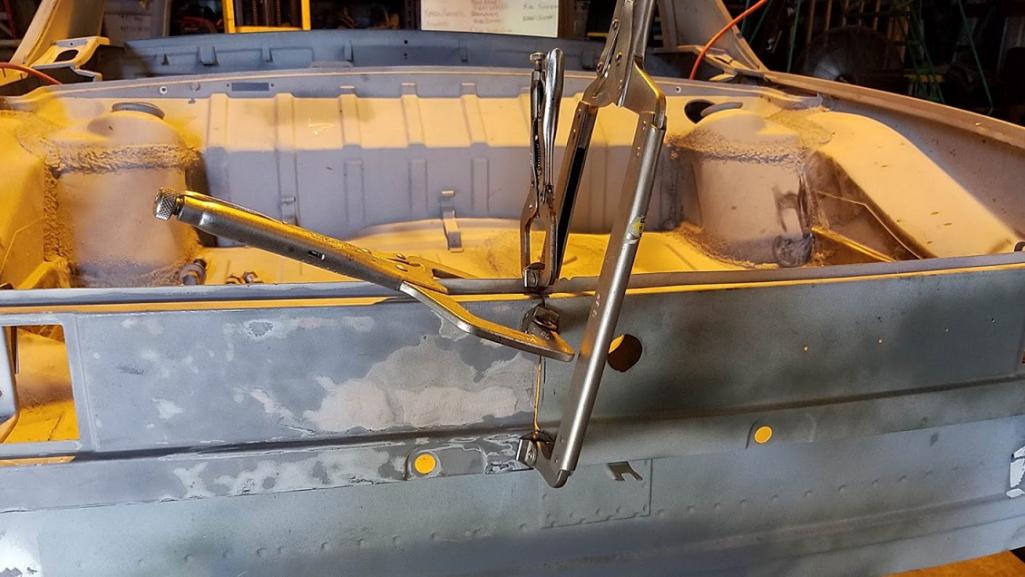 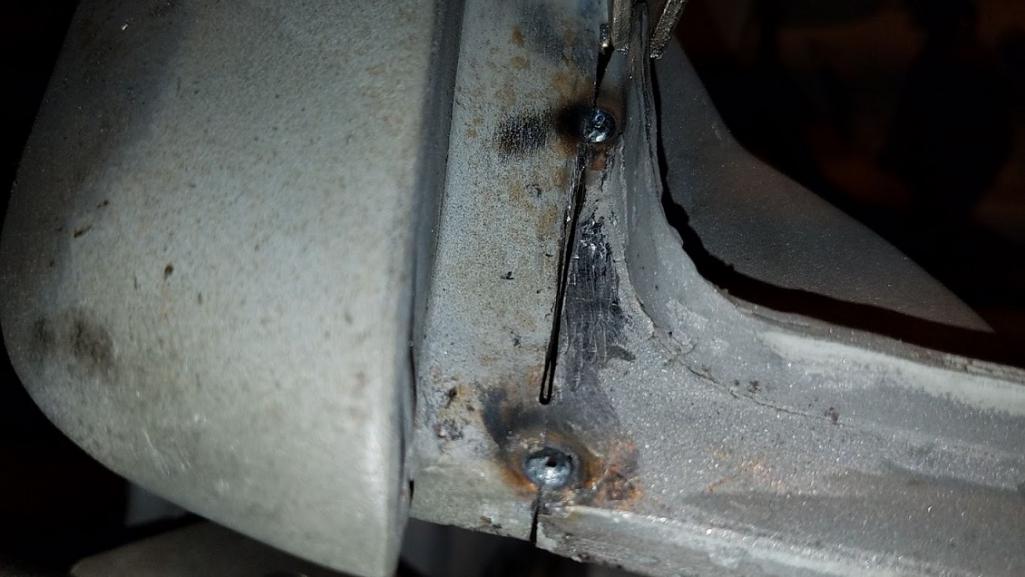 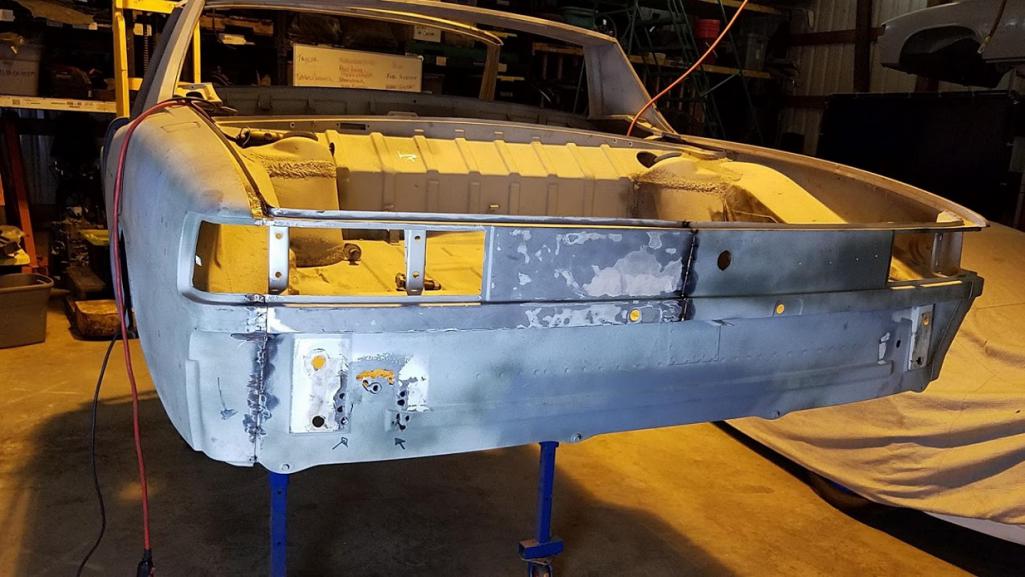 Not quite that easy. But you get the gist of it. A lot of measure 10 times, cut once. Then blip, blip, blip. Donor piece has had some love in the past but should be ok. |
|
|
|
| Mikey914 |
Feb 19 2020, 12:55 AM
Post
#165
|
|
The rubber man Group: Members Posts: 12,652 Joined: 27-December 04 From: Hillsboro, OR Member No.: 3,348 Region Association: None |
Making some progress.
we used tint-able truck bead liner and made it the color of the car. shot it and let it cure for about 12 weeks (no intentionally, just didn't have time and the weather to press on. Taylor was sanding and prepping the rest of the shell for the epoxy primer we shot today. Did make a few mistakes. Realized we needed seam sealer in a few places is the big one. That and a little learning curve with the gun, but we have sand paper.... lots of sandpaper. Plan to shoot the interior, windshield area, and the engine compartment so we can begin putting the engine, suspension and interior back in. Will shoot the rest onece most of the assembly work is done. Attached image(s) 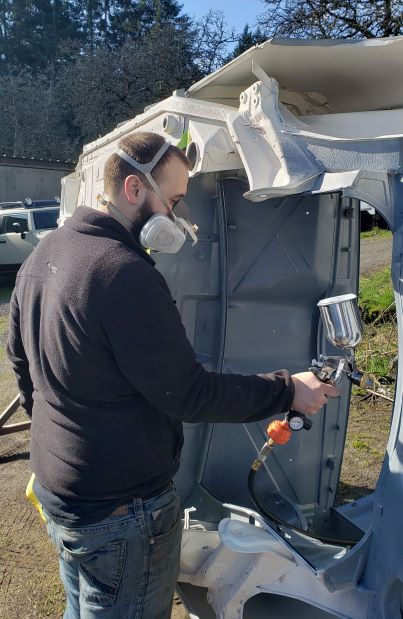 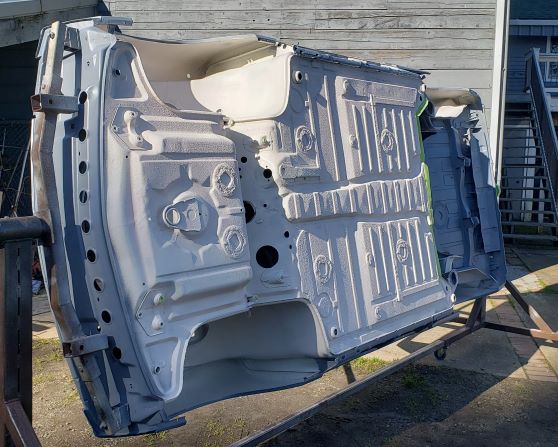 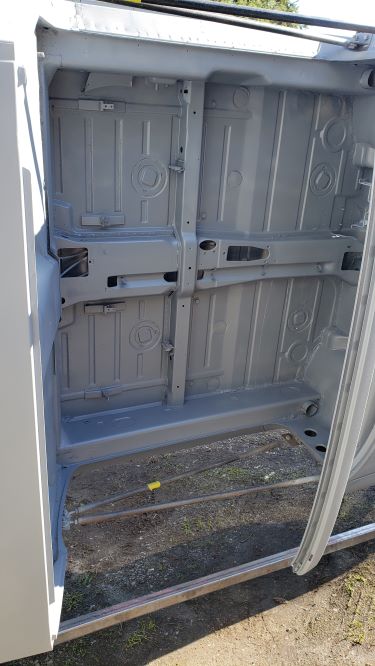 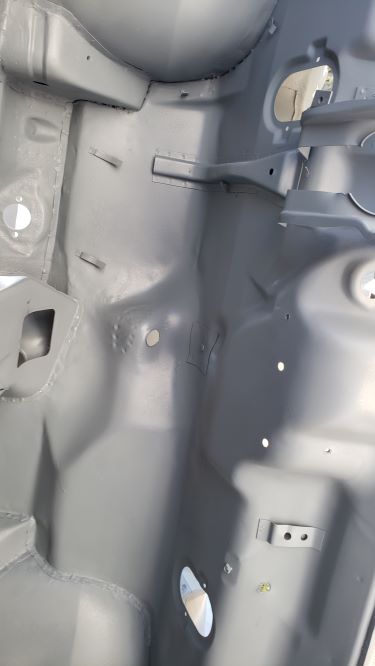 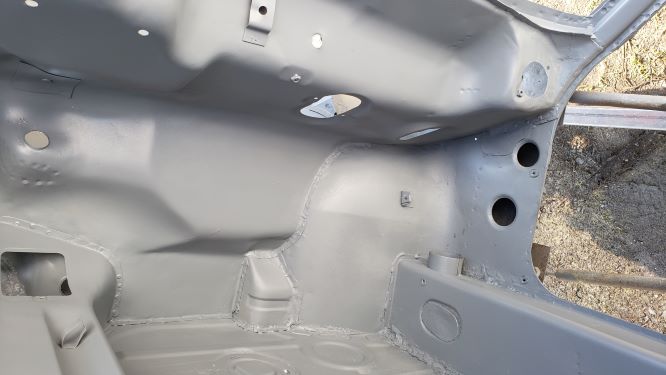 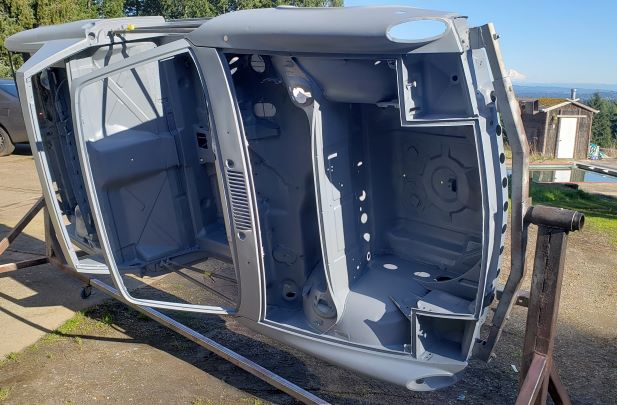 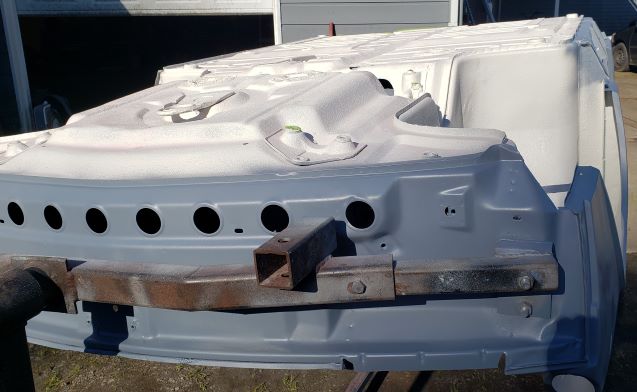  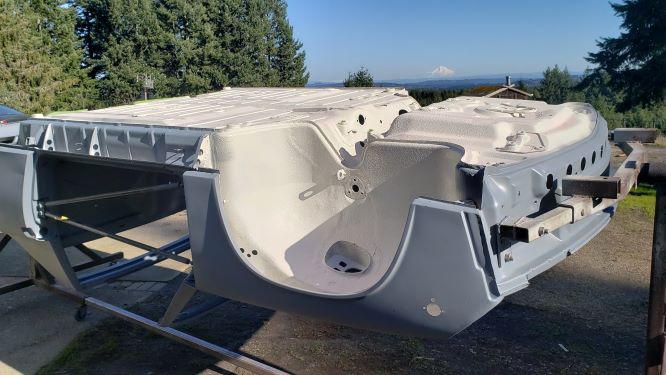
|
|
|
|
| Mikey914 |
Feb 19 2020, 12:55 AM
Post
#166
|
|
The rubber man Group: Members Posts: 12,652 Joined: 27-December 04 From: Hillsboro, OR Member No.: 3,348 Region Association: None |
And the artsy shot
It was a nice day today! (IMG:style_emoticons/default/beer3.gif) Attached image(s) 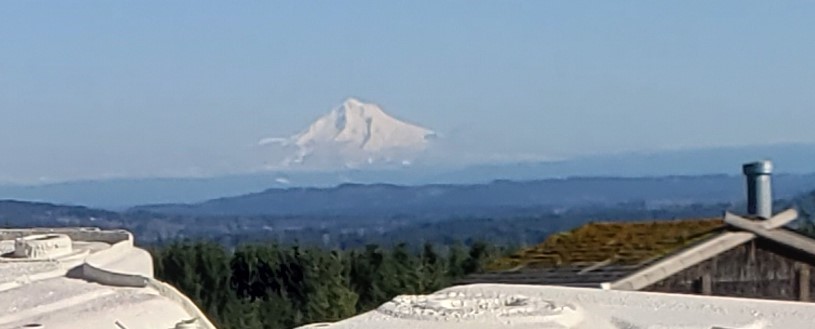
|
|
|
|
| raynekat |
Feb 19 2020, 09:59 PM
Post
#167
|
|
Advanced Member Group: Members Posts: 2,157 Joined: 30-December 14 From: Coeur d'Alene, Idaho Member No.: 18,263 Region Association: Pacific Northwest |
Looking good there....
I was actually up at Timberline lodge with the wife and twins today (Feb 19), but the weather was identical to you pic. 25F up there and sunny. Fun day. Nice to be able to drive there from our house in just under an hour. |
|
|
|
| sixnotfour |
Feb 20 2020, 06:23 AM
Post
#168
|
|
914 Wizard Group: Members Posts: 10,422 Joined: 12-September 04 From: Life Elevated..planet UT. Member No.: 2,744 Region Association: Rocky Mountains |
Good progress, Great view from the shop... (IMG:style_emoticons/default/flag.gif)
|
|
|
|
| Mikey914 |
Feb 24 2020, 11:50 AM
Post
#169
|
|
The rubber man Group: Members Posts: 12,652 Joined: 27-December 04 From: Hillsboro, OR Member No.: 3,348 Region Association: None |
Taylor laid some paint down in the areas that he needs to reassemble and will not be accessible once stuff is in.
The fun is about to start. Attached image(s) 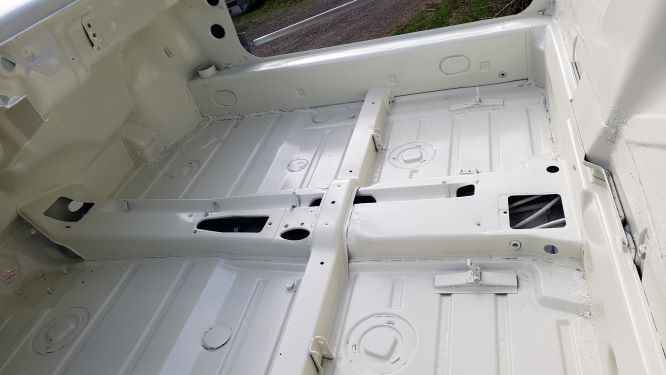
|
|
|
|
| Mikey914 |
Feb 24 2020, 11:51 AM
Post
#170
|
|
The rubber man Group: Members Posts: 12,652 Joined: 27-December 04 From: Hillsboro, OR Member No.: 3,348 Region Association: None |
more
Attached image(s) 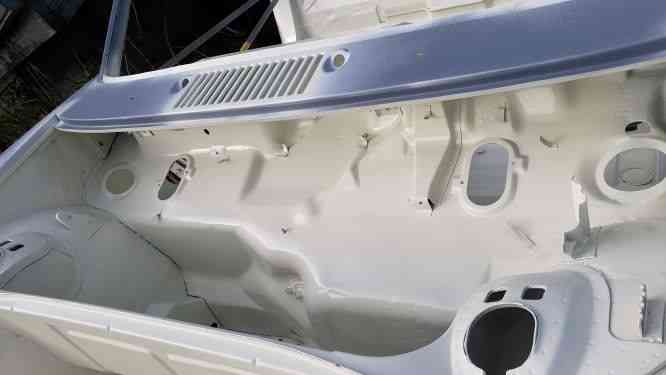
|
|
|
|
|
1 User(s) are reading this topic (1 Guests and 0 Anonymous Users)
0 Members:

|
Lo-Fi Version | Time is now: 5th May 2024 - 10:26 AM |
Invision Power Board
v9.1.4 © 2024 IPS, Inc.