|
|
|
Porsche, and the Porsche crest are registered trademarks of Dr. Ing. h.c. F. Porsche AG.
This site is not affiliated with Porsche in any way. Its only purpose is to provide an online forum for car enthusiasts. All other trademarks are property of their respective owners. |
|
|

  |

| branston |
 Apr 2 2017, 01:42 PM Apr 2 2017, 01:42 PM
Post
#21
|
|
Member  Group: Members Posts: 91 Joined: 17-October 12 From: Lock Haven, PA Member No.: 15,053 Region Association: Upper MidWest |
QUOTE Seat belts do not work well at all. Replace or refurbish? If your webbing doesn't clean up or the retractor sticks - I just mailed seat belts from my 912e to Safety Retore in MA, $75 to replace webbing. Claim to use OEM webbing will report back! |
   |

 
|
| boxsterfan |
Apr 2 2017, 02:26 PM
Post
#22
|
|
914's are kewl Group: Members Posts: 1,776 Joined: 6-June 03 From: San Ramon, CA Member No.: 791 Region Association: Northern California |
You are definitely going to need to order from these guys to replace longs.
http://www.restoration-design.com/store/category/914 They make a lot of the pieces you will need, but from the looks of it, not all of the pieces. There's going to be some custom fabricating or you will need some areas cut off of a parts car. When I do my car, I will be going without the jack points. I don't use them and I don't want to put back in a mud collector. |
|
|
|
| seanpaulmc |
Mar 3 2021, 07:11 PM
Post
#23
|
|
Member Group: Members Posts: 458 Joined: 6-December 16 From: Orlando, FL Member No.: 20,649 Region Association: South East States |
QUOTE(boxsterfan @ Apr 2 2017, 03:26 PM)  You are definitely going to need to order from these guys to replace longs. http://www.restoration-design.com/store/category/914 They make a lot of the pieces you will need, but from the looks of it, not all of the pieces. There's going to be some custom fabricating or you will need some areas cut off of a parts car. When I do my car, I will be going without the jack points. I don't use them and I don't want to put back in a mud collector. Funny that this was the last post on this thread...and that my first order from RD arrived yesterday (3/2/2021). 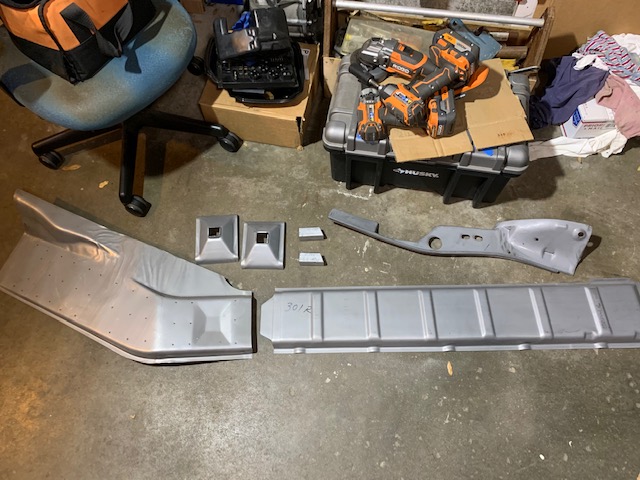 Reviving this old thread since so much good advice was offered when I just got the car. Well, still got the car and am getting back to working on it - I hope more regularly. |
|
|
|
| 930cabman |
Mar 3 2021, 07:24 PM
Post
#24
|
|
Advanced Member Group: Members Posts: 4,773 Joined: 12-November 20 From: Buffalo Member No.: 24,877 Region Association: North East States |
Time, patience, basic skills, repeat, repeat and don't forget $$$. Anything can be fixed, I have been at our project since late 11/20 and just about done with the structural metal work, still have floors, engine, transmission, brakes, suspension, ................
Persevere, you can/will win |
|
|
|
| seanpaulmc |
Mar 3 2021, 07:30 PM
Post
#25
|
|
Member Group: Members Posts: 458 Joined: 6-December 16 From: Orlando, FL Member No.: 20,649 Region Association: South East States |
Hard to believe this tread was stared four years ago. A lot has happened but little with the car. However, recent progress has me hopeful and wanting to share as well as seek advice.
Purchased a welder. Eastwood Mig135. 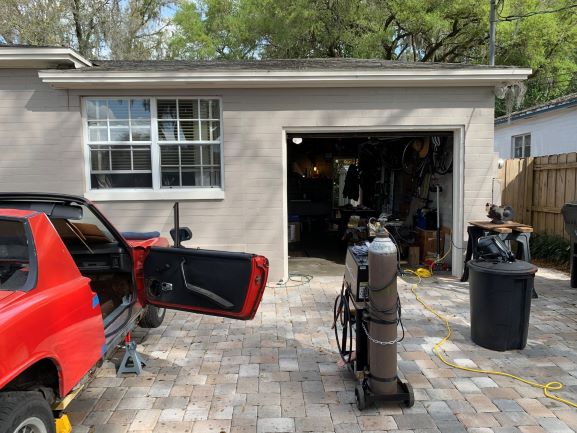 ...as well as a driveway should the keen observer look back at the older pictures. Same house. One day hopefully I'll get a two-car garage and get to work inside. It rained hard early today. Repaired an engine deck lid bracket. 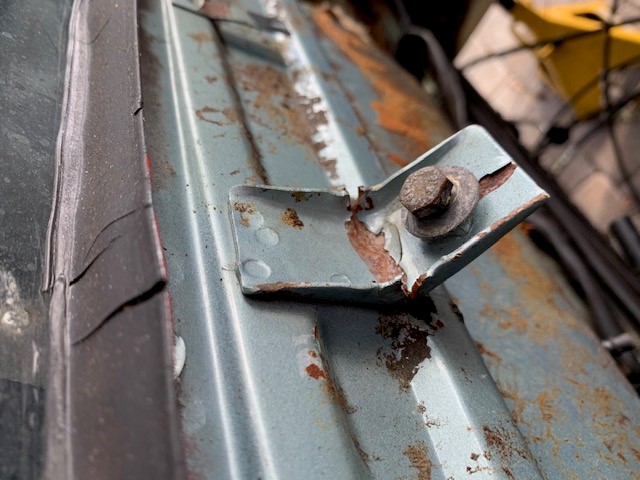 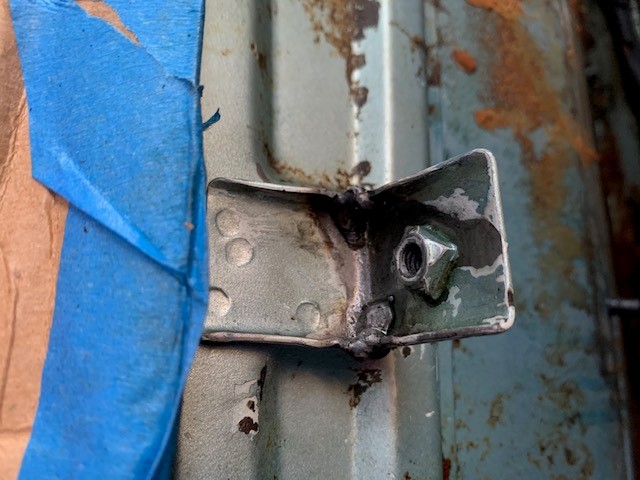 Started working on my engine tin repairs.  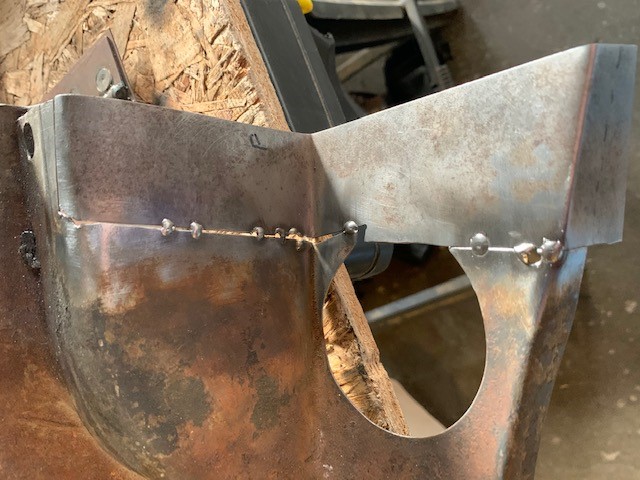 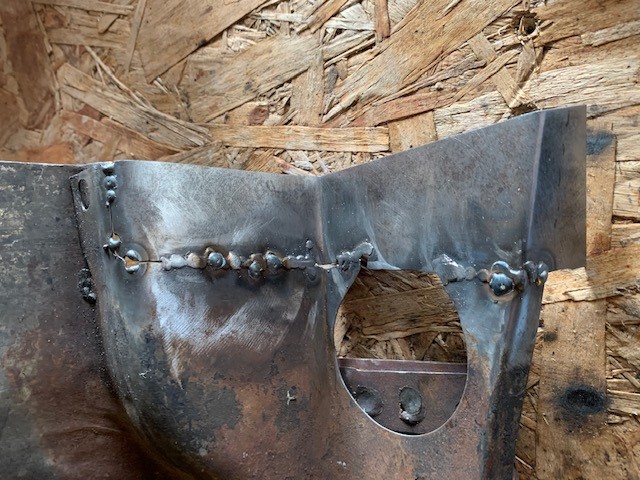 Made some door braces in anticipation of what's to come. 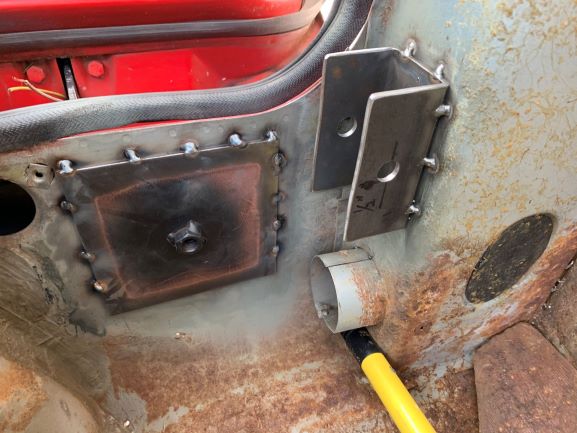 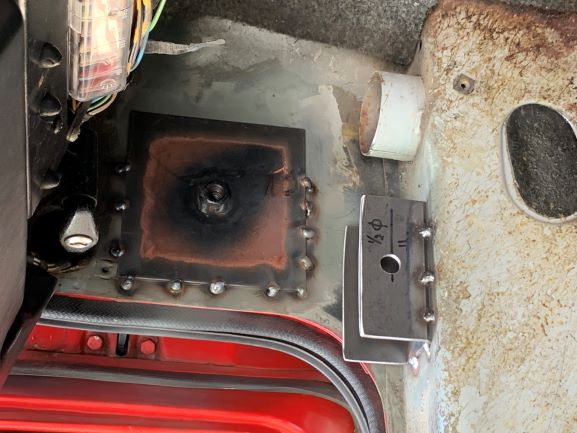 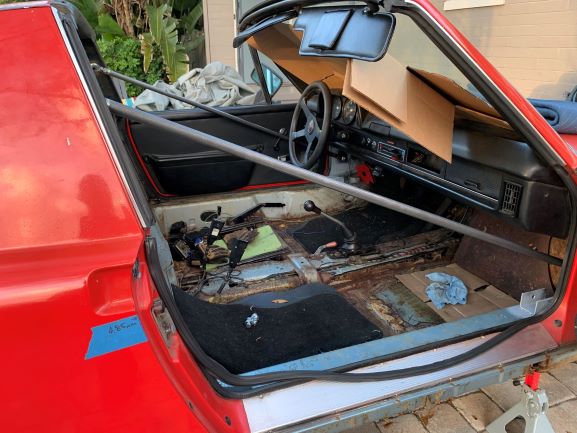 |
|
|
|
| seanpaulmc |
Mar 3 2021, 07:55 PM
Post
#26
|
|
Member Group: Members Posts: 458 Joined: 6-December 16 From: Orlando, FL Member No.: 20,649 Region Association: South East States |
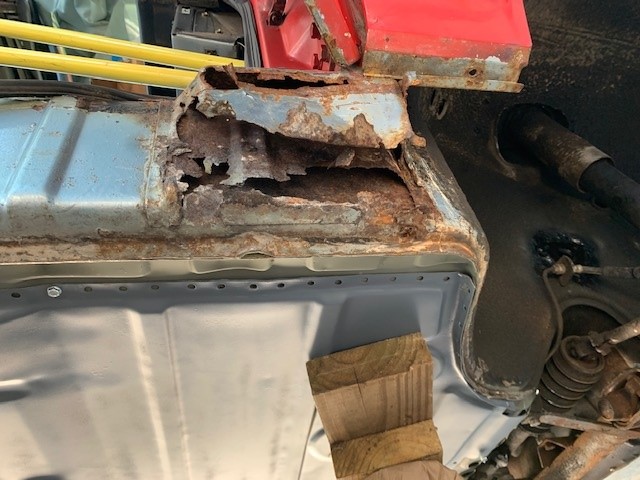
Let's see what we're working with. Or, without in this case.
 How may holes did you count?  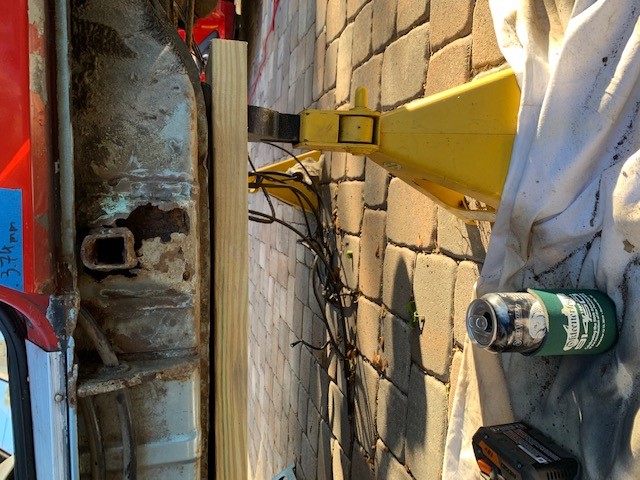 What about the battery tray area? 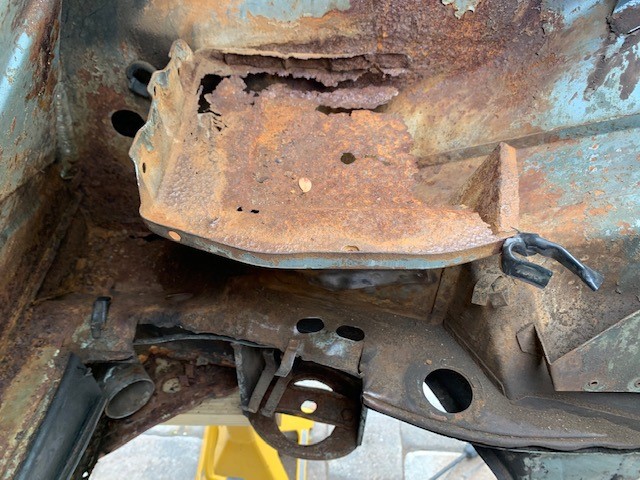 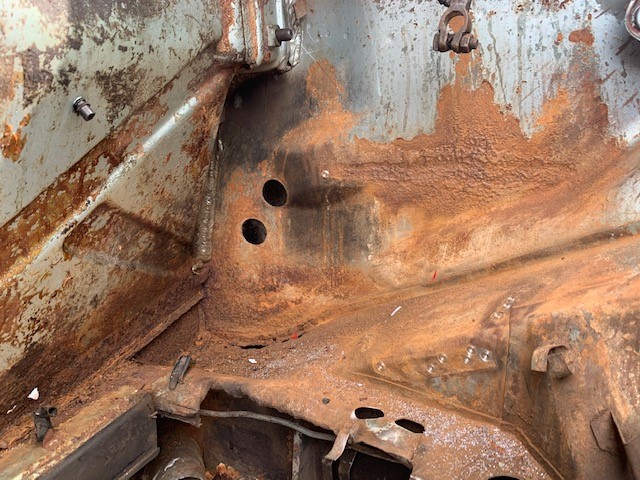 The tray itself was gone but the support was in rather good condition. However, it had to come out to do what is needed to do. 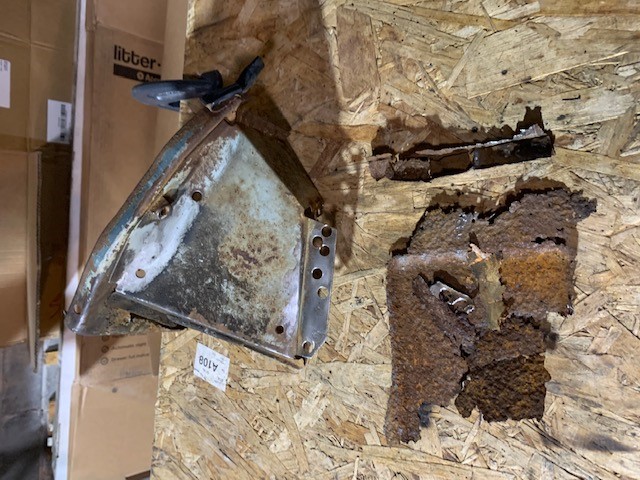 Let's look at that hell hole area. 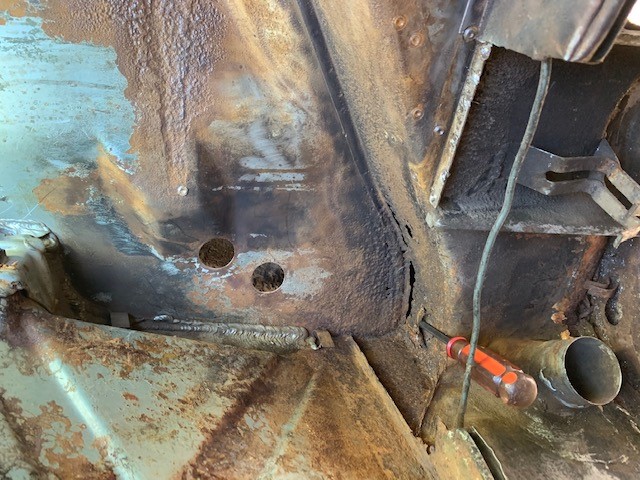 That's the paper thin top layer just eaten away. It took me a while before I realized what I was looking at. 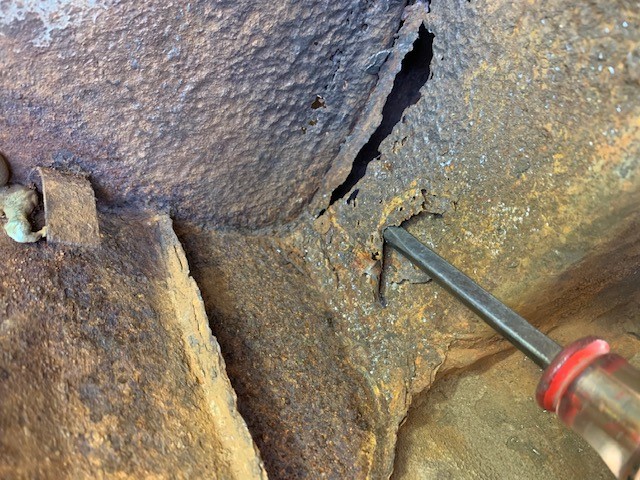 As thin as it was it still took me a while to peel back. Quite surprised to see the inner layer (top of the long I suppose) in quite good shape. However, I know the bottom of the long is not in good shape and will need work (think door braces). Still a nice surprise nevertheless. 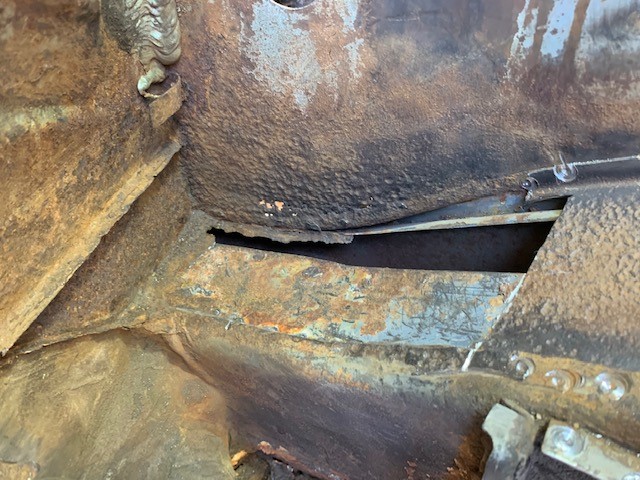 And if you look at the firewall in these pictures, it's pretty thin and rusted away at the bottom. Almost as if it was soaked in a wet sponge for years. (IMG:style_emoticons/default/av-943.gif) Here's to getting good use of that new welder. (IMG:style_emoticons/default/welder.gif) Thanks for the inspiration everyone. Cheers. |
|
|
|
| Robarabian |
Mar 3 2021, 10:33 PM
Post
#27
|
|
914 A Roo Group: Members Posts: 743 Joined: 11-February 19 From: Simi Valley, Kalifornia Member No.: 22,865 Region Association: Southern California |
Duplicate post. Sorry.
QUOTE(seanpaulmc @ Apr 1 2017, 04:52 PM) Here's the initial look underneath. I'm pretty sure the duct tape shouldn't be there. (IMG:style_emoticons/default/WTF.gif) The engine cradle is cockeyed (i.e. not vertical), should it be? Also, I started in on the removing the tar from the floor pans. The oscillating multi-tool with scraper blade works great. Didn't get very far since I started late in the day. Spent three hours doing yard work first. Will show the floor carnage after a little more progress tomorrow. Findings to date: Seat belts do not work well at all. Replace or refurbish? Has original fuel lines. I bought a fire extinguisher just in case. Rust in the longs and floor pans. Windshield washer switch arm broken. Horn moved to a button on the dash (push button). Ignition moved to a button on the dash (push button). Low beam headlights don't work but Highs do. I did put in LED bulbs if that means anything. Speedometer does not work; it is hooked up at both ends. Broken engine lid bracket (LS). No rear trunk springs (broom handle). Lots of rust in the rear jack points. The hunt goes on. Thoughts? |
|
|
|
| seanpaulmc |
May 8 2022, 05:30 PM
Post
#28
|
|
Member Group: Members Posts: 458 Joined: 6-December 16 From: Orlando, FL Member No.: 20,649 Region Association: South East States |
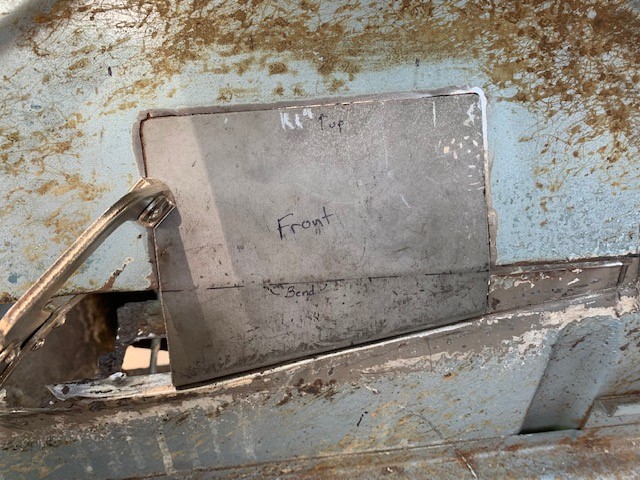
5/8/22 - might as well make it a project thread.
Catching up with the hell hole repair... Got good advice to use copper backers when working on my engine tin repairs. Worked very well here to hold the patch panel in place and reinforce the really thin material at the bottom. 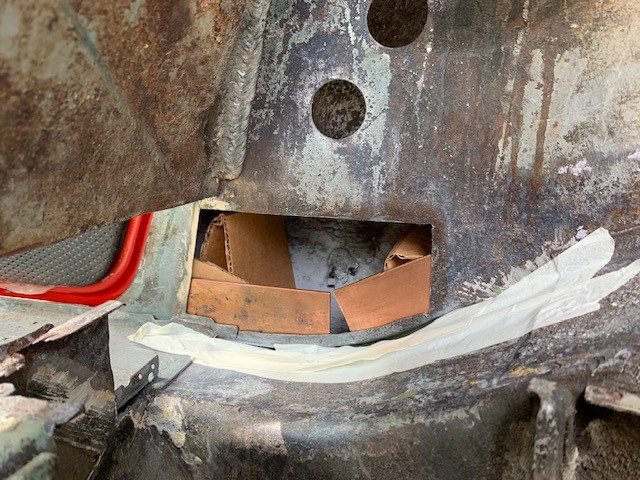 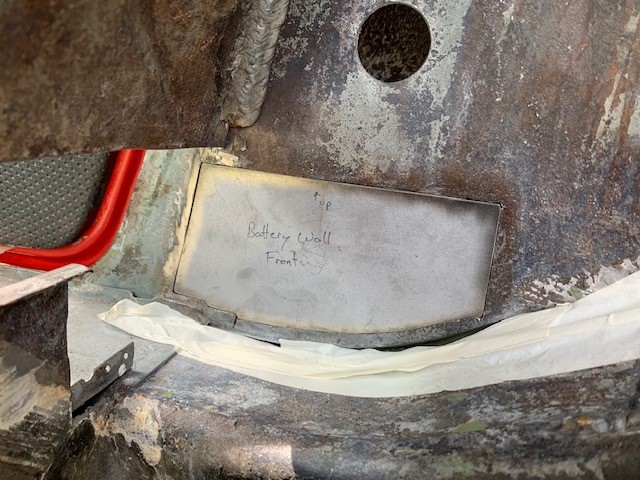 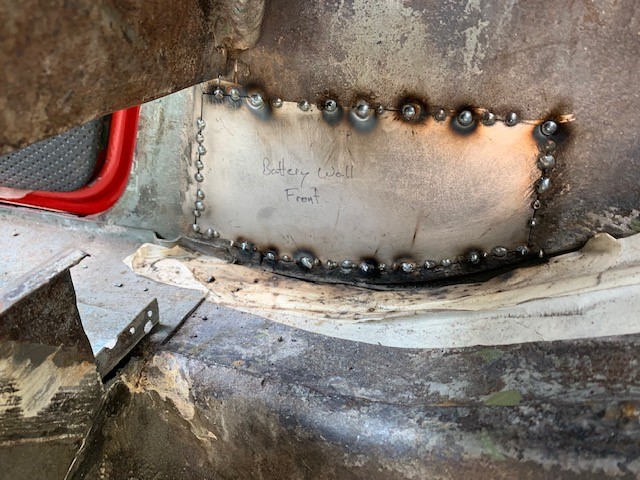 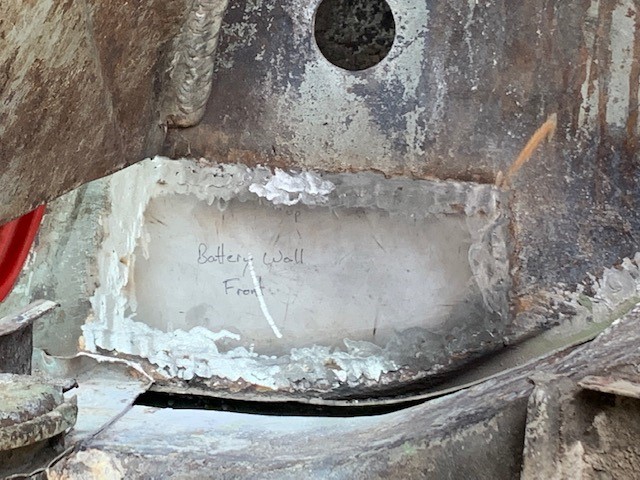 And looking from inside the fender 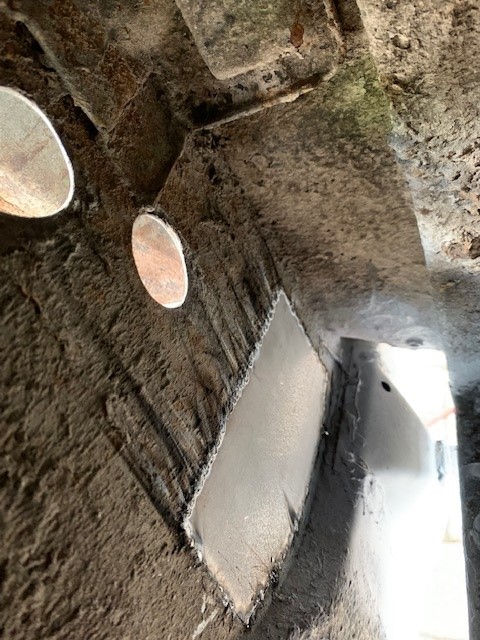 More to come. |
|
|
|
| seanpaulmc |
May 8 2022, 05:41 PM
Post
#29
|
|
Member Group: Members Posts: 458 Joined: 6-December 16 From: Orlando, FL Member No.: 20,649 Region Association: South East States |
I'm using 18 gage gavaneal and a lot of self taping screws.
You can also see the patch panel in the inner fender wall where the battery acid ate away a good chuck.  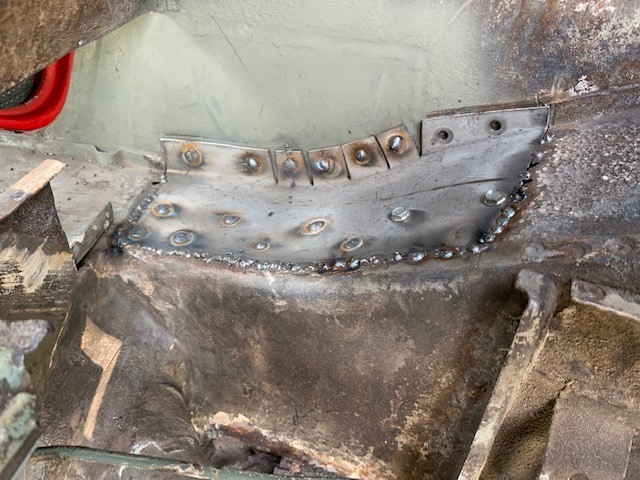 I may go back and grind more to pretty it up some but for now I'm just trying to get the patches in with solid weld connections. There is a lot of work still to do in this corner so I have ample opportunity to come back and dress those welds. 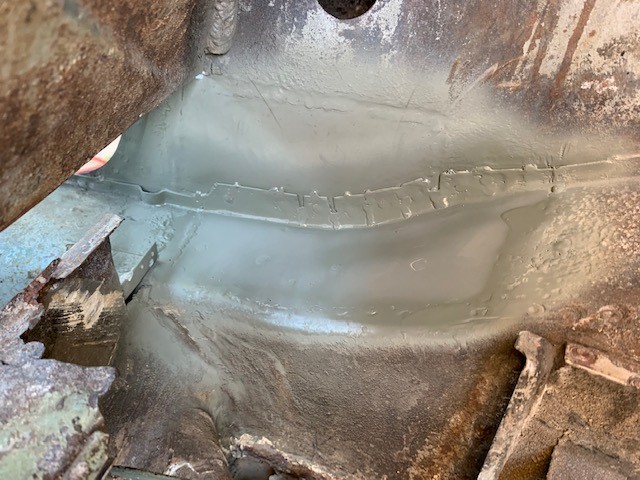 All better now. Question: Is this it? Or, does anyone do anything further like add a second layer on top of this? |
|
|
|
| seanpaulmc |
May 8 2022, 05:50 PM
Post
#30
|
|
Member Group: Members Posts: 458 Joined: 6-December 16 From: Orlando, FL Member No.: 20,649 Region Association: South East States |
Links to threads on some of the other repairs: (IMG:style_emoticons/default/type.gif)
Engine Tin - Sean's engine tin welding experiment Front Sway Bar - Front Sway Bar Parts Trunk Hinge Pivots - Fixing rear trunk hinge pivots with JWest This is so I can find them in the future. (IMG:style_emoticons/default/biggrin.gif) |
|
|
|
| seanpaulmc |
May 8 2022, 06:06 PM
Post
#31
|
|
Member Group: Members Posts: 458 Joined: 6-December 16 From: Orlando, FL Member No.: 20,649 Region Association: South East States |
Starting to patch the firewall.
  Using those copper backing plates where possible. 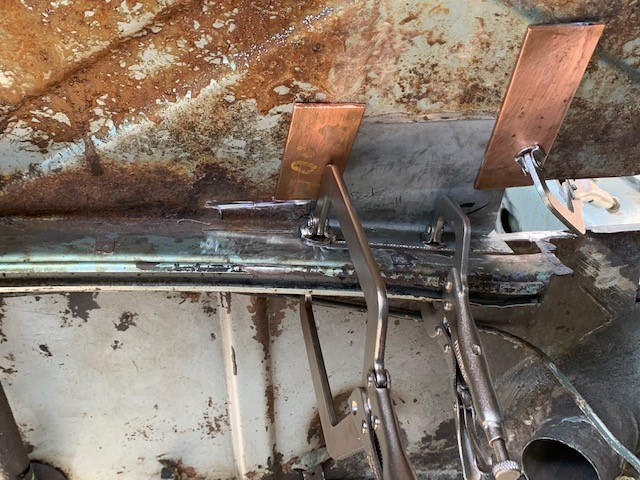 Looking pretty good. Small gaps. Good alignment. 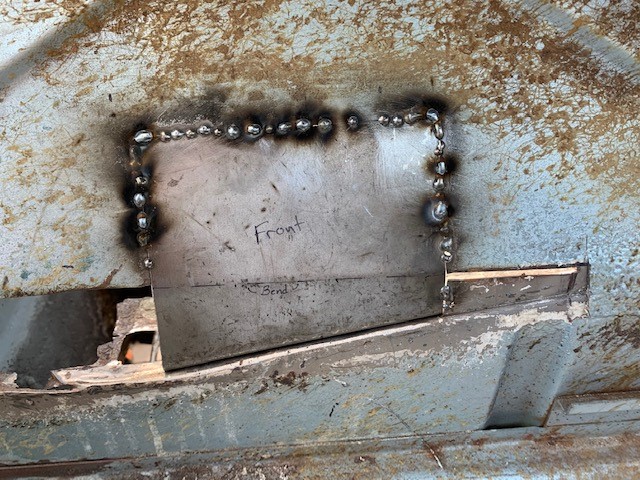 Looks good, that is, until you see the back. Notice the lack of weld penetration in the top panel. I'll have to go over the whole firewall section again to fix it but I'll do it from the engine side before grinding anything. So I turned up the machine when I realized this and have excellent weld penetration into the section of engine shelf. 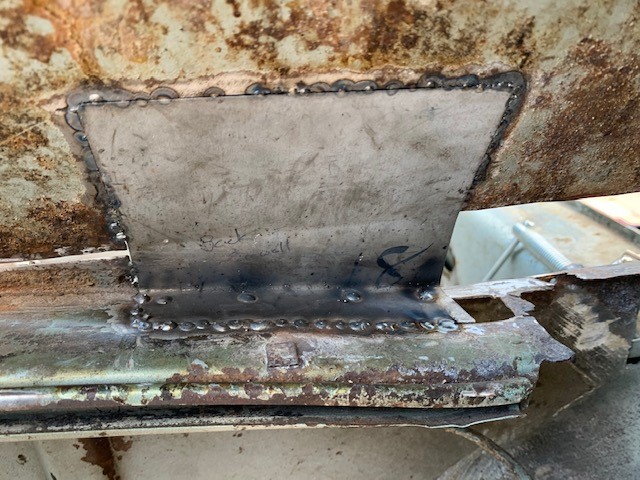 End of progress for the weekend. Time to take Mom out for Mother's Day. |
|
|
|
| seanpaulmc |
May 8 2022, 06:33 PM
Post
#32
|
|
Member Group: Members Posts: 458 Joined: 6-December 16 From: Orlando, FL Member No.: 20,649 Region Association: South East States |
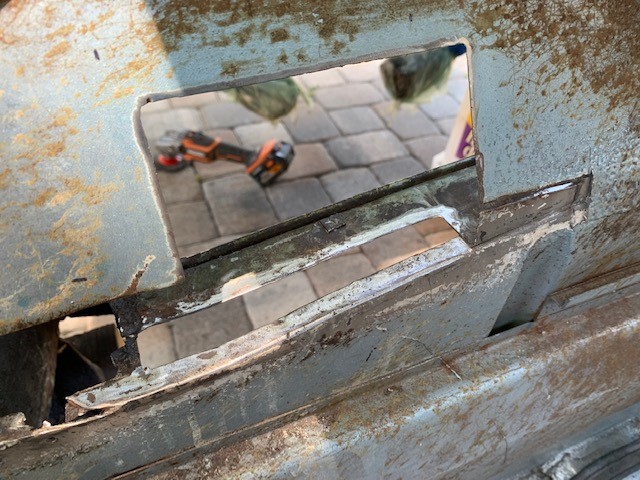
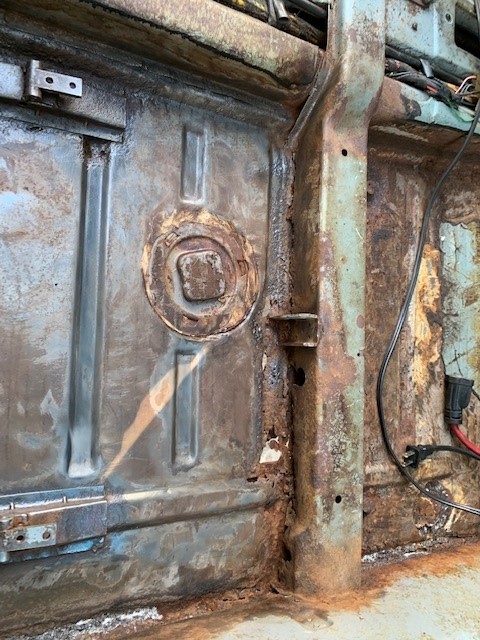
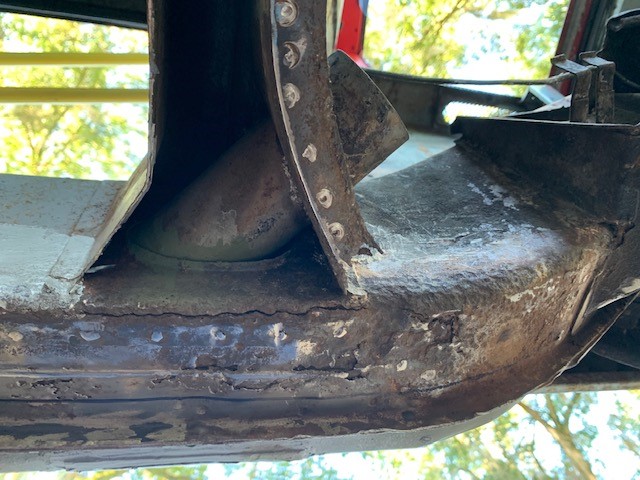
Passenger Jack Point repair:
 Peeing back the onion. 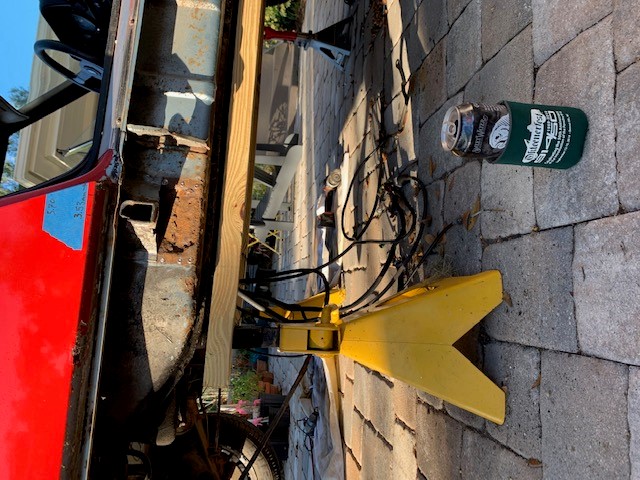 The jack tube, from the factory, is only welded on each side. No welds top or bottom of the tube. 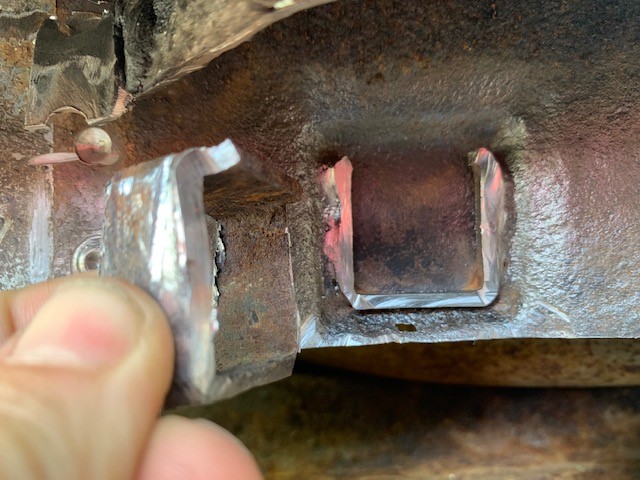 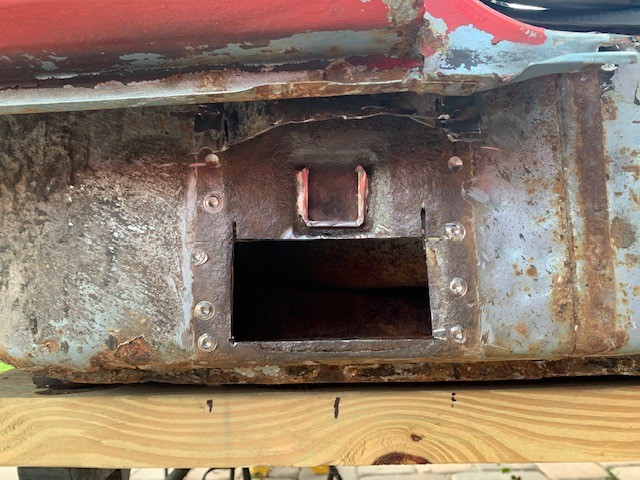 TAMO. (Then a Miracle Occurs) 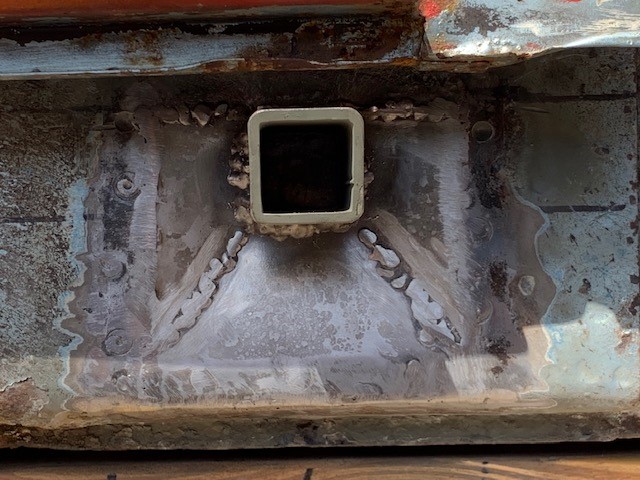 Should have taken more pictures. I replaced both inner and outer layers with hand formed 16 ga. Trying to avoid cutting the fender away I chose to cut out to the top of the jack tube because the metal above was solid and could be welded to with the new. To make it recess for the jack tube, the panel needed relief cuts that got weld once installed. View from fender. 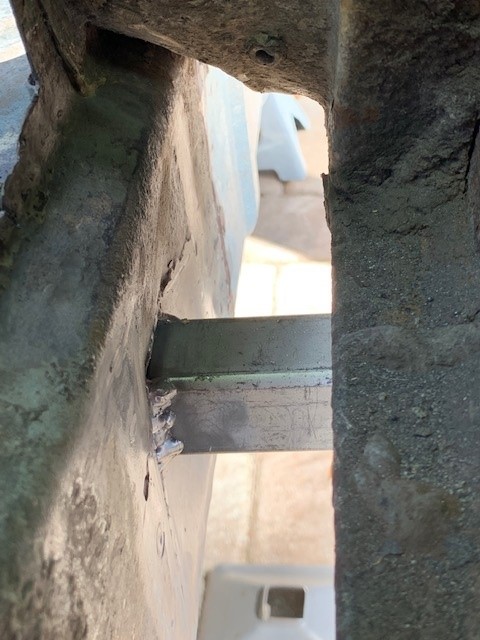 With the RD pyramid cover installed. 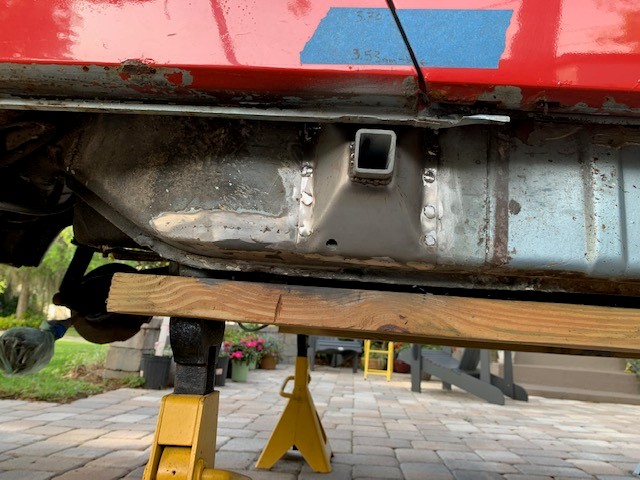 It will be so much fun to do the other side now. (IMG:style_emoticons/default/av-943.gif) |
|
|
|
| r_towle |
May 8 2022, 07:06 PM
Post
#33
|
|
Custom Member Group: Members Posts: 24,705 Joined: 9-January 03 From: Taxachusetts Member No.: 124 Region Association: North East States |
QUOTE(JoeDees @ Jan 31 2017, 07:11 PM) You're gonna need to buy a welder. Yup |
|
|
|
| 930cabman |
May 9 2022, 07:06 AM
Post
#34
|
|
Advanced Member Group: Members Posts: 4,773 Joined: 12-November 20 From: Buffalo Member No.: 24,877 Region Association: North East States |
Great looking work, keep your focus and she will be rolling down the road once again.
(IMG:style_emoticons/default/cheer.gif) (IMG:style_emoticons/default/cheer.gif) |
|
|
|
| seanpaulmc |
Aug 14 2022, 02:43 PM
Post
#35
|
|
Member Group: Members Posts: 458 Joined: 6-December 16 From: Orlando, FL Member No.: 20,649 Region Association: South East States |
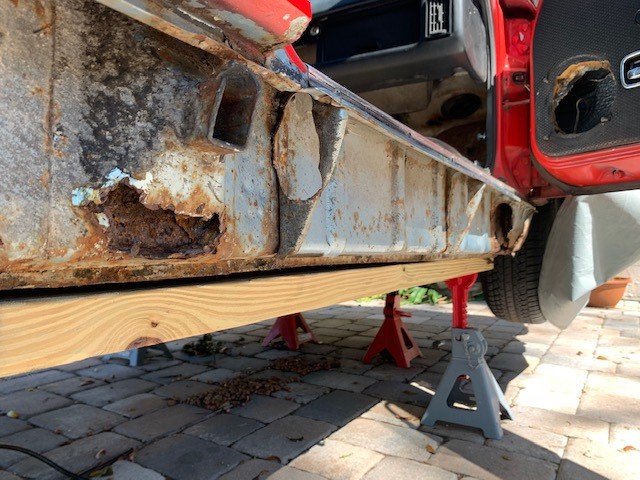
Been a while for an update. With it raining like it does here in the summer not much I can do outside anymore today so time for that update.
Driver side jack point as-found.  Getting down into it. Entire outside layer of the long which is inside the pyramid is in poor shape. However, the inner layer of the long here is in good shape on this side  Time to clear out this rental. Previous tenant left a ton of $h1t. 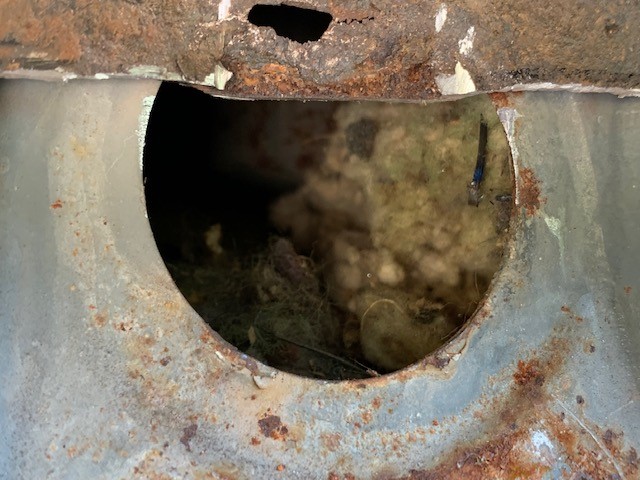 I'm amazed at how much nesting material got pulled out of here. There's a wall somewhere missing its insulation. Wonder if it's in my house? 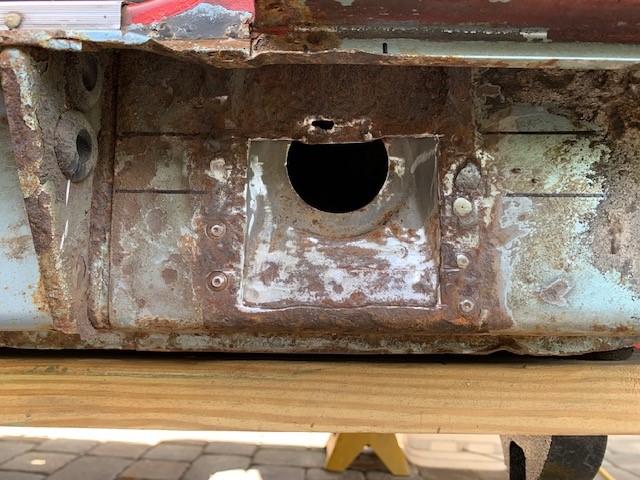 I had to put in an order to Eastwood for another can of the internal frame coating. Once the nest was removed I treated the whole long and the cavity in the firewall again. Used up the can in the center tunnel. Rebuilding the outer layer with 16 gage. 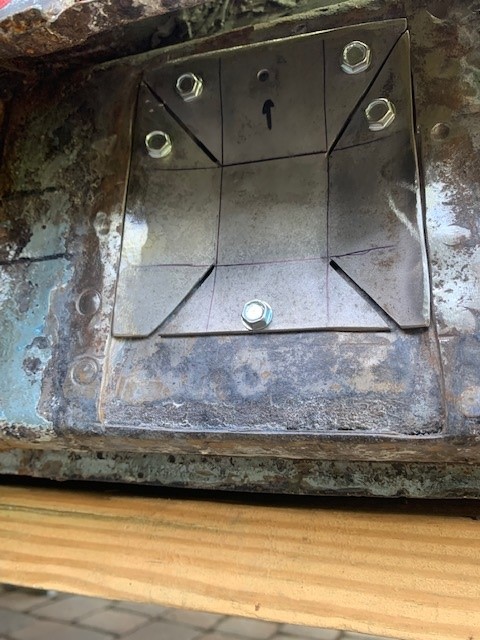 Got rolling and missed taking phots of the intermediate steps but much a repeat of the passenger side. Jack tube and pyramid in place. Not cutting to the fenders on either side to do this but does take a lot of time and I've left the suspension in place while doing all this. My wife says I always do things the hard way and I'm starting to believe her. 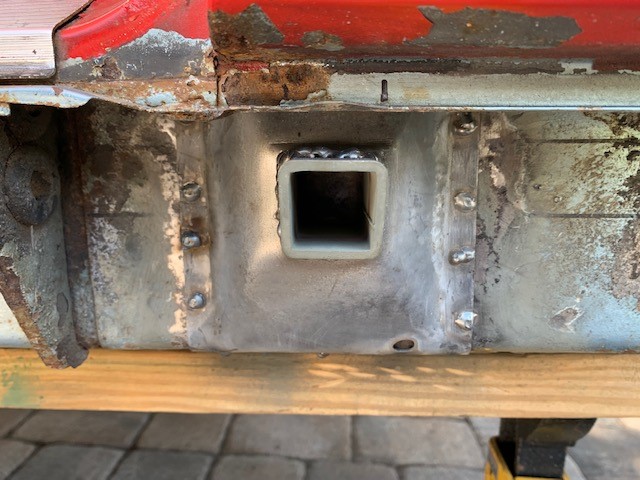 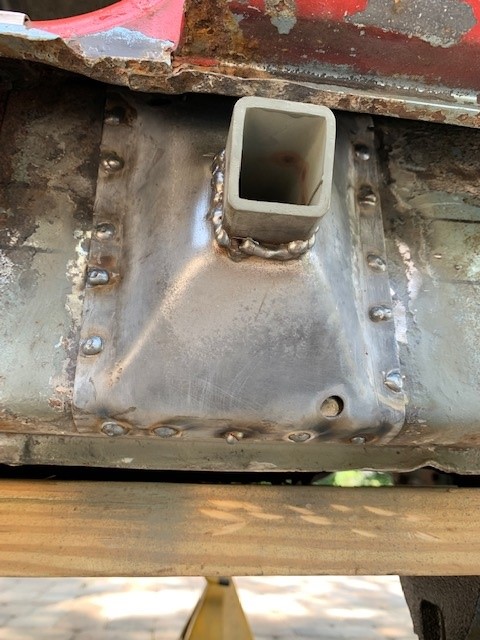 This is my first time doing anything like this and I'm pleased with the results on both sides. I've checked the alignment with the rocker covers on both sides and everything lines up nicely. Ugly welds did get dressed but again didn't take pictures. |
|
|
|
| seanpaulmc |
Aug 14 2022, 03:01 PM
Post
#36
|
|
Member Group: Members Posts: 458 Joined: 6-December 16 From: Orlando, FL Member No.: 20,649 Region Association: South East States |
Now that I've cut my teeth on the Hell hole repair, firewall patch, and both jack points it was time to move onto the passenger floor. Here's what I'm working with...
 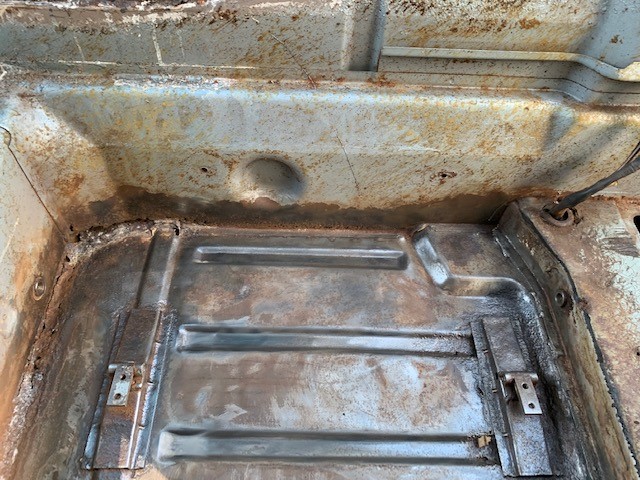 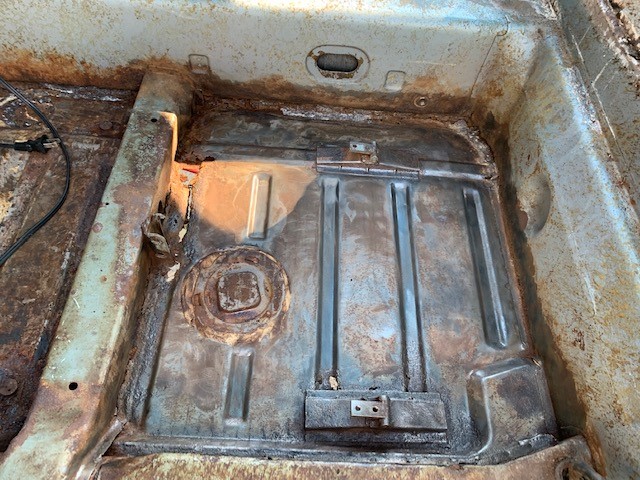  Passenger side floor cross brace has been replaced with keeping most of the old floor in place in order to get set right. Worked out well. 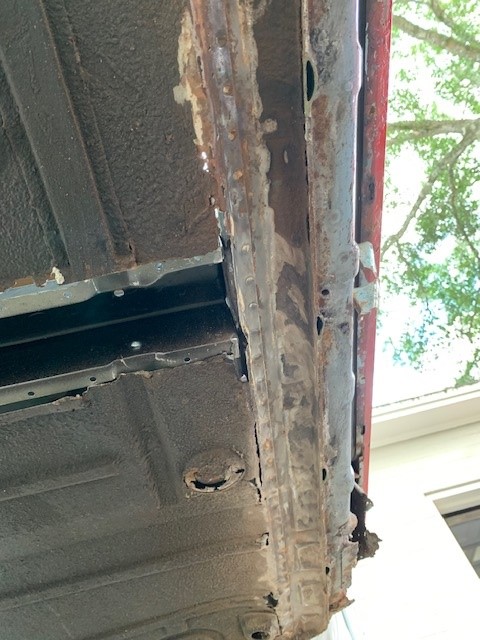 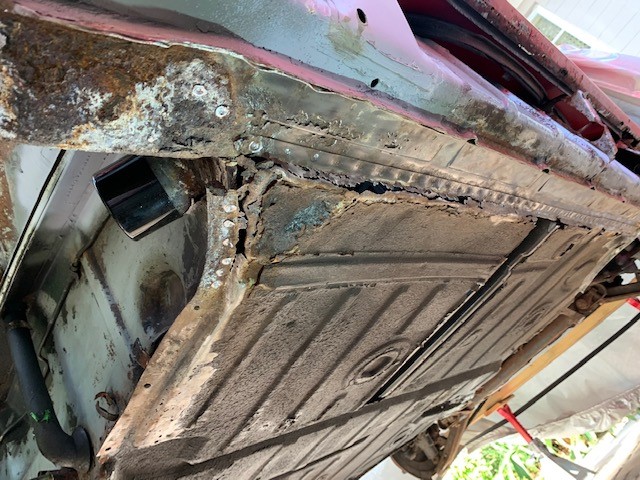 Ah nuts! They were very dirty tenants. 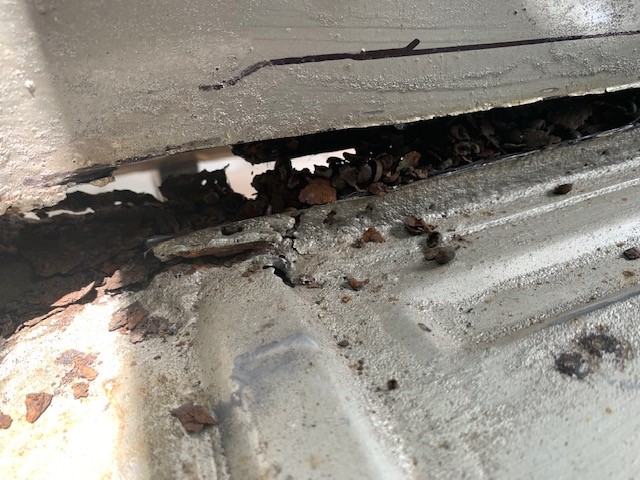 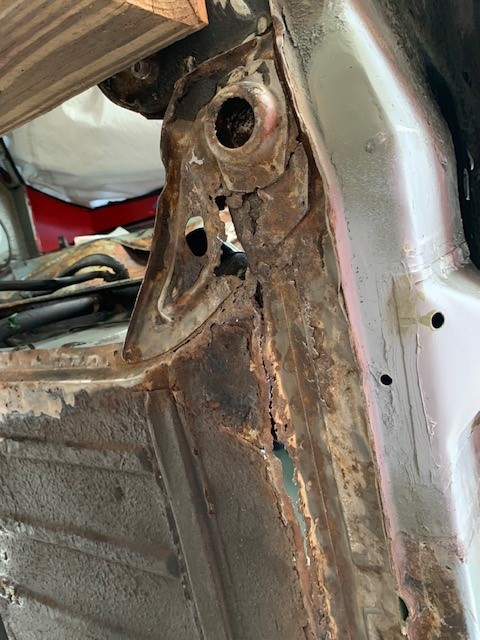 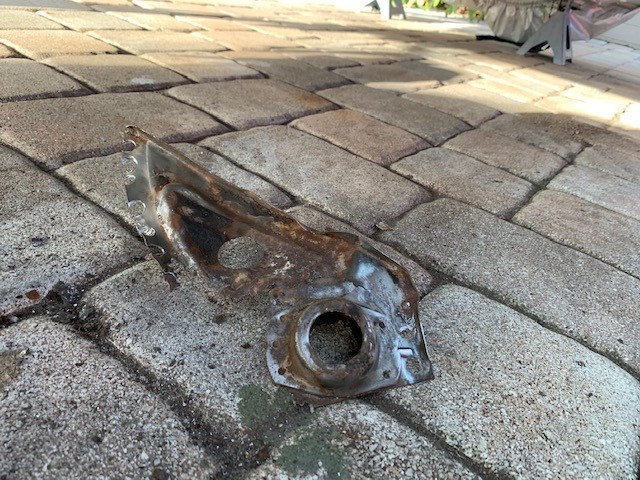 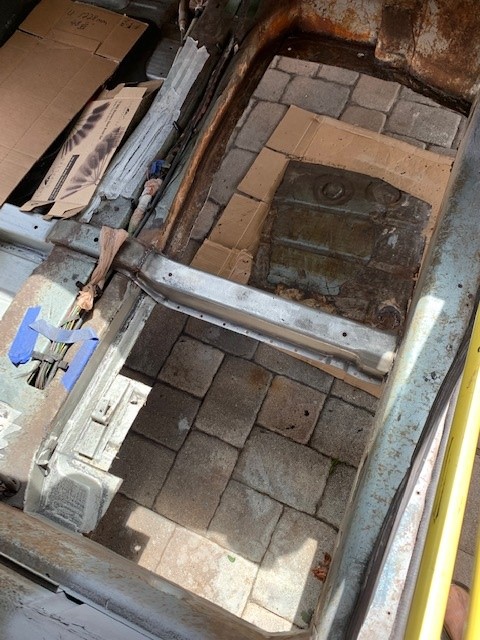 The floor was solid on the tunnel side but no so much on the side of the long. It all had to go. |
|
|
|
| seanpaulmc |
Aug 14 2022, 03:21 PM
Post
#37
|
|
Member Group: Members Posts: 458 Joined: 6-December 16 From: Orlando, FL Member No.: 20,649 Region Association: South East States |
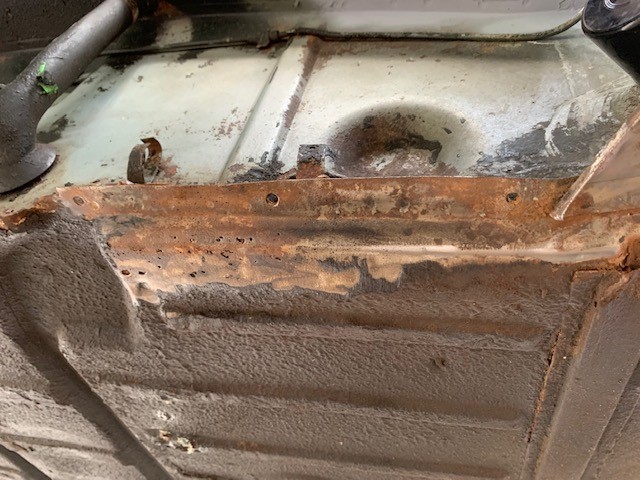
Clearly the plan was to work on getting the new floor installed. But that was not to be.
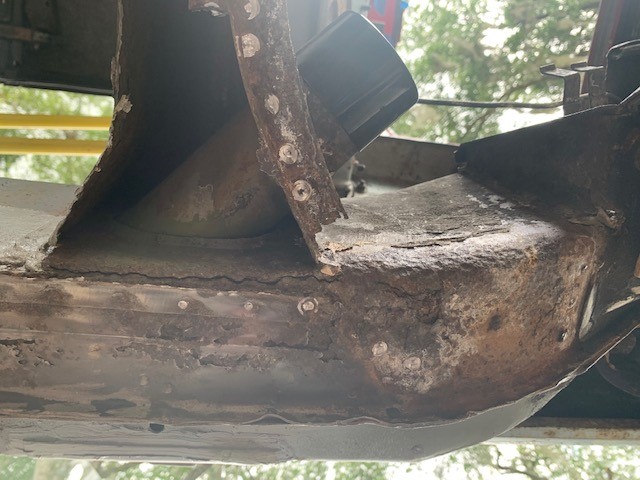  You know what they say, 'crack kills', so this needs to be fixed up before getting to that floor install. Peeling back the onion... 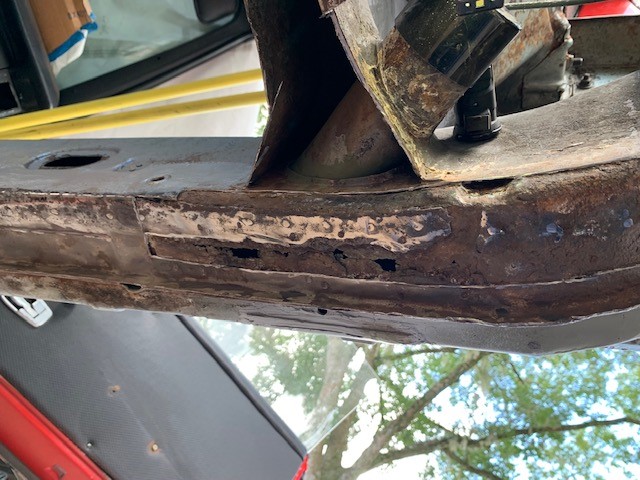 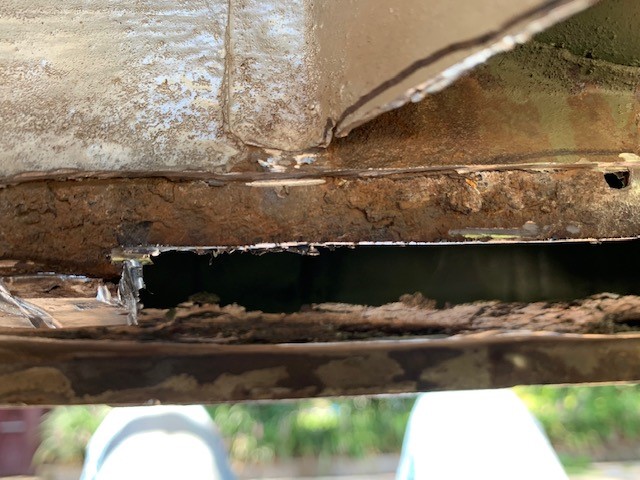 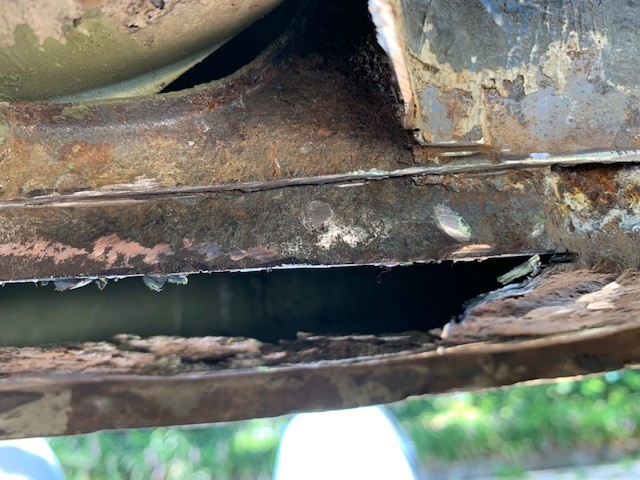 Here again I didn't do a good job of taking photos of the repair along the way. Kinda pissed I'm not gonna get that floor in over my long weekend. It needs to get fixed, I get it. There are several layers here. It took me quite a while. That Hell hole really lived up to the hype on this car. It just keeps on giving. 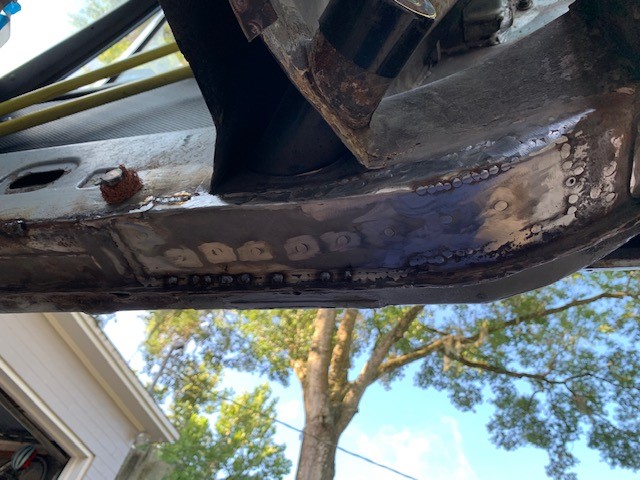 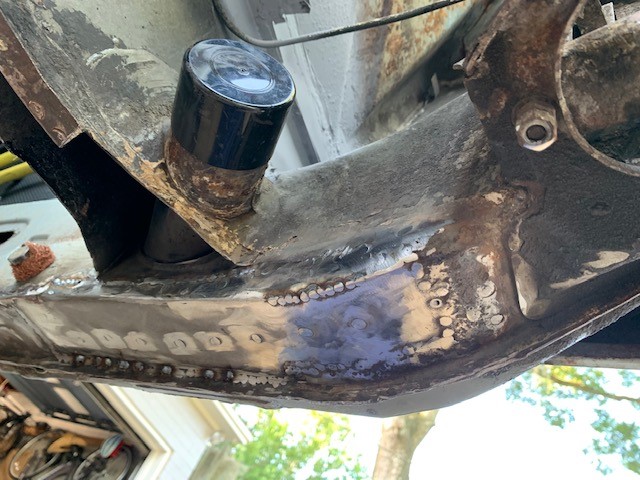 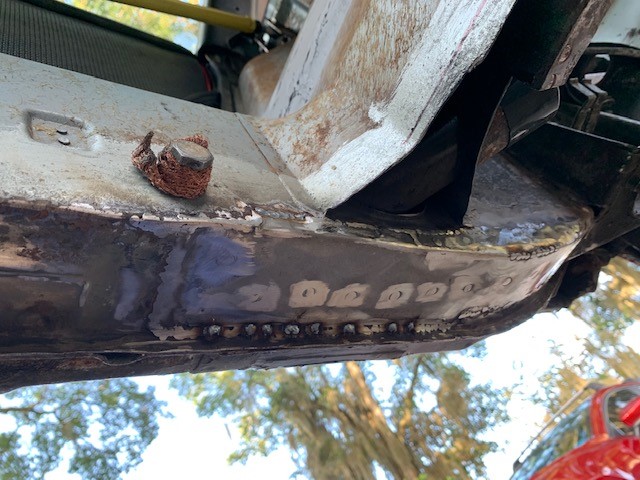 Rock solid now and ready for the floor panel. |
|
|
|
| seanpaulmc |
Aug 14 2022, 03:27 PM
Post
#38
|
|
Member Group: Members Posts: 458 Joined: 6-December 16 From: Orlando, FL Member No.: 20,649 Region Association: South East States |
And, for a change of pace worked on something else.
I finally got the pedal assembly disassembled using a valuable tip for another member who got it from Bruce Stone. It worked. Disassembled! 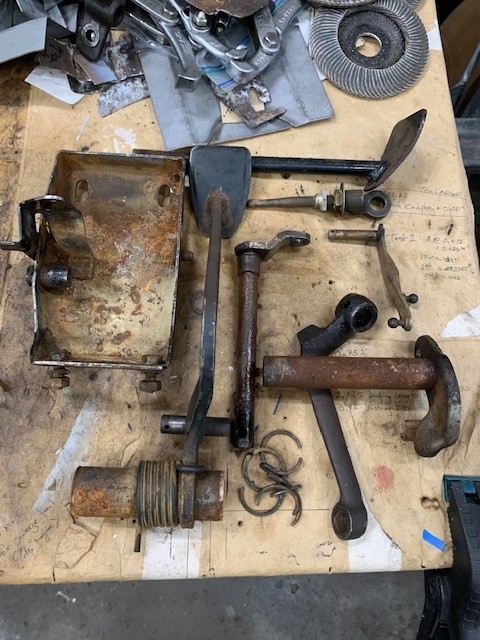 And, for the rebuild... 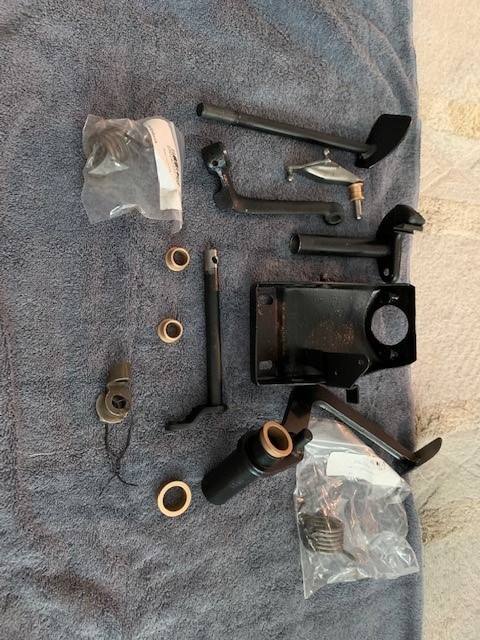 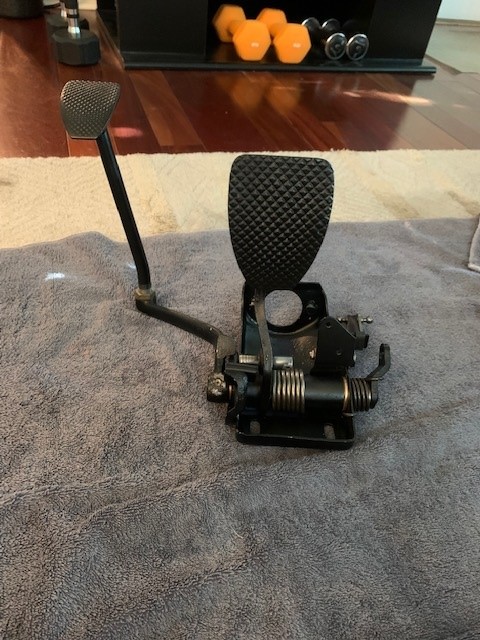 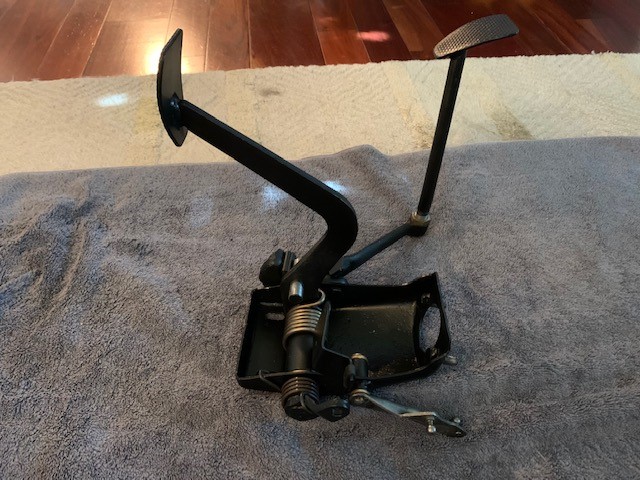 Just need to go get some cotter pins to finish it off. |
|
|
|
| Puebloswatcop |
Aug 14 2022, 05:33 PM
Post
#39
|
|
Senior Member Group: Members Posts: 1,708 Joined: 27-December 14 From: Mineola, Texas Member No.: 18,258 Region Association: Southwest Region |
Hey, things are looking good so far. as for the change of pace thing, I know the feeling...I go from a month of body work, to small projects, just to give myself a break, but keep my project moving. All I can say is have fun, and don't get frustrated, one day it will all come together..... (IMG:style_emoticons/default/drunk.gif)
|
|
|
|
| seanpaulmc |
Aug 22 2022, 03:33 PM
Post
#40
|
|
Member Group: Members Posts: 458 Joined: 6-December 16 From: Orlando, FL Member No.: 20,649 Region Association: South East States |
Working on the passenger side floor fit up. (IMG:style_emoticons/default/sawzall-smiley.gif) (IMG:style_emoticons/default/smash.gif) (IMG:style_emoticons/default/welder.gif)
 See the next 'opportunity'? (IMG:style_emoticons/default/lol-2.gif) |
|
|
|
|
40 User(s) are reading this topic (40 Guests and 0 Anonymous Users)
0 Members:

|
Lo-Fi Version | Time is now: 31st July 2026 - 07:47 PM |
Invision Power Board
v9.1.4 © 2026 IPS, Inc.