|
|

|
Porsche, and the Porsche crest are registered trademarks of Dr. Ing. h.c. F. Porsche AG.
This site is not affiliated with Porsche in any way. Its only purpose is to provide an online forum for car enthusiasts. All other trademarks are property of their respective owners. |
|
|
  |
| Ansbacher |
 Jul 12 2017, 12:00 PM Jul 12 2017, 12:00 PM
Post
#1
|
|
Senior Member    Group: Members Posts: 689 Joined: 4-July 14 From: Tampa Bay, Florida Member No.: 17,589 |
Is there a consensus as to what is the BEST spray adhesive to use for sail panel vinyl installation? I am getting ready to do this project and want to do it right.
Ansbacher |
| Socalandy |
 Jul 12 2017, 12:28 PM Jul 12 2017, 12:28 PM
Post
#2
|
|
Its got to be Yellow!!!     Group: Members Posts: 2,432 Joined: 29-August 09 From: Orange Member No.: 10,742 Region Association: Southern California  |
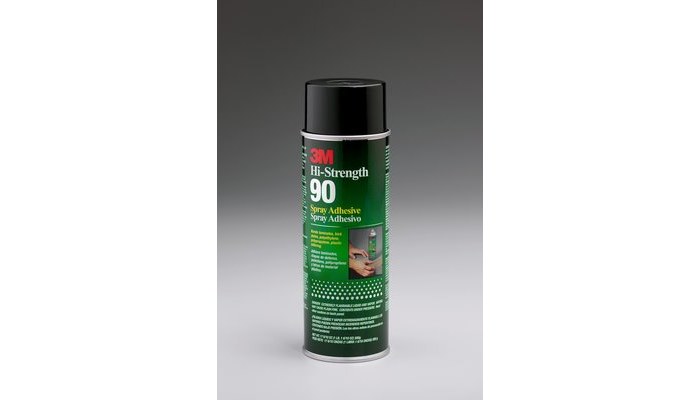
I have used 3M high strenth 90 with great success on sail panels and interior work
Attached image(s) 
|
| Mblizzard |
 Jul 12 2017, 01:38 PM Jul 12 2017, 01:38 PM
Post
#3
|
|
Advanced Member     Group: Members Posts: 3,033 Joined: 28-January 13 From: Knoxville Tn Member No.: 15,438 Region Association: South East States |
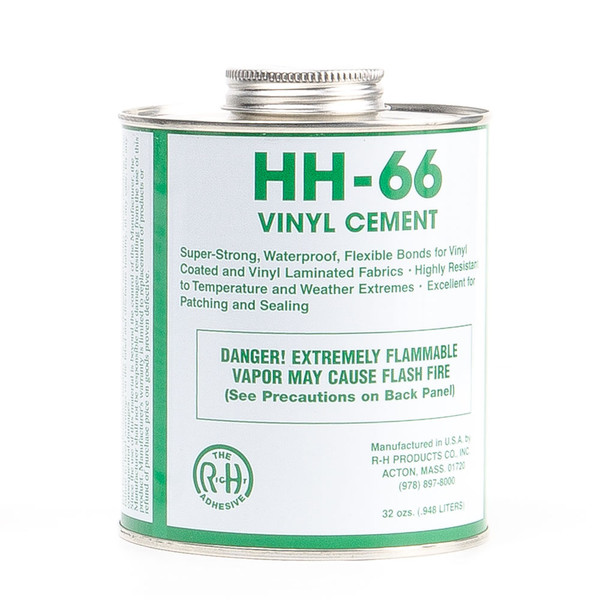
My best work was done with HH‑66 Vinyl Cement
 |
| IronHillRestorations |
 Jul 12 2017, 01:47 PM Jul 12 2017, 01:47 PM
Post
#4
|
|
I. I. R. C.      Group: Members Posts: 6,906 Joined: 18-March 03 From: West TN Member No.: 439 Region Association: None 
|
It's been several years since I've done the vinyl, but I always used 3M Super trim adhesive. If 3M makes a better one, then use it.
Have you done the side vinyl before? There are a few tricks that help. |
| Ansbacher |
 Jul 12 2017, 03:37 PM Jul 12 2017, 03:37 PM
Post
#5
|
|
Senior Member    Group: Members Posts: 689 Joined: 4-July 14 From: Tampa Bay, Florida Member No.: 17,589 |
As the hooker said "All tricks welcome".
|
| ConeDodger |
 Jul 12 2017, 04:57 PM Jul 12 2017, 04:57 PM
Post
#6
|
|
Apex killer!                Group: Members Posts: 24,303 Joined: 31-December 04 From: Tahoe Area Member No.: 3,380 Region Association: Northern California 
|
3M makes a couple different spray on contact adhesives. You want to be careful to check the specs. I believe 90 is the one but don't use it without checking.
The stuff activates with heat so you want to make sure it is ready for the kind of heat your car will see. ie: over 100 F. Biggest mistake I've made? Not letting it tack out enough. |
| arne |
 Jul 12 2017, 06:17 PM Jul 12 2017, 06:17 PM
Post
#7
|
|
Serial Rescuer of old vehicles...    Group: Members Posts: 789 Joined: 31-January 17 From: Eugene, Oregon Member No.: 20,799 Region Association: None |
I did the headliner on the 240Z with either 3M 76 or 77, I'll need to look through my stash to see what I have left over from that job. Was concerned about heat on that job as well, single layer roof baking in the sun. Whichever one I used there worked great for the remaining 4+ years I kept the car. If 90 is better for heat than 76 & 77, it should be fine.
Anyone know when the formulas may have changed to reduce the VOCs? My cans of 3M adhesives are all at least 10 years old. |
| IronHillRestorations |
 Jul 12 2017, 07:28 PM Jul 12 2017, 07:28 PM
Post
#8
|
|
I. I. R. C.      Group: Members Posts: 6,906 Joined: 18-March 03 From: West TN Member No.: 439 Region Association: None 
|
Read the directions on the back of the can, so you know the tack time.
I trim it to fit after it's all glued down. Just take time and care with a hobby knife. Lay the material out and let it get nice and flat. Mask off anything you don't want adhesive on. You can use the centerline of the holes as a line. Position the vinyl and tape around the edges of the top half, making sure it's exactly where you want it, and won't move. You are going to glue the bottom half first, and then the top half. Fold up the bottom half and secure it so you can spray adhesive on the back of the vinyl and the sail panel. You don't want to get too much adhesive in the folded area, as you don't want the line to show. If you don't get enough adhesive sprayed in the crack while you do the bottom, you can fold it down and get it when you do the top half. Let them tack. Starting at the horizontal halfway point, slowly and carefully smooth the vinyl, working left and right and slowly rolling the vinyl down on the panel. You can use a small, new clean bondo spreader if you want. Fold down the top half to the glue line, and repeat the process for the top, rolling the material upwards. For any mitered corners, make a cut in the middle of the corner not going to close to the edge, overlap the two sides and then cut them both at the same time for good seam. Don't be afraid to use a few new blades. If it doesn't cut like a scalpel, then toss it. As a last resort, if you can't work out an air bubble, make a tiny hole with a pin. |
| Ansbacher |
 Jul 12 2017, 08:22 PM Jul 12 2017, 08:22 PM
Post
#9
|
|
Senior Member    Group: Members Posts: 689 Joined: 4-July 14 From: Tampa Bay, Florida Member No.: 17,589 |
Great suggestions on technique, I will certainly try those methods. My experience with 3M 77 was not good with some interior vinyl down here in the Florida heat. Started to lift after about three months.
Ansbacher |
  |
1 User(s) are reading this topic (1 Guests and 0 Anonymous Users)
0 Members:

|
Lo-Fi Version | Time is now: 17th January 2026 - 10:24 PM |
Invision Power Board
v9.1.4 © 2026 IPS, Inc.


