|
|
|
Porsche, and the Porsche crest are registered trademarks of Dr. Ing. h.c. F. Porsche AG.
This site is not affiliated with Porsche in any way. Its only purpose is to provide an online forum for car enthusiasts. All other trademarks are property of their respective owners. |
|
|

  |

| solex |
 Aug 4 2017, 01:11 PM Aug 4 2017, 01:11 PM
Post
#1
|
|
Senior Member  Group: Members Posts: 789 Joined: 12-January 05 From: Long Island, NY Member No.: 3,439 Region Association: North East States |
I have tried adjusting the side windows every which way. There is absolutely no sag in the doors.
Turns out this morning we had a down pour when I need to bring my car in for an inspection. I replaced the side window rubber from (Mikey) but I'm thinking that the top rear gasket needs to be replaced. I just looked at another 914 and it seems to sit much lower. Also the point above the vent wing has a gap, does this mean the top window rubber needs to be replaced or does the front rubber on the window frame need replacement What do you think? Pictures have been attached for this morning. 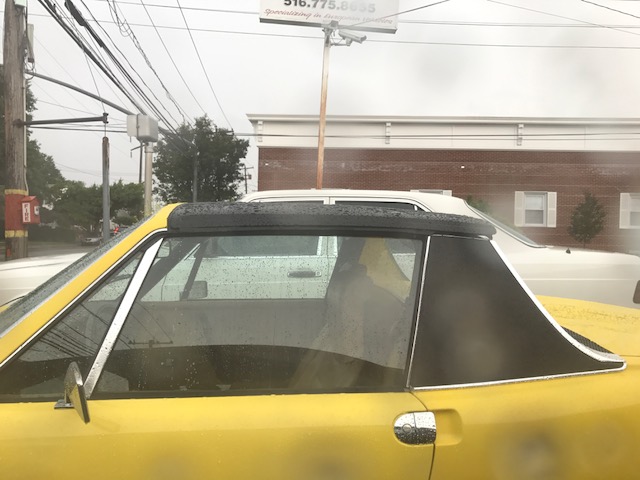 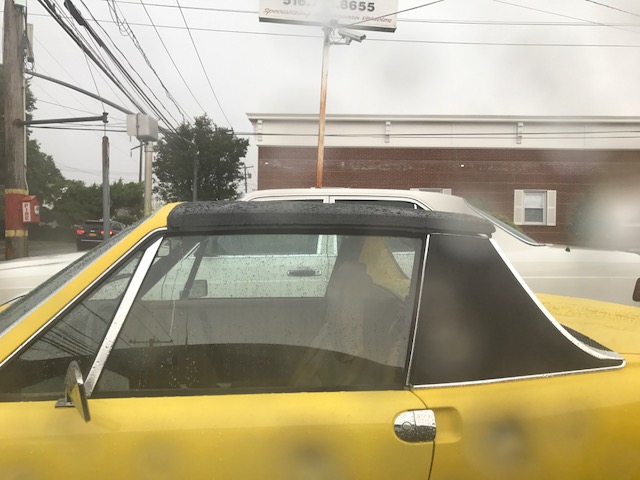 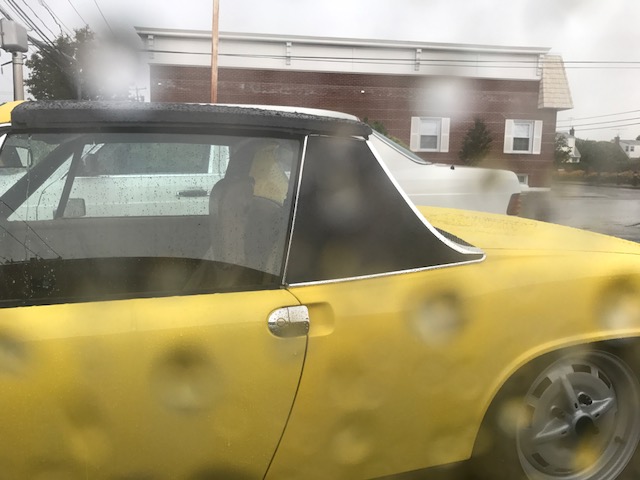 |
   |

 
|
| ljubodraz |
Aug 4 2017, 01:31 PM
Post
#2
|
|
Member Group: Members Posts: 64 Joined: 4-May 14 From: Chicagoland Member No.: 17,312 Region Association: Upper MidWest |
I agree that you shouldn't be able to see daylight beneath the rear of the targa top. It is clearly riding high in the rear or missing seals per your photos. Have you tried adjusting rear latching mechanism? Sounds like this may not be your only issue though.
|
|
|
|
| Montreal914 |
Aug 4 2017, 01:34 PM
Post
#3
|
|
Senior Member Group: Members Posts: 1,541 Joined: 8-August 10 From: Claremont, CA Member No.: 12,023 Region Association: Southern California |
The rear portion of the top should be lower and sit nicely on the roll bar. The 45 degree angle at the rear end of the top window rubber seal should sit nicely against the 45 degree angle of the rear vertical seal. You might want to provide close up pictures of every junction area (front, rear window corner/roll bar).
That being said, 914s are known to leak... (IMG:style_emoticons/default/dry.gif) You might want to look into one of the member vendor here for an "umbrella" to keep it dry. Like a hat, it covers the whole cabin. |
|
|
|
| Montreal914 |
Aug 4 2017, 01:51 PM
Post
#4
|
|
Senior Member Group: Members Posts: 1,541 Joined: 8-August 10 From: Claremont, CA Member No.: 12,023 Region Association: Southern California |
You might want to red this thread. Not saying this is the problem, but the more you know the better you will be able to asses the problem as there might be many things that need to be properly reset.
http://www.914world.com/bbs2/index.php?showtopic=249131 Also, there are 2 versions of tops for our cars, early and late. I would first determine if you have the correct one. Again, I don't think it's the problem but just giving you some leads on what to look for to make sure you have the right setup. Others will chime in... |
|
|
|
| Elliot Cannon |
Aug 4 2017, 01:56 PM
Post
#5
|
|
914 Guru Group: Retired Members Posts: 8,487 Joined: 29-December 06 From: Paso Robles Ca. (Central coast) Member No.: 7,407 Region Association: None |
I would be shocked if your said your windows DIDN'T leak. (IMG:style_emoticons/default/laugh.gif)
|
|
|
|
| Mikey914 |
Aug 4 2017, 02:10 PM
Post
#6
|
|
The rubber man Group: Members Posts: 12,638 Joined: 27-December 04 From: Hillsboro, OR Member No.: 3,348 Region Association: None |
The lower main targa seal can leak. Most look great until you try to remove them. Try to take it out adn put it back in. If it's hard and has cracks it's actually seeping through the rubber. Not the 1st place most look but it actually channels the water away that makes it past the upper. It's usually manifested as a consistant but slow drip.
That and adjustemes may help. My targa to window seals have a lip that the glass should close under. You can see where they go just under the main seal here http://shop.914rubber.com/914-Main-Targa-S...tion-914MTS.htm |
|
|
|
| 914_teener |
Aug 4 2017, 02:29 PM
Post
#7
|
|
914 Guru Group: Members Posts: 5,194 Joined: 31-August 08 From: So. Cal Member No.: 9,489 Region Association: Southern California |
With respect to the vent wing and gaps:
There is an adjustment shoulder bolt for the frame underneath the door panels as I am sure you are aware. There are a few threads on the door adjustments. Don.t have the links jandy at the moment. |
|
|
|
| 914_teener |
Aug 4 2017, 02:32 PM
Post
#8
|
|
914 Guru Group: Members Posts: 5,194 Joined: 31-August 08 From: So. Cal Member No.: 9,489 Region Association: Southern California |
Looks like you might be missing the end cap on the outside scraper but the photo is a little grainy so it is harder to tell.
|
|
|
|
| solex |
Aug 16 2017, 10:48 PM
Post
#9
|
|
Senior Member Group: Members Posts: 789 Joined: 12-January 05 From: Long Island, NY Member No.: 3,439 Region Association: North East States |
Last week I received the targa replacement parts from 914rubber, in hopes to get a more water tight seal.
I first installed the rear rubber seal and clean up the hardware. The ends of the seal needed trimming to fit correctly under the top window seals, I used the originals as a guide. I peeled the self adhesive and installed from one end to the other with some slight stretching along the back edge of the top making sure the seal lined up with the inside lip of the top and always checked the other side as I stretched. I used an Xacto knife to make holes through the foam rubber, using the SS moldings as a guide. To prep for the new Perlon liner I removed the front targa pad and cleaned the bottom side of the top with glue remover and a scotch bright pad. I spray both the top and the liner with spray glue and let is sit for 5 minutes until tacky. The liner was perfectly cut and did not need any trimming. I started at the back edge working my way forward. After a test fit, the back of the top was still a sitting too high. I removed the top targa pad and then the latches. I filed out the holes on the latches so I could adjust them lower (per Spoke). Once adjusted the fit was much better, I adjusted the vent wing on the drivers side and the whole door on the passenger side. It is as good as it is going to get and much much better than before. Now it is obvious that I need the top window seals, once replaced I will have replaced all window seals. Much appreciation to Mark & Scott at 914Rubber. 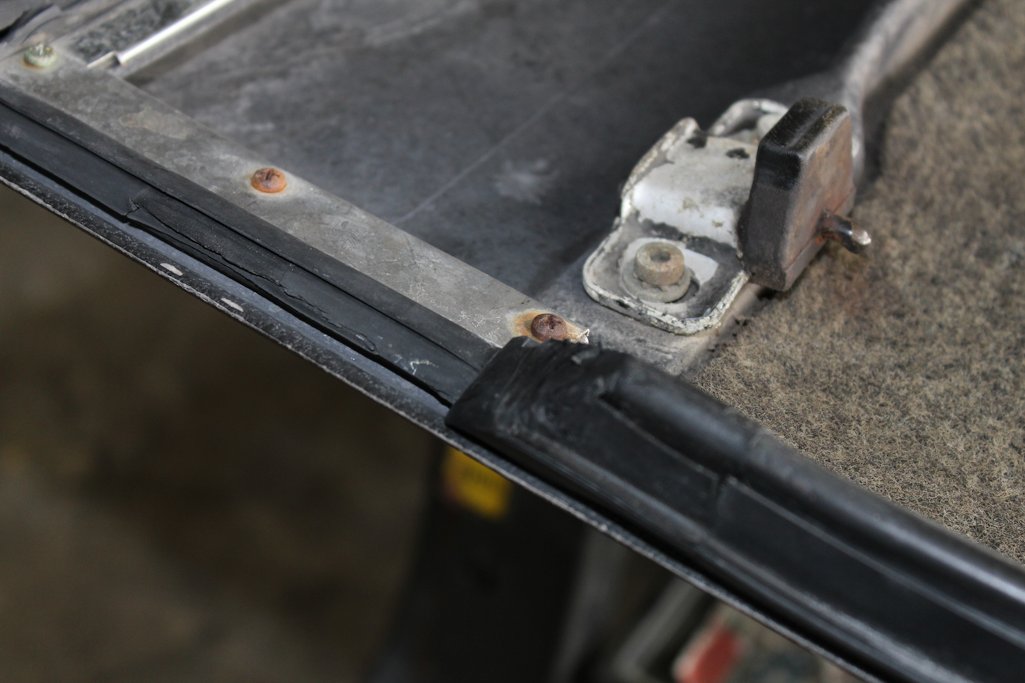 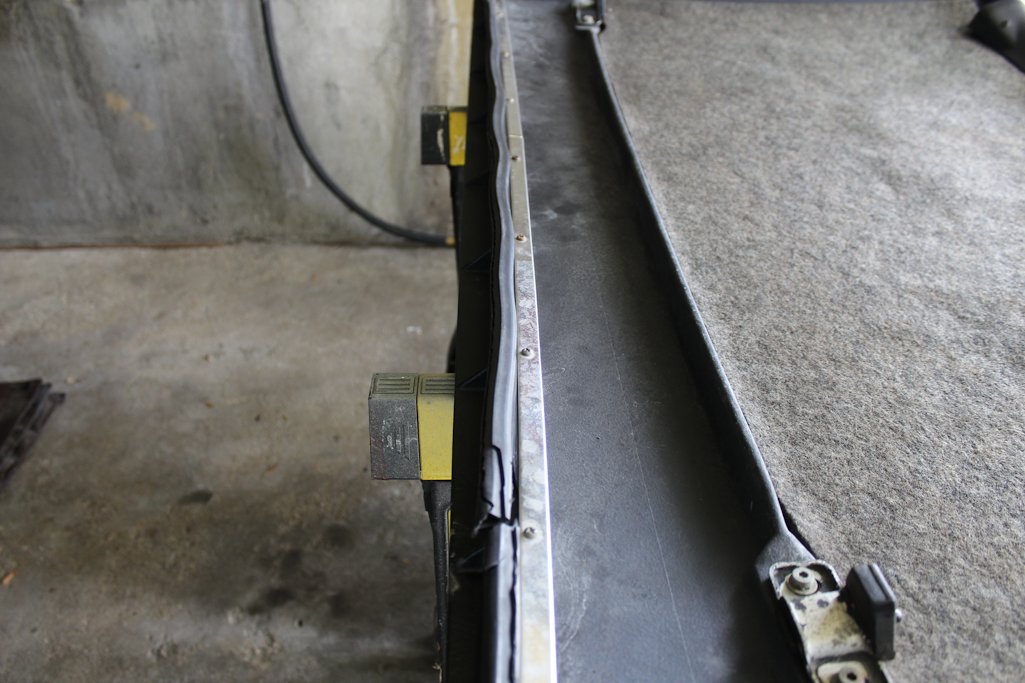 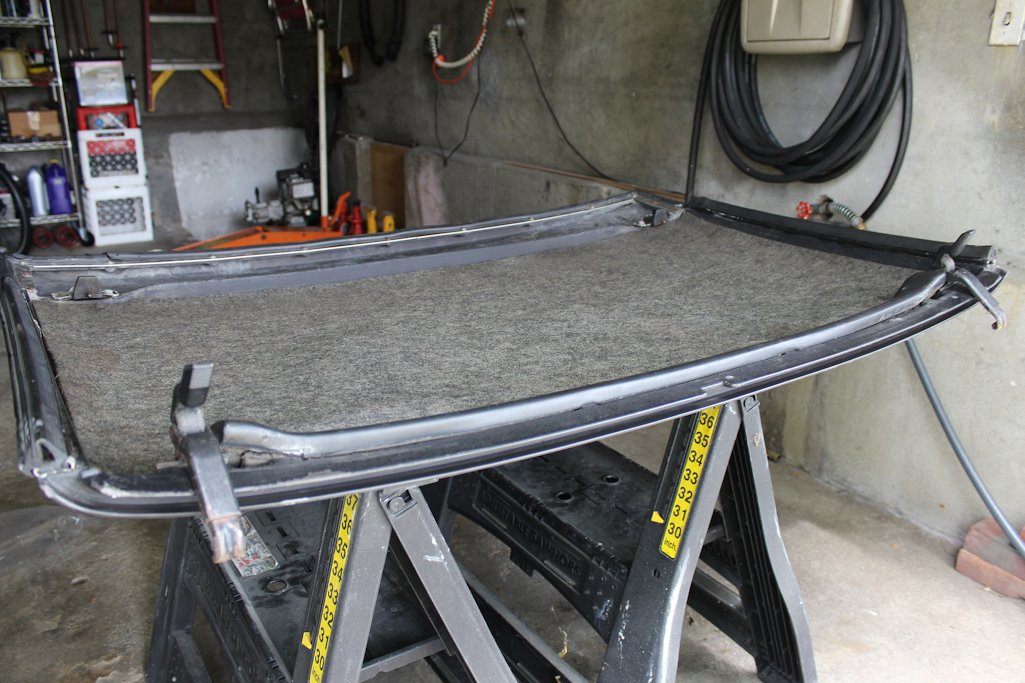 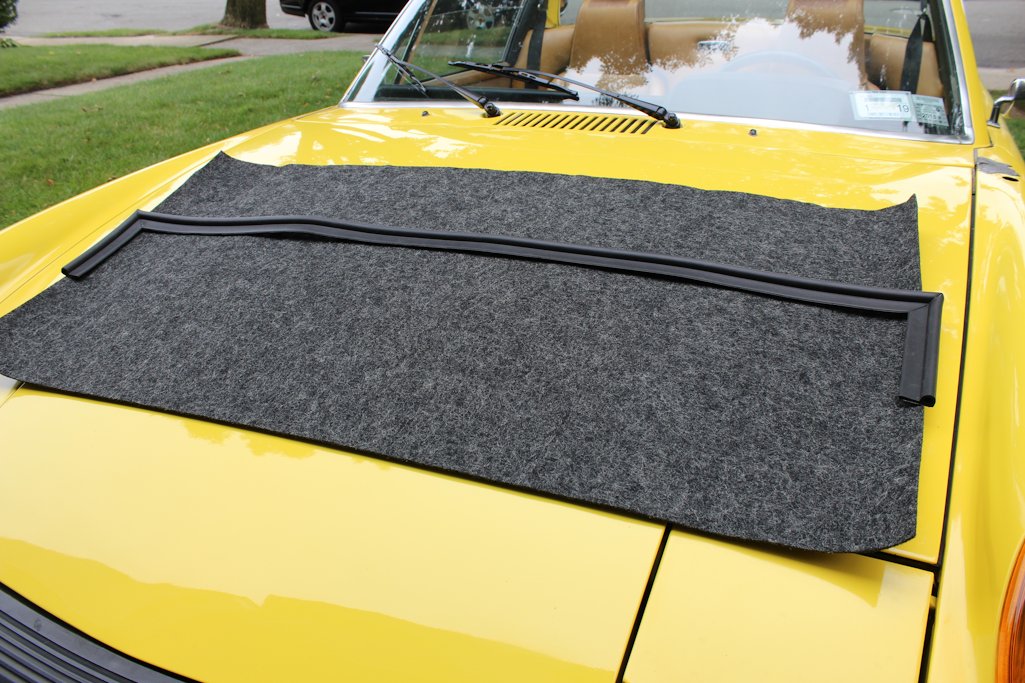 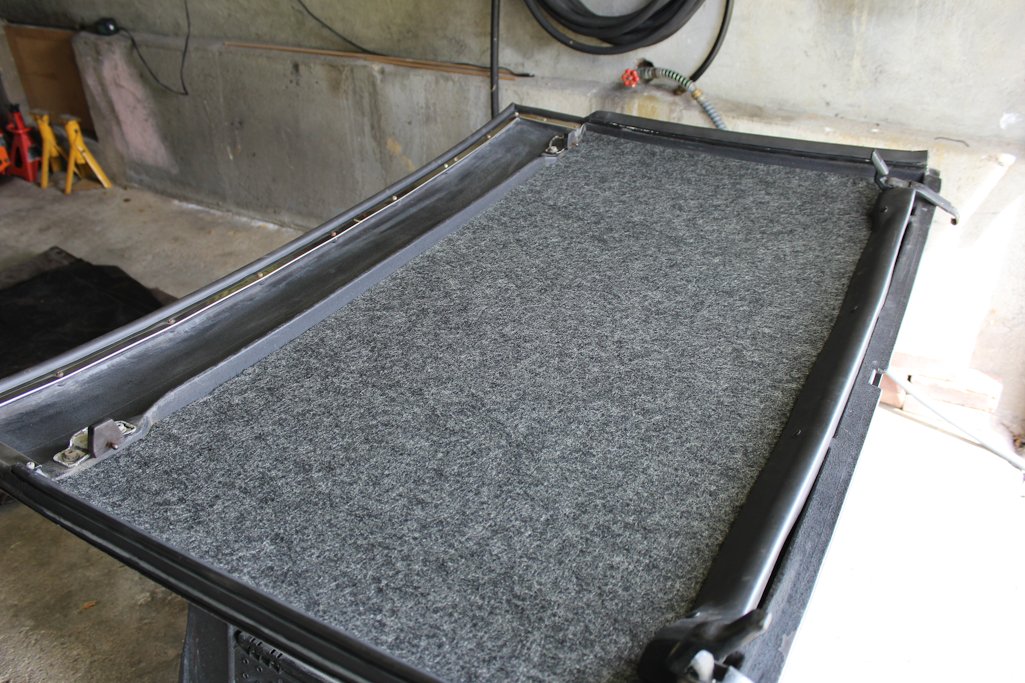 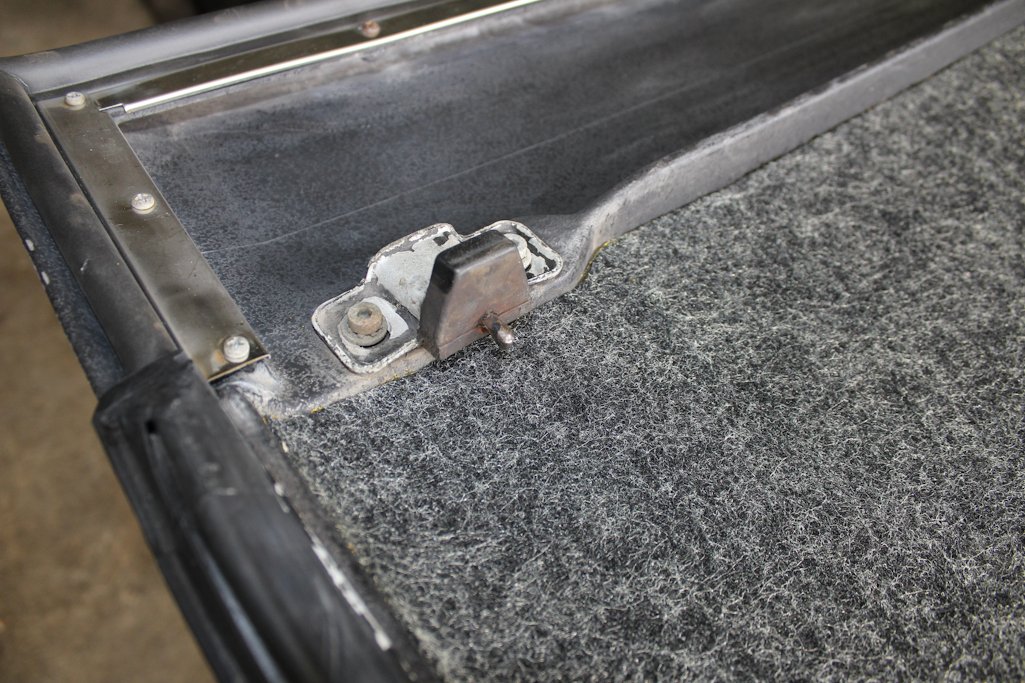 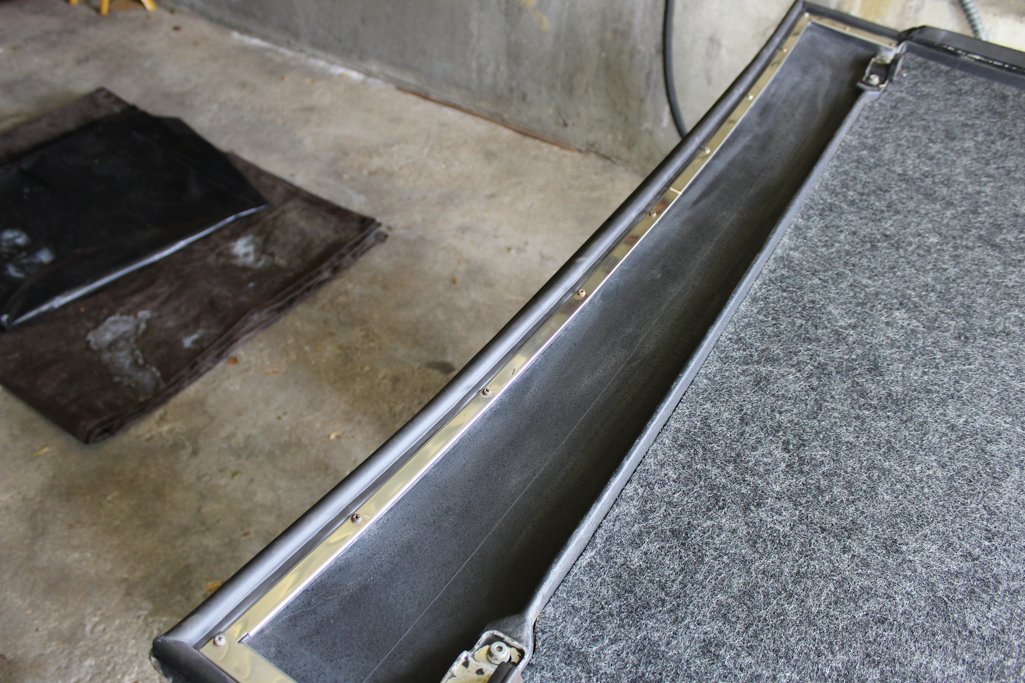 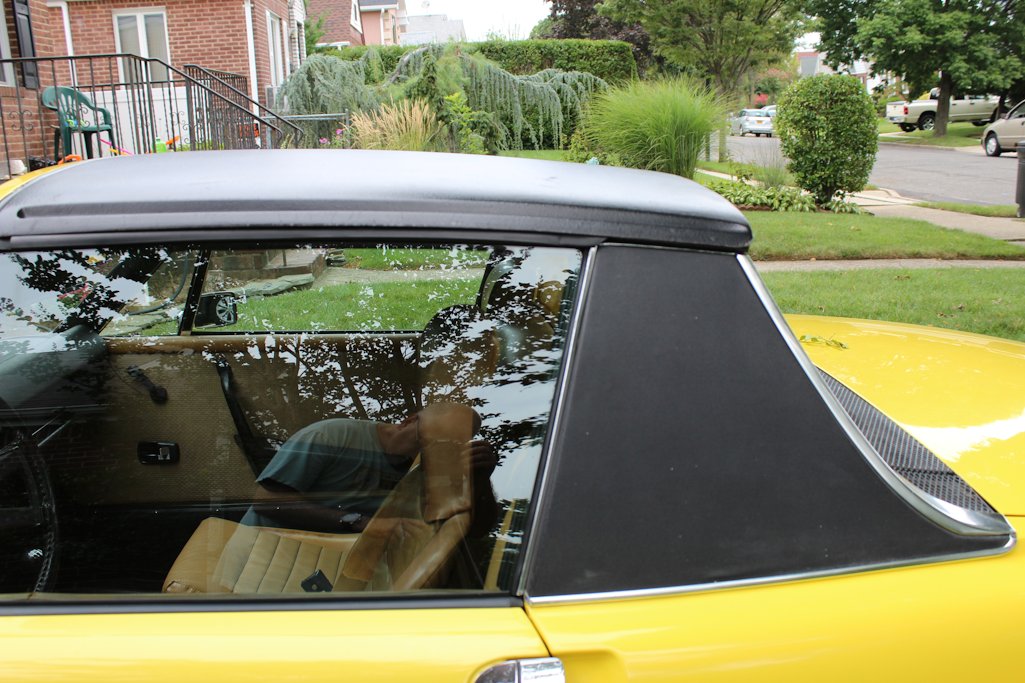 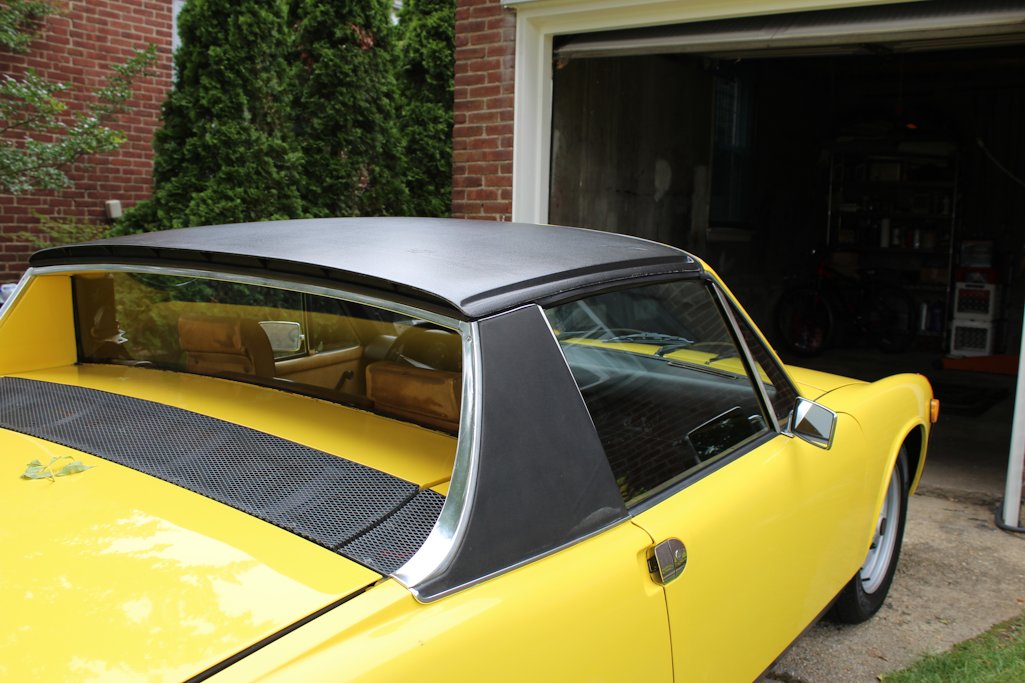 Some before and after pictures |
|
|
|
| porschetub |
Aug 16 2017, 11:38 PM
Post
#10
|
|
Advanced Member Group: Members Posts: 4,697 Joined: 25-July 15 From: New Zealand Member No.: 18,995 Region Association: None |
Don't fell alone you aren't the only member on here with that issue...sad but true.
|
 |
|
| Mikey914 |
Aug 18 2017, 12:26 AM
Post
#11
|
|
The rubber man Group: Members Posts: 12,638 Joined: 27-December 04 From: Hillsboro, OR Member No.: 3,348 Region Association: None |
After looking more closely at this I can see the side seals may be just a little further back that will allow the roof to come down.
The OEM style seal like you have has a hard rubber block on the end, you can pinch it and hold the roof up a little more in the back. You did need a rear anyhow so not money wasted. One of the things we did differently here not to make a glue in plug. It's cheaper and easier to make with a plug, but in leaving a cavity to compress allows for a much better fit. As you can see these is no bonding line on mine. Also an important piece of installation advice. NEVER EVER EVER pull the roof seal through the track. Install it by setting in position with the outside edge in and pushing the inside edge into the track. If you pull through you create tension on the rubber. You say yeah I know, I'll just lubricate the crap out of it and pull through, because the other way is time consuming and a pain. Sounds good, but a month maybe 2 later. your seal will appear to shrink. No, it's just the tension being released. Rubber has memory, vibration, expansion and contraction will overcome the friction holding it and you WILL wind up with 1/16- to 1/8" gap at the front of the seal at the windshield corner. I hope this helps others from getting shrinking rubber syndrome (IMG:style_emoticons/default/biggrin.gif) Attached image(s) 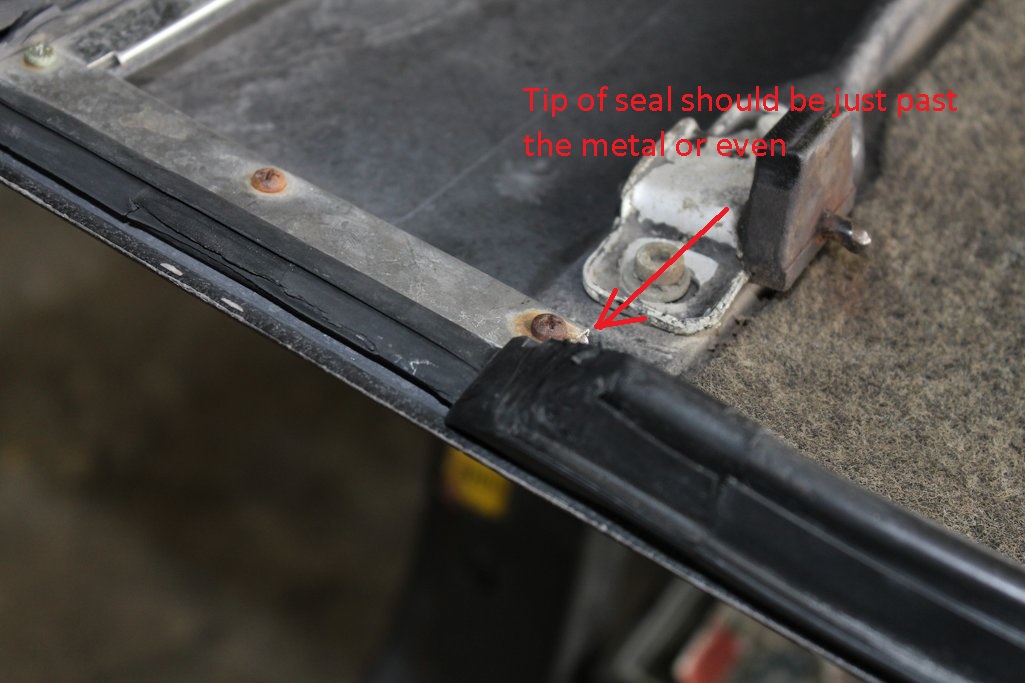 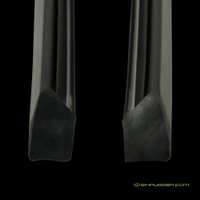
|
|
|
|
|
1 User(s) are reading this topic (1 Guests and 0 Anonymous Users)
0 Members:

|
Lo-Fi Version | Time is now: 25th April 2024 - 09:24 PM |
Invision Power Board
v9.1.4 © 2024 IPS, Inc.