|
|
|
Porsche, and the Porsche crest are registered trademarks of Dr. Ing. h.c. F. Porsche AG.
This site is not affiliated with Porsche in any way. Its only purpose is to provide an online forum for car enthusiasts. All other trademarks are property of their respective owners. |
|
|

  |

| BeatNavy |
 Oct 15 2017, 01:44 PM Oct 15 2017, 01:44 PM
Post
#21
|
|
Certified Professional Scapegoat  Group: Members Posts: 2,954 Joined: 26-February 14 From: Easton, MD Member No.: 17,042 Region Association: MidAtlantic Region |
QUOTE(jmitro @ Oct 15 2017, 10:21 AM)  I bought the polygraphite upper strut mounts from another vendor last week before I knew 914 rubber was offering them. Inner half seems to seat completely; outer (top) half doesn't completely seat up against the steel cup. I wonder if it's supposed to be this way? There is about 3-4mm of space between the mount and the steel cup. are you getting complete seating of this mount from 914 rubber? Here's a pic of it on edge where you can see the top lip. It's seated on there nicely: 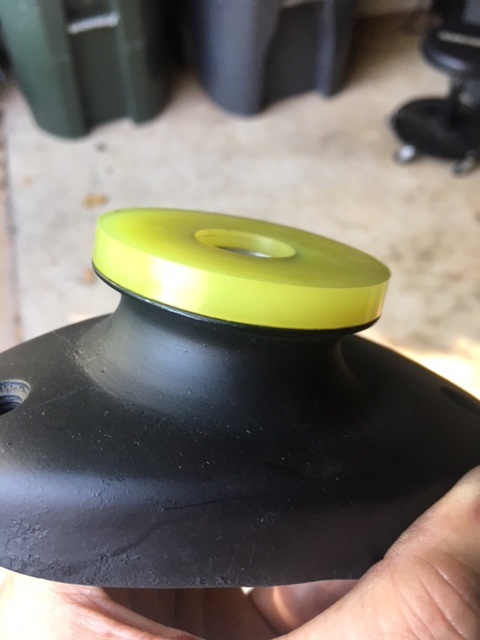 |
   |

 
|
| Mikey914 |
Oct 15 2017, 02:14 PM
Post
#22
|
|
The rubber man Group: Members Posts: 12,772 Joined: 27-December 04 From: Hillsboro, OR Member No.: 3,348 Region Association: None |
We made ours with the idea that you could put it together in the assembly and then tighten it completely down into place taking up the Gap in between the two. It's a much easier installation than trying to force pretty hard polite graphite material in through a narrow diameter. The only compromise we could make the other direction was by making the material softer which we did not want to do.
|
 |
|
| jmitro |
Oct 15 2017, 05:39 PM
Post
#23
|
|
Senior Member Group: Members Posts: 713 Joined: 23-July 15 From: Oklahoma Member No.: 18,986 Region Association: None |
Thanks, that's what I thought it should like look.
Here's mine. I guess I'll have to disassemble and try again Attached thumbnail(s) 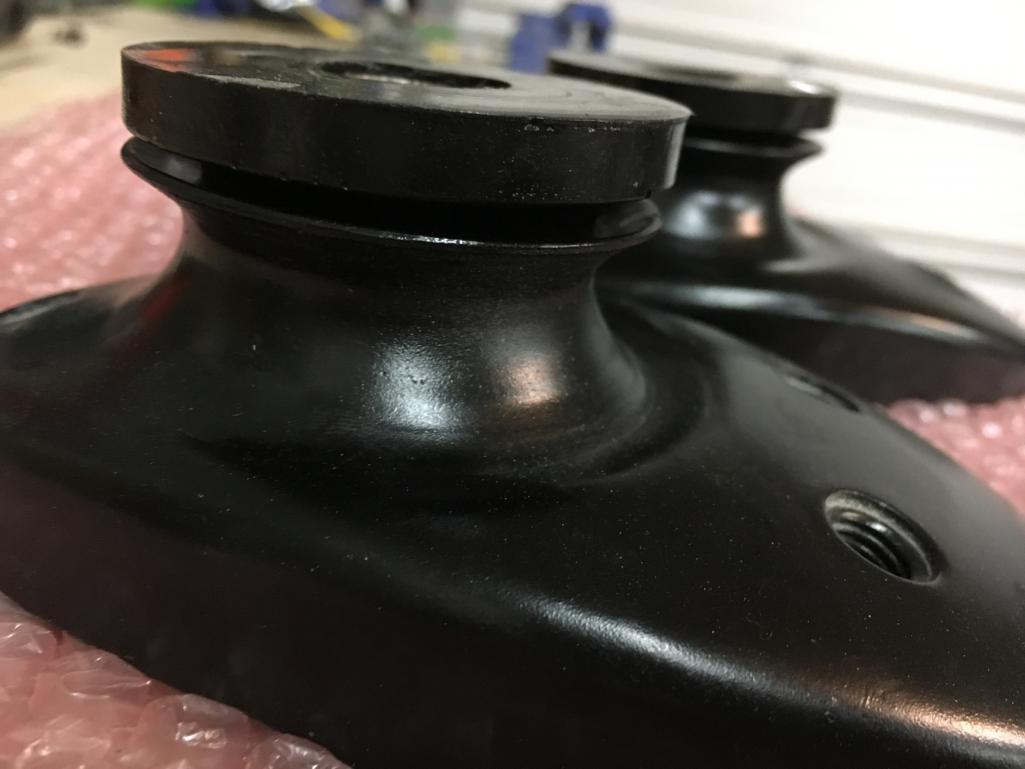
|
|
|
|
| Mikey914 |
Oct 15 2017, 05:49 PM
Post
#24
|
|
The rubber man Group: Members Posts: 12,772 Joined: 27-December 04 From: Hillsboro, OR Member No.: 3,348 Region Association: None |
The good news is you could always take a little bit off with sandpaper to make it seed in there correctly. Doesn't look like it's too far off but enough that it's standing up.
|
|
|
|
| mb911 |
Oct 15 2017, 07:27 PM
Post
#25
|
|
914 Guru Group: Members Posts: 7,611 Joined: 2-January 09 From: Burlington wi Member No.: 9,892 Region Association: Upper MidWest |
Whats the price point on these? They look great..
|
|
|
|
| Mikey914 |
Oct 15 2017, 11:33 PM
Post
#26
|
|
The rubber man Group: Members Posts: 12,772 Joined: 27-December 04 From: Hillsboro, OR Member No.: 3,348 Region Association: None |
The GB will be $28 a set reg price $42 a set. I'll start up a GB thread shortly, just wanted to get the test fit in the car and some feedback. We have tested these off the car and they have slightly less deflection that what the stock rubber had, but was hoping to get some feedback on feel in the car. It should tighten things up.
We also have a few other items that we are putting together that may go with these to help your ride. Hoping to have them ready about the same time. |
|
|
|
| BeatNavy |
Oct 16 2017, 05:16 PM
Post
#27
|
|
Certified Professional Scapegoat Group: Members Posts: 2,954 Joined: 26-February 14 From: Easton, MD Member No.: 17,042 Region Association: MidAtlantic Region |
Ok, Mark, perhaps a day late and a dollar short, but we have pics on a car as well as a road test! In addition to the previous pictures, I offer the following abbreviated installation tutorial:
First, I got the car jacked up and removed the wheel. At the top of the strut, bend back the fold on the safety washer and then loosen the top strut nut (in my case, with a 22 mm socket). Here is the old strut mount and bushing on car. 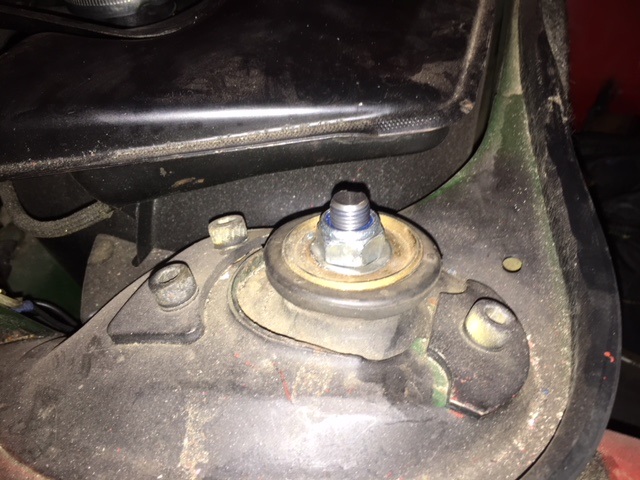 Once I removed the nut I pulled the strut down to compress it and then carefully swung the whole assembly into the wheel well. Removal of the strut mount is pretty easy. It requires a #8 hex for the 3 mounting bolts. The biggest annoyance is that, on the passenger side you need to unbolt two bolts and move the fuel expansion tank out of the way to get access to the third hex bolt. (This may not be true for later cars.) Also (and this is important), before you remove the bolts take a fine marker and outline where the plates are located. This way you shouldn't mess up your caster or camber (unless you were planning on doing a full alignment anyway). Pic below is with the plates outlined: 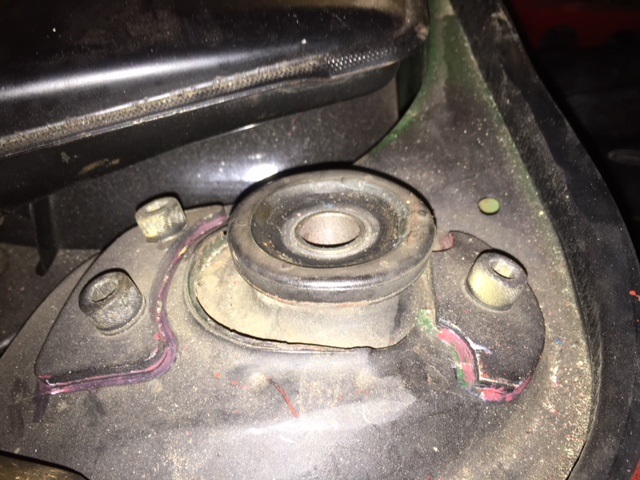 At this point, if you don't have an extra set of strut mounts from a project car like I did, you'd use a press or vice to remove the old bushings and install the new ones. Sorry, no pics of that process. I did this a couple of weeks ago. Remounting is easy peasy, although it may take slide fiddling to get the plates lined back up with your marks. It would be a good idea to use new schnorr washers under the hex bolts. 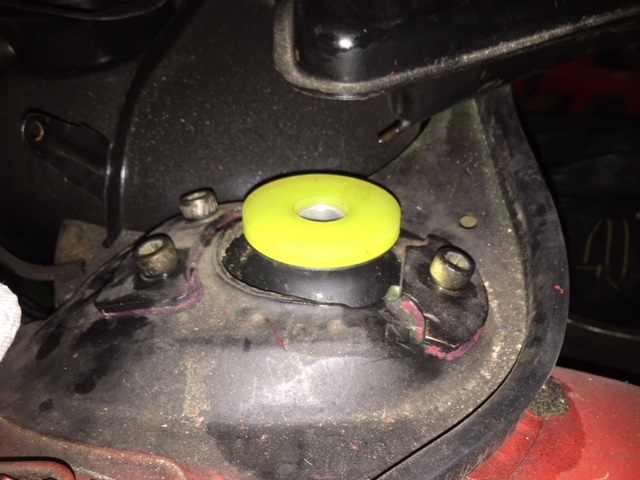 And here is a pic from underneath: 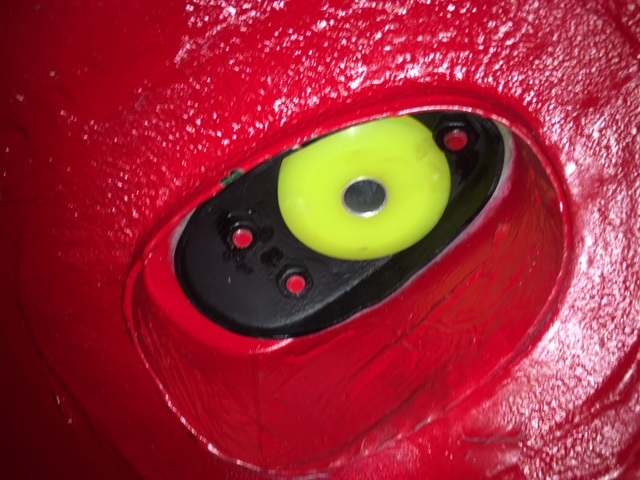 Getting the strut back up through the mount can be a slight challenge. I used a floor jack to help push up. It's a good idea to make sure the strut top is aligned properly with the hold. Once you do get the top through the bushing, put the washer(s) on, tighten to spec, and bend up the edge of the washer. All done passenger's side: 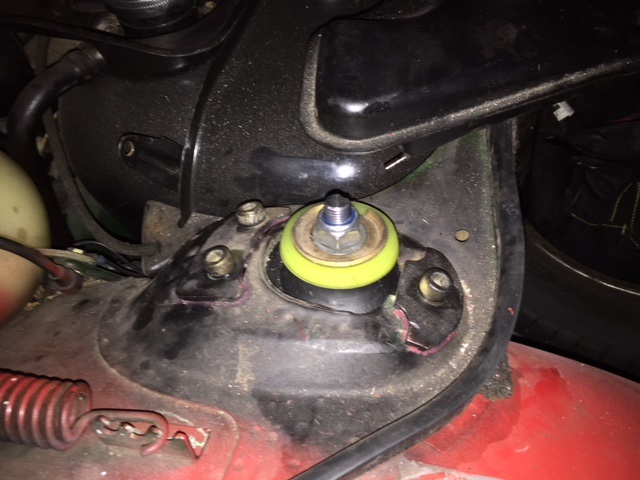 and driver's side (yes, I probably need a new washer): 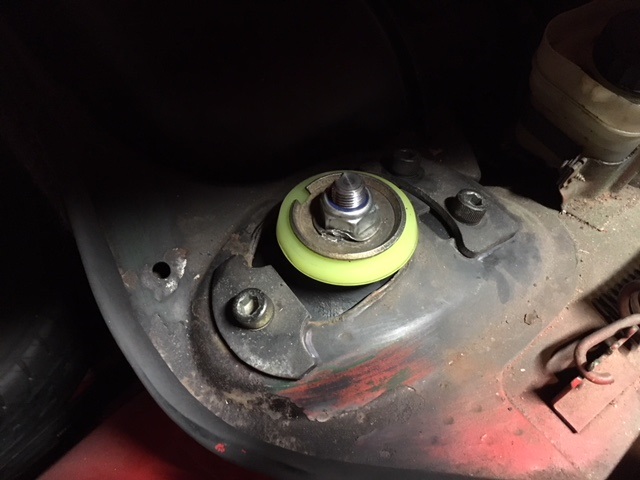 After taking it out for a short test drive, I can give these a big thumbs up (IMG:style_emoticons/default/smilie_pokal.gif) I replaced the struts and ball joints two weeks ago, and put turbo tie rods on last week, but after putting these on, the car handles better than ever. |
|
|
|
| theer |
Jul 10 2020, 06:44 AM
Post
#28
|
|
Senior Member Group: Members Posts: 692 Joined: 31-July 15 From: Dover, MA Member No.: 19,014 Region Association: North East States |
@Mikey914
Did these ever make it to production? I checked your website and didn't seem them. Thanks, Tom |
|
|
|
| Mikey914 |
Jul 10 2020, 09:22 AM
Post
#29
|
|
The rubber man Group: Members Posts: 12,772 Joined: 27-December 04 From: Hillsboro, OR Member No.: 3,348 Region Association: None |
They are being slightly redesigned. I will have them ready to ship in about 2 weeks.
SO yes. |
|
|
|
| bdstone914 |
Jul 10 2020, 01:57 PM
Post
#30
|
|
bdstone914 Group: Members Posts: 5,040 Joined: 8-November 03 From: Riverside CA Member No.: 1,319 |
@jmitro
Most companies made these to fit 911 mounts. They are different even tho they have the same part number. Some are not dished on the top to contour to the big washer. Elephant Racing corrected theirs. |
|
|
|
| mepstein |
Jul 10 2020, 03:45 PM
Post
#31
|
|
914-6 GT in waiting Group: Members Posts: 19,970 Joined: 19-September 09 From: Landenberg, PA/Wilmington, DE Member No.: 10,825 Region Association: MidAtlantic Region |
QUOTE(Mikey914 @ Jul 10 2020, 11:22 AM) They are being slightly redesigned. I will have them ready to ship in about 2 weeks. SO yes. Is there an exchange program for parts that needed a redesign? Front strut bushings, rear trailing arm bushings, etc. @Mkey914 |
|
|
|
| Mikey914 |
Jul 11 2020, 10:55 PM
Post
#32
|
|
The rubber man Group: Members Posts: 12,772 Joined: 27-December 04 From: Hillsboro, OR Member No.: 3,348 Region Association: None |
Well the only part we are redesigning is the top section on the strut tower bushing.
We do continue to make improvements to parts. Any unused parts you have we will take back. Mark |
|
|
|
| Cfletch |
Jul 13 2025, 09:18 PM
Post
#33
|
|
Member Group: Members Posts: 155 Joined: 30-January 14 From: Santa Barbara Member No.: 16,941 Region Association: Southern California |
QUOTE(jmitro @ Oct 15 2017, 04:39 PM) Thanks, that's what I thought it should like look. Here's mine. I guess I'll have to disassemble and try again I wanted to follow up specifically to this photo, I have the same gap here on the top of the strut with these shock mount bushings and was seeing what others have done to get this gap shrunk down so it can mount flush to the metal. I put the top rubber in a lathe to hopefully get it cut down slightly enough for it to sit flush and it must not have been enough as I still have the same gap more or less. It is causing me to have trouble getting the strut shaft to clear the bushing so I can get the washers and nut back onto the top of the shaft. Any specific questions? The lathe didn't like the rubber much, it was soft enough to kind of ignore the bit I was using to cut (flex around it vs cut) |
|
|
|
|
2 User(s) are reading this topic (1 Guests and 0 Anonymous Users)
1 Members: cholland_

|
Lo-Fi Version | Time is now: 15th July 2025 - 09:32 AM |
Invision Power Board
v9.1.4 © 2025 IPS, Inc.