|
|
|
Porsche, and the Porsche crest are registered trademarks of Dr. Ing. h.c. F. Porsche AG.
This site is not affiliated with Porsche in any way. Its only purpose is to provide an online forum for car enthusiasts. All other trademarks are property of their respective owners. |
|
|

  |

| DRPHIL914 |
 Nov 4 2017, 07:57 PM Nov 4 2017, 07:57 PM
Post
#21
|
|
Dr. Phil  Group: Members Posts: 5,950 Joined: 9-December 09 From: Kennesaw, GA Member No.: 11,106 Region Association: South East States |
using the bracket from tangerine - it went well except it appears the motor mounts have never been changed and the engine bar mount bolt on one side snapped due to being rusted in the bar - iv not removed a motor but i see here that my motor mounta were not attached to he motor- just resting on the rubber mounts- crazy wndwr how long those have been in this condition?
Attached thumbnail(s) 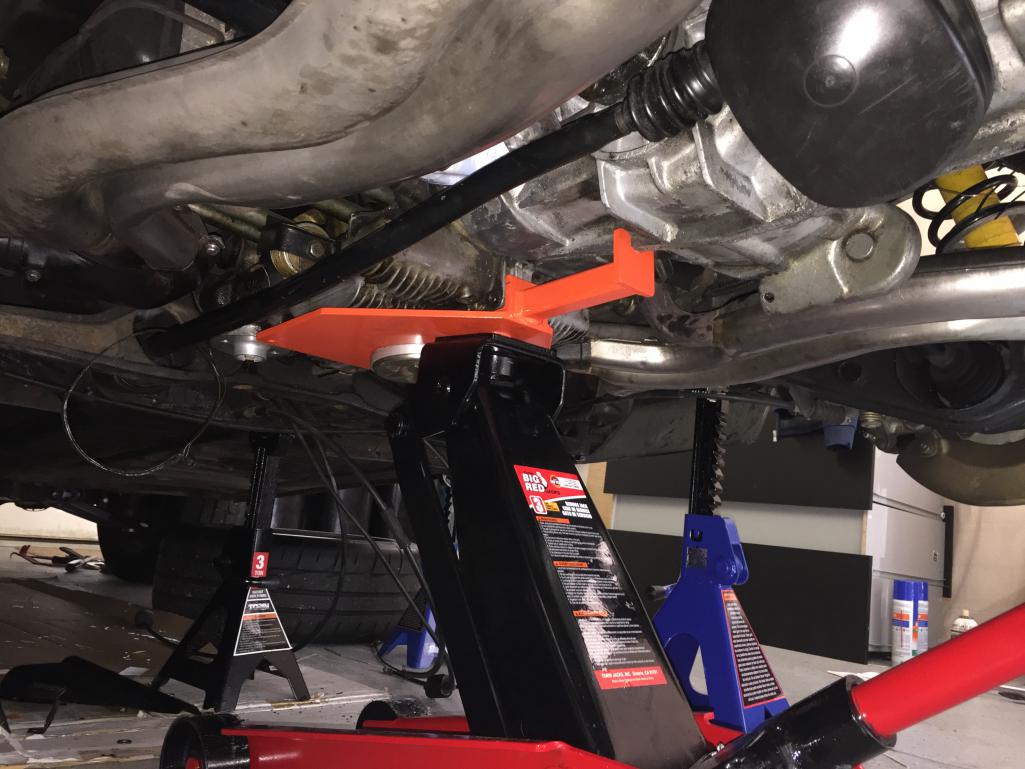
|
   |

 
|
| DRPHIL914 |
Nov 4 2017, 07:58 PM
Post
#22
|
|
Dr. Phil Group: Members Posts: 5,950 Joined: 9-December 09 From: Kennesaw, GA Member No.: 11,106 Region Association: South East States |
and out-
Attached thumbnail(s) 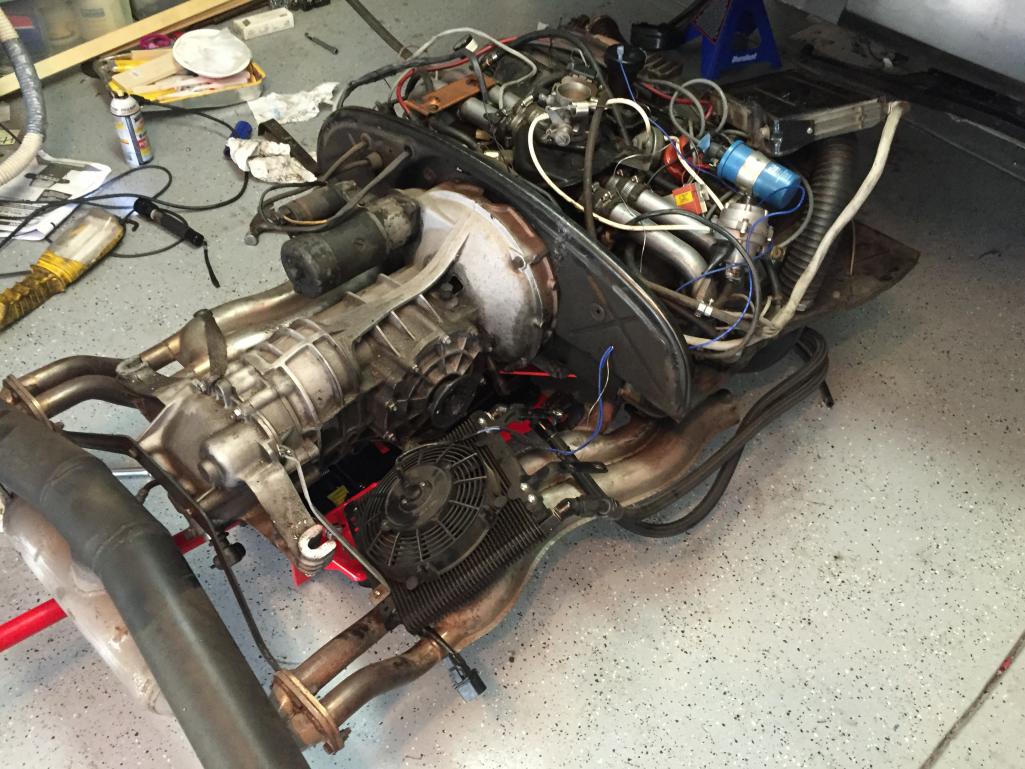
|
|
|
|
| DRPHIL914 |
Nov 4 2017, 08:12 PM
Post
#23
|
|
Dr. Phil Group: Members Posts: 5,950 Joined: 9-December 09 From: Kennesaw, GA Member No.: 11,106 Region Association: South East States |
i dont normally do pictures of myself , thought it might be appropriate to document - my friend Jim came over and helped out - went a lot easier with an extra hand! he still doesnt have a 914 but has a background as a aricraft mechanic very helpful
Attached thumbnail(s) 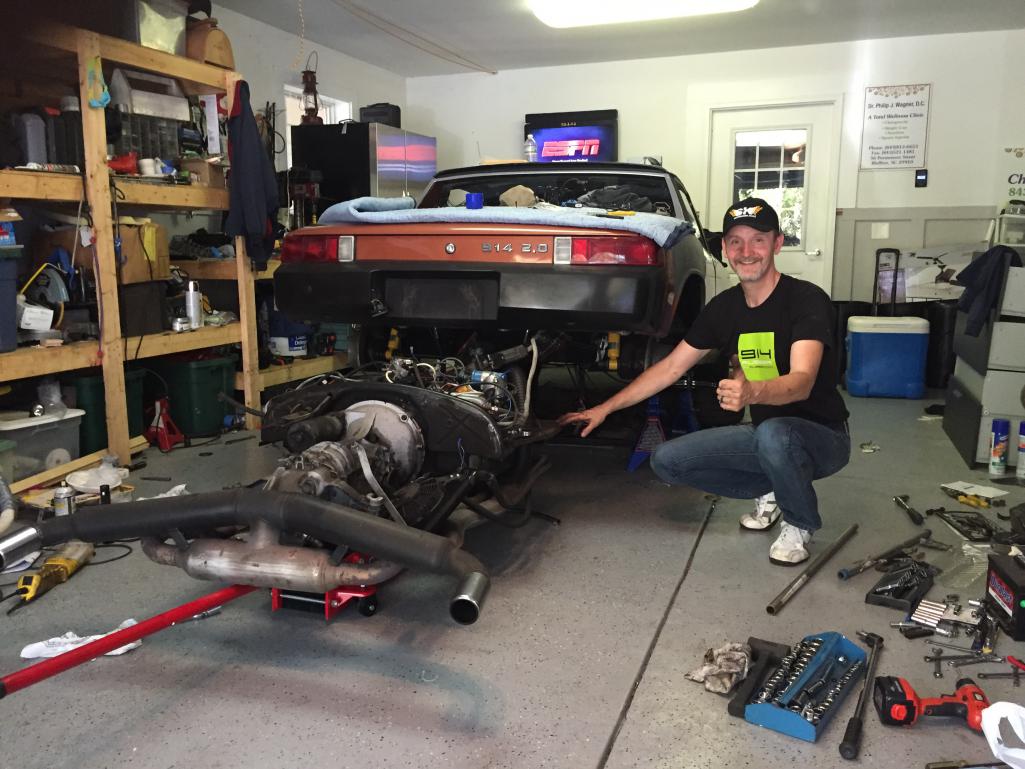
|
|
|
|
| DRPHIL914 |
Nov 4 2017, 08:16 PM
Post
#24
|
|
Dr. Phil Group: Members Posts: 5,950 Joined: 9-December 09 From: Kennesaw, GA Member No.: 11,106 Region Association: South East States |
how does one remove the rear bumper cover?
|
|
|
|
| DRPHIL914 |
Nov 4 2017, 08:32 PM
Post
#25
|
|
Dr. Phil Group: Members Posts: 5,950 Joined: 9-December 09 From: Kennesaw, GA Member No.: 11,106 Region Association: South East States |
also need a better picture of how the bar is supposed to attach to the motor and necessary hardware
|
|
|
|
| 914Sixer |
Nov 5 2017, 08:14 AM
Post
#26
|
|
914 Guru Group: Members Posts: 9,506 Joined: 17-January 05 From: San Angelo Texas Member No.: 3,457 Region Association: Southwest Region |
BUB come off with two bolts each. Disconnect and remove the fog lights and plate lights. Look about 18" off each bumper corner and you will find bolts. I think they are 17 or 19 mm. Pull the corner bumper flaps on each end. Pull straight out.
|
|
|
|
| DRPHIL914 |
Nov 5 2017, 05:16 PM
Post
#27
|
|
Dr. Phil Group: Members Posts: 5,950 Joined: 9-December 09 From: Kennesaw, GA Member No.: 11,106 Region Association: South East States |
QUOTE(914Sixer @ Nov 5 2017, 10:14 AM)  BUB come off with two bolts each. Disconnect and remove the fog lights and plate lights. Look about 18" off each bumper corner and you will find bolts. I think they are 17 or 19 mm. Pull the corner bumper flaps on each end. Pull straight out. thata the front but what about the rear, same? |
|
|
|
| DRPHIL914 |
Nov 5 2017, 05:20 PM
Post
#28
|
|
Dr. Phil Group: Members Posts: 5,950 Joined: 9-December 09 From: Kennesaw, GA Member No.: 11,106 Region Association: South East States |
also i have the window trim off - completely loose , so easy to remove only thing holding it in place was the chrome trim Attached thumbnail(s) 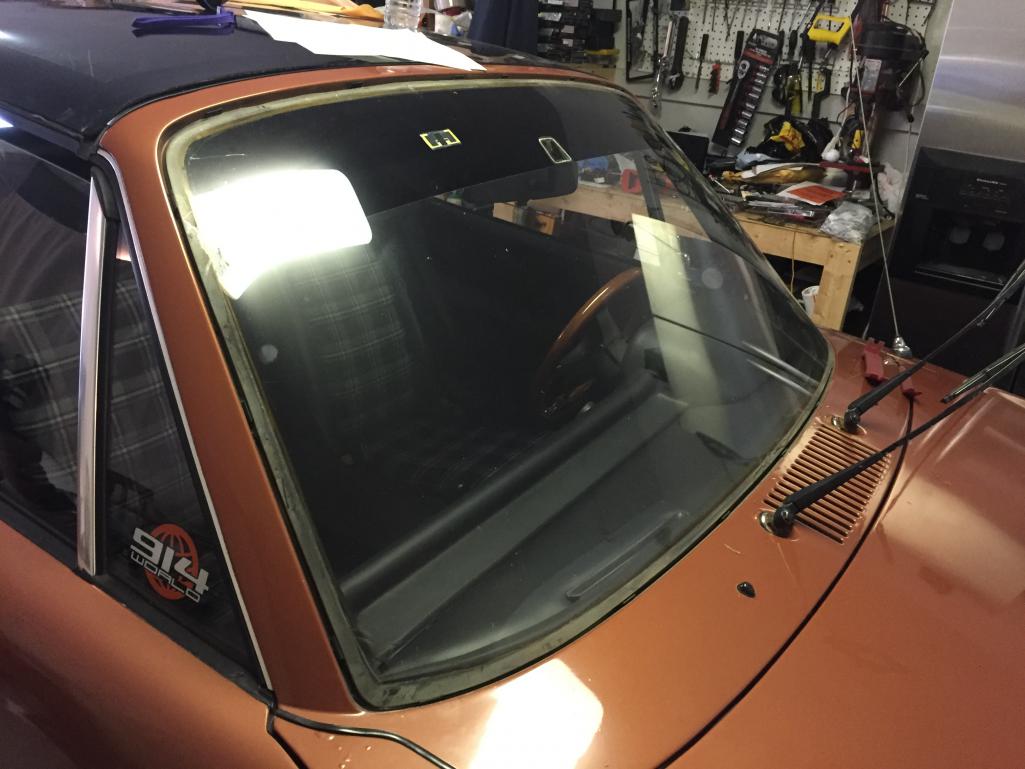
|
|
|
|
| DRPHIL914 |
Nov 5 2017, 05:32 PM
Post
#29
|
|
Dr. Phil Group: Members Posts: 5,950 Joined: 9-December 09 From: Kennesaw, GA Member No.: 11,106 Region Association: South East States |
interior partly out
Attached thumbnail(s) 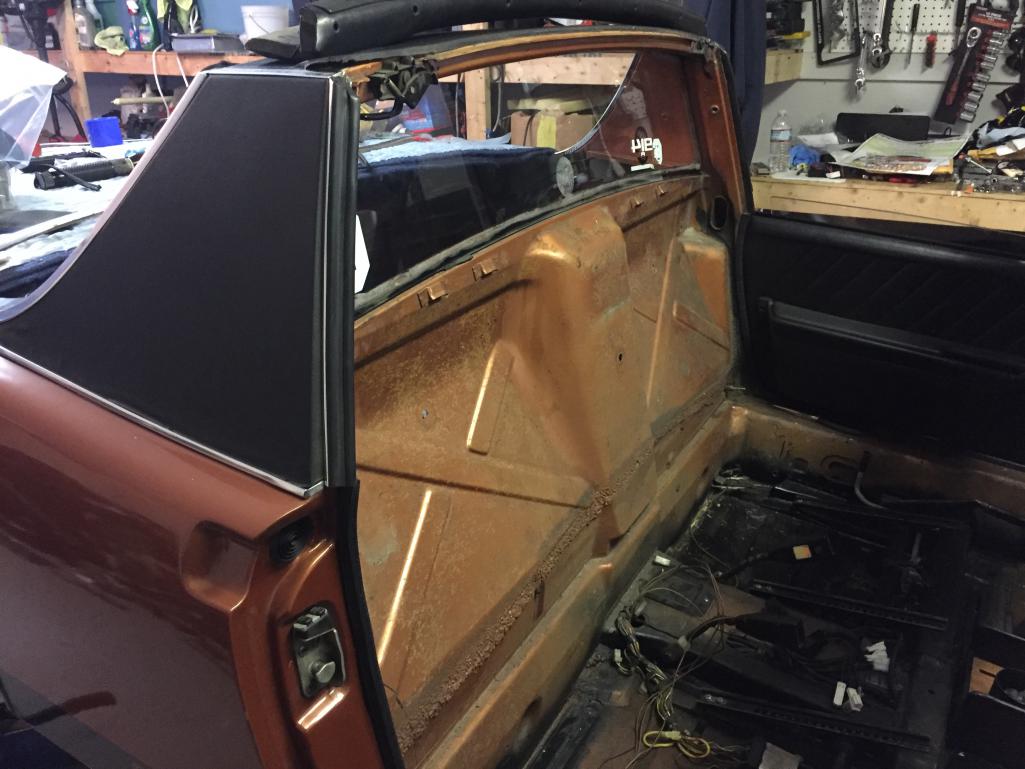
|
|
|
|
| DRPHIL914 |
Nov 5 2017, 05:37 PM
Post
#30
|
|
Dr. Phil Group: Members Posts: 5,950 Joined: 9-December 09 From: Kennesaw, GA Member No.: 11,106 Region Association: South East States |
one small sopt of rust thru on the targa area on right side,
any advice here for my guy when he fixes that? should spray the inside with rust reformer and some type if epoxy primer? Attached thumbnail(s) 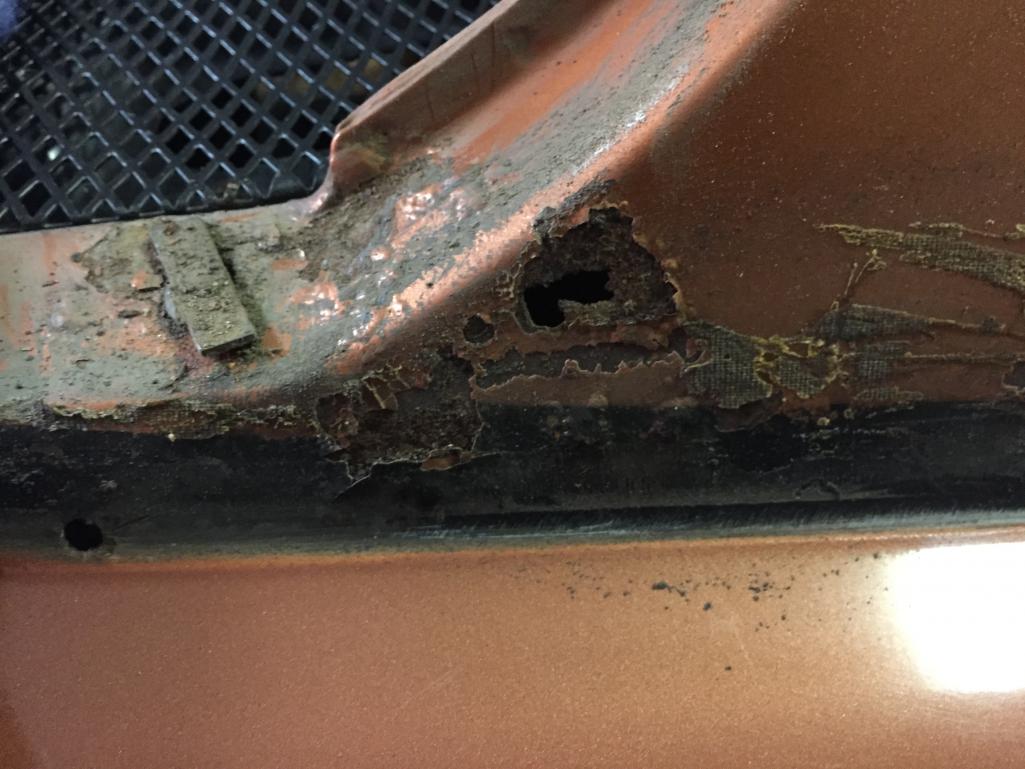
|
|
|
|
| DRPHIL914 |
Nov 5 2017, 06:08 PM
Post
#31
|
|
Dr. Phil Group: Members Posts: 5,950 Joined: 9-December 09 From: Kennesaw, GA Member No.: 11,106 Region Association: South East States |
rear window out, no rust surprises here , pretty clean on drivers side-
hey Bob, going to need that drivers door soon! Attached thumbnail(s) 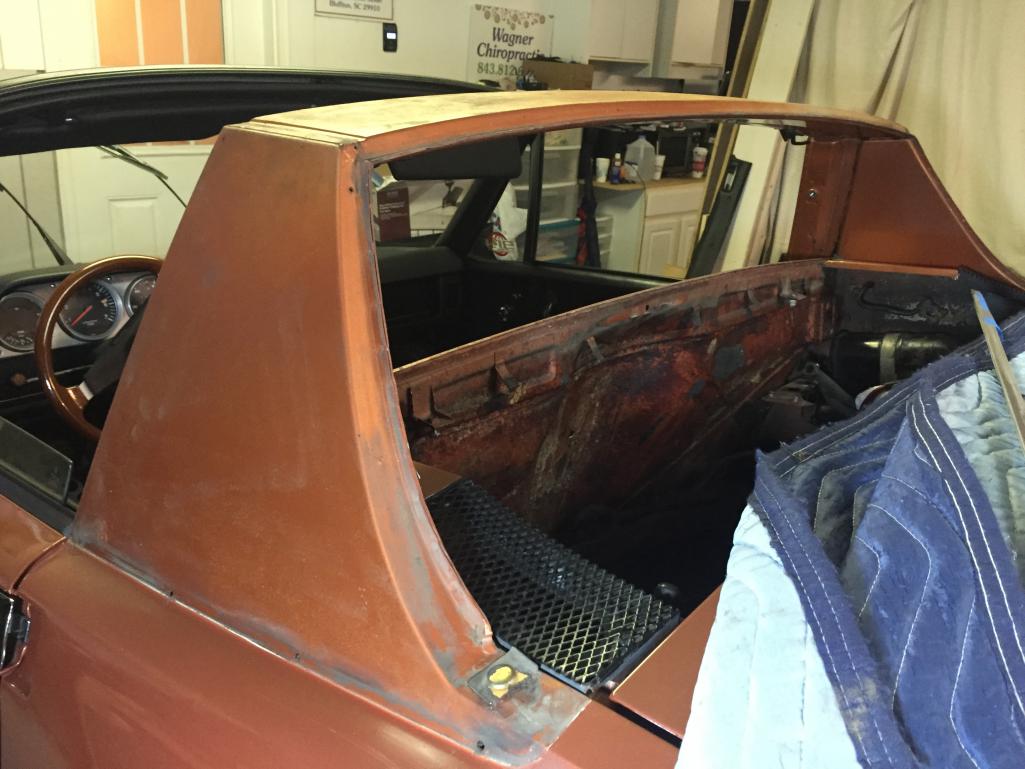
|
|
|
|
| mepstein |
Nov 5 2017, 06:08 PM
Post
#32
|
|
914-6 GT in waiting Group: Members Posts: 20,789 Joined: 19-September 09 From: Landenberg, PA/Wilmington, DE Member No.: 10,825 Region Association: MidAtlantic Region |
The sails had foam so they rust from the inside out. You need to cut back to solid metal, remove the foam, epoxy or etch prime, weld new metal and then prep and prime.
I would remove all the paint from the intersection of the sail panel and rear fender. Many times the paint just hides the rust. |
|
|
|
| DRPHIL914 |
Nov 5 2017, 06:11 PM
Post
#33
|
|
Dr. Phil Group: Members Posts: 5,950 Joined: 9-December 09 From: Kennesaw, GA Member No.: 11,106 Region Association: South East States |
QUOTE(mepstein @ Nov 5 2017, 08:08 PM) The sails had foam so they rust from the inside out. You need to cut back to solid metal, remove the foam, epoxy or etch prime, weld new metal and then prep and prime. I would remove all the paint from the intersection of the sail panel and rear fender. Many times the paint just hides the rust. plan is to sand all the second coat of paint(respray) and the original paint down to primer unless rust is found |
|
|
|
| DRPHIL914 |
Nov 7 2017, 06:28 PM
Post
#34
|
|
Dr. Phil Group: Members Posts: 5,950 Joined: 9-December 09 From: Kennesaw, GA Member No.: 11,106 Region Association: South East States |
more good news!! window is out , no rust under seal-
Attached thumbnail(s) 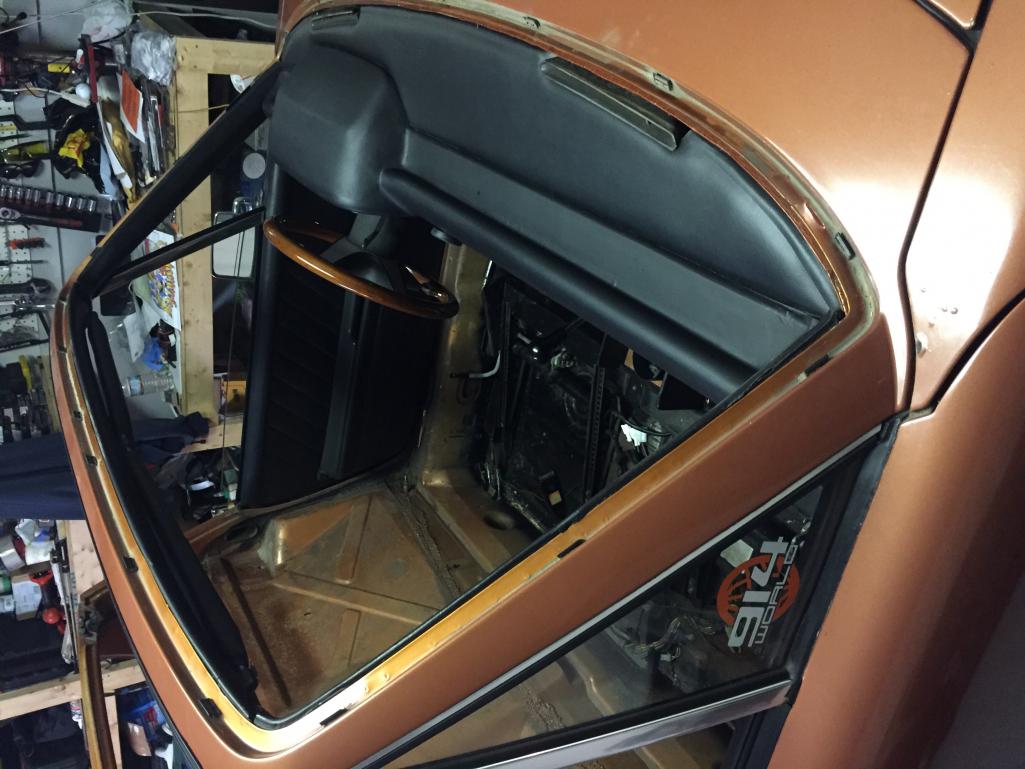
|
|
|
|
| IronHillRestorations |
Nov 7 2017, 08:52 PM
Post
#35
|
|
I. I. R. C. Group: Members Posts: 6,949 Joined: 18-March 03 From: West TN Member No.: 439 Region Association: None |
Lookin' good Phil! Looks like you are doing this right.
|
|
|
|
| DRPHIL914 |
Nov 7 2017, 09:37 PM
Post
#36
|
|
Dr. Phil Group: Members Posts: 5,950 Joined: 9-December 09 From: Kennesaw, GA Member No.: 11,106 Region Association: South East States |
Perry,
i've been encouraged by finding less rust than expected. its amazing that this is the original glass. i am looking forward to the color being returned to what it is supposed to be- i was originally just going todo only outside panels but its not thst much work to clean it up and strip it down enought for them to do the trunk and rear firewall, engine compartment while we are at it- for a car that was originally from Dublin Ohio, its amazing the hell hole and engine shelf and rear fire wall are as clean as they are. When i saw how bad the rust was in the jack points and rear longs i almost didnt do it- almost scrapped it - glad i didnt! |
|
|
|
| DRPHIL914 |
Nov 7 2017, 09:42 PM
Post
#37
|
|
Dr. Phil Group: Members Posts: 5,950 Joined: 9-December 09 From: Kennesaw, GA Member No.: 11,106 Region Association: South East States |
just a reminder of some of the challenges along the way- rear floor , jack points and rear outer longs were swiss cheese thanks to the Ohio winters i believe
Attached thumbnail(s) 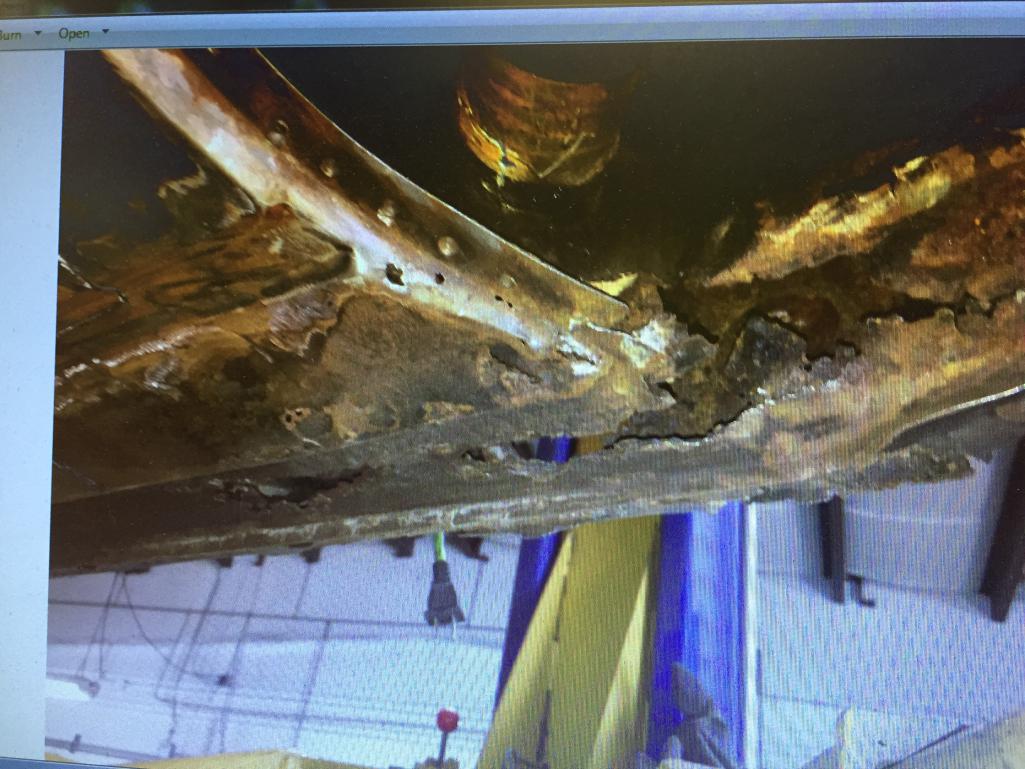
|
|
|
|
| ChrisFoley |
Nov 8 2017, 07:23 AM
Post
#38
|
|
I am Tangerine Racing Group: Members Posts: 8,031 Joined: 29-January 03 From: Bolton, CT Member No.: 209 Region Association: None |
QUOTE(Philip W. @ Nov 4 2017, 09:57 PM) using the bracket from tangerine - So you didn't need my special adapter with your new jack? |
|
|
|
| DRPHIL914 |
Nov 8 2017, 12:45 PM
Post
#39
|
|
Dr. Phil Group: Members Posts: 5,950 Joined: 9-December 09 From: Kennesaw, GA Member No.: 11,106 Region Association: South East States |
QUOTE(Racer Chris @ Nov 8 2017, 08:23 AM) QUOTE(Philip W. @ Nov 4 2017, 09:57 PM) using the bracket from tangerine - So you didn't need my special adapter with your new jack? Nope, - the jack I bought worked fine, just pulled the round jack plate off, and put yours on it the peg on the bottom of yours fit perfectly, same size so no nneed for the adaptor. - - btw at some point id like to get the adaptor you make for the side jack point in the long if you still make them. Thanks for sending that down so quickly it made the job much easier, I had help to balance the drivetrain just in case but could have done it myself if I had to. going to get with you about the SS fuel lines next- I will install once car comes back from paint. |
|
|
|
| billh1963 |
Nov 12 2017, 04:34 PM
Post
#40
|
|
Car Hoarder! Group: Members Posts: 3,433 Joined: 28-March 11 From: North Carolina Member No.: 12,871 Region Association: South East States |
Phil,
Was good seeing you Saturday! Thank you for bringing my Okteenerfest swag. Hope you enjoyed your rides in the 911s! |
|
|
|
|
1 User(s) are reading this topic (1 Guests and 0 Anonymous Users)
0 Members:

|
Lo-Fi Version | Time is now: 2nd July 2026 - 01:57 AM |
Invision Power Board
v9.1.4 © 2026 IPS, Inc.