|
|
|
Porsche, and the Porsche crest are registered trademarks of Dr. Ing. h.c. F. Porsche AG.
This site is not affiliated with Porsche in any way. Its only purpose is to provide an online forum for car enthusiasts. All other trademarks are property of their respective owners. |
|
|

  |

| DRPHIL914 |
 Aug 12 2018, 10:56 PM Aug 12 2018, 10:56 PM
Post
#241
|
|
Dr. Phil  Group: Members Posts: 5,932 Joined: 9-December 09 From: Kennesaw, GA Member No.: 11,106 Region Association: South East States |
issues with fitment in triangle seal and the adjustment screw rusted in place kept me from gettimg windows in, but new outer door handles and locks wer installed. Also on todays project list was engine lid, so new outside edge and gasket that goes between the mesh and the lid.
Attached thumbnail(s) 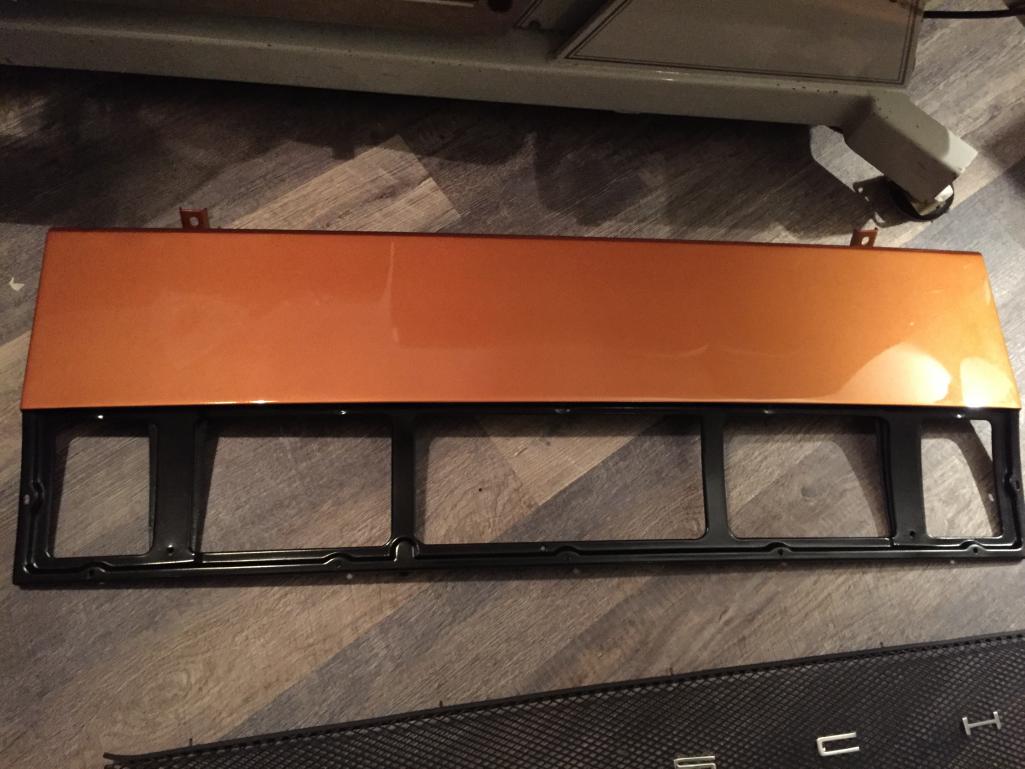 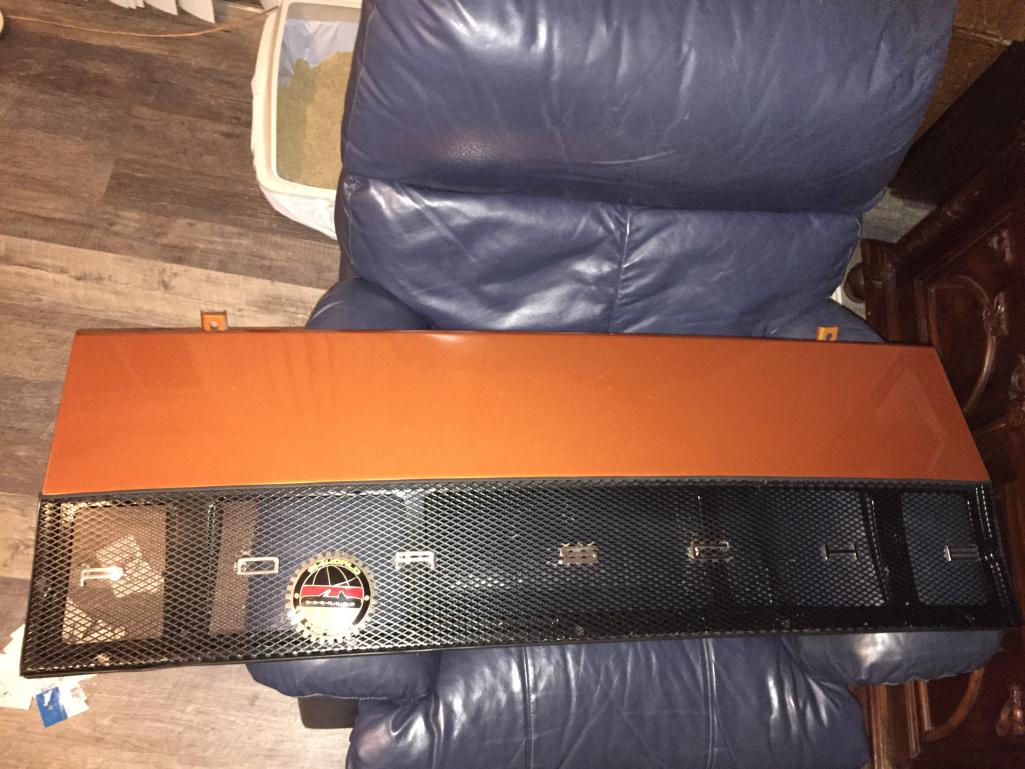
|
   |

 
|
| DRPHIL914 |
Aug 12 2018, 10:57 PM
Post
#242
|
|
Dr. Phil Group: Members Posts: 5,932 Joined: 9-December 09 From: Kennesaw, GA Member No.: 11,106 Region Association: South East States |
new window trim arrived
Attached thumbnail(s) 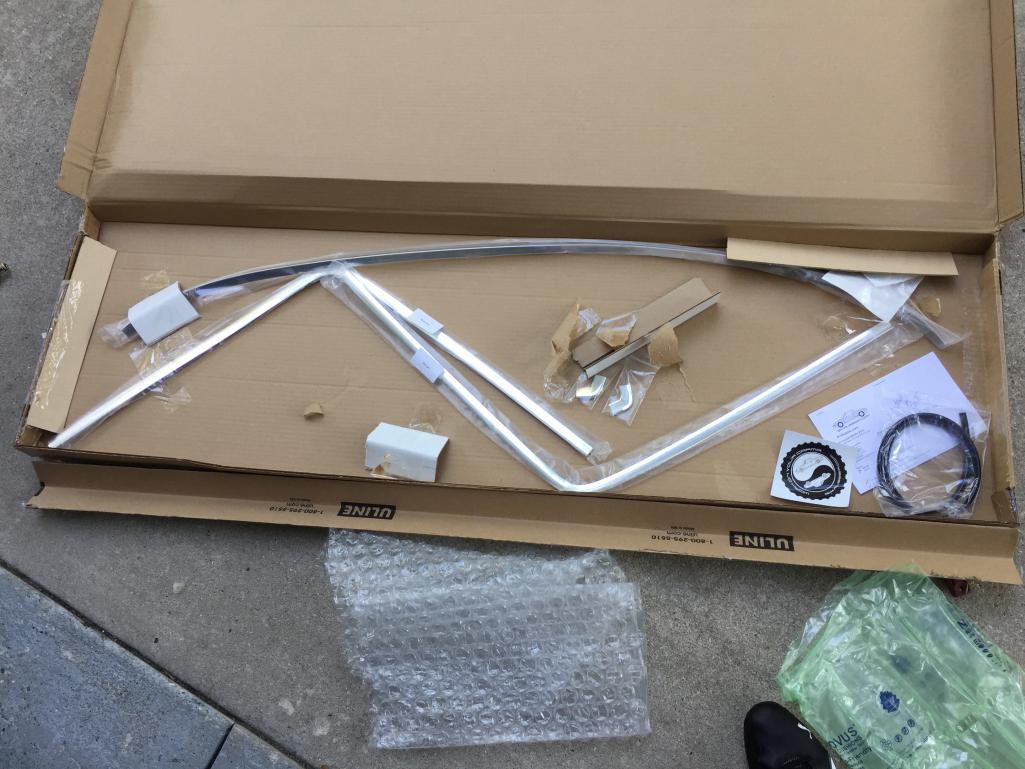
|
|
|
|
| DRPHIL914 |
Aug 12 2018, 10:58 PM
Post
#243
|
|
Dr. Phil Group: Members Posts: 5,932 Joined: 9-December 09 From: Kennesaw, GA Member No.: 11,106 Region Association: South East States |
tear valance intalled.
Attached thumbnail(s) 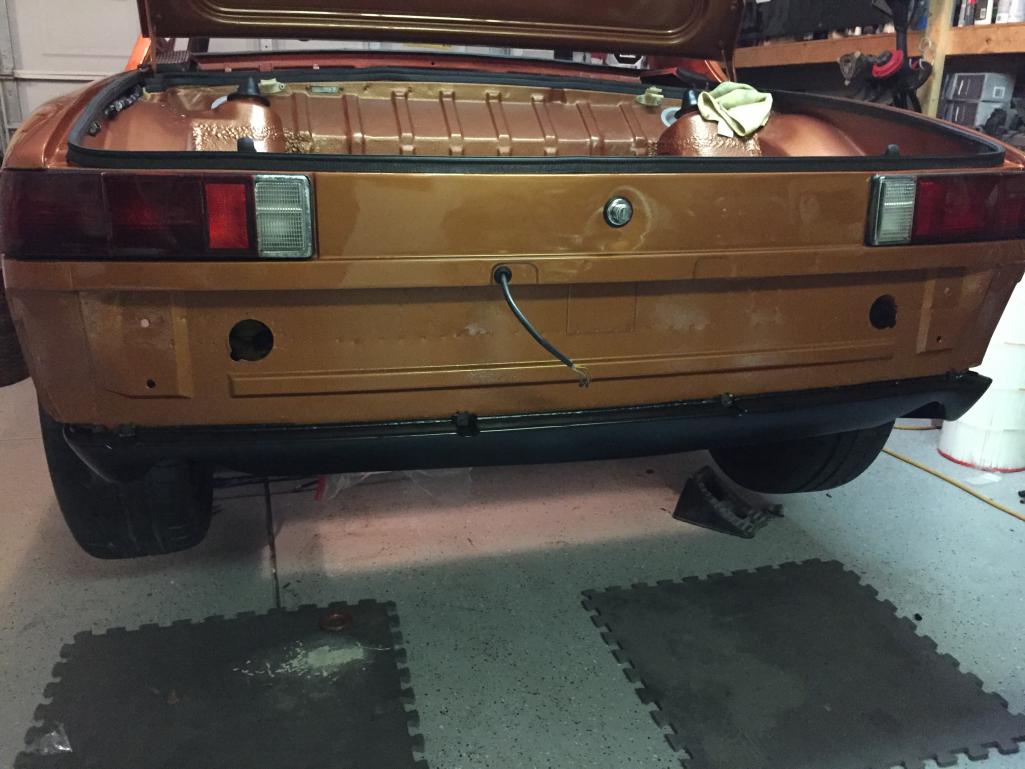
|
|
|
|
| DRPHIL914 |
Aug 12 2018, 11:00 PM
Post
#244
|
|
Dr. Phil Group: Members Posts: 5,932 Joined: 9-December 09 From: Kennesaw, GA Member No.: 11,106 Region Association: South East States |
new spare acquired today-
Attached thumbnail(s) 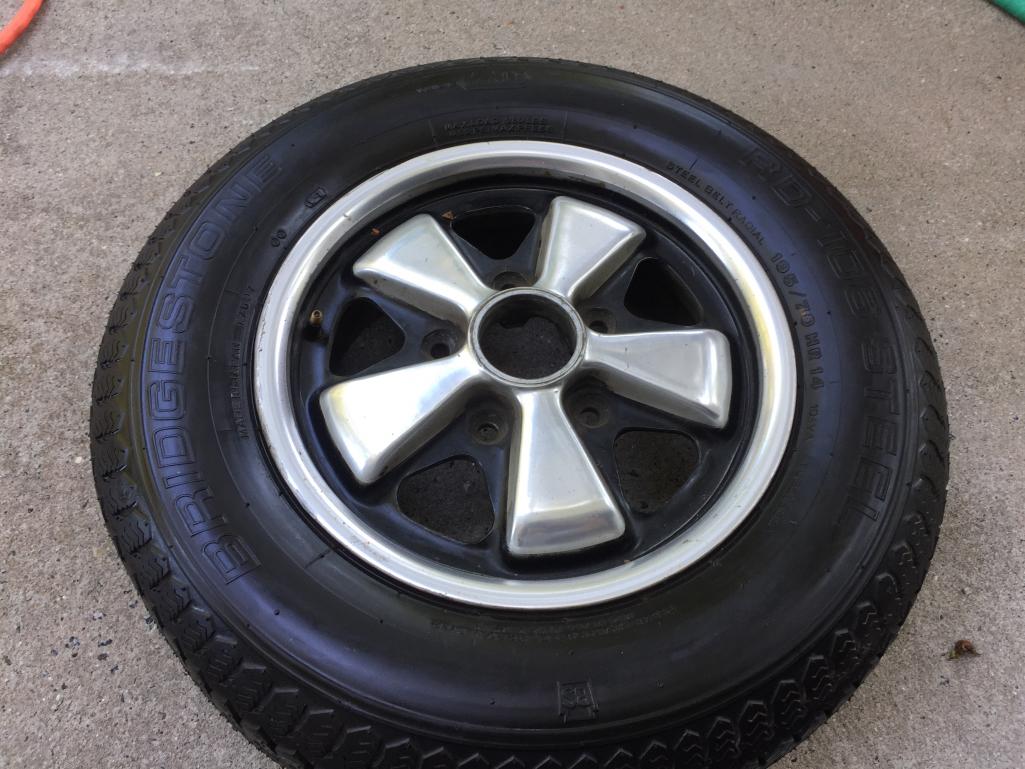
|
|
|
|
| DRPHIL914 |
Aug 12 2018, 11:01 PM
Post
#245
|
|
Dr. Phil Group: Members Posts: 5,932 Joined: 9-December 09 From: Kennesaw, GA Member No.: 11,106 Region Association: South East States |
new handles , acquired via Okteenerfest,
Attached thumbnail(s) 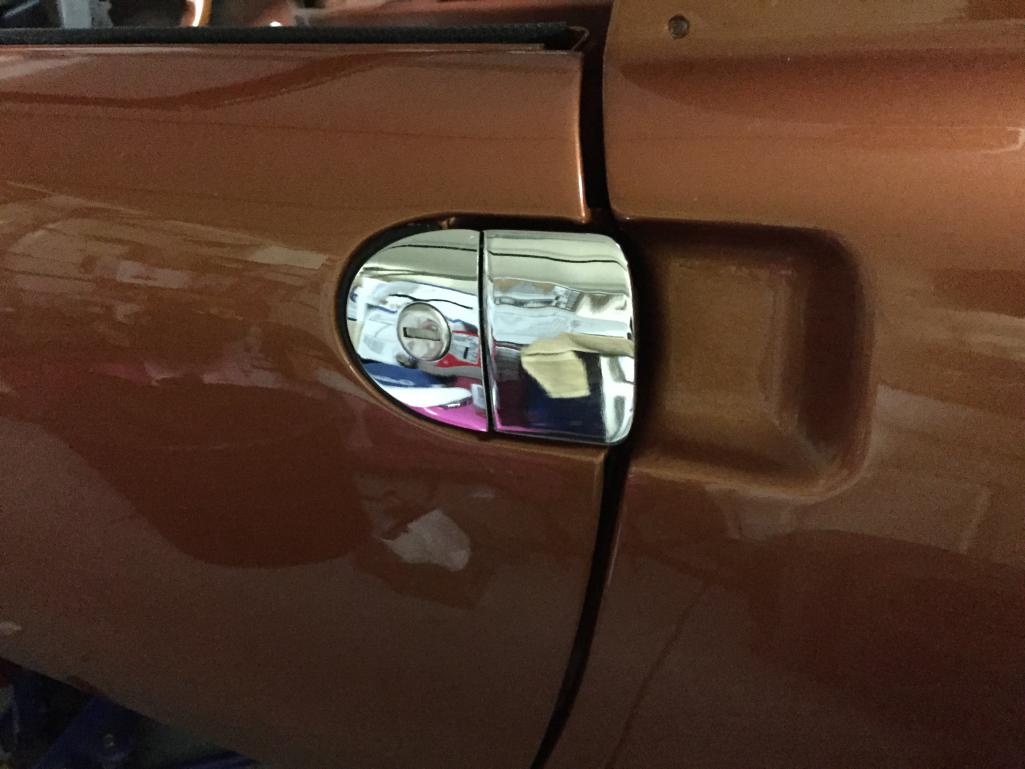 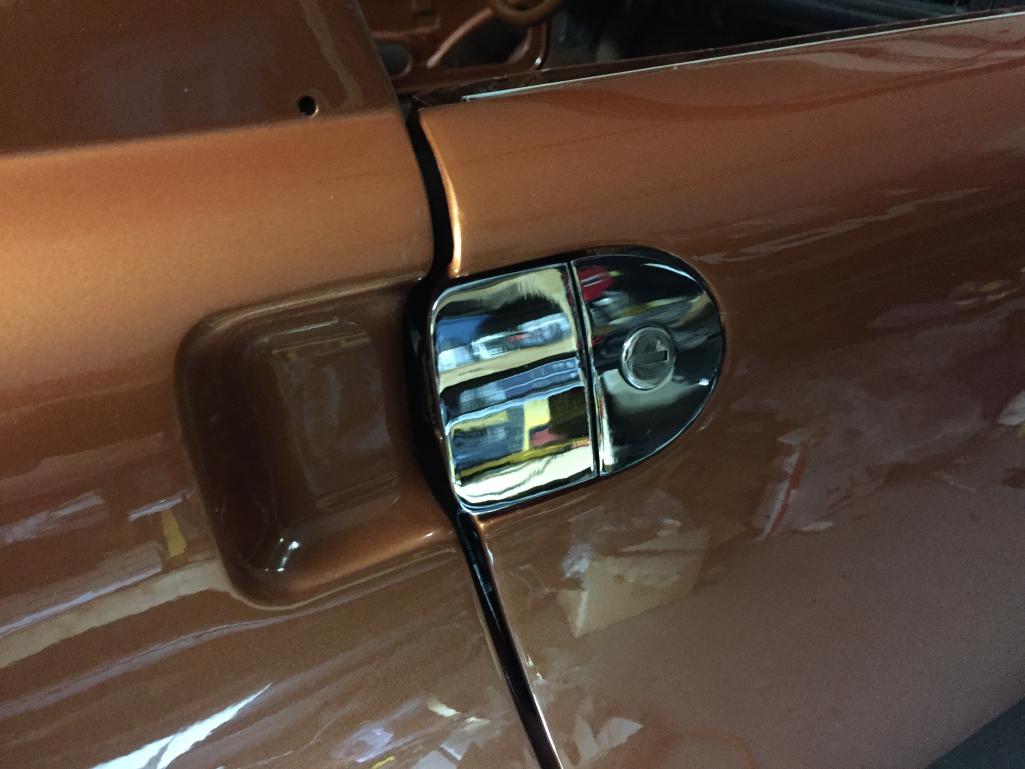
|
|
|
|
| DRPHIL914 |
Aug 12 2018, 11:02 PM
Post
#246
|
|
Dr. Phil Group: Members Posts: 5,932 Joined: 9-December 09 From: Kennesaw, GA Member No.: 11,106 Region Association: South East States |
old door stay pulled out
Attached thumbnail(s) 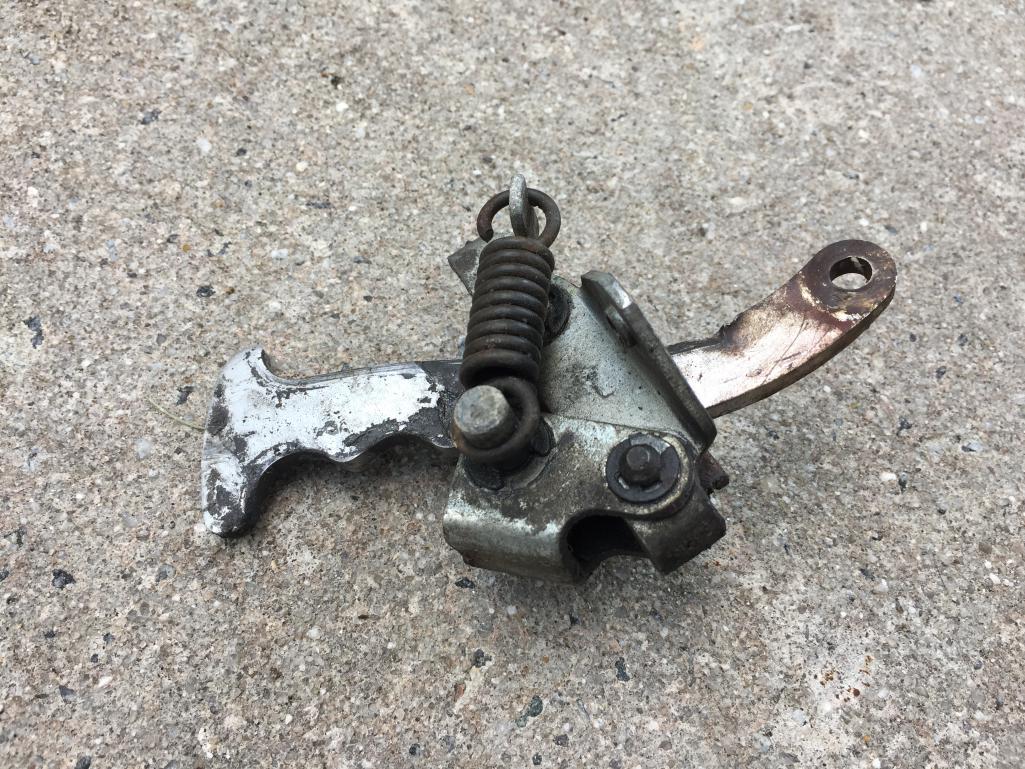
|
|
|
|
| DRPHIL914 |
Aug 12 2018, 11:04 PM
Post
#247
|
|
Dr. Phil Group: Members Posts: 5,932 Joined: 9-December 09 From: Kennesaw, GA Member No.: 11,106 Region Association: South East States |
new parts installed- new stay new bushings, and springs- the old one was missing the plastic roller,
Attached thumbnail(s) 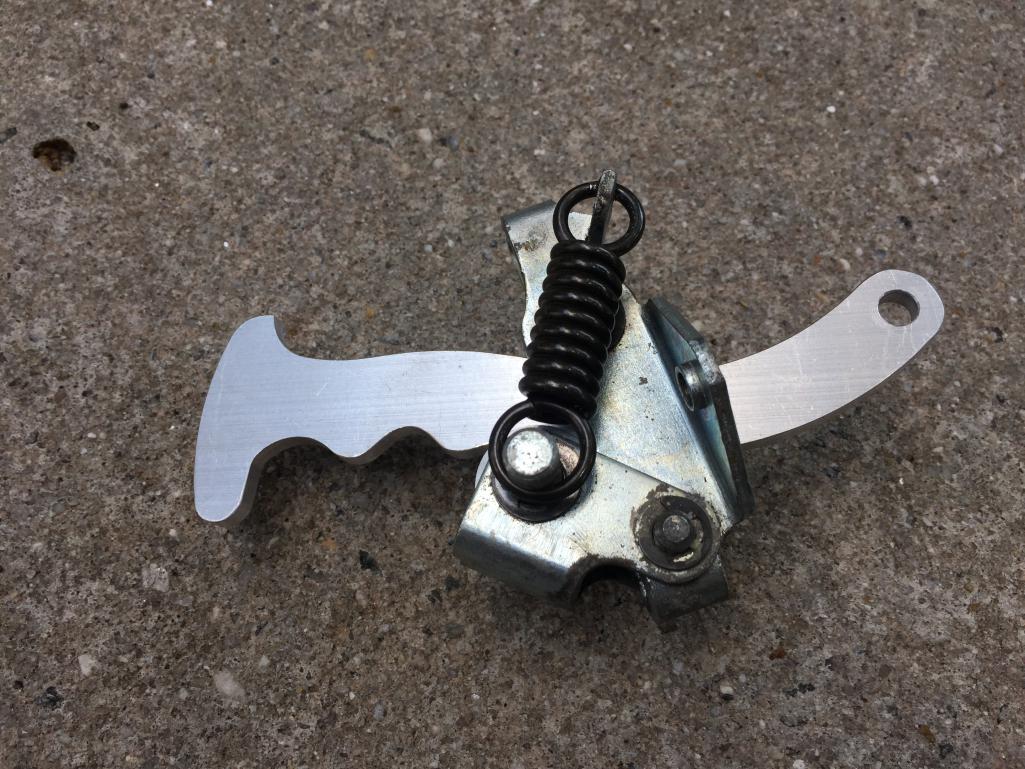
|
|
|
|
| DRPHIL914 |
Aug 12 2018, 11:07 PM
Post
#248
|
|
Dr. Phil Group: Members Posts: 5,932 Joined: 9-December 09 From: Kennesaw, GA Member No.: 11,106 Region Association: South East States |
this is what was left of the outer door fuzzy seal-
Attached thumbnail(s) 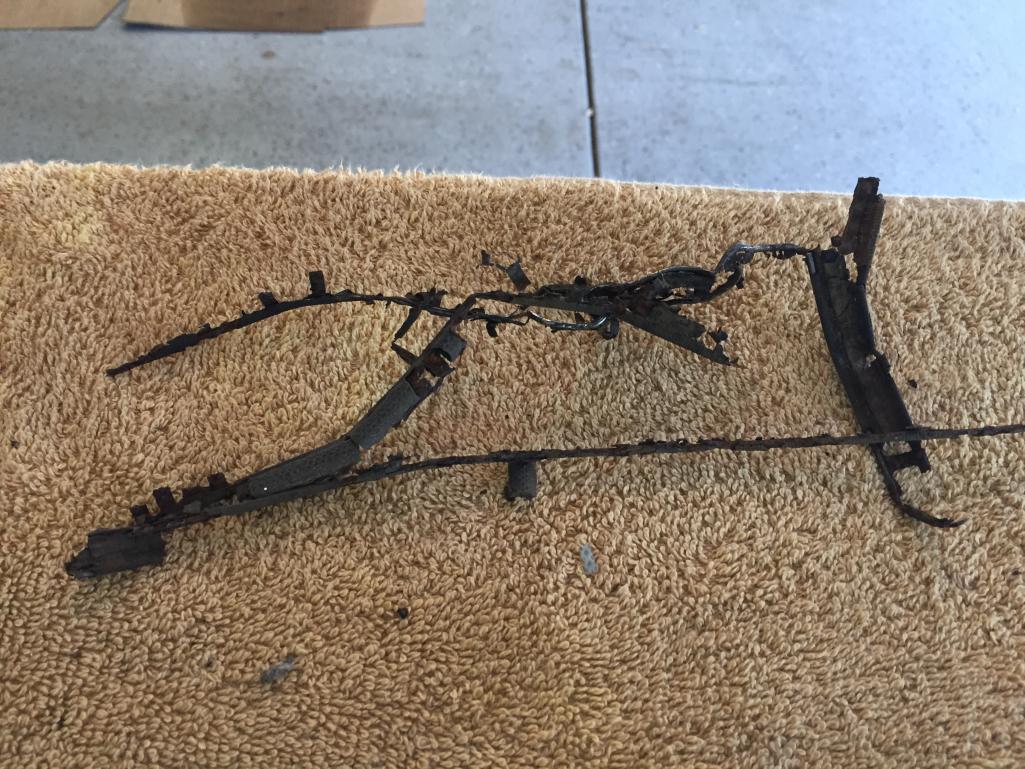
|
|
|
|
| DRPHIL914 |
Aug 12 2018, 11:09 PM
Post
#249
|
|
Dr. Phil Group: Members Posts: 5,932 Joined: 9-December 09 From: Kennesaw, GA Member No.: 11,106 Region Association: South East States |
engine bay seals are in,
Attached thumbnail(s) 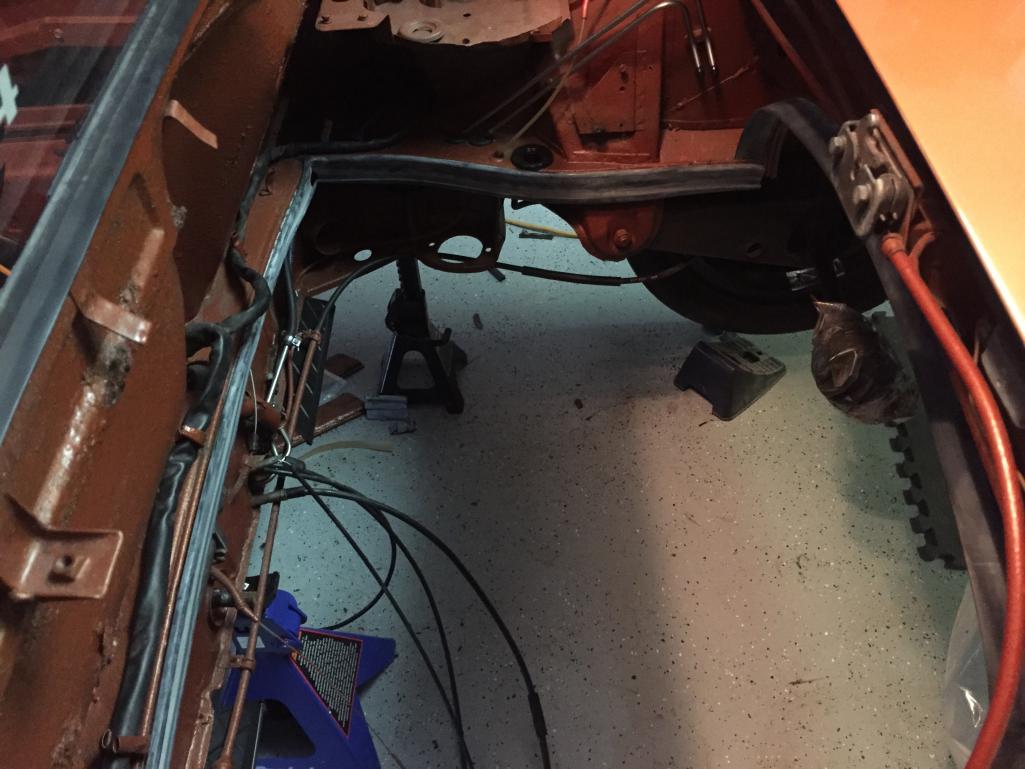
|
|
|
|
| DRPHIL914 |
Aug 13 2018, 08:17 AM
Post
#250
|
|
Dr. Phil Group: Members Posts: 5,932 Joined: 9-December 09 From: Kennesaw, GA Member No.: 11,106 Region Association: South East States |
making my final list of small stuff that need to be acquired to finish up( i'm sure other stuff will come up)
1. new accelerator cable - where can i get one fast?, new rear trunk insulation pad, - engine compartment sound pad - 2. period correct radio - coming soon from 914sixer 3. front bumper- coming in from Chrome this week 4. install window triangle seal , ugh 5. run wires for the cylinder head tem gauge i bought 6. interior installation 7. figure out how to adjust drivers door striker to get door to line up, when latched its still out by 1/8" - passenger side is perfect. 8. Install motor! what am i forgetting? - rear targa trim pieces- small upper side piece and the back curved trim part. touch ups. , |
|
|
|
| billh1963 |
Aug 13 2018, 08:22 AM
Post
#251
|
|
Car Hoarder! Group: Members Posts: 3,433 Joined: 28-March 11 From: North Carolina Member No.: 12,871 Region Association: South East States |
QUOTE(Philip W. @ Aug 13 2018, 10:17 AM)  making my final list of small stuff that need to be acquired to finish up( i'm sure other stuff will come up) 1. new accelerator cable - where can i get one fast?, new rear trunk insulation pad, - engine compartment sound pad - 2. period correct radio - coming soon from 914sixer 3. front bumper- coming in from Chrome this week 4. install window triangle seal , ugh 5. run wires for the cylinder head tem gauge i bought 6. interior installation 7. figure out how to adjust drivers door striker to get door to line up, when latched its still out by 1/8" - passenger side is perfect. 8. Install motor! what am i forgetting? - rear targa trim pieces- small upper side piece and the back curved trim part. touch ups. , I can't wait to see the car at Okteenerest...it's going to look stunning! |
|
|
|
| DRPHIL914 |
Aug 13 2018, 08:32 AM
Post
#252
|
|
Dr. Phil Group: Members Posts: 5,932 Joined: 9-December 09 From: Kennesaw, GA Member No.: 11,106 Region Association: South East States |
it took 2 days to pull the motor, interior and other trim and bits out, tank etc etc, and weeks to put back together! I wish i had more time. I will have to go back later and hit a few thinks like recover the original back pads, and insulate inside the doors, and touch up some areas like the door jams, but it will be 90% there( i hope)
I just hope the motor install goes smoothly. Its really close to being able to install it- i need to get the alternator harness this week and order a new accelerator cable- that was unexpected, but the outer sheath pulled out of the metal end at the firewall(other wise it is fine) and i don't know if i can get the end in it and re-crimp it. I am really considering trailering it not driving this year- between road grime and bugs ugh- i didn't used to care about that ! I knew that would happen!- if i sell my Boxster this weekend, maybe i can find a driver project to beat around in - |
|
|
|
| DRPHIL914 |
Aug 14 2018, 09:17 PM
Post
#253
|
|
Dr. Phil Group: Members Posts: 5,932 Joined: 9-December 09 From: Kennesaw, GA Member No.: 11,106 Region Association: South East States |
bumper mounted! not a perfect fit, but that will have to be adjusted later. new 914rubber bumper guard.
Attached thumbnail(s) 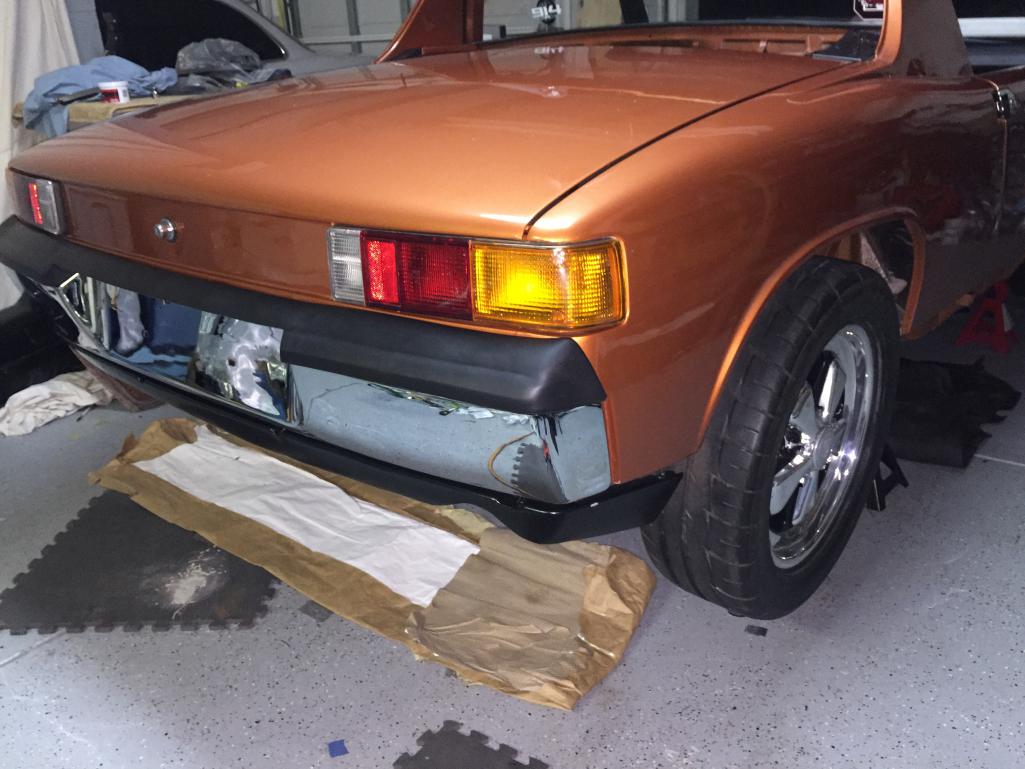 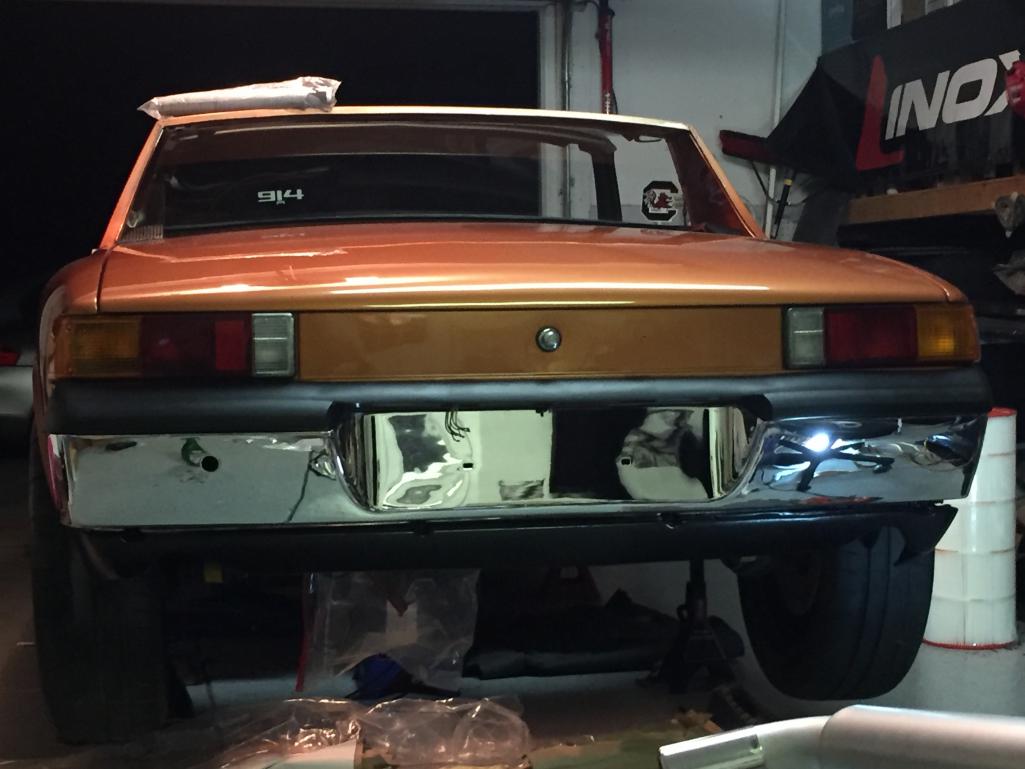
|
|
|
|
| Shadowfax |
Aug 14 2018, 09:37 PM
Post
#254
|
|
Show us the meaning of haste Group: Members Posts: 509 Joined: 19-January 15 Member No.: 18,340 Region Association: South East States |
You’re making great progress! Car looks amazing so far. The new door handles make me a little envious (IMG:style_emoticons/default/beerchug.gif)
Rear bumper looks good. Did you use the rubber washers? I bought 10 from 914Rubber and am curious where they go. They weren’t present when I removed the old bumper tops. |
|
|
|
| DRPHIL914 |
Aug 14 2018, 09:53 PM
Post
#255
|
|
Dr. Phil Group: Members Posts: 5,932 Joined: 9-December 09 From: Kennesaw, GA Member No.: 11,106 Region Association: South East States |
QUOTE(Shadowfax @ Aug 14 2018, 11:37 PM) You’re making great progress! Car looks amazing so far. The new door handles make me a little envious (IMG:style_emoticons/default/beerchug.gif) Rear bumper looks good. Did you use the rubber washers? I bought 10 from 914Rubber and am curious where they go. They weren’t present when I removed the old bumper tops. i did not use those, not sure either. my adjustment later will be to adjust the mount holes, and move the bumper about a 1/8” to right. what is interesting is my other bumper fit perfect and didnt have to pull it in with the bolts to get it to line up properly like this one. for one thing 45 year old cars are not perfectly square or straight, have to live with that and make it work. |
|
|
|
| Shadowfax |
Aug 14 2018, 10:09 PM
Post
#256
|
|
Show us the meaning of haste Group: Members Posts: 509 Joined: 19-January 15 Member No.: 18,340 Region Association: South East States |
QUOTE(Philip W. @ Aug 14 2018, 10:53 PM) what is interesting is my other bumper fit perfect and didnt have to pull it in with the bolts to get it to line up properly like this one. for one thing 45 year old cars are not perfectly square or straight, have to live with that and make it work. Yep. Fit and finish didn’t seem to be a priority back then. |
|
|
|
| DRPHIL914 |
Aug 14 2018, 10:56 PM
Post
#257
|
|
Dr. Phil Group: Members Posts: 5,932 Joined: 9-December 09 From: Kennesaw, GA Member No.: 11,106 Region Association: South East States |
it took me a long time to decide about the bumper back dating , about 2 years, but now when i look at it there is no doubt it looks so much better!
i am in it for about an extra $2000 |
|
|
|
| DRPHIL914 |
Aug 15 2018, 06:14 AM
Post
#258
|
|
Dr. Phil Group: Members Posts: 5,932 Joined: 9-December 09 From: Kennesaw, GA Member No.: 11,106 Region Association: South East States |
QUOTE(Shadowfax @ Aug 15 2018, 12:09 AM) QUOTE(Philip W. @ Aug 14 2018, 10:53 PM) what is interesting is my other bumper fit perfect and didnt have to pull it in with the bolts to get it to line up properly like this one. for one thing 45 year old cars are not perfectly square or straight, have to live with that and make it work. Yep. Fit and finish didn’t seem to be a priority back then. so Matt says the spacers are for helping fill in for irregularities in the top of the bumpers, some are not level or straight, have high or low spots so may need one or even 2 or 3 to level the topper- He sent me a few pics to show that- I didn't have to use any as my bumper is really straight and level . The only thing I have that is off a bit is the left side I have a larger gap between the bumper and the car than on the right. So either the car is not square(very possible ) or the bumper is not, it might have a slight twist? IDK, because the dogbone spacer is in there I have it bolted up tight. Another interesting issue here is that I have a different bumper that was going to be used. When the car was getting body work done and in primer I went up and test fitted that bumper and bolted it up and it was a perfect fit. This one when mounted up exactly the same way, is over to the left about 1/8", actually maybe 3/16" and that makes a big difference. The right side is tight to the body and the left side has a gap. If I was not on a time crunch here I would sell this bumper and sent off the one that was test fit in the first place and get it rechromed. I could put it on the car, it is an original never been redone with really nice finish , just a slight fade that you would expect in a 40 year old bumper, and a very small scratch not to metal but cant buff it out(and I have a buyer for it). So the other solution is to enlarge the mount holes to be able to move it over that 1/8'' , but even then the curve of this bumper on that side , the radius of it seems like its not as tight- cant decide. I think I will look at it and not be happy that its not the fit I want. I could modify the dog bone and trim it just a bit to let the bumper pull in a bit more on that side. suggestions are welcome here guys. For now it stays on, I don't have time to fool with it more. spent 3 hours last night trying to see what I could do to make it fit a bit more- as it was initinally the right side was so tight as I pulled it in it scraped some paint! SUCKS!! but that is covered up by the edge of the bumper but I will have to touch that up later. nothgin works like It should, well except my front bumper that was a perfect fit, but it needs to be redone as well. The look of the later chrome bumpers with the "tits" on is kind of growing on me - the other one I have had just rechromed is an early one and kind of looks bare with out those. Well I didn't get the windows worked on last night, hope to tonight!! Mark and Matt have been helping me figure it out, I will try to detail what we do to get them to fit. |
|
|
|
| DRPHIL914 |
Aug 23 2018, 09:03 AM
Post
#259
|
|
Dr. Phil Group: Members Posts: 5,932 Joined: 9-December 09 From: Kennesaw, GA Member No.: 11,106 Region Association: South East States |
no progress to report, posted the latest try on triangle window seal installation on the other thread, so far no go,
things that I need to do yet: -window seals and window installation - intall motor, gas tank front fresh air fan, alternator harness and new accerator cable, also the wiring for the new CHT gauge - the whole interior - targa bar vinyl and trim - I need a engine compartment back firewall sound pad- running out of time!-------- |
|
|
|
| DRPHIL914 |
Aug 25 2018, 05:44 PM
Post
#260
|
|
Dr. Phil Group: Members Posts: 5,932 Joined: 9-December 09 From: Kennesaw, GA Member No.: 11,106 Region Association: South East States |
Today:
installed a new accelerator cable, and did the outer CV joint boots, got theses NOS from 914Sixer! Thanks! 4 holes not 6 so no more grease slinging! all repacked with new grease . AND got the new front chrome trim on the window , BUT NOT with out producing choice words ans a few scratches on my new paint- and i found out yes, you can put new clips in even with a window in place! due to poorly bent trim, we were very careful but i hd 3 brand new clips break or snap in half- this should not happen! there is no way they should be this brittle- my OEM ones that were 40 years old didnt even break taking the trim off! 914rubber, i think you can do better, and that is all i am saying about that!!(Forest Gump) no i didnt get the motor in- lots of corrosion in the old alternator. took it out to put in new harness( new harness is awesome! thanks 914rubber) , so i ordered a new reman 75 amp unit that should be in by wednesday. might as well put in a whole new unit. turns out the old one was a 50 amp bus unit anyway |
|
|
|
|
1 User(s) are reading this topic (1 Guests and 0 Anonymous Users)
0 Members:

|
Lo-Fi Version | Time is now: 14th May 2026 - 12:45 AM |
Invision Power Board
v9.1.4 © 2026 IPS, Inc.