|
|
|
Porsche, and the Porsche crest are registered trademarks of Dr. Ing. h.c. F. Porsche AG.
This site is not affiliated with Porsche in any way. Its only purpose is to provide an online forum for car enthusiasts. All other trademarks are property of their respective owners. |
|
|

  |

| nditiz1 |
 Nov 15 2017, 02:18 PM Nov 15 2017, 02:18 PM
Post
#1
|
|
Senior Member  Group: Members Posts: 1,187 Joined: 26-May 15 From: Mount Airy, Maryland Member No.: 18,763 Region Association: MidAtlantic Region |
So I finished dropping the motor today. It went great!
Now the break down begins to get the heads off. I'll be detaching the tranny as well since it should be easier to break everything down via an engine stand. Also, I'll be taking the tranny to Dr. Evil's class at the end of the year. The video posted by Ian and McMark's write up were very helpful. The dual carbs took a lot of extra work out of the equation. 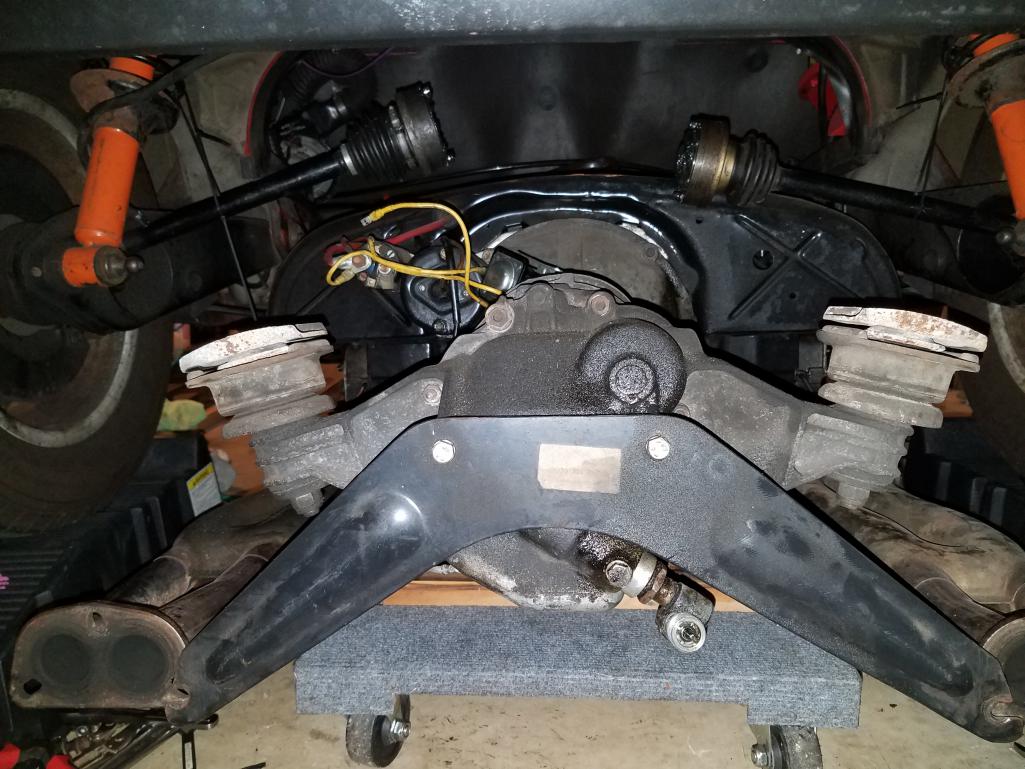 |
   |

 
|
| johnhora |
Nov 15 2017, 02:24 PM
Post
#2
|
|
Senior Member Group: Members Posts: 866 Joined: 7-January 03 From: Derby City KY Member No.: 107 Region Association: None |
Congrats!...way to go....(IMG:style_emoticons/default/beerchug.gif)
now to the fun stuff (IMG:style_emoticons/default/biggrin.gif) |
|
|
|
| Spoke |
Nov 15 2017, 02:49 PM
Post
#3
|
|
Jerry Group: Members Posts: 6,978 Joined: 29-October 04 From: Allentown, PA Member No.: 3,031 Region Association: None |
QUOTE(nditiz1 @ Nov 15 2017, 03:18 PM)  So I finished dropping the motor today...I'll be taking the tranny to Dr. Evil's class at the end of the year. Congrats on the engine drop. I've only done 2 drops and it's more work and thinking about it than actually doing it. The only thing I really don't like about dropping the engine are the breaking apart the CVs. On my 930, the CVs are sealed so no fucking with seals and adding grease. Did you do the drop by yourself? BTW, Dr. Evil is the man! |
|
|
|
| krazykonrad |
Nov 15 2017, 02:49 PM
Post
#4
|
|
Senior Member Group: Members Posts: 1,126 Joined: 21-February 06 From: Canton, GA Member No.: 5,610 |
Bag and tag everything! Ask me how I know. (IMG:style_emoticons/default/headbang.gif)
Best of luck, Konrad |
|
|
|
| nditiz1 |
Nov 15 2017, 02:56 PM
Post
#5
|
|
Senior Member Group: Members Posts: 1,187 Joined: 26-May 15 From: Mount Airy, Maryland Member No.: 18,763 Region Association: MidAtlantic Region |
Thanks!
I did drop by myself. Will do about the bag and tag. I think it will be more work to get the heads off than the actual drop. Not looking forward to that. |
|
|
|
| Boomingbeetle |
Nov 15 2017, 03:09 PM
Post
#6
|
|
Member Group: Members Posts: 118 Joined: 1-November 16 From: Orange County Member No.: 20,556 Region Association: Southern California |
Heads are easy, you can see all the nuts! I guarantee you will go to split the case and find that you've missed one stud someplace covered in grease, grime, or hidden in the webbing someplace! (IMG:style_emoticons/default/biggrin.gif)
|
|
|
|
| bbrock |
Nov 15 2017, 05:02 PM
Post
#7
|
|
914 Guru Group: Members Posts: 5,269 Joined: 17-February 17 From: Montana Member No.: 20,845 Region Association: Rocky Mountains |
QUOTE(nditiz1 @ Nov 15 2017, 01:56 PM) I think it will be more work to get the heads off than the actual drop. Not looking forward to that. I think getting the tins off is the hardest part of that operation. Those original tin screws are bastards. I just noticed last night that one of my heads has one busted off in it. I'll probably find another in the other side. I think every pair of heads I've had rebuilt had at least one that had to be extracted. But once the tins are off, the heads are easy. |
|
|
|
| nditiz1 |
Nov 15 2017, 05:25 PM
Post
#8
|
|
Senior Member Group: Members Posts: 1,187 Joined: 26-May 15 From: Mount Airy, Maryland Member No.: 18,763 Region Association: MidAtlantic Region |
I guess the question I have is do I need to take off the fan shroud/alt/fan to get the heads off. I know I need to take the headers off and I'm guessing take those off while its on the ground. Then all the tin once its up on the stand.
|
|
|
|
| bigkensteele |
Nov 15 2017, 06:18 PM
Post
#9
|
|
Major Member Group: Members Posts: 2,197 Joined: 30-August 04 From: Cincinnati, OH Member No.: 2,660 Region Association: South East States |
Do yourself a favor and take everything off but the pistons and cylinders and clean it all up. Then replace every gasket and seal you can get to once you have determined that the case doesn't need to be split. Clean and paint everything before putting it back in and it really will be far more enjoyable to work on when you get it all back together. NObody likes wrenching on a dirty engine. (IMG:style_emoticons/default/beerchug.gif)
|
|
|
|
| bbrock |
Nov 15 2017, 06:46 PM
Post
#10
|
|
914 Guru Group: Members Posts: 5,269 Joined: 17-February 17 From: Montana Member No.: 20,845 Region Association: Rocky Mountains |
QUOTE(bigkensteele @ Nov 15 2017, 05:18 PM) Do yourself a favor and take everything off but the pistons and cylinders and clean it all up. Then replace every gasket and seal you can get to once you have determined that the case doesn't need to be split. Clean and paint everything before putting it back in and it really will be far more enjoyable to work on when you get it all back together. NObody likes wrenching on a dirty engine. (IMG:style_emoticons/default/beerchug.gif) (IMG:style_emoticons/default/agree.gif) I can't remember if you can slide the heads off with the fan shroud in place, but there is no reason to try. Once those stupid tins are off, there is nothing that is difficult to remove. You don't have to take the shroud apart though. Remove the fan and unhook the thermostat bellows. Then it is just 4-M10 nuts to get the shroud off. Bear in mind that I haven't done it in over 25 years so I'm going from memory here. Somebody will slap me if I missed something. (IMG:style_emoticons/default/slap.gif) |
|
|
|
| bigkensteele |
Nov 15 2017, 08:56 PM
Post
#11
|
|
Major Member Group: Members Posts: 2,197 Joined: 30-August 04 From: Cincinnati, OH Member No.: 2,660 Region Association: South East States |
QUOTE(bbrock @ Nov 15 2017, 04:46 PM) QUOTE(bigkensteele @ Nov 15 2017, 05:18 PM) Do yourself a favor and take everything off but the pistons and cylinders and clean it all up. Then replace every gasket and seal you can get to once you have determined that the case doesn't need to be split. Clean and paint everything before putting it back in and it really will be far more enjoyable to work on when you get it all back together. NObody likes wrenching on a dirty engine. (IMG:style_emoticons/default/beerchug.gif) (IMG:style_emoticons/default/agree.gif) I can't remember if you can slide the heads off with the fan shroud in place, but there is no reason to try. Once those stupid tins are off, there is nothing that is difficult to remove. You don't have to take the shroud apart though. Remove the fan and unhook the thermostat bellows. Then it is just 4-M10 nuts to get the shroud off. Bear in mind that I haven't done it in over 25 years so I'm going from memory here. Somebody will slap me if I missed something. (IMG:style_emoticons/default/slap.gif) Nope, you are correct. Just 4 bolts holding the shroud on and agreed, there is no need to split the shroud unless you are just curious to see what it looks like inside. Take lots and lots of pictures as you pull things apart. That was invaluable for me. Do a search on replacing main seals. Not hard and worth the peace of mind. |
|
|
|
| McMark |
Nov 16 2017, 07:43 AM
Post
#12
|
|
914 Freak! Group: Retired Admin Posts: 20,179 Joined: 13-March 03 From: Grand Rapids, MI Member No.: 419 Region Association: None |
To get the heads off, you need to remove the tins just behind the fan shroud (over the oil cooler, and on the opposite side). In order to remove those tins, you need to remove the fan shroud.
But those aren't steps that take much time. I run into this quite a bit, or used to anyway, be careful not to waste a bunch of time trying to save some time. If something looks like it's in the way, stop and take the time to remove it. (IMG:style_emoticons/default/wink.gif) Get an engine stand. Even a harbor freight one, or a used one on craigslist. I've done this on the ground countless times, and it's always WAY harder. See the advice just above this.... Doing it on the ground is a way to waste a bunch of time trying to save some time. To swap the heads you'll have to: 1. Remove the exhaust and intake. 2. Pull off all the tin and fan shroud. 3. Remove the valve covers (these make nice part-holders for the next steps). 4. Remove the pushrod tube retaining wires. 5. Remove the rocker assemblies (11mm socket). 6. Remove the pushrods. Stock pushrods are all the same length, don't worry about 'mixing them up'. If you don't have stock pushrods, organize or mark where they go. 7. Remove the pushrod tubes. They're a pain. 8. Remove the last pieces of engine tin below the cylinders. 9. Loosen all the head nuts before removing any of them. Then remove them. 10. Slide the head off. Sometimes cylinders will stick to the heads. Hopefully that's not the case for you. Nothing will fall apart or come out of place or otherwise complicate reinstallation. The only caveat is that the cylinder to case joint MAY leak slightly because that joint has been disturbed. If you're meticulous, you can slide the cylinders away a bit, carefully clean and reapply sealant just before installing the heads. But if you're going to do this, let me know and I'll add more details about this process. |
|
|
|
| bbrock |
Nov 16 2017, 08:27 AM
Post
#13
|
|
914 Guru Group: Members Posts: 5,269 Joined: 17-February 17 From: Montana Member No.: 20,845 Region Association: Rocky Mountains |
QUOTE(McMark @ Nov 16 2017, 06:43 AM) The only caveat is that the cylinder to case joint MAY leak slightly because that joint has been disturbed. If you're meticulous, you can slide the cylinders away a bit, carefully clean and reapply sealant just before installing the heads. But if you're going to do this, let me know and I'll add more details about this process. Would you use sealant on bases of new cylinders on a fresh build? If so, what sealant do you use and do you apply it to both sides of the base gasket? |
|
|
|
| McMark |
Nov 16 2017, 08:58 AM
Post
#14
|
|
914 Freak! Group: Retired Admin Posts: 20,179 Joined: 13-March 03 From: Grand Rapids, MI Member No.: 419 Region Association: None |
I use sealant (Curil T) since it remains pliable to cope with expansion and contraction. No 'gasket' is called for there. There are shims available for setting deck height, but only use those if you need to.
|
|
|
|
| iankarr |
Nov 16 2017, 11:19 AM
Post
#15
|
|
The wrencher formerly known as Cuddy_K Group: Members Posts: 2,473 Joined: 22-May 15 From: Heber City, UT Member No.: 18,749 Region Association: Intermountain Region |
Congrats! Glad the video was helpful.
Listen to whatever McMark says. FWIW, I used permatex aviation on the cylinder-to-case and it worked great. What's key is that everything is square. All these years later, most cases need to be decked... |
|
|
|
| Dr Evil |
Nov 16 2017, 11:48 AM
Post
#16
|
|
Send me your transmission! Group: Members Posts: 22,995 Joined: 21-November 03 From: Loveland, OH 45140 Member No.: 1,372 Region Association: MidAtlantic Region |
If I ever go to the trouble of pulling the heads, I always pull the jugs, and replace the rings. Then clean every thing. I don't find it all that much work and not too expensive.
|
|
|
|
| Dave_Darling |
Nov 16 2017, 03:14 PM
Post
#17
|
|
914 Idiot Group: Members Posts: 14,984 Joined: 9-January 03 From: Silicon Valley / Kailua-Kona Member No.: 121 Region Association: Northern California |
Where's the obligatory standing-in-the-engine-bay photo? (IMG:style_emoticons/default/biggrin.gif)
--DD |
|
|
|
| nditiz1 |
Nov 23 2017, 11:32 AM
Post
#18
|
|
Senior Member Group: Members Posts: 1,187 Joined: 26-May 15 From: Mount Airy, Maryland Member No.: 18,763 Region Association: MidAtlantic Region |
Dave,
I'll get one and post it up. Just an update - got the headers off, tranny disconnected, and some of the tin off. I found the original builder of this 2056 swapped heads left and right, at least that's the way it seems as the cht sensor was still plugged in on the 1,2 side. Can you guess which exhaust valve dropped? Number 2 of course which would be number 3 on the right side. Too much abuse over the years. Happy thanksgiving!!! |
|
|
|
|
1 User(s) are reading this topic (1 Guests and 0 Anonymous Users)
0 Members:

|
Lo-Fi Version | Time is now: 13th May 2024 - 10:31 PM |
Invision Power Board
v9.1.4 © 2024 IPS, Inc.