|
|

|
Porsche, and the Porsche crest are registered trademarks of Dr. Ing. h.c. F. Porsche AG.
This site is not affiliated with Porsche in any way. Its only purpose is to provide an online forum for car enthusiasts. All other trademarks are property of their respective owners. |
|
|
  |
| Bates |
 Jan 10 2018, 09:24 PM Jan 10 2018, 09:24 PM
Post
#21
|
|
Bates   Group: Members Posts: 68 Joined: 27-December 13 From: Madison, Virginia Member No.: 16,800 Region Association: MidAtlantic Region |
Louvers on the Morgan were harder, the 3003 aluminum is softer, but doesnt hold it shape as easily as steel. Thats why I made the steel stretcher die.
Back on the 914; Finished floor, with louvers and 1" x 1" bar between front suspension 3 bolt 'pads' for a oil cooler mount and some stiffness for the front end of the car. 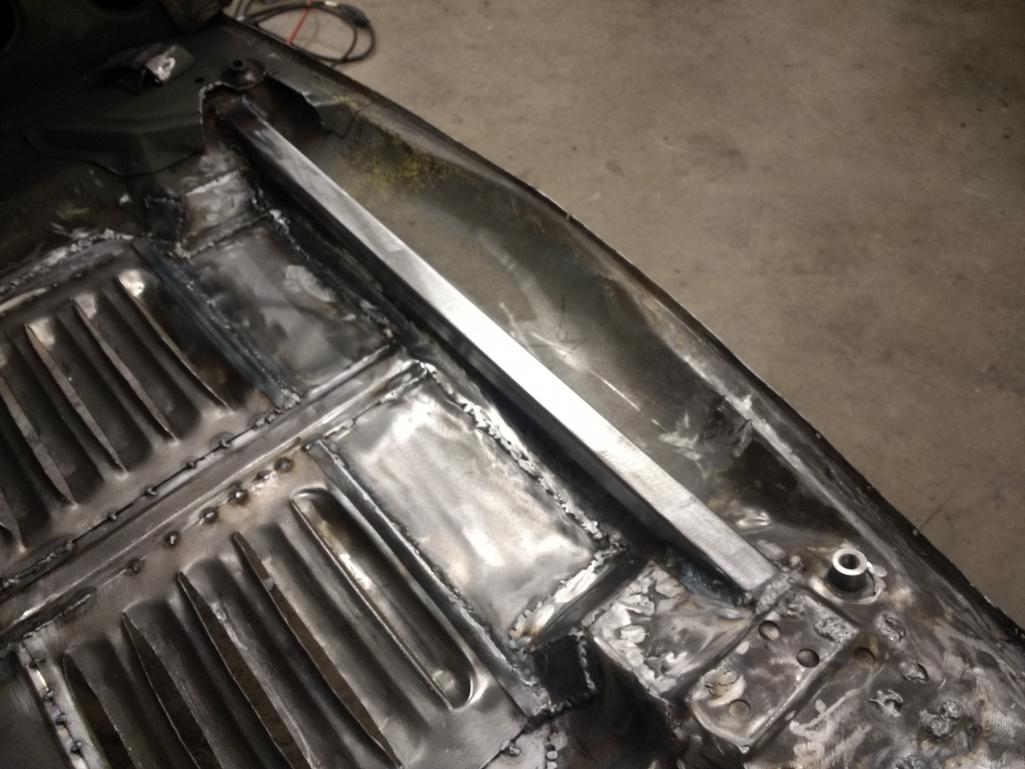 fiberglass oil cooler shroud fits perfectly. 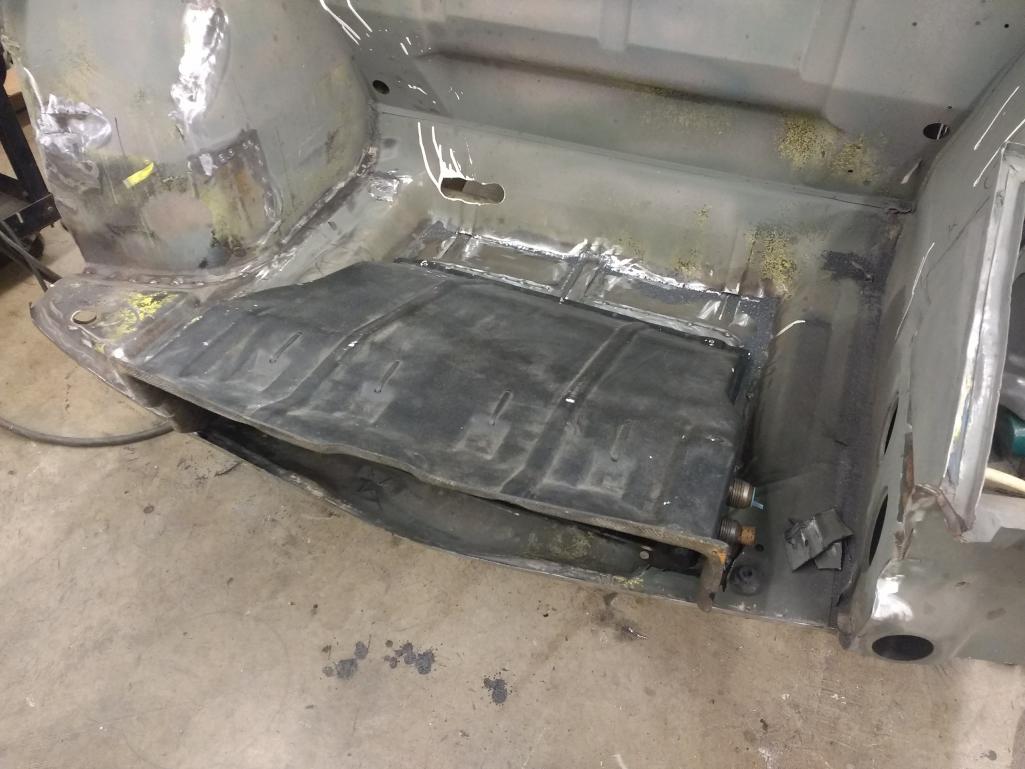 Now, trim and fit the nose panel, then weld it in place, and I'll move to the rear of the car to tidy up (grind off and replace) some old reinforcements and boogered patches on the rear longerons and suspension consoles. |
| jmitro |
 Jan 11 2018, 09:41 AM Jan 11 2018, 09:41 AM
Post
#22
|
|
Senior Member    Group: Members Posts: 713 Joined: 23-July 15 From: Oklahoma Member No.: 18,986 Region Association: None 
|
love the custom fabrication!
|
| Bates |
 Jan 12 2018, 06:38 AM Jan 12 2018, 06:38 AM
Post
#23
|
|
Bates   Group: Members Posts: 68 Joined: 27-December 13 From: Madison, Virginia Member No.: 16,800 Region Association: MidAtlantic Region |
|
| bbrock |
 Jan 12 2018, 11:03 AM Jan 12 2018, 11:03 AM
Post
#24
|
|
914 Guru      Group: Members Posts: 5,269 Joined: 17-February 17 From: Montana Member No.: 20,845 Region Association: Rocky Mountains 
|
Somehow, I missed this thread when it first popped up. Very cool stuff! Nice work!!! I'll be watching this for pointers on my own project.
|
| Porschef |
 Jan 12 2018, 03:19 PM Jan 12 2018, 03:19 PM
Post
#25
|
|
How you doin'     Group: Members Posts: 2,180 Joined: 7-September 10 From: LawnGuyland Member No.: 12,152 Region Association: North East States 
|
Somehow, I missed this thread when it first popped up. Very cool stuff! Nice work!!! I'll be watching this for pointers on my own project. Likewise, I was never a fan of wheel arch venting. Cool stuff!! (IMG:style_emoticons/default/beer.gif) |
| Bates |
 Jan 13 2018, 08:23 AM Jan 13 2018, 08:23 AM
Post
#26
|
|
Bates   Group: Members Posts: 68 Joined: 27-December 13 From: Madison, Virginia Member No.: 16,800 Region Association: MidAtlantic Region |
Somehow, I missed this thread when it first popped up. Very cool stuff! Nice work!!! I'll be watching this for pointers on my own project. Likewise, I was never a fan of wheel arch venting. Cool stuff!! (IMG:style_emoticons/default/beer.gif) Wheel arches are structural. Taking away parts of any 'arch' does not appeal to me. I figure copying what the factory did back, 'in the day' is pretty darn safe. More pictures coming, along with some tips on what products I use. Cheers, Bates |
| r_towle |
 Jan 13 2018, 02:48 PM Jan 13 2018, 02:48 PM
Post
#27
|
|
Custom Member                Group: Members Posts: 24,705 Joined: 9-January 03 From: Taxachusetts Member No.: 124 Region Association: North East States 
|
how did you make the louvers?
Do you press them in a die? rich |
| Mueller |
 Jan 13 2018, 03:40 PM Jan 13 2018, 03:40 PM
Post
#28
|
|
914 Freak!                Group: Members Posts: 17,155 Joined: 4-January 03 From: Antioch, CA Member No.: 87 Region Association: None 
|
Love the fixture for fixing the front suspension pick up mounts.
Not that familiar with the GT builds, are the louvers done the way the factory or other race teams did the oil coolers? Great work so far! |
| Bates |
 Jan 13 2018, 04:48 PM Jan 13 2018, 04:48 PM
Post
#29
|
|
Bates   Group: Members Posts: 68 Joined: 27-December 13 From: Madison, Virginia Member No.: 16,800 Region Association: MidAtlantic Region |
Love the fixture for fixing the front suspension pick up mounts. Not that familiar with the GT builds, are the louvers done the way the factory or other race teams did the oil coolers? Great work so far! Oil cooler mounts at front of car, cover over cooler and the floor vent, higher air pressure at front of car forces air thru cooler and out the bottom. I have a factory cooler and cover, there are some pictures of the black cover. |
| Bates |
 Jan 13 2018, 04:50 PM Jan 13 2018, 04:50 PM
Post
#30
|
|
Bates   Group: Members Posts: 68 Joined: 27-December 13 From: Madison, Virginia Member No.: 16,800 Region Association: MidAtlantic Region |
|
| Bates |
 Jan 15 2018, 09:10 AM Jan 15 2018, 09:10 AM
Post
#31
|
|
Bates   Group: Members Posts: 68 Joined: 27-December 13 From: Madison, Virginia Member No.: 16,800 Region Association: MidAtlantic Region |
I am doing repairs of my 73 914 chassis in preparation of creating yet another GT clone.
I have started a build thread; GT Build; Flares add flare here; http://www.914world.com/bbs2/index.php?sho...322283&st=0 I thought anyone else who has repaired a 914 may have run into oval rear suspension console mount holes; Here is the suspension pivot , which has a step shoulder on the end that locates the pivot in the suspension console hole. My non digital caliper measures it at .550" The pivot is one I cut in half to see how it was made, easier to deal with also. Here are pictures of measuring my right side console; out of focus, but easy to see needle is .030 larger than the step of the shaft Vertical measurement is .040" larger than the step of the shaft. I want to keep the suspension hole close to original placement, and the original two pieces of stamped plate are in decent condition, so my plan it to make a new locater out of a larger piece of stock; I took a piece of 4140 tubing, .750" o.d., .500" i.d.. First step is to make the i.d. fit the step of the pivot shaft , something just larger than .055". I checked the stock in my lathe and bored the center out to .055" (14mm). So now I have a shaft to create a 'washer' from that has the perfect inside diameter. I'll take it back to the lathe and 'part' the thickness of the two plates that currently have an oval hole inside. After I have a repair washer that is .750" outside diameter, I'll drill a hole .75" in the oval hole and insert the new washer. Here is the rough washer, it is a bit warm from machining, so pliers are in order. Now I'll mark a step bit at the diameter I do not want to exceed with a Sharpie. The red is very visible as I drill, and as soon as I get the hole to the red mark I know to stop. Step drills are good for keeping slightly oval holes on the original hole center when enlarging the hole for repairs. I took the little washer back to the car, de-burred it and metal finished to clean for welding later. placed it in the .75" hole, holding it there with the stepped shaft for placement; I then tacked it in place with my MIG welder, and then ground off any 'proud' weld tacks. I went back after this picture and ran a TIG weld pass around both sides of the new 'washer' . The stepped shaft is now fixed in one location, no moving up and down/ back and forth,. creating havoc when trying to align a suspension. Next step, new roll bar. |
| Bates |
 Jan 15 2018, 09:35 AM Jan 15 2018, 09:35 AM
Post
#32
|
|
Bates   Group: Members Posts: 68 Joined: 27-December 13 From: Madison, Virginia Member No.: 16,800 Region Association: MidAtlantic Region |
pictures show up here; ???? dont know why they disappeared here/ http://www.914world.com/bbs2/index.php?showtopic=322681 |
| Bates |
 Feb 1 2018, 12:24 PM Feb 1 2018, 12:24 PM
Post
#33
|
|
Bates   Group: Members Posts: 68 Joined: 27-December 13 From: Madison, Virginia Member No.: 16,800 Region Association: MidAtlantic Region |
After grinding off all of the layers of crappy reinforcements that were stacked on rust, partial welds etc, time to make some pretty repair panels;
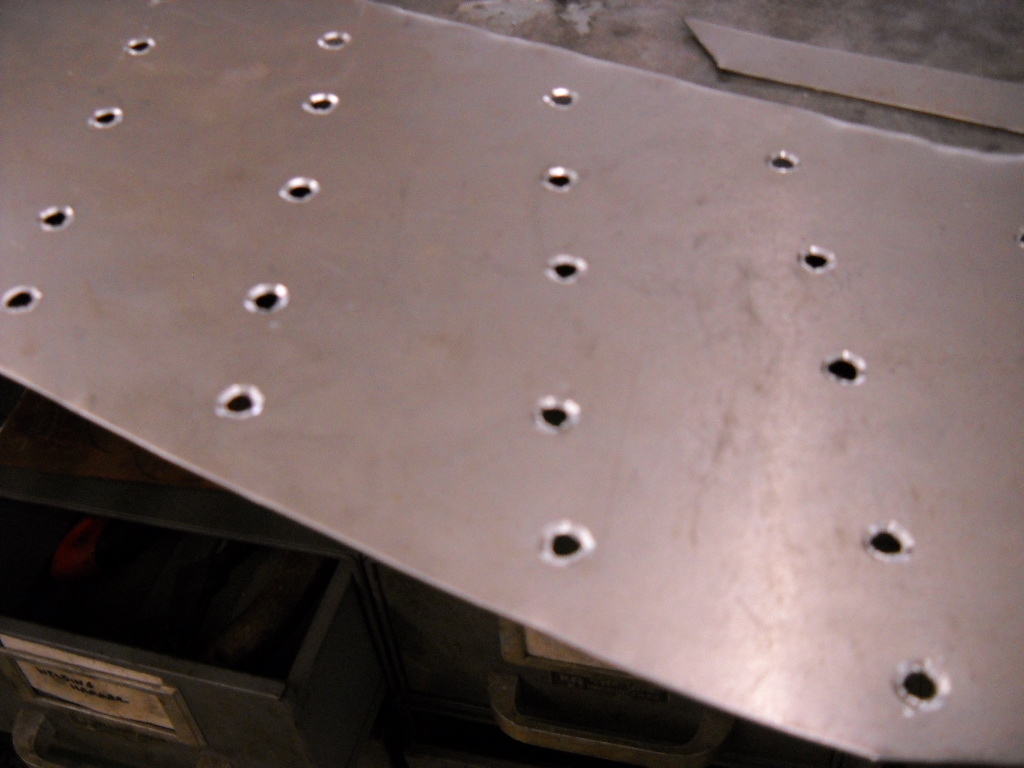 Now lay the panel on , start plug welding in the middle and work out. 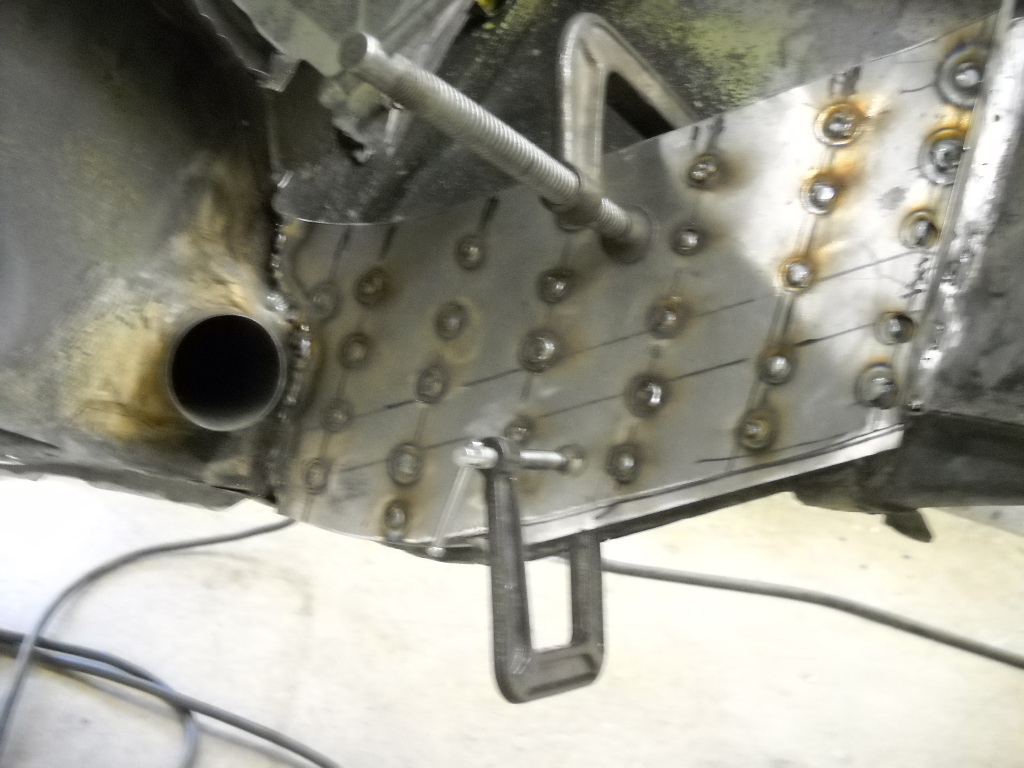 Now reinforce the top of the rear suspension above the console. 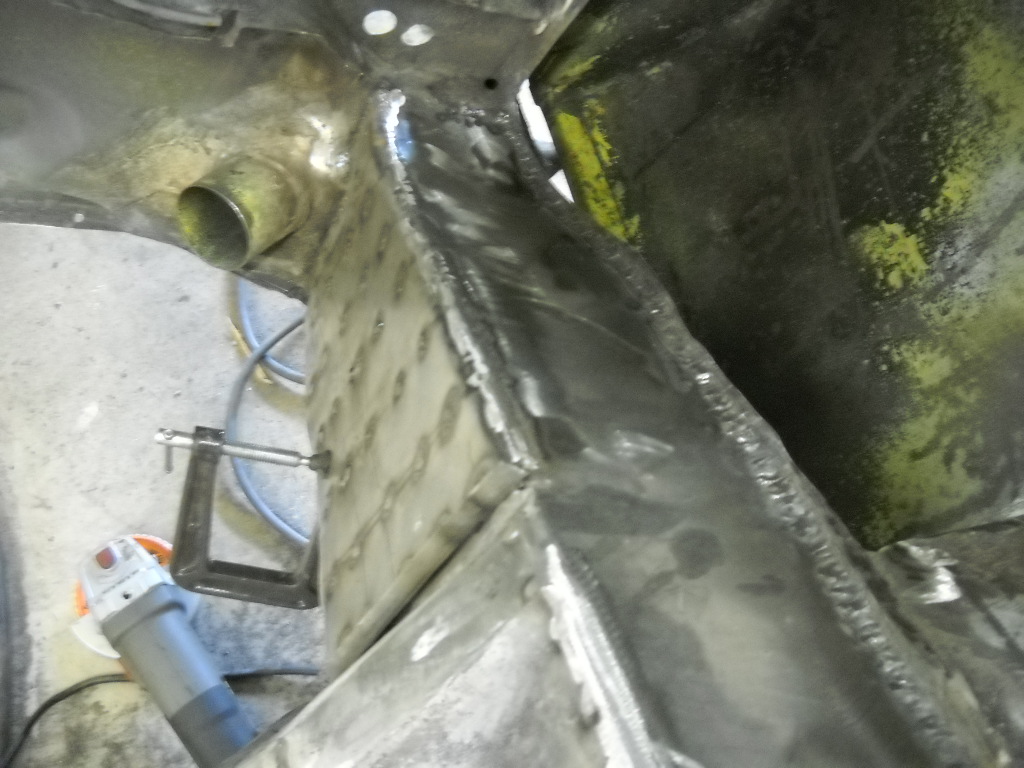 The previous owner had cut out the rear trunk floor along with the rear suspension console cross member. The arched sheetmetal box section at the rear of the engine compartment opening, and replaced it with 1.5" x .120 wall tubes that were paerially welded in place. This triangle had been 'bugging' me since I bought the car. I had guessed the triangle was heavier that the origional structure and since tthe triangle was only partially wellded ( they welded where it was easy to access- total lack of planning on the part of the welder) 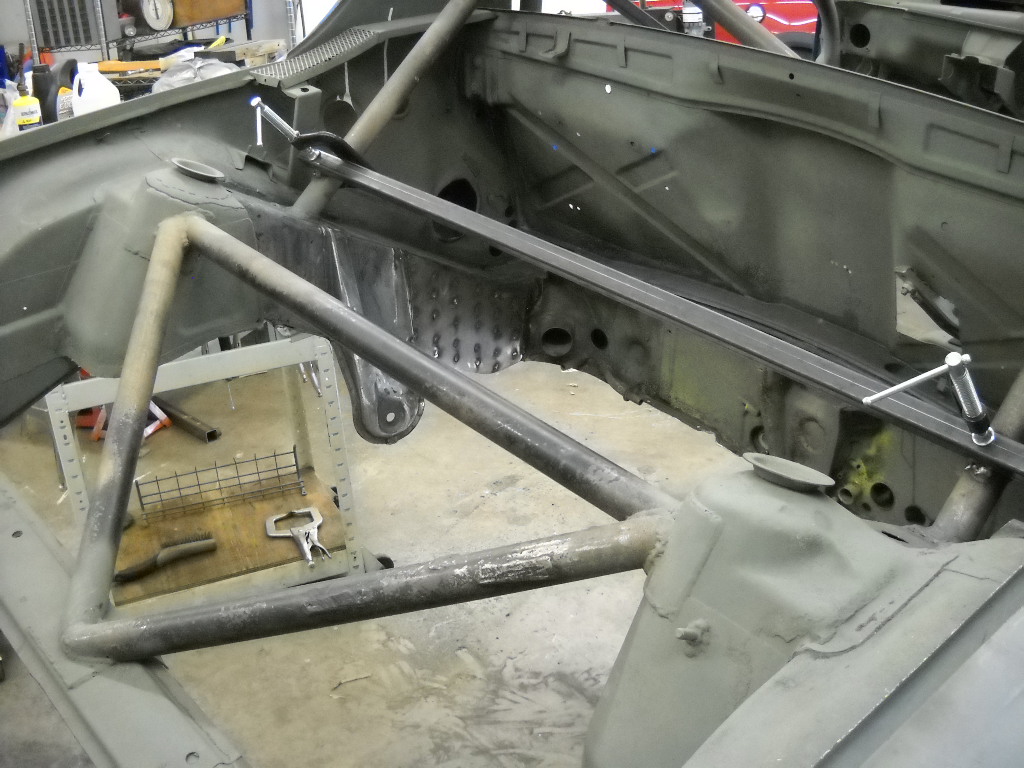 You can see the square tube I welded in to the rear diagonals of the roll cage. Just in case things want to tweak. 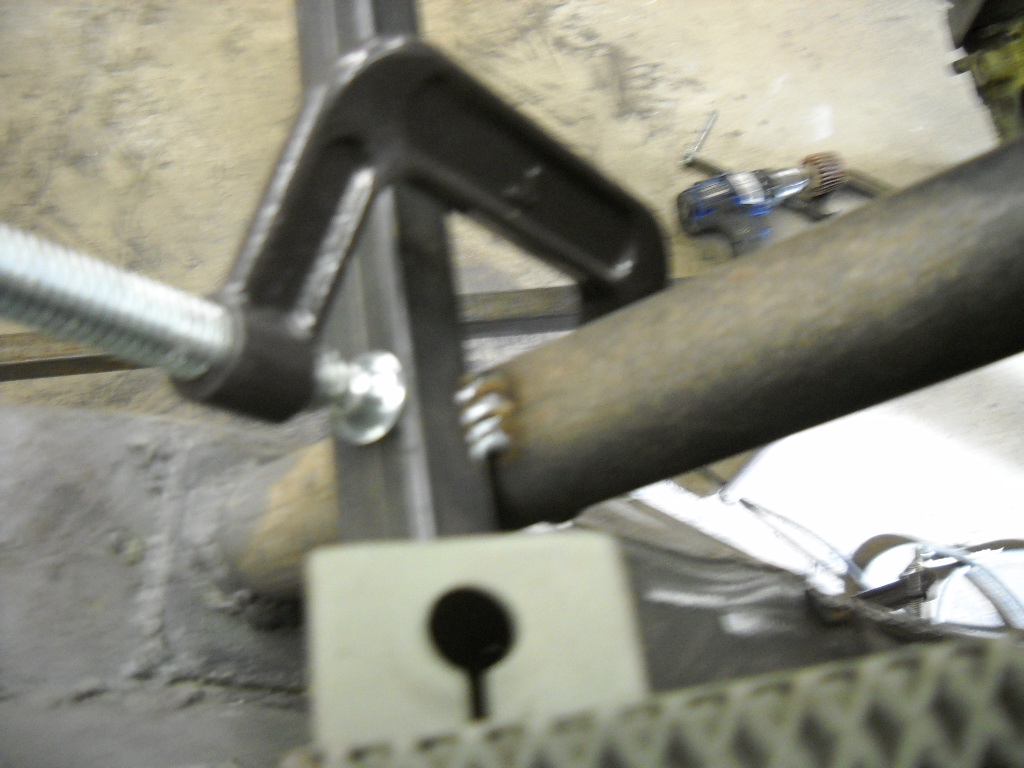 So finally get to see how much the weight difference is.... 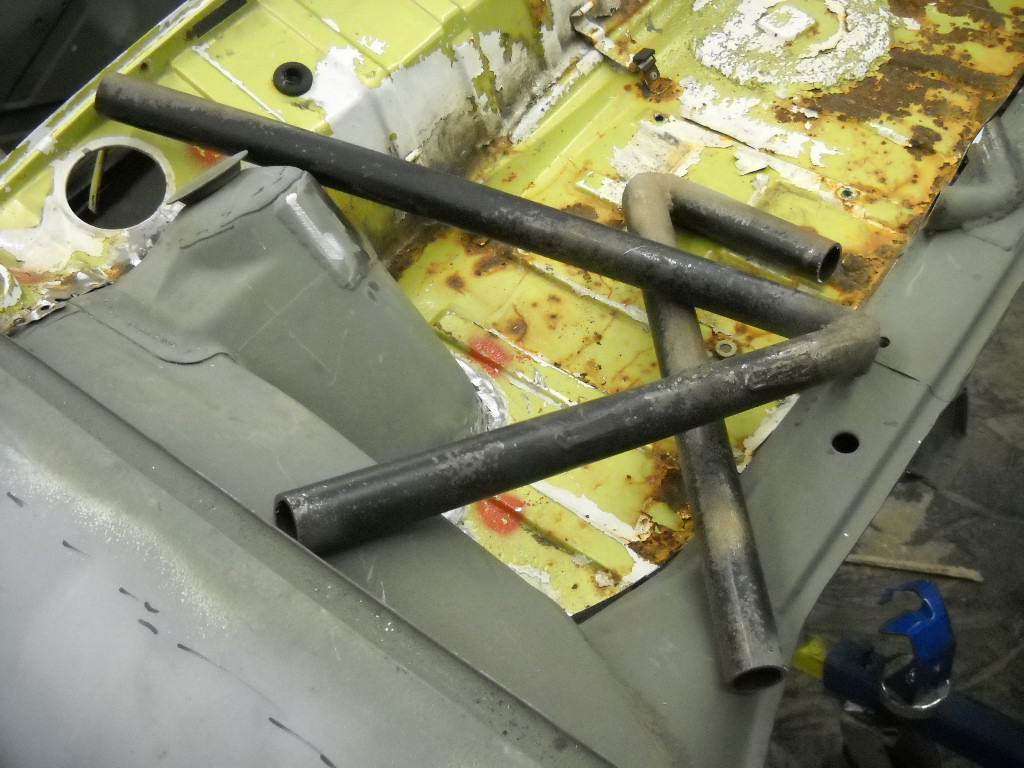 Stock floor is the lighter in weight. and no doubt stronger, look at the lack of weld on the diagonals; 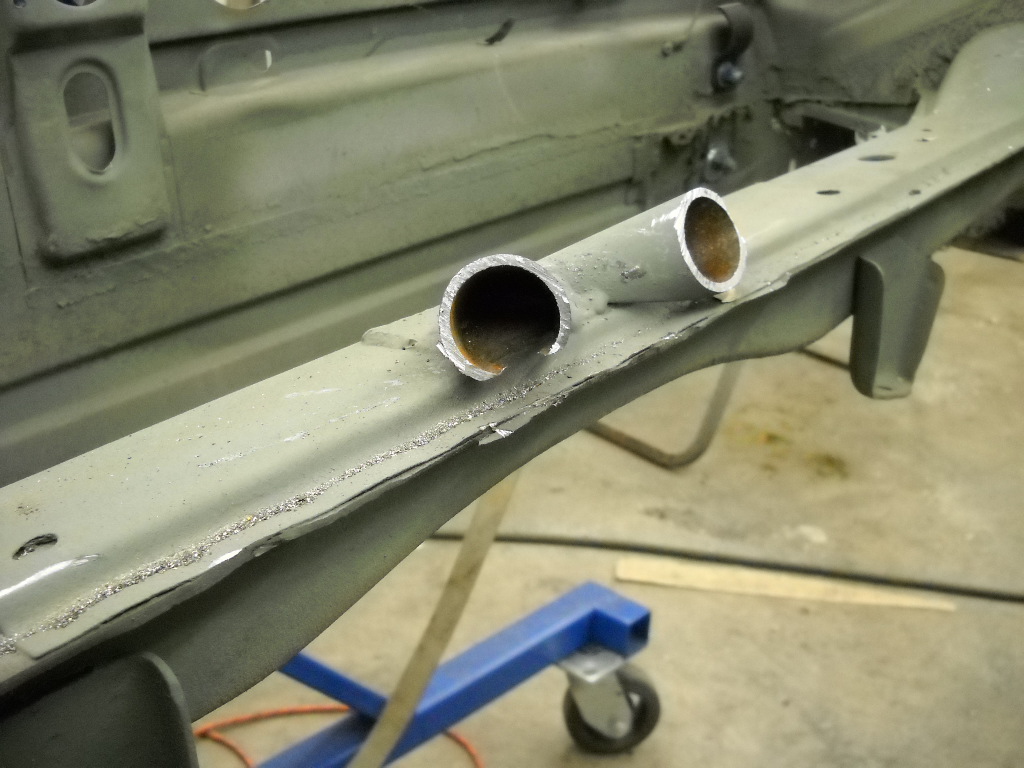 Next reattach the floor and the cross brace. I'll be making my own rear floor section. |
| Bates |
 Feb 1 2018, 12:49 PM Feb 1 2018, 12:49 PM
Post
#34
|
|
Bates   Group: Members Posts: 68 Joined: 27-December 13 From: Madison, Virginia Member No.: 16,800 Region Association: MidAtlantic Region |
I strained my back, so grinding/welding is uncomfortable, time to do some busy work. Clean small parts and start plating them.
I got some of the Zinc Chromate pretty parts nicely plated. I'm doing some other parts with just shiny zinc; suspension shims, etc. 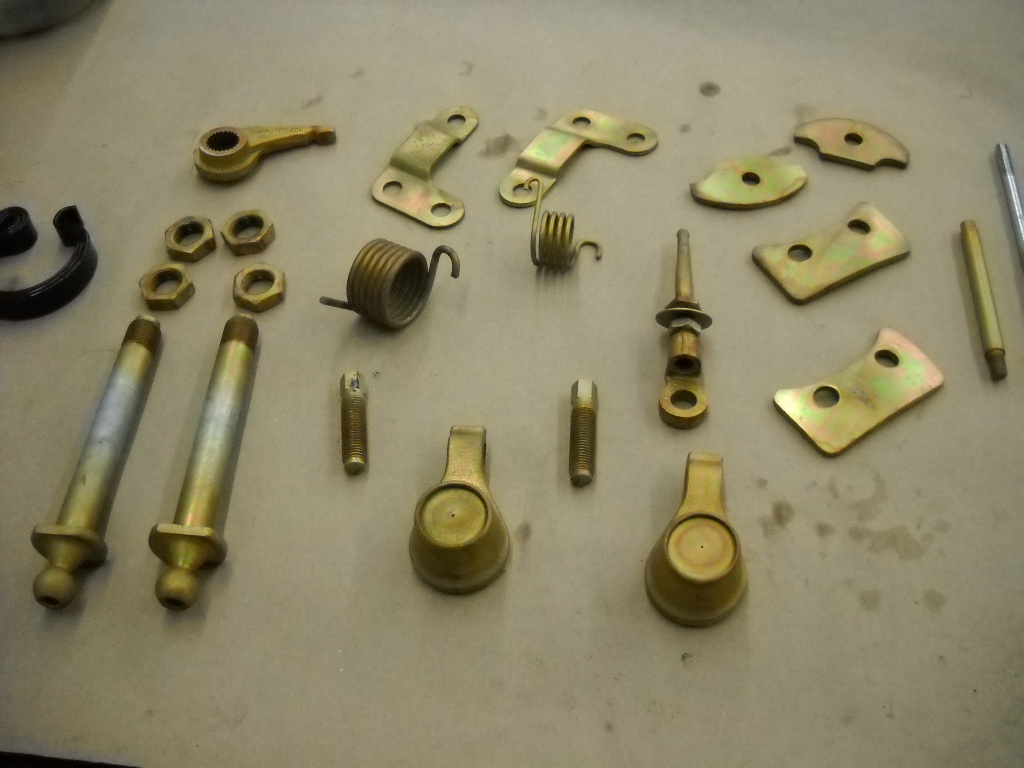 Cleaning and prep take the most time. I plate a few parts at a time, set a timer to remind me to take the plated parts out of the 'bath' and put in a few more while I'm working on something else. Pretty amazing what you can do with vinegar/Epsom salts, a piece of zinc and a D cell battery. After you get the zinc on, dip the part in the yellow zinc chromate bath, and hang to dry. |
  |
1 User(s) are reading this topic (1 Guests and 0 Anonymous Users)
0 Members:

|
Lo-Fi Version | Time is now: 26th December 2025 - 12:32 PM |
Invision Power Board
v9.1.4 © 2025 IPS, Inc.


