|
|
|
Porsche, and the Porsche crest are registered trademarks of Dr. Ing. h.c. F. Porsche AG.
This site is not affiliated with Porsche in any way. Its only purpose is to provide an online forum for car enthusiasts. All other trademarks are property of their respective owners. |
|
|

  |

| koozy |
 Feb 27 2018, 10:11 PM Feb 27 2018, 10:11 PM
Post
#21
|
|
Senior Member  Group: Members Posts: 646 Joined: 21-July 07 Member No.: 7,931 Region Association: None |
That thing looks wicked. I'm guessing it will turn some heads. Interesting components too. Looking forward to seeing video of your maiden voyage.
|
   |

 
|
| Mblizzard |
Mar 2 2018, 07:35 PM
Post
#22
|
|
Advanced Member Group: Members Posts: 3,033 Joined: 28-January 13 From: Knoxville Tn Member No.: 15,438 Region Association: South East States |
Wow! Have not shown the 2056 much love or even started it in 2 months. Went out tonight and it started on the first turn of the switch.
It is a good build. |
|
|
|
| Mblizzard |
Mar 4 2018, 02:35 PM
Post
#23
|
|
Advanced Member Group: Members Posts: 3,033 Joined: 28-January 13 From: Knoxville Tn Member No.: 15,438 Region Association: South East States |
Well making slow progress. Installed fittings in the breather base plates for the intake air temp sensor and,the return from the oil catch can for the head vents.
 Ran a few of the AN lines. I sucked it up and purchased the Kool Tool for putting on the fittings and it takes about 15 seconds to put a fitting on a poorly cut hose and 2 seconds for a clean cut. Well worth the $30 bucks. Not a single bandaid need!  |
|
|
|
| Mblizzard |
Mar 19 2018, 10:51 AM
Post
#24
|
|
Advanced Member Group: Members Posts: 3,033 Joined: 28-January 13 From: Knoxville Tn Member No.: 15,438 Region Association: South East States |
Started the removal process of the 2056 to go to Germany!
Not too nasty but could use a bit of cleaning! 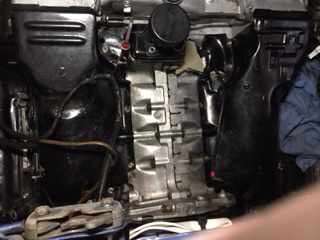 Also ripped off the disgusting foil water holding cheap back pad material. Looks like I have some glue removal to do. 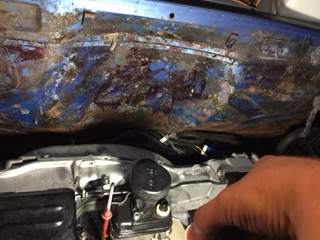 Will start the rear wheel bearing and bushing replacement after I get the engine out. |
|
|
|
| Robnxious |
Mar 19 2018, 11:56 AM
Post
#25
|
|
RobnxiousOne Group: Members Posts: 184 Joined: 26-October 06 From: Sacramento Member No.: 7,097 Region Association: Northern California |
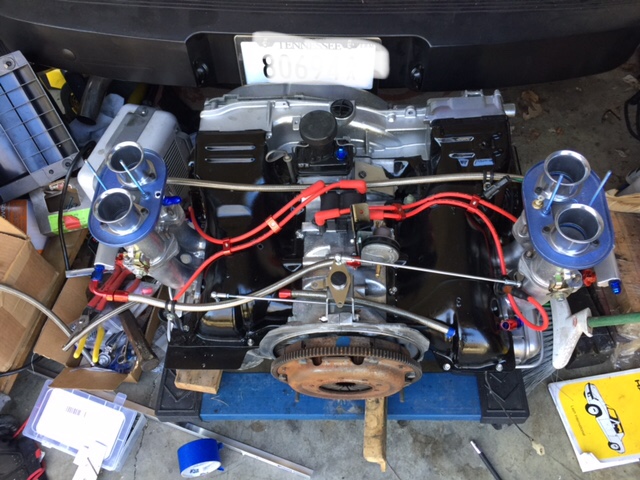
Nice build there Mike, what size carbs are you going to be running on it? Also, what are you using for headers on it? You can really pump some power out of that build, and it's SO much fun to drive
|
|
|
|
| Mblizzard |
Mar 25 2018, 05:11 PM
Post
#26
|
|
Advanced Member Group: Members Posts: 3,033 Joined: 28-January 13 From: Knoxville Tn Member No.: 15,438 Region Association: South East States |
Progress made!
Engine out and prepped for it’s return to Germany. 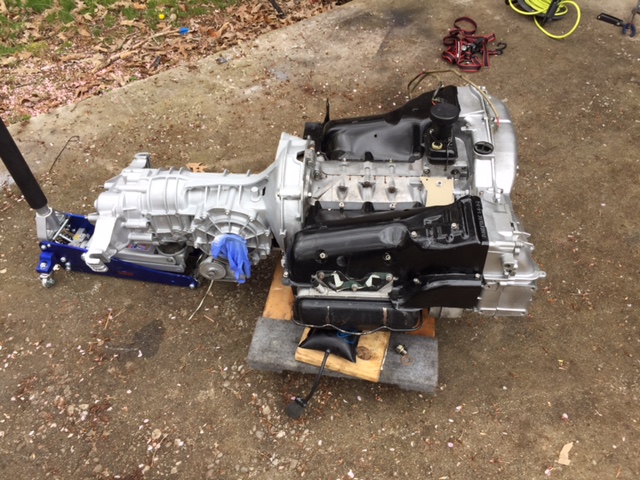 Got all of the tins on the 2.3 cleaned and painted and impeller housing cleaned and installed. 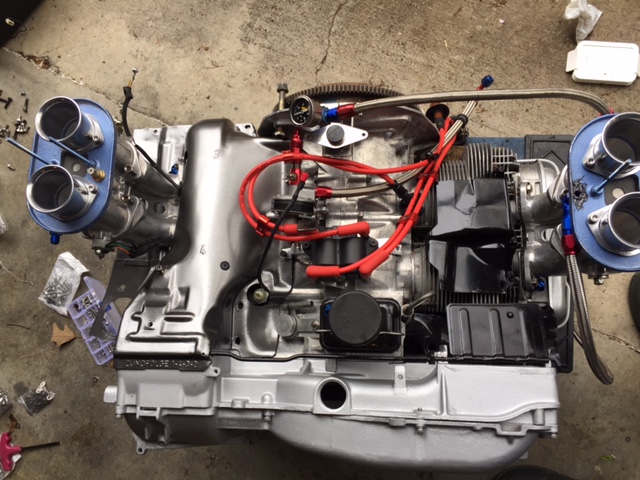 Got the tranny cleaned and ready. 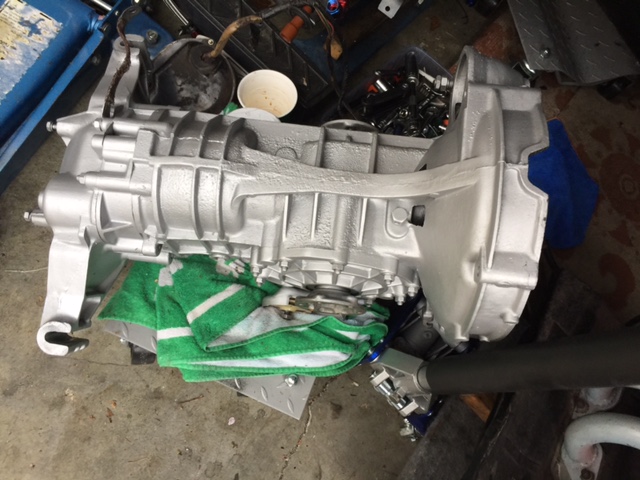 Now to start adding all my new suspension parts! |
|
|
|
| Mblizzard |
Mar 31 2018, 02:42 PM
Post
#27
|
|
Advanced Member Group: Members Posts: 3,033 Joined: 28-January 13 From: Knoxville Tn Member No.: 15,438 Region Association: South East States |
Got the left rear suspension pulled out. No need for hub puller it practically fell out wit the race stuck on.
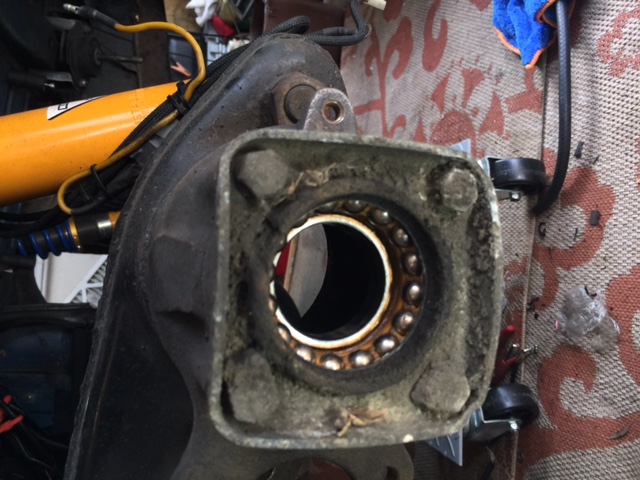 Ales a big hole! 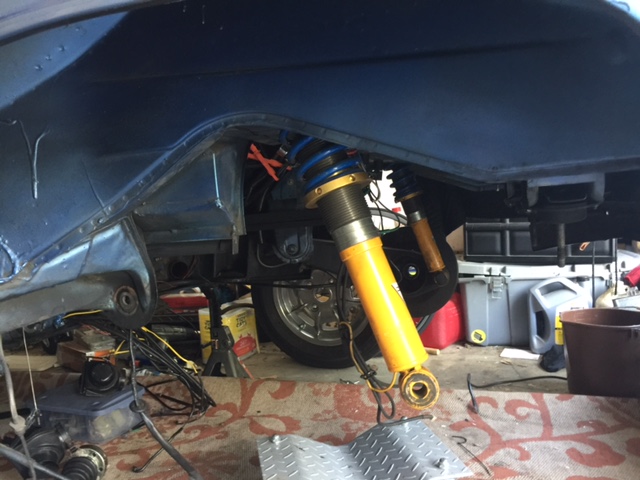 Tomorrow add new rear wheel bearing and install the 914 Rubber SS povit shaft and bushing and tear apart right side. |
|
|
|
| rhodyguy |
Mar 31 2018, 02:54 PM
Post
#28
|
|
Chimp Sanctuary NW. Check it out. Group: Members Posts: 22,070 Joined: 2-March 03 From: Orion's Bell. The BELL! Member No.: 378 Region Association: Galt's Gulch |
REALLY a clean and uncluttered look. It will look great when installed. Not so sure you want to leave the FI bodies on when you put it in. The shelve and the control arm shafts/nuts get in the way.
|
|
|
|
| Mblizzard |
Mar 31 2018, 03:24 PM
Post
#29
|
|
Advanced Member Group: Members Posts: 3,033 Joined: 28-January 13 From: Knoxville Tn Member No.: 15,438 Region Association: South East States |
QUOTE(rhodyguy @ Mar 31 2018, 12:54 PM)  REALLY a clean and uncluttered look. It will look great when installed. Not so sure you want to leave the FI bodies on when you put it in. The shelve and the control arm shafts/nuts get in the way. Yes i think we all do it a few times even with stock FI thinking we can shoe horn it in. With no damage. Easier to remove before install for sure. Wheel bearing did not look too bad if you discount the grit and huge amount of slop in the bearing. 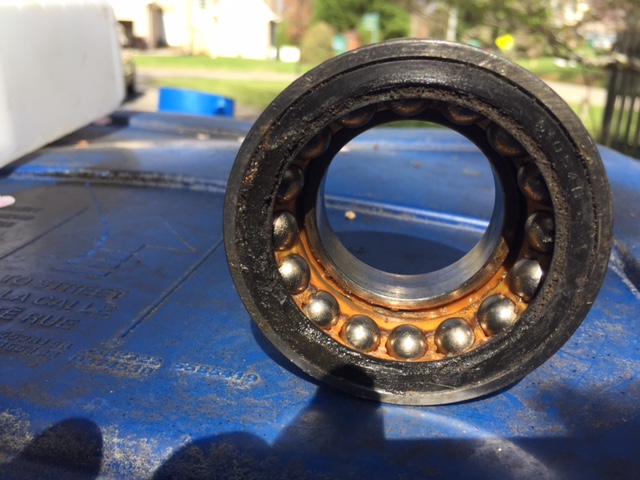 |
|
|
|
| Mblizzard |
Apr 1 2018, 02:40 PM
Post
#30
|
|
Advanced Member Group: Members Posts: 3,033 Joined: 28-January 13 From: Knoxville Tn Member No.: 15,438 Region Association: South East States |
More progress.
Left rear control arm all clean. 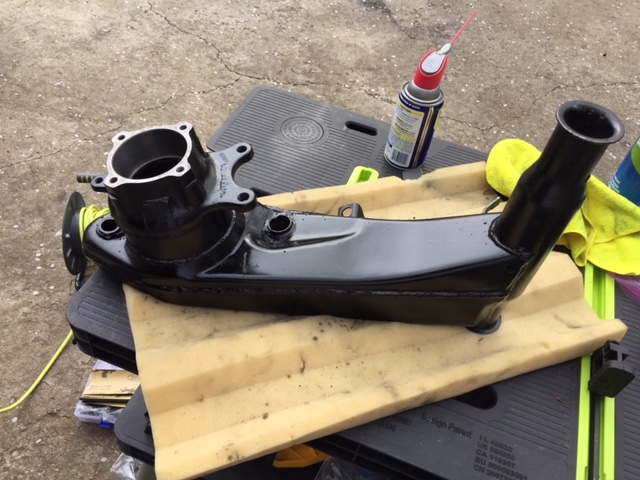 Rear wheel bearing frozen for over a year went in with no fuss. 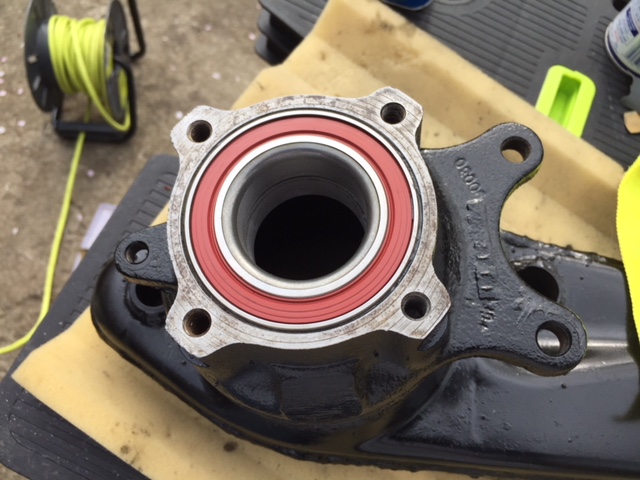 Nice new parts from Bruce to make it all look nice. 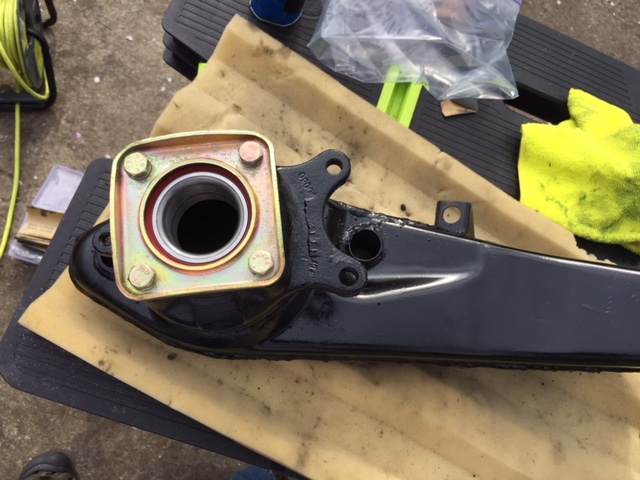 914 Rubber SS shaft and bushings went in super nice and easy. 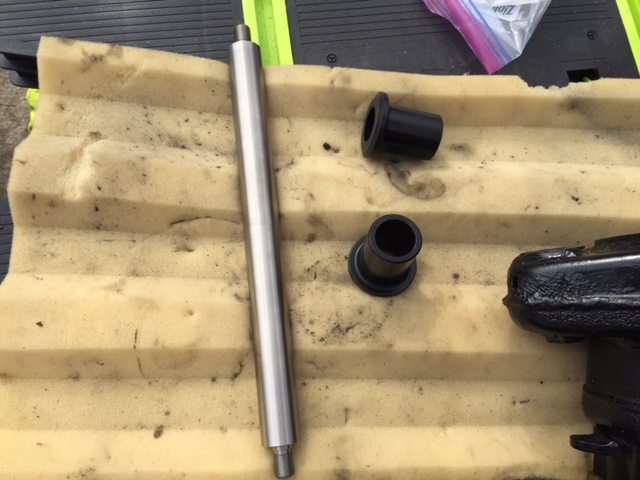 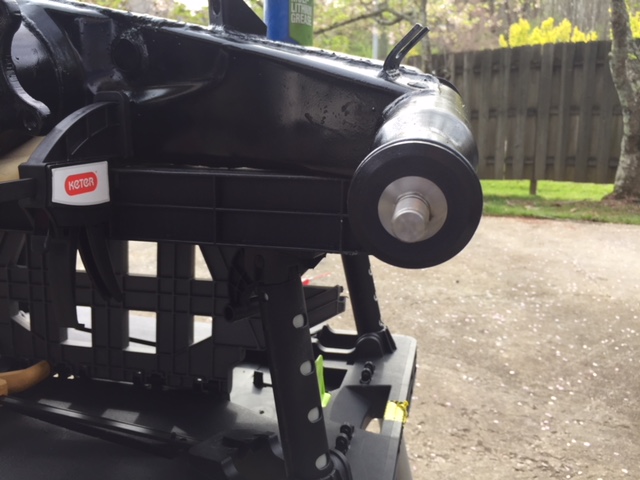 All mounted up very nice. 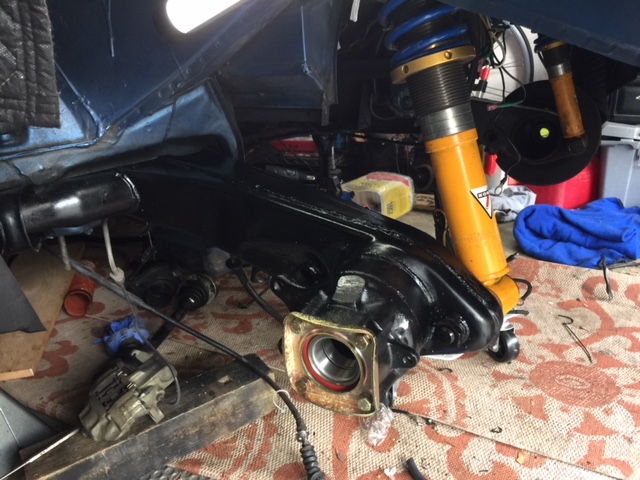 New rotors added and now to the other side. 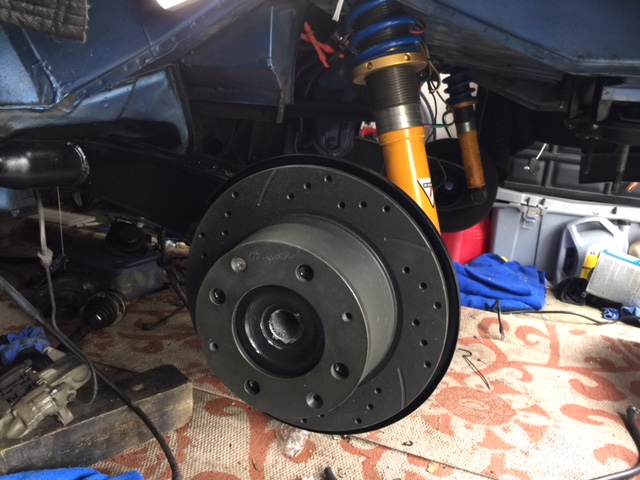 |
|
|
|
| stephenaki |
Apr 1 2018, 02:57 PM
Post
#31
|
|
Can I get this one dad?? Group: Members Posts: 1,183 Joined: 11-August 07 From: Palmetto, FL Member No.: 7,987 Region Association: None |
Sweet!
|
|
|
|
| DRPHIL914 |
Apr 1 2018, 03:43 PM
Post
#32
|
|
Dr. Phil Group: Members Posts: 5,760 Joined: 9-December 09 From: Bluffton, SC Member No.: 11,106 Region Association: South East States |
mike are you still with 4 lug, or did you upgrade to 5?
- looks lime four on those new rotors- if so, where did yoy get drilled rotors that fit with stock calipers? |
|
|
|
| Mblizzard |
Apr 1 2018, 04:32 PM
Post
#33
|
|
Advanced Member Group: Members Posts: 3,033 Joined: 28-January 13 From: Knoxville Tn Member No.: 15,438 Region Association: South East States |
QUOTE(Philip W. @ Apr 1 2018, 01:43 PM) mike are you still with 4 lug, or did you upgrade to 5? - looks lime four on those new rotors- if so, where did yoy get drilled rotors that fit with stock calipers? Still 4. Had them done in CA by Performance Brake. About $150 with pads and because they come with lifetime warranty doesn’t matter if the crack or warp. Got a set for wife’s Boxster as well. Seem to be good stuff. The can do the 5 lug as well. |
|
|
|
| koozy |
Apr 1 2018, 08:23 PM
Post
#34
|
|
Senior Member Group: Members Posts: 646 Joined: 21-July 07 Member No.: 7,931 Region Association: None |
Are the bushings Delrin, hard plastic type stuff, or rubber and did you lube the shaft? Does the shaft spin smoothly, with little resistance, in the bushings before assembly?
|
|
|
|
| Mblizzard |
Apr 2 2018, 04:54 AM
Post
#35
|
|
Advanced Member Group: Members Posts: 3,033 Joined: 28-January 13 From: Knoxville Tn Member No.: 15,438 Region Association: South East States |
QUOTE(koozy @ Apr 1 2018, 06:23 PM) Are the bushings Delrin, hard plastic type stuff, or rubber and did you lube the shaft? Does the shaft spin smoothly, with little resistance, in the bushings before assembly? I assume you are talking about the shaft bushings. Not sure of the material but not soft rubber. Slightly hard plastic. Yes lube on shaft and it turns very smoothly. Once the nuts are tightened up there is more resistance. But super easy install compared to the trauma of putting the rubber ones in. |
|
|
|
| koozy |
Apr 2 2018, 09:47 AM
Post
#36
|
|
Senior Member Group: Members Posts: 646 Joined: 21-July 07 Member No.: 7,931 Region Association: None |
Fantastic. This will make a huge difference in ride quality and driveability. Resistance adds to the spring rate and this free moving suspension will allow your shocks/springs to do their work.
It all looks clean and well done. Good job. |
|
|
|
| Mblizzard |
Apr 14 2018, 10:21 AM
Post
#37
|
|
Advanced Member Group: Members Posts: 3,033 Joined: 28-January 13 From: Knoxville Tn Member No.: 15,438 Region Association: South East States |
Rear sway bar test fitted.
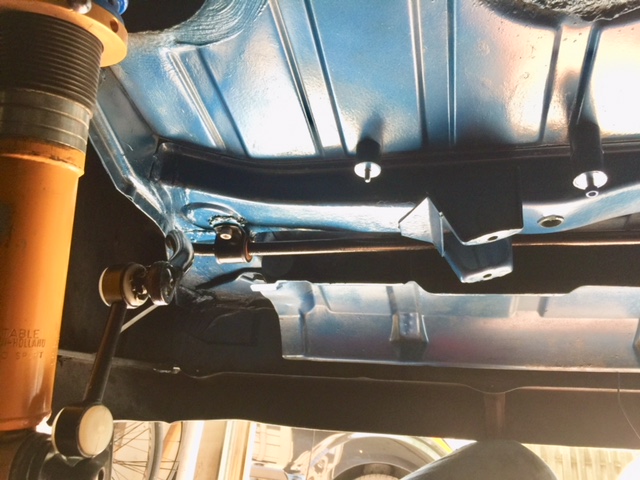 914 Rubber engine bay pad test fitted.  Just need to install new trans mounts an a few hundred other thing then the engine goes in! |
|
|
|
| Mblizzard |
Apr 18 2018, 07:09 PM
Post
#38
|
|
Advanced Member Group: Members Posts: 3,033 Joined: 28-January 13 From: Knoxville Tn Member No.: 15,438 Region Association: South East States |
Starting the rewire. Minor changes but upping the spark a bit.
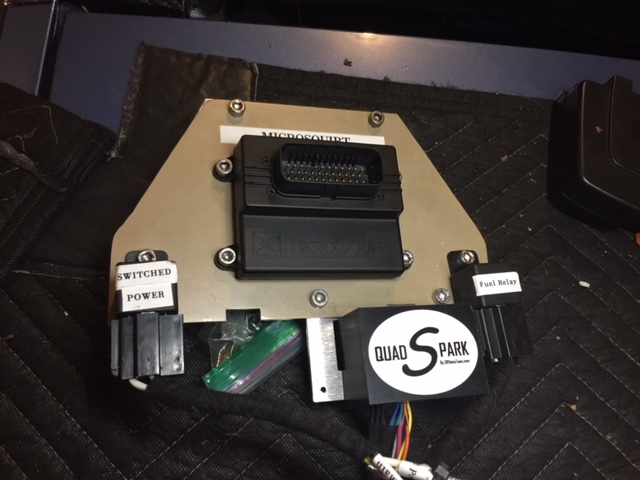 So much to do (IMG:style_emoticons/default/smash.gif) |
|
|
|
| koozy |
Apr 19 2018, 08:26 AM
Post
#39
|
|
Senior Member Group: Members Posts: 646 Joined: 21-July 07 Member No.: 7,931 Region Association: None |
|
|
|
|
| Mblizzard |
Apr 20 2018, 05:25 PM
Post
#40
|
|
Advanced Member Group: Members Posts: 3,033 Joined: 28-January 13 From: Knoxville Tn Member No.: 15,438 Region Association: South East States |
Making progress.
May have overdone the axels. These things are freaking massive. 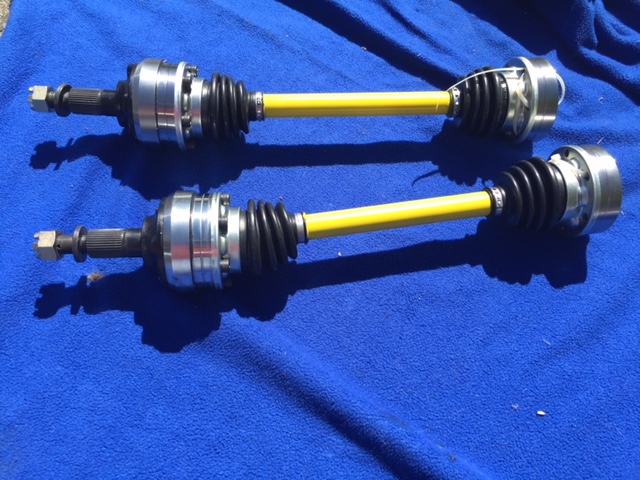 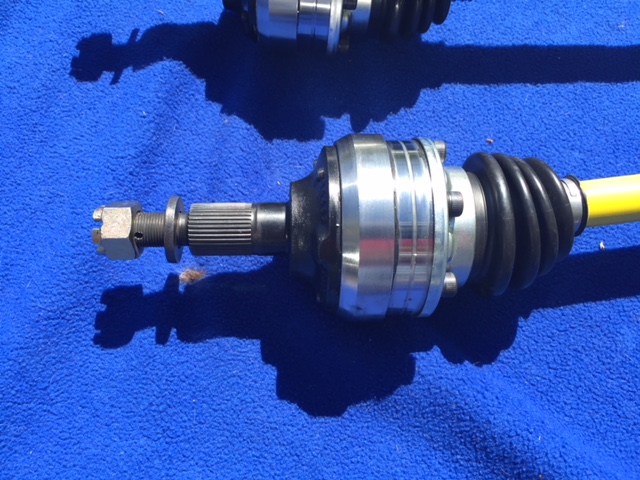 Got the engine in today! (IMG:style_emoticons/default/piratenanner.gif) 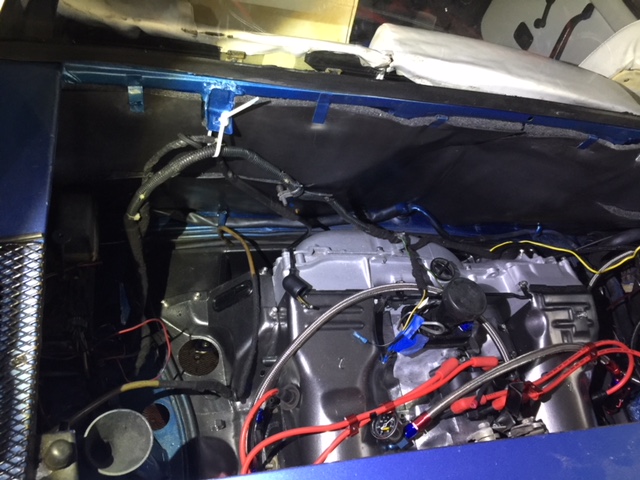 View from the bottom is not too bad.  More work to come! |
|
|
|
|
1 User(s) are reading this topic (1 Guests and 0 Anonymous Users)
0 Members:

|
Lo-Fi Version | Time is now: 1st May 2024 - 07:33 PM |
Invision Power Board
v9.1.4 © 2024 IPS, Inc.