|
|
|
Porsche, and the Porsche crest are registered trademarks of Dr. Ing. h.c. F. Porsche AG.
This site is not affiliated with Porsche in any way. Its only purpose is to provide an online forum for car enthusiasts. All other trademarks are property of their respective owners. |
|
|

  |

| Tdskip |
 Feb 7 2018, 02:36 PM Feb 7 2018, 02:36 PM
Post
#1
|
|
Advanced Member  Group: Members Posts: 3,686 Joined: 1-December 17 From: soCal Member No.: 21,666 Region Association: None |
I have a fuel tank bottom fitting removal question if I may-I have removed the nuts in the picture below but the actual winds don't want to move. Am I correct in understanding that it's likely just a few over and just holding them in place and I can gently tap them loose, or is there a better way to remove these?
Anyone need a fuel tank in SoCal? No extra charge for the varnish gas that's inside it. This is from the 1971 donor car. Thanks! Attached thumbnail(s) 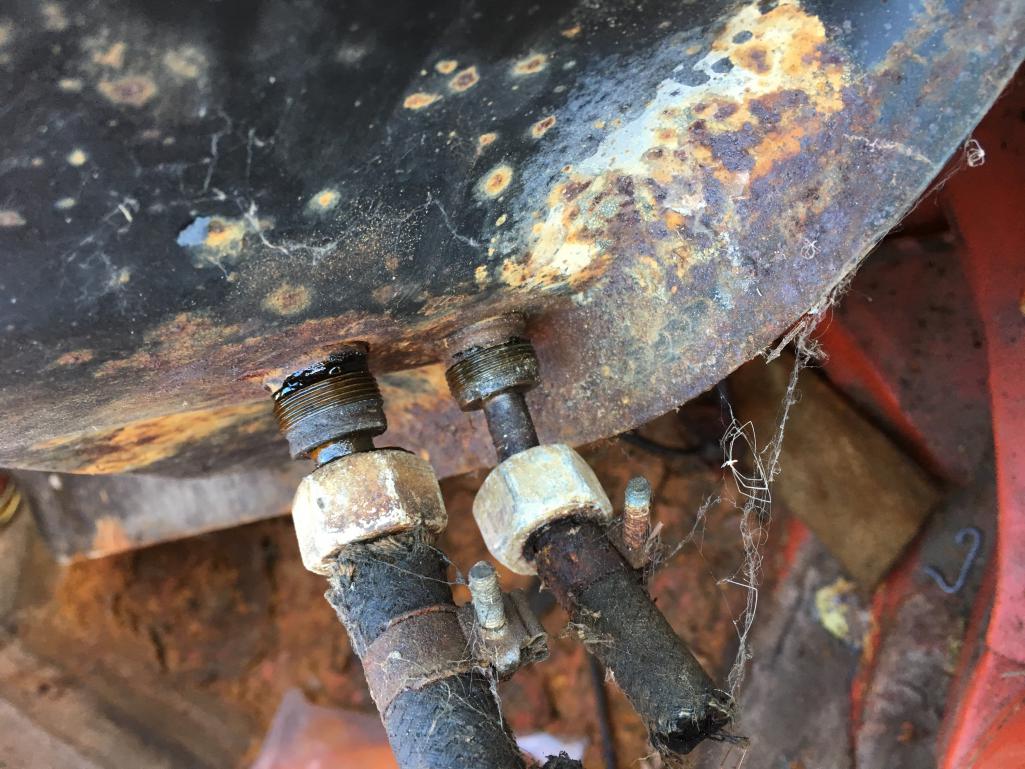
|
   |

 
|
| iankarr |
Feb 7 2018, 02:56 PM
Post
#2
|
|
The wrencher formerly known as Cuddy_K Group: Members Posts: 2,473 Joined: 22-May 15 From: Heber City, UT Member No.: 18,749 Region Association: Intermountain Region |
Tapping is probably all you need to free them. There should be washers between the pipe rim and the thread. Maybe shoot it with some penetrating oil first?
|
|
|
|
| iankarr |
Feb 7 2018, 02:57 PM
Post
#3
|
|
The wrencher formerly known as Cuddy_K Group: Members Posts: 2,473 Joined: 22-May 15 From: Heber City, UT Member No.: 18,749 Region Association: Intermountain Region |
double post
|
|
|
|
| Tdskip |
Feb 7 2018, 03:00 PM
Post
#4
|
|
Advanced Member Group: Members Posts: 3,686 Joined: 1-December 17 From: soCal Member No.: 21,666 Region Association: None |
Thanks Ian
|
|
|
|
| johnhora |
Feb 7 2018, 04:50 PM
Post
#5
|
|
Senior Member Group: Members Posts: 866 Joined: 7-January 03 From: Derby City KY Member No.: 107 Region Association: None |
Ian...
Hopefully this picture will give you a better idea of what your dealing with... the two top parts are the suction line side going to the fuel pump the two bottom parts are the return line side the second from the top still has the copper strainer "sock" on it soak the fittings well and then take a knife/box cutter and go around and around the area where they meet the tank. As you can see the third from the top still has the paper washer on it....this is the area where you need to place the knife/box cutter. Take your time and you will get them off and not brake anything... Good Luck! 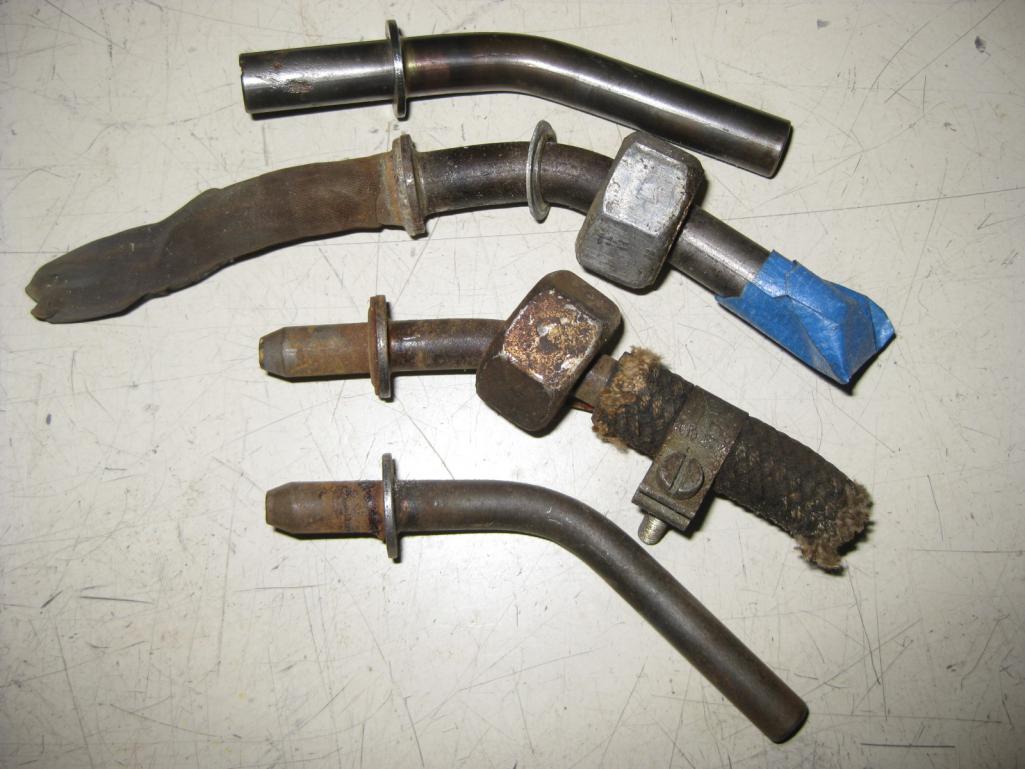 |
|
|
|
| Tdskip |
Feb 7 2018, 05:06 PM
Post
#6
|
|
Advanced Member Group: Members Posts: 3,686 Joined: 1-December 17 From: soCal Member No.: 21,666 Region Association: None |
Very helpful, thank you for the additional help Ian.
|
|
|
|
| kahluver |
Feb 8 2018, 11:00 PM
Post
#7
|
|
Newbie Group: Members Posts: 49 Joined: 3-October 14 From: Huntington Beach, ca Member No.: 17,973 Region Association: Southern California |
Tom - I literally had the same problem with the tank I just sold you. I ended up drenching wd40 inside the tank at the fittings as they were rusted to the tank. AFter a few days, they came right off.
|
|
|
|
|
1 User(s) are reading this topic (1 Guests and 0 Anonymous Users)
0 Members:

|
Lo-Fi Version | Time is now: 19th May 2024 - 05:40 AM |
Invision Power Board
v9.1.4 © 2024 IPS, Inc.