|
|
|
Porsche, and the Porsche crest are registered trademarks of Dr. Ing. h.c. F. Porsche AG.
This site is not affiliated with Porsche in any way. Its only purpose is to provide an online forum for car enthusiasts. All other trademarks are property of their respective owners. |
|
|

  |

| DRPHIL914 |
 Feb 19 2018, 11:37 AM Feb 19 2018, 11:37 AM
Post
#1
|
|
Dr. Phil  Group: Members Posts: 5,766 Joined: 9-December 09 From: Bluffton, SC Member No.: 11,106 Region Association: South East States |
do i have to source a puller of some kind?
if so is it a specific kind? thanks Attached thumbnail(s) 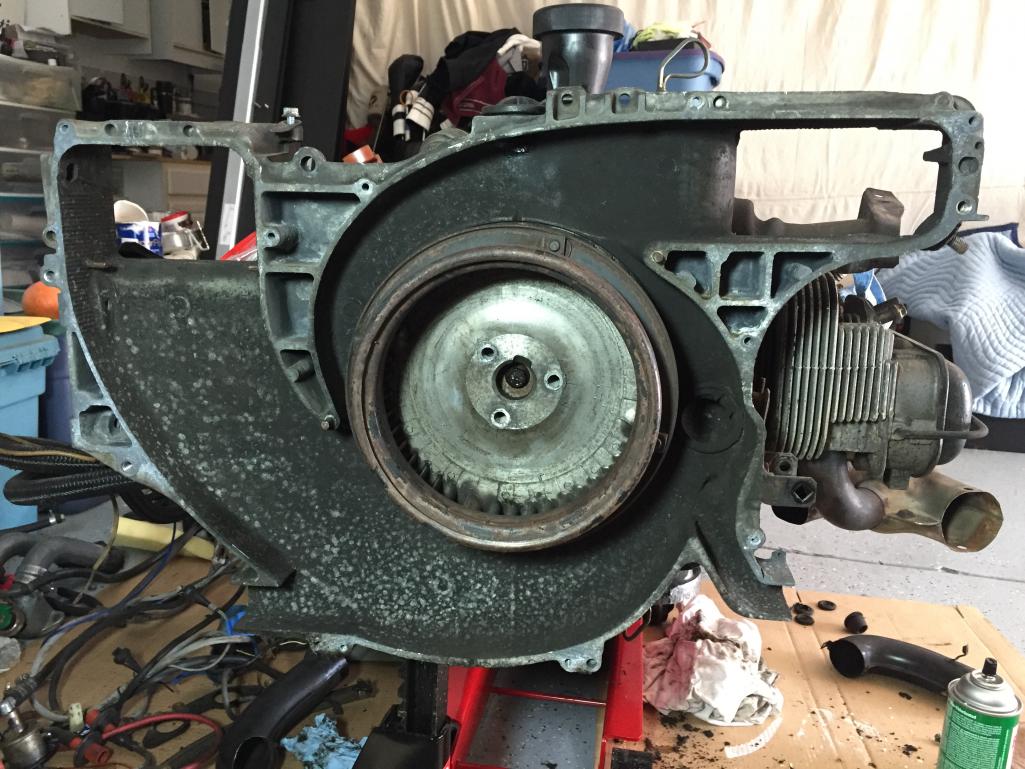
|
   |

 
|
| TheCabinetmaker |
Feb 19 2018, 12:20 PM
Post
#2
|
|
I drive my car everyday Group: Members Posts: 8,300 Joined: 8-May 03 From: Tulsa, Ok. Member No.: 666 |
Did you try smacking it (in the middle) with a hammer?
|
|
|
|
| DRPHIL914 |
Feb 19 2018, 12:42 PM
Post
#3
|
|
Dr. Phil Group: Members Posts: 5,766 Joined: 9-December 09 From: Bluffton, SC Member No.: 11,106 Region Association: South East States |
a ha! got it! no I was not brave enough to whack it with a hammer but yes I just tapped around the edges with a rubber hammer moving it a little bit at a time and finally got it off thanks for the suggestion now the question is whether or not I should attempt going after The crank seal on the front which I think might be leaking let me know you what you think and if you have any suggestions
|
|
|
|
| Larmo63 |
Feb 19 2018, 12:51 PM
Post
#4
|
|
Advanced Member Group: Members Posts: 4,264 Joined: 3-March 14 From: San Clemente, Ca Member No.: 17,068 Region Association: Southern California |
They can be fussy, but with a little persuasion, they usually will walk off slowly.
Glad you got it off. (IMG:style_emoticons/default/smash.gif) |
|
|
|
| DRPHIL914 |
Feb 19 2018, 01:09 PM
Post
#5
|
|
Dr. Phil Group: Members Posts: 5,766 Joined: 9-December 09 From: Bluffton, SC Member No.: 11,106 Region Association: South East States |
yes exactly- now, what abouy this?
same thing here or a puller to get it off ? Attached thumbnail(s) 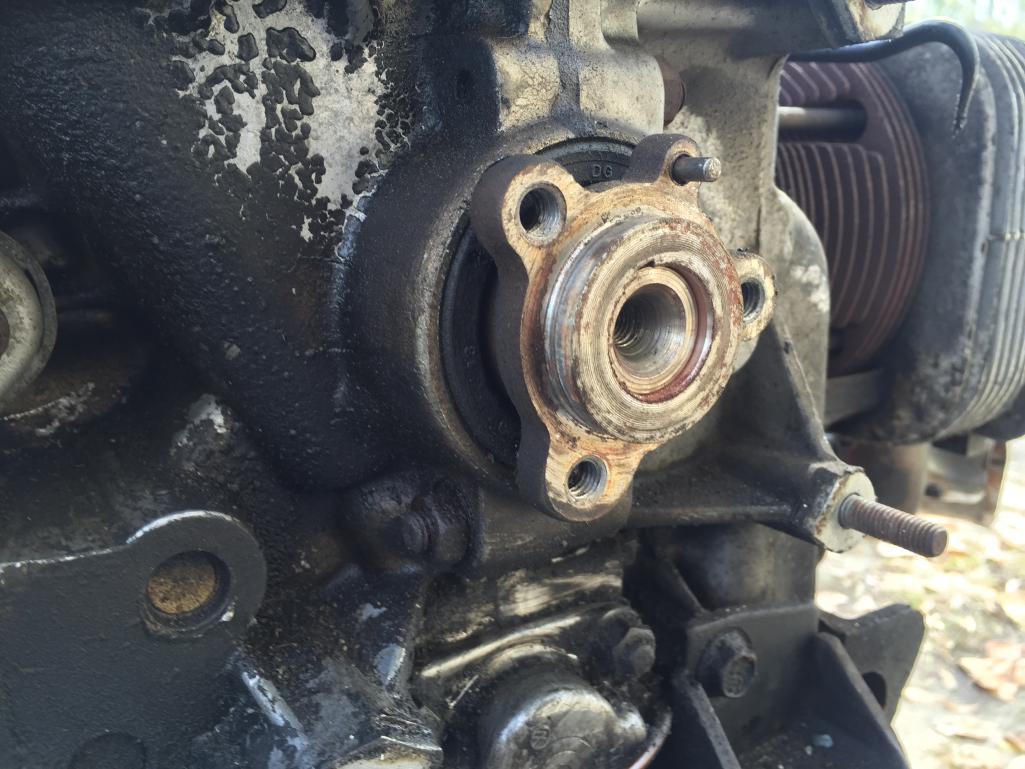
|
|
|
|
| DRPHIL914 |
Feb 19 2018, 01:17 PM
Post
#6
|
|
Dr. Phil Group: Members Posts: 5,766 Joined: 9-December 09 From: Bluffton, SC Member No.: 11,106 Region Association: South East States |
rats! i thought i had a front seal but i have the wrong part! , too big
Attached thumbnail(s) 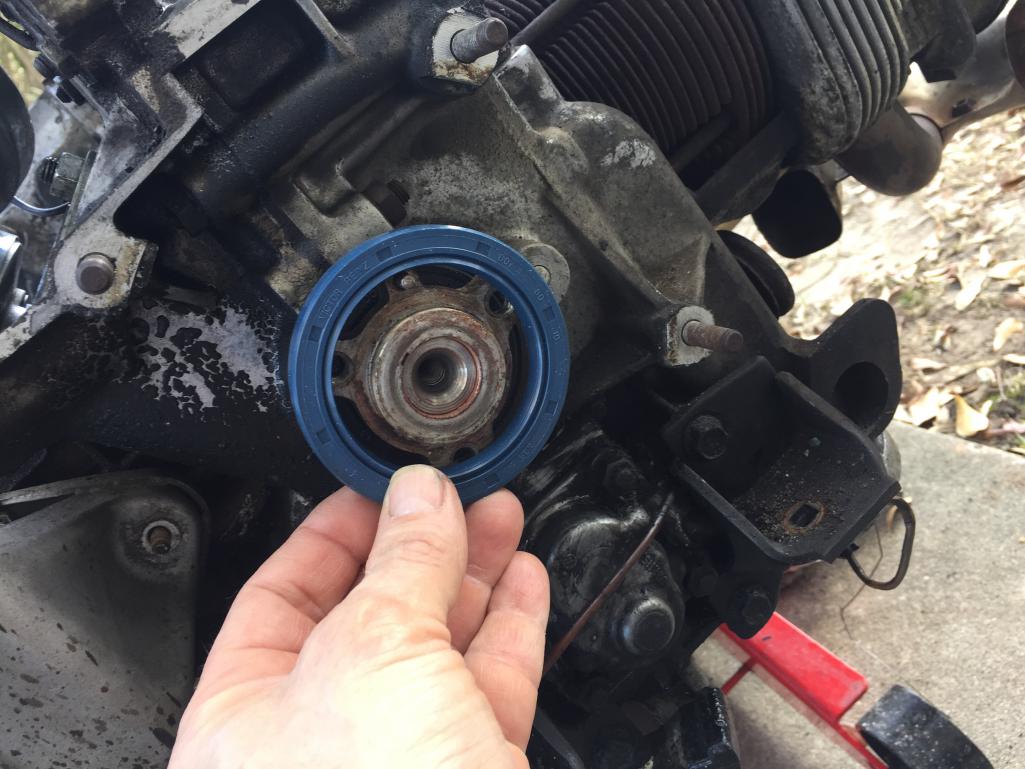
|
|
|
|
| DRPHIL914 |
Feb 19 2018, 01:45 PM
Post
#7
|
|
Dr. Phil Group: Members Posts: 5,766 Joined: 9-December 09 From: Bluffton, SC Member No.: 11,106 Region Association: South East States |
is the seal behind this the front crankshaft seal?
Attached thumbnail(s) 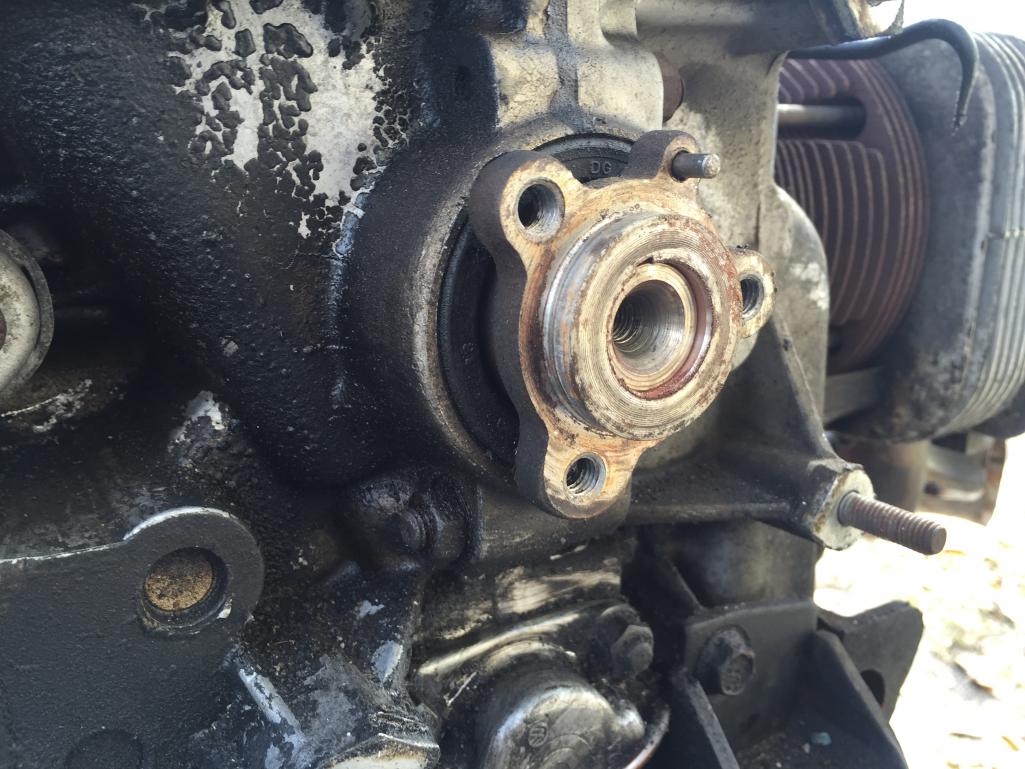
|
|
|
|
| iankarr |
Feb 19 2018, 02:03 PM
Post
#8
|
|
The wrencher formerly known as Cuddy_K Group: Members Posts: 2,474 Joined: 22-May 15 From: Heber City, UT Member No.: 18,749 Region Association: Intermountain Region |
That black piece behind the hub is the front of the crankshaft seal. The trick to removing the hub is to use 3 pieces of bar stock steel or very thick washers under the fan bolt holes. Make sure the stock and/or washers are wide enough to span the bolt hole and overlap the front of the case, as you'll be leveraging the hub against the metal and you don't want to damage the case.
Screw the bolts back in to the hub and tighten in a circular pattern so the pressure is even. Eventually the hub will pop off...and by pop, I mean it. It will scare the $hit out of you when it does and you'll think you've broken something. Oh...and put a white towel around the hub and on the floor to catch the woodruff key which may go flying. Very tough to see on anything but white. Having a "spotter" keep an eye on the woodruff key is helpful too. Be safe and good luck! |
|
|
|
| Dave_Darling |
Feb 19 2018, 03:19 PM
Post
#9
|
|
914 Idiot Group: Members Posts: 14,990 Joined: 9-January 03 From: Silicon Valley / Kailua-Kona Member No.: 121 Region Association: Northern California |
For the fan itself, just grab the edges and rock it back and forth. It'll come off at some point.
For the fan hub, put something behind it (large washers, flat bar, whatever) to distribute the load, then put the fan retaining bolts in there. Run them down until they're holding the load-distributing part onto the front of the case, then give each one a half-turn or so in order. --DD |
|
|
|
| IronHillRestorations |
Feb 19 2018, 05:44 PM
Post
#10
|
|
I. I. R. C. Group: Members Posts: 6,719 Joined: 18-March 03 From: West TN Member No.: 439 Region Association: None |
Soak it with what I call "secret sauce" overnight and then do what cuddyk says.
Secret sauce is a 1 to 1 mixture of acetone and automatic transmission fluid, but only mix what you need, as the acetone evaporates and it doesn't keep. You'll find this is the best penetrating solvent you can use for stubborn fasteners, but it will ruin painted surfaces and damage plastic. |
|
|
|
| iankarr |
Feb 19 2018, 06:35 PM
Post
#11
|
|
The wrencher formerly known as Cuddy_K Group: Members Posts: 2,474 Joined: 22-May 15 From: Heber City, UT Member No.: 18,749 Region Association: Intermountain Region |
dave described the process far more eloquently than me. As usual.
|
|
|
|
| DRPHIL914 |
Feb 19 2018, 07:04 PM
Post
#12
|
|
Dr. Phil Group: Members Posts: 5,766 Joined: 9-December 09 From: Bluffton, SC Member No.: 11,106 Region Association: South East States |
ok thanks all for the help- that popped off with using a puller, no issues but yes very sudden-
now how to get this seal out! its really stuck and i thinknim going to ruin it to get it out- Attached thumbnail(s) 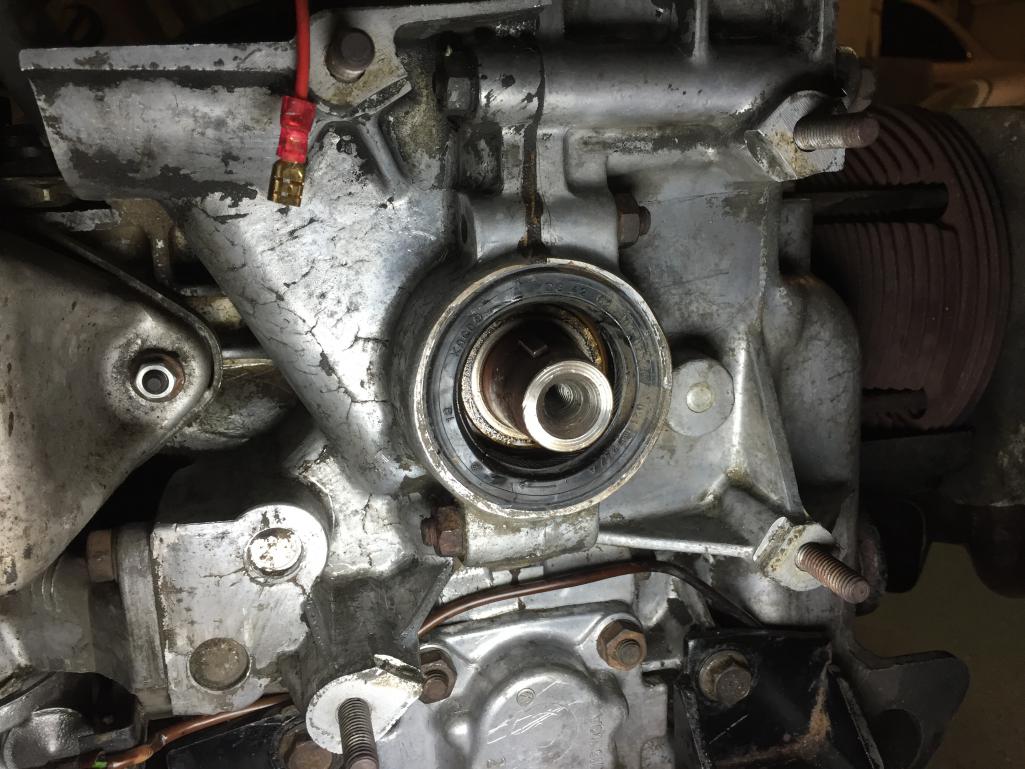
|
|
|
|
| DRPHIL914 |
Feb 19 2018, 07:06 PM
Post
#13
|
|
Dr. Phil Group: Members Posts: 5,766 Joined: 9-December 09 From: Bluffton, SC Member No.: 11,106 Region Association: South East States |
pulled off and cleaned up the motor mounts etc , some new hardware and new oil cooler seals too-
Attached thumbnail(s) 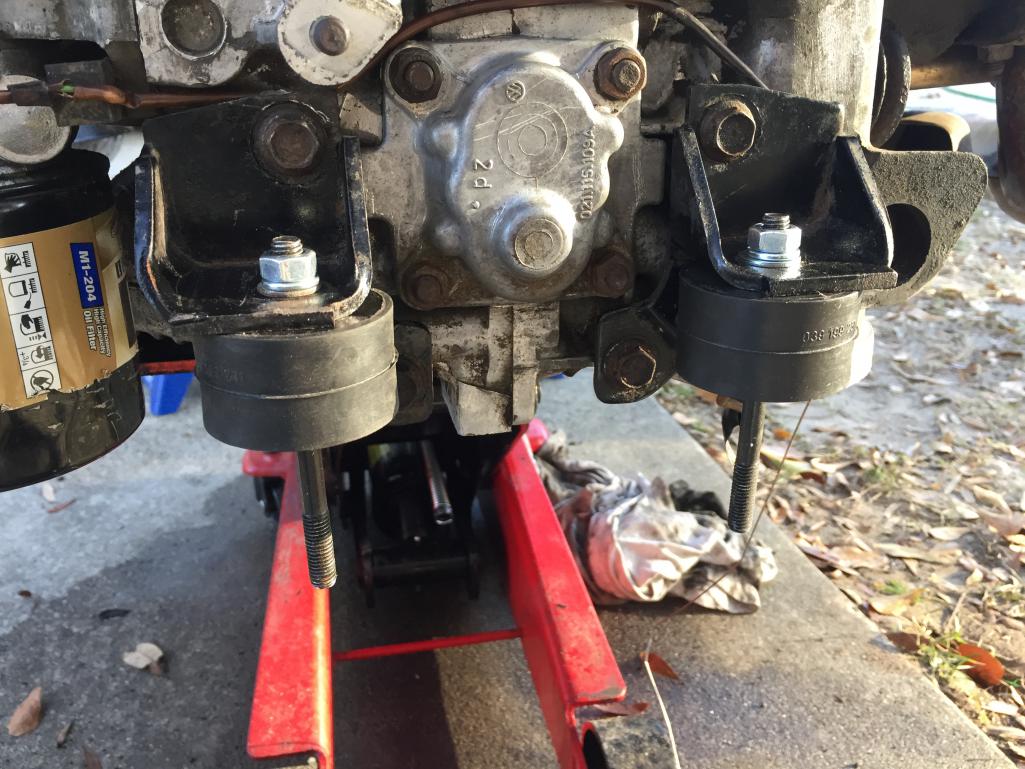
|
|
|
|
| iankarr |
Feb 19 2018, 07:19 PM
Post
#14
|
|
The wrencher formerly known as Cuddy_K Group: Members Posts: 2,474 Joined: 22-May 15 From: Heber City, UT Member No.: 18,749 Region Association: Intermountain Region |
I put a few small screws in the front and used them to pull the seal out. Be super careful with any method. You definitely don't want to scratch the inside of the bore. Also recommend you pull the woodruff key and put it in a ziplock bag in a safe place (IMG:style_emoticons/default/wink.gif)
|
|
|
|
| DRPHIL914 |
Feb 19 2018, 08:18 PM
Post
#15
|
|
Dr. Phil Group: Members Posts: 5,766 Joined: 9-December 09 From: Bluffton, SC Member No.: 11,106 Region Association: South East States |
there was so much gooey oily junk along thst whole area , most o which was under coating crap syrayed everywhere, all ouver the fan shroud and even up to the oil cooler.
i just dont get how they could get away with being so sloppy and not cover the motor and transmission and fan etc- i dealt with cleaning up all the suspension parts and brake lines too- evennin front and rear trunks i had to clean out all that as well- |
|
|
|
| ClayPerrine |
Feb 19 2018, 08:51 PM
Post
#16
|
|
Life's been good to me so far..... Group: Admin Posts: 15,474 Joined: 11-September 03 From: Hurst, TX. Member No.: 1,143 Region Association: NineFourteenerVille |
QUOTE(Philip W. @ Feb 19 2018, 07:04 PM)  ok thanks all for the help- that popped off with using a puller, no issues but yes very sudden- now how to get this seal out! its really stuck and i thinknim going to ruin it to get it out- To get the seal out, just take a big flat blade screwdriver and put it across the seal with the end under the inside of the seal. Then push the handle away from you, prying it out. Should come out fairly easy. When you put it back in, put a light smear of wheel bearing grease on the lip to keep from damaging the lip at initial start up. After that, the oil on the inside will keep the lip lubed. Tap the seal in gently in a circle, pushing it in a little at a time. Once the hammer starts to make a "tink tink tink" noise of the hammer hitting metal, the seal is far enough in. Go slow and light with the hammer and keep moving around the circle. |
|
|
|
| Jonathan Livesay |
Feb 19 2018, 09:03 PM
Post
#17
|
|
Senior Member Group: Members Posts: 741 Joined: 13-March 10 From: La Canada CA Member No.: 11,461 Region Association: None |
QUOTE(ClayPerrine @ Feb 19 2018, 06:51 PM) QUOTE(Philip W. @ Feb 19 2018, 07:04 PM) ok thanks all for the help- that popped off with using a puller, no issues but yes very sudden- now how to get this seal out! its really stuck and i thinknim going to ruin it to get it out- To get the seal out, just take a big flat blade screwdriver and put it across the seal with the end under the inside of the seal. Then push the handle away from you, prying it out. Should come out fairly easy. When you put it back in, put a light smear of wheel bearing grease on the lip to keep from damaging the lip at initial start up. After that, the oil on the inside will keep the lip lubed. Tap the seal in gently in a circle, pushing it in a little at a time. Once the hammer starts to make a "tink tink tink" noise of the hammer hitting metal, the seal is far enough in. Go slow and light with the hammer and keep moving around the circle. That seal is like $8 why take it out if you are not replacing it, in fact why remove the fan hub if you aren't replacing the seal? Long story short put in a new seal, no? |
|
|
|
| DRPHIL914 |
Feb 19 2018, 09:44 PM
Post
#18
|
|
Dr. Phil Group: Members Posts: 5,766 Joined: 9-December 09 From: Bluffton, SC Member No.: 11,106 Region Association: South East States |
new seal is in- i winded up using a needle nose vice grip the thin screw drivers flexed too much and the bigger ones too wide - it was really stuck in there-
any way i should be able to get the new shroud put on tomorrow nite and the rest of the tin will go on very quickly, today i got a lot done with degreasing the transmission, cleaning off the h.e.'s top end of the motor and cleaned off all that tar gunk off the front - a feeling if accomplishment for sure with it getting closer to getting car back from paint and body- Now i have to decide if i want to replace a couple of the push rod tube seals now or not- did thst a few years ago and i didnt do a very good job- brand new vitron seals ans several were still leaking- i suppose that will be the job for next weekend- Attached thumbnail(s) 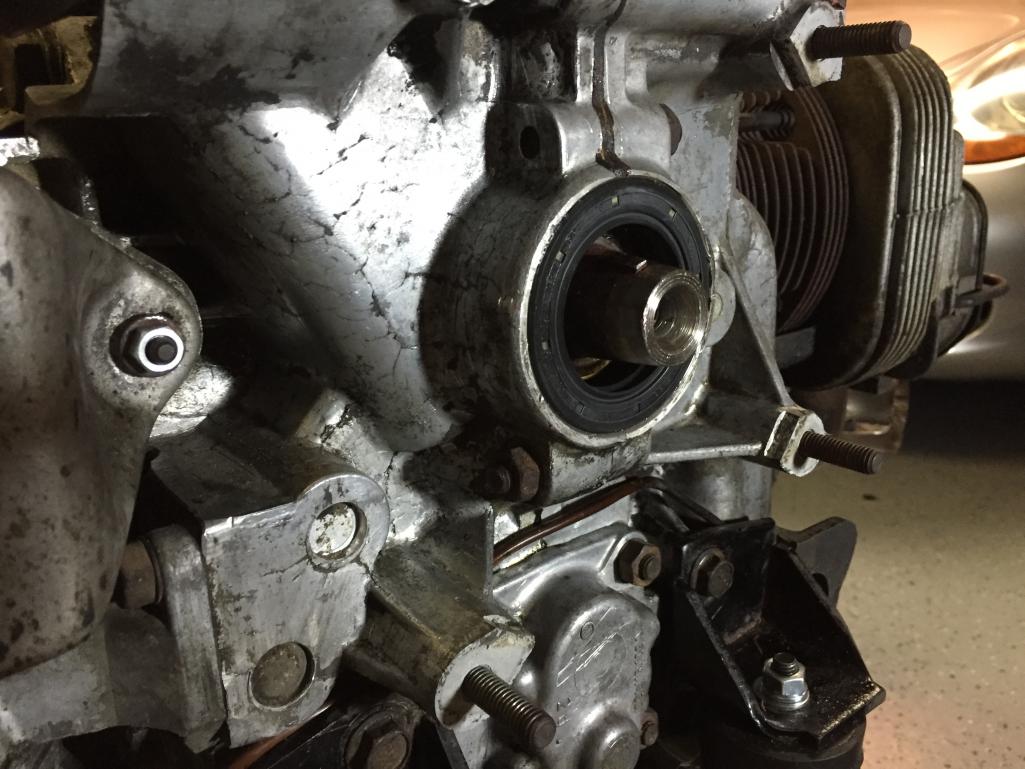
|
|
|
|
| DRPHIL914 |
Feb 19 2018, 09:46 PM
Post
#19
|
|
Dr. Phil Group: Members Posts: 5,766 Joined: 9-December 09 From: Bluffton, SC Member No.: 11,106 Region Association: South East States |
just for comparrison here is before i cleaned it up- all that black stuff is rust proofing crap from 44 years ago
Attached thumbnail(s) 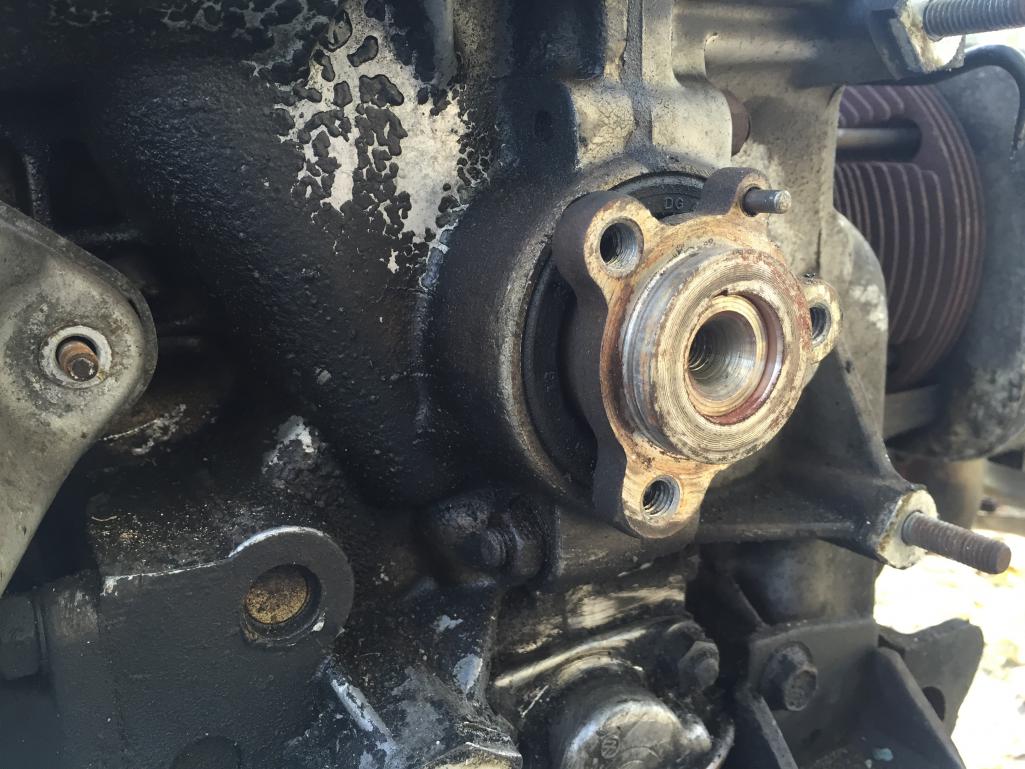
|
|
|
|
| Dave_Darling |
Feb 19 2018, 09:53 PM
Post
#20
|
|
914 Idiot Group: Members Posts: 14,990 Joined: 9-January 03 From: Silicon Valley / Kailua-Kona Member No.: 121 Region Association: Northern California |
You might want to goop some epoxy over the "freeze plugs" that cover the drilled oil passages. That's if you don't want to try removing the plugs and tapping the holes. The epoxy can add a bit more resistance to them popping out, which will just ruin your whole morning. (Don't ask how I know that.)
--DD |
|
|
|
|
1 User(s) are reading this topic (1 Guests and 0 Anonymous Users)
0 Members:

|
Lo-Fi Version | Time is now: 20th May 2024 - 11:41 PM |
Invision Power Board
v9.1.4 © 2024 IPS, Inc.