|
|
|
Porsche, and the Porsche crest are registered trademarks of Dr. Ing. h.c. F. Porsche AG.
This site is not affiliated with Porsche in any way. Its only purpose is to provide an online forum for car enthusiasts. All other trademarks are property of their respective owners. |
|
|

  |

| Mikey914 |
 Mar 15 2018, 05:58 PM Mar 15 2018, 05:58 PM
Post
#1
|
|
The rubber man  Group: Members Posts: 12,661 Joined: 27-December 04 From: Hillsboro, OR Member No.: 3,348 Region Association: None |
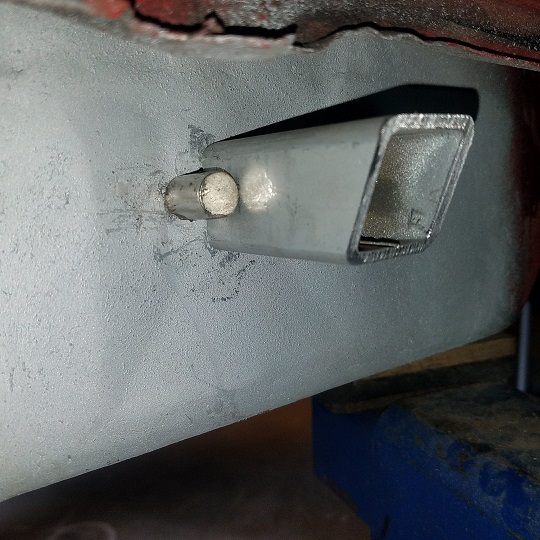
The car I bought in the desert is about as rust free as I've ever seen in the unrestored world. But the jack points were missing. Someone had bondo'ed over them and painted. I was scared as to what I would find, but dug into them. I found that heating it with a torch and pulling out with a screw driver worked well. I had hoped that as both were removed, it was not rust that caused them to be removed. This is what I found.
Attached thumbnail(s) 
|
   |

 
|
| Mikey914 |
Mar 15 2018, 06:00 PM
Post
#2
|
|
The rubber man Group: Members Posts: 12,661 Joined: 27-December 04 From: Hillsboro, OR Member No.: 3,348 Region Association: None |
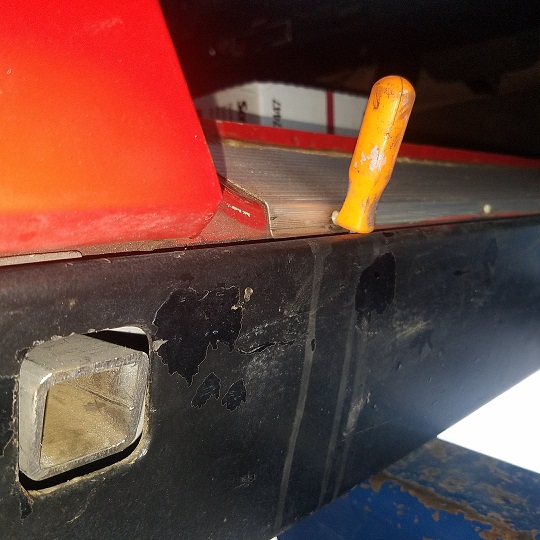
Looked mostly like surface rust, I had hoped that someone dorked up the jack point and decided to remove so that they would look the same, I think that's what happened as they looked good.
Attached thumbnail(s) 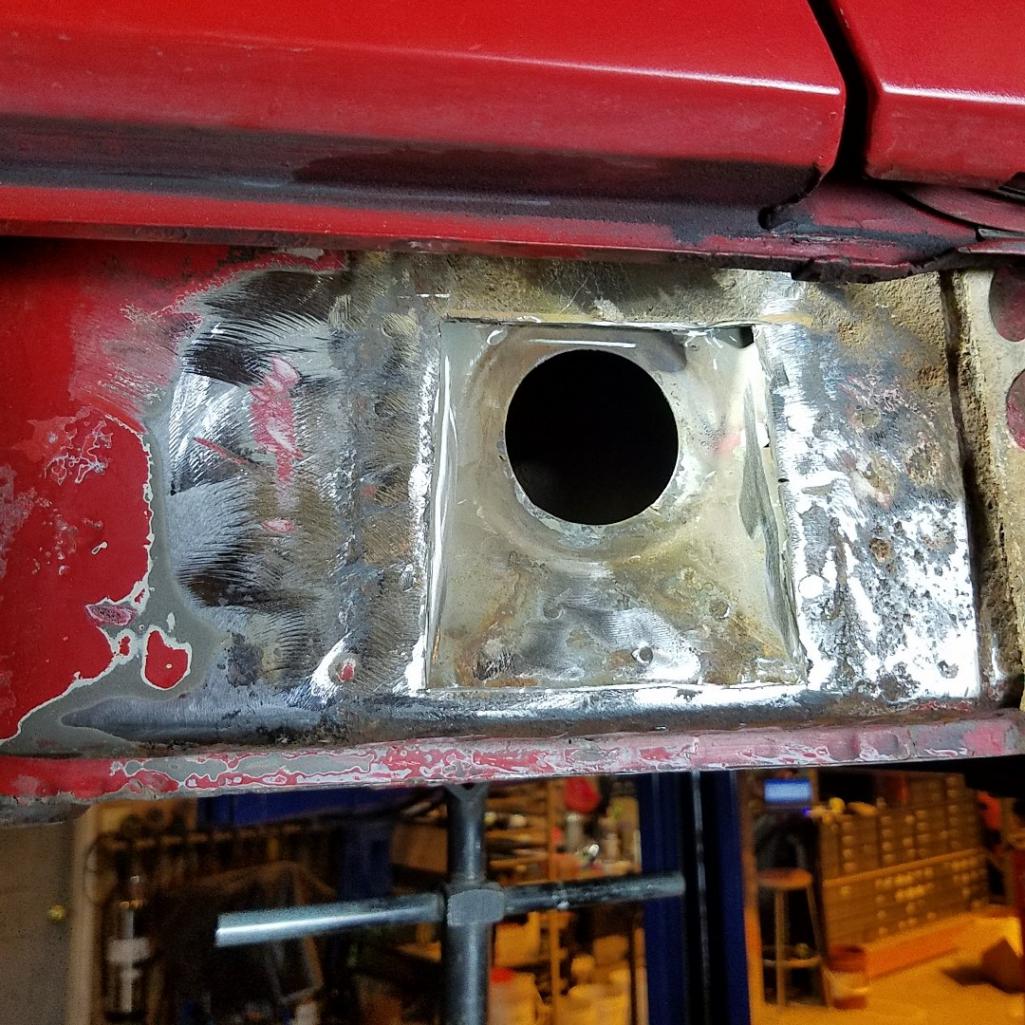 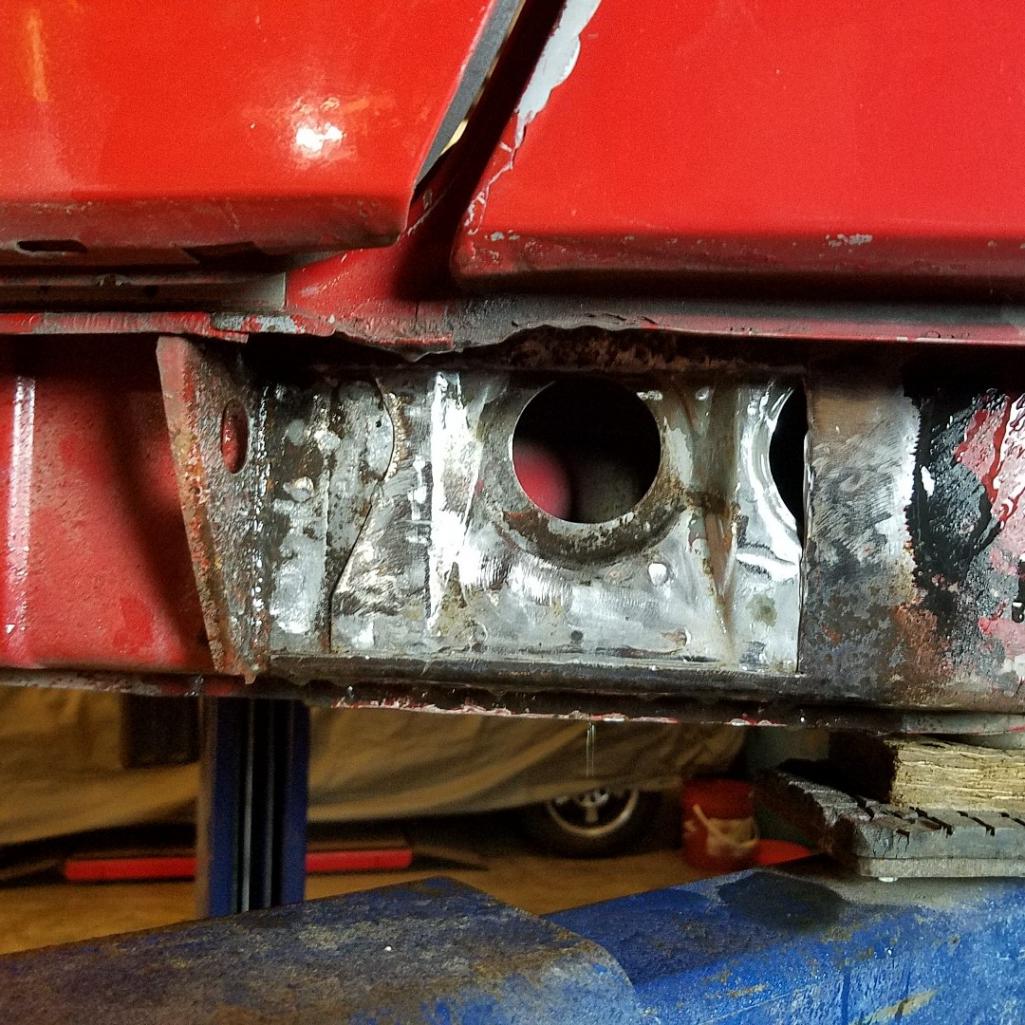
|
|
|
|
| Mikey914 |
Mar 15 2018, 06:01 PM
Post
#3
|
|
The rubber man Group: Members Posts: 12,661 Joined: 27-December 04 From: Hillsboro, OR Member No.: 3,348 Region Association: None |
Took it to Cary and he got me squared away pretty quickly.
Just got the pics in Attached thumbnail(s) 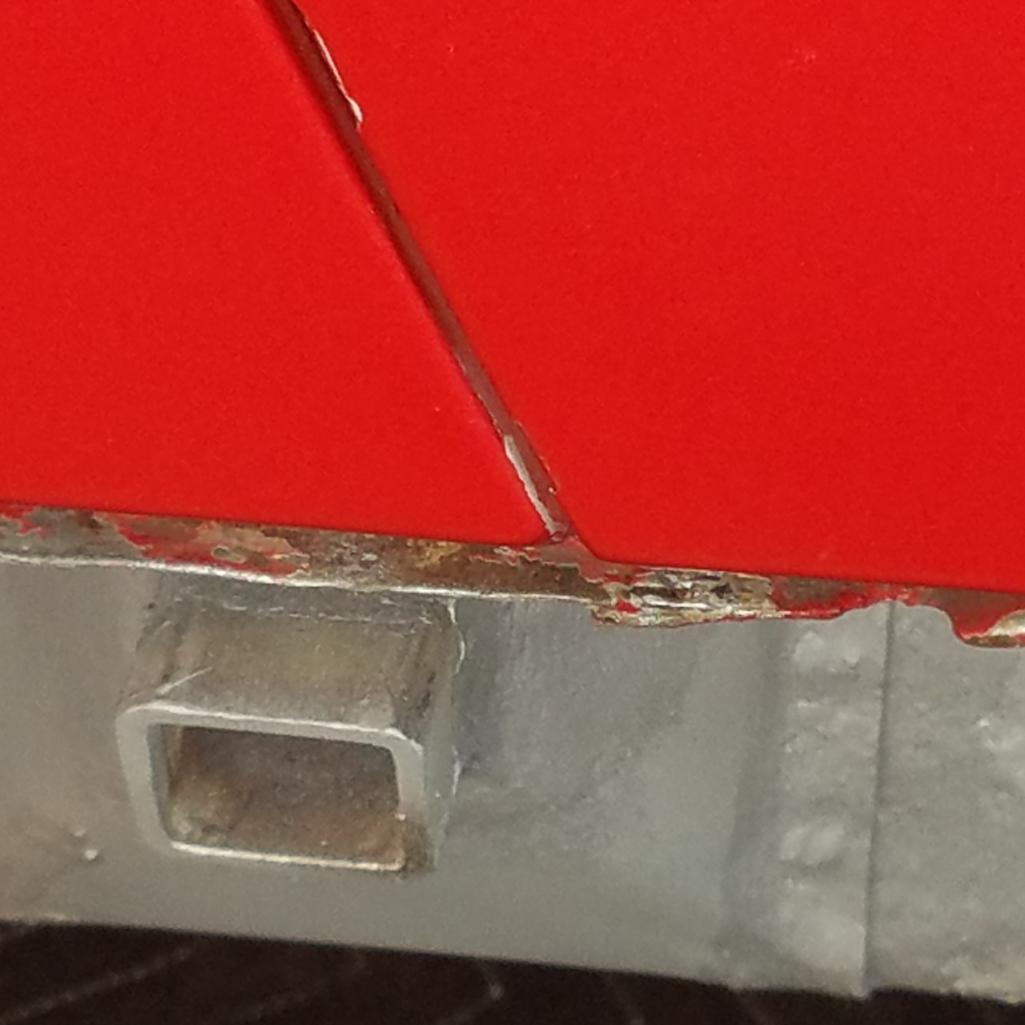 Attached image(s) 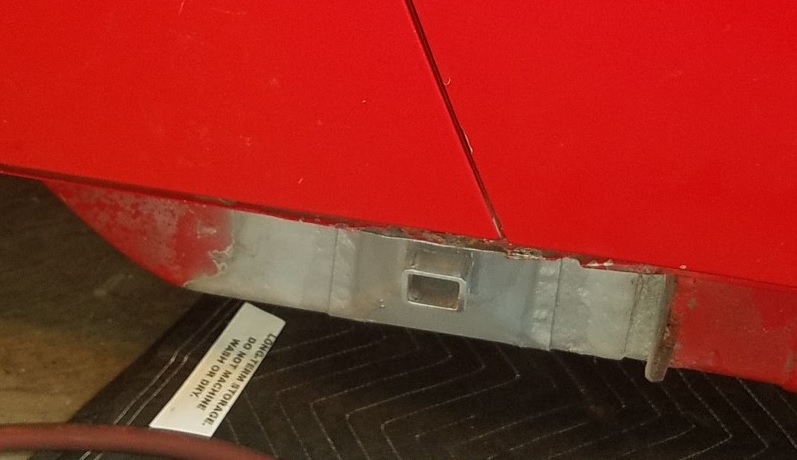
|
|
|
|
| cary |
Mar 15 2018, 08:55 PM
Post
#4
|
|
Advanced Member Group: Members Posts: 3,900 Joined: 26-January 04 From: Sherwood Oregon Member No.: 1,608 Region Association: Pacific Northwest |
Left side, start to finish.
  Find the sweet spot to match up with rocker cover. As a final detail I line the rivet holes up so they don't have to be re-drilled. I also trim the tube so that 7mm is outside the rocker panel. 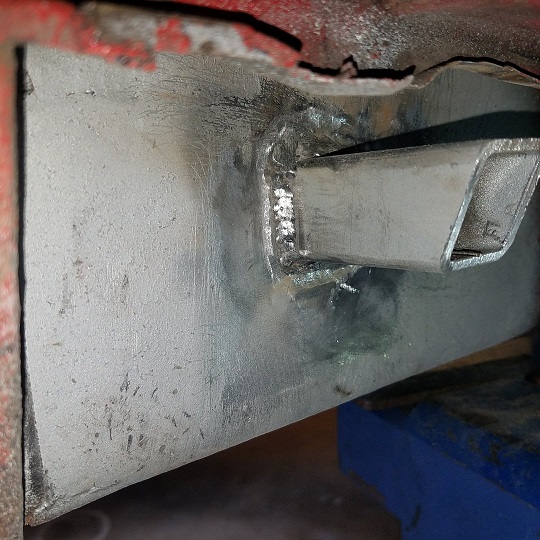 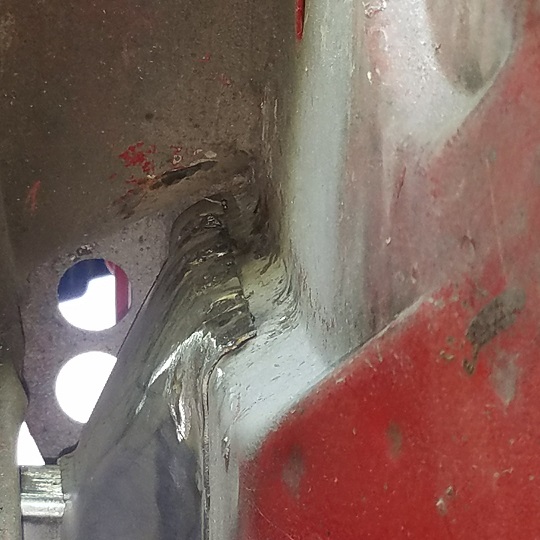 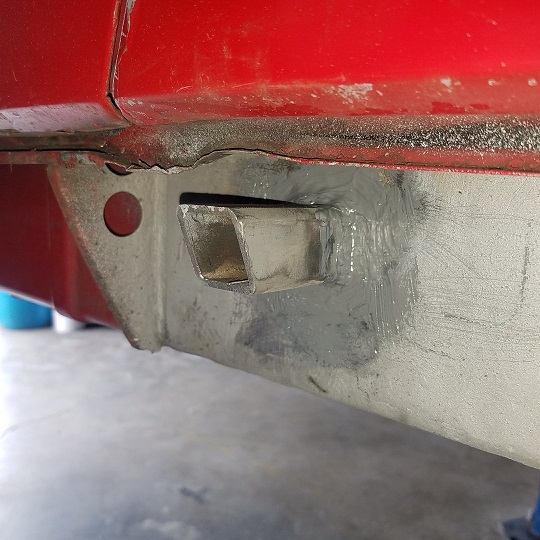 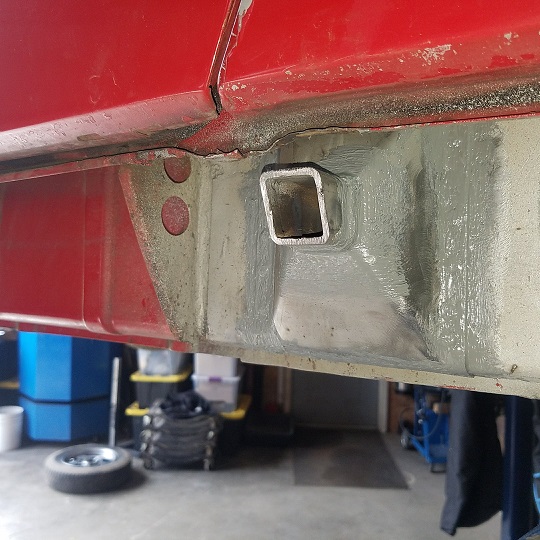 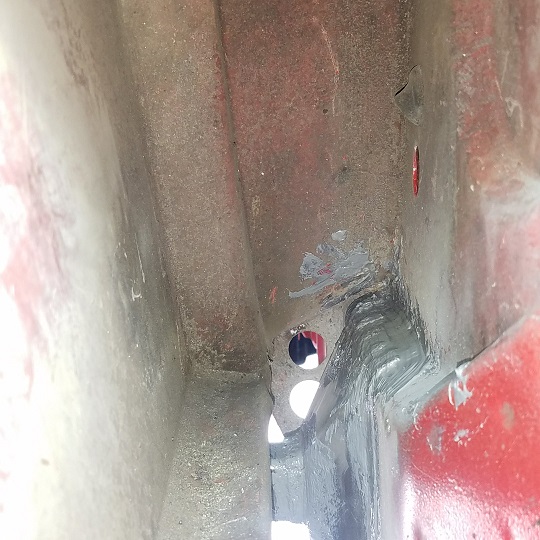 Note : I do drill the drain holes on my cars. But not customer cars unless asked. |
|
|
|
| n2j2ryan |
Mar 15 2018, 10:44 PM
Post
#5
|
|
Member Group: Members Posts: 85 Joined: 9-January 17 From: Victoria BC Member No.: 20,740 Region Association: Canada |
Those look awesome. Great work. Makes me feel bad for deleting mine, but then again I live on an Island in the middle of a rain forest!
|
|
|
|
|
1 User(s) are reading this topic (1 Guests and 0 Anonymous Users)
0 Members:

|
Lo-Fi Version | Time is now: 14th May 2024 - 12:27 PM |
Invision Power Board
v9.1.4 © 2024 IPS, Inc.