|
|
|
Porsche, and the Porsche crest are registered trademarks of Dr. Ing. h.c. F. Porsche AG.
This site is not affiliated with Porsche in any way. Its only purpose is to provide an online forum for car enthusiasts. All other trademarks are property of their respective owners. |
|
|


| autopro |
 Apr 10 2018, 08:22 AM Apr 10 2018, 08:22 AM
Post
#241
|
|
Member  Group: Members Posts: 306 Joined: 14-January 18 From: San Diego / Tijuana Member No.: 21,797 Region Association: Southern California |
Hello guys, I am new here to the 914 World forum. I have really enjoyed the topics that are covered here and loved watching all of the build threads and restoration projects everyone has posted.
I just bought a 1972 914 from a friend a couple of weeks ago and I am trying to come up with a plan on how to get this car back on the road. It seems it has been off the road for more than 10 years and it has just sat since then. Luckily it had been kept from the elements so there is minimal surface rust and most body panels are straight. The engine seems to be missing some components and the harness for the fuel injection is in pretty bad shape. Also the engine seems to be from a 1973 model year because the number on it is EB005705 (IMG:style_emoticons/default/sad.gif) Now since the engine isn't original for the car I do not know if it's worth to go on an all out restoration or to just do a repaint, fix all the mechanicals and get it on the road again, what do you guys think? Oh and since I know how people hate threads without pictures here are some of the car for you. 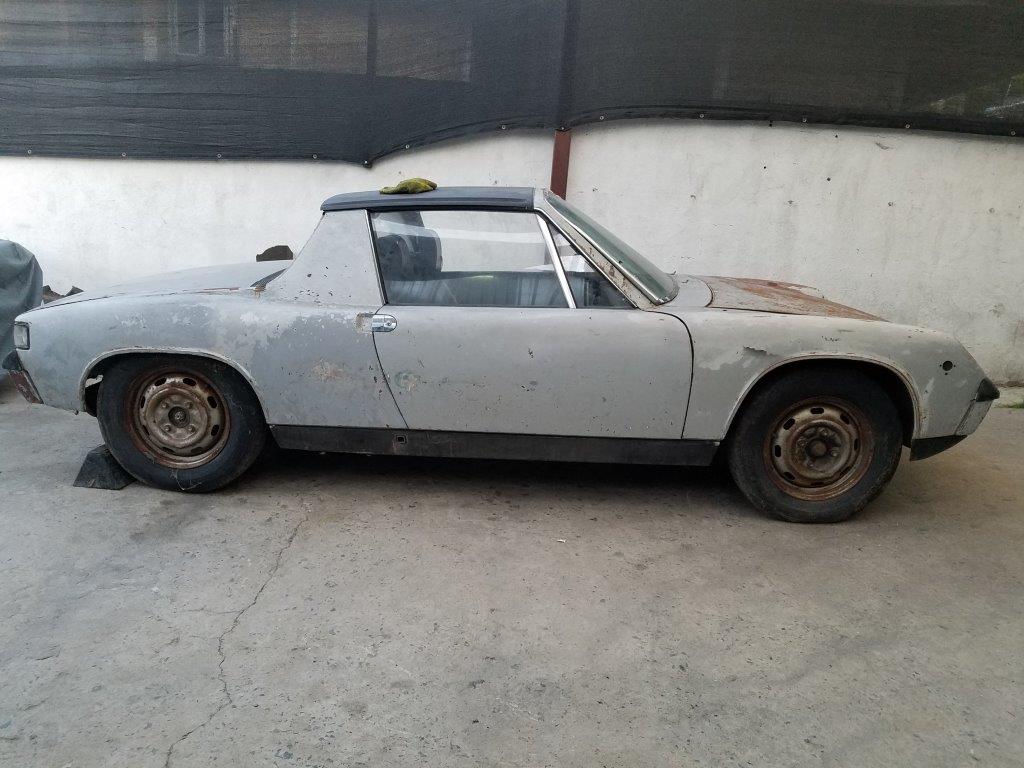 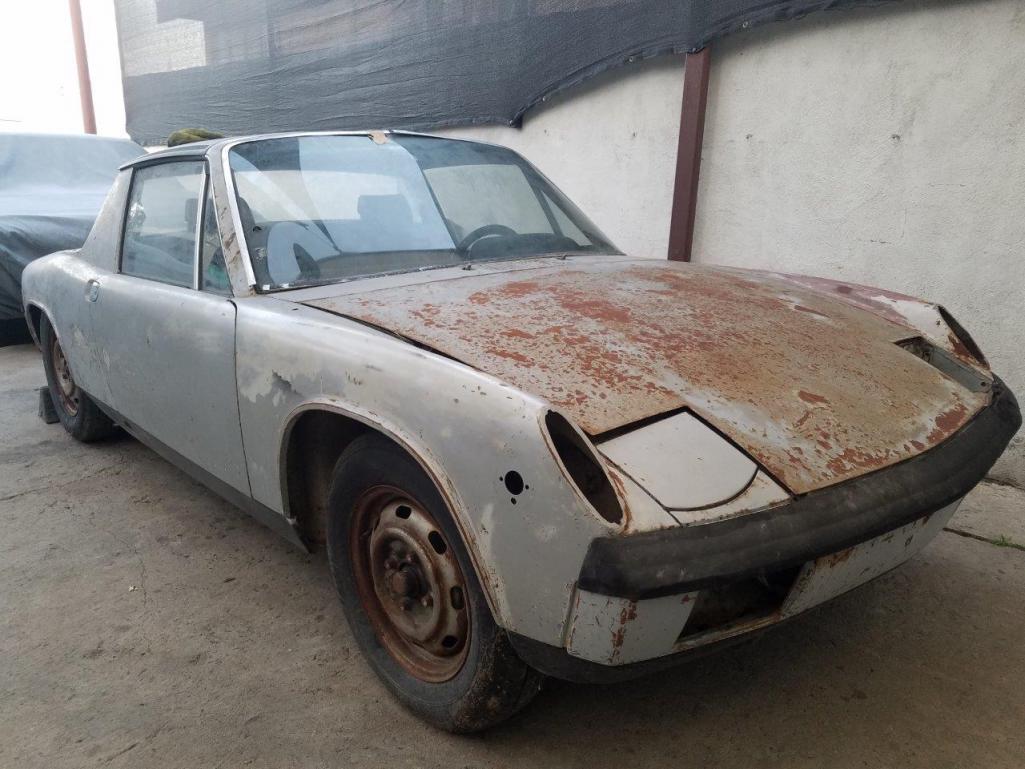 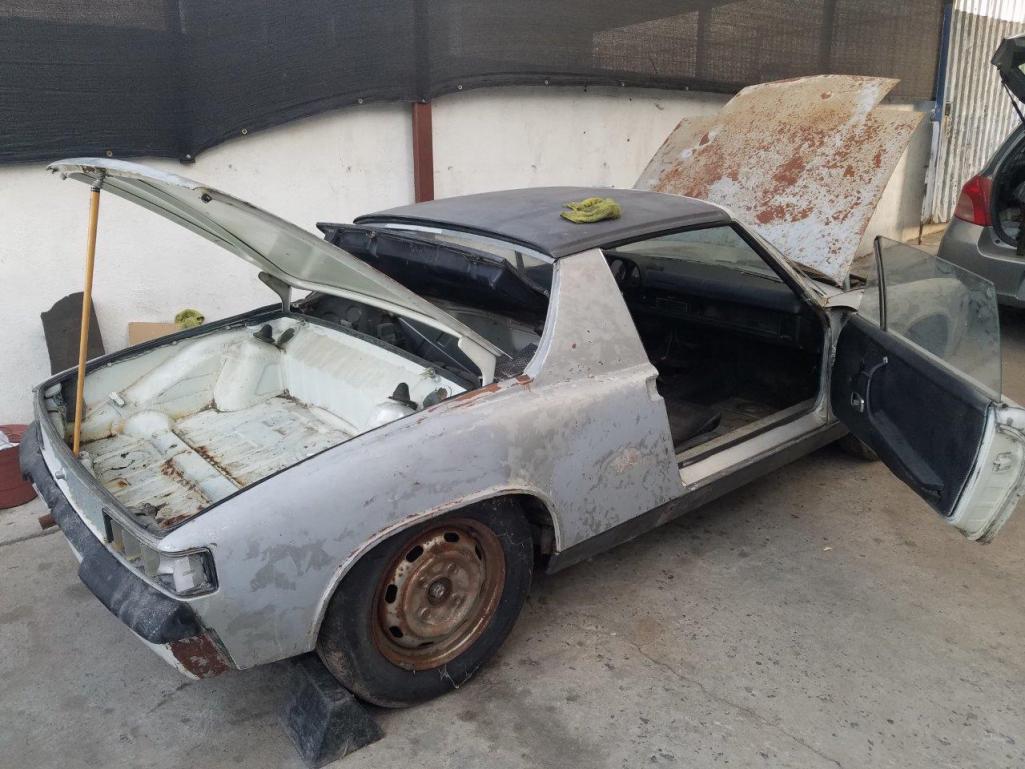 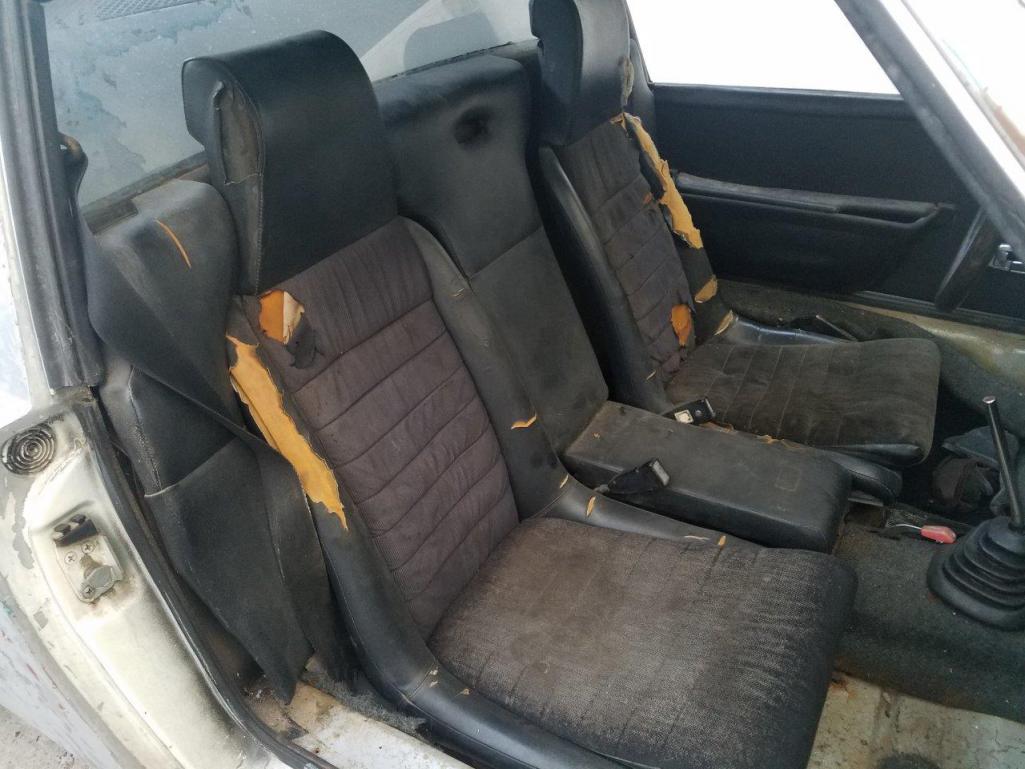 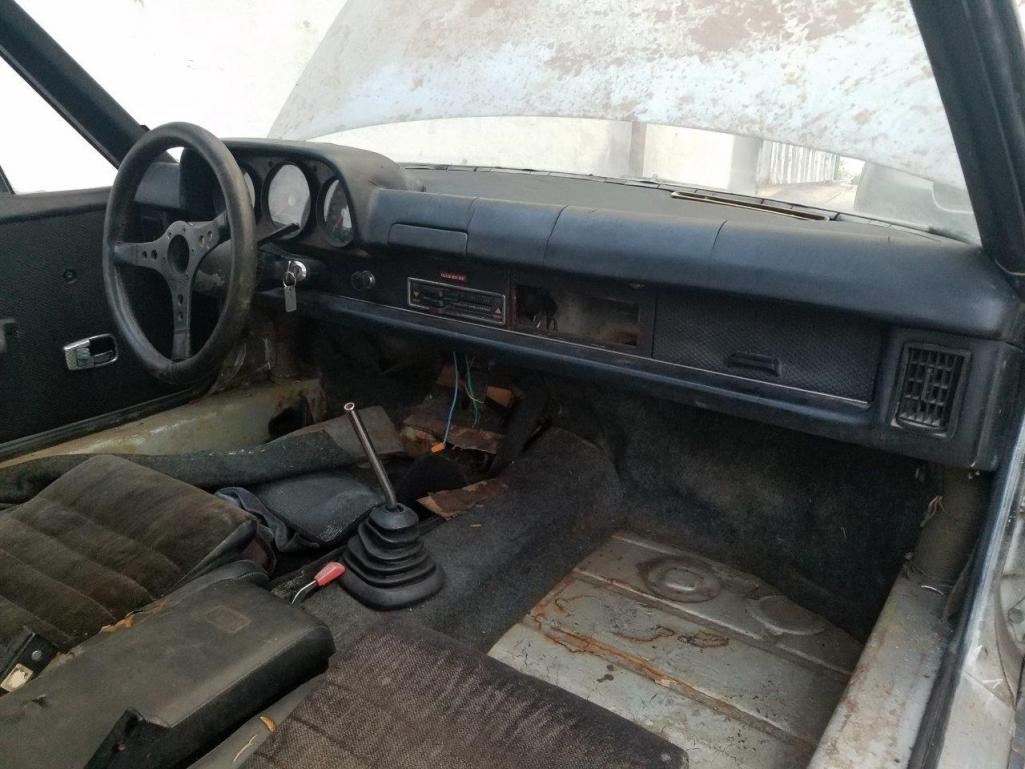 And this is after I got the engine home on my truck. 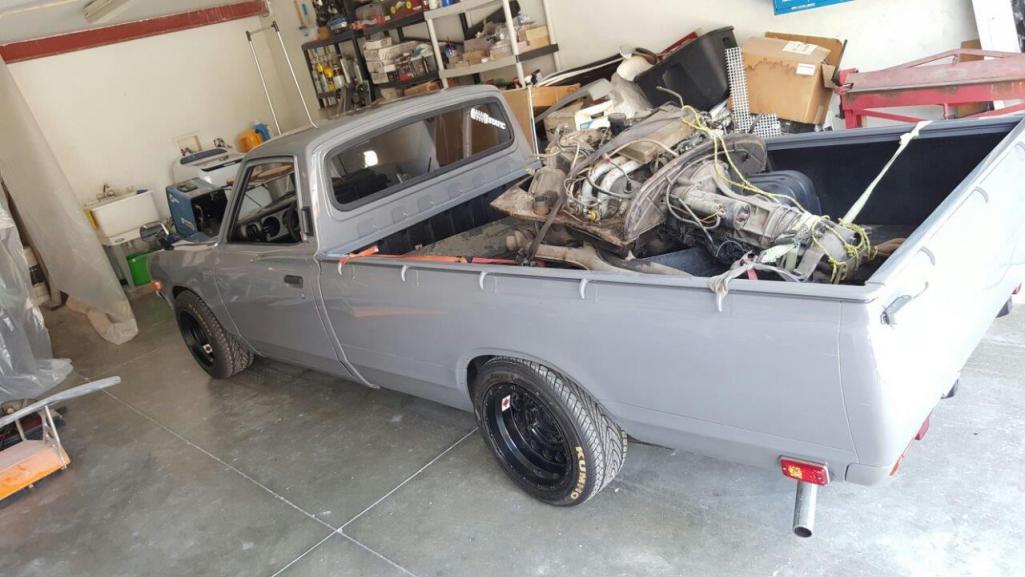 |
   |

 
|
Posts in this topic
 autopro 1972 914 Build Apr 10 2018, 08:22 AM
 Philip W. :wttc: :wttc: :wttc:
I know the paint looks ro... Apr 10 2018, 10:29 AM
Philip W. :wttc: :wttc: :wttc:
I know the paint looks ro... Apr 10 2018, 10:29 AM
 autopro
I know the paint looks rough but it looks clean... Apr 10 2018, 03:47 PM 914forme :agree: :wttc:
Also look in the classifieds or ... Apr 10 2018, 10:47 AM autopro
And 10 years off the road :rotfl: that was a s... Apr 10 2018, 03:56 PM carking1996 Nice car! I love seeing restorations from cars... Apr 10 2018, 11:38 AM mbseto Welcome! Original or not, I lean towards gett... Apr 10 2018, 12:07 PM pt_700 off topic; that's a bitchin' 620 you'v... Apr 10 2018, 12:09 PM autopro
Welcome! Original or not, I lean towards get... Apr 10 2018, 04:10 PM ConeDodger
[quote name='mbseto' post='2598184' date='Apr 10 ... May 1 2018, 08:56 PM krazykonrad :wttc: Apr 11 2018, 10:30 AM The Cabinetmaker I bought a 1600 pickup in June of 73, then my firs... Apr 11 2018, 12:54 PM autopro Thanks guys really appreciate it :wavebye:
@ Th... Apr 11 2018, 10:00 PM aggiezig :wttc:
Your project looks like a great starting ... Apr 11 2018, 03:59 PM Freezin 914 :wttc: Apr 11 2018, 06:41 PM Larmo63 The engine compartment looks dirty, but doesn... Apr 11 2018, 10:16 PM autopro
The engine compartment looks dirty, but doesn... Apr 12 2018, 08:33 AM bbrock :wttc: I'll be watching this thread because th... Apr 12 2018, 10:20 AM autopro bbrock, I'm glad you like it. I sure hope tha... Apr 13 2018, 09:07 AM autopro Got the engine semi torn apart and I also started ... Apr 30 2018, 08:35 AM krazykonrad :wttc: and nice truck!
Konrad Apr 30 2018, 04:21 PM Dion Hi Pedro. Looks as good as most of these projects ... Apr 30 2018, 06:17 PM Shadowfax :wttc:
From another Pedro :beer2: Apr 30 2018, 06:53 PM Fatboy007 Way ta go man....make it happen! :Qarl: Apr 30 2018, 09:57 PM autopro @ Konrad, thanks bud :D
@ Dion, yeah the body i... May 1 2018, 10:36 AM autopro That is such a beautiful car Rob :wub: I was lo... May 11 2018, 10:50 AM autopro Some pictures of the disassembly process. I built... May 16 2018, 08:49 AM autopro This past weekend I finished taking the car apart ... May 22 2018, 01:54 PM ndfrigi Looking good on your project! keep posting ur ... May 16 2019, 06:36 PM Superhawk996 You guys have no idea how good you’ve got it wit... May 16 2019, 07:09 PM autopro It's been a while, but I had to put the car in... Aug 21 2020, 08:40 PM JOEPROPER Surprises on these cars usually are not nice like ... Aug 22 2020, 06:37 AM autopro JOEPROPER I agree, wish they happened more often.
... Sep 16 2020, 12:22 PM autopro Since my car did not have a front sway bar, I deci... Sep 19 2020, 12:51 PM autopro Ok, where did I leave off so long ago :( , yes I ... Jul 18 2021, 07:10 PM autopro Had to do a bit of wire repair and paint, I was lu... Jul 18 2021, 07:17 PM autopro My homebrew plating operation :stir: Not profes... Jul 18 2021, 07:30 PM autopro Even though the car was fairly rust free, the rear... Jul 18 2021, 07:51 PM autopro At this point I was happy how everything was fitti... Jul 19 2021, 12:08 PM autopro Here is the bracket installed and the installation... Jul 19 2021, 12:15 PM autopro Last week I took my engine on a little trip to LA,... Jul 21 2021, 08:41 PM autopro Got my boy some new shoes. Bought these from Maxi... Jul 30 2021, 10:24 AM ValcoOscar Looking like progress!!!!
With th... Jul 30 2021, 10:38 AM Root_Werks Another build thread, awesome!
This 914 looks... Jul 30 2021, 02:06 PM autopro
Looking like progress!!!!
With t... Aug 1 2021, 07:38 PM autopro During my kids summer break I put him to work on a... Aug 2 2021, 10:12 AM autopro Primer inside the cab so it doesn't rust again... Aug 2 2021, 10:23 AM 930cabman Another one coming back to life, keep up the good ... Aug 2 2021, 10:43 AM autopro
Another one coming back to life, keep up the good... Aug 6 2021, 01:19 PM autopro A few more. I was able to finish the whole car an... Aug 6 2021, 01:22 PM autopro Well now that the whole body has been taken down t... Aug 13 2021, 03:01 PM autopro Upon arrival at my friends shop, couldn't wait... Aug 13 2021, 03:47 PM autopro Now that the car is at the body shop, I can concen... Aug 25 2021, 07:14 PM autopro Removed all the paint and rust
Here are all the... Aug 25 2021, 08:35 PM autopro Another thing on my to do list before paint was th... Aug 25 2021, 09:03 PM Cairo94507 :popcorn: :beer2: Aug 26 2021, 07:53 AM tygaboy :agree: Aug 26 2021, 08:35 AM autopro Lots of bodywork has been going on, here are some ... Oct 20 2021, 10:19 AM autopro Got it back to my shop, hopefully I won't have... Oct 20 2021, 10:43 AM autopro I still had to take care of some details for the f... Oct 20 2021, 11:01 AM autopro Finished first round of guide coat and blocking an... Oct 21 2021, 11:39 AM autopro I turned my attention to the wheel wells to make t... Oct 21 2021, 11:48 AM autopro Underside of the car is now finished, just waiting... Oct 22 2021, 12:24 PM Root_Werks There's something about a bare, ready to paint... Oct 22 2021, 01:56 PM autopro
There's something about a bare, ready to pain... Nov 2 2021, 05:56 PM Dion A body in “white” & a proper power plant. ... Nov 2 2021, 09:14 PM TRS63 This body is looking fantastic :wub:
Looking for... Nov 3 2021, 02:57 AM 76-914 Great build and well done. You move quickly. :bee... Nov 4 2021, 04:48 PM autopro
A body in “white” & a proper power plant.... Nov 5 2021, 11:06 AM autopro Not too much to show this week but I did get a few... Nov 5 2021, 11:15 AM autopro Had a productive day yesterday, I was able to get ... Nov 12 2021, 11:49 AM autopro Moved on to cylinder and piston installation, I st... Nov 12 2021, 11:59 AM autopro I forgot to add these pictures of where I left off... Nov 23 2021, 11:42 AM autopro So before spraying the Raptor I wanted to finish p... Nov 23 2021, 11:59 AM autopro Finally we have some color and most of the hard wo... Nov 23 2021, 01:27 PM brant way to go
saving another one.
and that is a great... Nov 23 2021, 02:14 PM autopro
way to go
saving another one.
and that is a grea... Nov 23 2021, 02:56 PM Shivers Hey Pedro. That came out great, I was wondering ab... Nov 24 2021, 09:25 AM autopro
Hey Pedro. That came out great, I was wondering a... Nov 25 2021, 09:02 PM bkrantz Very nice. Reaching the point where you are putti... Nov 24 2021, 09:52 PM TRS63 The pictures with the raptor look so great..now I ... Nov 26 2021, 03:19 AM autopro My latest set of pictures, painting the interiors ... Apr 28 2022, 04:21 PM autopro More
Apr 28 2022, 04:29 PM autopro A couple from the engine compartment
After th... Apr 28 2022, 04:36 PM autopro Here they are all cleared
Apr 28 2022, 04:42 PM ValcoOscar Great update, love that color :beer2:
:popcor... Apr 28 2022, 04:50 PM 914Toy Likely need new tires. Apr 28 2022, 04:52 PM brant Beautiful! Apr 28 2022, 06:16 PM 9146C Don't recall seeing this thread earlier. Compa... Apr 28 2022, 06:32 PM bkrantz Nice paint work. Apr 28 2022, 07:52 PM Dion Awesome colour. Nice work. :trophy: Apr 28 2022, 09:08 PM TRS63 Awesome seeing this fresh Paint, what a cool progr... Apr 29 2022, 01:00 AM Superhawk996 Really nice!
Great job on the makeshift pai... Apr 29 2022, 06:42 AM autopro
Great update, love that color :beer2:
:popcorn... Apr 29 2022, 09:15 AM slowrodent That's beautiful paint dude... You should be p... Apr 29 2022, 12:41 PM autopro
That's beautiful paint dude... You should be ... Apr 29 2022, 04:05 PM Freezin 914 Just started reading through this build, looks gre... Apr 29 2022, 06:49 PM autopro
Just started reading through this build, looks gr... May 3 2022, 10:15 AM ndfrigi
Just started reading through this build, looks g... May 3 2022, 10:20 AM autopro So no paint on Saturday, no paint on Sunday but Mo... May 3 2022, 10:21 AM
autopro
I know the paint looks rough but it looks clean... Apr 10 2018, 03:47 PM 914forme :agree: :wttc:
Also look in the classifieds or ... Apr 10 2018, 10:47 AM autopro
And 10 years off the road :rotfl: that was a s... Apr 10 2018, 03:56 PM carking1996 Nice car! I love seeing restorations from cars... Apr 10 2018, 11:38 AM mbseto Welcome! Original or not, I lean towards gett... Apr 10 2018, 12:07 PM pt_700 off topic; that's a bitchin' 620 you'v... Apr 10 2018, 12:09 PM autopro
Welcome! Original or not, I lean towards get... Apr 10 2018, 04:10 PM ConeDodger
[quote name='mbseto' post='2598184' date='Apr 10 ... May 1 2018, 08:56 PM krazykonrad :wttc: Apr 11 2018, 10:30 AM The Cabinetmaker I bought a 1600 pickup in June of 73, then my firs... Apr 11 2018, 12:54 PM autopro Thanks guys really appreciate it :wavebye:
@ Th... Apr 11 2018, 10:00 PM aggiezig :wttc:
Your project looks like a great starting ... Apr 11 2018, 03:59 PM Freezin 914 :wttc: Apr 11 2018, 06:41 PM Larmo63 The engine compartment looks dirty, but doesn... Apr 11 2018, 10:16 PM autopro
The engine compartment looks dirty, but doesn... Apr 12 2018, 08:33 AM bbrock :wttc: I'll be watching this thread because th... Apr 12 2018, 10:20 AM autopro bbrock, I'm glad you like it. I sure hope tha... Apr 13 2018, 09:07 AM autopro Got the engine semi torn apart and I also started ... Apr 30 2018, 08:35 AM krazykonrad :wttc: and nice truck!
Konrad Apr 30 2018, 04:21 PM Dion Hi Pedro. Looks as good as most of these projects ... Apr 30 2018, 06:17 PM Shadowfax :wttc:
From another Pedro :beer2: Apr 30 2018, 06:53 PM Fatboy007 Way ta go man....make it happen! :Qarl: Apr 30 2018, 09:57 PM autopro @ Konrad, thanks bud :D
@ Dion, yeah the body i... May 1 2018, 10:36 AM autopro That is such a beautiful car Rob :wub: I was lo... May 11 2018, 10:50 AM autopro Some pictures of the disassembly process. I built... May 16 2018, 08:49 AM autopro This past weekend I finished taking the car apart ... May 22 2018, 01:54 PM ndfrigi Looking good on your project! keep posting ur ... May 16 2019, 06:36 PM Superhawk996 You guys have no idea how good you’ve got it wit... May 16 2019, 07:09 PM autopro It's been a while, but I had to put the car in... Aug 21 2020, 08:40 PM JOEPROPER Surprises on these cars usually are not nice like ... Aug 22 2020, 06:37 AM autopro JOEPROPER I agree, wish they happened more often.
... Sep 16 2020, 12:22 PM autopro Since my car did not have a front sway bar, I deci... Sep 19 2020, 12:51 PM autopro Ok, where did I leave off so long ago :( , yes I ... Jul 18 2021, 07:10 PM autopro Had to do a bit of wire repair and paint, I was lu... Jul 18 2021, 07:17 PM autopro My homebrew plating operation :stir: Not profes... Jul 18 2021, 07:30 PM autopro Even though the car was fairly rust free, the rear... Jul 18 2021, 07:51 PM autopro At this point I was happy how everything was fitti... Jul 19 2021, 12:08 PM autopro Here is the bracket installed and the installation... Jul 19 2021, 12:15 PM autopro Last week I took my engine on a little trip to LA,... Jul 21 2021, 08:41 PM autopro Got my boy some new shoes. Bought these from Maxi... Jul 30 2021, 10:24 AM ValcoOscar Looking like progress!!!!
With th... Jul 30 2021, 10:38 AM Root_Werks Another build thread, awesome!
This 914 looks... Jul 30 2021, 02:06 PM autopro
Looking like progress!!!!
With t... Aug 1 2021, 07:38 PM autopro During my kids summer break I put him to work on a... Aug 2 2021, 10:12 AM autopro Primer inside the cab so it doesn't rust again... Aug 2 2021, 10:23 AM 930cabman Another one coming back to life, keep up the good ... Aug 2 2021, 10:43 AM autopro
Another one coming back to life, keep up the good... Aug 6 2021, 01:19 PM autopro A few more. I was able to finish the whole car an... Aug 6 2021, 01:22 PM autopro Well now that the whole body has been taken down t... Aug 13 2021, 03:01 PM autopro Upon arrival at my friends shop, couldn't wait... Aug 13 2021, 03:47 PM autopro Now that the car is at the body shop, I can concen... Aug 25 2021, 07:14 PM autopro Removed all the paint and rust
Here are all the... Aug 25 2021, 08:35 PM autopro Another thing on my to do list before paint was th... Aug 25 2021, 09:03 PM Cairo94507 :popcorn: :beer2: Aug 26 2021, 07:53 AM tygaboy :agree: Aug 26 2021, 08:35 AM autopro Lots of bodywork has been going on, here are some ... Oct 20 2021, 10:19 AM autopro Got it back to my shop, hopefully I won't have... Oct 20 2021, 10:43 AM autopro I still had to take care of some details for the f... Oct 20 2021, 11:01 AM autopro Finished first round of guide coat and blocking an... Oct 21 2021, 11:39 AM autopro I turned my attention to the wheel wells to make t... Oct 21 2021, 11:48 AM autopro Underside of the car is now finished, just waiting... Oct 22 2021, 12:24 PM Root_Werks There's something about a bare, ready to paint... Oct 22 2021, 01:56 PM autopro
There's something about a bare, ready to pain... Nov 2 2021, 05:56 PM Dion A body in “white” & a proper power plant. ... Nov 2 2021, 09:14 PM TRS63 This body is looking fantastic :wub:
Looking for... Nov 3 2021, 02:57 AM 76-914 Great build and well done. You move quickly. :bee... Nov 4 2021, 04:48 PM autopro
A body in “white” & a proper power plant.... Nov 5 2021, 11:06 AM autopro Not too much to show this week but I did get a few... Nov 5 2021, 11:15 AM autopro Had a productive day yesterday, I was able to get ... Nov 12 2021, 11:49 AM autopro Moved on to cylinder and piston installation, I st... Nov 12 2021, 11:59 AM autopro I forgot to add these pictures of where I left off... Nov 23 2021, 11:42 AM autopro So before spraying the Raptor I wanted to finish p... Nov 23 2021, 11:59 AM autopro Finally we have some color and most of the hard wo... Nov 23 2021, 01:27 PM brant way to go
saving another one.
and that is a great... Nov 23 2021, 02:14 PM autopro
way to go
saving another one.
and that is a grea... Nov 23 2021, 02:56 PM Shivers Hey Pedro. That came out great, I was wondering ab... Nov 24 2021, 09:25 AM autopro
Hey Pedro. That came out great, I was wondering a... Nov 25 2021, 09:02 PM bkrantz Very nice. Reaching the point where you are putti... Nov 24 2021, 09:52 PM TRS63 The pictures with the raptor look so great..now I ... Nov 26 2021, 03:19 AM autopro My latest set of pictures, painting the interiors ... Apr 28 2022, 04:21 PM autopro More
Apr 28 2022, 04:29 PM autopro A couple from the engine compartment
After th... Apr 28 2022, 04:36 PM autopro Here they are all cleared
Apr 28 2022, 04:42 PM ValcoOscar Great update, love that color :beer2:
:popcor... Apr 28 2022, 04:50 PM 914Toy Likely need new tires. Apr 28 2022, 04:52 PM brant Beautiful! Apr 28 2022, 06:16 PM 9146C Don't recall seeing this thread earlier. Compa... Apr 28 2022, 06:32 PM bkrantz Nice paint work. Apr 28 2022, 07:52 PM Dion Awesome colour. Nice work. :trophy: Apr 28 2022, 09:08 PM TRS63 Awesome seeing this fresh Paint, what a cool progr... Apr 29 2022, 01:00 AM Superhawk996 Really nice!
Great job on the makeshift pai... Apr 29 2022, 06:42 AM autopro
Great update, love that color :beer2:
:popcorn... Apr 29 2022, 09:15 AM slowrodent That's beautiful paint dude... You should be p... Apr 29 2022, 12:41 PM autopro
That's beautiful paint dude... You should be ... Apr 29 2022, 04:05 PM Freezin 914 Just started reading through this build, looks gre... Apr 29 2022, 06:49 PM autopro
Just started reading through this build, looks gr... May 3 2022, 10:15 AM ndfrigi
Just started reading through this build, looks g... May 3 2022, 10:20 AM autopro So no paint on Saturday, no paint on Sunday but Mo... May 3 2022, 10:21 AM  |
1 User(s) are reading this topic (1 Guests and 0 Anonymous Users)
0 Members:

|
Lo-Fi Version | Time is now: 1st April 2026 - 03:02 PM |
Invision Power Board
v9.1.4 © 2026 IPS, Inc.