|
|
|
Porsche, and the Porsche crest are registered trademarks of Dr. Ing. h.c. F. Porsche AG.
This site is not affiliated with Porsche in any way. Its only purpose is to provide an online forum for car enthusiasts. All other trademarks are property of their respective owners. |
|
|


| North Coast Jim |
 Apr 19 2018, 05:54 PM Apr 19 2018, 05:54 PM
Post
#1
|
|
Member  Group: Members Posts: 323 Joined: 11-December 15 From: Northern Ohio Member No.: 19,450 Region Association: MidAtlantic Region |
Rebuilt both the door stops with 914 Rubber kits last year. Kits were from a purchase made in early 2017 IIRC, could be earlier. Doors open and close fine BUT both closures produce loud clicks upon closure of the door. Opening of the doors adds a loud pop to the clicks. Both are lubricated but no relief is found.
What I have noticed is the aluminum machined arms received have no vertical grooves where the wheels are to roll. The profile is smooth except for the closure stop points. I've looked at other door closures and this is the only difference I see - they have these vertical grooves. Anybody else has experience with these closures and can provide some input. Left an e-mail with Mikey but he must be flying or driving to Hershey. |
   |

 
|
  |
Replies
| raynekat |
Aug 18 2018, 10:58 PM
Post
#2
|
|
Advanced Member Group: Members Posts: 2,158 Joined: 30-December 14 From: Coeur d'Alene, Idaho Member No.: 18,263 Region Association: Pacific Northwest |
Attacked my door stops today to rid them of the loud snapping when they are opening or closed.
Again in my case, the door pin fits snuggly into pin receivers in the door jams on both sides. My issue was that the hole in the end of the arm was too large. See pic above. Found some Oilite bronze bushings on-line that were 3/16" ID by 5/16" OD by 1/4" long. Seemed like this was the size I needed to start with. I found that the bushings w/o the collar worked better or easier. First I enlarged the hole in the end of the arm with my 5/16" drill bit. Then took the arm and bushing over to my vise and beat the bushing into the hole, and continued to beat on it with the hammer to try and flatten out the bushing a bit to really snug it up into that hole that was enlarged. Seemed to be in there very tightly. The pin's OD is right at 6mm. A 15/64" drill bit is right at 5.95mm, a hair smaller than the pin, so perfect. I used progressively larger drill bits starting just small enough to go into the ID of the bushing. Slow and patient here as you don't want to dislodge the bushing from the end of the arm. After working my way up to the 15/64" drill bit, I used that to barely open up the hole enough for the pin to snuggly fit inside. After this I dressed up both sides of the bushing so that it was flush with the arm. You don't want any of the bushing sticking out on either side of the arm or it won't fit into the receiver in the door jam. I used my dremel with a sanding drum to take care of this and followed it up with some very fine sandpaper. The bushing still looked quite seated in the arm. The bronze bushing was quite tough to drill, so I think it will be very durable and last many more miles. The end result is no more snapping noise when opening and closing the door. Job done! I dressed up the end of the arm to look much better than what you see in the pic. 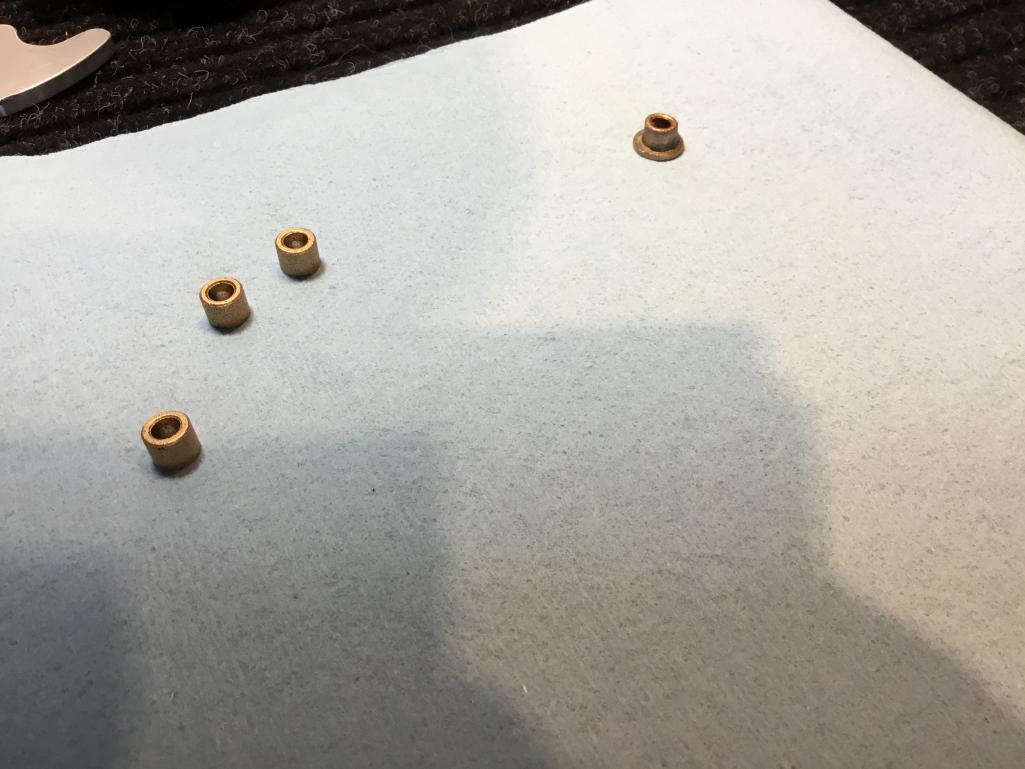 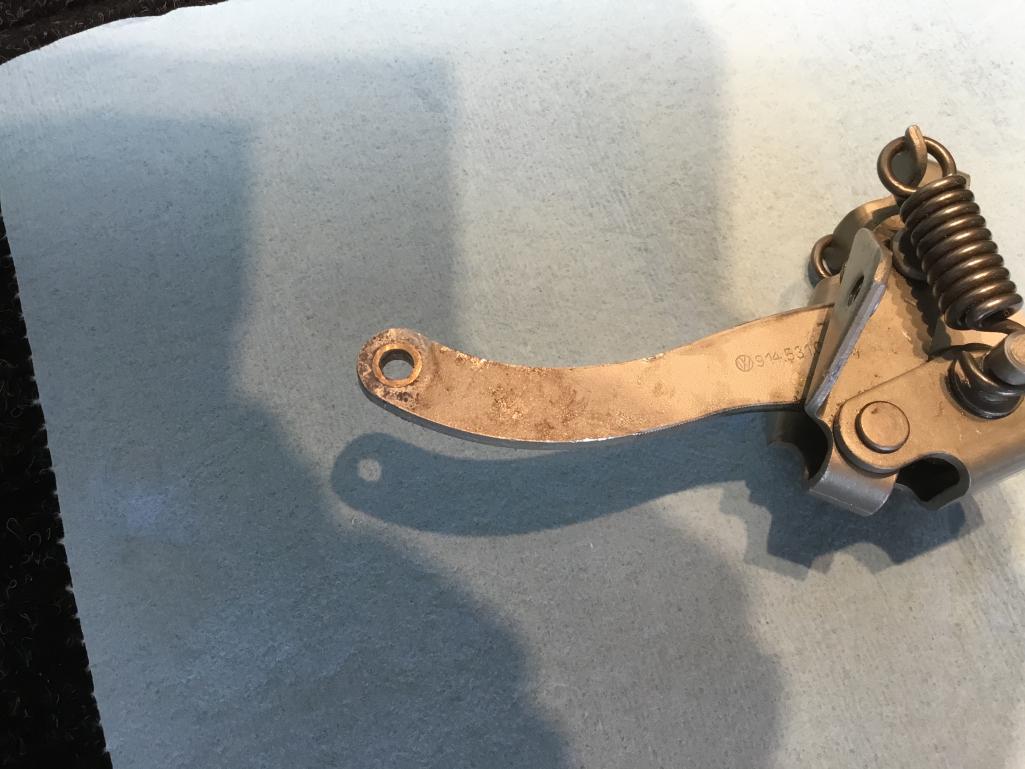 |
|
|
|
Posts in this topic
 North Coast Jim Door Stop Rebuild Apr 19 2018, 05:54 PM
 914Sixer Problem is not the kit. The holes for the rod in ... Apr 19 2018, 08:55 PM jcd914 :agree:
I don't know anything about the rebui... Apr 19 2018, 10:00 PM Rob-O Somewhat agree with above. The holes on the piece... Apr 20 2018, 07:39 AM Mikey914 I can add the serrations, it just adds $25 to... Apr 20 2018, 09:50 AM Rob-O Completely agree, Mark. It’s tough to juggle un... Apr 20 2018, 11:49 AM Bartlett 914 I had the same problem. The pin hole on the body o... Apr 20 2018, 02:16 PM
914Sixer Problem is not the kit. The holes for the rod in ... Apr 19 2018, 08:55 PM jcd914 :agree:
I don't know anything about the rebui... Apr 19 2018, 10:00 PM Rob-O Somewhat agree with above. The holes on the piece... Apr 20 2018, 07:39 AM Mikey914 I can add the serrations, it just adds $25 to... Apr 20 2018, 09:50 AM Rob-O Completely agree, Mark. It’s tough to juggle un... Apr 20 2018, 11:49 AM Bartlett 914 I had the same problem. The pin hole on the body o... Apr 20 2018, 02:16 PM
 North Coast Jim
I had the same problem. The pin hole on the body ... Apr 20 2018, 07:14 PM raynekat I have the same problem and rebuilt mine completel... Jun 28 2018, 11:50 PM North Coast Jim
I have the same problem and rebuilt mine complete... Jun 30 2018, 08:34 AM raynekat
I have the same problem and rebuilt mine complet... Jun 30 2018, 09:02 PM n2j2ryan Have the same problem with mine. Definitely the pi... Jun 30 2018, 02:45 PM Mikey914 We actually went through painstaking detail to rep... Jun 30 2018, 10:51 PM n2j2ryan I'll take two pins! Jul 1 2018, 12:01 AM raynekat What I've found in my case is that the very lo... Aug 13 2018, 12:12 AM Philip W.
What I've found in my case is that the very l... Aug 13 2018, 08:25 AM raynekat If any of your pins in the door stop assembly look... Aug 13 2018, 12:40 PM mepstein
If any of your pins in the door stop assembly loo... Aug 13 2018, 01:14 PM Rob-O Awesome! Aug 19 2018, 06:44 AM Mikey914 Interesting.
We actually machine these parts. The ... Aug 19 2018, 10:29 AM Mikey914 Guys I've checked the tolerance on the parts o... Aug 20 2018, 04:42 PM restore2seater So what your saying is you need to manufacture rep... Aug 20 2018, 06:35 PM ConeDodger
So what your saying is you need to manufacture re... Aug 20 2018, 07:03 PM Mikey914 Well its obvious now that they do wear.
Gonna star... Aug 20 2018, 08:02 PM Mikey914 Will start a thread Sep 19 2018, 11:27 PM restore2seater Thanks Mark. :) Sep 20 2018, 09:47 PM
North Coast Jim
I had the same problem. The pin hole on the body ... Apr 20 2018, 07:14 PM raynekat I have the same problem and rebuilt mine completel... Jun 28 2018, 11:50 PM North Coast Jim
I have the same problem and rebuilt mine complete... Jun 30 2018, 08:34 AM raynekat
I have the same problem and rebuilt mine complet... Jun 30 2018, 09:02 PM n2j2ryan Have the same problem with mine. Definitely the pi... Jun 30 2018, 02:45 PM Mikey914 We actually went through painstaking detail to rep... Jun 30 2018, 10:51 PM n2j2ryan I'll take two pins! Jul 1 2018, 12:01 AM raynekat What I've found in my case is that the very lo... Aug 13 2018, 12:12 AM Philip W.
What I've found in my case is that the very l... Aug 13 2018, 08:25 AM raynekat If any of your pins in the door stop assembly look... Aug 13 2018, 12:40 PM mepstein
If any of your pins in the door stop assembly loo... Aug 13 2018, 01:14 PM Rob-O Awesome! Aug 19 2018, 06:44 AM Mikey914 Interesting.
We actually machine these parts. The ... Aug 19 2018, 10:29 AM Mikey914 Guys I've checked the tolerance on the parts o... Aug 20 2018, 04:42 PM restore2seater So what your saying is you need to manufacture rep... Aug 20 2018, 06:35 PM ConeDodger
So what your saying is you need to manufacture re... Aug 20 2018, 07:03 PM Mikey914 Well its obvious now that they do wear.
Gonna star... Aug 20 2018, 08:02 PM Mikey914 Will start a thread Sep 19 2018, 11:27 PM restore2seater Thanks Mark. :) Sep 20 2018, 09:47 PM |
1 User(s) are reading this topic (1 Guests and 0 Anonymous Users)
0 Members:

|
Lo-Fi Version | Time is now: 18th May 2024 - 03:08 AM |
Invision Power Board
v9.1.4 © 2024 IPS, Inc.