|
|
|
Porsche, and the Porsche crest are registered trademarks of Dr. Ing. h.c. F. Porsche AG.
This site is not affiliated with Porsche in any way. Its only purpose is to provide an online forum for car enthusiasts. All other trademarks are property of their respective owners. |
|
|

  |

| TravisNeff |
 Jul 14 2018, 06:37 PM Jul 14 2018, 06:37 PM
Post
#121
|
|
914 Guru  Group: Members Posts: 5,082 Joined: 20-March 03 From: Mesa, AZ Member No.: 447 Region Association: Southwest Region |
Easy come, easy go. I sold the SRP bar to Hans and have the Welt bar in the classifieds. I didn't understand that the hollow 25mm bar is the same stiffness as my solid 22 bar.
I ordered a 32mm .095 bar from Tangerine Racing. I was able to patch where I had the crack in the frame rail on the drivers side. I will add a reinforcement to this area on both the driver and passenger side. Attached image(s)  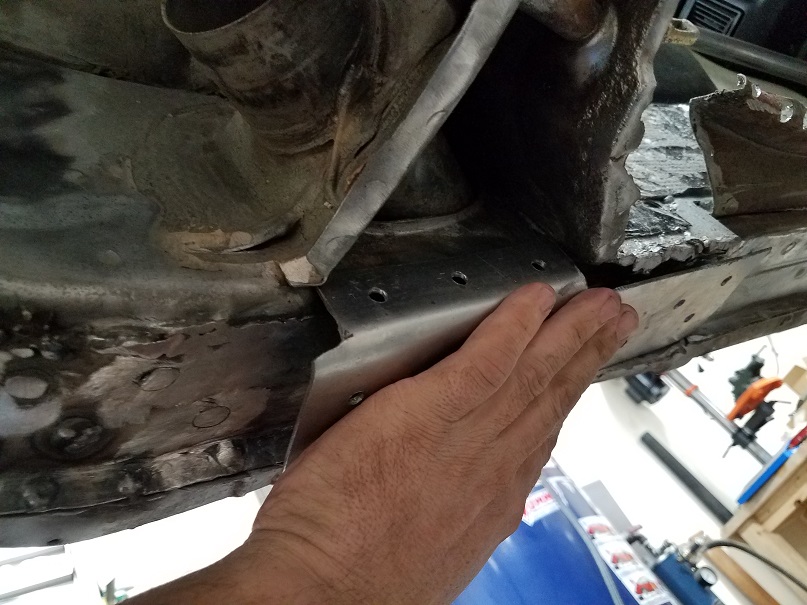
|
   |

 
|
| TravisNeff |
Jul 14 2018, 06:40 PM
Post
#122
|
|
914 Guru Group: Members Posts: 5,082 Joined: 20-March 03 From: Mesa, AZ Member No.: 447 Region Association: Southwest Region |
forgot a pic.. When I weld this in it will tie right to the existing stiffening kit in the corner, along the seam of the inner side of the frame rail and wrap up to the heater duct. I will worry about the engine compartment side at a later time. Need to get this in so I can move on with the floor replacement.
I am also cutting about an inch up on the lower firewall and patching that area before the floors go in. Attached image(s) 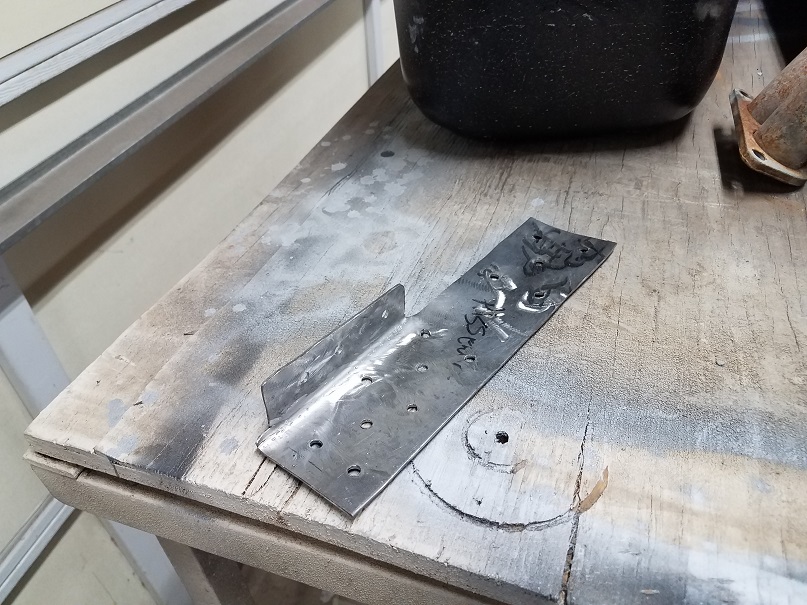
|
|
|
|
| TravisNeff |
Aug 20 2018, 11:40 AM
Post
#123
|
|
914 Guru Group: Members Posts: 5,082 Joined: 20-March 03 From: Mesa, AZ Member No.: 447 Region Association: Southwest Region |
Not much to report on progress.
I have the floors partially done, the perimeter welds are in, still need to plug weld along the interior and do the butt weld from old floor to new. Jamie Rust sent me a little gift, a 5 lug spare. I probably would have driven around without one until I learned my lesson the hard way, I appreciate the gift! I also received new SS fuel lines and a tangerine shift linkage kit,. I picked up some Monoballs for the front struts that I found in the classifieds here. Attached image(s) 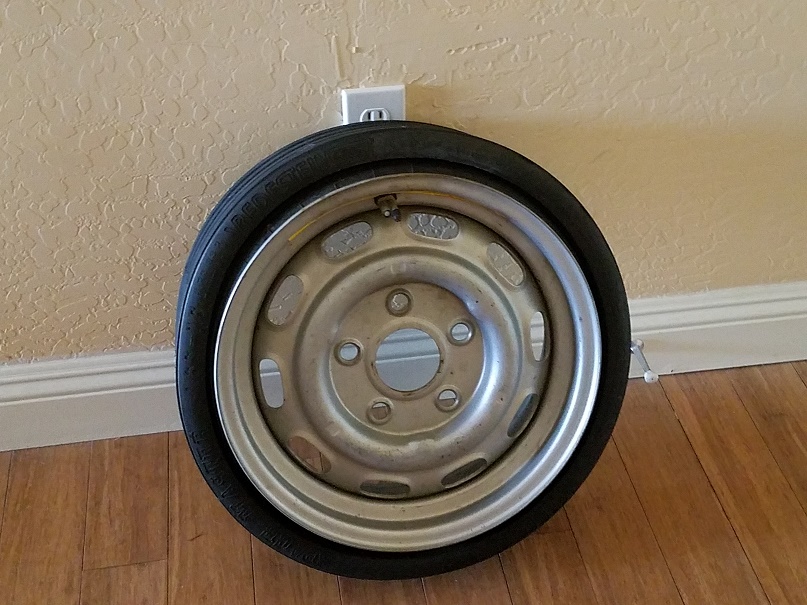 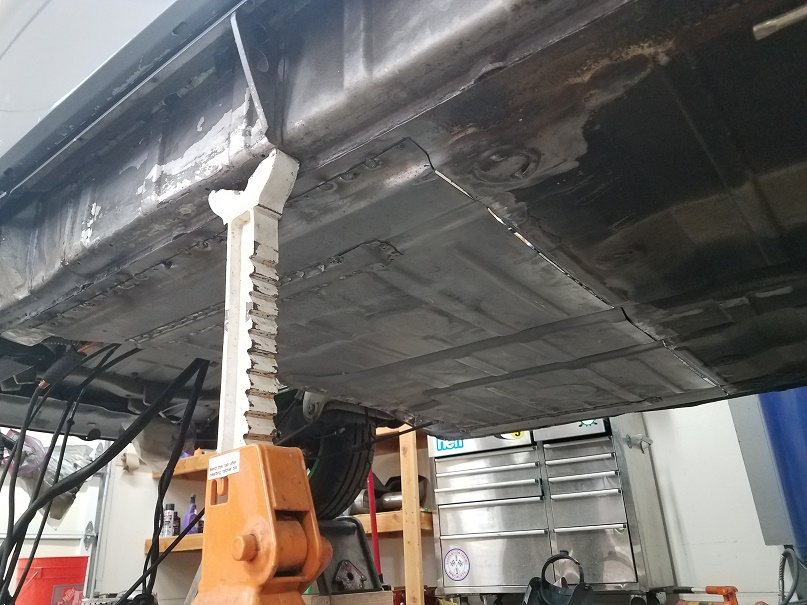
|
|
|
|
| mb911 |
Aug 20 2018, 02:20 PM
Post
#124
|
|
914 Guru Group: Members Posts: 7,789 Joined: 2-January 09 From: Burlington wi Member No.: 9,892 Region Association: Upper MidWest |
Very cool. I need to get a 5 lug spare as well..
|
|
|
|
| TravisNeff |
Sep 4 2018, 11:38 AM
Post
#125
|
|
914 Guru Group: Members Posts: 5,082 Joined: 20-March 03 From: Mesa, AZ Member No.: 447 Region Association: Southwest Region |
Engine shelf is in.
Attached image(s) 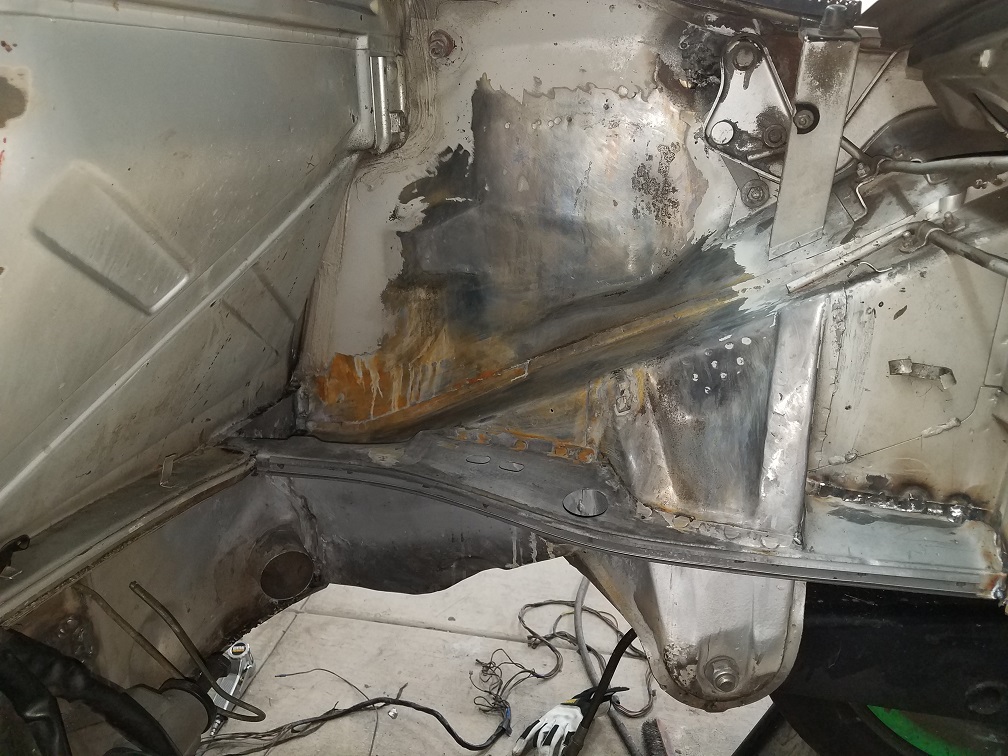
|
|
|
|
| mb911 |
Sep 4 2018, 03:17 PM
Post
#126
|
|
914 Guru Group: Members Posts: 7,789 Joined: 2-January 09 From: Burlington wi Member No.: 9,892 Region Association: Upper MidWest |
QUOTE(TravisNeff @ Sep 4 2018, 09:38 AM)  Engine shelf is in. Funny mine is just like that. I feel its strange that part doesn't have the channel for the rubber that goes all the way to meet the front corner. |
|
|
|
| TravisNeff |
Sep 16 2018, 05:32 PM
Post
#127
|
|
914 Guru Group: Members Posts: 5,082 Joined: 20-March 03 From: Mesa, AZ Member No.: 447 Region Association: Southwest Region |
As you can see the in the pic above, the trunk pivot looks like a booger farm.
Lots of braze and some weld, looks like this was attempted to be repaired a couple of times. Good thing I took this out, it was cracked and smashed. The wall behind the pivot has given way and I will need to patch. I am a bit worried about access and needing that patch to not fail in the future. Attached thumbnail(s) 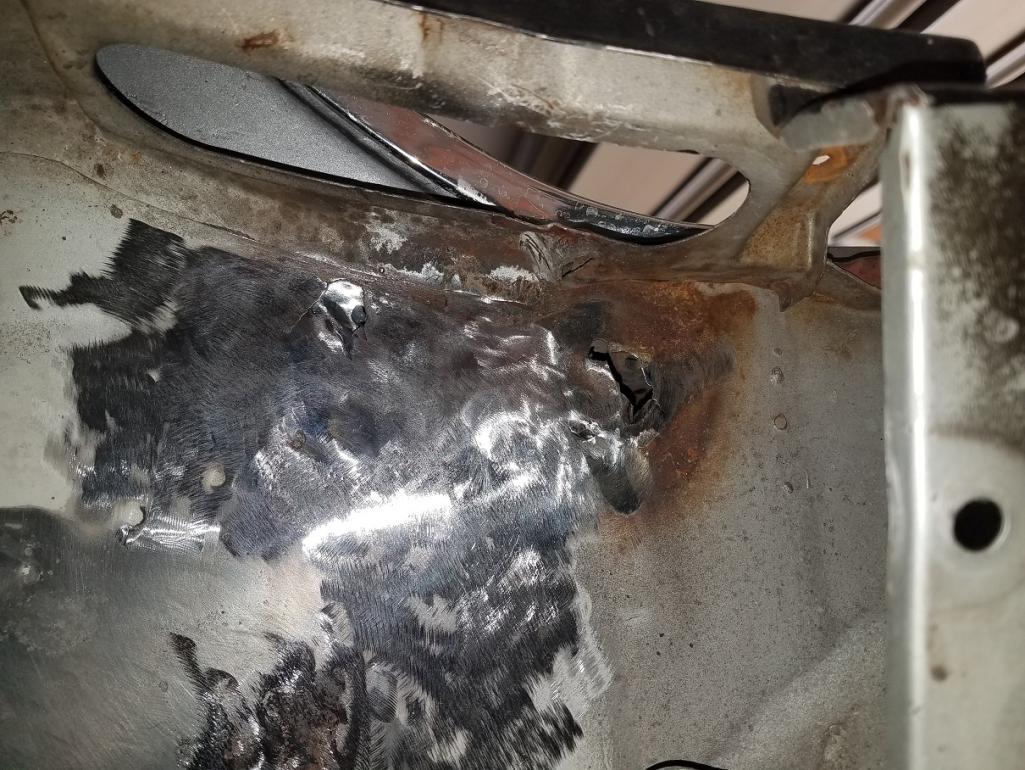 Attached image(s) 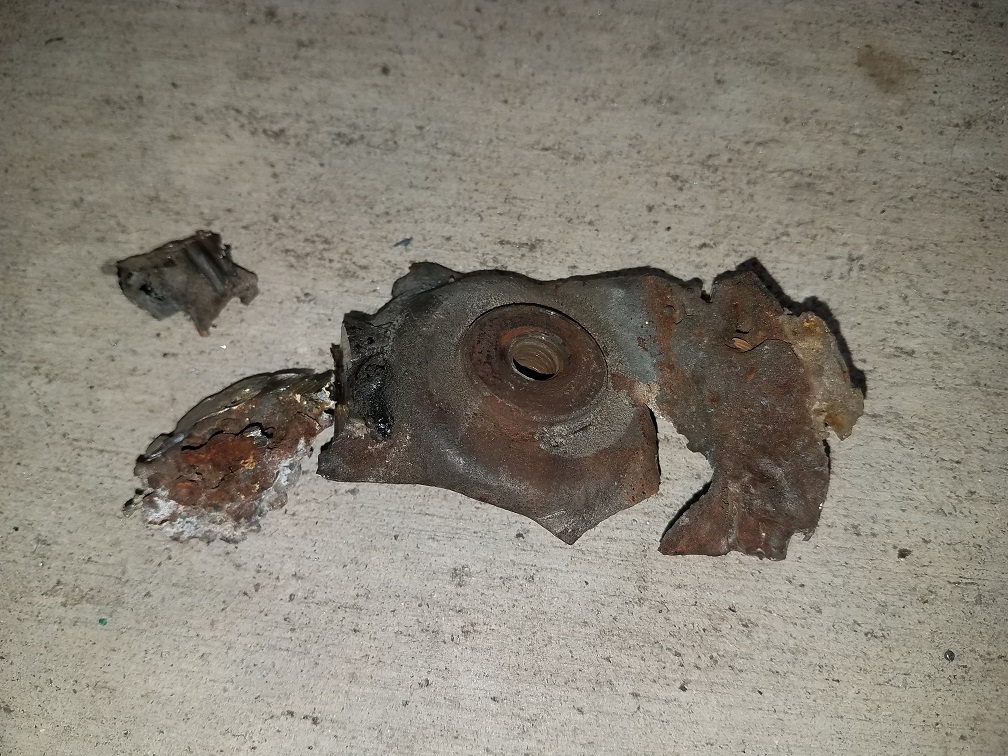
|
|
|
|
| TravisNeff |
Sep 16 2018, 06:22 PM
Post
#128
|
|
914 Guru Group: Members Posts: 5,082 Joined: 20-March 03 From: Mesa, AZ Member No.: 447 Region Association: Southwest Region |
Hole cut. I smoked my dremel with the flexi wand and had to finish with a cutoff wheel.
Attached thumbnail(s) 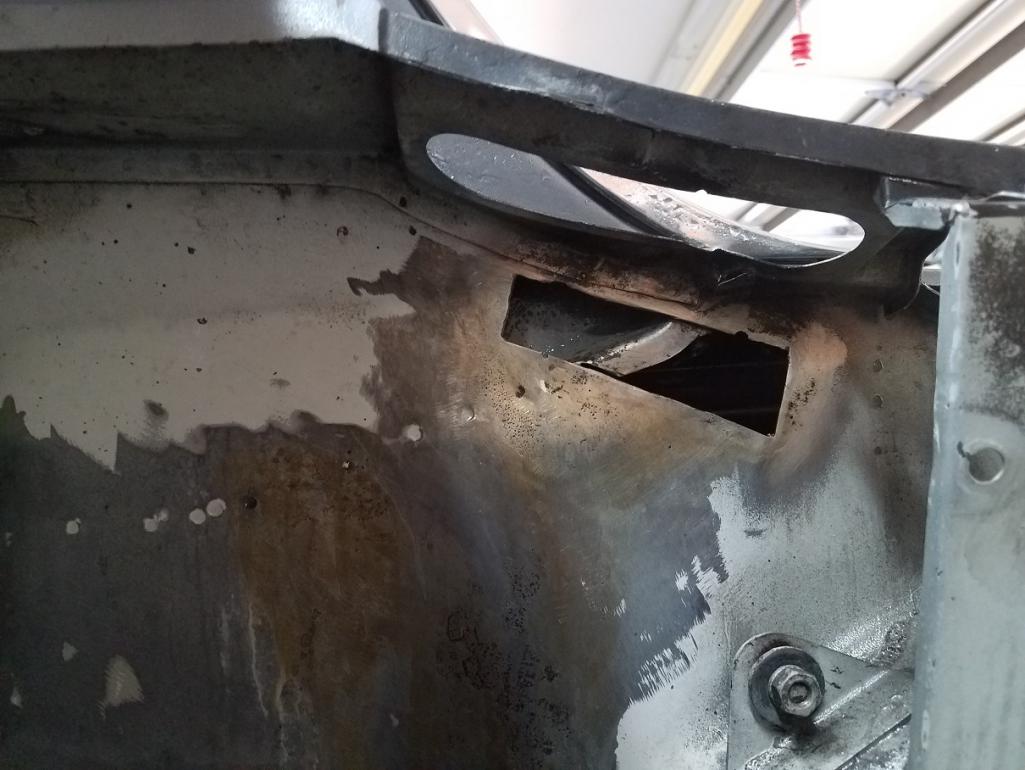
|
|
|
|
| TravisNeff |
Sep 29 2018, 12:59 PM
Post
#129
|
|
914 Guru Group: Members Posts: 5,082 Joined: 20-March 03 From: Mesa, AZ Member No.: 447 Region Association: Southwest Region |
Hinge patch piece is in and the hinge is as well.
Moving onto reinforcing the frame rail in the engine compartment. I wasn't sure about recreating the -4 mount divot, but went for it. Turned out decent enough that it wont go in the scrap pile. I will go around the bottom of the frame rail and make the remainder of the divot there, I think it will be easier to do. Then weld the 2 pieces together as one - then hot glue it into the car. I am not going to commit to welding this in unless I can get the drivers side to turn out the same. Attached thumbnail(s) 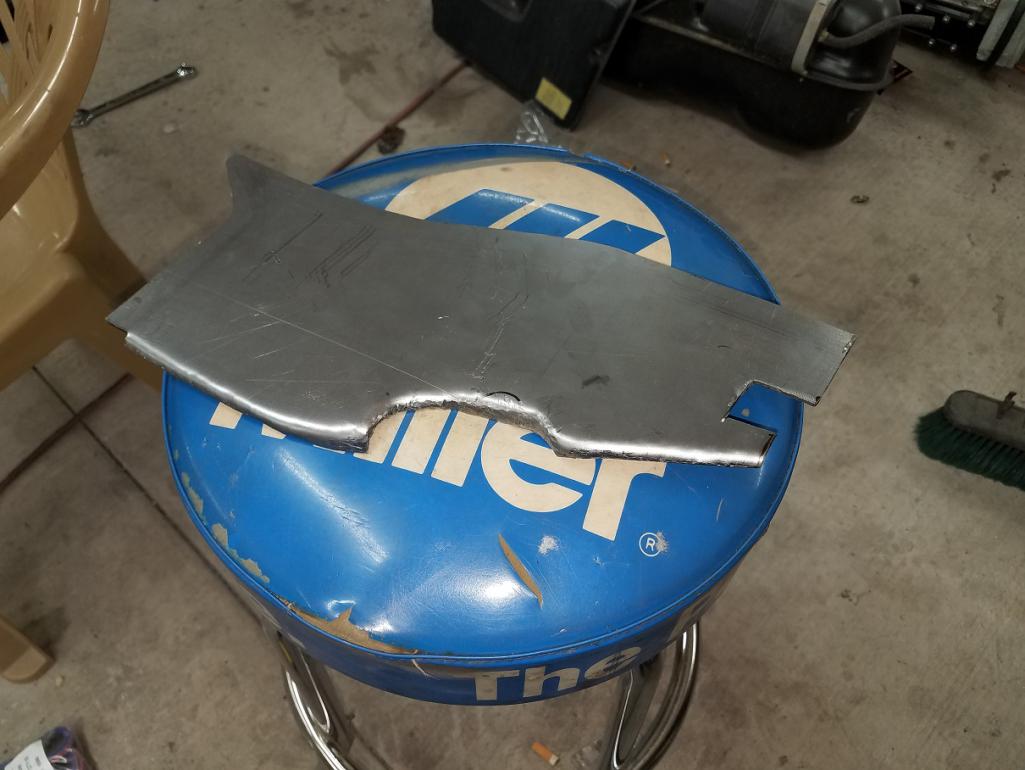 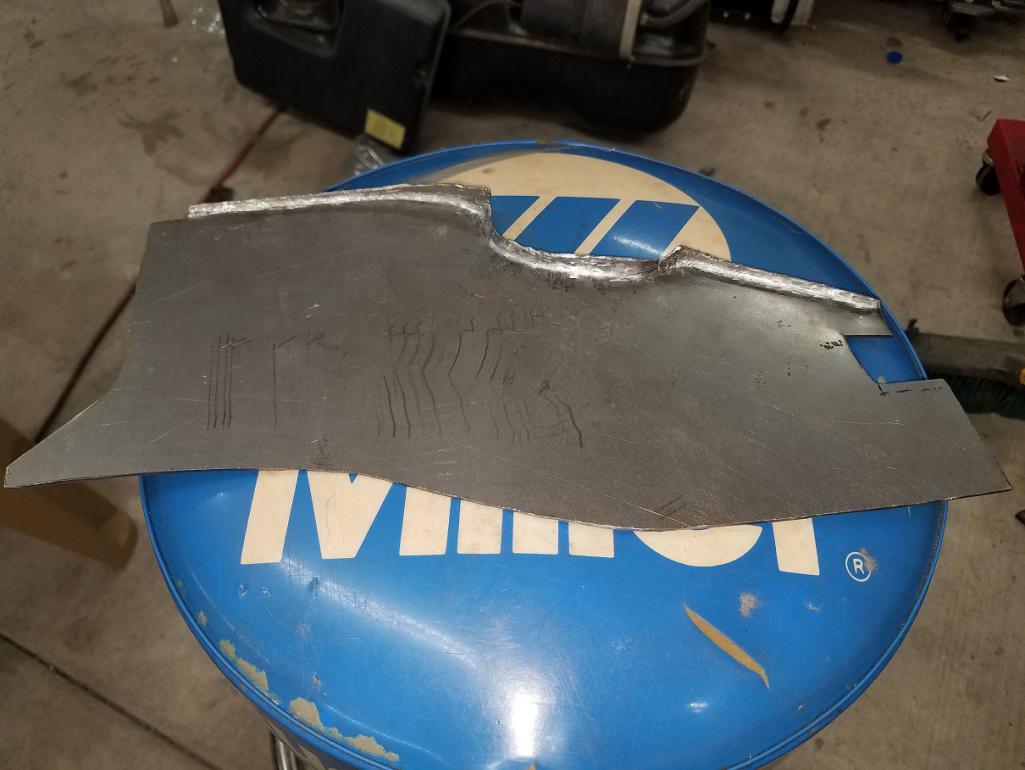 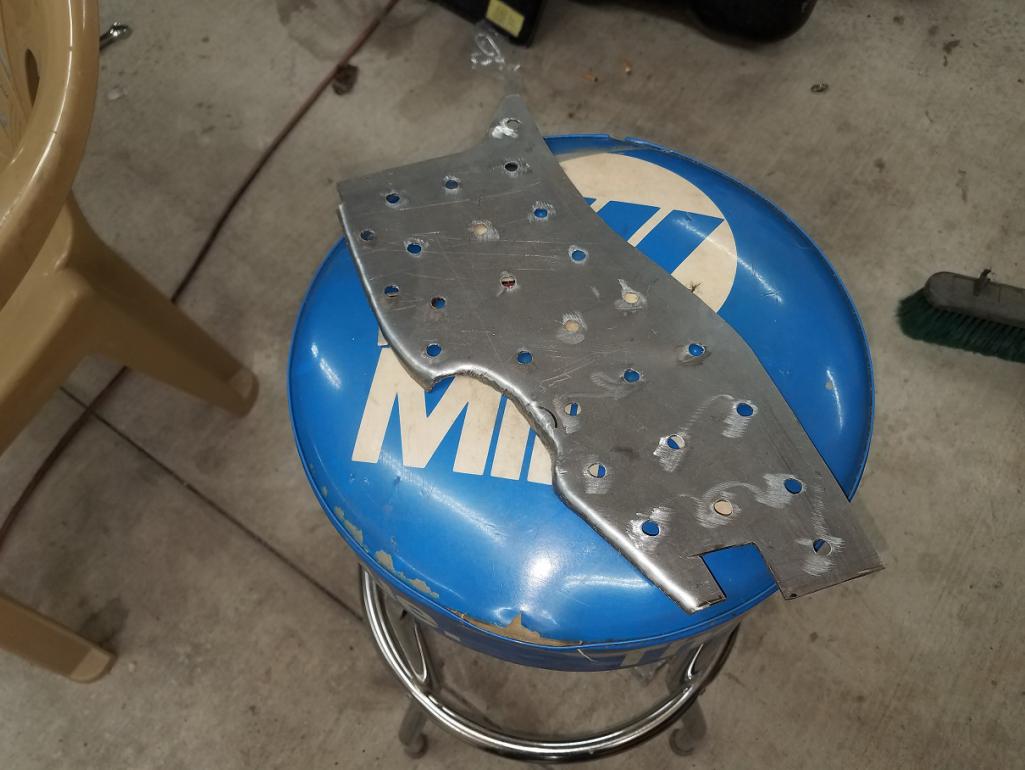
|
|
|
|
| TravisNeff |
Sep 29 2018, 03:42 PM
Post
#130
|
|
914 Guru Group: Members Posts: 5,082 Joined: 20-March 03 From: Mesa, AZ Member No.: 447 Region Association: Southwest Region |
2nd one done
Attached thumbnail(s) 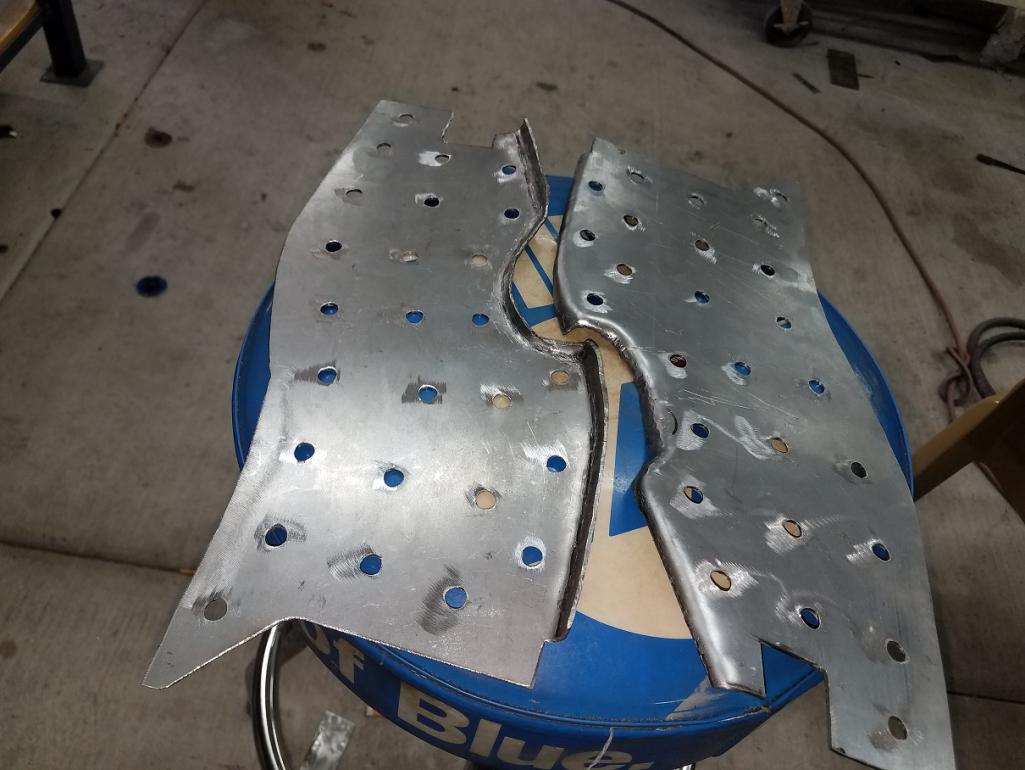
|
|
|
|
| TravisNeff |
Sep 30 2018, 05:48 PM
Post
#131
|
|
914 Guru Group: Members Posts: 5,082 Joined: 20-March 03 From: Mesa, AZ Member No.: 447 Region Association: Southwest Region |
Driver side is complete. I was going to recreate the divot piece entirely, but I think I will leave it like this and stitch it on in. Bending a very small peice of 14g into a cup shape and have it fit, then trim to size sounds like a half day ordeal for my skillset.
Attached thumbnail(s) 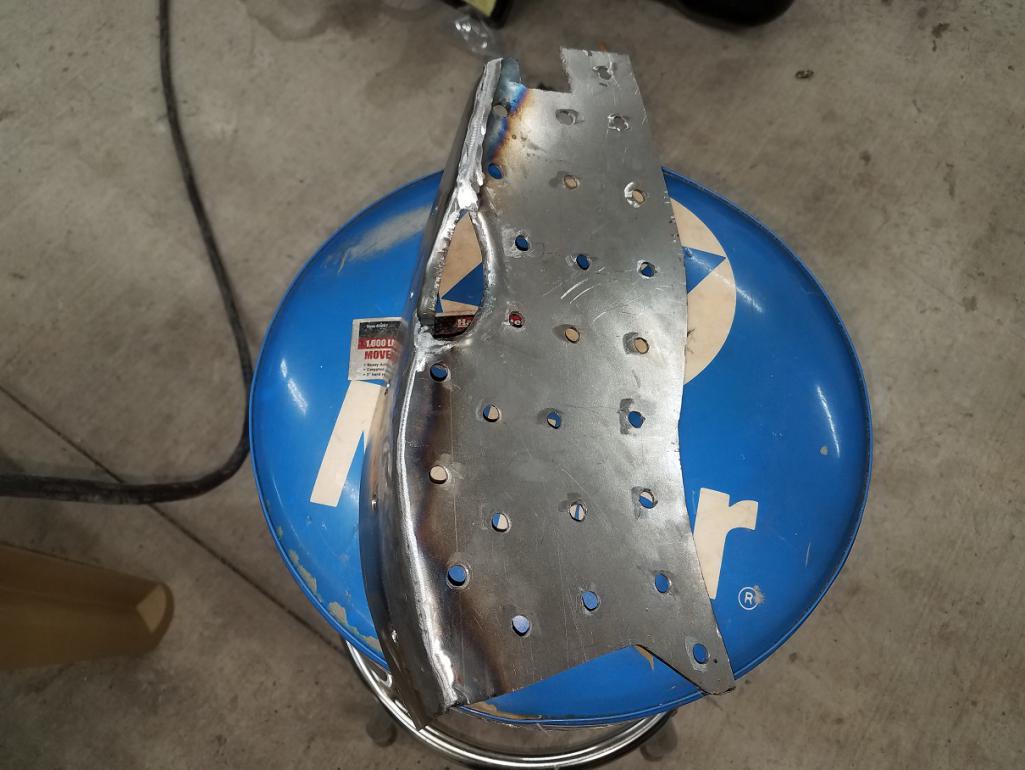
|
|
|
|
| bbrock |
Sep 30 2018, 05:52 PM
Post
#132
|
|
914 Guru Group: Members Posts: 5,269 Joined: 17-February 17 From: Montana Member No.: 20,845 Region Association: Rocky Mountains |
Good call! I had to recreate those $%^#ing divots on both sides and it was no fun. I need the 4-banger mounts so no other option. Then I got to cut one of them open and do it again when it was time to reinstall the mount because I didn't get it quite right. The less you have to do with those divots, the better. Fantastic work. Enjoying watching the progress. (IMG:style_emoticons/default/beerchug.gif)
|
|
|
|
| TravisNeff |
Sep 30 2018, 05:53 PM
Post
#133
|
|
914 Guru Group: Members Posts: 5,082 Joined: 20-March 03 From: Mesa, AZ Member No.: 447 Region Association: Southwest Region |
In place
Attached thumbnail(s) 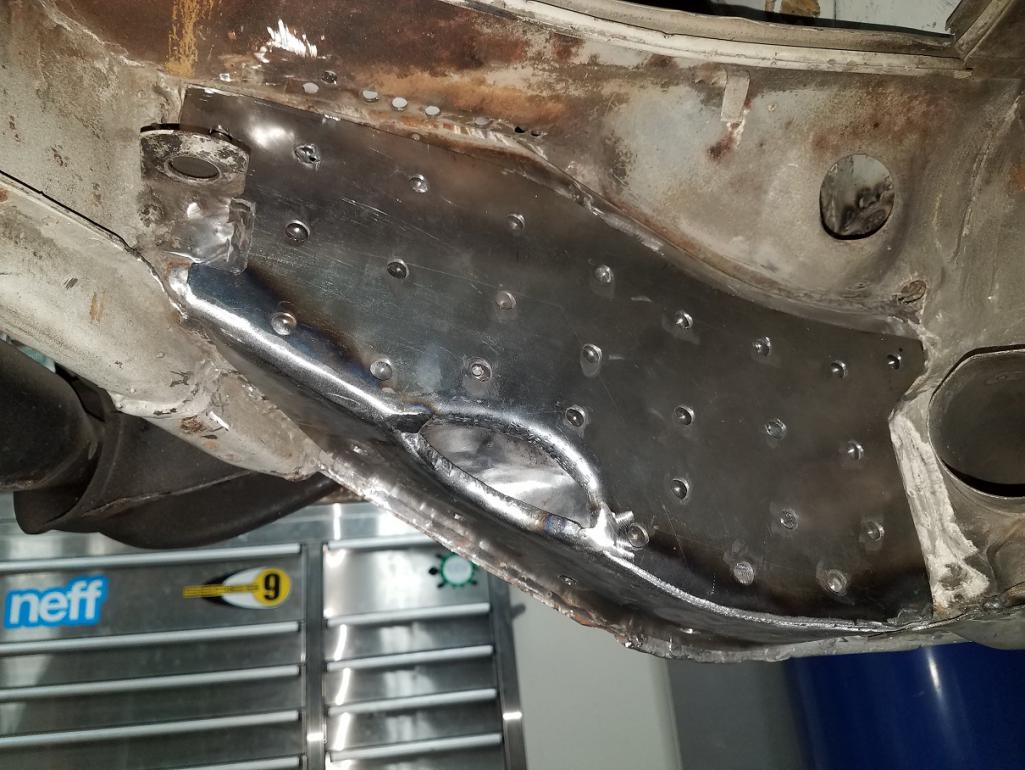
|
|
|
|
| TravisNeff |
Sep 30 2018, 05:54 PM
Post
#134
|
|
914 Guru Group: Members Posts: 5,082 Joined: 20-March 03 From: Mesa, AZ Member No.: 447 Region Association: Southwest Region |
Thanks Brent, I appreciate the kind words. This turned out better than I expected.
|
|
|
|
| bbrock |
Sep 30 2018, 06:00 PM
Post
#135
|
|
914 Guru Group: Members Posts: 5,269 Joined: 17-February 17 From: Montana Member No.: 20,845 Region Association: Rocky Mountains |
QUOTE(TravisNeff @ Sep 30 2018, 05:54 PM) Thanks Brent, I appreciate the kind words. This turned out better than I expected. BTW, because that divot is a double walled dome, it is already hell for stout. I wailed on one with a small sledge trying to nudge it just a little to allow installing my mount. It didn't budge. Your reinforcement is tying right into the strongest part so trying to fill that in would have been a waste of time IMHO. Looks fantastic! |
|
|
|
| mb911 |
Sep 30 2018, 07:04 PM
Post
#136
|
|
914 Guru Group: Members Posts: 7,789 Joined: 2-January 09 From: Burlington wi Member No.: 9,892 Region Association: Upper MidWest |
Looks very similar to what I did..
|
|
|
|
| TravisNeff |
Sep 30 2018, 07:44 PM
Post
#137
|
|
914 Guru Group: Members Posts: 5,082 Joined: 20-March 03 From: Mesa, AZ Member No.: 447 Region Association: Southwest Region |
QUOTE(mb911 @ Sep 30 2018, 06:04 PM) Looks very similar to what I did.. Yep, you started it.. (IMG:style_emoticons/default/poke.gif) |
|
|
|
| mb911 |
Oct 1 2018, 06:53 AM
Post
#138
|
|
914 Guru Group: Members Posts: 7,789 Joined: 2-January 09 From: Burlington wi Member No.: 9,892 Region Association: Upper MidWest |
QUOTE(TravisNeff @ Sep 30 2018, 05:44 PM) QUOTE(mb911 @ Sep 30 2018, 06:04 PM) Looks very similar to what I did.. Yep, you started it.. (IMG:style_emoticons/default/poke.gif) You took better pictures.. I also used 14ga from memory. |
|
|
|
| TravisNeff |
Oct 2 2018, 09:58 PM
Post
#139
|
|
914 Guru Group: Members Posts: 5,082 Joined: 20-March 03 From: Mesa, AZ Member No.: 447 Region Association: Southwest Region |
Finished making the passenger side reinforcement. Got most of the driver's side welded in. I had a few challenges with weld contamination, otherwise it's ok. I will finish this up tomorrow and then onto the other side.
Attached image(s)  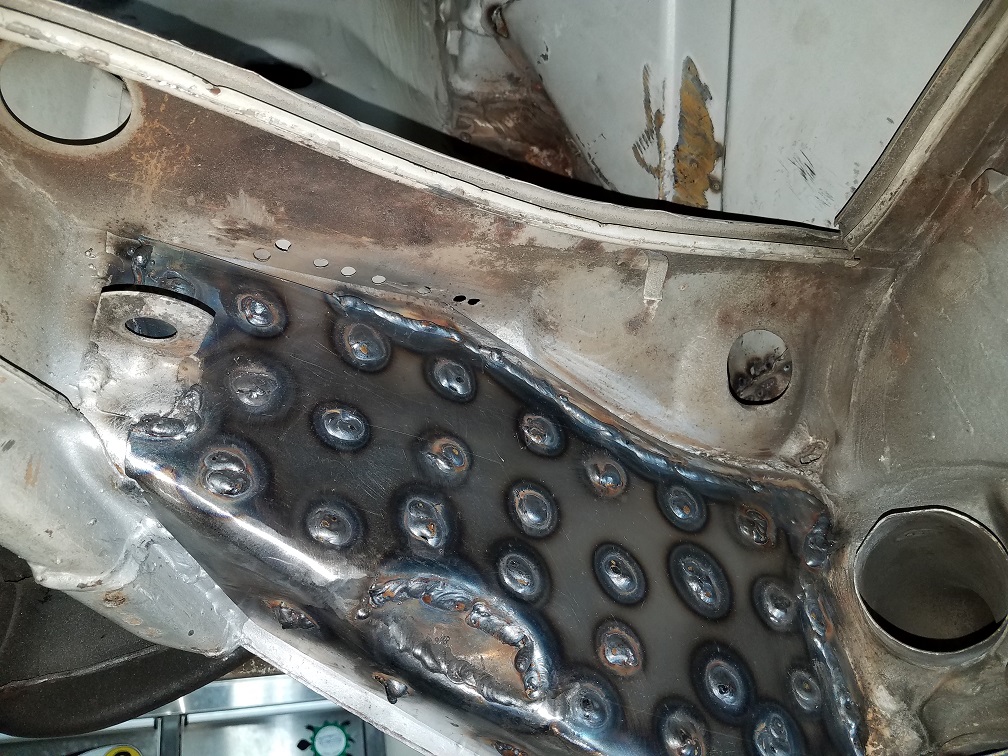
|
|
|
|
| TravisNeff |
Oct 6 2018, 03:48 PM
Post
#140
|
|
914 Guru Group: Members Posts: 5,082 Joined: 20-March 03 From: Mesa, AZ Member No.: 447 Region Association: Southwest Region |
Hijacking my own thread. Did a distributor rebuild for the SC and new bronze shift coupler bushings. The car has been running hot and takes its time getting back to idle from cruise once warm, at 94k miles it was time.
I got a nice kit from PartsKlassic for the rebuild. I hope i didnt jack anything up Attached thumbnail(s) 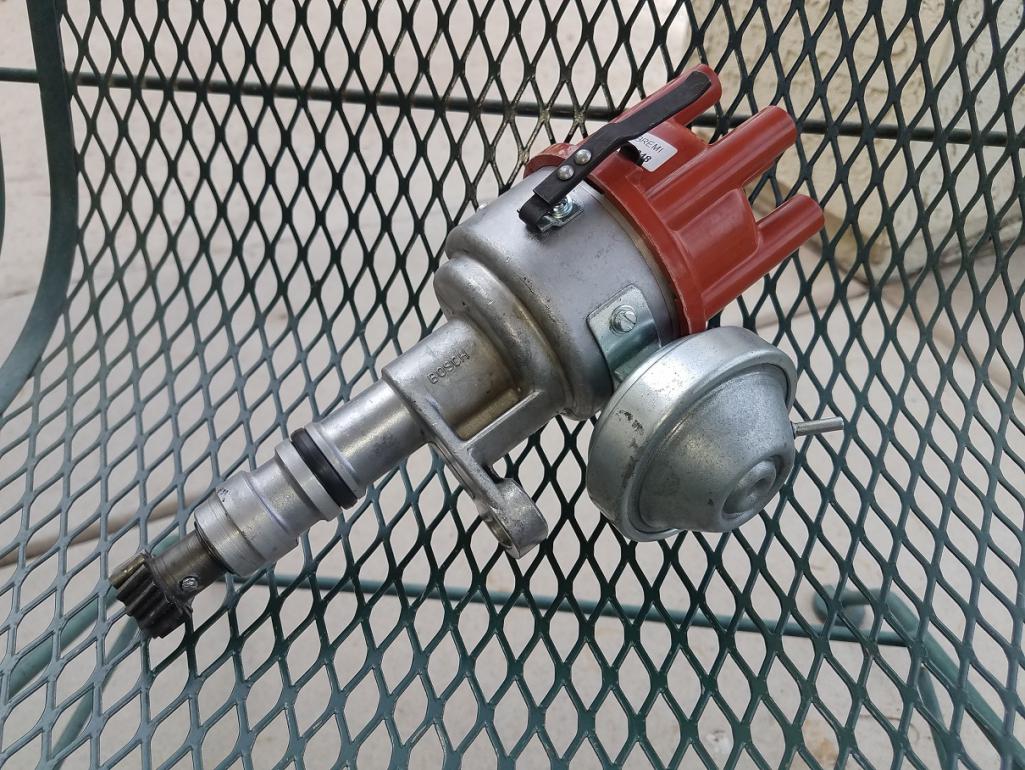
|
|
|
|
|
1 User(s) are reading this topic (1 Guests and 0 Anonymous Users)
0 Members:

|
Lo-Fi Version | Time is now: 3rd July 2026 - 07:54 AM |
Invision Power Board
v9.1.4 © 2026 IPS, Inc.