|
|
|
Porsche, and the Porsche crest are registered trademarks of Dr. Ing. h.c. F. Porsche AG.
This site is not affiliated with Porsche in any way. Its only purpose is to provide an online forum for car enthusiasts. All other trademarks are property of their respective owners. |
|
|

  |

| TravisNeff |
 Oct 8 2018, 02:37 PM Oct 8 2018, 02:37 PM
Post
#141
|
|
914 Guru  Group: Members Posts: 5,082 Joined: 20-March 03 From: Mesa, AZ Member No.: 447 Region Association: Southwest Region |
I got both reinforcements welded in, in the engine compartment.
I needed to find something to do for my lunch hour. I have the reinforcement plates for the front swaybar from Maddog. They are 16g, I used them as a template and made a pair out of my leftover 14g. Overkill? maybe. I want to run a smaller torsion bar and a big swaybar, and why the hell not. Plus I had to hog out the swaybar hole for the 31mm bar. i hope to get that this week! Excited about that. Attached thumbnail(s) 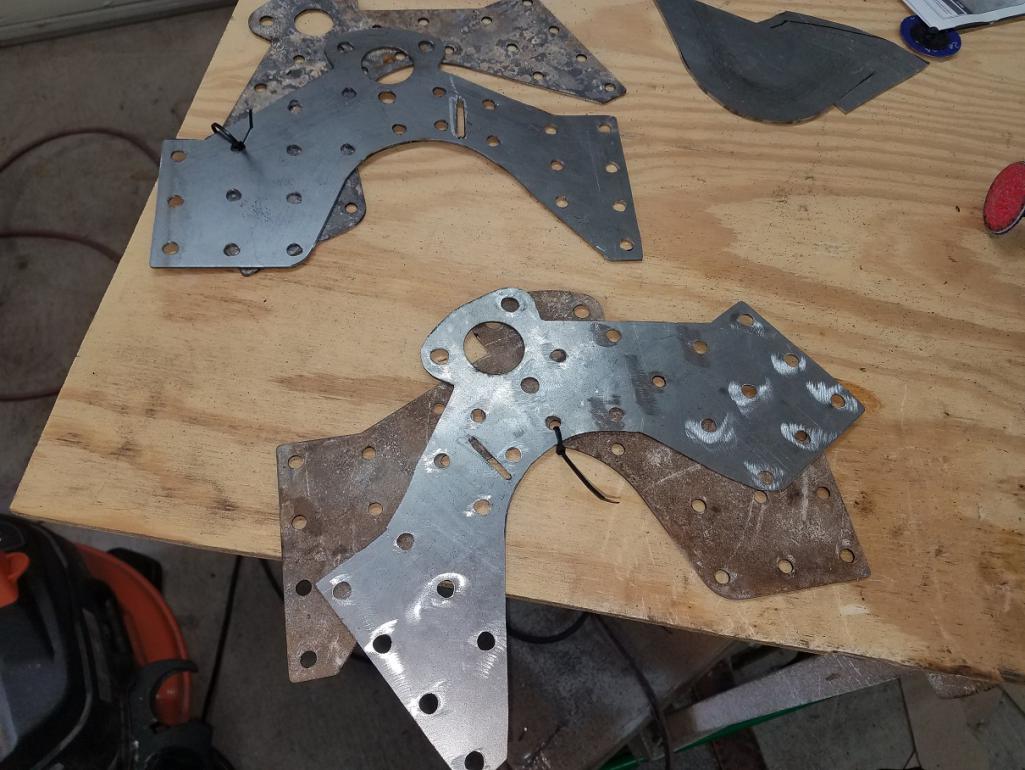
|
   |

 
|
| mb911 |
Oct 8 2018, 02:59 PM
Post
#142
|
|
914 Guru Group: Members Posts: 7,789 Joined: 2-January 09 From: Burlington wi Member No.: 9,892 Region Association: Upper MidWest |
I made my own stiffness out 14 ga for everything. I like the way you think.
|
|
|
|
| TravisNeff |
Oct 8 2018, 03:04 PM
Post
#143
|
|
914 Guru Group: Members Posts: 5,082 Joined: 20-March 03 From: Mesa, AZ Member No.: 447 Region Association: Southwest Region |
Giddyup! I don't feel so foolish now (IMG:style_emoticons/default/smile.gif)
|
|
|
|
| sixnotfour |
Oct 8 2018, 03:04 PM
Post
#144
|
|
914 Wizard Group: Members Posts: 11,275 Joined: 12-September 04 Member No.: 2,744 Region Association: NineFourteenerVille |
SC distr. rotate the wrong way wont go in your 2.4
end of hyjack |
|
|
|
| TravisNeff |
Oct 8 2018, 03:07 PM
Post
#145
|
|
914 Guru Group: Members Posts: 5,082 Joined: 20-March 03 From: Mesa, AZ Member No.: 447 Region Association: Southwest Region |
That's good, I put it back into the SC. Got lucky and fired up on the first try and runs much better at low rpms. I have a 123 distributor for the 2.7
|
|
|
|
| ChrisFoley |
Oct 8 2018, 03:19 PM
Post
#146
|
|
I am Tangerine Racing Group: Members Posts: 8,031 Joined: 29-January 03 From: Bolton, CT Member No.: 209 Region Association: None |
I think those plates are overkill at 16ga.
|
 |
|
| TravisNeff |
Oct 8 2018, 03:31 PM
Post
#147
|
|
914 Guru Group: Members Posts: 5,082 Joined: 20-March 03 From: Mesa, AZ Member No.: 447 Region Association: Southwest Region |
hmmm
|
|
|
|
| sixnotfour |
Oct 8 2018, 03:51 PM
Post
#148
|
|
914 Wizard Group: Members Posts: 11,275 Joined: 12-September 04 Member No.: 2,744 Region Association: NineFourteenerVille |
have you drilled your door handles yet...if not no worries on weight
|
|
|
|
| TravisNeff |
Oct 8 2018, 03:53 PM
Post
#149
|
|
914 Guru Group: Members Posts: 5,082 Joined: 20-March 03 From: Mesa, AZ Member No.: 447 Region Association: Southwest Region |
I was gonna take out the handles completely and use a piece of rope with a knotted end.
|
|
|
|
| TravisNeff |
Oct 13 2018, 12:34 PM
Post
#150
|
|
914 Guru Group: Members Posts: 5,082 Joined: 20-March 03 From: Mesa, AZ Member No.: 447 Region Association: Southwest Region |
I shitcanned the front reinforcements. The maddog ones and the ones I made needed some extra trimming to make it fit. I had previously welded in the backing plates and fixed the crack in the tub, from the old swaybar that didn't have the backing plates. We will see how it goes as is.
I also traded out my 22mm torsion bars with Yeahmag for his 21mm bars. When I pulled the front struts away to open up the swaybar holes I found that one of my Koni's had bit the dust. I bought them 15 years ago and don't have a receipt for a warranty rebuild. I will have to find someone who can rebuild them for me, I hear that not many places rebuild the Koni's and the wait time is pretty long. I got a surprise from Tangerine Racing this morning. Attached thumbnail(s) 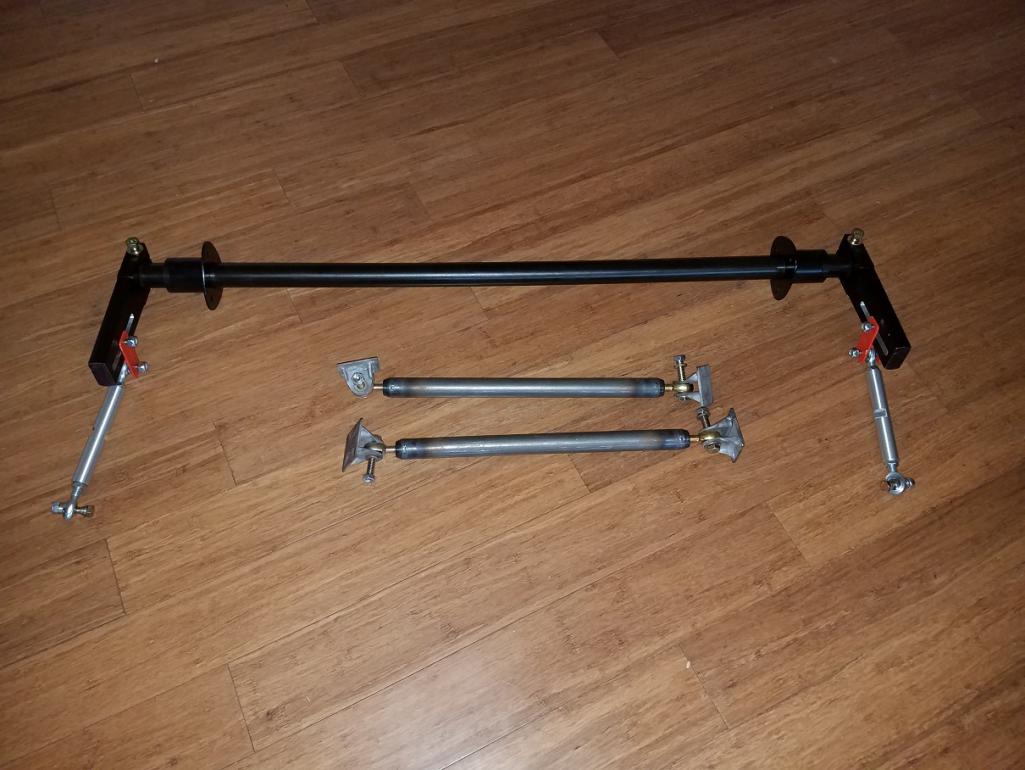
|
|
|
|
| ChrisFoley |
Oct 13 2018, 01:20 PM
Post
#151
|
|
I am Tangerine Racing Group: Members Posts: 8,031 Joined: 29-January 03 From: Bolton, CT Member No.: 209 Region Association: None |
There's a trick to setting up the anti-sway bar so there's no binding. Doing this will go a long way to preventing stress cracks in the future.
Bolt up both bushing brackets and slide the bar in until it nearly touches the other side. Determine which way it needs to be moved to line up perfectly. Pull the bar back out most of the way and lean on it in the direction needed to bend the chassis so next time you slide it in it will go right into the other bushing. It may take 2 or 3 tries to line it up just right. Then follow the same procedure from the other side of the car. After doing this it should be possible to rotate the bar by hand after it's fully inserted - without the arms attached. Put some bearing grease on both bushings when you're ready to permanently install the bar. |
|
|
|
| TravisNeff |
Oct 13 2018, 01:22 PM
Post
#152
|
|
914 Guru Group: Members Posts: 5,082 Joined: 20-March 03 From: Mesa, AZ Member No.: 447 Region Association: Southwest Region |
That'll work, I am super excited about this bar.
Thanks Chris, I just have it finger tight and it seems just about right - I will heed your advice when I bolt her down. Attached thumbnail(s) 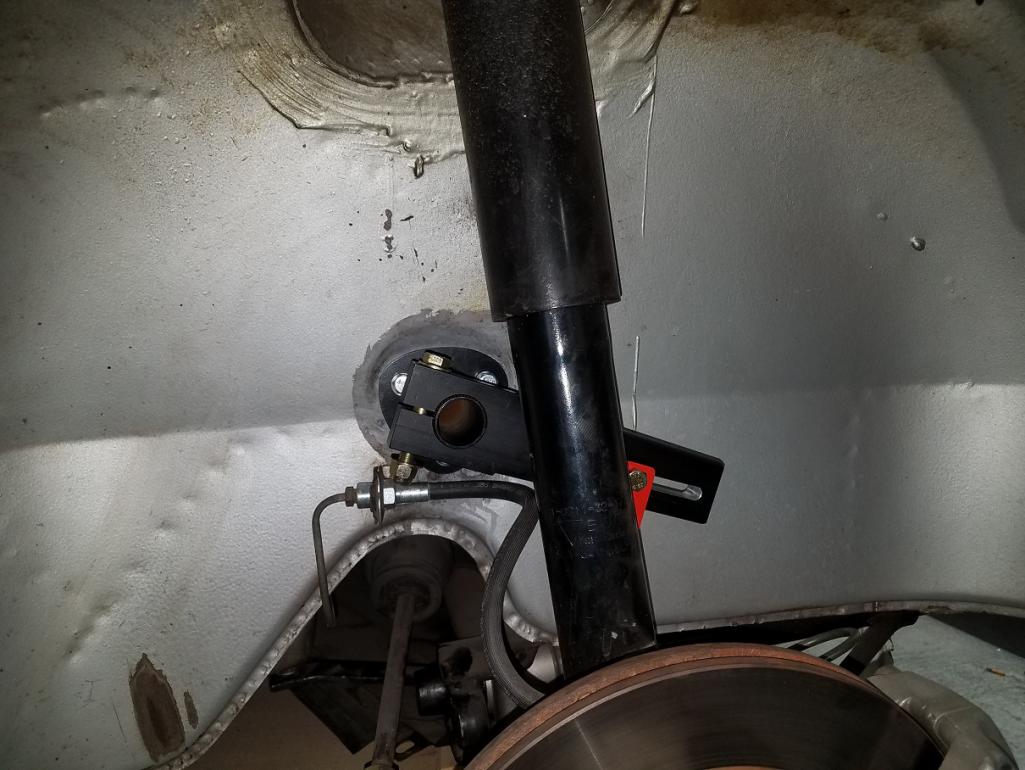 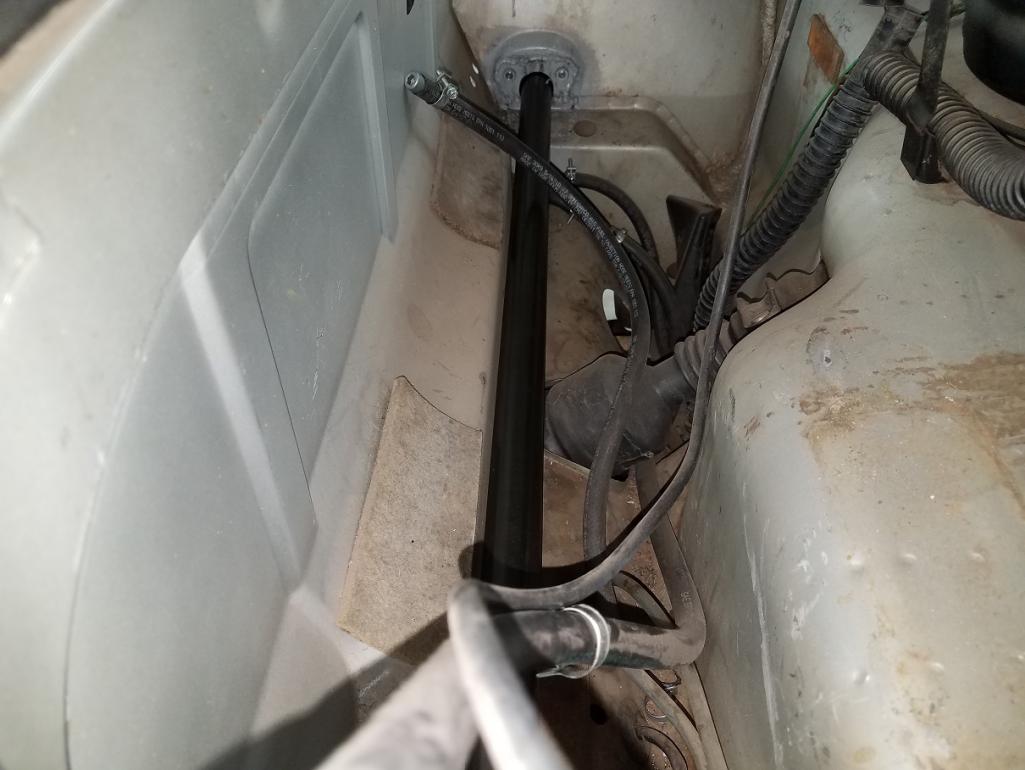
|
|
|
|
| TravisNeff |
Oct 13 2018, 08:00 PM
Post
#153
|
|
914 Guru Group: Members Posts: 5,082 Joined: 20-March 03 From: Mesa, AZ Member No.: 447 Region Association: Southwest Region |
Firewall forward mount for the suspension brace.
Attached thumbnail(s) 
|
|
|
|
| TravisNeff |
Oct 13 2018, 09:00 PM
Post
#154
|
|
914 Guru Group: Members Posts: 5,082 Joined: 20-March 03 From: Mesa, AZ Member No.: 447 Region Association: Southwest Region |
I made a plate that wraps around the front of the suspension console and glued in the bracket.
Attached thumbnail(s) 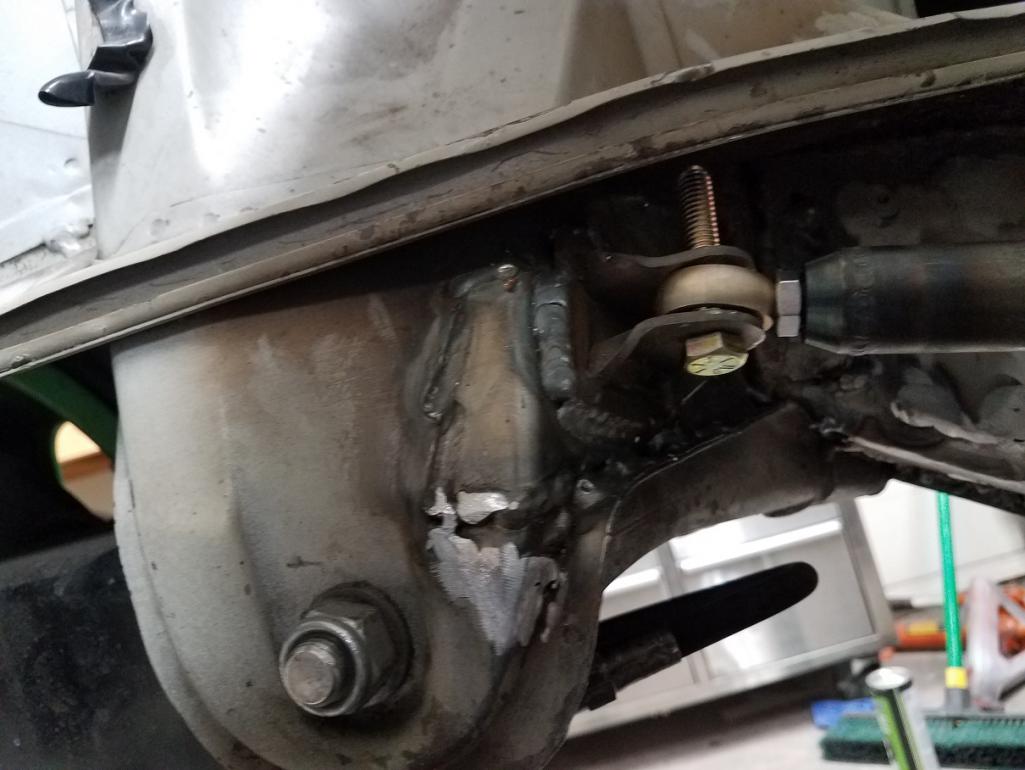 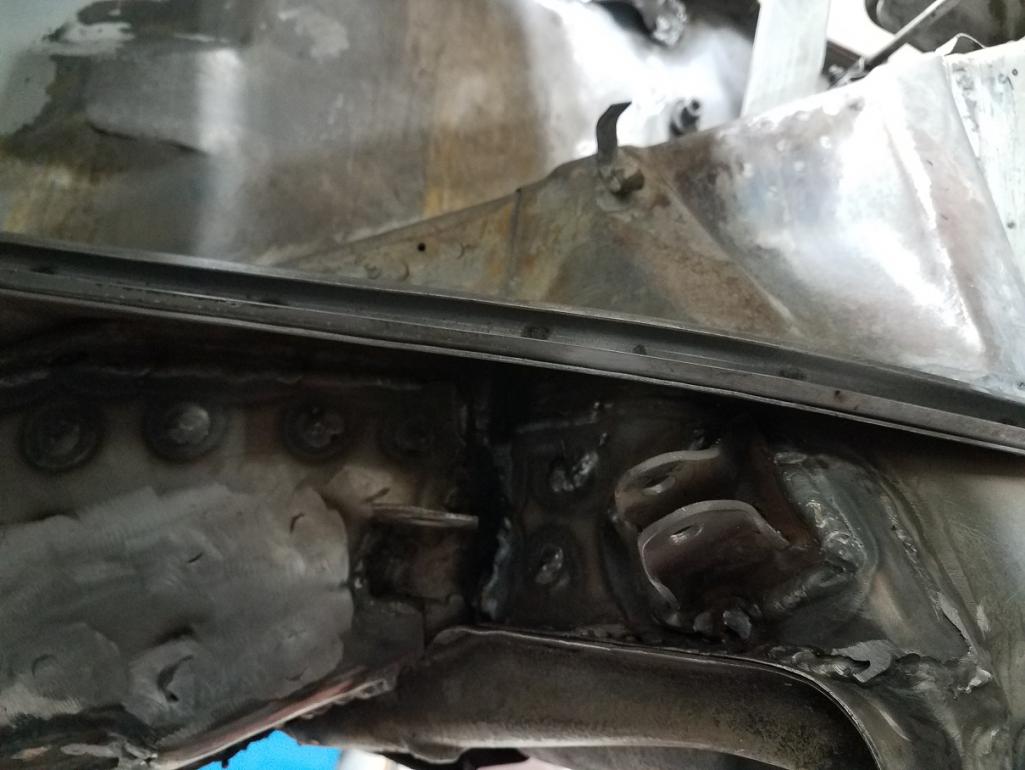 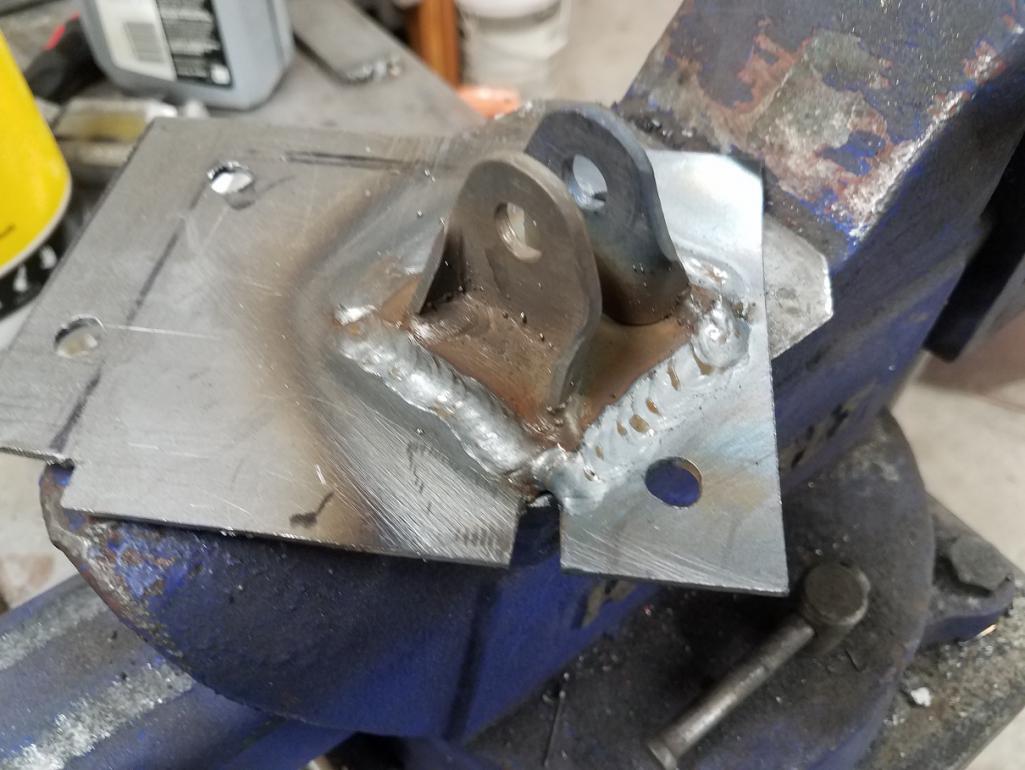
|
|
|
|
| mb911 |
Oct 14 2018, 06:17 AM
Post
#155
|
|
914 Guru Group: Members Posts: 7,789 Joined: 2-January 09 From: Burlington wi Member No.: 9,892 Region Association: Upper MidWest |
Travis your welds are really shaping up.. Good job.
|
|
|
|
| TravisNeff |
Oct 14 2018, 01:18 PM
Post
#156
|
|
914 Guru Group: Members Posts: 5,082 Joined: 20-March 03 From: Mesa, AZ Member No.: 447 Region Association: Southwest Region |
Thanks for the vote of confidence Ben. It's in, had a couple blown holes that I need to fix.
Attached thumbnail(s) 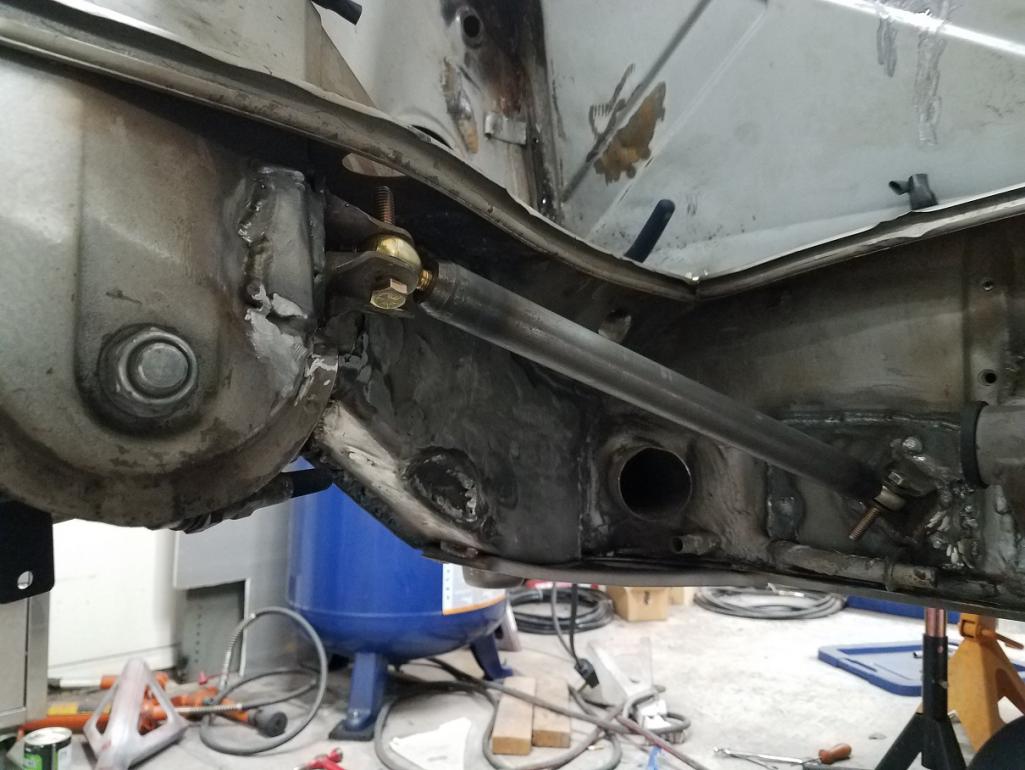 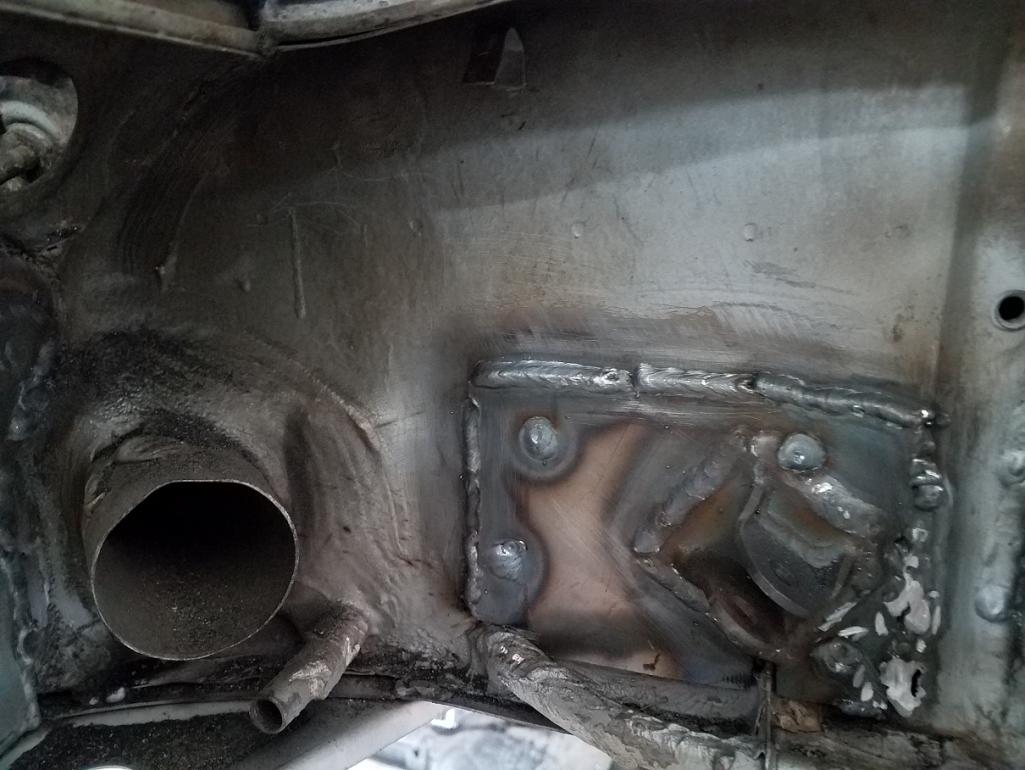
|
|
|
|
| TravisNeff |
Oct 14 2018, 07:26 PM
Post
#157
|
|
914 Guru Group: Members Posts: 5,082 Joined: 20-March 03 From: Mesa, AZ Member No.: 447 Region Association: Southwest Region |
Moving onto the inside. The car was crashed at some point and the hump below the seat belt pocket was crushed up pretty good. Hardly noticeable when the relay board was in place. I was able to beat it mostly back into shape, but have a crack in the metal. This is going to be a bit tricky for me to make a patch piece.
Attached thumbnail(s) 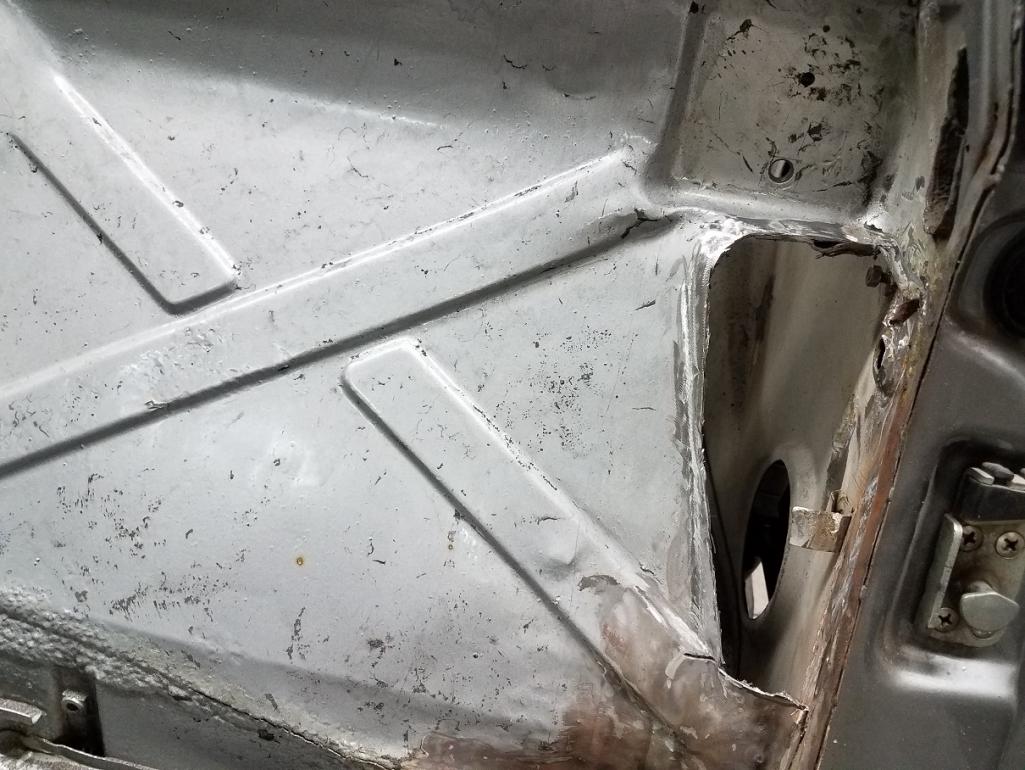 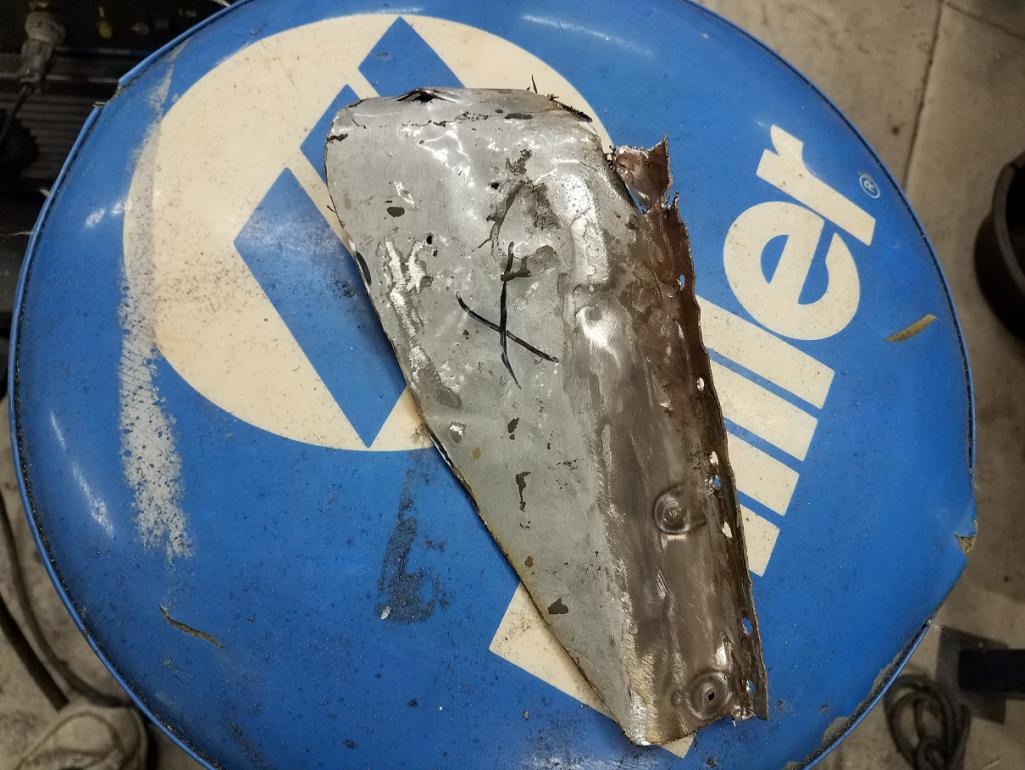
|
|
|
|
| TravisNeff |
Oct 14 2018, 08:16 PM
Post
#158
|
|
914 Guru Group: Members Posts: 5,082 Joined: 20-March 03 From: Mesa, AZ Member No.: 447 Region Association: Southwest Region |
Starting of the patch piece.
Attached thumbnail(s) 
|
|
|
|
| bbrock |
Oct 14 2018, 08:25 PM
Post
#159
|
|
914 Guru Group: Members Posts: 5,269 Joined: 17-February 17 From: Montana Member No.: 20,845 Region Association: Rocky Mountains |
That's an impressive start! You are doing better than me. I had to patch the little bulge where the hood release pull attaches which is a similar PITA dome. I wound up having to make a relief cut to pull the metal around to form the dome. Nice work on yours! (IMG:style_emoticons/default/smilie_pokal.gif)
|
|
|
|
| TravisNeff |
Oct 14 2018, 09:49 PM
Post
#160
|
|
914 Guru Group: Members Posts: 5,082 Joined: 20-March 03 From: Mesa, AZ Member No.: 447 Region Association: Southwest Region |
Thanks Brent, got lucky with this part. A little closer now.
Attached thumbnail(s) 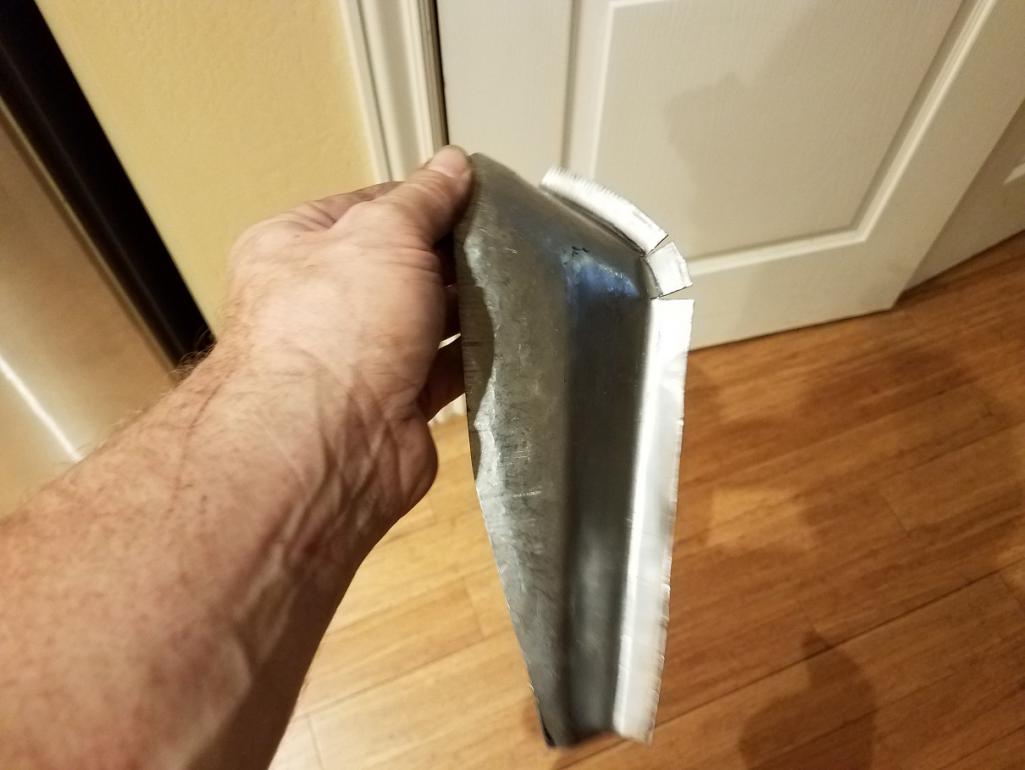
|
|
|
|
|
1 User(s) are reading this topic (1 Guests and 0 Anonymous Users)
0 Members:

|
Lo-Fi Version | Time is now: 3rd July 2026 - 09:07 AM |
Invision Power Board
v9.1.4 © 2026 IPS, Inc.