|
|
|
Porsche, and the Porsche crest are registered trademarks of Dr. Ing. h.c. F. Porsche AG.
This site is not affiliated with Porsche in any way. Its only purpose is to provide an online forum for car enthusiasts. All other trademarks are property of their respective owners. |
|
|

  |

| TravisNeff |
 Nov 12 2018, 01:50 PM Nov 12 2018, 01:50 PM
Post
#221
|
|
914 Guru  Group: Members Posts: 5,082 Joined: 20-March 03 From: Mesa, AZ Member No.: 447 Region Association: Southwest Region |
QUOTE(sixnotfour @ Nov 12 2018, 10:33 AM)  QUOTE You've started something.. should only take a couple of hours .... I only had 20 minutes. I had a duct cover that looks similar to Ben's that I was playing around with, I cut the height to 2.25 and the depth to about 1.25 to keep it tight as possible to the wheel well. Found a metal scrap on the floor to mock the foot rest of the dead pedal. Bent it so the dead rest is a little further back in the footwell. I am gonna have to call this the dead duck. Attached image(s) 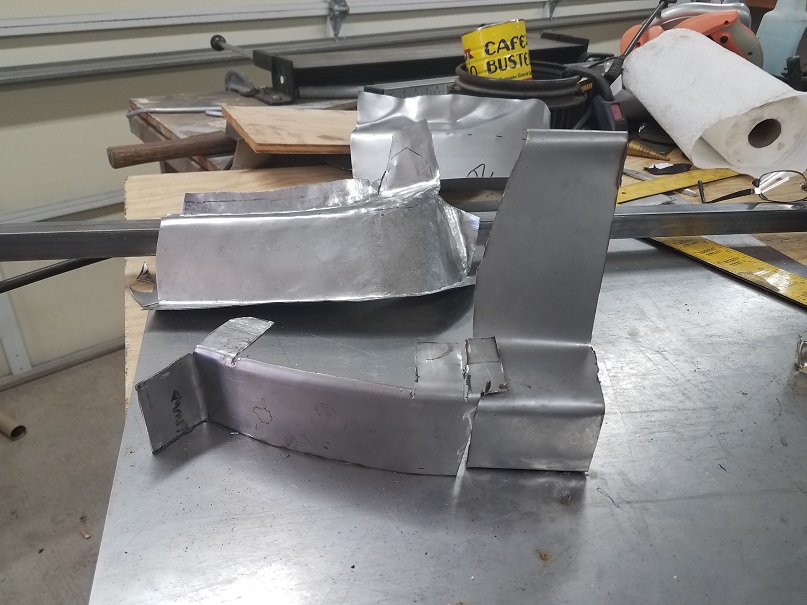 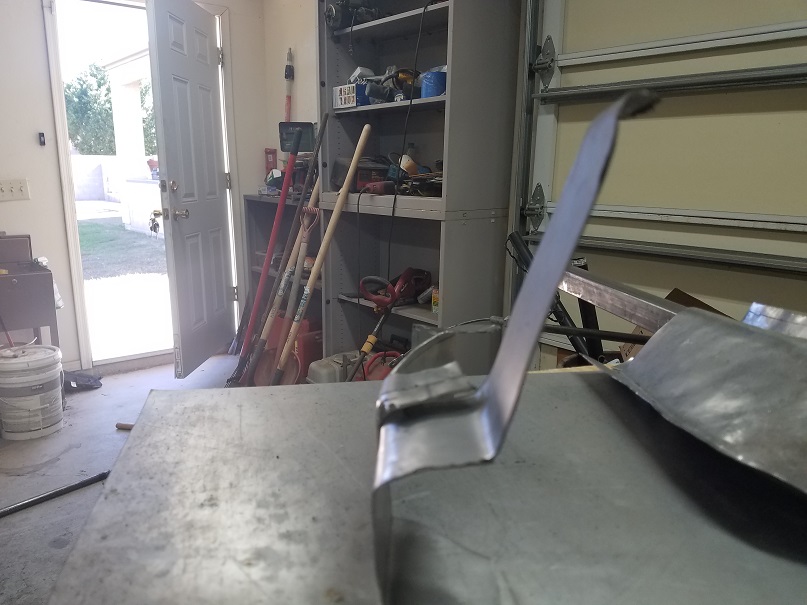 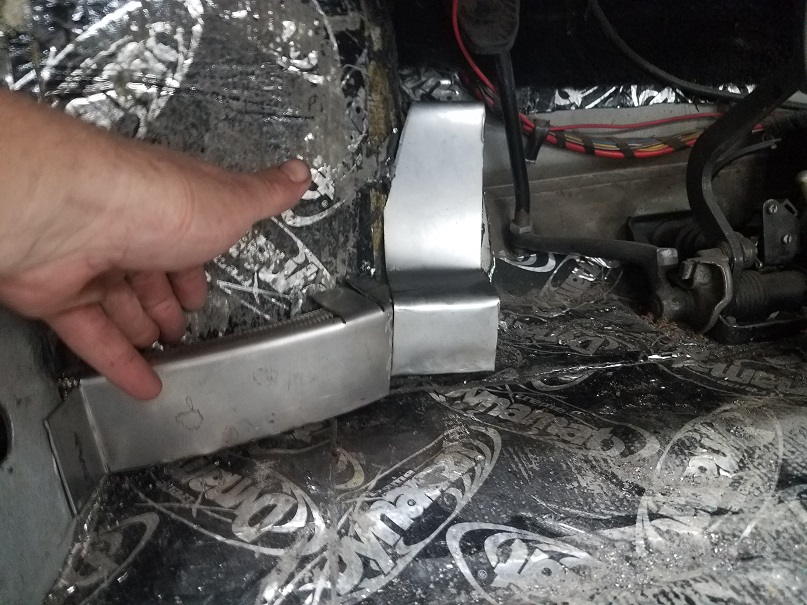
|
   |

 
|
| jfort |
Nov 12 2018, 02:08 PM
Post
#222
|
|
Senior Member Group: Members Posts: 1,189 Joined: 5-May 03 From: Findlay, OH Member No.: 652 Region Association: Upper MidWest |
love that dead pedal! |
|
|
|
| TravisNeff |
Nov 14 2018, 09:26 PM
Post
#223
|
|
914 Guru Group: Members Posts: 5,082 Joined: 20-March 03 From: Mesa, AZ Member No.: 447 Region Association: Southwest Region |
My initial mock up for the pedal was way too close to the clutch pedal. From the "show me your dead pedal" thread I see what I need to do.
I build a new oil line cover and bent a piece for the dead pedal to see how I like it. There will be more changes before I glue it up together. Attached image(s) 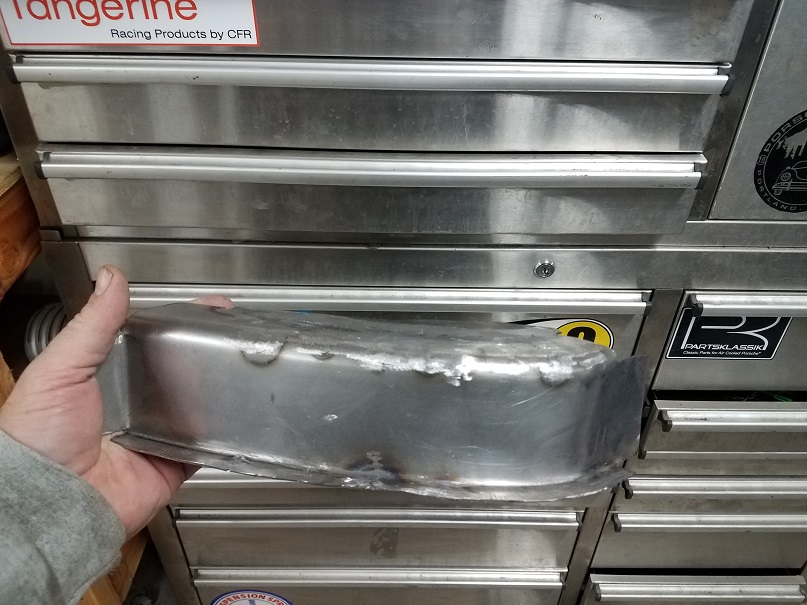 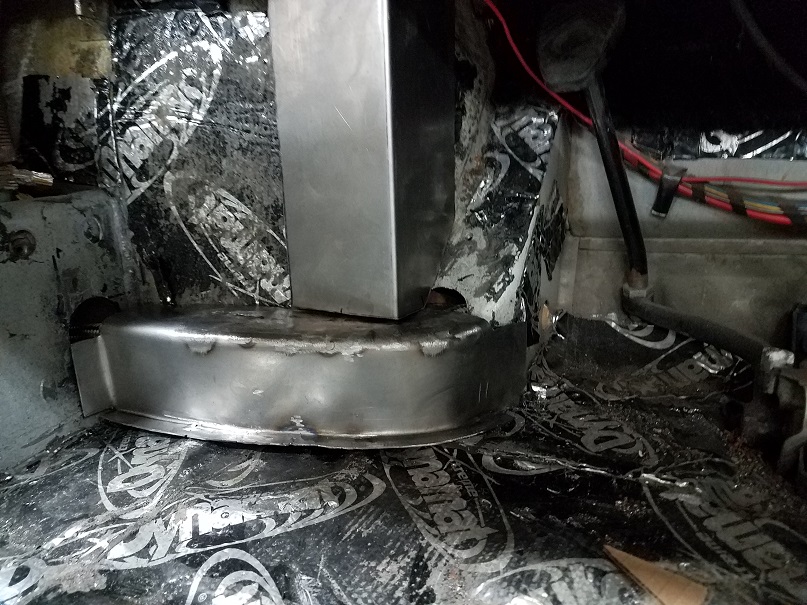 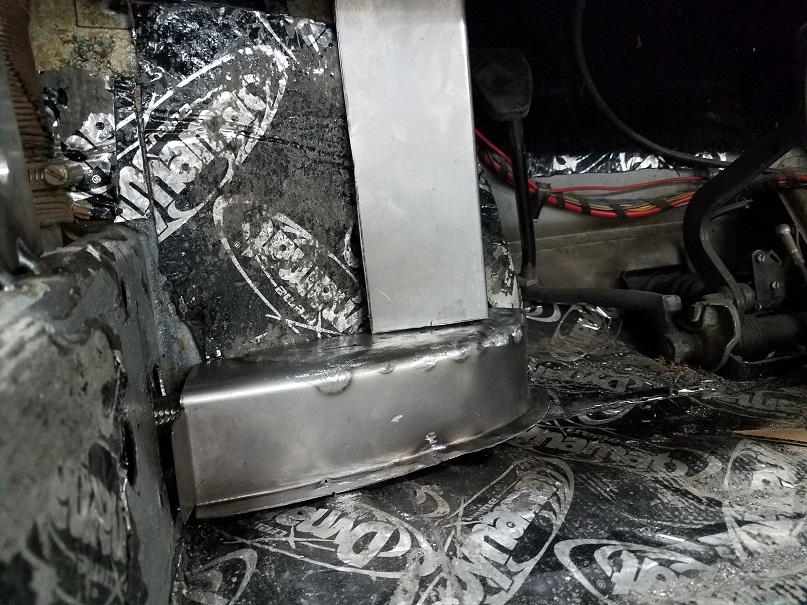
|
|
|
|
| TravisNeff |
Nov 17 2018, 11:36 AM
Post
#224
|
|
914 Guru Group: Members Posts: 5,082 Joined: 20-March 03 From: Mesa, AZ Member No.: 447 Region Association: Southwest Region |
Switching gears from the oil line cover and dead pedal. I better finish off the front trunk floor.
I got my tow hook off the chunk of floor I cut out. I bent it a little to give some room to hook. Then, when looking at the factory GT pics on Armando's site I see that these cars has re-used the tow hook but dropped it down a bit with a piece of metal that looked like a frisbee. So I bent up a box. I will weld the hook to it, then the box to the floor. I screwed up on my bends and you can see one side is a little taller than the other. Almost looks like I intended it to work out this way from the pics. (IMG:style_emoticons/default/biggrin.gif) Attached thumbnail(s) 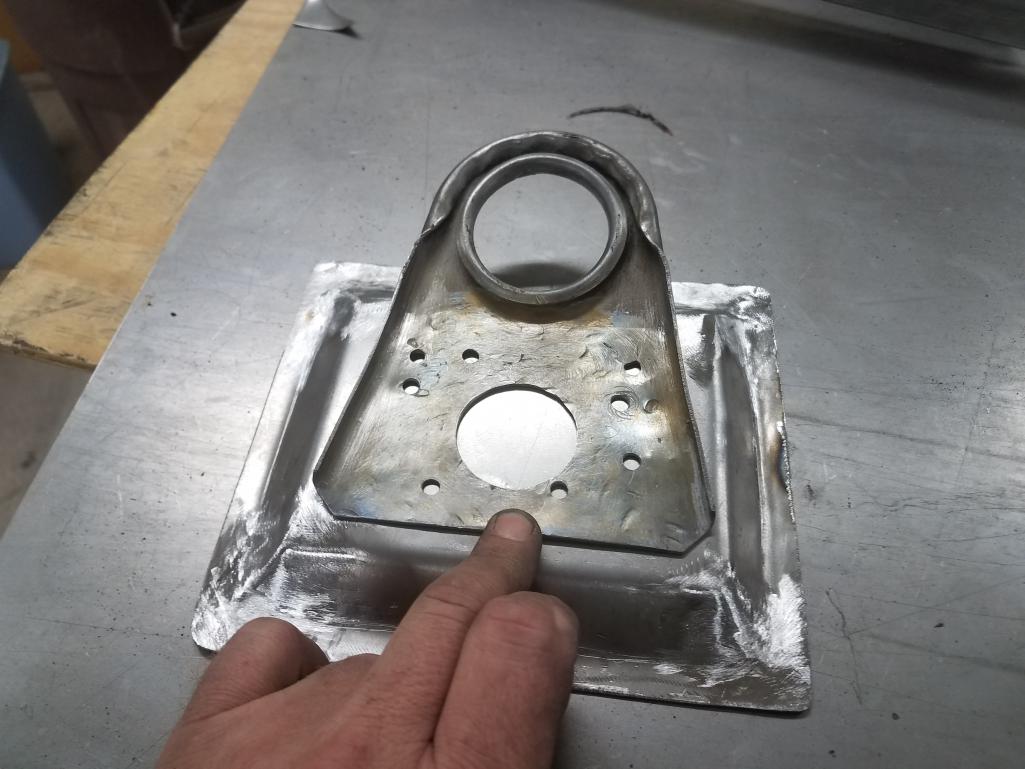 Attached image(s)  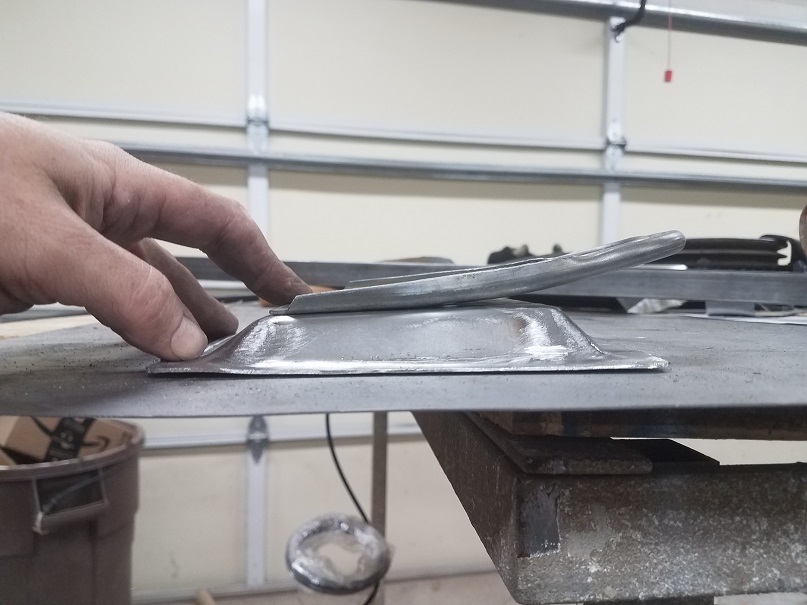
|
|
|
|
| TravisNeff |
Nov 17 2018, 12:47 PM
Post
#225
|
|
914 Guru Group: Members Posts: 5,082 Joined: 20-March 03 From: Mesa, AZ Member No.: 447 Region Association: Southwest Region |
I used etch primer and scratched away the surface that I was going to weld. Weld through primer is super expensive and that crap always clogs, even if you store the can upside down. Plus you need to scratch away the surface anyhow..
Welded in and a little burn validation Attached image(s) 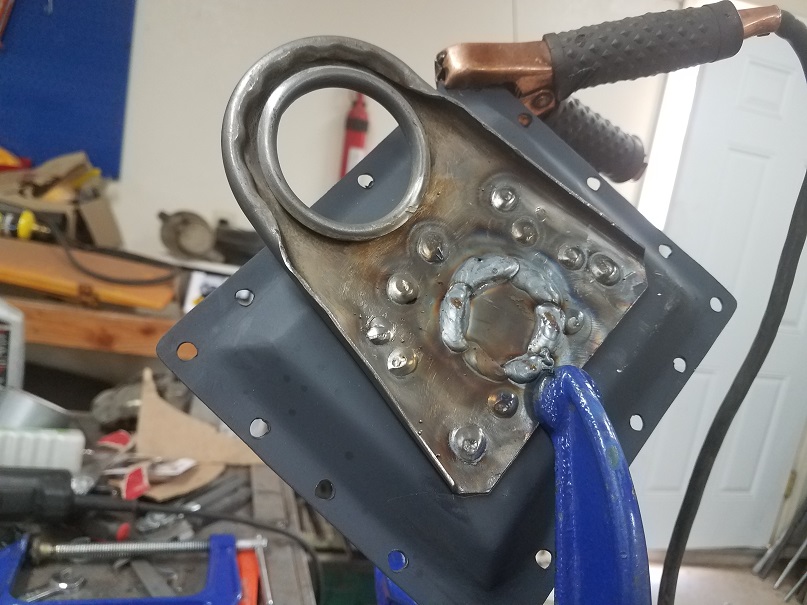 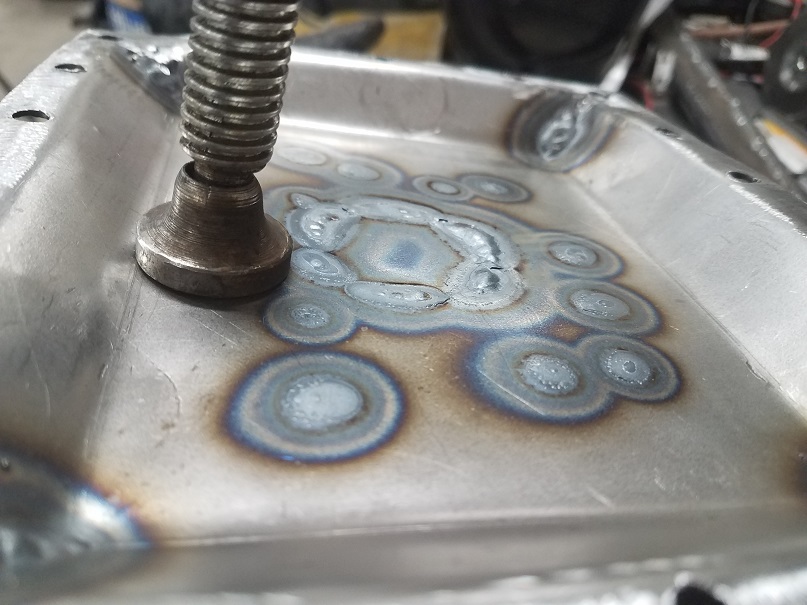
|
|
|
|
| 914forme |
Nov 17 2018, 02:04 PM
Post
#226
|
|
Times a wastin', get wrenchin'! Group: Members Posts: 3,899 Joined: 24-July 04 From: Dayton, Ohio Member No.: 2,388 Region Association: None |
Travis nice job there, and I must say your welds are looking better and better each time. And your metal fab skills have also improved. Doing a great job, can't wait to see what you have planned next.
|
|
|
|
| TravisNeff |
Nov 17 2018, 02:09 PM
Post
#227
|
|
914 Guru Group: Members Posts: 5,082 Joined: 20-March 03 From: Mesa, AZ Member No.: 447 Region Association: Southwest Region |
In place. I didn't get all the etch primer off on a few holes and that gave me a couple problems. I am ready to retire this leather jacket I bought at goodwill for $10. Welding upside down is no bueno. I have to stop what I am doing every few minutes because the hot metal that falls on me burns through the coat and the inside of the jacket smolders all over the place (IMG:style_emoticons/default/laugh.gif)
Attached image(s) 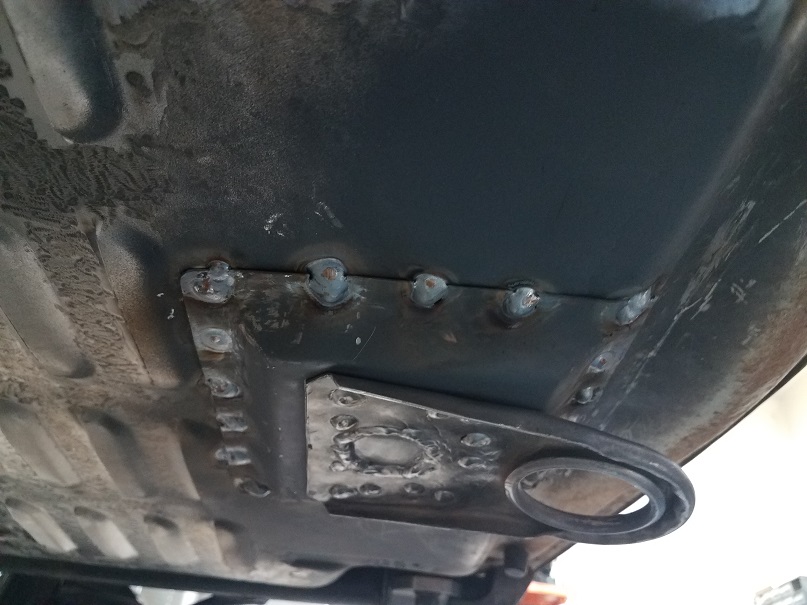 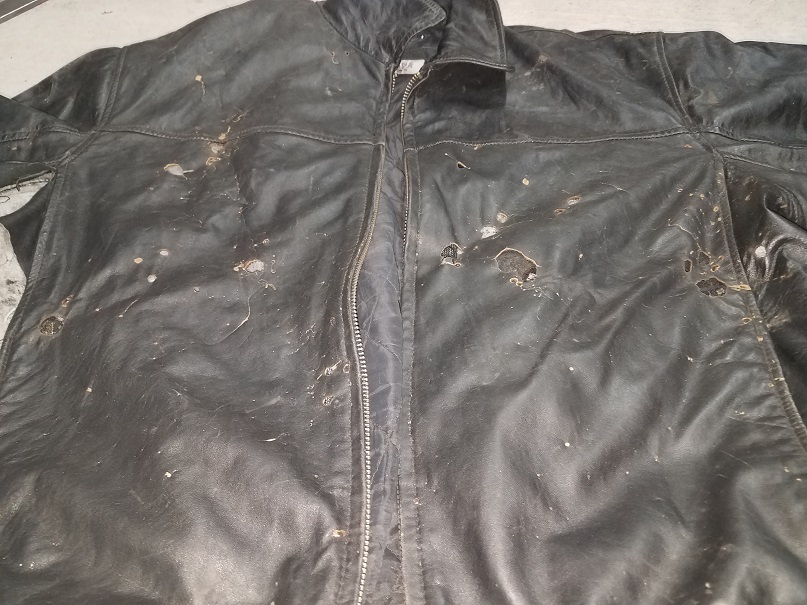
|
|
|
|
| bbrock |
Nov 17 2018, 02:10 PM
Post
#228
|
|
914 Guru Group: Members Posts: 5,269 Joined: 17-February 17 From: Montana Member No.: 20,845 Region Association: Rocky Mountains |
QUOTE(TravisNeff @ Nov 17 2018, 10:36 AM) I screwed up on my bends and you can see one side is a little taller than the other. Almost looks like I intended it to work out this way from the pics. (IMG:style_emoticons/default/biggrin.gif) As the late Bob Ross would say, "Happy little accident." (IMG:style_emoticons/default/smile.gif) |
|
|
|
| TravisNeff |
Nov 17 2018, 02:11 PM
Post
#229
|
|
914 Guru Group: Members Posts: 5,082 Joined: 20-March 03 From: Mesa, AZ Member No.: 447 Region Association: Southwest Region |
QUOTE(914forme @ Nov 17 2018, 01:04 PM) Travis nice job there, and I must say your welds are looking better and better each time. And your metal fab skills have also improved. Doing a great job, can't wait to see what you have planned next. Thanks Stephen. I still don't know what I am doing - but things are getting better with practice. |
|
|
|
| TravisNeff |
Nov 17 2018, 02:19 PM
Post
#230
|
|
914 Guru Group: Members Posts: 5,082 Joined: 20-March 03 From: Mesa, AZ Member No.: 447 Region Association: Southwest Region |
QUOTE(bbrock @ Nov 17 2018, 01:10 PM) QUOTE(TravisNeff @ Nov 17 2018, 10:36 AM) I screwed up on my bends and you can see one side is a little taller than the other. Almost looks like I intended it to work out this way from the pics. (IMG:style_emoticons/default/biggrin.gif) As the late Bob Ross would say, "Happy little accident." (IMG:style_emoticons/default/smile.gif) Attached image(s) 
|
|
|
|
| TravisNeff |
Nov 18 2018, 06:06 PM
Post
#231
|
|
914 Guru Group: Members Posts: 5,082 Joined: 20-March 03 From: Mesa, AZ Member No.: 447 Region Association: Southwest Region |
I cut out the rust in the rocker and patched it today. Then got the cooler line duct glued in. Needs more finishing, I will tackle that another day!
Attached image(s) 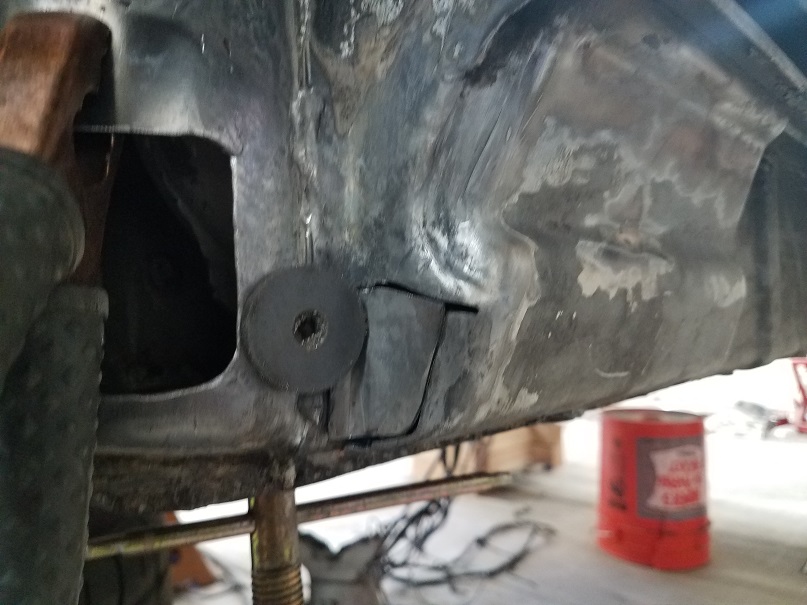 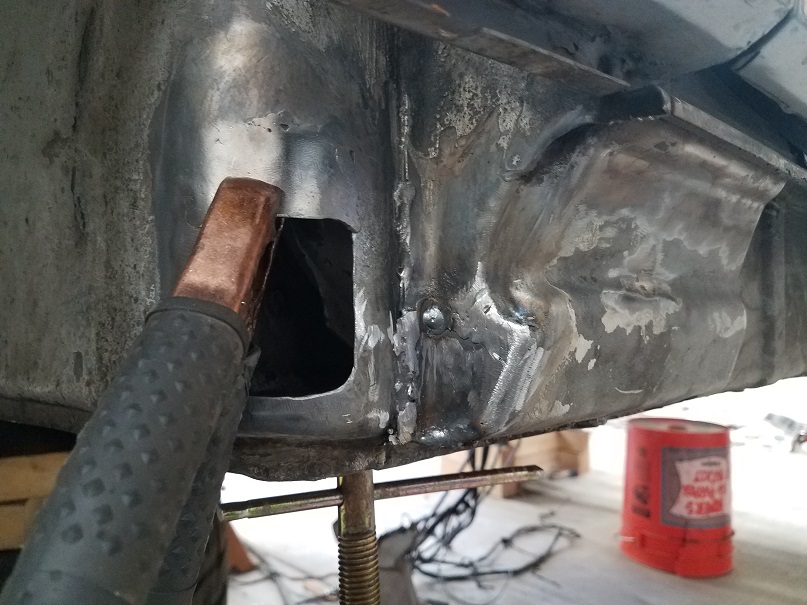 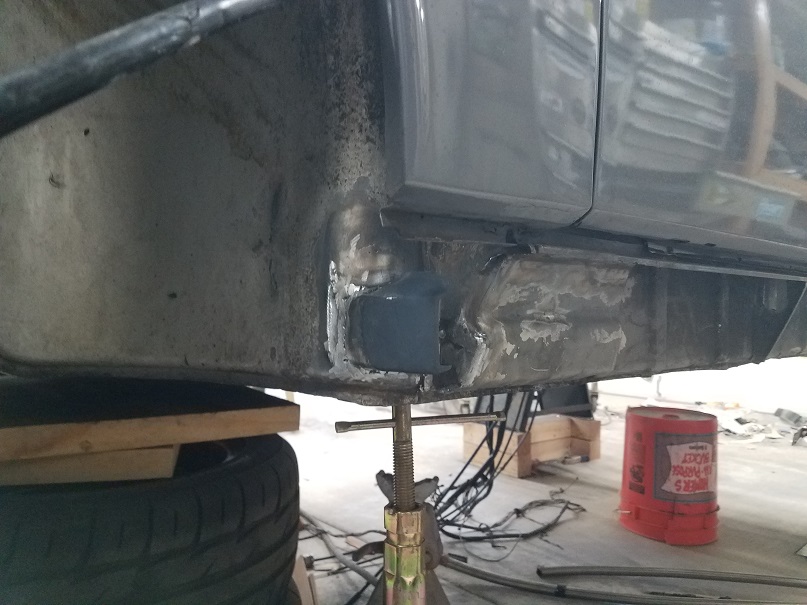
|
|
|
|
| TravisNeff |
Nov 18 2018, 06:16 PM
Post
#232
|
|
914 Guru Group: Members Posts: 5,082 Joined: 20-March 03 From: Mesa, AZ Member No.: 447 Region Association: Southwest Region |
Forgot, got the bulkhead hole opened up about as far as I can & got most of the surface rust out with acid and a small metal brush. I see now in the pic I have a little more cleanup to do along the top. The duct is not a perfect rectangle, it is angled along the top from the lower left to upper right.
Attached image(s) 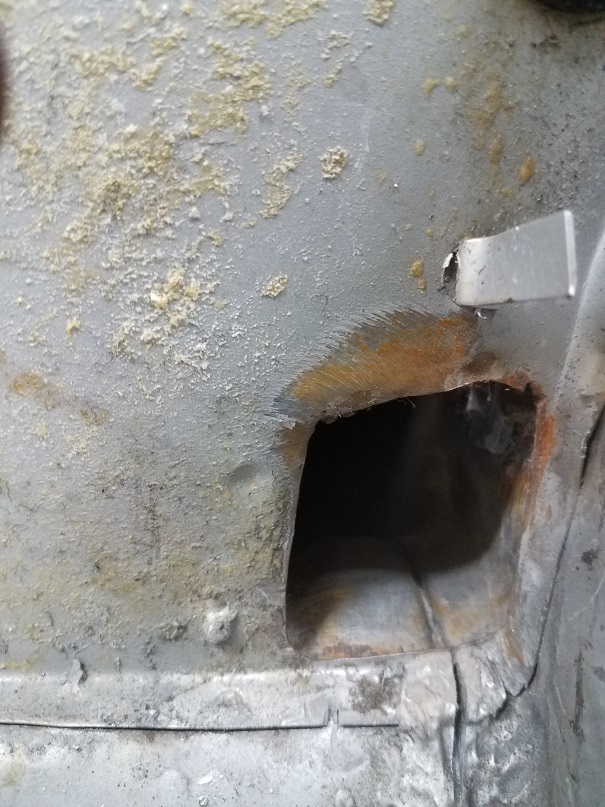
|
|
|
|
| mb911 |
Nov 18 2018, 06:20 PM
Post
#233
|
|
914 Guru Group: Members Posts: 7,791 Joined: 2-January 09 From: Burlington wi Member No.: 9,892 Region Association: Upper MidWest |
QUOTE(TravisNeff @ Nov 18 2018, 04:16 PM) Forgot, got the bulkhead hole opened up about as far as I can & got most of the surface rust out with acid and a small metal brush. I see now in the pic I have a little more cleanup to do along the top. The duct is not a perfect rectangle, it is angled along the top from the lower left to upper right. Yes they are an odd shape.. Mine looks the same.. Can't make them rectangular. |
 |
|
| TravisNeff |
Nov 19 2018, 02:02 PM
Post
#234
|
|
914 Guru Group: Members Posts: 5,082 Joined: 20-March 03 From: Mesa, AZ Member No.: 447 Region Association: Southwest Region |
Oh Boy! I sent out my hinges for Oscar's special treatment and got them back today. I am afraid what these would look like if I tried to take this on. The zinc plate is a nice touch
In the box I got two unexpected surprises. Thank you Oscar!! This has made my day @ValcoOscar Attached thumbnail(s) 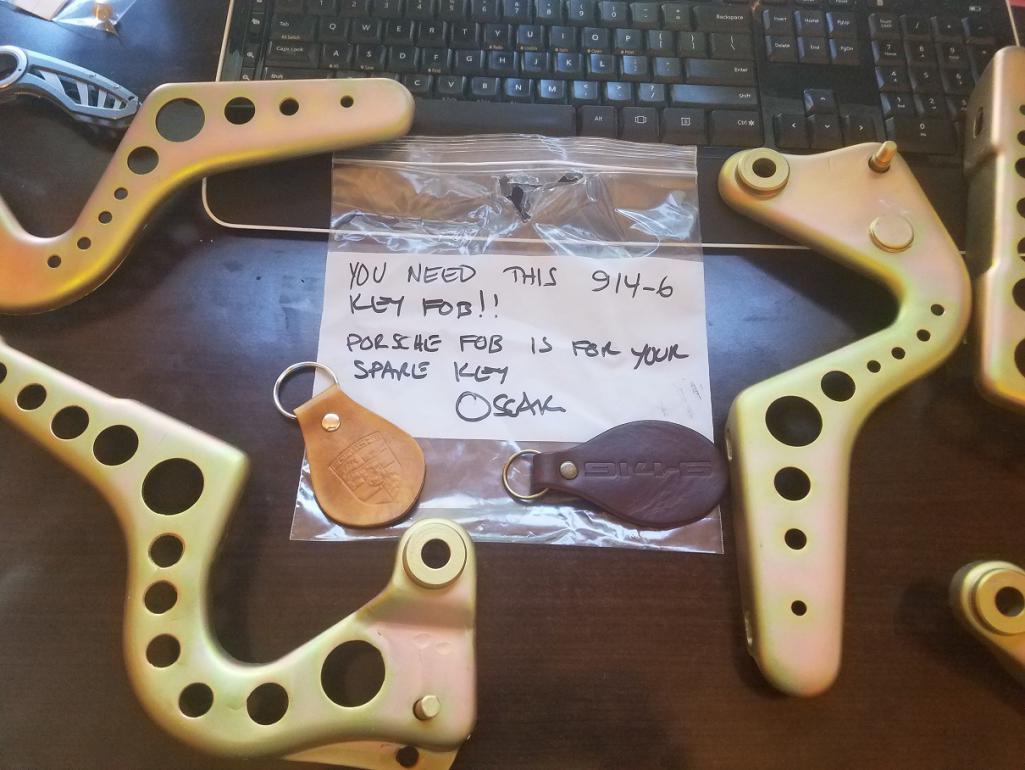 Attached image(s) 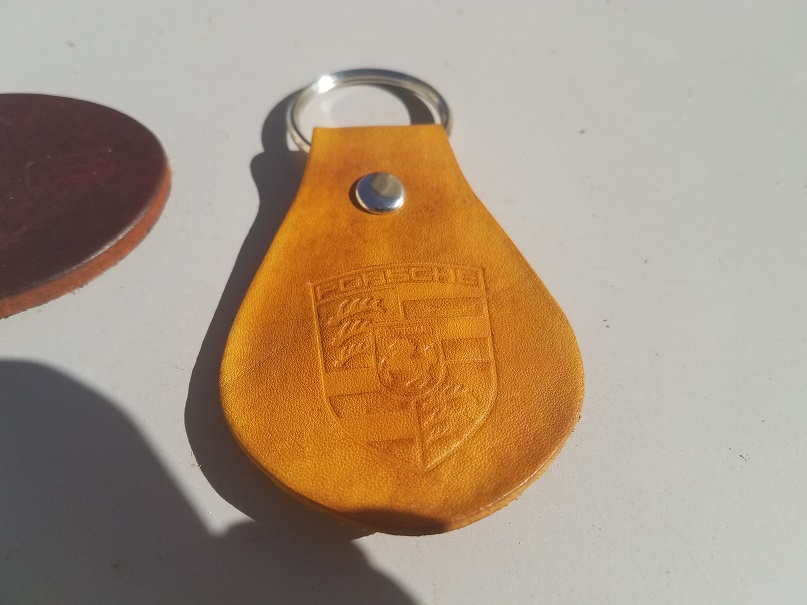 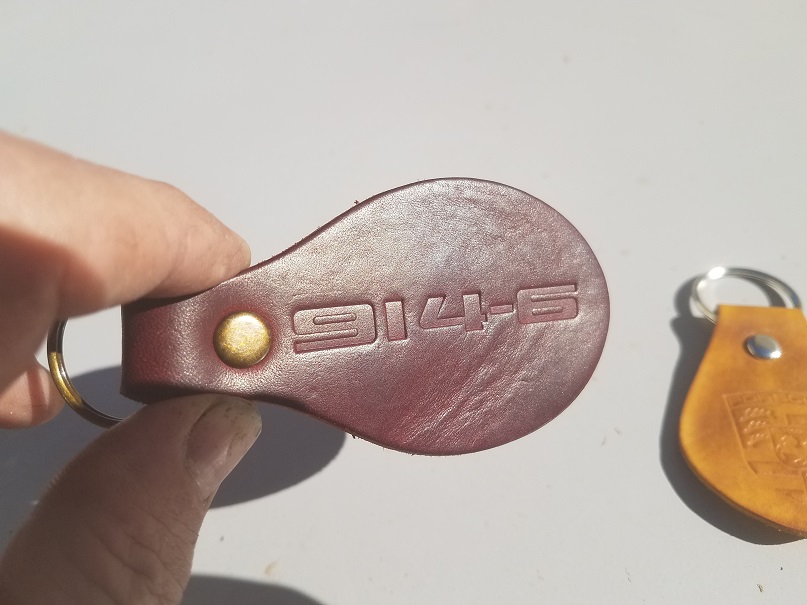
|
|
|
|
| TravisNeff |
Nov 19 2018, 06:31 PM
Post
#235
|
|
914 Guru Group: Members Posts: 5,082 Joined: 20-March 03 From: Mesa, AZ Member No.: 447 Region Association: Southwest Region |
Another part to patch, the metal is pitted all the way through in a couple of spots. The piece I pulled out I could crinkle up in one hand.
Attached image(s) 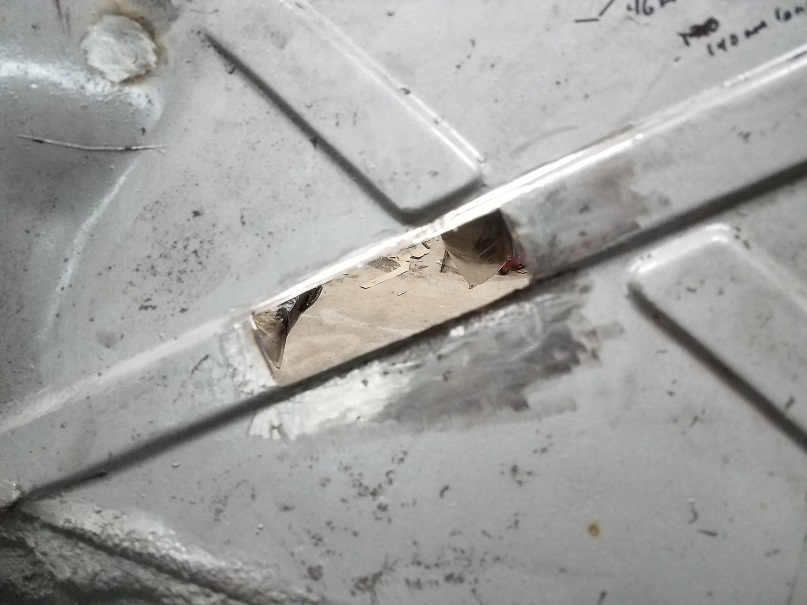
|
|
|
|
| TravisNeff |
Nov 20 2018, 10:48 AM
Post
#236
|
|
914 Guru Group: Members Posts: 5,082 Joined: 20-March 03 From: Mesa, AZ Member No.: 447 Region Association: Southwest Region |
This escalated quickly.. (IMG:style_emoticons/default/laugh.gif) When I welded in my patch some of the creases from a previous crash came back in full force. I popped out the rear window and can now hammer/ dolly out some of the crinkely dinks. I got some paint stripper and POR15 is no match for this stuff. Pretty satisfying listening to it crackle and peeling it off like old sunburnt skin
Attached image(s) 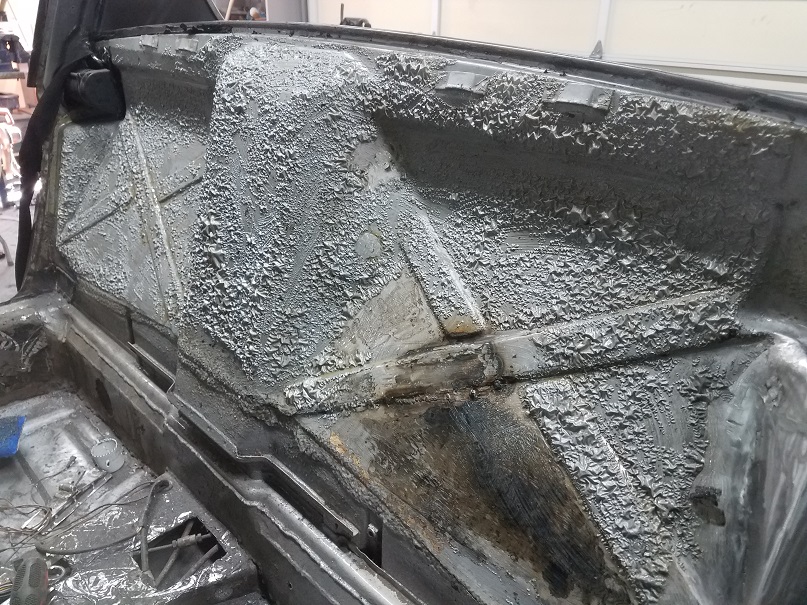
|
|
|
|
| TravisNeff |
Nov 20 2018, 11:35 AM
Post
#237
|
|
914 Guru Group: Members Posts: 5,082 Joined: 20-March 03 From: Mesa, AZ Member No.: 447 Region Association: Southwest Region |
Like a tweaker picking at his face..
Attached image(s) 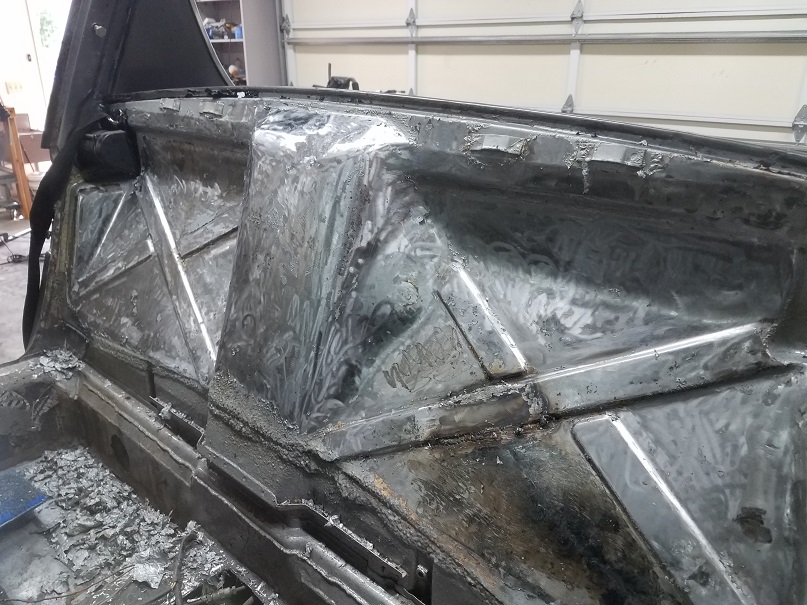
|
|
|
|
| bbrock |
Nov 20 2018, 04:12 PM
Post
#238
|
|
914 Guru Group: Members Posts: 5,269 Joined: 17-February 17 From: Montana Member No.: 20,845 Region Association: Rocky Mountains |
QUOTE(TravisNeff @ Nov 20 2018, 10:35 AM) Like a tweaker picking at his face.. (IMG:style_emoticons/default/av-943.gif) Have fun with that patch! |
|
|
|
| TravisNeff |
Nov 20 2018, 07:31 PM
Post
#239
|
|
914 Guru Group: Members Posts: 5,082 Joined: 20-March 03 From: Mesa, AZ Member No.: 447 Region Association: Southwest Region |
I am having no fun with this patch. I did get a bunch of the crinkled up metal in other areas fairly straight though.
If you see where I cut, I left a the lip of the indent and was going to weld to that. Well it was like a game of whack a mole blowing holes along the whole damn thing as the metal was too thin and I was set too hot on the welder. When i got the metal finally all glued down the indent along the middle was pretty much flat along the bottom seam I don't care too much if it is ugly in the interior, it will be covered. Would like it to look a little more seamless in the engine bay. I am thinking this is a cut out and do-over, I could extend a couple inches along the indent as I found some more pitted metal when I stripped all the por15 off. |
|
|
|
| Dion |
Nov 20 2018, 07:42 PM
Post
#240
|
|
RN Group: Members Posts: 2,931 Joined: 16-September 04 From: Shepherdstown, WV Member No.: 2,766 Region Association: MidAtlantic Region |
QUOTE(TravisNeff @ Nov 20 2018, 05:31 PM) I am having no fun with this patch. I did get a bunch of the crinkled up metal in other areas fairly straight though. If you see where I cut, I left a the lip of the indent and was going to weld to that. Well it was like a game of whack a mole blowing holes along the whole damn thing as the metal was too thin and I was set too hot on the welder. When i got the metal finally all glued down the indent along the middle was pretty much flat along the bottom seam I don't care too much if it is ugly in the interior, it will be covered. Would like it to look a little more seamless in the engine bay. I am thinking this is a cut out and do-over, I could extend a couple inches along the indent as I found some more pitted metal when I stripped all the por15 off. Oh how I can relate to this whole sentiment... Travis your deadpedal and oil line cover is very cool. Looking good mate. (IMG:style_emoticons/default/beerchug.gif) |
|
|
|
|
1 User(s) are reading this topic (1 Guests and 0 Anonymous Users)
0 Members:

|
Lo-Fi Version | Time is now: 3rd July 2026 - 11:25 AM |
Invision Power Board
v9.1.4 © 2026 IPS, Inc.