|
|
|
Porsche, and the Porsche crest are registered trademarks of Dr. Ing. h.c. F. Porsche AG.
This site is not affiliated with Porsche in any way. Its only purpose is to provide an online forum for car enthusiasts. All other trademarks are property of their respective owners. |
|
|

  |

| bbrock |
 Nov 20 2018, 08:04 PM Nov 20 2018, 08:04 PM
Post
#241
|
|
914 Guru  Group: Members Posts: 5,269 Joined: 17-February 17 From: Montana Member No.: 20,845 Region Association: Rocky Mountains |
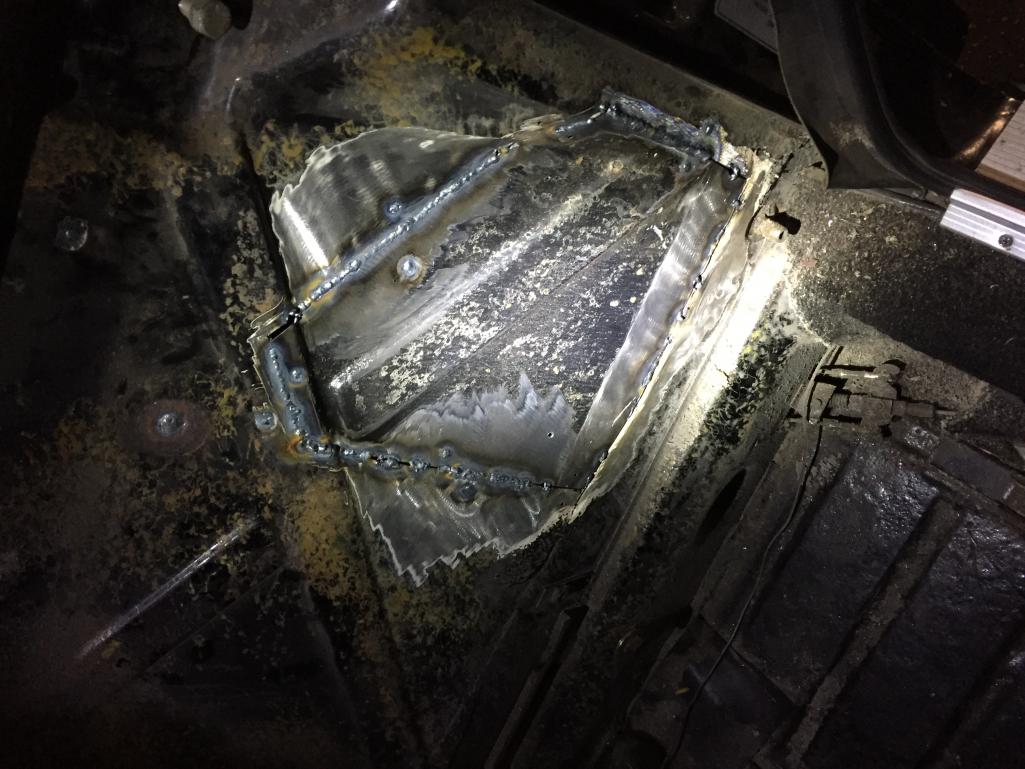
QUOTE(TravisNeff @ Nov 20 2018, 06:31 PM)  I am having no fun with this patch. I did get a bunch of the crinkled up metal in other areas fairly straight though. If you see where I cut, I left a the lip of the indent and was going to weld to that. Well it was like a game of whack a mole blowing holes along the whole damn thing as the metal was too thin and I was set too hot on the welder. When i got the metal finally all glued down the indent along the middle was pretty much flat along the bottom seam I don't care too much if it is ugly in the interior, it will be covered. Would like it to look a little more seamless in the engine bay. I am thinking this is a cut out and do-over, I could extend a couple inches along the indent as I found some more pitted metal when I stripped all the por15 off. Stop! You are giving me flashbacks. (IMG:style_emoticons/default/lol-2.gif) Boy does that sound familiar. I spent a LOT of time trying to make those patches look perfect and thought I had succeeded. Then the sexy glossy paint went on and this showed up. 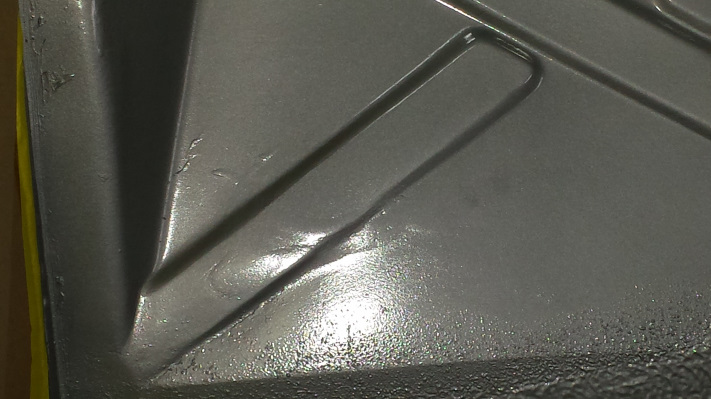 And this is what I'm working on tonight to fix it. (IMG:style_emoticons/default/biggrin.gif)  I did a little better on the other side, but boy did I waste a lot of time on it. 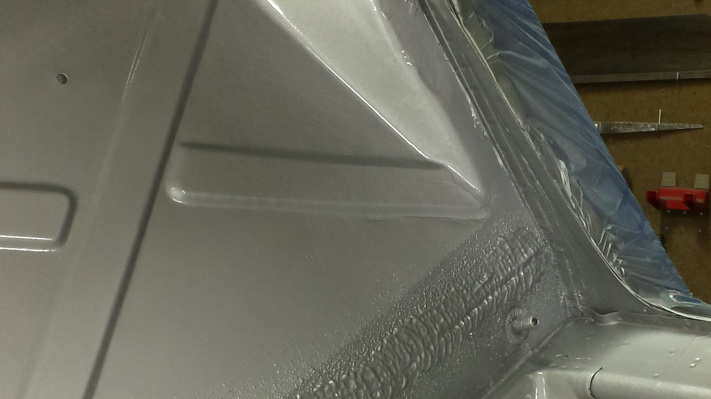 Keep up the great work (IMG:style_emoticons/default/smilie_pokal.gif) |
   |

 
|
| TravisNeff |
Nov 20 2018, 08:51 PM
Post
#242
|
|
914 Guru Group: Members Posts: 5,082 Joined: 20-March 03 From: Mesa, AZ Member No.: 447 Region Association: Southwest Region |
Well it is not the worst and it sure as hell can be a lot better. Lets see if I can make a patch piece first before I commit to cutting bait.
This is just about the right width. Had to get ingenious on how to do this 4 bend so close together, I can only do 2 primary (center) bends on my cheap-o brake. Attached image(s) 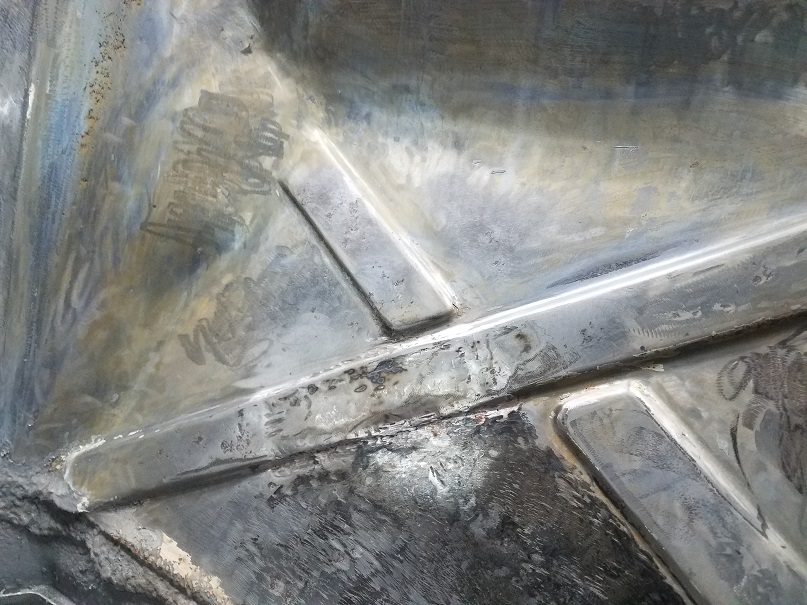 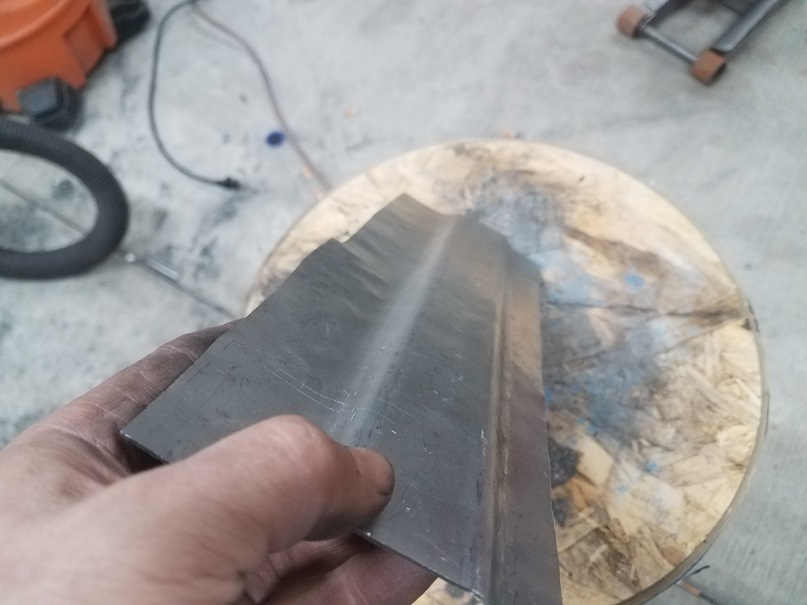 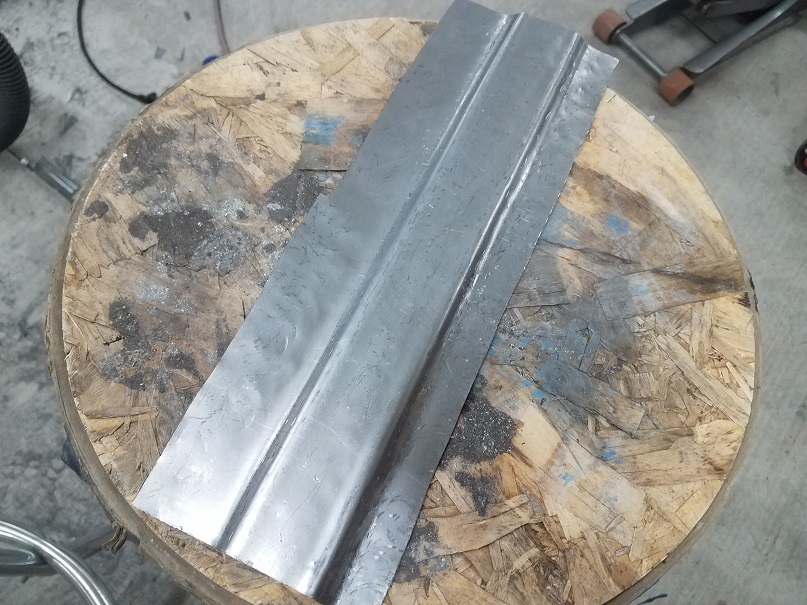
|
|
|
|
| TravisNeff |
Nov 20 2018, 08:52 PM
Post
#243
|
|
914 Guru Group: Members Posts: 5,082 Joined: 20-March 03 From: Mesa, AZ Member No.: 447 Region Association: Southwest Region |
There are a lot of little things that only YOU would know about that no one else would spot. funny how it eats at ya.
|
|
|
|
| TravisNeff |
Nov 20 2018, 09:57 PM
Post
#244
|
|
914 Guru Group: Members Posts: 5,082 Joined: 20-March 03 From: Mesa, AZ Member No.: 447 Region Association: Southwest Region |
Out it comes. The metal on the bottom (darkened metal) is paper thin. I will cut a little further down as I have some extra on my patch.
Test fit and it looks like a good start. Attached image(s) 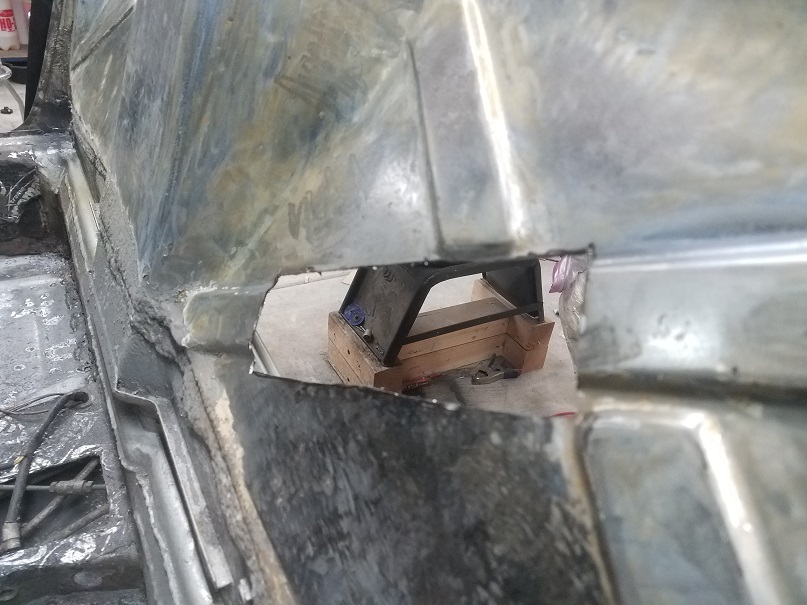 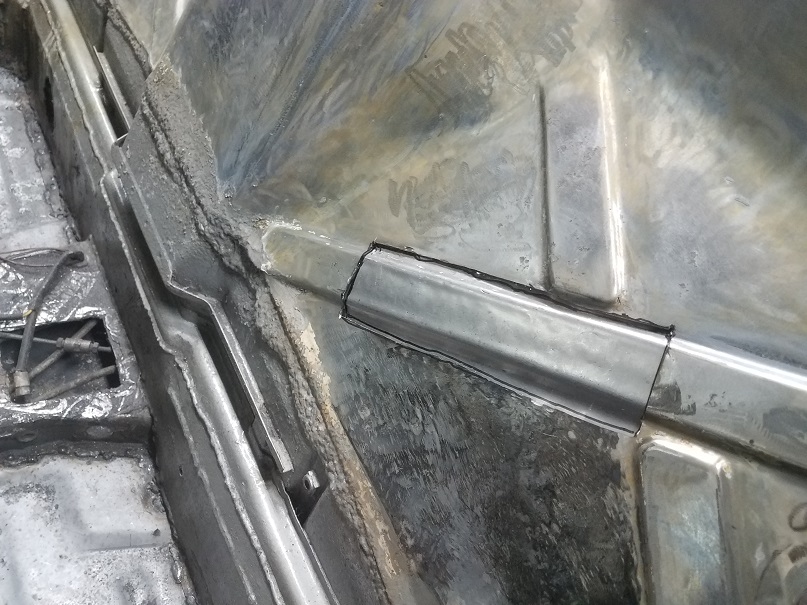
|
|
|
|
| Larmo63 |
Nov 20 2018, 11:35 PM
Post
#245
|
|
Advanced Member Group: Members Posts: 4,267 Joined: 3-March 14 From: San Clemente, Ca Member No.: 17,068 Region Association: Southern California |
I like my battle scars to show. Of course, I primed here and painted it black, but it shows.....
 |
|
|
|
| defianty |
Nov 21 2018, 03:05 AM
Post
#246
|
|
Senior Member Group: Members Posts: 659 Joined: 9-August 06 From: Essex, UK Member No.: 6,621 Region Association: None |
QUOTE(TravisNeff @ Nov 21 2018, 03:57 AM) Out it comes. The metal on the bottom (darkened metal) is paper thin. I will cut a little further down as I have some extra on my patch. Test fit and it looks like a good start. That looks a better job and similar to how I repaired mine. I too was limited to what my brake could do. Nicely done though and it's always good to revisit something if you think it's not quite right. The reward of getting it right is worth the hassle! |
|
|
|
| TravisNeff |
Nov 21 2018, 02:31 PM
Post
#247
|
|
914 Guru Group: Members Posts: 5,082 Joined: 20-March 03 From: Mesa, AZ Member No.: 447 Region Association: Southwest Region |
time to feed the OCD. I cut a little more, if the pic looks like it is paper thin towards the lower left - it is! I am down to better metal. I am contemplating patching the entire flat area, there is some weird built up tension. When I cut the piece(s) loose the back wall instantly did a pucker.
Fitting the new piece. I am no good about putting my tools away so a little improvisation with some allen wrenches was needed. I will fine tune the bends a little more too. Attached image(s) 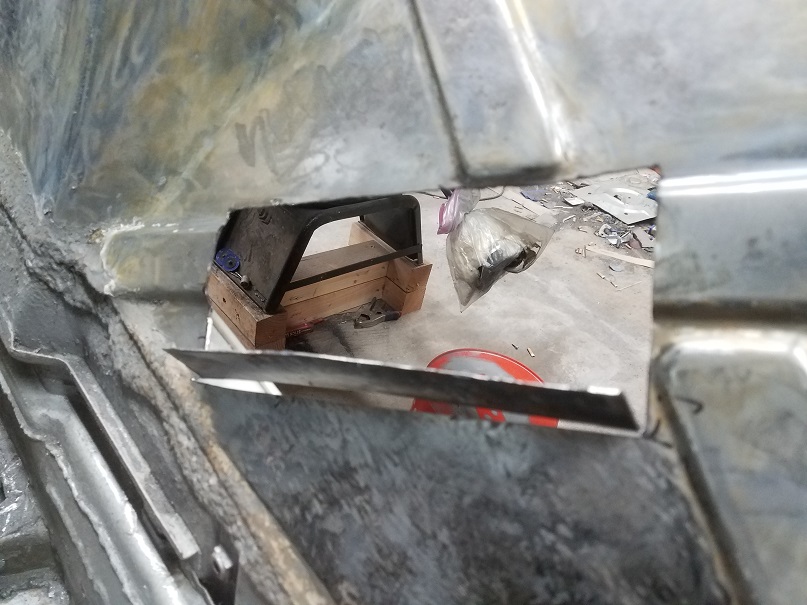 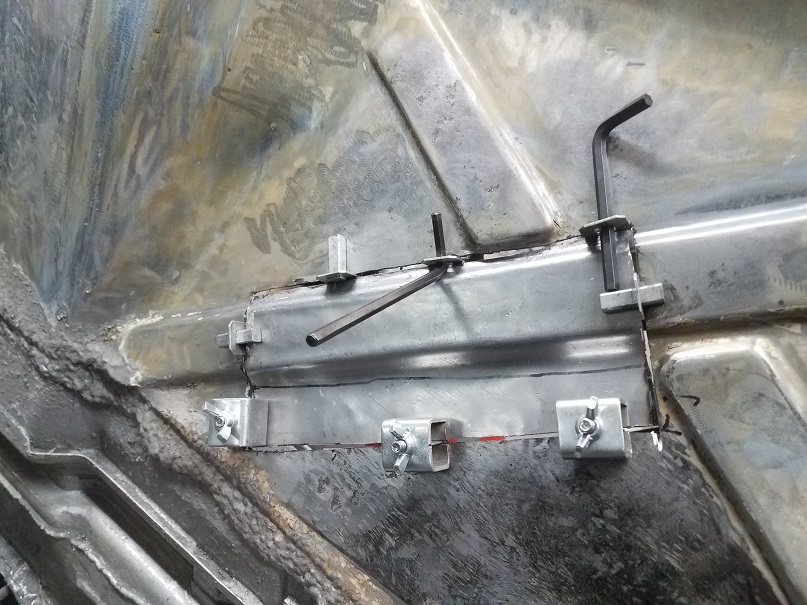
|
|
|
|
| TravisNeff |
Nov 21 2018, 03:07 PM
Post
#248
|
|
914 Guru Group: Members Posts: 5,082 Joined: 20-March 03 From: Mesa, AZ Member No.: 447 Region Association: Southwest Region |
A view from the side you will see. Hmm. I am going to attempt to remake this and shoot for a sharper line in by bend.
Attached image(s) 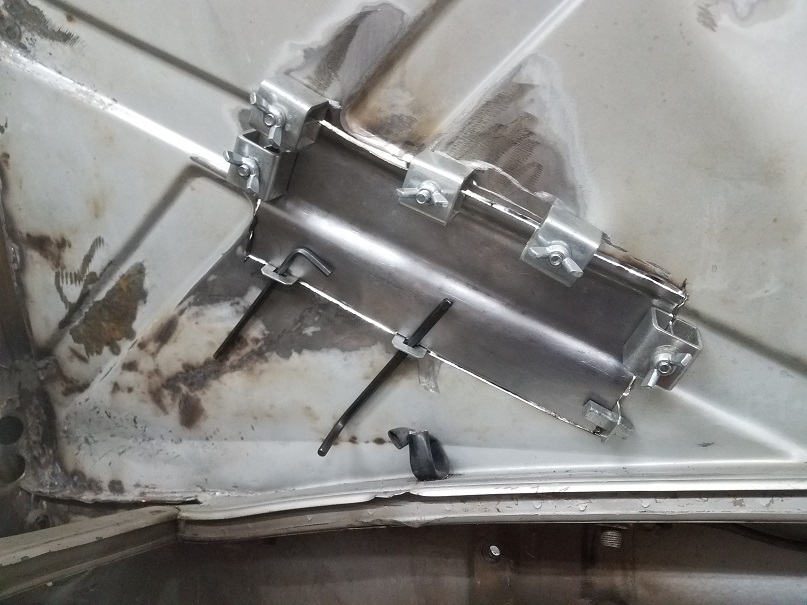
|
|
|
|
| TravisNeff |
Nov 21 2018, 05:26 PM
Post
#249
|
|
914 Guru Group: Members Posts: 5,082 Joined: 20-March 03 From: Mesa, AZ Member No.: 447 Region Association: Southwest Region |
Made another test piece to see if I can get the profile a little sharper.
Attached image(s)  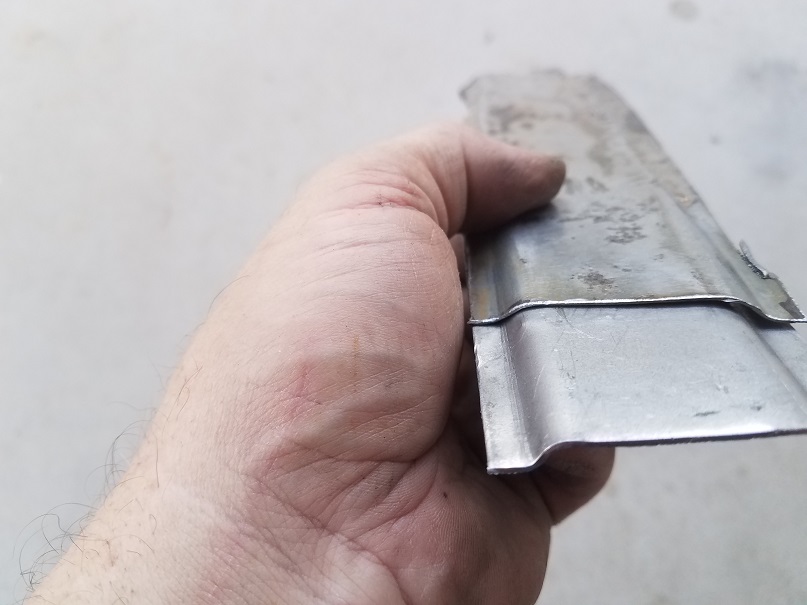
|
|
|
|
| worn |
Nov 21 2018, 06:24 PM
Post
#250
|
|
Winner of the Utah Twisted Joint Award Group: Members Posts: 3,616 Joined: 3-June 11 From: Madison, WI and North Bend WA Member No.: 13,152 Region Association: Upper MidWest |
QUOTE(TravisNeff @ Nov 21 2018, 04:26 PM) Made another test piece to see if I can get the profile a little sharper. A bit too wide maybe? Depends on how you squint. But life is short. If you like, I bet we can get a signed affidavit absolving you of all guilt. Theses things bug the holy crp outa me. Not sure there’s a cure either. |
|
|
|
| TravisNeff |
Nov 21 2018, 07:17 PM
Post
#251
|
|
914 Guru Group: Members Posts: 5,082 Joined: 20-March 03 From: Mesa, AZ Member No.: 447 Region Association: Southwest Region |
That was just to test out if I could get the profile sharper. And yes, its off on the overall width
I ended up modifying the patch I previously made and got the edges a little more crisp. I am cleaning the hell out of the new and old metal as best I can. Wish me luck |
|
|
|
| bbrock |
Nov 21 2018, 07:35 PM
Post
#252
|
|
914 Guru Group: Members Posts: 5,269 Joined: 17-February 17 From: Montana Member No.: 20,845 Region Association: Rocky Mountains |
Love the allen wrenches in the panel clamps (IMG:style_emoticons/default/beer.gif)
|
|
|
|
| TravisNeff |
Nov 21 2018, 09:36 PM
Post
#253
|
|
914 Guru Group: Members Posts: 5,082 Joined: 20-March 03 From: Mesa, AZ Member No.: 447 Region Association: Southwest Region |
It's in. No butt weld would be complete without being able to play musical stringers once your done.
Attached image(s) 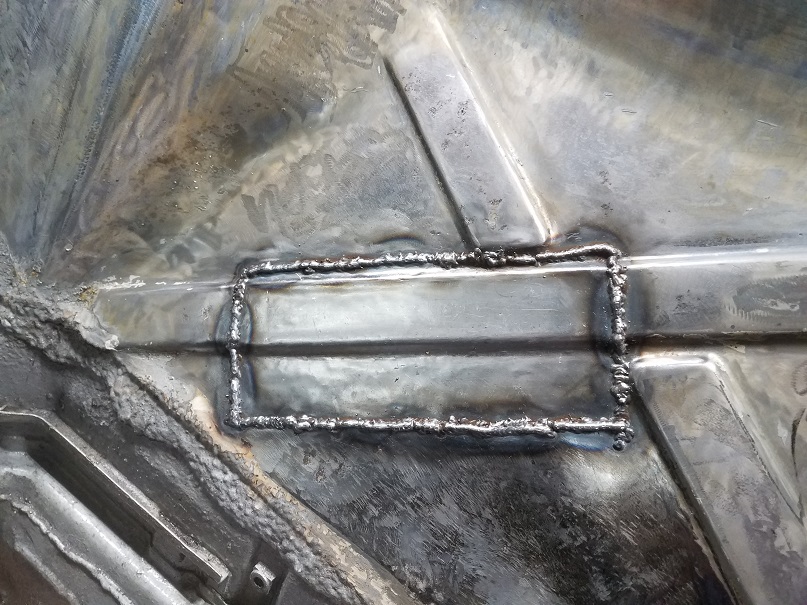 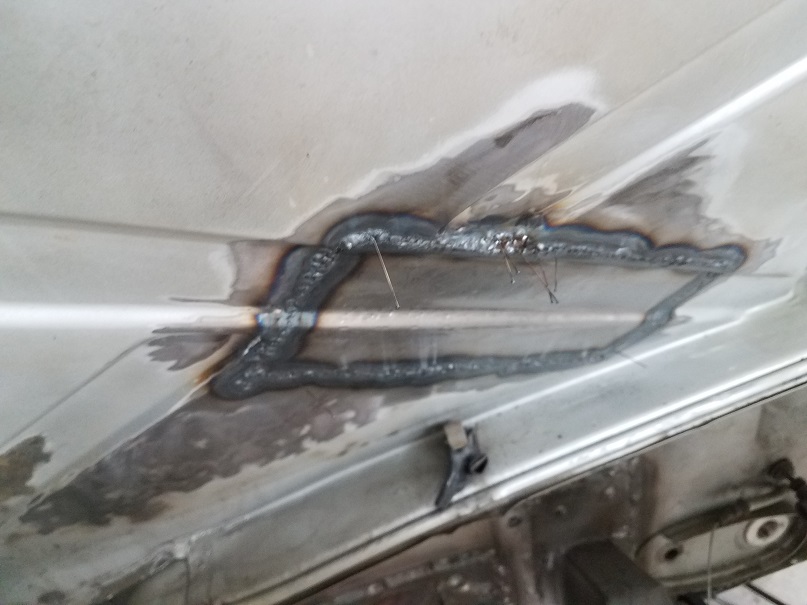
|
|
|
|
| bbrock |
Nov 21 2018, 11:51 PM
Post
#254
|
|
914 Guru Group: Members Posts: 5,269 Joined: 17-February 17 From: Montana Member No.: 20,845 Region Association: Rocky Mountains |
Well done!
|
|
|
|
| TravisNeff |
Nov 24 2018, 03:56 PM
Post
#255
|
|
914 Guru Group: Members Posts: 5,082 Joined: 20-March 03 From: Mesa, AZ Member No.: 447 Region Association: Southwest Region |
More work on this. I ended up having to weld the backside. Ground down and dealt with shrinkage of the joint. There are a couple of pinholes still, but I am going to quit while I am ahead and move onto something else. I'll come back to this later. Pretty happy with the results so far.
Attached image(s) 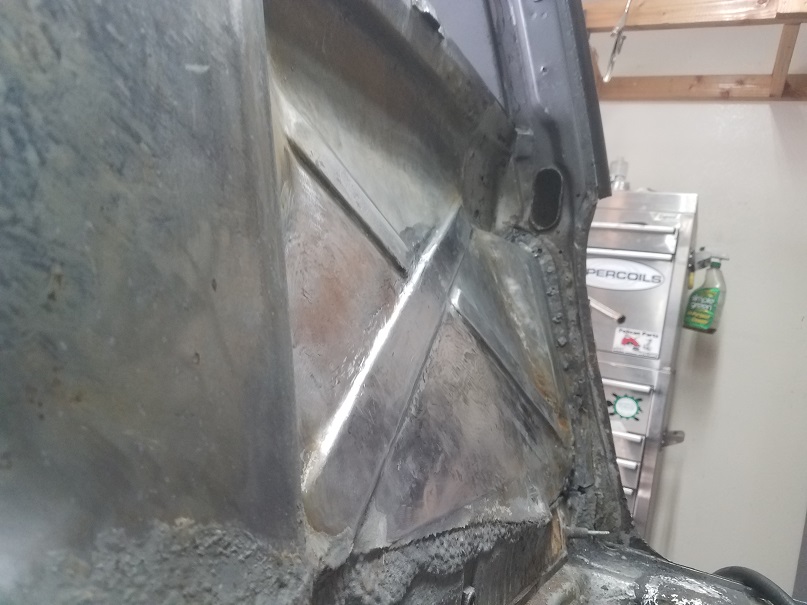 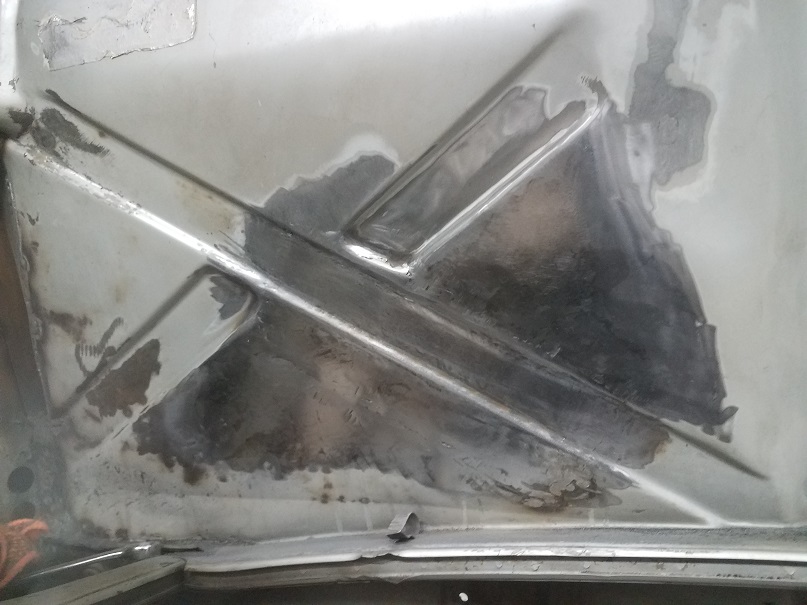
|
|
|
|
| sixnotfour |
Nov 24 2018, 06:40 PM
Post
#256
|
|
914 Wizard Group: Members Posts: 11,275 Joined: 12-September 04 Member No.: 2,744 Region Association: NineFourteenerVille |
well done...dead pedal?? (IMG:style_emoticons/default/slap.gif)
|
|
|
|
| TravisNeff |
Nov 24 2018, 06:56 PM
Post
#257
|
|
914 Guru Group: Members Posts: 5,082 Joined: 20-March 03 From: Mesa, AZ Member No.: 447 Region Association: Southwest Region |
Yeah, yeah. I have so much OCD on the pedal that I am getting stagefright. Going to weld in the seat hinges next. I can then put in the driver seat and figure out the dead pedal.
|
|
|
|
| TravisNeff |
Nov 24 2018, 10:19 PM
Post
#258
|
|
914 Guru Group: Members Posts: 5,082 Joined: 20-March 03 From: Mesa, AZ Member No.: 447 Region Association: Southwest Region |
seat hinge mount thingies in place.
Attached image(s) 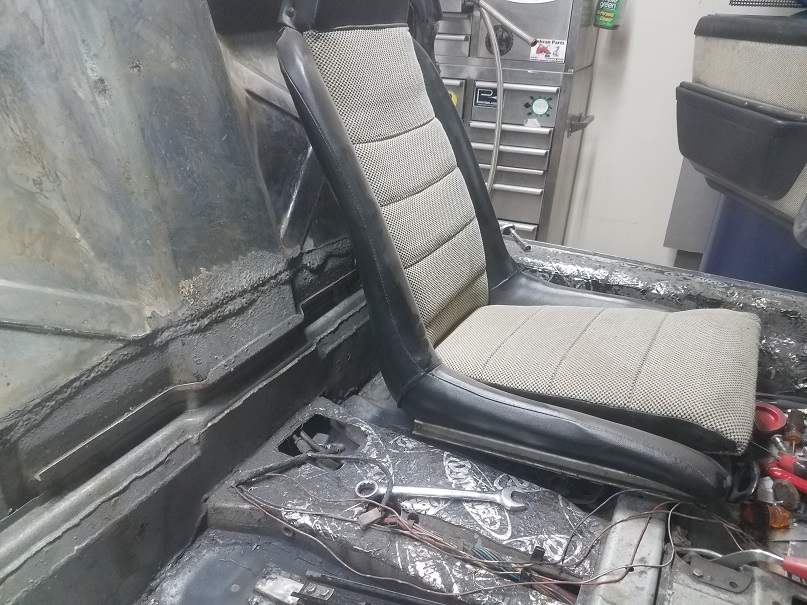
|
|
|
|
| sixnotfour |
Nov 24 2018, 10:20 PM
Post
#259
|
|
914 Wizard Group: Members Posts: 11,275 Joined: 12-September 04 Member No.: 2,744 Region Association: NineFourteenerVille |
|
|
|
|
| TravisNeff |
Dec 1 2018, 05:40 PM
Post
#260
|
|
914 Guru Group: Members Posts: 5,082 Joined: 20-March 03 From: Mesa, AZ Member No.: 447 Region Association: Southwest Region |
Finishing up the oil cooler setup. I cut the opening a little bigger and used some of these nifty weld nuts I got from RD. I am going to have to re-glass the top flange of the cooler duct. Someone cut it a little short when they made it.
Attached image(s) 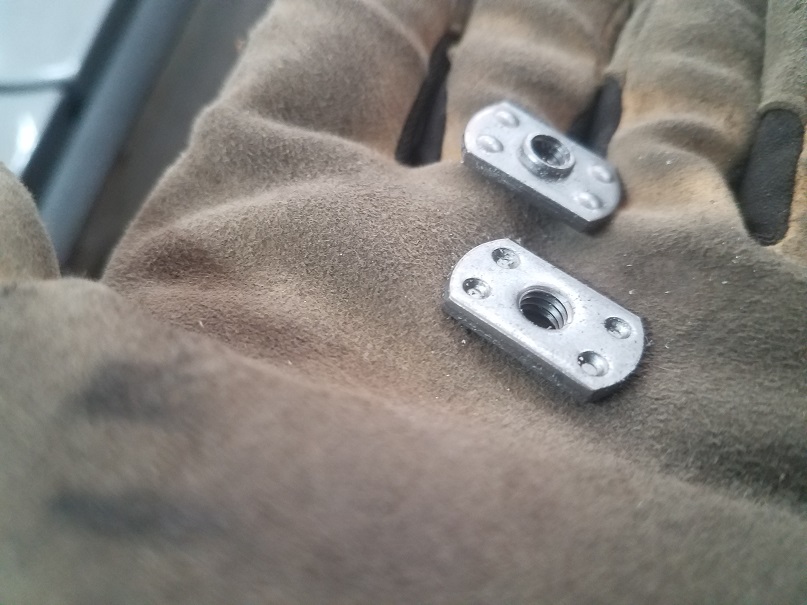 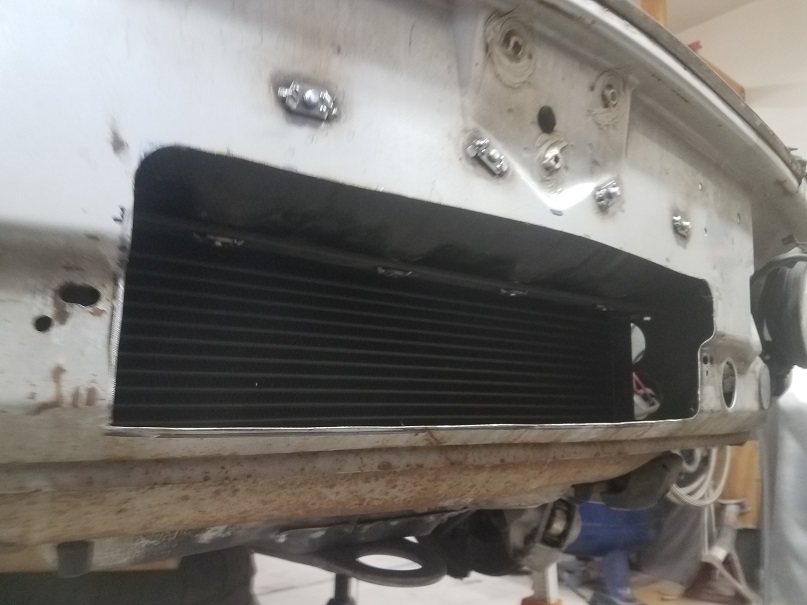 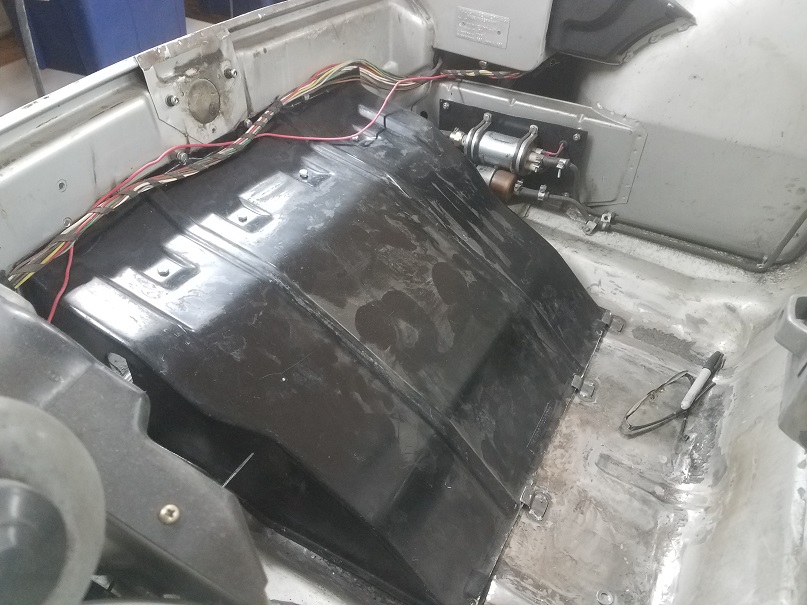
|
|
|
|
|
1 User(s) are reading this topic (1 Guests and 0 Anonymous Users)
0 Members:

|
Lo-Fi Version | Time is now: 3rd July 2026 - 12:22 PM |
Invision Power Board
v9.1.4 © 2026 IPS, Inc.