|
|
|
Porsche, and the Porsche crest are registered trademarks of Dr. Ing. h.c. F. Porsche AG.
This site is not affiliated with Porsche in any way. Its only purpose is to provide an online forum for car enthusiasts. All other trademarks are property of their respective owners. |
|
|

  |

| 914forme |
 Jan 7 2019, 06:17 PM Jan 7 2019, 06:17 PM
Post
#341
|
|
Times a wastin', get wrenchin'!  Group: Members Posts: 3,899 Joined: 24-July 04 From: Dayton, Ohio Member No.: 2,388 Region Association: None |
I like it, I would just counter bore two holes and just use machine screws to bolt it to you base.
|
   |

 
|
| TravisNeff |
Jan 8 2019, 07:51 PM
Post
#342
|
|
914 Guru Group: Members Posts: 5,082 Joined: 20-March 03 From: Mesa, AZ Member No.: 447 Region Association: Southwest Region |
Followed your advice, I spotfaced the holes with a leftover milling bit, dished it with a large bit and then the hole for the screw shank. I am going to try to find some nuts that are mild steel instead of stainless so I can weld it to the back. Once the pedal is in place i wont be able to get back there again.
I also decided on going with my original oil line cover, it looks like hell because I am trying to fix up some of the screw ups. Attached image(s) 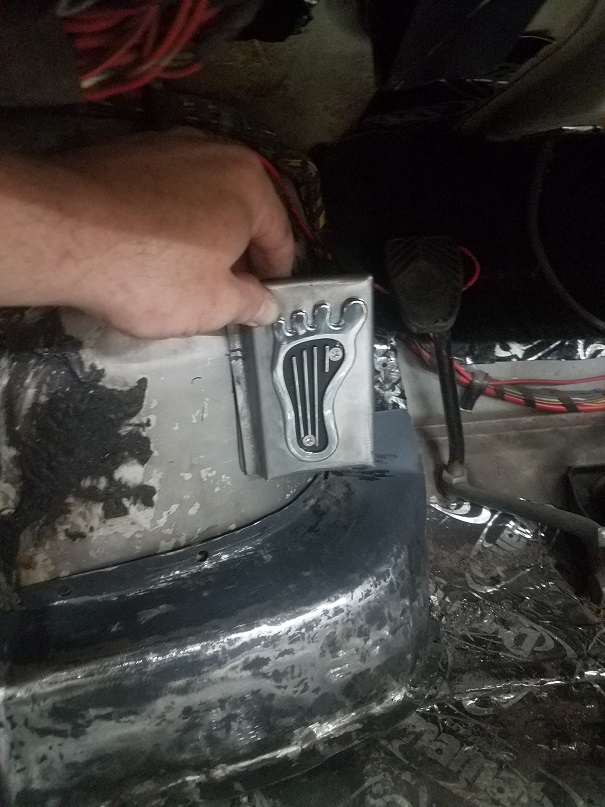
|
|
|
|
| 914forme |
Jan 8 2019, 08:05 PM
Post
#343
|
|
Times a wastin', get wrenchin'! Group: Members Posts: 3,899 Joined: 24-July 04 From: Dayton, Ohio Member No.: 2,388 Region Association: None |
rivet nuts would also work
|
|
|
|
| TravisNeff |
Jan 14 2019, 06:40 PM
Post
#344
|
|
914 Guru Group: Members Posts: 5,082 Joined: 20-March 03 From: Mesa, AZ Member No.: 447 Region Association: Southwest Region |
Did some more work on the dead pedal. Added more to the attachment flange, drilled and belled a big huge hole in the side and filled in the top with some sheet metal.
Attached image(s) 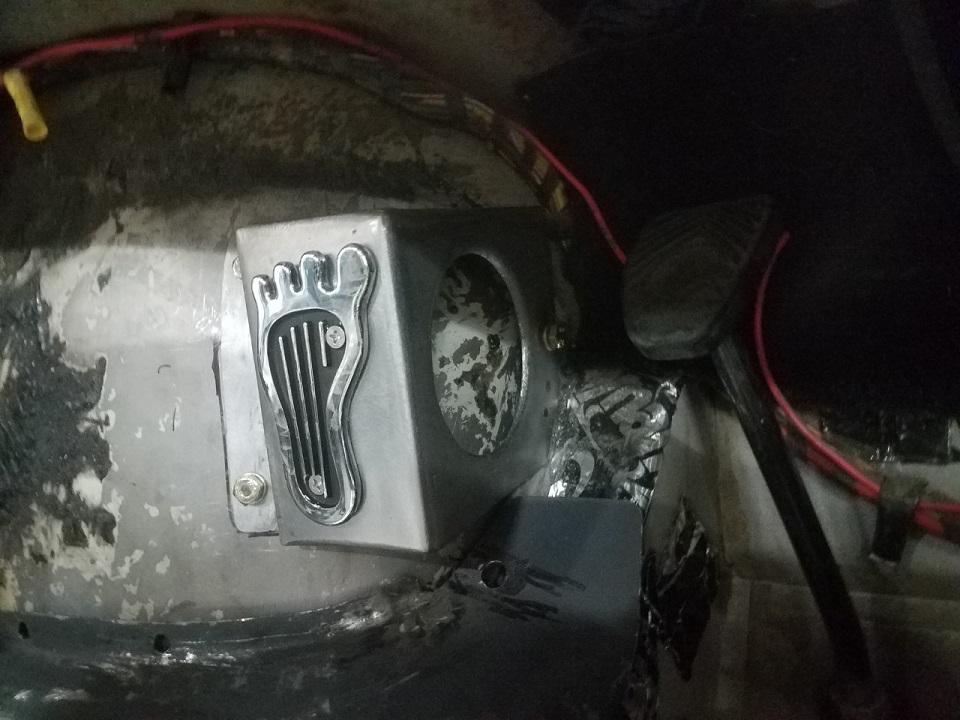 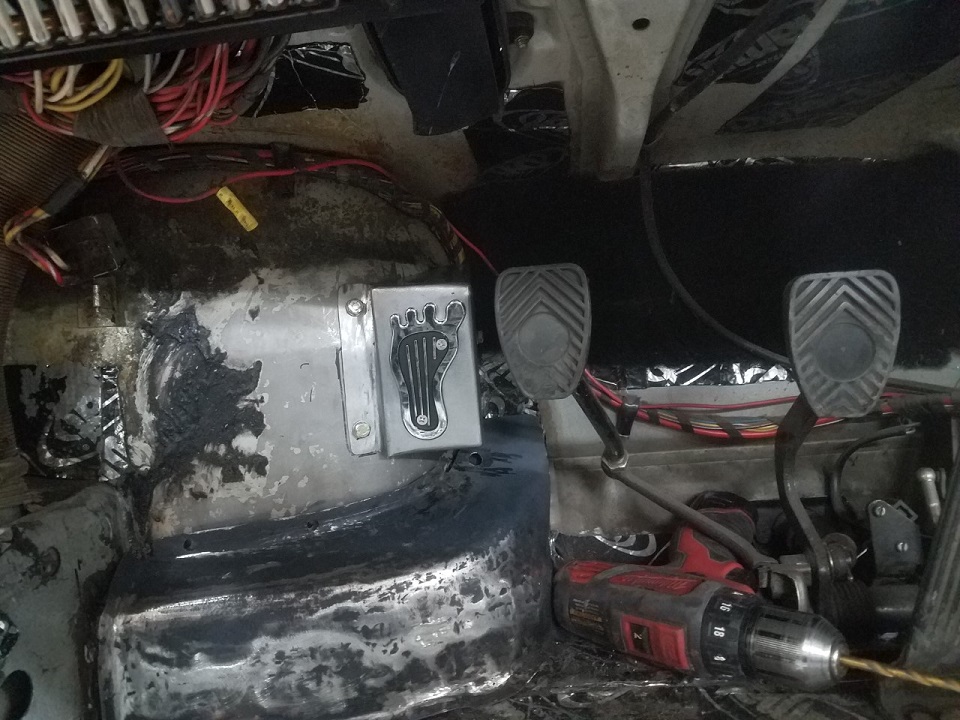
|
|
|
|
| 914forme |
Jan 14 2019, 07:45 PM
Post
#345
|
|
Times a wastin', get wrenchin'! Group: Members Posts: 3,899 Joined: 24-July 04 From: Dayton, Ohio Member No.: 2,388 Region Association: None |
Bottom open I hope? That would be my suggestion just to keep it from trapping crap in cavity via the hole.
I do like it, just odd enough to make me (IMG:style_emoticons/default/biggrin.gif) |
|
|
|
| TravisNeff |
Jan 14 2019, 07:55 PM
Post
#346
|
|
914 Guru Group: Members Posts: 5,082 Joined: 20-March 03 From: Mesa, AZ Member No.: 447 Region Association: Southwest Region |
Yes bottom open, top closed.
|
|
|
|
| bbrock |
Jan 14 2019, 08:09 PM
Post
#347
|
|
914 Guru Group: Members Posts: 5,269 Joined: 17-February 17 From: Montana Member No.: 20,845 Region Association: Rocky Mountains |
|
|
|
|
| TravisNeff |
Jan 20 2019, 01:20 PM
Post
#348
|
|
914 Guru Group: Members Posts: 5,082 Joined: 20-March 03 From: Mesa, AZ Member No.: 447 Region Association: Southwest Region |
Rebuilt the front of the passenger torque box, it was rotted through both layers of metal. I was able to save the outer flanged piece, that was the only part not rusted.
Attached image(s) 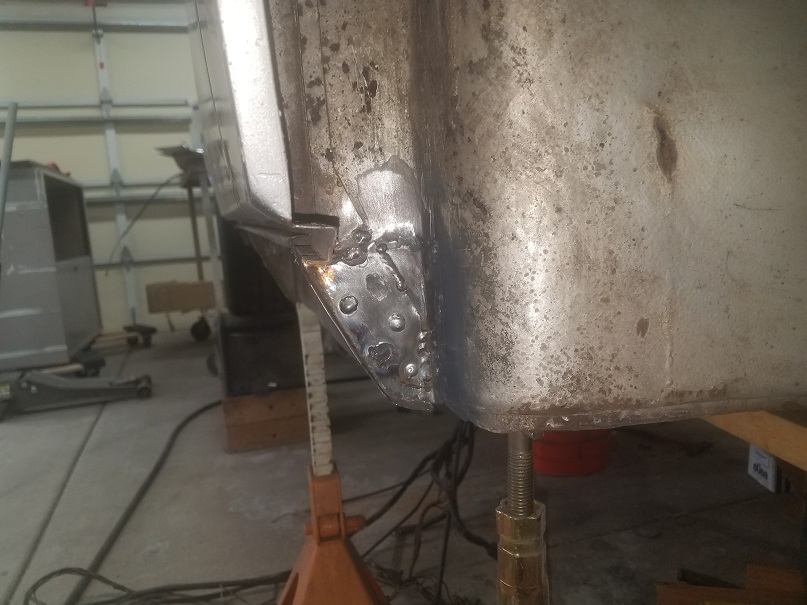
|
|
|
|
| TravisNeff |
Jan 26 2019, 09:12 AM
Post
#349
|
|
914 Guru Group: Members Posts: 5,082 Joined: 20-March 03 From: Mesa, AZ Member No.: 447 Region Association: Southwest Region |
Time to revisit one of the first repairs I did. I have been hiding this ugly from all of you for a while - but here it is.
Well, when I put the trunk floor In I had to pull in the back panel in a good 3/4 of an inch along the center. While this will be covered by the bumper, I need to try and fix it a little better. I think I need to cut a slit in the back of the trunk floor and get the back panel flat again then stitch in metal along the cut. I had to patch the back panel too as it was pitted through in a couple of spots. A long long time ago the rear panel and the passenger quarter were replaced with factory parts I think (red oxide primer on the backs on them). The panel has some crinkles in it too, time to remove some paint and figure out what's what. Attached thumbnail(s) 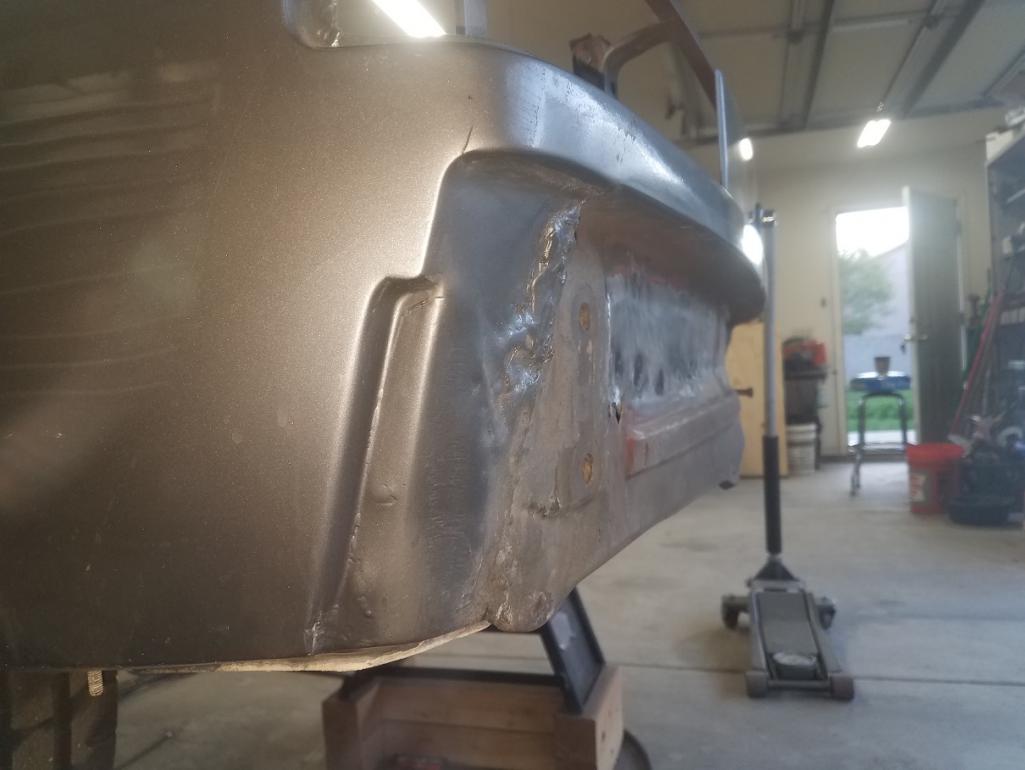 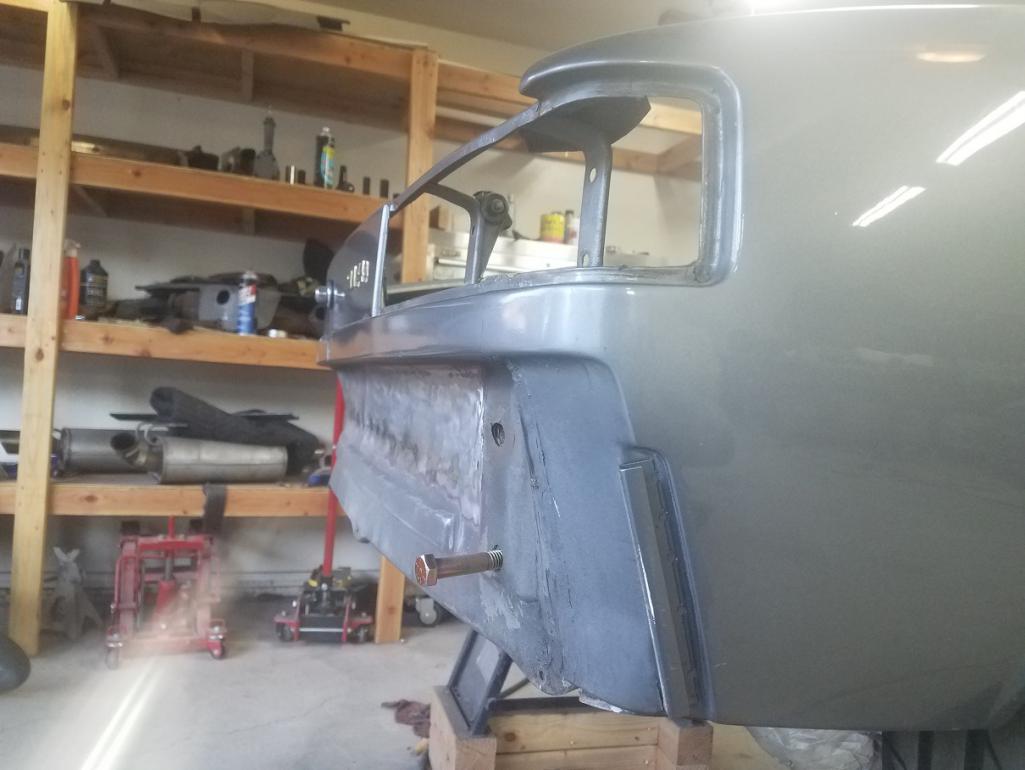 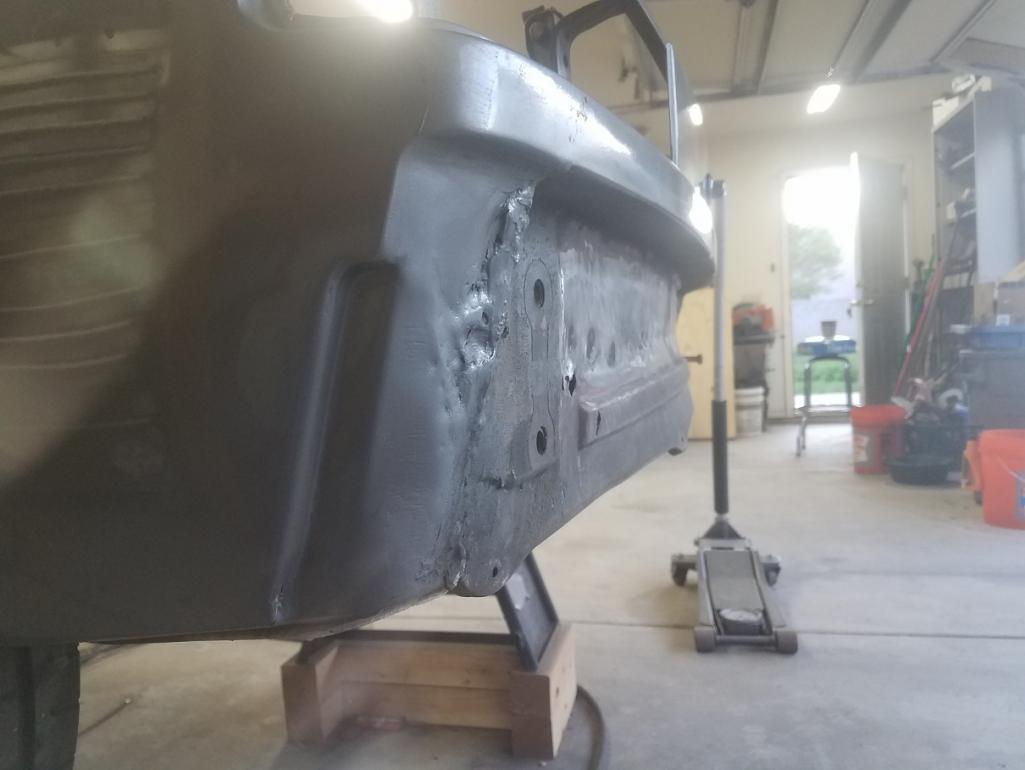
|
|
|
|
| bbrock |
Jan 26 2019, 09:41 AM
Post
#350
|
|
914 Guru Group: Members Posts: 5,269 Joined: 17-February 17 From: Montana Member No.: 20,845 Region Association: Rocky Mountains |
QUOTE(TravisNeff @ Jan 26 2019, 08:12 AM)  Time to revisit one of the first repairs I did. I have been hiding this ugly from all of you for a while - but here it is. I have a couple of those spots hiding behind my rotisserie mounts too. (IMG:style_emoticons/default/popcorn[1].gif) |
|
|
|
| Tdskip |
Jan 26 2019, 10:35 AM
Post
#351
|
|
Advanced Member Group: Members Posts: 3,783 Joined: 1-December 17 From: soCal Member No.: 21,666 Region Association: None |
Look at all that unused shelving, someone quick get that man two or three more projects!
|
|
|
|
| TravisNeff |
Jan 26 2019, 12:44 PM
Post
#352
|
|
914 Guru Group: Members Posts: 5,082 Joined: 20-March 03 From: Mesa, AZ Member No.: 447 Region Association: Southwest Region |
Paint removed. Found some more rust and the backing plate didn't have any primer on it. I am thinking that the whole panel needs to come out. Something is not right with the inward bow where the trunk floor meets the back panel.
Plus I am not sure how to get to the drivers side damage and fix. Attached image(s) 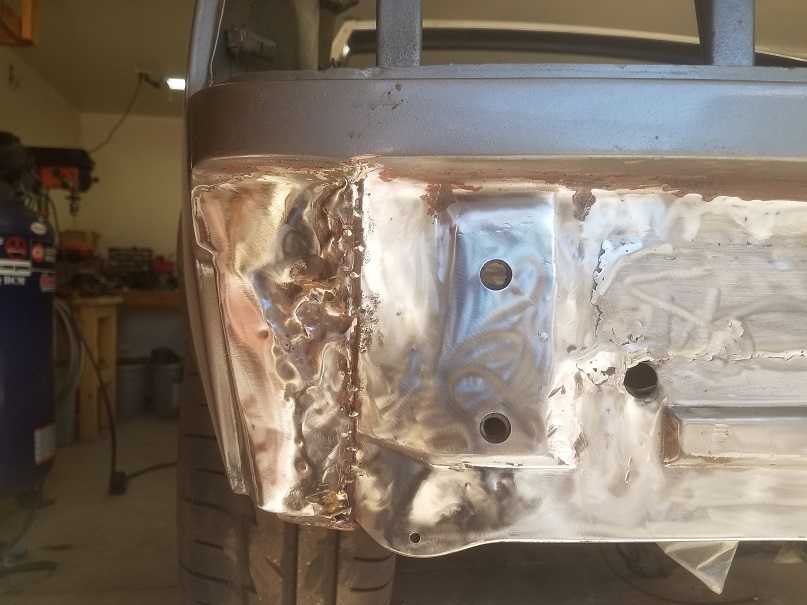 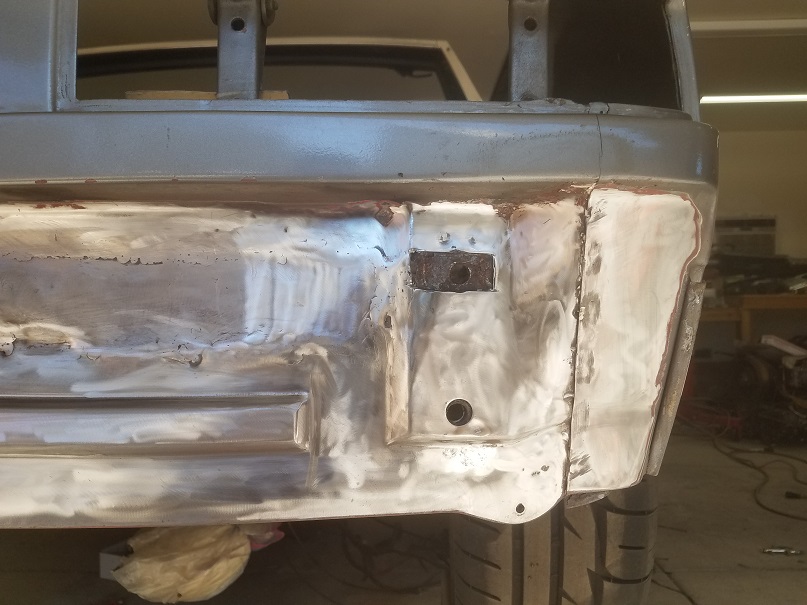 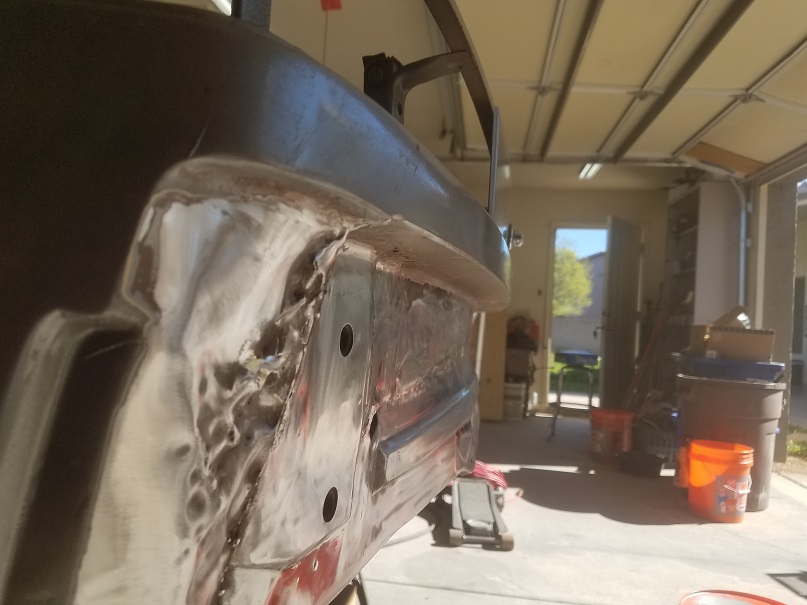
|
|
|
|
| TravisNeff |
Jan 26 2019, 04:20 PM
Post
#353
|
|
914 Guru Group: Members Posts: 5,082 Joined: 20-March 03 From: Mesa, AZ Member No.: 447 Region Association: Southwest Region |
What an asspain!.I win..
Attached image(s) 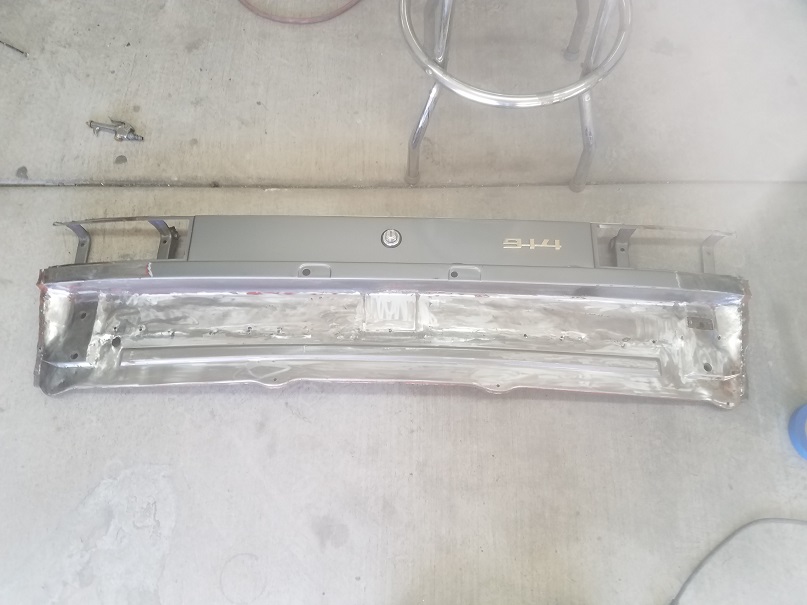 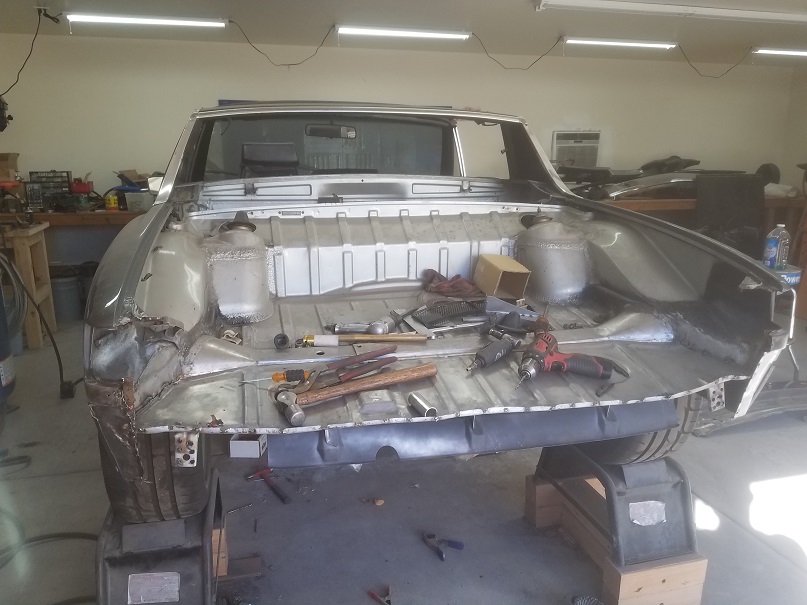
|
|
|
|
| TravisNeff |
Jan 26 2019, 06:25 PM
Post
#354
|
|
914 Guru Group: Members Posts: 5,082 Joined: 20-March 03 From: Mesa, AZ Member No.: 447 Region Association: Southwest Region |
I could only get so far with straightening this side panel. not much access for a dolly. I cheated and used a torch to heat it up before I could beat it sorta back into shape. There was a few spots of braze and sure enough it was for some holes. This corner piece is shot.
So after all that, I cut out the corner and will have to make a replacement piece. It will be a challenge because of the curve. Attached image(s) 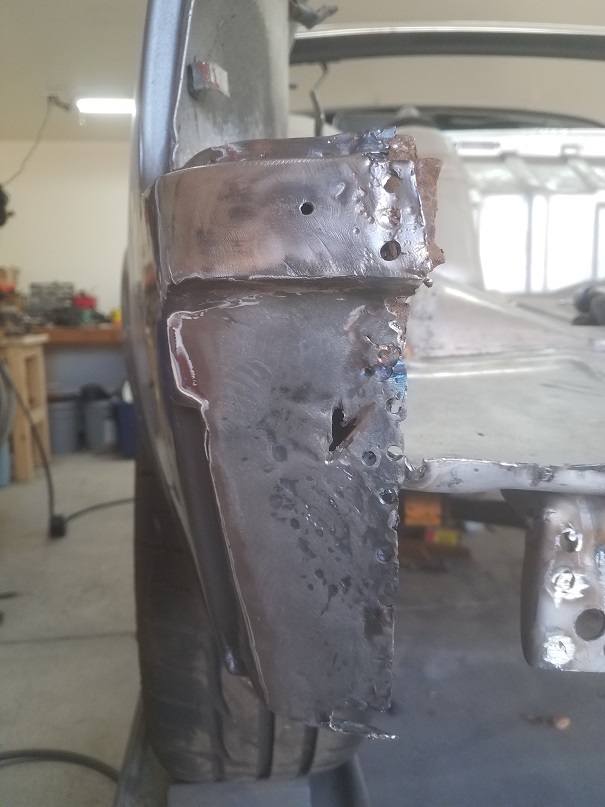 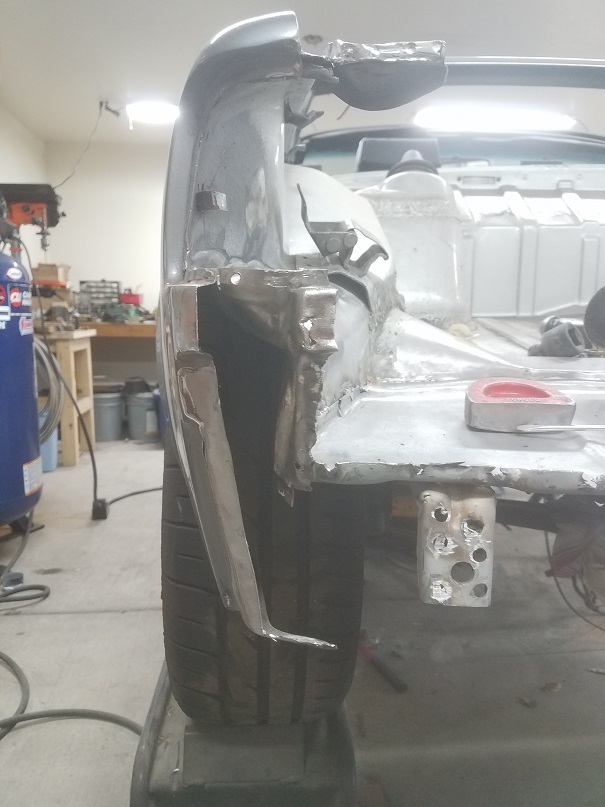 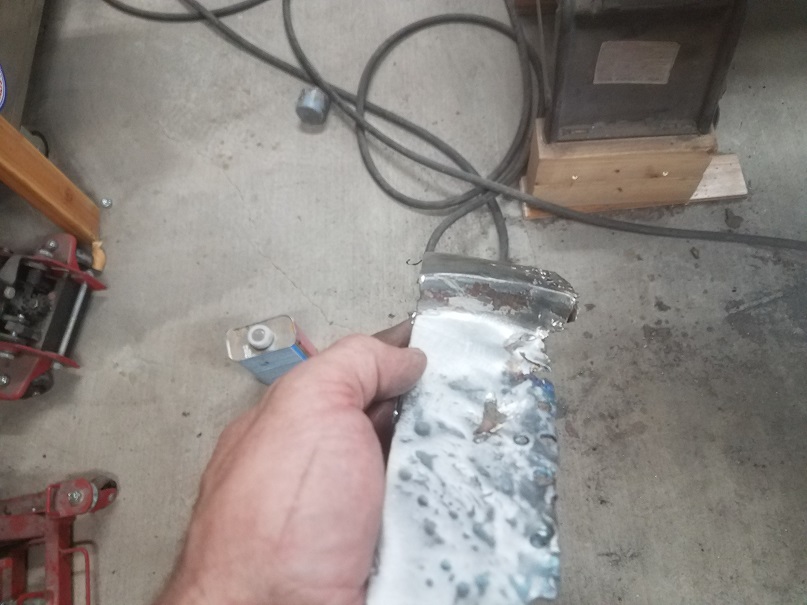
|
|
|
|
| sixnotfour |
Jan 26 2019, 08:50 PM
Post
#355
|
|
914 Wizard Group: Members Posts: 11,275 Joined: 12-September 04 Member No.: 2,744 Region Association: NineFourteenerVille |
|
|
|
|
| mb911 |
Jan 27 2019, 09:02 AM
Post
#356
|
|
914 Guru Group: Members Posts: 7,789 Joined: 2-January 09 From: Burlington wi Member No.: 9,892 Region Association: Upper MidWest |
That is one tough spot to fab a part for. I always have considered just buying the entire back piece from restoration design for my car.. Though mine worked our pretty nicely..
|
|
|
|
| mepstein |
Jan 27 2019, 09:49 AM
Post
#357
|
|
914-6 GT in waiting Group: Members Posts: 20,789 Joined: 19-September 09 From: Landenberg, PA/Wilmington, DE Member No.: 10,825 Region Association: MidAtlantic Region |
914sixer sent me a part from a car he's cutting up. Maybe give him a PM.
@914sixer |
 |
|
| TravisNeff |
Jan 27 2019, 11:30 AM
Post
#358
|
|
914 Guru Group: Members Posts: 5,082 Joined: 20-March 03 From: Mesa, AZ Member No.: 447 Region Association: Southwest Region |
Kicking ass this morning, el fabricato
Attached image(s) 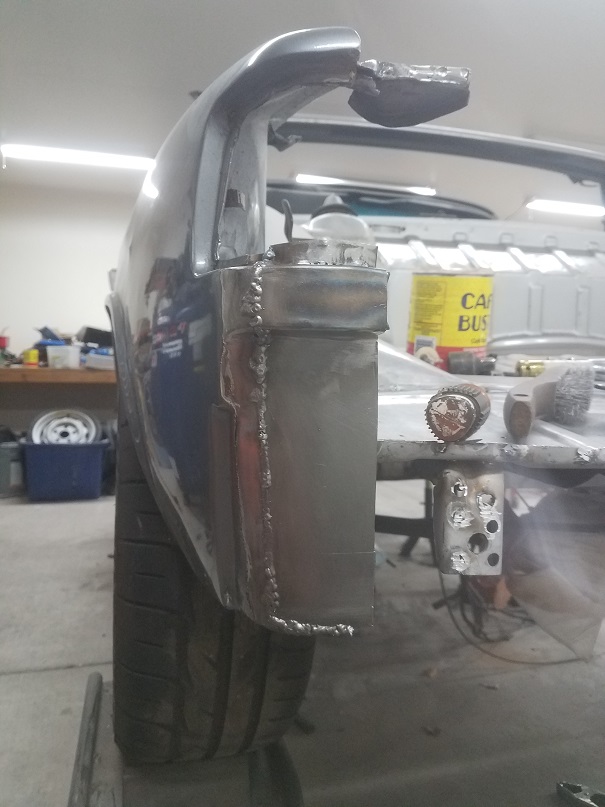 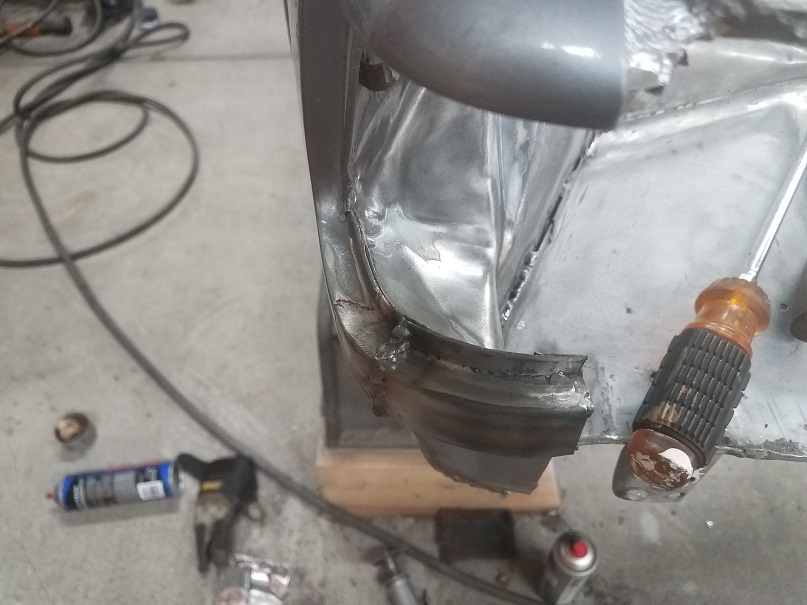 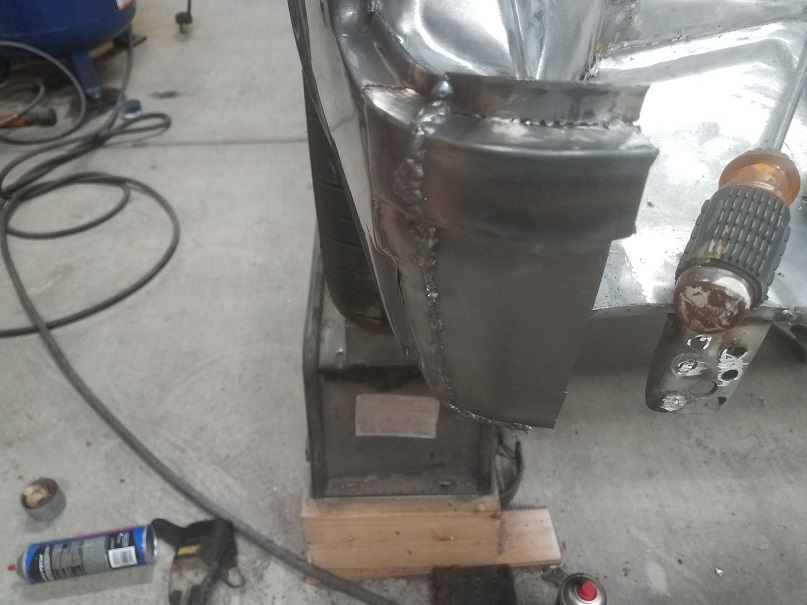
|
|
|
|
| TravisNeff |
Jan 27 2019, 12:16 PM
Post
#359
|
|
914 Guru Group: Members Posts: 5,082 Joined: 20-March 03 From: Mesa, AZ Member No.: 447 Region Association: Southwest Region |
Couple of pinholes and I have to trim the side to fit, other than that I am VERY happy how this turned out.
Attached thumbnail(s) 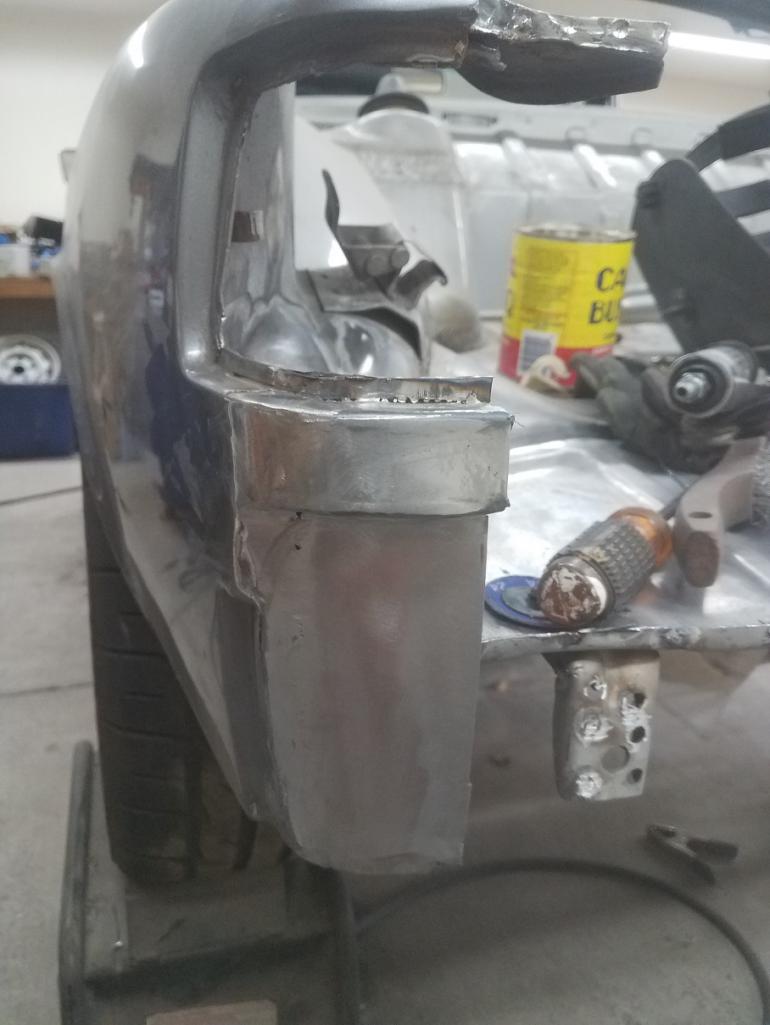
|
|
|
|
| bbrock |
Jan 27 2019, 04:12 PM
Post
#360
|
|
914 Guru Group: Members Posts: 5,269 Joined: 17-February 17 From: Montana Member No.: 20,845 Region Association: Rocky Mountains |
Whoa! (IMG:style_emoticons/default/pray.gif) (IMG:style_emoticons/default/pray.gif) (IMG:style_emoticons/default/pray.gif)
|
|
|
|
|
1 User(s) are reading this topic (1 Guests and 0 Anonymous Users)
0 Members:

|
Lo-Fi Version | Time is now: 3rd July 2026 - 10:15 AM |
Invision Power Board
v9.1.4 © 2026 IPS, Inc.