|
|
|
Porsche, and the Porsche crest are registered trademarks of Dr. Ing. h.c. F. Porsche AG.
This site is not affiliated with Porsche in any way. Its only purpose is to provide an online forum for car enthusiasts. All other trademarks are property of their respective owners. |
|
|

  |

| Tdskip |
 Jan 27 2019, 05:48 PM Jan 27 2019, 05:48 PM
Post
#361
|
|
Advanced Member  Group: Members Posts: 3,783 Joined: 1-December 17 From: soCal Member No.: 21,666 Region Association: None |
Nice!
|
   |

 
|
| Dion |
Jan 27 2019, 06:04 PM
Post
#362
|
|
RN Group: Members Posts: 2,931 Joined: 16-September 04 From: Shepherdstown, WV Member No.: 2,766 Region Association: MidAtlantic Region |
Great work Travis.
|
|
|
|
| 914forme |
Jan 27 2019, 08:34 PM
Post
#363
|
|
Times a wastin', get wrenchin'! Group: Members Posts: 3,899 Joined: 24-July 04 From: Dayton, Ohio Member No.: 2,388 Region Association: None |
exceptional work Travis, if you look back over the thread you can see your progression on skills. It is really neat to see.
|
|
|
|
| worn |
Jan 27 2019, 09:53 PM
Post
#364
|
|
Winner of the Utah Twisted Joint Award Group: Members Posts: 3,616 Joined: 3-June 11 From: Madison, WI and North Bend WA Member No.: 13,152 Region Association: Upper MidWest |
QUOTE(bbrock @ Jan 26 2019, 07:41 AM)  QUOTE(TravisNeff @ Jan 26 2019, 08:12 AM) Time to revisit one of the first repairs I did. I have been hiding this ugly from all of you for a while - but here it is. I have a couple of those spots hiding behind my rotisserie mounts too. (IMG:style_emoticons/default/popcorn[1].gif) (IMG:style_emoticons/default/agree.gif) But the paint is already on. I admire your persistence. Truly good work |
|
|
|
| worn |
Jan 27 2019, 09:58 PM
Post
#365
|
|
Winner of the Utah Twisted Joint Award Group: Members Posts: 3,616 Joined: 3-June 11 From: Madison, WI and North Bend WA Member No.: 13,152 Region Association: Upper MidWest |
QUOTE(TravisNeff @ Jan 27 2019, 10:16 AM) Couple of pinholes and I have to trim the side to fit, other than that I am VERY happy how this turned out. Wow! And I have the same screw driver. Reflected glory. Unfortunately the rear is where the cars get hit a lot. Your car is fortunate. |
|
|
|
| TravisNeff |
Jan 29 2019, 11:12 AM
Post
#366
|
|
914 Guru Group: Members Posts: 5,082 Joined: 20-March 03 From: Mesa, AZ Member No.: 447 Region Association: Southwest Region |
Thanks for the kind words everyone. I am either getting lucky or I am getting better.
Anyways. I was looking at the rear corners of the inner rear trunk. On the drivers side, there is a crease that almost looks factory. On the passenger side it does not have the same crease. It is a small thing and I wouldnt really worry about it - but I have access now. The car always looked high on the passenger side rear even though the height from the rear jacking donuts were even from side to side. What do you all think. I am adding a pic from Cairo's car, you can clearly see this rear corner does not have the crease. Attached thumbnail(s) 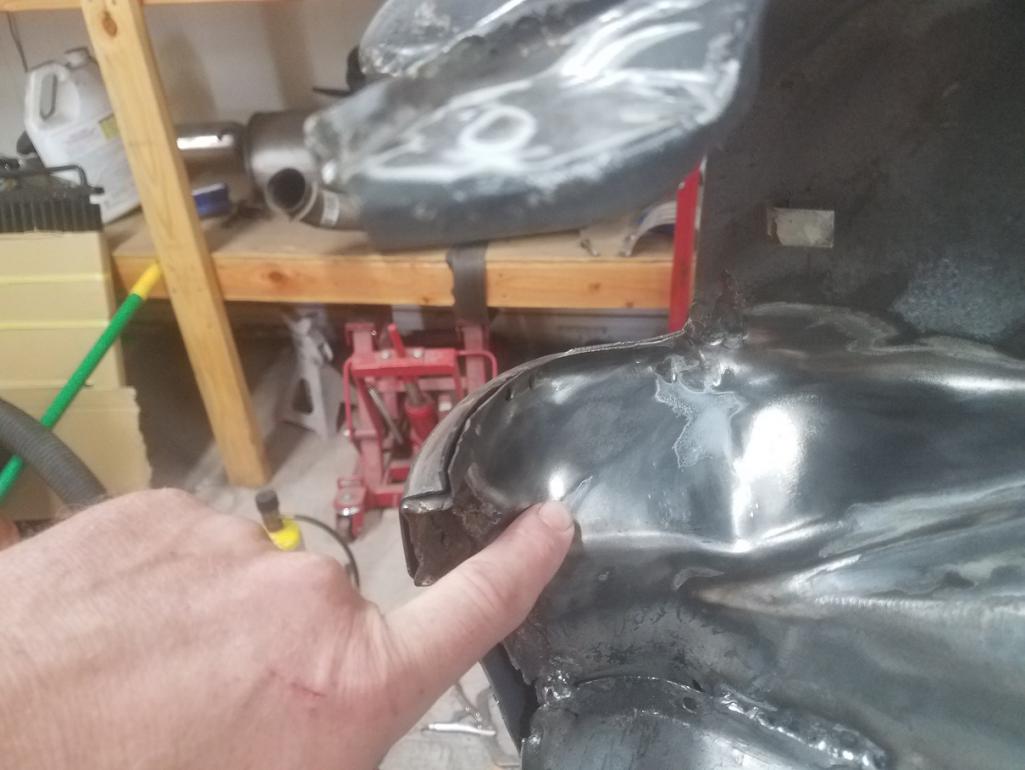 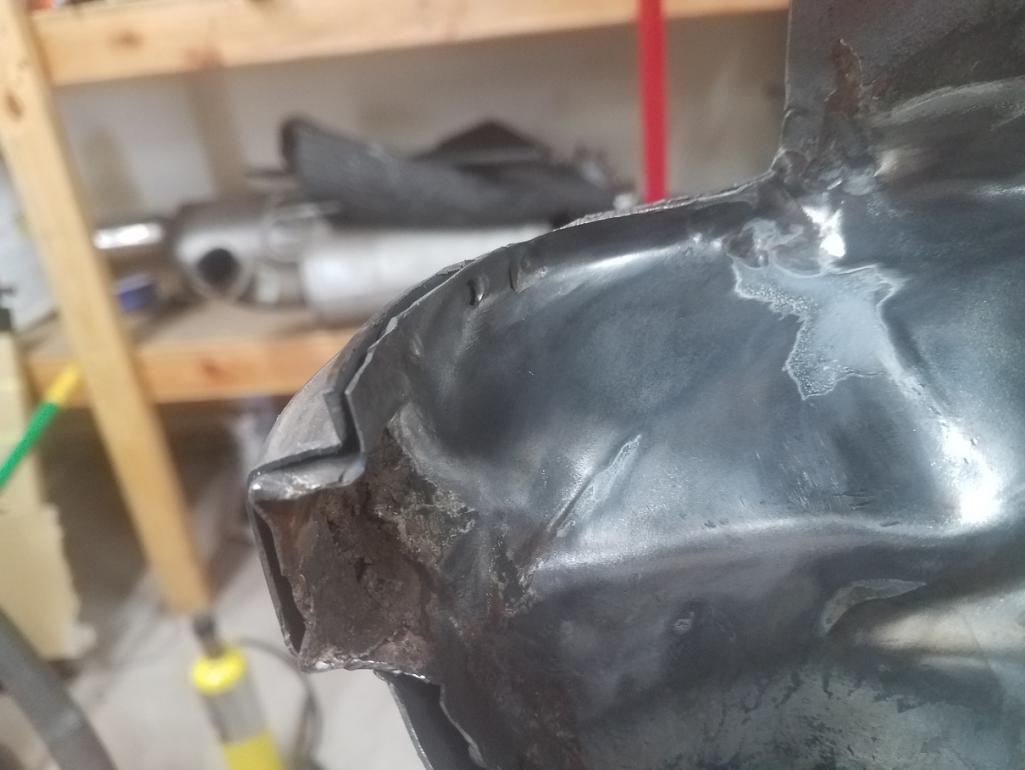 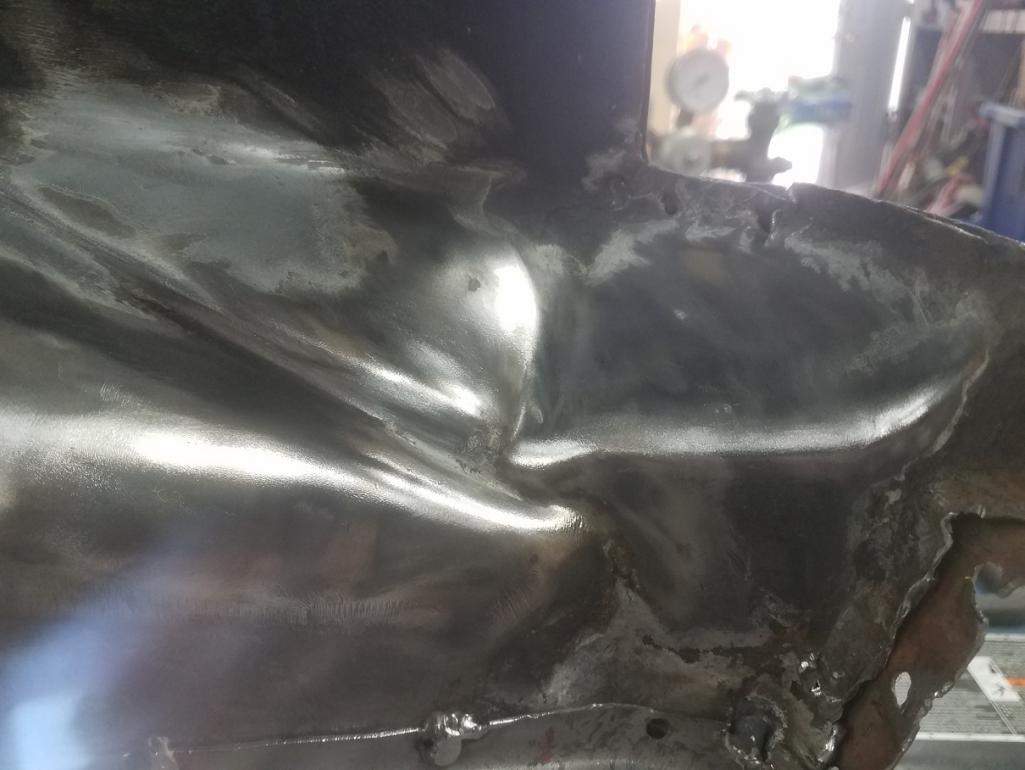 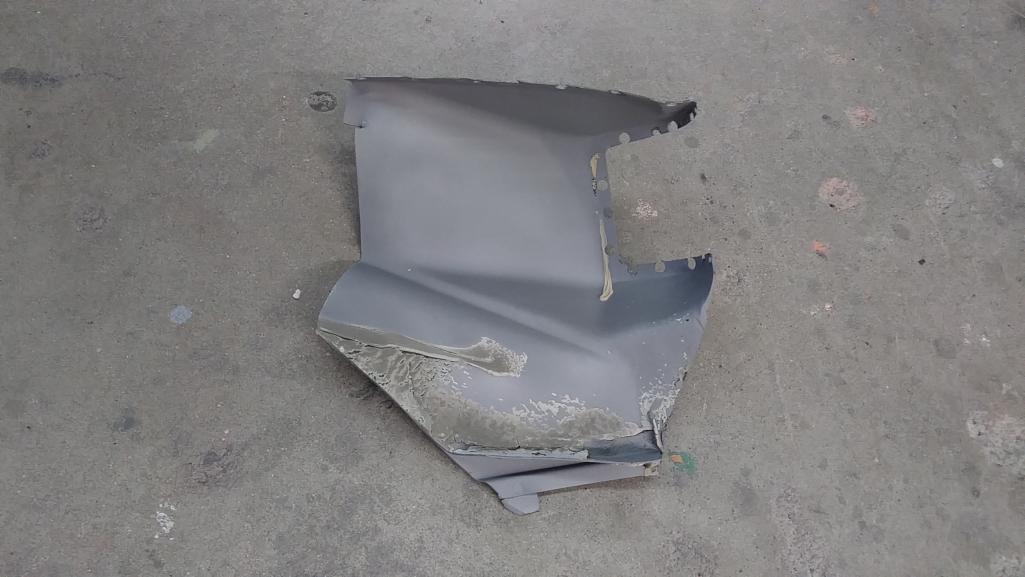
|
|
|
|
| TravisNeff |
Feb 3 2019, 04:28 PM
Post
#367
|
|
914 Guru Group: Members Posts: 5,082 Joined: 20-March 03 From: Mesa, AZ Member No.: 447 Region Association: Southwest Region |
I cut out the patches I put in and am starting over. found more rust and had to patch the bumper mount portion. Don't have a drill bit bit enough for the hole and my holesaws are too big. I will get to that later. Passenger side is done, driver side is next.
Attached image(s) 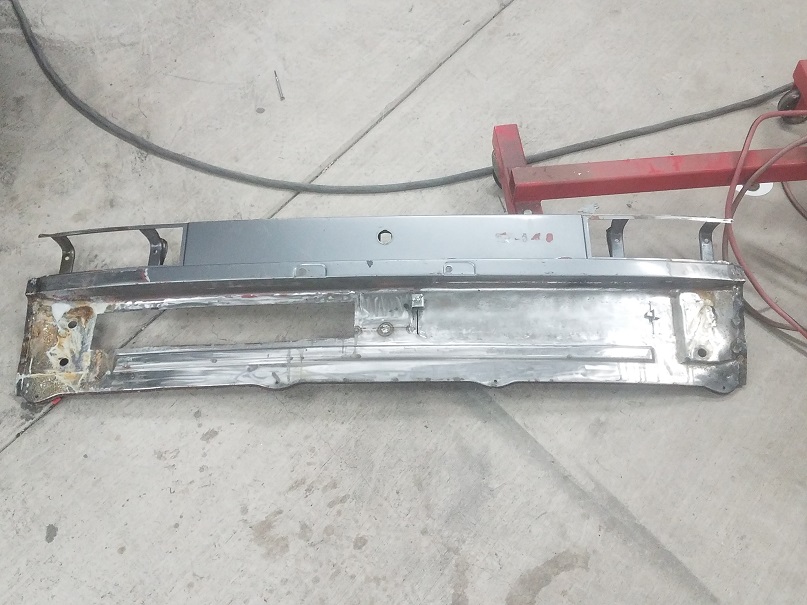 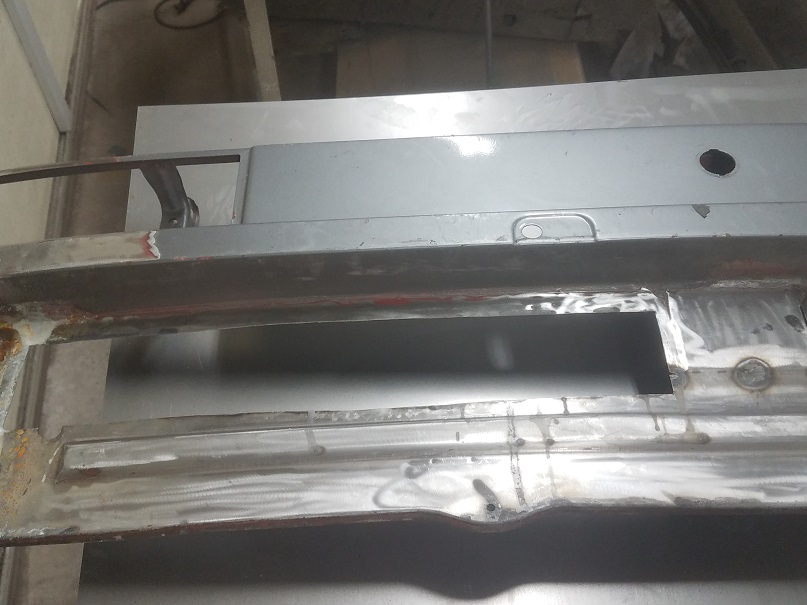 
|
|
|
|
| TravisNeff |
Feb 7 2019, 09:03 PM
Post
#368
|
|
914 Guru Group: Members Posts: 5,082 Joined: 20-March 03 From: Mesa, AZ Member No.: 447 Region Association: Southwest Region |
Other side patched in. Have a little more hammer and dolly work and final sanding. At least its not all warped to hell like the last attempt!
Attached image(s) 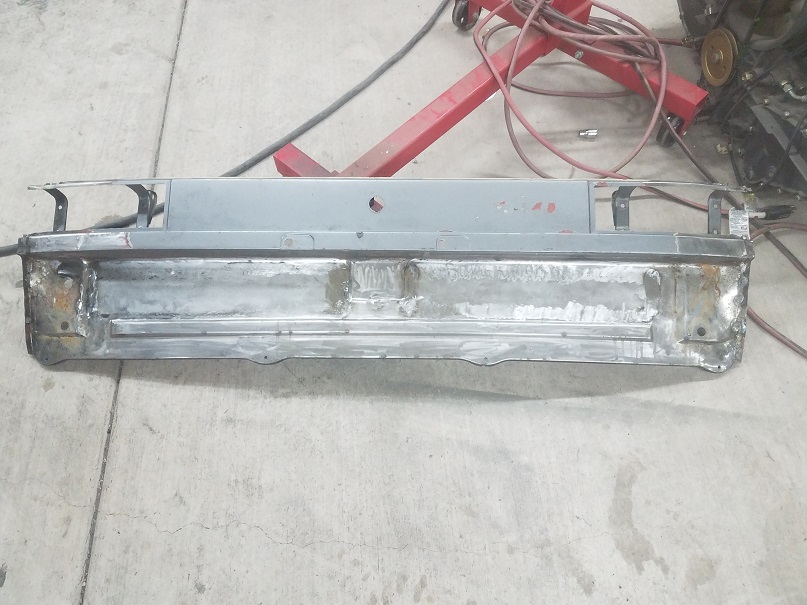
|
|
|
|
| ChrisFoley |
Feb 8 2019, 12:00 PM
Post
#369
|
|
I am Tangerine Racing Group: Members Posts: 8,031 Joined: 29-January 03 From: Bolton, CT Member No.: 209 Region Association: None |
Looks good.
When you're reattaching that panel, don't forget to test fit the rear bumper and check that the curvature matches before you weld it in solid. |
 |
|
| defianty |
Feb 8 2019, 12:35 PM
Post
#370
|
|
Senior Member Group: Members Posts: 659 Joined: 9-August 06 From: Essex, UK Member No.: 6,621 Region Association: None |
QUOTE(ChrisFoley @ Feb 8 2019, 06:00 PM) Looks good. When you're reattaching that panel, don't forget to test fit the rear bumper and check that the curvature matches before you weld it in solid. (IMG:style_emoticons/default/agree.gif) And the trunk lid too! Coming along well Travis. |
|
|
|
| TravisNeff |
Feb 8 2019, 01:43 PM
Post
#371
|
|
914 Guru Group: Members Posts: 5,082 Joined: 20-March 03 From: Mesa, AZ Member No.: 447 Region Association: Southwest Region |
Was just thinking that same thing, it's close!
Attached image(s) 
|
|
|
|
| TravisNeff |
Feb 9 2019, 11:23 AM
Post
#372
|
|
914 Guru Group: Members Posts: 5,082 Joined: 20-March 03 From: Mesa, AZ Member No.: 447 Region Association: Southwest Region |
A little metal work was needed along the bottom edge, it wants to flip outward. Getting closer though.
Attached image(s) 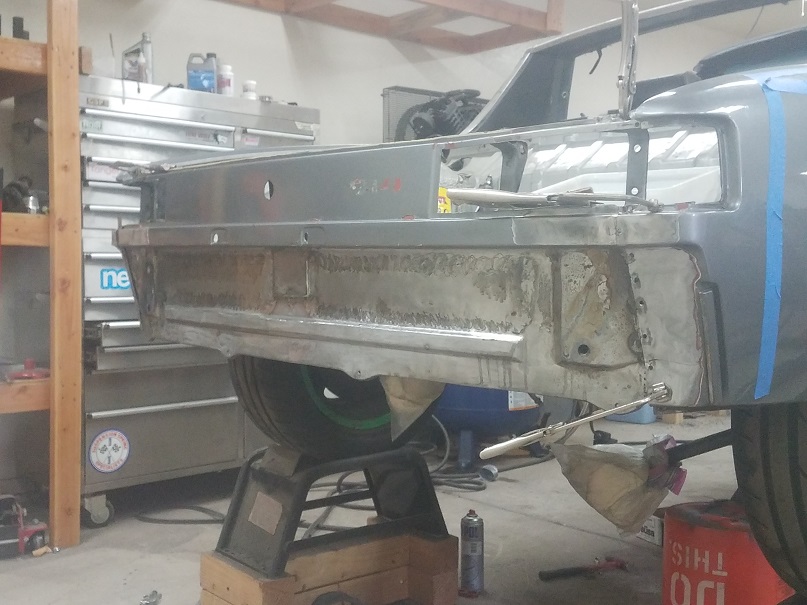 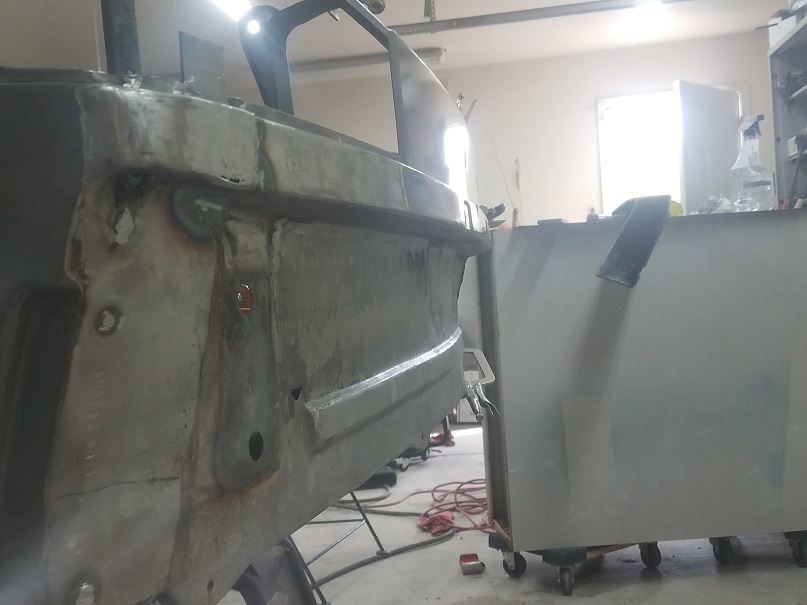 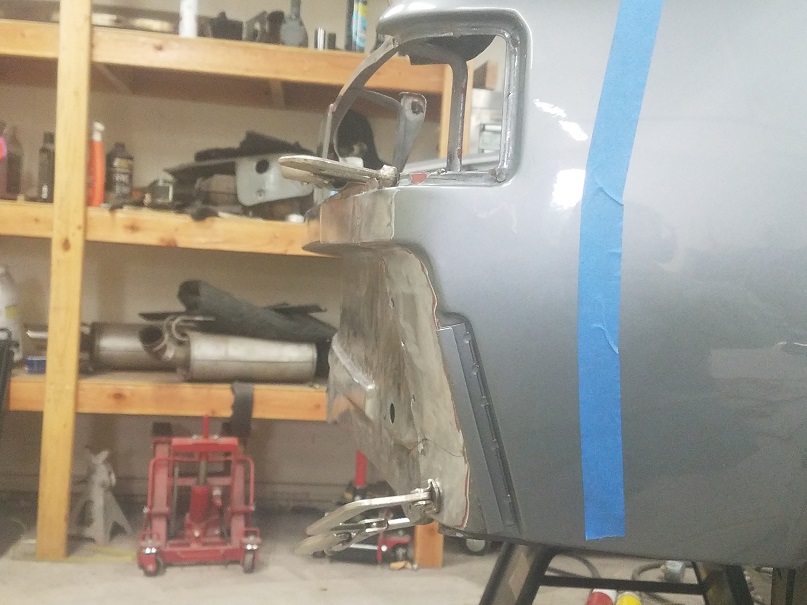
|
|
|
|
| Tdskip |
Feb 9 2019, 01:18 PM
Post
#373
|
|
Advanced Member Group: Members Posts: 3,783 Joined: 1-December 17 From: soCal Member No.: 21,666 Region Association: None |
Thanks for the updates. Time, time, time, it all takes time.
Oh, and you are most certainly getting better. :-) |
|
|
|
| TravisNeff |
Feb 10 2019, 04:59 PM
Post
#374
|
|
914 Guru Group: Members Posts: 5,082 Joined: 20-March 03 From: Mesa, AZ Member No.: 447 Region Association: Southwest Region |
Thanks TDSkip!
Farted around with the shrinker and it is close enough. Burned into place. Attached image(s) 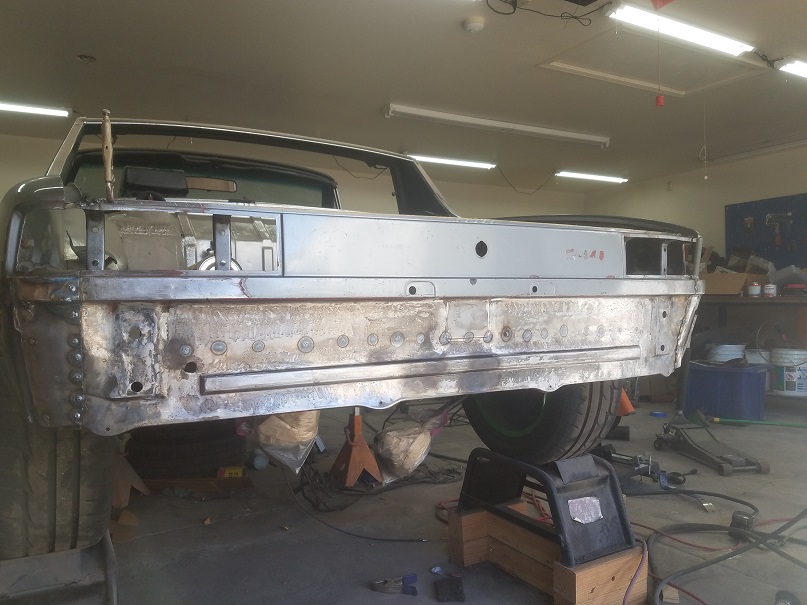
|
|
|
|
| mb911 |
Feb 10 2019, 07:46 PM
Post
#375
|
|
914 Guru Group: Members Posts: 7,789 Joined: 2-January 09 From: Burlington wi Member No.: 9,892 Region Association: Upper MidWest |
Travis maybe I missed this but that looks like 75,76 replacement right rear 1/4 ?
|
|
|
|
| TravisNeff |
Feb 10 2019, 08:17 PM
Post
#376
|
|
914 Guru Group: Members Posts: 5,082 Joined: 20-March 03 From: Mesa, AZ Member No.: 447 Region Association: Southwest Region |
QUOTE(mb911 @ Feb 10 2019, 06:46 PM) Travis maybe I missed this but that looks like 75,76 replacement right rear 1/4 ? Yep Passenger quarter and rear panel had been replaced in a previous life. Gotta get that flange off while I am screwing around back there |
|
|
|
| TravisNeff |
Feb 15 2019, 06:25 PM
Post
#377
|
|
914 Guru Group: Members Posts: 5,082 Joined: 20-March 03 From: Mesa, AZ Member No.: 447 Region Association: Southwest Region |
Well I got rid of that 75-76 rear bumper flange (IMG:style_emoticons/default/lol-2.gif)
Attached image(s) 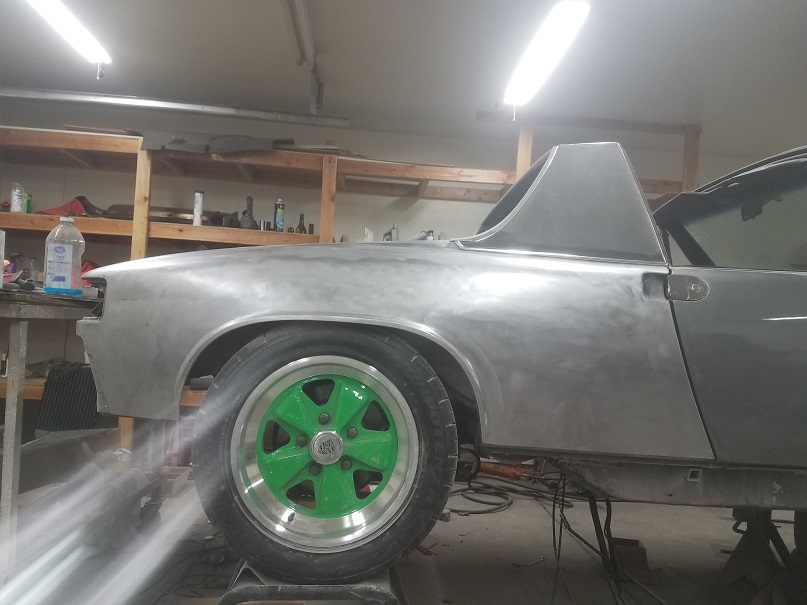 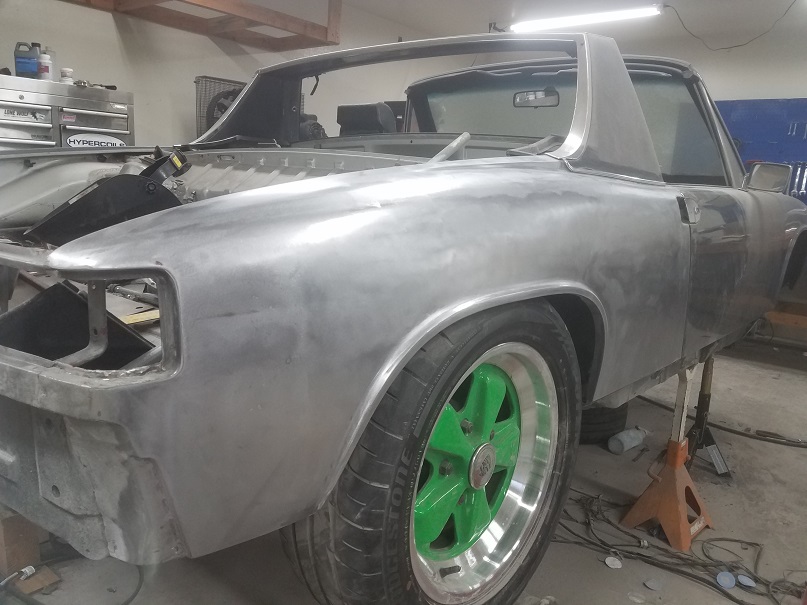
|
|
|
|
| Dion |
Feb 16 2019, 09:12 AM
Post
#378
|
|
RN Group: Members Posts: 2,931 Joined: 16-September 04 From: Shepherdstown, WV Member No.: 2,766 Region Association: MidAtlantic Region |
Really nice progress. I do love those green rims with the silver... something about it...very cool. :-)
|
|
|
|
| sixnotfour |
Feb 16 2019, 11:19 AM
Post
#379
|
|
914 Wizard Group: Members Posts: 11,275 Joined: 12-September 04 Member No.: 2,744 Region Association: NineFourteenerVille |
QUOTE Well I got rid of that 75-76 rear bumper flange (IMG:style_emoticons/default/lol-2.gif) Awesome (IMG:style_emoticons/default/aktion035.gif) (IMG:style_emoticons/default/popcorn[1].gif) |
|
|
|
| TravisNeff |
Feb 16 2019, 01:58 PM
Post
#380
|
|
914 Guru Group: Members Posts: 5,082 Joined: 20-March 03 From: Mesa, AZ Member No.: 447 Region Association: Southwest Region |
Next up is fixing that door gap, they got the panel on all screwy. Its all brazed on and the went a little short so the gap is wide. Door closes great though! Anyways I got the bottom section fixed up and now moving onto the top side. I should have cut the whole thing out to make it easier. Oh well. Picturs later
|
|
|
|
|
1 User(s) are reading this topic (1 Guests and 0 Anonymous Users)
0 Members:

|
Lo-Fi Version | Time is now: 3rd July 2026 - 09:06 AM |
Invision Power Board
v9.1.4 © 2026 IPS, Inc.