|
|
|
Porsche, and the Porsche crest are registered trademarks of Dr. Ing. h.c. F. Porsche AG.
This site is not affiliated with Porsche in any way. Its only purpose is to provide an online forum for car enthusiasts. All other trademarks are property of their respective owners. |
|
|

  |

| TravisNeff |
 Jun 15 2018, 04:57 PM Jun 15 2018, 04:57 PM
Post
#61
|
|
914 Guru  Group: Members Posts: 5,082 Joined: 20-March 03 From: Mesa, AZ Member No.: 447 Region Association: Southwest Region |
Got it, thank you (IMG:style_emoticons/default/smile.gif)
|
   |

 
|
| mb911 |
Jun 15 2018, 05:34 PM
Post
#62
|
|
914 Guru Group: Members Posts: 7,789 Joined: 2-January 09 From: Burlington wi Member No.: 9,892 Region Association: Upper MidWest |
Btw I like the project. Looks like a great start.
|
|
|
|
| Larmo63 |
Jun 15 2018, 05:43 PM
Post
#63
|
|
Advanced Member Group: Members Posts: 4,267 Joined: 3-March 14 From: San Clemente, Ca Member No.: 17,068 Region Association: Southern California |
I see you took the /4 mounts out, I left mine in. I felt that they strengthen and square up the chassis at that critical point.
I know /6s don't have them, but I ran my oil lines through the driver's side one, just so it could make itself useful. |
|
|
|
| Ferg |
Jun 15 2018, 09:17 PM
Post
#64
|
|
914 Guru Group: Members Posts: 5,948 Joined: 8-January 03 From: Boulder CO Member No.: 116 Region Association: None |
Looking Good!
|
|
|
|
| Justinp71 |
Jun 15 2018, 10:20 PM
Post
#65
|
|
Senior Member Group: Members Posts: 1,647 Joined: 11-October 04 From: Sacramento, CA Member No.: 2,922 Region Association: None |
Cool! You're going to love that motor when its done! Carb'd flat sixes are amazing! |
|
|
|
| mb911 |
Jun 16 2018, 06:22 AM
Post
#66
|
|
914 Guru Group: Members Posts: 7,789 Joined: 2-January 09 From: Burlington wi Member No.: 9,892 Region Association: Upper MidWest |
When removing my 4 mounts I made 14 gauge over lay reinforcements.. I will see if I can dig up a picture.. oops just found one.
 |
|
|
|
| TravisNeff |
Jun 16 2018, 11:11 AM
Post
#67
|
|
914 Guru Group: Members Posts: 5,082 Joined: 20-March 03 From: Mesa, AZ Member No.: 447 Region Association: Southwest Region |
I thought about leaving the mounts in when I had them halfway out. I was getting frustrated that I might not be able to get them out without a huge leftover mess!
I like the overlays and am thinking about something similar. Ollie's 914-6 blog has something like that as well. I will decide once I get the longs all fixed up. I took Ben's critique on my mounts and while I didn't really like to hear it, I needed to. And I am thankful to get the feedback. So I went out and did some practicing and fooling around with the controls. I am going to try to practice a little bit each day before I start doing any more weld in work. Also on plug & butt welds. It's easy to rush to get something done vs. trying the best you can and slow down a bit. Attached image(s) 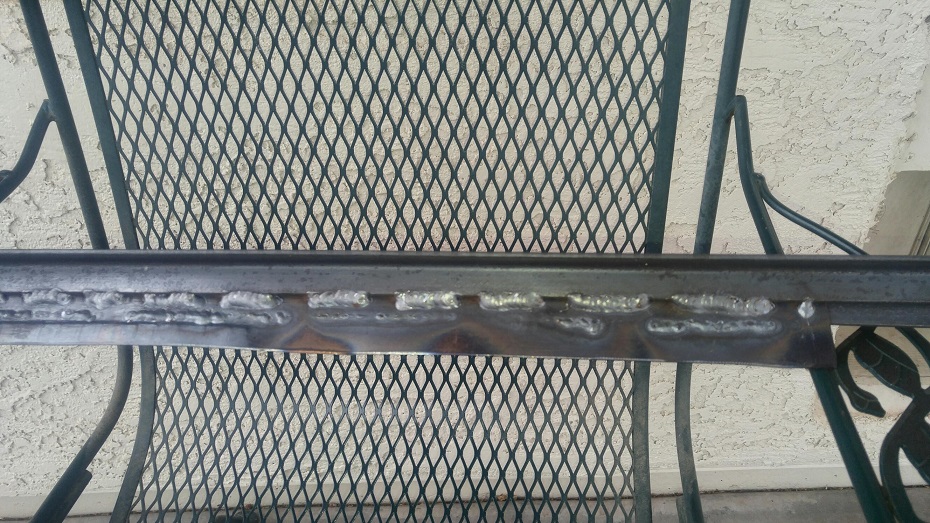
|
|
|
|
| mb911 |
Jun 16 2018, 11:20 AM
Post
#68
|
|
914 Guru Group: Members Posts: 7,789 Joined: 2-January 09 From: Burlington wi Member No.: 9,892 Region Association: Upper MidWest |
QUOTE(Travis Neff @ Jun 16 2018, 09:11 AM)  I thought about leaving the mounts in when I had them halfway out. I was getting frustrated that I might not be able to get them out without a huge leftover mess! I like the overlays and am thinking about something similar. Ollie's 914-6 blog has something like that as well. I will decide once I get the longs all fixed up. I took Ben's critique on my mounts and while I didn't really like to hear it, I needed to. And I am thankful to get the feedback. So I went out and did some practicing and fooling around with the controls. I am going to try to practice a little bit each day before I start doing any more weld in work. Also on plug & butt welds. It's easy to rush to get something done vs. trying the best you can and slow down a bit. Looks very good.. Big improvement. Remember I have done it professionally for 25 years plus. It takes a while to be able to weld like this. 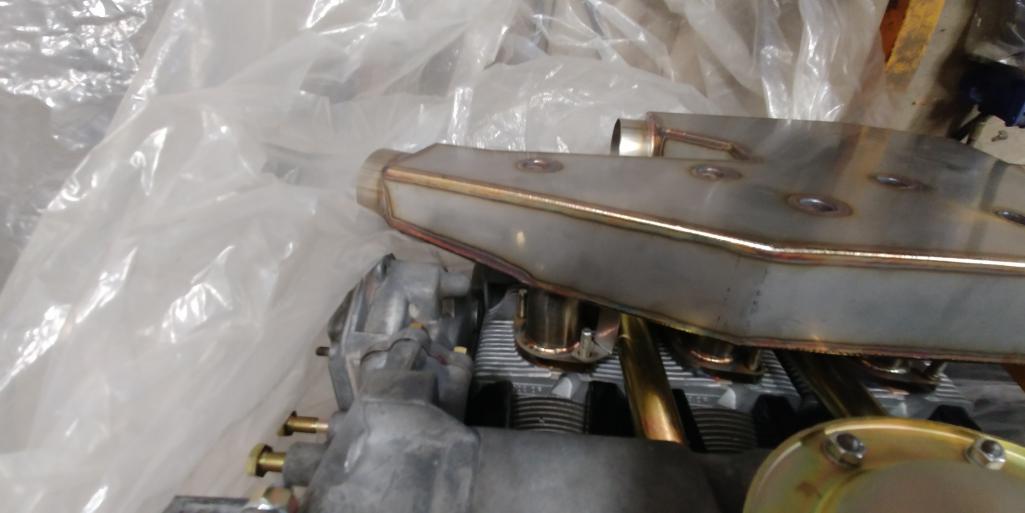 |
|
|
|
| TravisNeff |
Jun 16 2018, 11:23 AM
Post
#69
|
|
914 Guru Group: Members Posts: 5,082 Joined: 20-March 03 From: Mesa, AZ Member No.: 447 Region Association: Southwest Region |
Beautiful! Obviously not done with a metal glue gun.
|
|
|
|
| mb911 |
Jun 16 2018, 12:47 PM
Post
#70
|
|
914 Guru Group: Members Posts: 7,789 Joined: 2-January 09 From: Burlington wi Member No.: 9,892 Region Association: Upper MidWest |
QUOTE(Travis Neff @ Jun 16 2018, 09:23 AM) Beautiful! Obviously not done with a metal glue gun. Your getting there.. Just all about practice. |
|
|
|
| TravisNeff |
Jun 16 2018, 03:26 PM
Post
#71
|
|
914 Guru Group: Members Posts: 5,082 Joined: 20-March 03 From: Mesa, AZ Member No.: 447 Region Association: Southwest Region |
More practice today. I won't keep boring you with all this, but I am happy about the improvement and wanted to share.
I found that doing the plug welds, I got the best penetration by starting the puddle in the middle and pull out to the side of the hole, then do the same in 3, 6, 9, 12 & follow up with filling the hole. Where I filled the hole in one shot, amazingly I had the least penetration. For the welds on the top, I redialed in my auto-darkening helmet so I could see better as i go. I did about 2" at a time and still need more practice were I start a weld next to the old weld (hope that makes sense). Also need to focus on using all the real estate on the side of the flat stock. This is new metal to new metal, so no blowing holes. I practiced on some old sheet metal I cut out of the car and that was much more tricky to not blow holes. 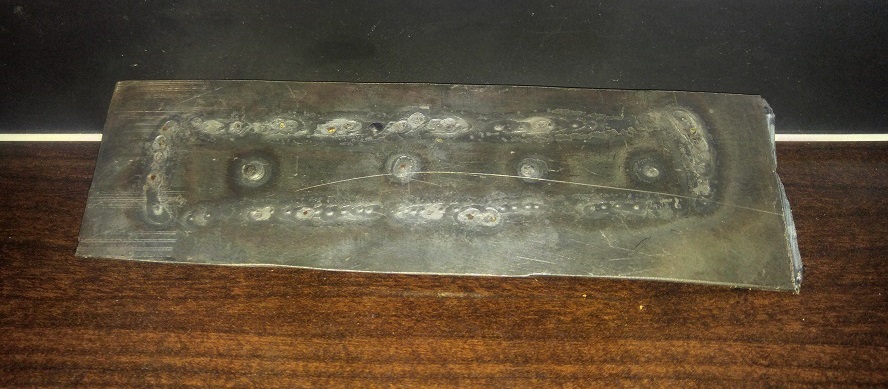 Attached image(s) 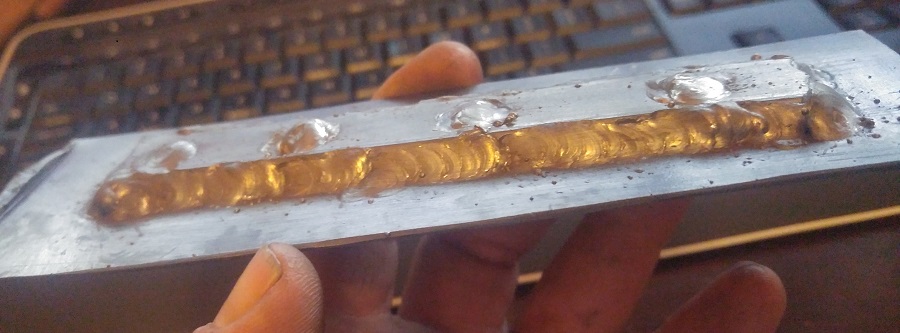
|
|
|
|
| mb911 |
Jun 18 2018, 06:57 AM
Post
#72
|
|
914 Guru Group: Members Posts: 7,789 Joined: 2-January 09 From: Burlington wi Member No.: 9,892 Region Association: Upper MidWest |
Keep it up.. Now your up to the job. Carry on..
|
|
|
|
| TravisNeff |
Jun 18 2018, 03:59 PM
Post
#73
|
|
914 Guru Group: Members Posts: 5,082 Joined: 20-March 03 From: Mesa, AZ Member No.: 447 Region Association: Southwest Region |
Let's pucker up and start to cut..
Attached image(s)  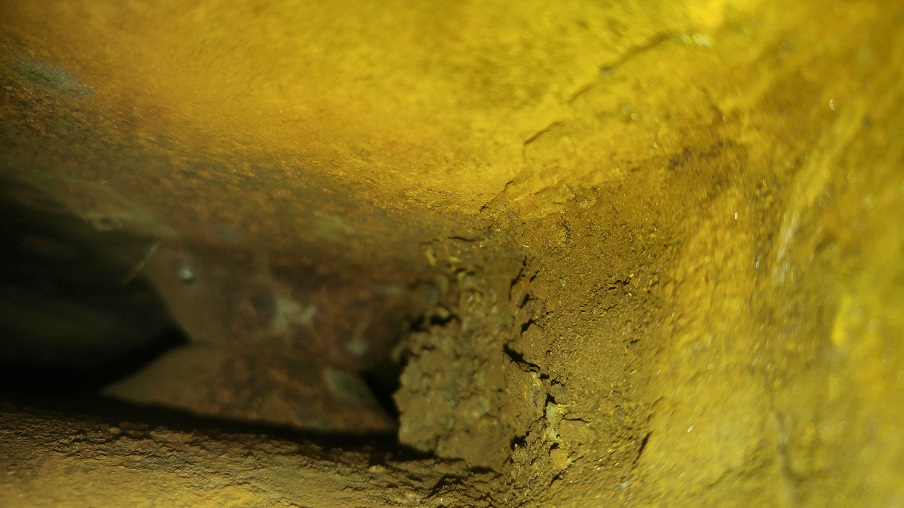 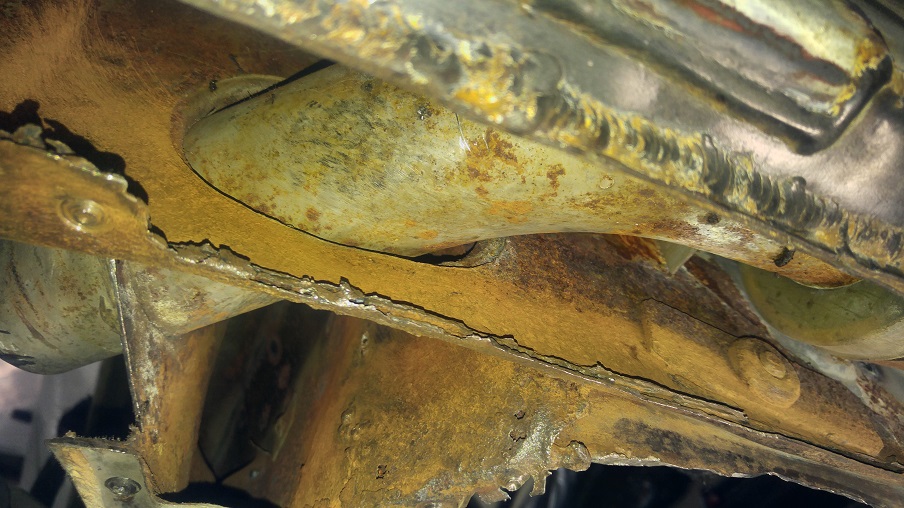 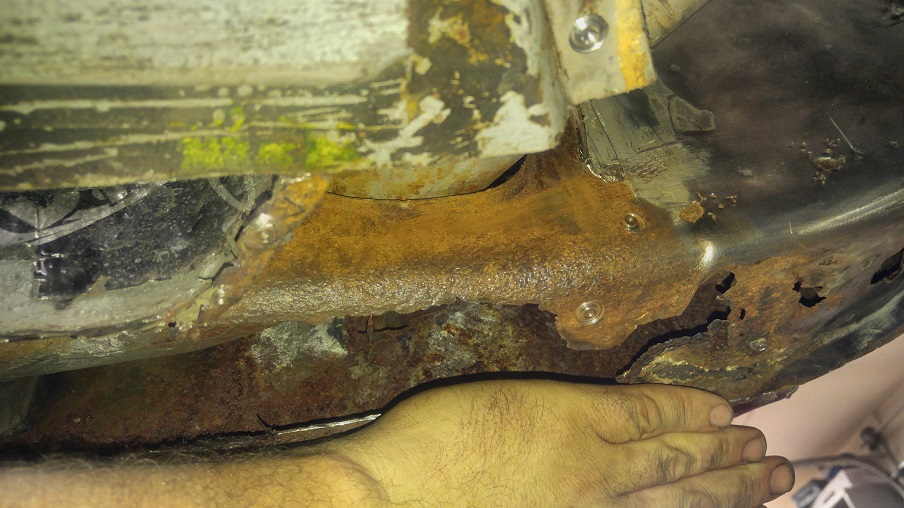 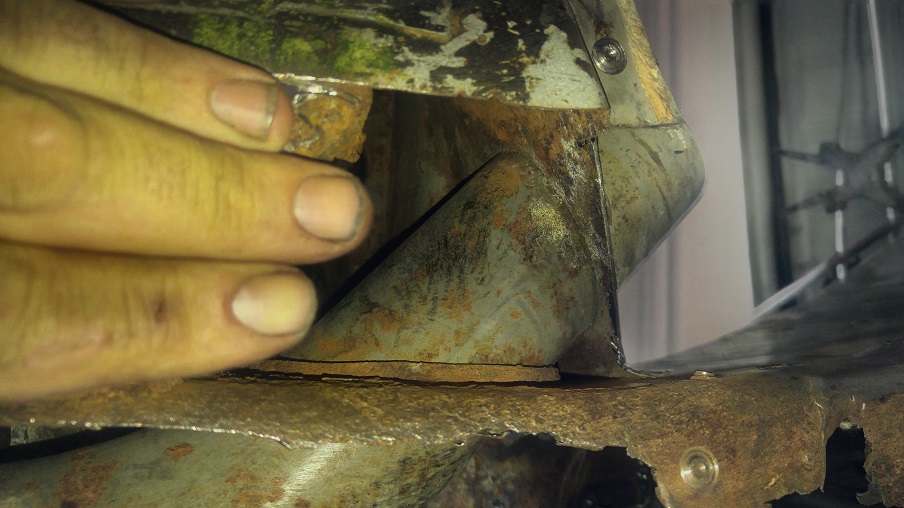
|
|
|
|
| mb911 |
Jun 18 2018, 04:13 PM
Post
#74
|
|
914 Guru Group: Members Posts: 7,789 Joined: 2-January 09 From: Burlington wi Member No.: 9,892 Region Association: Upper MidWest |
Btdt.. Oh what fun.
|
|
|
|
| bbrock |
Jun 18 2018, 04:19 PM
Post
#75
|
|
914 Guru Group: Members Posts: 5,269 Joined: 17-February 17 From: Montana Member No.: 20,845 Region Association: Rocky Mountains |
QUOTE(Travis Neff @ Jun 18 2018, 03:59 PM) Let's pucker up and start to cut.. I know that feeling! (IMG:style_emoticons/default/lol-2.gif) You are doing great work. Fun to watch. |
|
|
|
| TravisNeff |
Jun 18 2018, 04:26 PM
Post
#76
|
|
914 Guru Group: Members Posts: 5,082 Joined: 20-March 03 From: Mesa, AZ Member No.: 447 Region Association: Southwest Region |
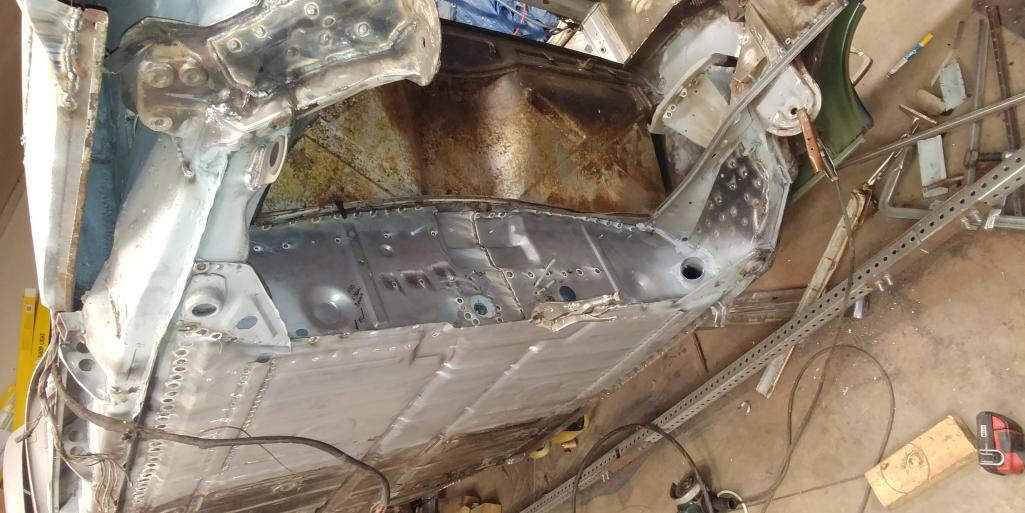
A bunch more cotton and mouse trash fell out of the hollow section of the lower firewall. Those little bastards can get everywhere!
Now to figure out where to start patching. I have the huge urge to cut out the jack point area, but knowing my luck the car will collapse in half. I'll need to patch what I cut (and a few more cuts, like the inside corner of the passenger compartment), then move onto the next spot. |
|
|
|
| TravisNeff |
Jun 18 2018, 04:51 PM
Post
#77
|
|
914 Guru Group: Members Posts: 5,082 Joined: 20-March 03 From: Mesa, AZ Member No.: 447 Region Association: Southwest Region |
I think I will cut these 2 parts next. I will need to figure out how to bend the replacement long pieces to make that smooth, rounded corner. Anyone have any insight on this? I have a cheap-o 30 inch HF brake. I guess finding some conduit or something to help make the shape.
Attached image(s)  
|
|
|
|
| bbrock |
Jun 18 2018, 05:00 PM
Post
#78
|
|
914 Guru Group: Members Posts: 5,269 Joined: 17-February 17 From: Montana Member No.: 20,845 Region Association: Rocky Mountains |
I have the same cheapo HF bending brake and bending the radius on those inner longs is actually pretty easy. I welded a piece of 3/8" solid round stock to a piece of plate that I bent the patch around. Matches the radius very well. You can see it about half way down on this post: http://www.914world.com/bbs2/index.php?s=&...t&p=2516927
|
|
|
|
| TravisNeff |
Jun 18 2018, 06:27 PM
Post
#79
|
|
914 Guru Group: Members Posts: 5,082 Joined: 20-March 03 From: Mesa, AZ Member No.: 447 Region Association: Southwest Region |
QUOTE(bbrock @ Jun 18 2018, 04:00 PM) I have the same cheapo HF bending brake and bending the radius on those inner longs is actually pretty easy. I welded a piece of 3/8" solid round stock to a piece of plate that I bent the patch around. Matches the radius very well. You can see it about half way down on this post: http://www.914world.com/bbs2/index.php?s=&...t&p=2516927 Giddyup! That will save me a whole day trying a bunch of different things. Thank you Brent. |
|
|
|
| TravisNeff |
Jun 18 2018, 06:38 PM
Post
#80
|
|
914 Guru Group: Members Posts: 5,082 Joined: 20-March 03 From: Mesa, AZ Member No.: 447 Region Association: Southwest Region |
A little more cancer cuts
Attached image(s) 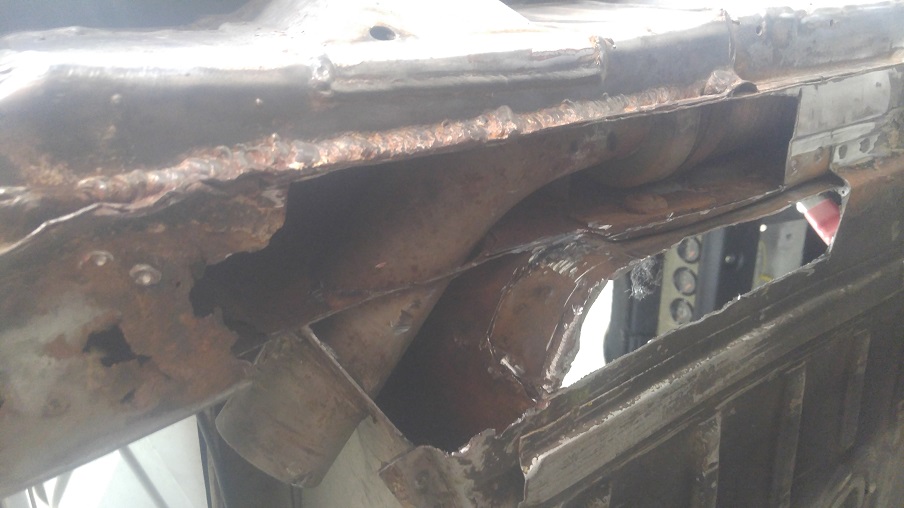
|
|
|
|
|
1 User(s) are reading this topic (1 Guests and 0 Anonymous Users)
0 Members:

|
Lo-Fi Version | Time is now: 3rd July 2026 - 06:41 AM |
Invision Power Board
v9.1.4 © 2026 IPS, Inc.