|
|
|
Porsche, and the Porsche crest are registered trademarks of Dr. Ing. h.c. F. Porsche AG.
This site is not affiliated with Porsche in any way. Its only purpose is to provide an online forum for car enthusiasts. All other trademarks are property of their respective owners. |
|
|

  |

| bbrock |
 Jun 18 2018, 07:31 PM Jun 18 2018, 07:31 PM
Post
#81
|
|
914 Guru  Group: Members Posts: 5,269 Joined: 17-February 17 From: Montana Member No.: 20,845 Region Association: Rocky Mountains |
QUOTE(Travis Neff @ Jun 18 2018, 06:27 PM)  QUOTE(bbrock @ Jun 18 2018, 04:00 PM) I have the same cheapo HF bending brake and bending the radius on those inner longs is actually pretty easy. I welded a piece of 3/8" solid round stock to a piece of plate that I bent the patch around. Matches the radius very well. You can see it about half way down on this post: http://www.914world.com/bbs2/index.php?s=&...t&p=2516927 Giddyup! That will save me a whole day trying a bunch of different things. Thank you Brent. Double check the radius of the rod stock. IIRC, the inner has the sharper radius which the 3/8" rod fit nicely. The outer was shallower and I think I used a 1/2" rod to fit the radius. Also, the first time I tried to bend a long piece of 18 ga with the HF brake, I snapped the crappy welds on the gizmo. No biggie to reweld solidly but might be worth doing preemptively. (IMG:style_emoticons/default/beerchug.gif) |
   |

 
|
| TravisNeff |
Jun 18 2018, 07:51 PM
Post
#82
|
|
914 Guru Group: Members Posts: 5,082 Joined: 20-March 03 From: Mesa, AZ Member No.: 447 Region Association: Southwest Region |
Alright, I will get both sizes and some flat bar stock to create the recesses. (IMG:style_emoticons/default/smash.gif)
Scrubbed things down a bit more with a smaller sized wire brush I found, then hosed it down with Metal Prep. That stuff has some STANK. |
|
|
|
| bbrock |
Jun 18 2018, 08:16 PM
Post
#83
|
|
914 Guru Group: Members Posts: 5,269 Joined: 17-February 17 From: Montana Member No.: 20,845 Region Association: Rocky Mountains |
QUOTE(Travis Neff @ Jun 18 2018, 07:51 PM) Alright, I will get both sizes and some flat bar stock to create the recesses. (IMG:style_emoticons/default/smash.gif) Scrubbed things down a bit more with a smaller sized wire brush I found, then hosed it down with Metal Prep. That stuff has some STANK. Oh yeah, on the recesses, I made my forms as positives that I hammered what would be recesses on the panel over the bar stock which worked, but is the stupid way unless you really want to work on your upper arm strength. Check out Ben's (mb911) thread for a better way to do it which is to hammer the recesses DOWN into recesses in your forms. (IMG:style_emoticons/default/smash.gif) |
|
|
|
| TravisNeff |
Jun 18 2018, 08:43 PM
Post
#84
|
|
914 Guru Group: Members Posts: 5,082 Joined: 20-March 03 From: Mesa, AZ Member No.: 447 Region Association: Southwest Region |
Found it! Thanks for the tip and thanks to Ben to show us how it's done.
I only need to worry about the first 2 recesses (left) (IMG:style_emoticons/default/smilie_pokal.gif) Attached image(s) 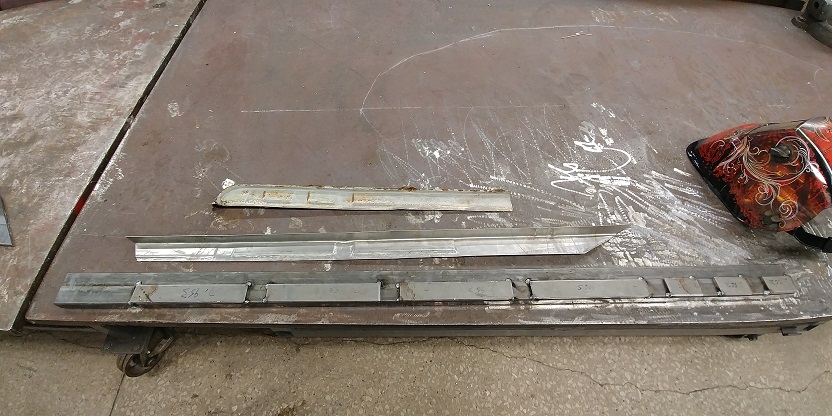
|
|
|
|
| mb911 |
Jun 19 2018, 05:06 AM
Post
#85
|
|
914 Guru Group: Members Posts: 7,789 Joined: 2-January 09 From: Burlington wi Member No.: 9,892 Region Association: Upper MidWest |
QUOTE(Travis Neff @ Jun 18 2018, 06:43 PM) Found it! Thanks for the tip and thanks to Ben to show us how it's done. I only need to worry about the first 2 recesses (left) (IMG:style_emoticons/default/smilie_pokal.gif) I still have the "buck" to do it.. I may even have some samples.. What part do you need? |
|
|
|
| TravisNeff |
Jun 19 2018, 10:08 AM
Post
#86
|
|
914 Guru Group: Members Posts: 5,082 Joined: 20-March 03 From: Mesa, AZ Member No.: 447 Region Association: Southwest Region |
That would save me some serious time!
I would need from here to here with the flange that meets the outside cover on the bottom, and the radius curve on the inside that goes up about 1.5 inches in height. Attached image(s) 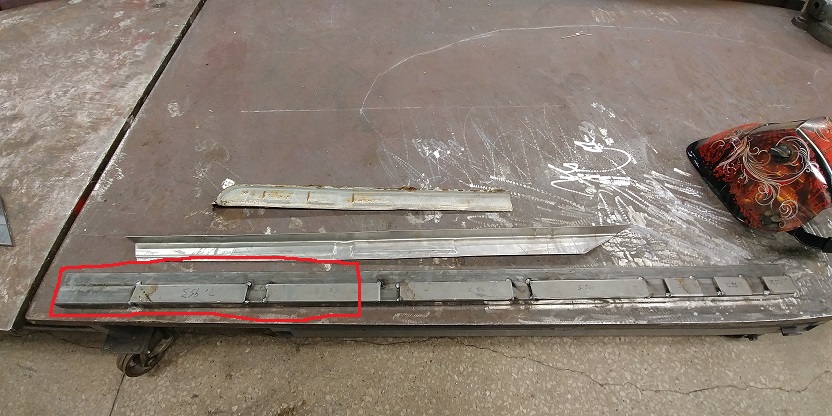
|
|
|
|
| TravisNeff |
Jun 19 2018, 09:47 PM
Post
#87
|
|
914 Guru Group: Members Posts: 5,082 Joined: 20-March 03 From: Mesa, AZ Member No.: 447 Region Association: Southwest Region |
Brent, thanks for the tip on the round bar. 1/2 and 3/8 round bar works out great.
I welded the bars onto some 1/4x1.5 flat stock for my cheap-0 HF brake. Then tested it out on some 20g. Attached image(s) 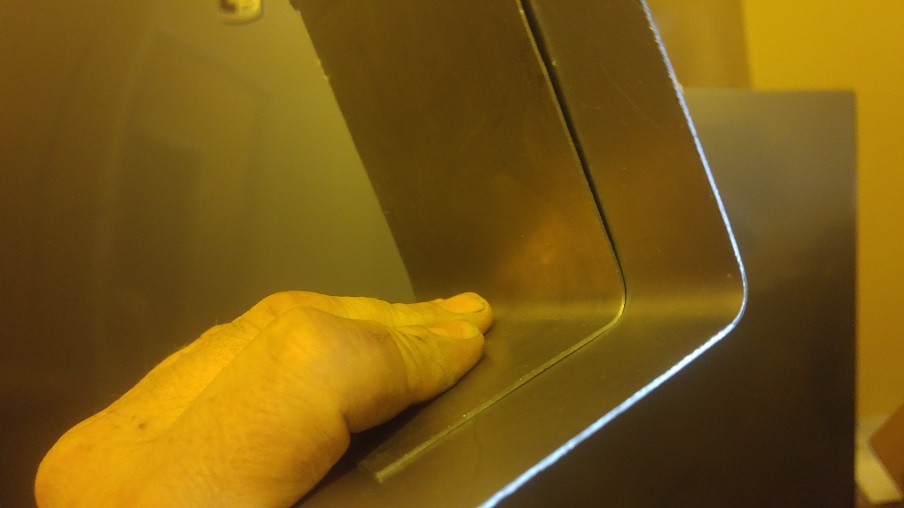 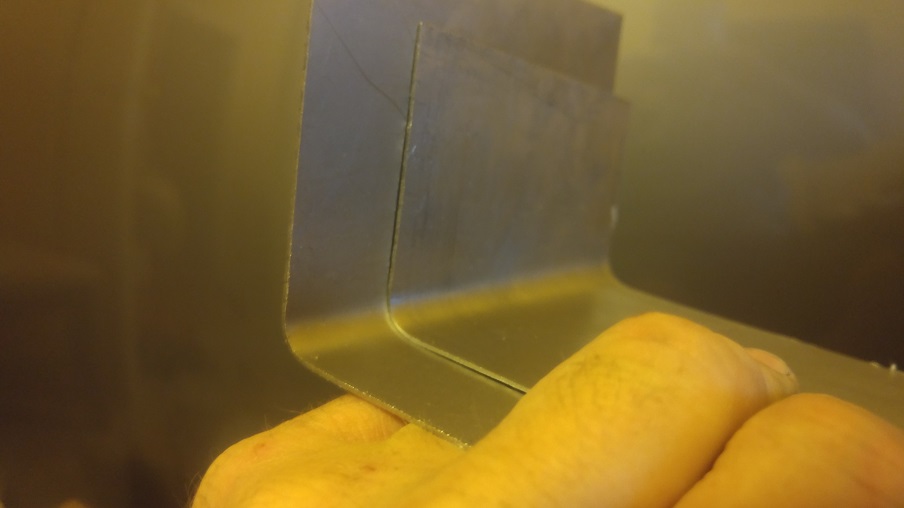
|
|
|
|
| bbrock |
Jun 19 2018, 11:13 PM
Post
#88
|
|
914 Guru Group: Members Posts: 5,269 Joined: 17-February 17 From: Montana Member No.: 20,845 Region Association: Rocky Mountains |
QUOTE(Travis Neff @ Jun 19 2018, 09:47 PM) Brent, thanks for the tip on the round bar. 1/2 and 3/8 round bar works out great. I welded the bars onto some 1/4x1.5 flat stock for my cheap-0 HF brake. Then tested it out on some 20g. (IMG:style_emoticons/default/smilie_pokal.gif) |
|
|
|
| mb911 |
Jun 20 2018, 05:11 AM
Post
#89
|
|
914 Guru Group: Members Posts: 7,789 Joined: 2-January 09 From: Burlington wi Member No.: 9,892 Region Association: Upper MidWest |
QUOTE(Travis Neff @ Jun 19 2018, 08:08 AM) That would save me some serious time! I would need from here to here with the flange that meets the outside cover on the bottom, and the radius curve on the inside that goes up about 1.5 inches in height. I will look what I have.. I was also thinking I could just send you the buck and you could pass it on to the next person that needs it? |
|
|
|
| TravisNeff |
Jun 20 2018, 08:50 AM
Post
#90
|
|
914 Guru Group: Members Posts: 5,082 Joined: 20-March 03 From: Mesa, AZ Member No.: 447 Region Association: Southwest Region |
Either way would be fantastic!
|
|
|
|
| TravisNeff |
Jun 21 2018, 11:18 PM
Post
#91
|
|
914 Guru Group: Members Posts: 5,082 Joined: 20-March 03 From: Mesa, AZ Member No.: 447 Region Association: Southwest Region |
Patched a small part of long and put a backer in place over the original backer. I will have to jigsaw puzzle that part back together. Will have some pics tomorrow. Welding upside sucks, I think I need to seriously bump up the wire speed, as soon as a good puddle started it wanted to drop out onto my chest LOL.
I cleaned up the floor section that I removed and the the back part of it was super pitted and bent like tin foil. I fabbed a patch up, which was a bit of a chore to make that corner. But it seemed to work out. Blow a bunch of holes trying to section in the flange with the firewall section. Attached image(s) 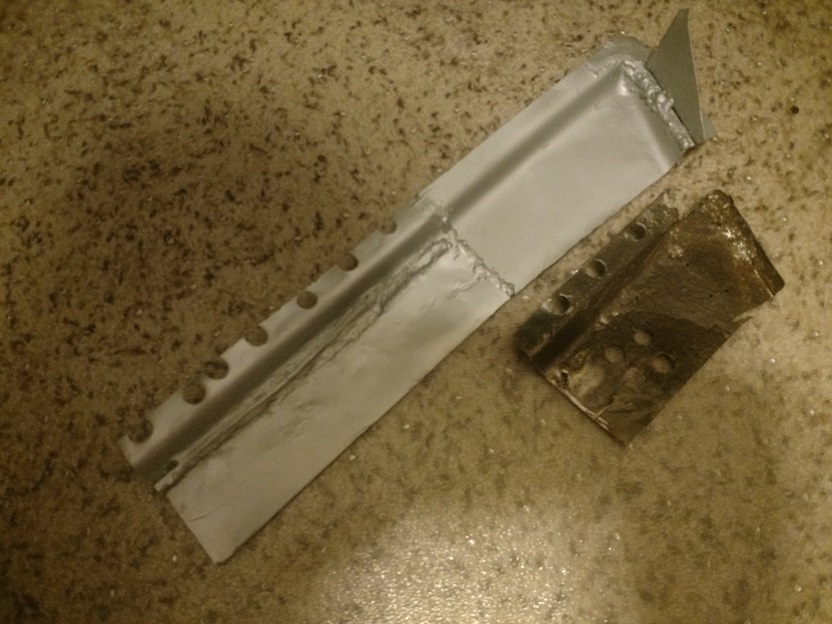
|
|
|
|
| TravisNeff |
Jun 21 2018, 11:27 PM
Post
#92
|
|
914 Guru Group: Members Posts: 5,082 Joined: 20-March 03 From: Mesa, AZ Member No.: 447 Region Association: Southwest Region |
Forgot a pic of the good looking side
Attached image(s) 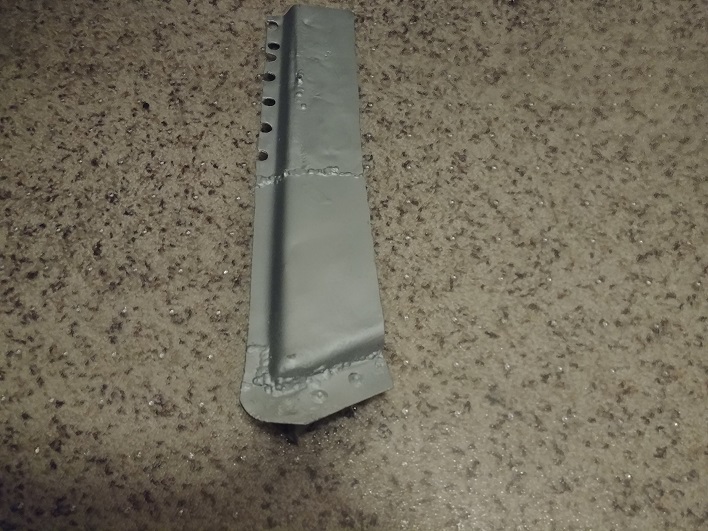
|
|
|
|
| TravisNeff |
Jun 23 2018, 09:57 PM
Post
#93
|
|
914 Guru Group: Members Posts: 5,082 Joined: 20-March 03 From: Mesa, AZ Member No.: 447 Region Association: Southwest Region |
I put in the backing panel against the inside long wall. I had to leave a gap so I could get the welding gun in there to weld to the side of the long. Then added in a filler piece with a flange so I could plug weld and run a stitch at the seam. Its a little ugly, but it will be covered up.
Went on to make the bottom of the long to cover the same area. Made 2 recess to replicate the original long. I made them about a 1/4 to wide, and thought hard about making another panel. Then I said screw it, it will all be covered by seam sealer anyways. It's in, I'll share pics tomorrow for that. Attached image(s)   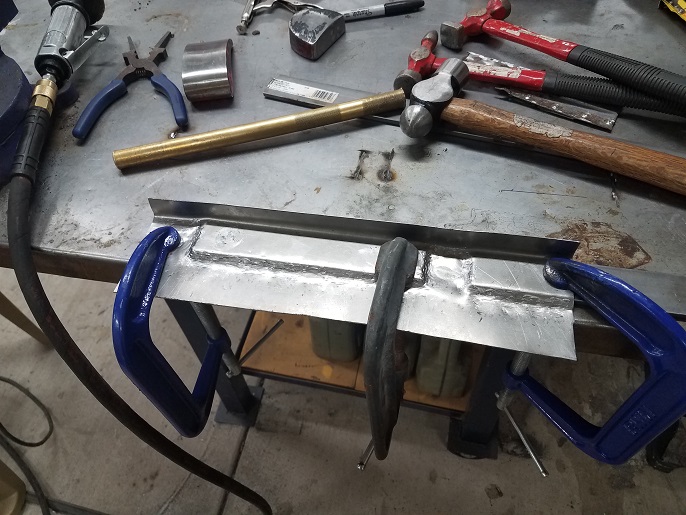
|
|
|
|
| mb911 |
Jun 24 2018, 05:00 AM
Post
#94
|
|
914 Guru Group: Members Posts: 7,789 Joined: 2-January 09 From: Burlington wi Member No.: 9,892 Region Association: Upper MidWest |
QUOTE(Travis Neff @ Jun 23 2018, 07:57 PM) I put in the backing panel against the inside long wall. I had to leave a gap so I could get the welding gun in there to weld to the side of the long. Then added in a filler piece with a flange so I could plug weld and run a stitch at the seam. Its a little ugly, but it will be covered up. Went on to make the bottom of the long to cover the same area. Made 2 recess to replicate the original long. I made them about a 1/4 to wide, and thought hard about making another panel. Then I said screw it, it will all be covered by seam sealer anyways. It's in, I'll share pics tomorrow for that. Sorry I didn't get back to you on that.. Looks like you figured it out.. |
|
|
|
| TravisNeff |
Jun 24 2018, 10:08 AM
Post
#95
|
|
914 Guru Group: Members Posts: 5,082 Joined: 20-March 03 From: Mesa, AZ Member No.: 447 Region Association: Southwest Region |
QUOTE(mb911 @ Jun 24 2018, 04:00 AM) QUOTE(Travis Neff @ Jun 23 2018, 07:57 PM) I put in the backing panel against the inside long wall. I had to leave a gap so I could get the welding gun in there to weld to the side of the long. Then added in a filler piece with a flange so I could plug weld and run a stitch at the seam. Its a little ugly, but it will be covered up. Went on to make the bottom of the long to cover the same area. Made 2 recess to replicate the original long. I made them about a 1/4 to wide, and thought hard about making another panel. Then I said screw it, it will all be covered by seam sealer anyways. It's in, I'll share pics tomorrow for that. Sorry I didn't get back to you on that.. Looks like you figured it out.. No problemo. It helped that your picture had the length written on them! Only took about 10 minutes from start to end. |
|
|
|
| TravisNeff |
Jun 24 2018, 02:31 PM
Post
#96
|
|
914 Guru Group: Members Posts: 5,082 Joined: 20-March 03 From: Mesa, AZ Member No.: 447 Region Association: Southwest Region |
Patch is in. Had to grind down some the welds to get the floor pan piece to fit flush.
Attached image(s) 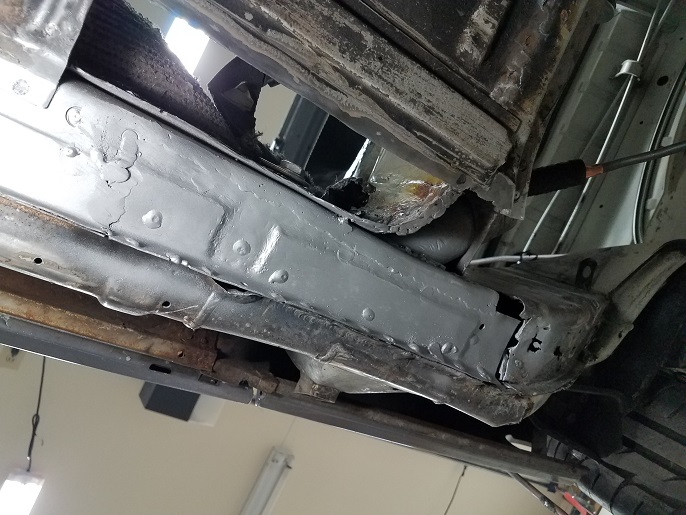
|
|
|
|
| TravisNeff |
Jun 24 2018, 04:15 PM
Post
#97
|
|
914 Guru Group: Members Posts: 5,082 Joined: 20-March 03 From: Mesa, AZ Member No.: 447 Region Association: Southwest Region |
Moving on..
This cut exercised my pelvic floor pretty good. Looks like I am just about into all good metal, may need to cut another inch higher. I haven't poked around in there, but I may need to cut out the divot for the -4 engine mount. Not sure if it is worth trying to replicate that divot part. Attached image(s) 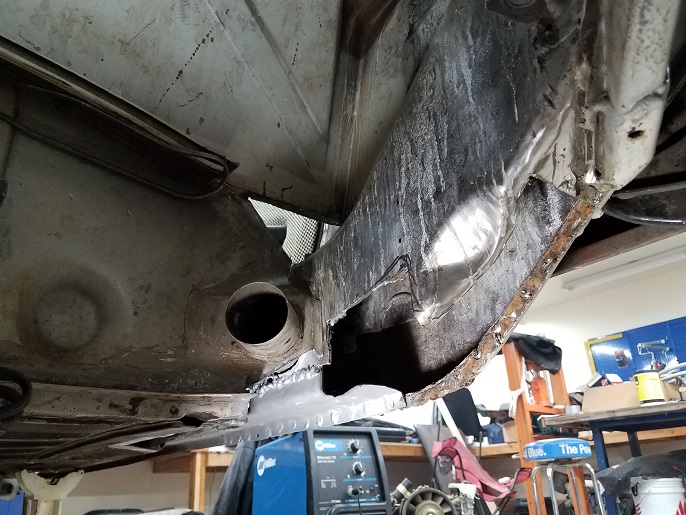 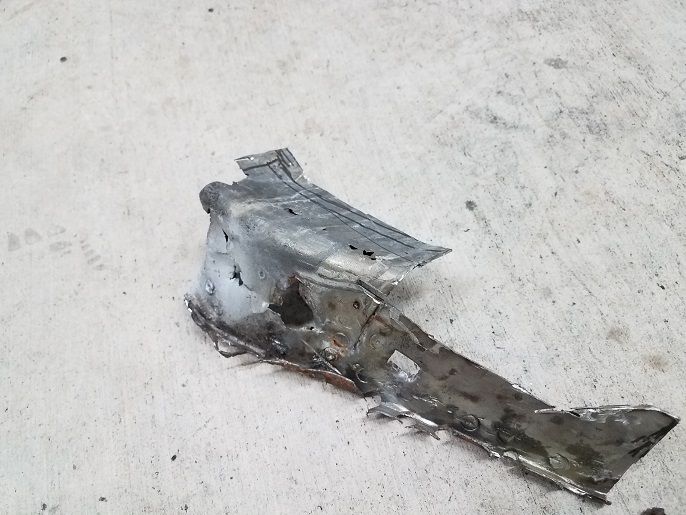 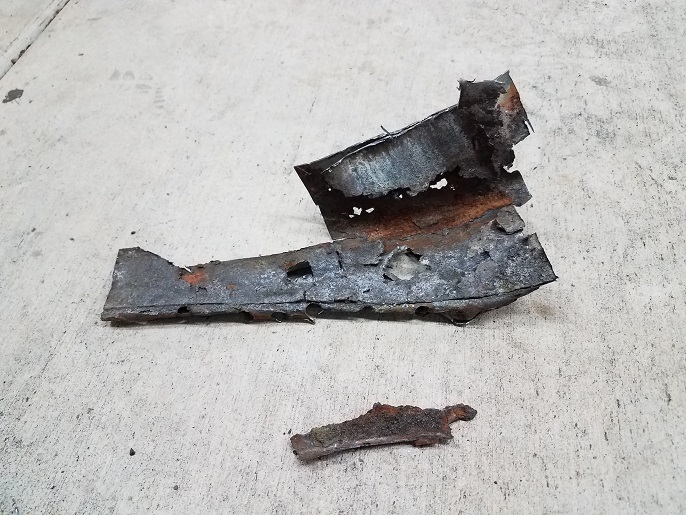
|
|
|
|
| TravisNeff |
Jun 24 2018, 07:34 PM
Post
#98
|
|
914 Guru Group: Members Posts: 5,082 Joined: 20-March 03 From: Mesa, AZ Member No.: 447 Region Association: Southwest Region |
Looked a little further and the bump for the -4 mount indentation had to come out. You can see the backing piece is totally gone.
After cutting this out I was able to get the backer off and I think I can save this piece. Attached image(s) 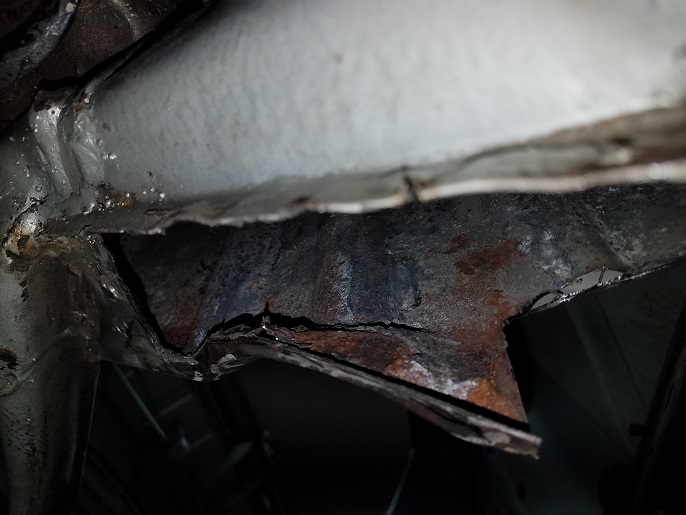 
|
|
|
|
| bbrock |
Jun 24 2018, 08:40 PM
Post
#99
|
|
914 Guru Group: Members Posts: 5,269 Joined: 17-February 17 From: Montana Member No.: 20,845 Region Association: Rocky Mountains |
QUOTE(Travis Neff @ Jun 24 2018, 07:34 PM) Looked a little further and the bump for the -4 mount indentation had to come out. You can see the backing piece is totally gone. After cutting this out I was able to get the backer off and I think I can save this piece. Saving that piece is a bonus because it is a total PITA trying to replicate that divot, and the divot is needed for the mount to fit properly. Good work! Keep it coming. (IMG:style_emoticons/default/beerchug.gif) |
|
|
|
| TravisNeff |
Jul 3 2018, 05:33 PM
Post
#100
|
|
914 Guru Group: Members Posts: 5,082 Joined: 20-March 03 From: Mesa, AZ Member No.: 447 Region Association: Southwest Region |
I am officially sick of rust repair, LOL.
I made a patch for the inner long, outer long and created the 2nd layer backing for both. I was able to patch in the -4 cyl bump too. A little more cleanup that needs to be done, still thinking whether or not I want to do an overlay as suggested before. Attached image(s) 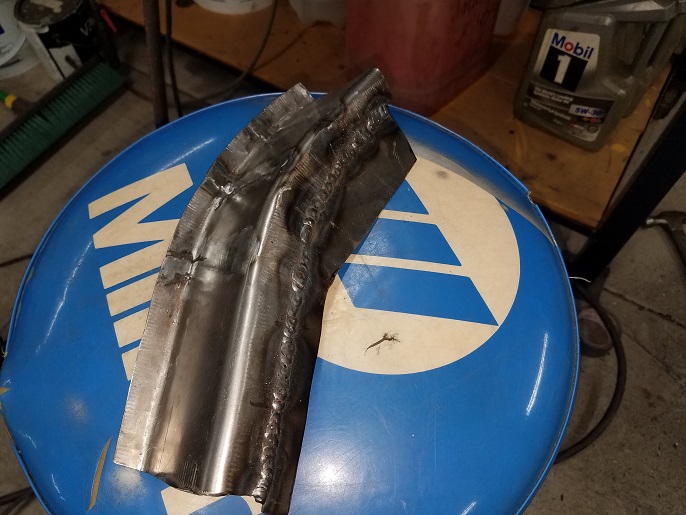 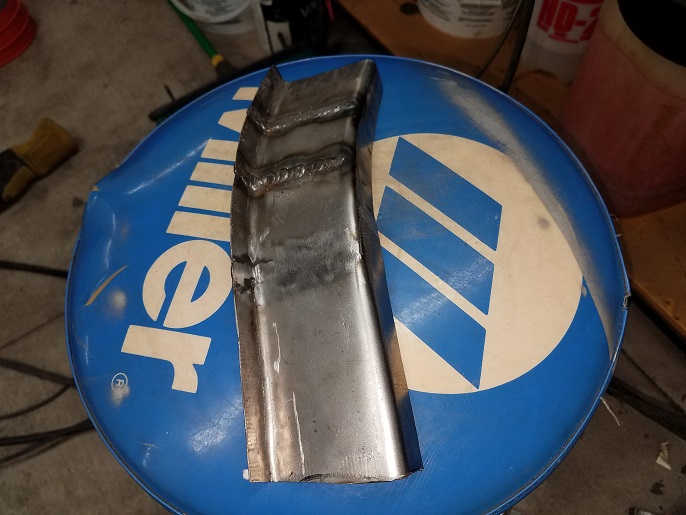 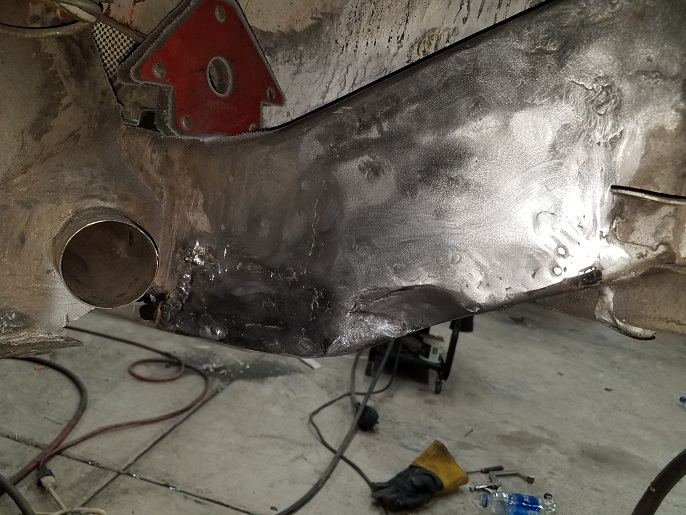 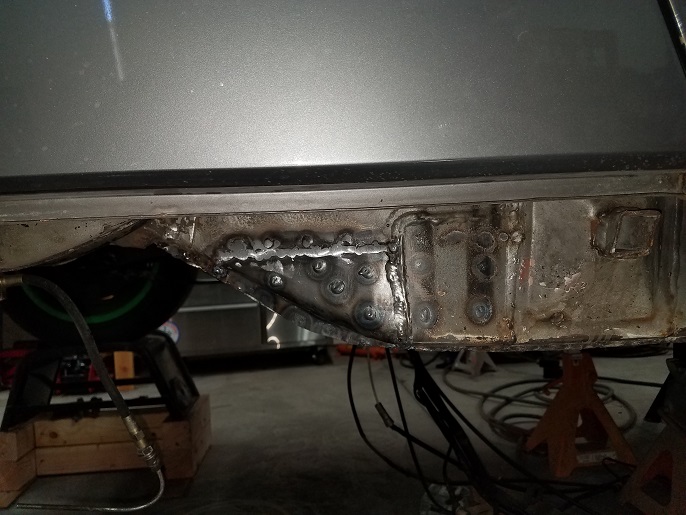
|
|
|
|
|
1 User(s) are reading this topic (1 Guests and 0 Anonymous Users)
0 Members:

|
Lo-Fi Version | Time is now: 3rd July 2026 - 06:41 AM |
Invision Power Board
v9.1.4 © 2026 IPS, Inc.