|
|
|
Porsche, and the Porsche crest are registered trademarks of Dr. Ing. h.c. F. Porsche AG.
This site is not affiliated with Porsche in any way. Its only purpose is to provide an online forum for car enthusiasts. All other trademarks are property of their respective owners. |
|
|

  |

| Olympic 914 |
 Aug 2 2018, 09:00 AM Aug 2 2018, 09:00 AM
Post
#61
|
 Group: Members Posts: 1,662 Joined: 7-July 11 From: Pittsburgh PA Member No.: 13,287 Region Association: North East States |
QUOTE(914 RZ-1 @ Aug 1 2018, 10:41 PM)  +3 on Kevin Tetz. I learned most of this from his videos. I also bought some sanding supplies and tools from Eastwood. I just wish they had 800, 1000, 1500 and 2000 grit for the long Durablocks. Their house brand sandpaper is pretty good. I'm using 3M and it works, but clogs and wears out fast, even though I'm using water. I don't remember where I bought it but you can get the finer grits in adhesive backed rolls for the longboards. maybe these pics will help. 1500,2000,2500. I think I also have some 800 and 1000 AND Made in Germany... 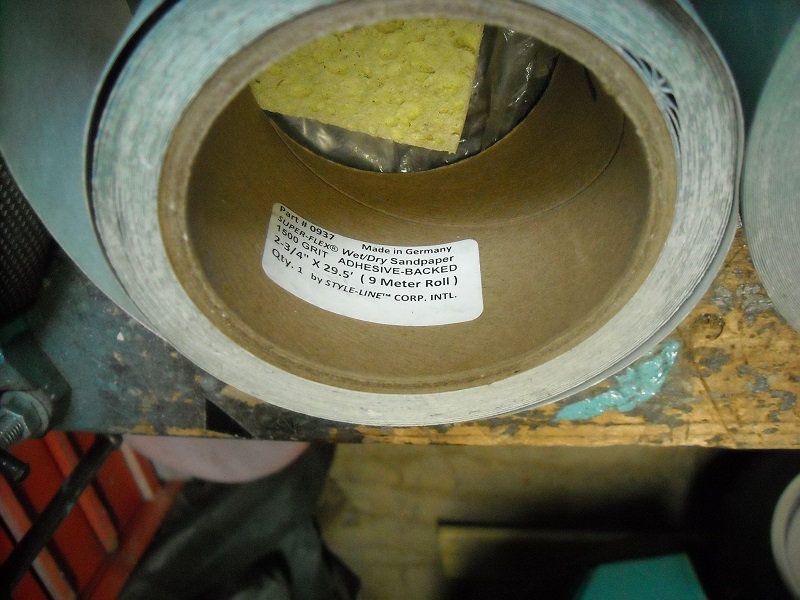 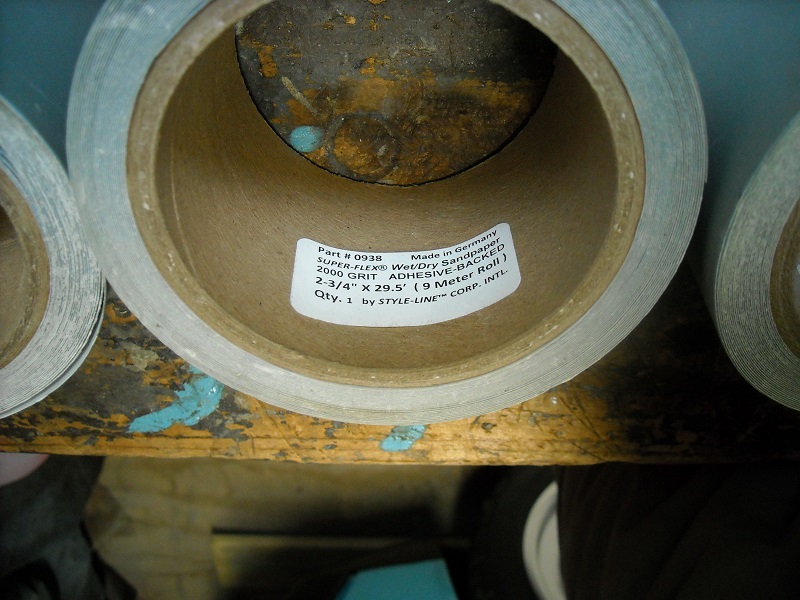 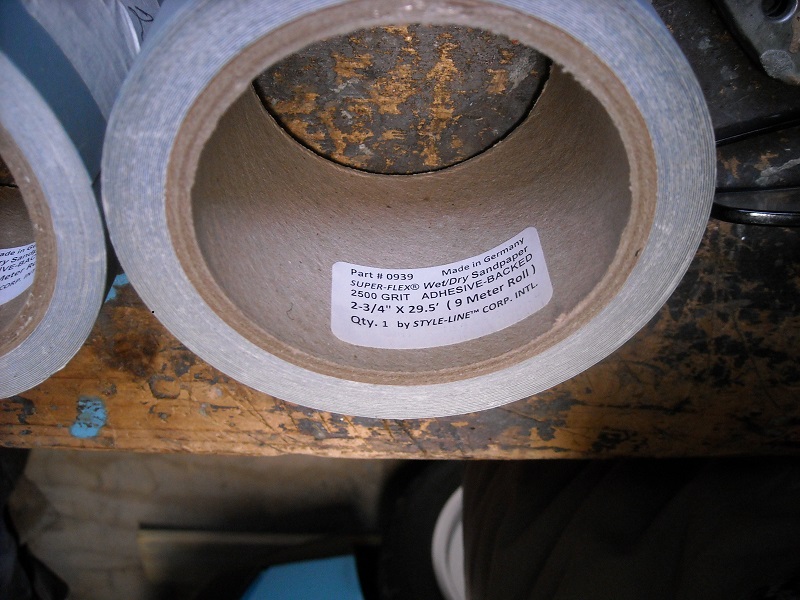 |
   |

 
|
| Rav914 |
Aug 2 2018, 09:17 AM
Post
#62
|
|
All-weather fan Group: Members Posts: 738 Joined: 15-April 07 From: WA Member No.: 7,669 Region Association: None |
QUOTE(mbseto @ Aug 1 2018, 09:06 PM) Man this is a clinic. Almost makes me want to try to paint my own car. Jump in and do it. I'm on my second car; bare metal repaint in the original color. This is after two coats of single stage. Still 2-3 more coats to apply. Once you learn how to do it, you'll look at car purchases differently. It's an enormous of work, the most I've had to do, but super rewarding and saves a TON of money. Attached image(s) 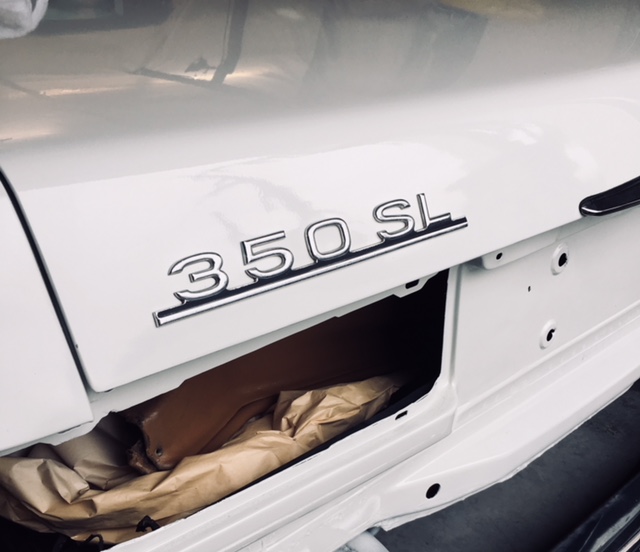
|
|
|
|
| 914 RZ-1 |
Aug 2 2018, 06:17 PM
Post
#63
|
|
Porsche Padawan Group: Members Posts: 683 Joined: 17-December 14 From: Santa Clarita, CA Member No.: 18,230 Region Association: Southern California |
I found it! Thanks! (IMG:style_emoticons/default/beerchug.gif)
https://www.shop.softsanders.com/Super-Flex...andpaper_c8.htm Eastwood also has it, but they are out of 800 grit. They were a bit cheaper on the shipping, but not by much. |
|
|
|
| 914 RZ-1 |
Aug 2 2018, 06:23 PM
Post
#64
|
|
Porsche Padawan Group: Members Posts: 683 Joined: 17-December 14 From: Santa Clarita, CA Member No.: 18,230 Region Association: Southern California |
QUOTE(mbseto @ Aug 1 2018, 09:06 PM) Man this is a clinic. Almost makes me want to try to paint my own car. DO IT! I didn't know much about spray-painting cars. It isn't rocket science. I did it to save money. The cheapest quote I got was $4000 and I heard that $6000 to $8000 was more realistic for a decent job. So far I've spent less than $2000, but it has taken me several months of practice and prep. Will mine be as good? Probably not, but I won't be freaking out when I drive it and get a rock chip in it. I got this car to work on, so I'd like to be able to say, "Yeah, I did that", about everything on it. |
|
|
|
| aggiezig |
Aug 2 2018, 08:39 PM
Post
#65
|
|
Porsche Wannabe Group: Members Posts: 319 Joined: 13-January 16 From: Los Angeles, CA Member No.: 19,557 Region Association: Southern California |
I think that with enough trial/error & practice you can do a pretty bang up job yourself. You just have to be realistic with your expectations and also be willing to work at it for hours and hours. I think all said and done I will have between $2,500 and $3,000 invested in my paint job. That includes paint guns, sanders, primers, good quality paint, undercoating, fillers, supplies, etc.
Prior to my current project, I had zero experience. I am learning as I go and pleased with my results. This is using PPG DCC Concept single stage acrylic urethane in Mexico Blue. After a cut with 2000 and compound with M105. (IMG:http://www.914world.com/bbs2/uploads_offsite/i.imgur.com-19557-1533263956.1.jpg) (IMG:http://www.914world.com/bbs2/uploads_offsite/i.imgur.com-19557-1533263956.2.jpg) |
|
|
|
| 914dave |
Aug 4 2018, 07:34 AM
Post
#66
|
|
914 Addict Group: Members Posts: 700 Joined: 19-October 03 From: Willow Grove Pa. Member No.: 1,262 Region Association: North East States |
I had the same wrapped up in my paint. Tools included. Very rewarding when it’s done.
Keep it up. Nice job! |
|
|
|
| 914 RZ-1 |
Aug 8 2018, 12:15 PM
Post
#67
|
|
Porsche Padawan Group: Members Posts: 683 Joined: 17-December 14 From: Santa Clarita, CA Member No.: 18,230 Region Association: Southern California |
So I got the suggested filter:
https://www.harborfreight.com/inline-desicc...lter-68215.html However, it doesn't seem to allow enough pressure thru. I have the hose going into the filter, then the pressure regulator, then the gun. With the pumpkin filter and the gauge set at 30psi, I get plenty of air. But, with the filter above and the gauge set at 30psi, I get far less air, the spray pattern is smaller. I tried it with two different air pressure gauges. Not sure what's causing this. None of my usual sources addresses this. I painted the hoods and am still getting a bit of orange peel. The gun also sprays intermittently, but only when painting; it works fine when I spray acetone thru it. |
|
|
|
| 914 RZ-1 |
Aug 8 2018, 12:18 PM
Post
#68
|
|
Porsche Padawan Group: Members Posts: 683 Joined: 17-December 14 From: Santa Clarita, CA Member No.: 18,230 Region Association: Southern California |
Nice job! Yeah, it's taking me lots of practice. I'm using the hoods to dial it in since they are easy to sand and re-paint.
QUOTE(aggiezig @ Aug 2 2018, 07:39 PM) I think that with enough trial/error & practice you can do a pretty bang up job yourself. You just have to be realistic with your expectations and also be willing to work at it for hours and hours. I think all said and done I will have between $2,500 and $3,000 invested in my paint job. That includes paint guns, sanders, primers, good quality paint, undercoating, fillers, supplies, etc. Prior to my current project, I had zero experience. I am learning as I go and pleased with my results. This is using PPG DCC Concept single stage acrylic urethane in Mexico Blue. After a cut with 2000 and compound with M105. (IMG:http://www.914world.com/bbs2/uploads_offsite/i.imgur.com-19557-1533263956.1.jpg) (IMG:http://www.914world.com/bbs2/uploads_offsite/i.imgur.com-19557-1533263956.2.jpg) |
|
|
|
| Andyrew |
Aug 8 2018, 12:42 PM
Post
#69
|
|
Spooling.... Please wait Group: Members Posts: 13,376 Joined: 20-January 03 From: Riverbank, Ca Member No.: 172 Region Association: Northern California |
QUOTE(914 RZ-1 @ Aug 8 2018, 11:15 AM) So I got the suggested filter: https://www.harborfreight.com/inline-desicc...lter-68215.html However, it doesn't seem to allow enough pressure thru. I have the hose going into the filter, then the pressure regulator, then the gun. With the pumpkin filter and the gauge set at 30psi, I get plenty of air. But, with the filter above and the gauge set at 30psi, I get far less air, the spray pattern is smaller. I tried it with two different air pressure gauges. Not sure what's causing this. None of my usual sources addresses this. I painted the hoods and am still getting a bit of orange peel. The gun also sprays intermittently, but only when painting; it works fine when I spray acetone thru it. You need to put your regulator after the filter. Your air tank should be at say 90psi. The desiccant filter certainly takes a bit more air pressure to push through but it shouldnt be that bad. |
|
|
|
| 914 RZ-1 |
Aug 8 2018, 05:57 PM
Post
#70
|
|
Porsche Padawan Group: Members Posts: 683 Joined: 17-December 14 From: Santa Clarita, CA Member No.: 18,230 Region Association: Southern California |
You need to put your regulator after the filter. Your air tank should be at say 90psi.
The desiccant filter certainly takes a bit more air pressure to push through but it shouldnt be that bad. I did that: air hose from tank>filter>regulator>gun. Tank is set about 80-90 psi. The difference is really noticable. I thought it odd that the gauge read the same with both filters, but the air coming out of the gun is clearly different. I tried two different gauges, too. The filter had two caps, which I took out. Did I miss something else that could be blocking airflow? |
|
|
|
| 914GT |
Aug 8 2018, 07:05 PM
Post
#71
|
|
Senior Member Group: Members Posts: 1,100 Joined: 11-October 04 From: Tucson Member No.: 2,923 Region Association: Southwest Region |
You are setting your pressure at the gun with the gun trigger pulled, right? Just setting the static pressure to 30 or whatever your gun requires will not give you correct pressure when spraying. I use the regulator on the wall to set my max gun pressure to 25 or so then use the valve at the gun to reduce it further as necessary.
|
|
|
|
| 914 RZ-1 |
Aug 9 2018, 01:54 PM
Post
#72
|
|
Porsche Padawan Group: Members Posts: 683 Joined: 17-December 14 From: Santa Clarita, CA Member No.: 18,230 Region Association: Southern California |
QUOTE(914GT @ Aug 8 2018, 06:05 PM) You are setting your pressure at the gun with the gun trigger pulled, right? Just setting the static pressure to 30 or whatever your gun requires will not give you correct pressure when spraying. I use the regulator on the wall to set my max gun pressure to 25 or so then use the valve at the gun to reduce it further as necessary. Yes, I am setting the pressure with the trigger pulled. |
|
|
|
| Andyrew |
Aug 9 2018, 02:01 PM
Post
#73
|
|
Spooling.... Please wait Group: Members Posts: 13,376 Joined: 20-January 03 From: Riverbank, Ca Member No.: 172 Region Association: Northern California |
Thinking back, I do remember having this issue once. I think I ended up going with a different filter for that particular job or not using one alltogether.
looking back over my paint thread, I notice this picture (IMG:http://www.914world.com/bbs2/uploads_offsite/i1210.photobucket.com-172-1304697293.2.jpg) You can see the filter near the tank. I wonder if moving it farther away from the gun and before the regulator could help? You can see its not on my gun in this pic of me spraying the car. (IMG:http://www.914world.com/bbs2/uploads/post-172-1305529585_thumb.jpg) |
|
|
|
| Andyrew |
Aug 9 2018, 02:03 PM
Post
#74
|
|
Spooling.... Please wait Group: Members Posts: 13,376 Joined: 20-January 03 From: Riverbank, Ca Member No.: 172 Region Association: Northern California |
Note. Spray the body side in one go, Not panel by panel as shown. Walk the body.
This was only the 2nd car I sprayed at the time and I was still learning. Doing it the method shown will cause for runs near the body seams. |
|
|
|
| Andyrew |
Aug 9 2018, 02:05 PM
Post
#75
|
|
Spooling.... Please wait Group: Members Posts: 13,376 Joined: 20-January 03 From: Riverbank, Ca Member No.: 172 Region Association: Northern California |
Also noticed this review online.
"We reviewed dryer for in-house use. Air must be in contact with media for 750 msec(3/4 sec) to remove water from 90% humidity to 40% ( 1.25 sec for 20%). The air flow is restricted by small orifice so that 90 psi inlet to 0 psi outlet reduces to 40% RH. This flow is not sufficient to run most tools, it is ok for painting. DO NOT install dryer directly in-line with tool. You must use a buffer tank( we found 5 gal tank to work ok for sanders, wrenches). Run hose from compressor to dryer, then from dryer to buffer tank. From tank to tool. Remember that average air flow must be handled by buffer or not exceed 3.5 CFM or you will get very low working pressures. Do not drill out the orifice as was mentioned in other reviews. This will indeed increase the air flow and downstream pressure; but the air will pass too quickly through the dryer media and will not be dryed(defeating the purpose of the dryer). To get greater air flow, use several dryers in parallel. We actually use 3 dryers side by side, leading to buffer tank." That plays in line with running it before the line. and far away from the tool. |
|
|
|
| 914 RZ-1 |
Aug 9 2018, 05:19 PM
Post
#76
|
|
Porsche Padawan Group: Members Posts: 683 Joined: 17-December 14 From: Santa Clarita, CA Member No.: 18,230 Region Association: Southern California |
I've got similar orange peel on my hoods; were you able to color sand and buff that out?
I've got two filters in addition to the one at the gun. It goes like this: compressor>25' coiled air hose>2 moisture removing filters> small hose to reel>50' hose (might be 25') on reel>pumpkin filter>regulator>gun Maybe I'll put the filter closer as you suggest. Thanks for the input! (IMG:style_emoticons/default/beerchug.gif) |
|
|
|
| 914 RZ-1 |
Aug 9 2018, 05:21 PM
Post
#77
|
|
Porsche Padawan Group: Members Posts: 683 Joined: 17-December 14 From: Santa Clarita, CA Member No.: 18,230 Region Association: Southern California |
Wish I'd bothered to read the reviews. Maybe I can take it back if relocating it doesn't work. The pumpkin filter seems to work just fine. Introducing another variable just makes the learning curve steeper, so maybe I'll stick with what has worked so far.
QUOTE(Andyrew @ Aug 9 2018, 01:05 PM) Also noticed this review online. "We reviewed dryer for in-house use. Air must be in contact with media for 750 msec(3/4 sec) to remove water from 90% humidity to 40% ( 1.25 sec for 20%). The air flow is restricted by small orifice so that 90 psi inlet to 0 psi outlet reduces to 40% RH. This flow is not sufficient to run most tools, it is ok for painting. DO NOT install dryer directly in-line with tool. You must use a buffer tank( we found 5 gal tank to work ok for sanders, wrenches). Run hose from compressor to dryer, then from dryer to buffer tank. From tank to tool. Remember that average air flow must be handled by buffer or not exceed 3.5 CFM or you will get very low working pressures. Do not drill out the orifice as was mentioned in other reviews. This will indeed increase the air flow and downstream pressure; but the air will pass too quickly through the dryer media and will not be dryed(defeating the purpose of the dryer). To get greater air flow, use several dryers in parallel. We actually use 3 dryers side by side, leading to buffer tank." That plays in line with running it before the line. and far away from the tool. |
|
|
|
| 914 RZ-1 |
Aug 9 2018, 05:24 PM
Post
#78
|
|
Porsche Padawan Group: Members Posts: 683 Joined: 17-December 14 From: Santa Clarita, CA Member No.: 18,230 Region Association: Southern California |
Yeah, that's what I'm doing. I actually have the doors off, so it's not really an issue. At this point, I'm trying to dial in the technique on the hoods so I can spray the body one more time and be done.
When I'm done, this car will have LOTS of coats of paint. QUOTE(Andyrew @ Aug 9 2018, 01:03 PM) Note. Spray the body side in one go, Not panel by panel as shown. Walk the body. This was only the 2nd car I sprayed at the time and I was still learning. Doing it the method shown will cause for runs near the body seams. |
|
|
|
| 914 RZ-1 |
Aug 19 2018, 05:46 PM
Post
#79
|
|
Porsche Padawan Group: Members Posts: 683 Joined: 17-December 14 From: Santa Clarita, CA Member No.: 18,230 Region Association: Southern California |
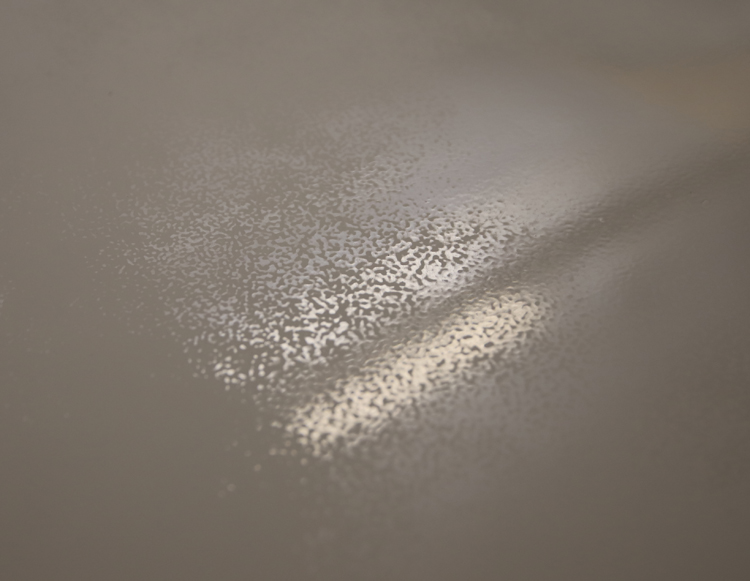
I'm STILL getting orange peel.
To review, here's the set-up: 1. 33 gallon compressor (8.6/6.4 CFM @ 40/90 psi, 2 running HP)>25' coiled hose>2 moisture filters>25' 3/8" hose reel>"pumpkin"-style filter>regulator>gun. 2. Gun: the $70 Harbor Freight one. I clean the gun thoroughly after use, by the way. All the important parts look new when I'm done. 3. Spraying single stage paint (R-M brand) at 30 psi (at the regulator). Using high temp reducer. I use mid-temp hardener. I mix the paint well to the proper proportions. I'm wondering if the paint is not going on wet enough? How do I tell, other than the obvious "it looks wet"? 4. 80-90 degree weather, 40-50% humidity in the garage. I made a makeshift vented "booth" to keep the dust and wind out. 5. I'm about 6-8" away. I'm not sure of spraying speed; maybe 12 inches per second? 6. I'm getting orange peel that will not easily sand out. I'm starting with 800 and using a long block. There are still shiny spots. How much orange peel is acceptable and sands out with 800 or 100 grit? The images I've found have way less than I'm getting. 7. Does the gun really matter? Should I get a better gun? The one I have seems to spray just fine; I think I am the problem! I've heard that better guns atomize better, but I've also heard that the painting conditions matter, too. Is there a price point at which the quality of the gun actually shows up/makes a difference? In other words, are guns below say, $100 all pretty much the same and I gotta spend at least $200 or whatever to get better quality that will actually matter? I know it's as art, but I thought I've done everything "right", but I'm still not getting good results. |
|
|
|
| 914 RZ-1 |
Aug 19 2018, 05:54 PM
Post
#80
|
|
Porsche Padawan Group: Members Posts: 683 Joined: 17-December 14 From: Santa Clarita, CA Member No.: 18,230 Region Association: Southern California |
A picture after wet-sanding with 800 for your viewing pleasure:
 |
|
|
|
|
3 User(s) are reading this topic (3 Guests and 0 Anonymous Users)
0 Members:

|
Lo-Fi Version | Time is now: 1st May 2024 - 06:33 PM |
Invision Power Board
v9.1.4 © 2024 IPS, Inc.