|
|
|
Porsche, and the Porsche crest are registered trademarks of Dr. Ing. h.c. F. Porsche AG.
This site is not affiliated with Porsche in any way. Its only purpose is to provide an online forum for car enthusiasts. All other trademarks are property of their respective owners. |
|
|

  |

| 914_7T3 |
 Dec 24 2018, 03:10 PM Dec 24 2018, 03:10 PM
Post
#1
|
|
Please forgive me, I'm new to all of this!  Group: Members Posts: 1,853 Joined: 3-April 17 From: Los Angeles, CA Member No.: 20,991 Region Association: Southern California |
Used the clips that come with The Genuine Porsche OEM trim kit From Sierra Madre and important to note that they do not break as easily as the aftermarket ones. Drawback is that they were one clip short in the package. Luckily our 914World Designated Windshield Installer had a spare.
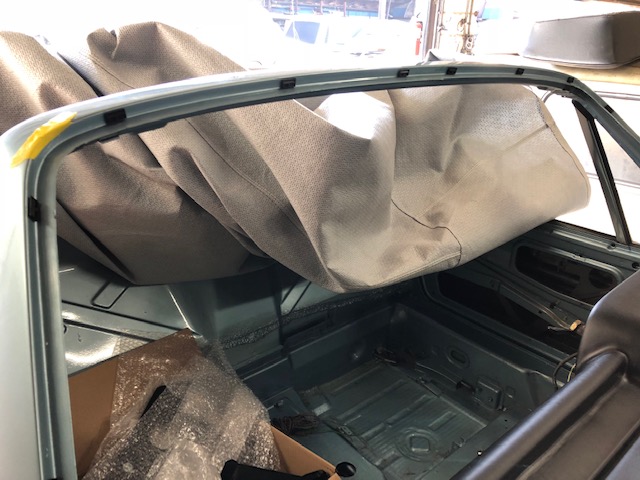 Once clips were in, a Butyl Primer was used as recommended in the below thread. http://914world.com/bbs2/index.php?showtopic=312146 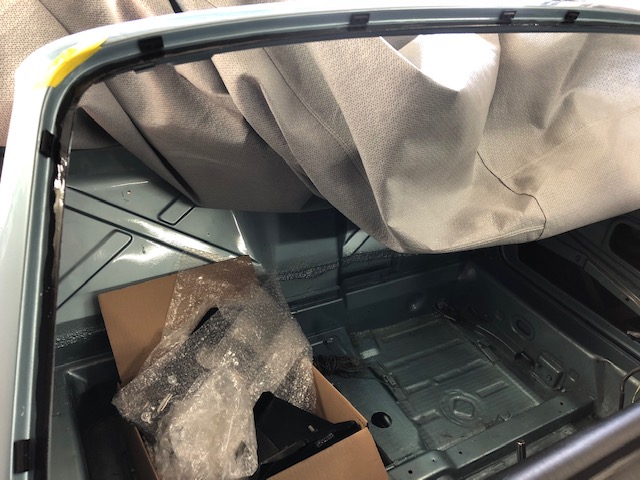 Windshield was warmed up in the sun prior to install.  5/16 Butyl Primer is used and the glass positioned and seated.  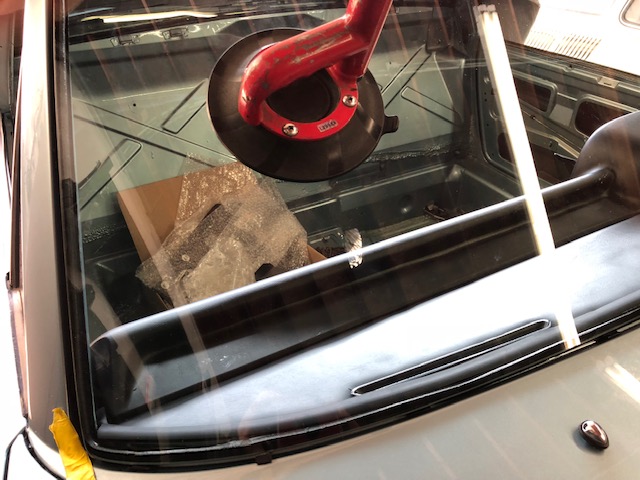 Snap in the trim clips and you're good to go. 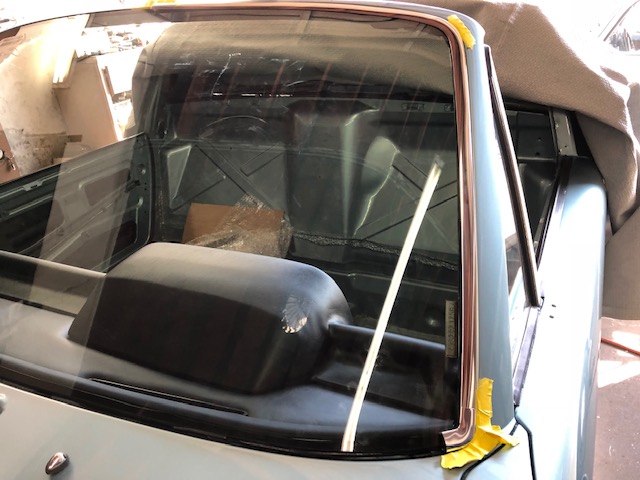 The windshield I am using is a Sekurit from Finland and it seems to not sit 100% flush in some areas. As a result, it takes some finessing to make sure there is enough clearance for the trim to notch comfortably into the clips. The takeaway here is to use a professional installer if you do not have the suction tool or have not done a windshield install before! |
   |

 
|
| 914Sixer |
Dec 24 2018, 03:20 PM
Post
#2
|
|
914 Guru Group: Members Posts: 8,882 Joined: 17-January 05 From: San Angelo Texas Member No.: 3,457 Region Association: Southwest Region |
Don't see bottom windshield spacer ?
|
|
|
|
| 914_7T3 |
Dec 24 2018, 03:22 PM
Post
#3
|
|
Please forgive me, I'm new to all of this! Group: Members Posts: 1,853 Joined: 3-April 17 From: Los Angeles, CA Member No.: 20,991 Region Association: Southern California |
QUOTE(914Sixer @ Dec 24 2018, 01:20 PM)  Don't see bottom windshield spacer ? There were several of them used that came in the kit. Guess I missed that part.... (IMG:style_emoticons/default/laugh.gif) |
|
|
|
| iankarr |
Dec 24 2018, 05:14 PM
Post
#4
|
|
The wrencher formerly known as Cuddy_K Group: Members Posts: 2,473 Joined: 22-May 15 From: Heber City, UT Member No.: 18,749 Region Association: Intermountain Region |
Nice write up...and glad the glass is in!
|
|
|
|
| HansJan |
Dec 24 2018, 09:19 PM
Post
#5
|
|
Member Group: Members Posts: 395 Joined: 5-April 16 From: Sugar Land TX Member No.: 19,860 Region Association: Southwest Region |
Installing the windshield is a lot easier then it seems.
I was very nervous about it as well. But there is no special skill-set needed. See the end of this YouTube video. https://youtu.be/3ByJvvXwkdk It was a cool day, so I used the lamps to warm up the Butyl while slowly pushing the window into the Butyl. The Sekurit windshield, was standing proud at the left and right sides at first. But by keeping the Butyl warm and continues massaging/pushing the windshield I was able to embed it into the Butyl. There is no need to pay someone for this. Actually, you don’t even need the suction cups. The glass is small and not very heavy. However; having another set of hands to help you put it in place is recommended (once it touches the Butyl it will stick). Don’t be afraid to do this. |
|
|
|
| buck toenges |
Dec 24 2018, 10:46 PM
Post
#6
|
|
Senior Member Group: Members Posts: 553 Joined: 25-November 03 From: Fort wayne In Member No.: 1,388 Region Association: None |
Can you add the chrome trim pieces on later or does it have to be put on while the butyl is new and pliable? Can you also talk about the primer. is there a track area of the windshield frame that demarcates exactly where it goes?
Buck |
|
|
|
| HansJan |
Dec 24 2018, 11:21 PM
Post
#7
|
|
Member Group: Members Posts: 395 Joined: 5-April 16 From: Sugar Land TX Member No.: 19,860 Region Association: Southwest Region |
QUOTE(buck toenges @ Dec 24 2018, 10:46 PM) Can you add the chrome trim pieces on later or does it have to be put on while the butyl is new and pliable? Can you also talk about the primer. is there a track area of the windshield frame that demarcates exactly where it goes? Buck The trim can be put on at later stage, if you wish to do that. Just make sure the clips are in place “before” installing the glass. I bought clips from 914Rubber. Then found out that they could break. 914Rubber send a bunch of spares. But in the end, I used originals from the Porsche dealer. There is no clearly marked area for the primer. Just paint the entire surface, that the glass sits against (also hides a the paint color, where you don’t want to see it). Good luck. |
|
|
|
| Tdskip |
Dec 24 2018, 11:38 PM
Post
#8
|
|
Advanced Member Group: Members Posts: 3,686 Joined: 1-December 17 From: soCal Member No.: 21,666 Region Association: None |
Thanks for the write up and discussion, very helpful.
|
|
|
|
| Larmo63 |
Dec 25 2018, 11:56 AM
Post
#9
|
|
Advanced Member Group: Members Posts: 4,264 Joined: 3-March 14 From: San Clemente, Ca Member No.: 17,068 Region Association: Southern California |
I assume you used Ruffino to install your windshield from "Findland" (IMG:style_emoticons/default/smash.gif)
|
|
|
|
| IronHillRestorations |
Dec 25 2018, 01:47 PM
Post
#10
|
|
I. I. R. C. Group: Members Posts: 6,717 Joined: 18-March 03 From: West TN Member No.: 439 Region Association: None |
A couple body & glass guys I know recommended 3M 08682 single step primer for the painted surface of the windshield channel.
I've done two WS installs with it and no problems. The nice thing is it's black and you can cover all the color. It really helps the tap stick to the car. |
|
|
|
| iankarr |
Dec 25 2018, 03:09 PM
Post
#11
|
|
The wrencher formerly known as Cuddy_K Group: Members Posts: 2,473 Joined: 22-May 15 From: Heber City, UT Member No.: 18,749 Region Association: Intermountain Region |
I removed and replaced the windshield on my '73. Pretty straightforward if you go sloooowly and carefully. Though the nice thing about hiring a pro is that it's on them if they break it;). If I lived in SoCal, I def would've done as @914_7T3 did. The hardest / scariest part is pressing the corners into the butyl, which is when the windshield seems most prone to cracking.
Here are a few pics. You can see where I put the butyl primer. I was much neater than I needed to be, since I'm totally OCD. In reality the butyl / glass / trim covers the whole channel. Also a pic of the primer I used. Put the butyl "seam" on the bottom and butted the ends. One other tip which I'm pretty sure I read here on the world, though I can't seem to find the link... test fit the glass in-place before you put the butyl down using suction cups (cheeep at HF), the spacer blocks and a helper. Line it up/down/left/right so that it's sitting evenly in the channel and put a piece of blue painter's tape in the middle of each edge, straddling the glass and the frame (top, bottom, left, right). Use a sharpie to draw across the space between the glass and body and cut the tape in-place using a razor blade. The tape and sharpie marks allow you to line up the glass perfectly before you set it down. Once the glass touches the butyl, you can't move it much, so it's important to it place it exactly right before you commit. 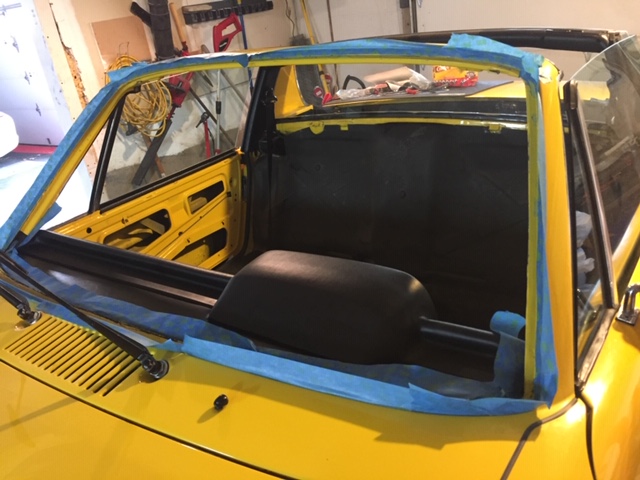 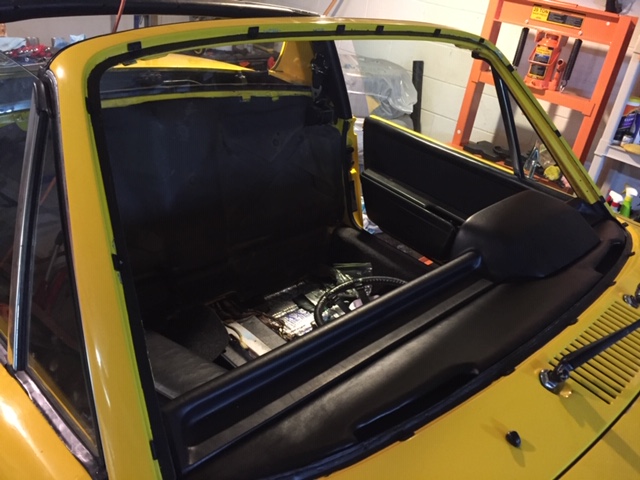 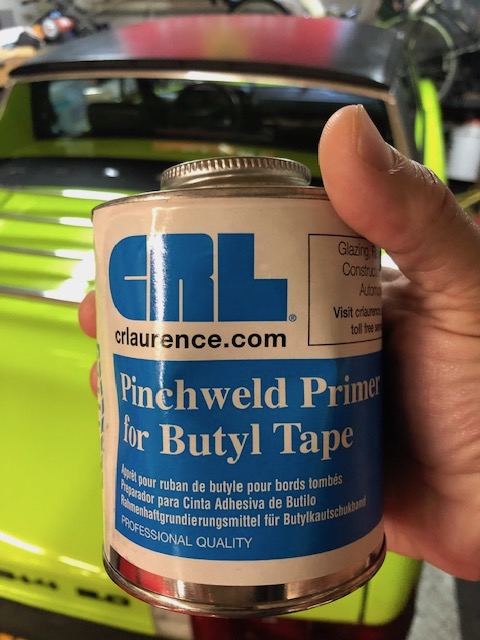 |
|
|
|
| Tdskip |
Dec 26 2018, 08:05 AM
Post
#12
|
|
Advanced Member Group: Members Posts: 3,686 Joined: 1-December 17 From: soCal Member No.: 21,666 Region Association: None |
Anyone have a close up picture of how the clip and windshield actually fit together?
How much primer used? Does use of the primer mean, as I assume, not butyl tape needed? |
|
|
|
| mepstein |
Dec 26 2018, 08:18 AM
Post
#13
|
|
914-6 GT in waiting Group: Members Posts: 19,270 Joined: 19-September 09 From: Landenberg, PA/Wilmington, DE Member No.: 10,825 Region Association: MidAtlantic Region |
Primer is just used to help the butyl tape stick better and create a nice black trim frame under the glass.
|
 |
|
| Tdskip |
Dec 26 2018, 09:42 AM
Post
#14
|
|
Advanced Member Group: Members Posts: 3,686 Joined: 1-December 17 From: soCal Member No.: 21,666 Region Association: None |
QUOTE(mepstein @ Dec 26 2018, 09:18 AM) Primer is just used to help the butyl tape stick better and create a nice black trim frame under the glass. Ah, so it is both not either or. Thanks! |
|
|
|
| Costa05 |
Dec 26 2018, 10:02 AM
Post
#15
|
|
Member Group: Members Posts: 320 Joined: 27-October 16 From: Phoenix, Arizona Member No.: 20,535 Region Association: Southwest Region |
Great advise on this thread. Thx. I am planning to install the 914rubber rubber trim instead of the chrome one. Any advice for it? I assume it goes on after the windshield is installed? Adhesive? Start and end where with installing it?
Rich |
|
|
|
| 914_7T3 |
Dec 26 2018, 08:08 PM
Post
#16
|
|
Please forgive me, I'm new to all of this! Group: Members Posts: 1,853 Joined: 3-April 17 From: Los Angeles, CA Member No.: 20,991 Region Association: Southern California |
QUOTE(Larmo63 @ Dec 25 2018, 09:56 AM) I assume you used Ruffino to install your windshield from "Findland" (IMG:style_emoticons/default/smash.gif) @Larmo63 The windshield is from "Findland", but Ruffino is not! One type-O and everyone is a critic (IMG:style_emoticons/default/rolleyes.gif) |
|
|
|
| buck toenges |
Jan 2 2019, 07:48 PM
Post
#17
|
|
Senior Member Group: Members Posts: 553 Joined: 25-November 03 From: Fort wayne In Member No.: 1,388 Region Association: None |
914 rubber includes instructions on their butyl tape (I think it is from the Porsche factory that shows butyl primer being applied to the windshield). It says apply around the perimeter about 15mm. Do you have too?
is the 3m primer 80682 for butyl or urethane or both? Where do you get a dabber to apply the primer? Thanks, Buck |
|
|
|
| iankarr |
Jan 2 2019, 09:15 PM
Post
#18
|
|
The wrencher formerly known as Cuddy_K Group: Members Posts: 2,473 Joined: 22-May 15 From: Heber City, UT Member No.: 18,749 Region Association: Intermountain Region |
On the CRL primer, the dabber is integrated into the cap...
|
|
|
|
| Mikey914 |
Jan 6 2019, 12:17 PM
Post
#19
|
|
The rubber man Group: Members Posts: 12,661 Joined: 27-December 04 From: Hillsboro, OR Member No.: 3,348 Region Association: None |
QUOTE(Costa05 @ Dec 26 2018, 08:02 AM) Great advise on this thread. Thx. I am planning to install the 914rubber rubber trim instead of the chrome one. Any advice for it? I assume it goes on after the windshield is installed? Adhesive? Start and end where with installing it? Rich It sets with modern urethane. No spacers needed, but a helper and 2 glass cups help a lot to center, you can go too low or high, it will move around some. Tape up and let set for at least 3hours. |
|
|
|
| nivekdodge |
Oct 28 2022, 07:38 AM
Post
#20
|
|
Member Group: Members Posts: 250 Joined: 28-August 21 From: Pittsburgh Pa Member No.: 25,860 Region Association: MidAtlantic Region |
I’ve been been reading a lot of these glass install posts. Non of them give a reason for using butyl other than “that’s the way we’ve always done it”. Does anyone have a concrete reason why you would use 50 year old tech?
|
|
|
|
|
1 User(s) are reading this topic (1 Guests and 0 Anonymous Users)
0 Members:

|
Lo-Fi Version | Time is now: 14th May 2024 - 04:55 PM |
Invision Power Board
v9.1.4 © 2024 IPS, Inc.