|
|
|
Porsche, and the Porsche crest are registered trademarks of Dr. Ing. h.c. F. Porsche AG.
This site is not affiliated with Porsche in any way. Its only purpose is to provide an online forum for car enthusiasts. All other trademarks are property of their respective owners. |
|
|


| saigon71 |
 Feb 24 2019, 12:37 PM Feb 24 2019, 12:37 PM
Post
#1
|
|
Senior Member  Group: Members Posts: 1,999 Joined: 1-June 09 From: Dillsburg, PA Member No.: 10,428 Region Association: MidAtlantic Region |
One of my winter projects was to install a new set of heat control cables from 914 Rubber. My old ones were always too short, causing heat to roll into the cabin year round. When I disconnected the wire from the bottom of the heat control lever, the spade terminal that powers the fan broke off.
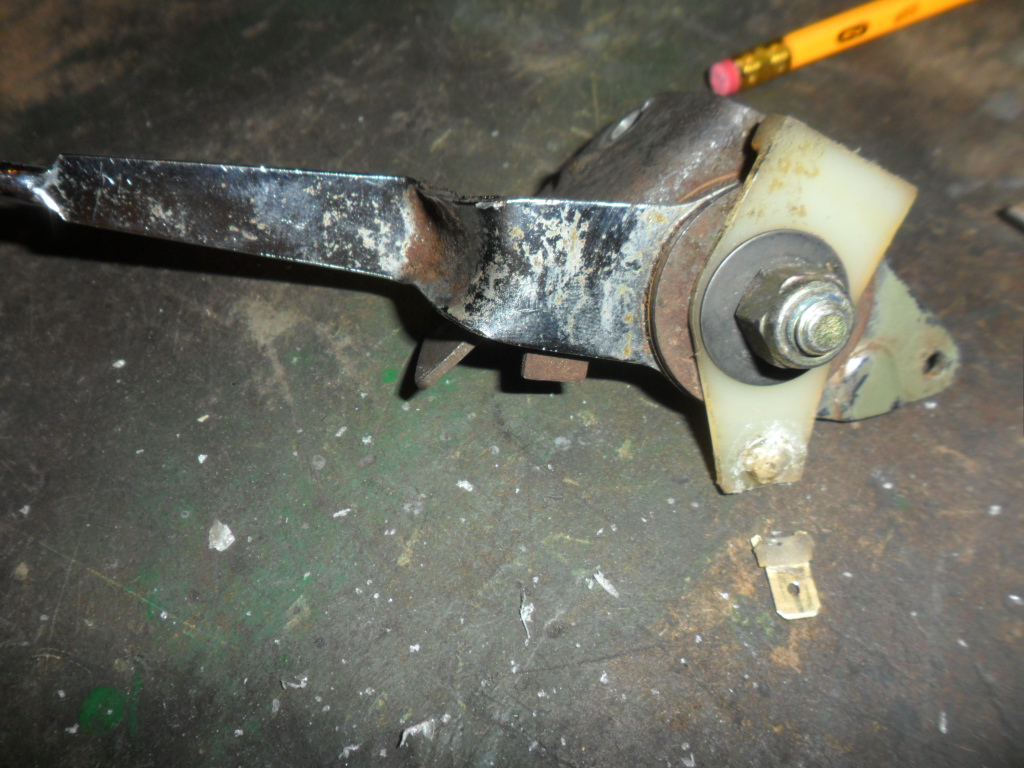 This circuit relies on the blob of brass? on the back side to make contact with the metal of the lever, grounding the circuit and allowing the fan to run. 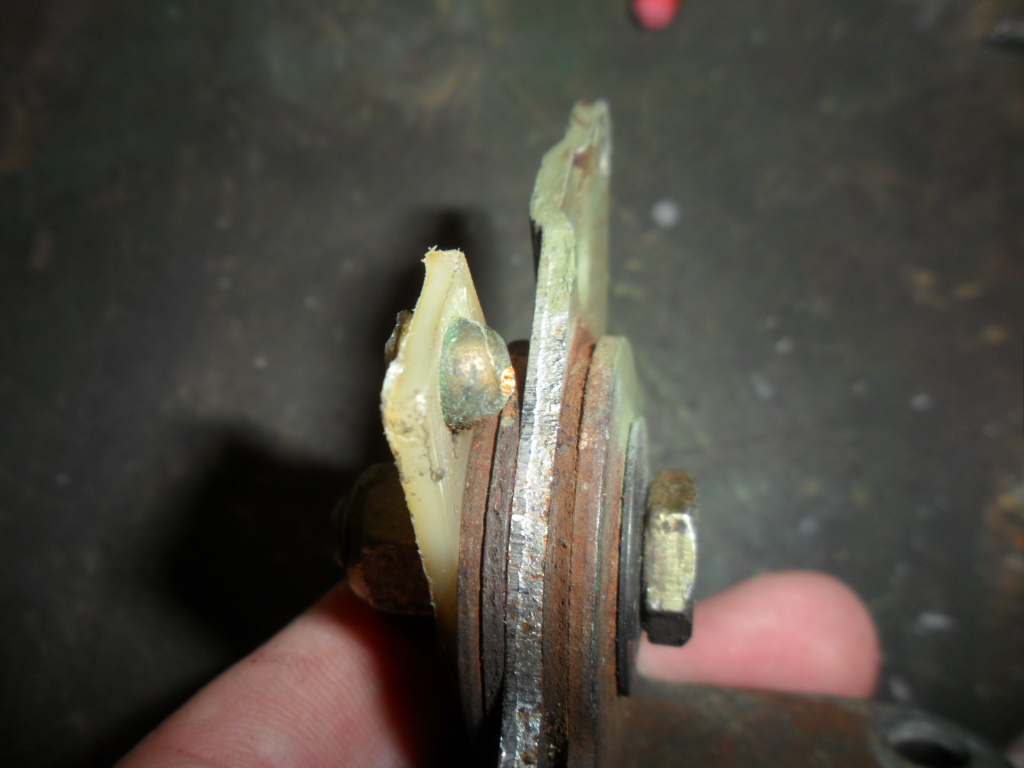 I tried drilling out the old connection, but it started spinning on me. Next step was to use a Dremmel tool with a cut off wheel to grind one side down. Unfortunately, this heated up the plastic and effectively melted the connection out of the plastic piece. Luckily, there was still enough meat left on the plastic for my plan to work. If I ever need to fix another one, I will work a little at a time with the Dremmel, letting things cool down to avoid the melting problem. 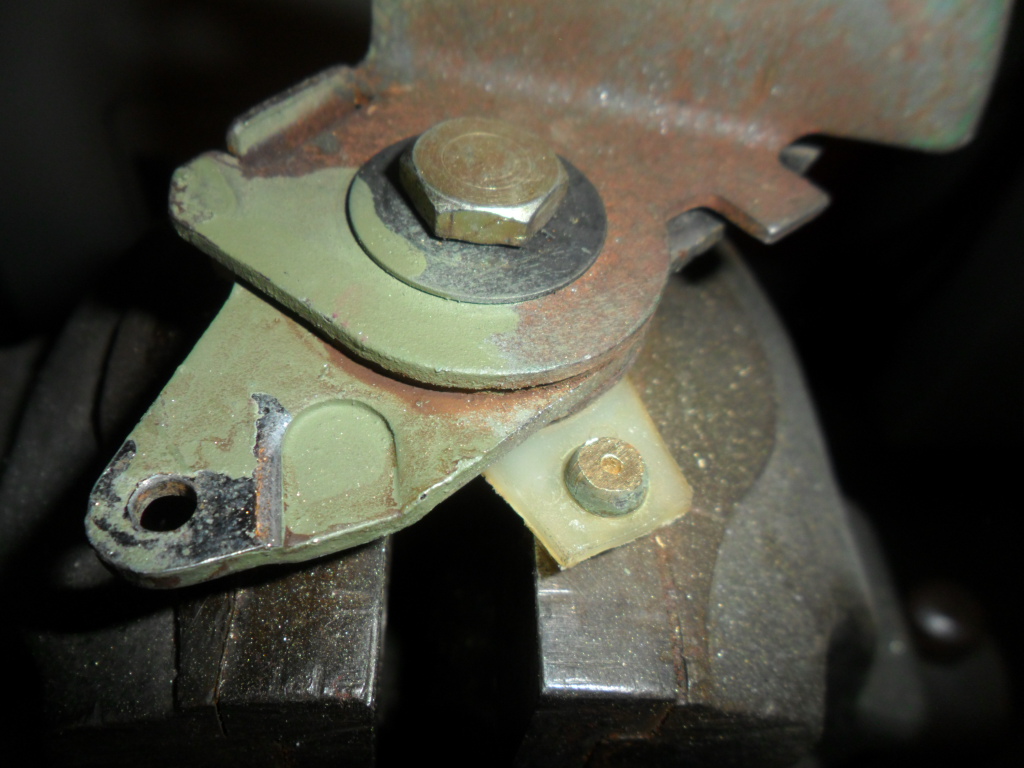 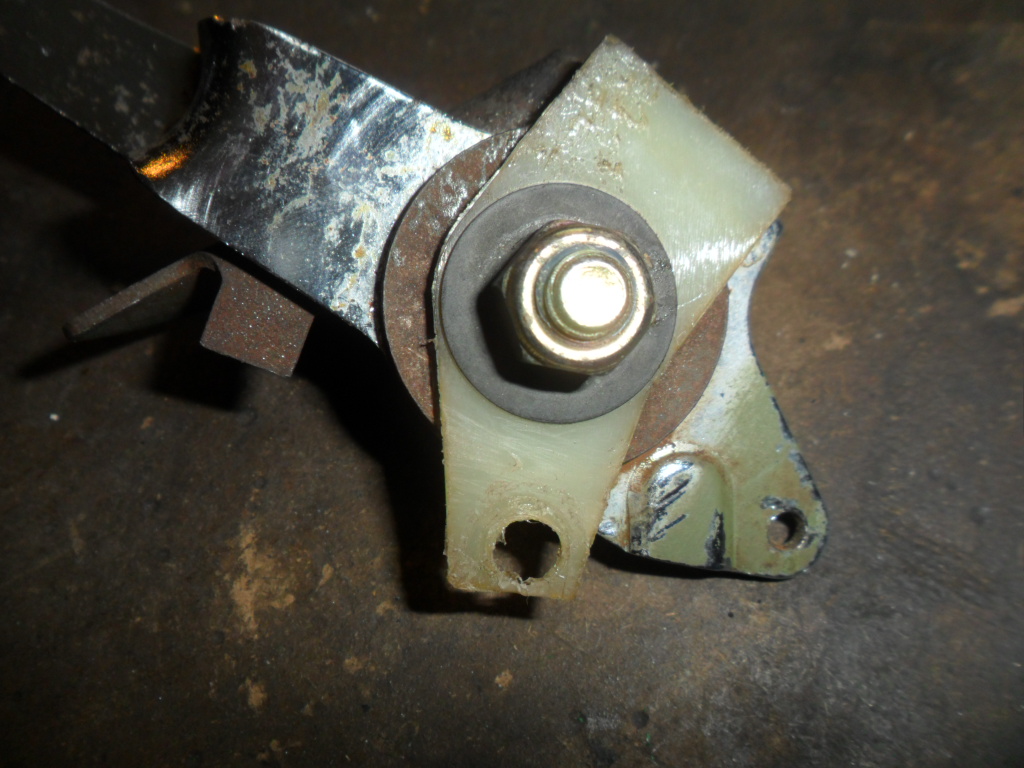 I took a trip the nut and bolt section of my local ACE Hardware in search of a solution. I found a #8 X 32 brass, round head machine screw. The screw head had nearly the same dimensions as the original blob. I matched it up with a brass nut and some washers. I couldn't find a connection like the original, so I used a crimp ring terminal mated with a short piece of wire and a crimp spade terminal. I cut the excess length off the screw. 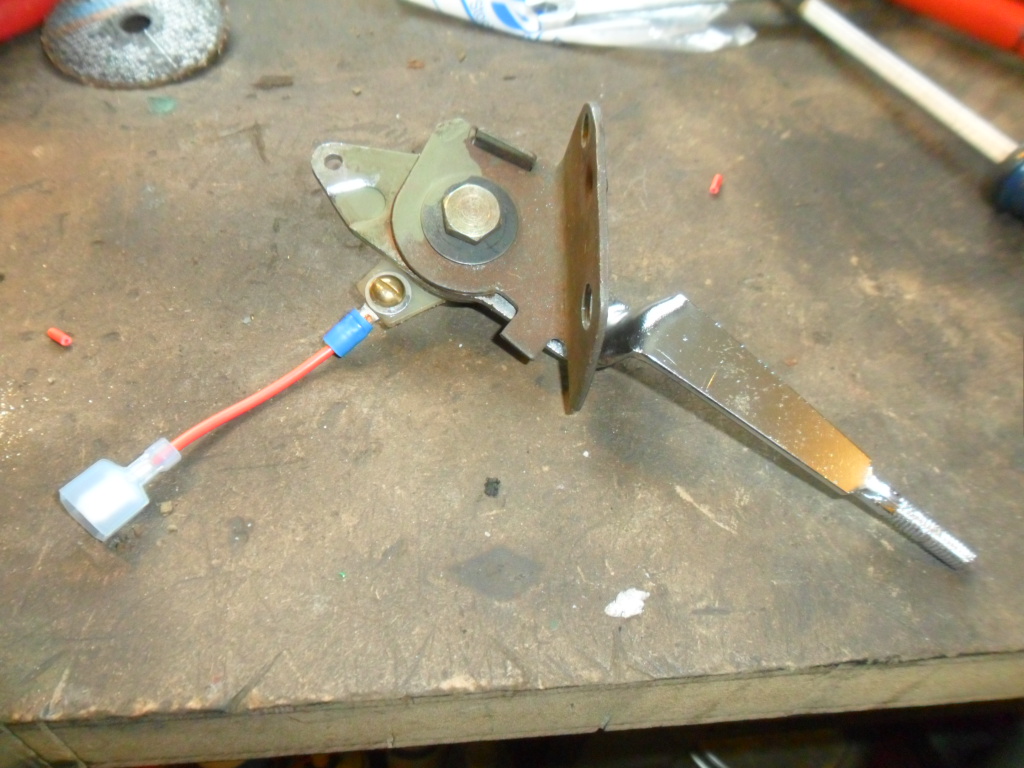 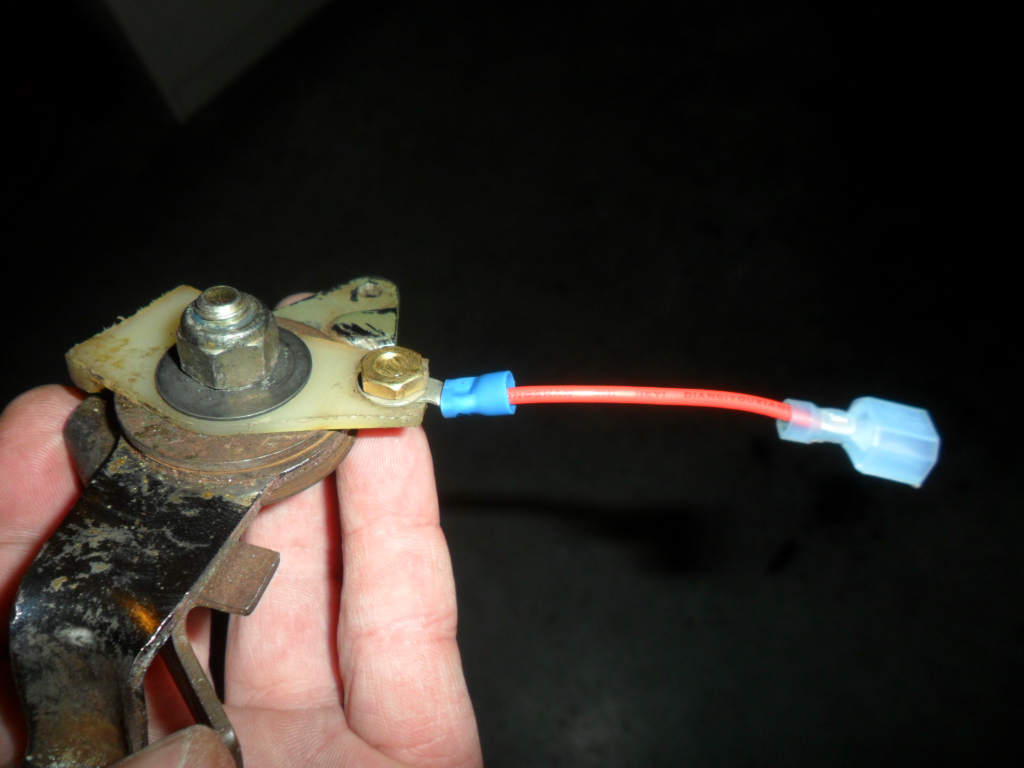 I installed everything and tested it. This assembly is a tight fit in the tunnel. On my first pass, I had a problem with the fan running constantly. I realized that the brass nut was touching a tube in the tunnel, grounding out and powering the fan. I just removed a washer to correct it. |
   |

 
|
  |
Replies(1 - 2)
| mepstein |
Feb 24 2019, 03:40 PM
Post
#2
|
|
914-6 GT in waiting Group: Members Posts: 19,286 Joined: 19-September 09 From: Landenberg, PA/Wilmington, DE Member No.: 10,825 Region Association: MidAtlantic Region |
Bob - Nice work but the other solution would be to text me and I'll send you one. (IMG:style_emoticons/default/beerchug.gif)
|
|
|
|
| saigon71 |
Feb 25 2019, 11:43 AM
Post
#3
|
|
Senior Member Group: Members Posts: 1,999 Joined: 1-June 09 From: Dillsburg, PA Member No.: 10,428 Region Association: MidAtlantic Region |
QUOTE(mepstein @ Feb 24 2019, 04:40 PM)  Bob - Nice work but the other solution would be to text me and I'll send you one. (IMG:style_emoticons/default/beerchug.gif) Thanks Mark - appreciate the access to you parts stash. (IMG:style_emoticons/default/beerchug.gif) |
|
|
|
|
1 User(s) are reading this topic (1 Guests and 0 Anonymous Users)
0 Members:

|
Lo-Fi Version | Time is now: 25th May 2024 - 03:17 AM |
Invision Power Board
v9.1.4 © 2024 IPS, Inc.