|
|
|
Porsche, and the Porsche crest are registered trademarks of Dr. Ing. h.c. F. Porsche AG.
This site is not affiliated with Porsche in any way. Its only purpose is to provide an online forum for car enthusiasts. All other trademarks are property of their respective owners. |
|
|

  |

| Mblizzard |
 Apr 19 2019, 06:18 PM Apr 19 2019, 06:18 PM
Post
#21
|
|
Advanced Member  Group: Members Posts: 3,033 Joined: 28-January 13 From: Knoxville Tn Member No.: 15,438 Region Association: South East States |
QUOTE(Bills914-4 @ Apr 19 2019, 03:06 PM)  QUOTE(Mblizzard @ Apr 17 2019, 09:04 PM) QUOTE(Bills914-4 @ Apr 17 2019, 01:49 PM) Hi Mike, Welcome to the big motors (IMG:style_emoticons/default/evilgrin.gif) , Nice list of parts , do you plan on having the bearings coated , calico coatings not to far away , I have had good success with them, I might be wrong but with that parts list , I feel you should go 1 3/4 on the exhaust system , let that that BIG motor breathe , I run the 1 7/8 system on my 2.8-4 , I'm assuming that the cam will have a reduced base circle (rod to cam clearance with that stoke & bigger rod journal ) just a heads up ?, Good luck & I'll be lookingforward to seeing it at Okteenerfest (IMG:style_emoticons/default/aktion035.gif) , Bill D. Yes you are correct on the exhaust. Chris Foley had already set me straight on the exhaust size. Not familiar with the coating of bearings. Tell me more. It's a performance coating for bearings , piston skirts, piston tops, It might be (would be) a worthwhile investment with this motor , have your bearings coated , piston tops coated & skirts recoated (better quality coating) I believe Len recommends having the heads (chambers & valves) done , I hope this helps Bill D. PS who is doing your timesert install for your cylinder studs ? if your doing it ,let me know I have some tools that I made to help install them below the surface, bearings - CT-1 piston skirts - CT-3 piston tops - CT-2 www.calicocoatings.com/coatings/ Contacted them. I like this tech? |
   |

 
|
| bahnzai |
Apr 20 2019, 03:30 AM
Post
#22
|
|
Member Group: Members Posts: 305 Joined: 26-July 06 From: Columbia, SC Member No.: 6,509 Region Association: South East States |
+1 on Calico Coatings! Did this on a 3.5 930 engine build.
|
|
|
|
| Mblizzard |
Apr 22 2019, 10:46 AM
Post
#23
|
|
Advanced Member Group: Members Posts: 3,033 Joined: 28-January 13 From: Knoxville Tn Member No.: 15,438 Region Association: South East States |
QUOTE(Bills914-4 @ Apr 19 2019, 03:06 PM) QUOTE(Mblizzard @ Apr 17 2019, 09:04 PM) QUOTE(Bills914-4 @ Apr 17 2019, 01:49 PM) Hi Mike, Welcome to the big motors (IMG:style_emoticons/default/evilgrin.gif) , Nice list of parts , do you plan on having the bearings coated , calico coatings not to far away , I have had good success with them, I might be wrong but with that parts list , I feel you should go 1 3/4 on the exhaust system , let that that BIG motor breathe , I run the 1 7/8 system on my 2.8-4 , I'm assuming that the cam will have a reduced base circle (rod to cam clearance with that stoke & bigger rod journal ) just a heads up ?, Good luck & I'll be lookingforward to seeing it at Okteenerfest (IMG:style_emoticons/default/aktion035.gif) , Bill D. Yes you are correct on the exhaust. Chris Foley had already set me straight on the exhaust size. Not familiar with the coating of bearings. Tell me more. It's a performance coating for bearings , piston skirts, piston tops, It might be (would be) a worthwhile investment with this motor , have your bearings coated , piston tops coated & skirts recoated (better quality coating) I believe Len recommends having the heads (chambers & valves) done , I hope this helps Bill D. PS who is doing your timesert install for your cylinder studs ? if your doing it ,let me know I have some tools that I made to help install them below the surface, bearings - CT-1 piston skirts - CT-3 piston tops - CT-2 www.calicocoatings.com/coatings/ Bill Set me straight on the RaceWare head studs. I saw they cam with Timecerts but thought they were optional? Because I am sticking with relatively low compression I was going to just use the standard bolt holes. Contacted Calico but nothing yet. |
|
|
|
| jd74914 |
Apr 22 2019, 11:40 AM
Post
#24
|
|
Its alive Group: Members Posts: 4,780 Joined: 16-February 04 From: CT Member No.: 1,659 Region Association: North East States |
QUOTE(Mblizzard @ Apr 22 2019, 11:46 AM) Contacted Calico but nothing yet. If you're looking for some other options... SwainTech also is known for excellent engine coatings work. Website sucks though. Hekimian Racing does a good amount of coatings work as I understand it. Never used them for coatings, but have used them extensively for cryoing parts (mostly bike transmission) and I would imagine they do good coatings work too. Gregg is awesome and a wealth of knowledge. Another crappy website. Might be worth cryoing your crank and perhaps some other parts. Not too expensive and people have had good results. A while ago I read on shoptalk that Jake was cryoing parts in ~75% of his big motors. |
|
|
|
| RFoulds |
Apr 22 2019, 03:10 PM
Post
#25
|
|
Green Teen 66 Group: Members Posts: 837 Joined: 10-August 09 From: La Quinta, CA Member No.: 10,656 Region Association: Southwest Region |
you mentioned some of your old components for sale?
whatcha got? I especially looking for heads and valves I can use. |
|
|
|
| Mblizzard |
Apr 22 2019, 05:31 PM
Post
#26
|
|
Advanced Member Group: Members Posts: 3,033 Joined: 28-January 13 From: Knoxville Tn Member No.: 15,438 Region Association: South East States |
QUOTE(RFoulds @ Apr 22 2019, 01:10 PM) you mentioned some of your old components for sale? whatcha got? I especially looking for heads and valves I can use. Got 2 big valve heads, ported, dual springs, and opened up to fit 98mm jugs. Have one good stock 2.0 and complete set of new valves. |
|
|
|
| RFoulds |
Apr 23 2019, 09:00 AM
Post
#27
|
|
Green Teen 66 Group: Members Posts: 837 Joined: 10-August 09 From: La Quinta, CA Member No.: 10,656 Region Association: Southwest Region |
Sent you a PM
|
|
|
|
| Mblizzard |
Apr 29 2019, 07:35 AM
Post
#28
|
|
Advanced Member Group: Members Posts: 3,033 Joined: 28-January 13 From: Knoxville Tn Member No.: 15,438 Region Association: South East States |
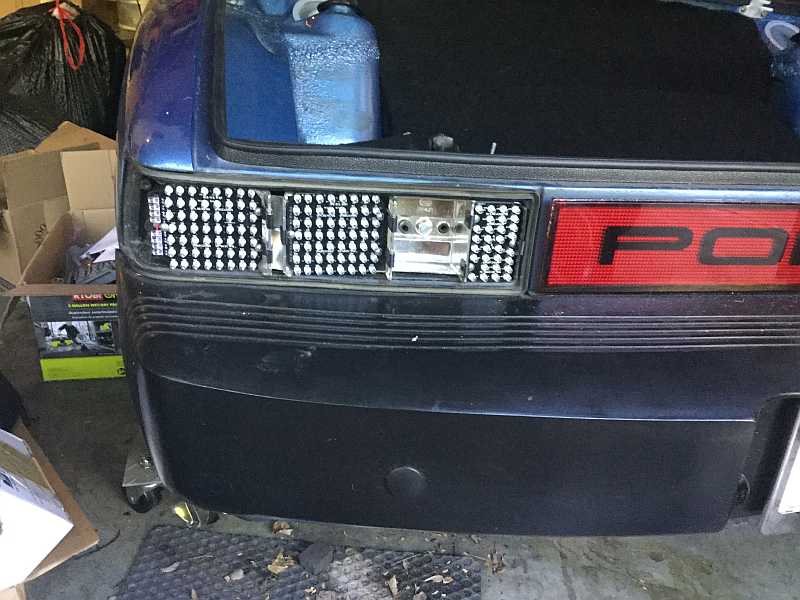
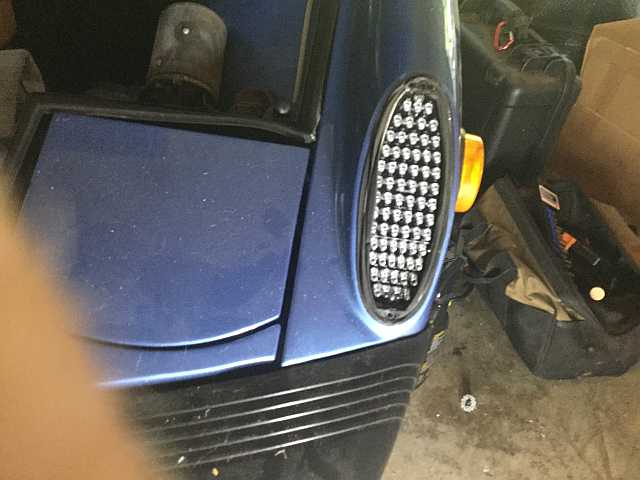
Not much progress. Still waiting on machine shop. But did get to install my SpokeWorks LED lights. Super easy install and fit perfectly!
   |
|
|
|
| Mblizzard |
Apr 30 2019, 11:47 AM
Post
#29
|
|
Advanced Member Group: Members Posts: 3,033 Joined: 28-January 13 From: Knoxville Tn Member No.: 15,438 Region Association: South East States |
Well more good news! Shop called and they will get to my stuff next week. (IMG:style_emoticons/default/piratenanner.gif)
|
|
|
|
| Mblizzard |
May 1 2019, 07:57 AM
Post
#30
|
|
Advanced Member Group: Members Posts: 3,033 Joined: 28-January 13 From: Knoxville Tn Member No.: 15,438 Region Association: South East States |
Bill, On the Timesert install, I have the RaceWare install tool but I don't think it does anything for ensuring that it is flush. Supposedly no machining is required. I have not tried to install them but it does seem like the lip on top will prevent a flush install. What are the tools you are referring to? |
|
|
|
| Bills914-4 |
May 1 2019, 08:49 AM
Post
#31
|
|
Member Group: Members Posts: 310 Joined: 1-March 08 From: suburbs of Miami FL. Member No.: 8,762 Region Association: South East States |
QUOTE(Mblizzard @ May 1 2019, 09:57 AM) Bill, On the Timesert install, I have the RaceWare install tool but I don't think it does anything for ensuring that it is flush. Supposedly no machining is required. I have not tried to install them but it does seem like the lip on top will prevent a flush install. What are the tools you are referring to? It's just a 1/2 ball mill (for making recess c'bore / in slo-mo hand drill ) a bolt (matches threads on studs/ coarse end ) a nut with part of the hex turned down dia. smaller then the timesert shoulder plus a tap for chasing thread (makes easier install ) the tool that comes with the studs & serts is for locking the serts in once you bury them . it spreads the bottom of the serts so they don't back out . one at time you bury it , if it's good then remove put loctite then rebury it ,then use tool that comes with the serts , I hope this helps Bill D. ps let me know if you decide to do yourself, I'll send you the tools 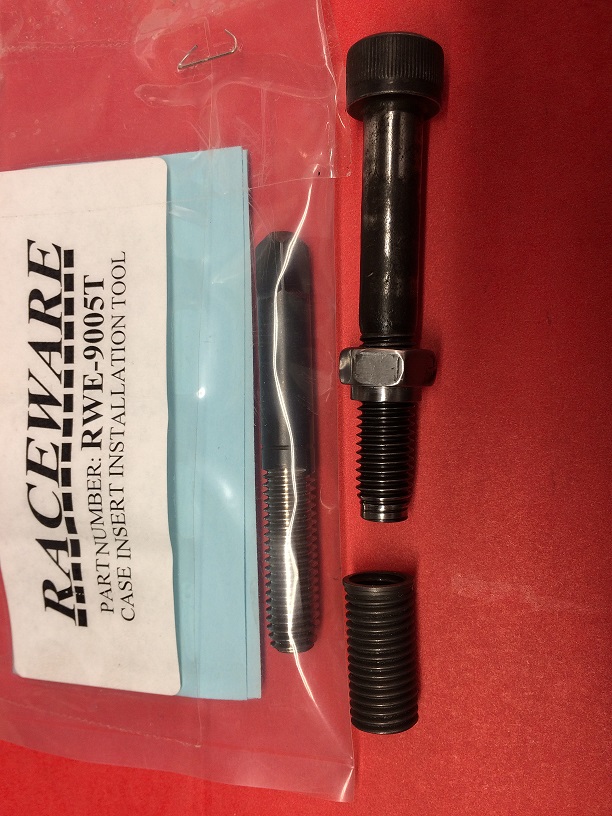 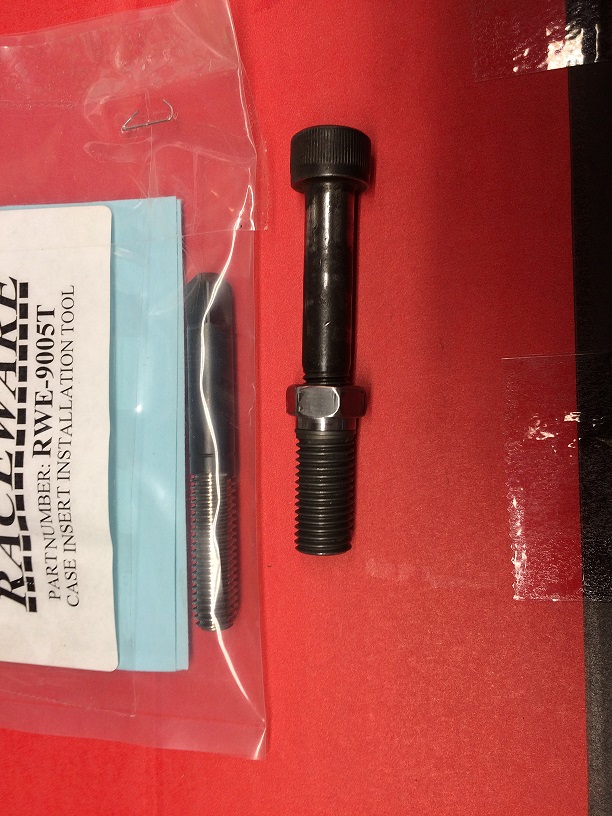 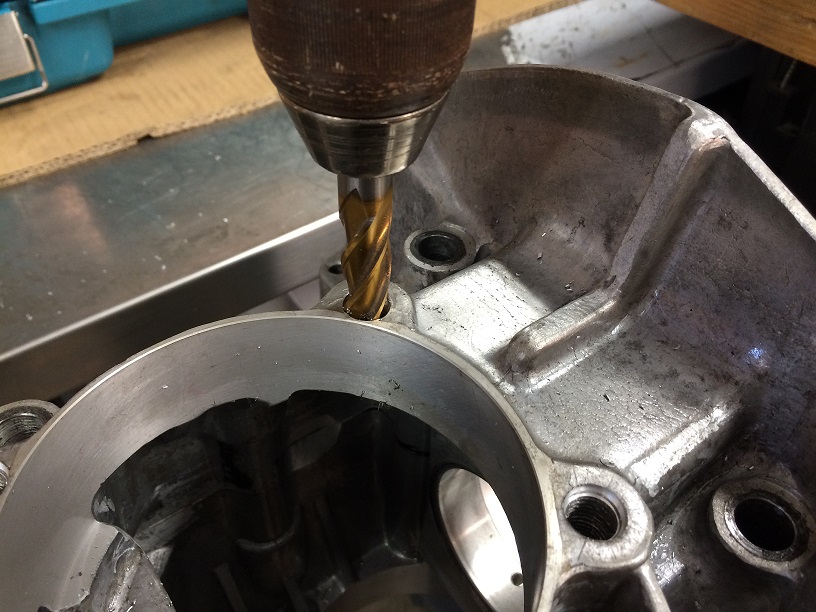 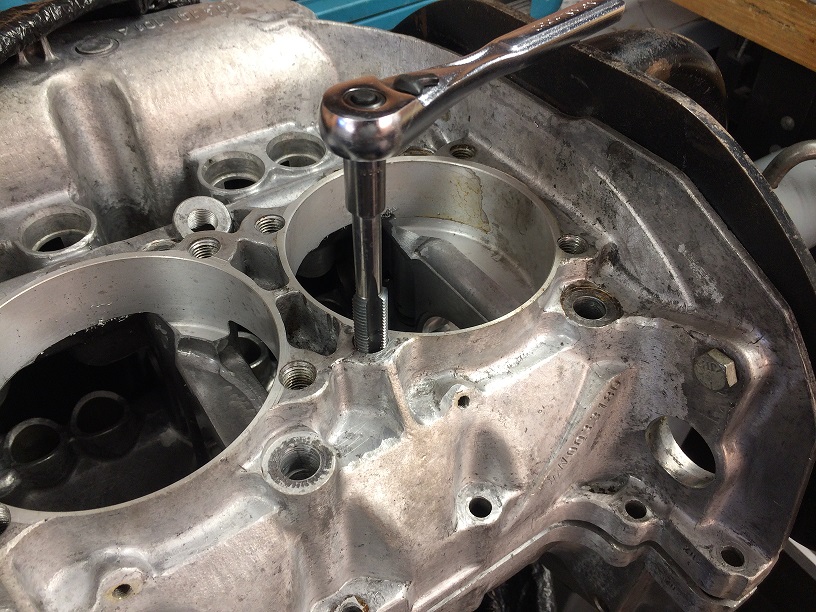 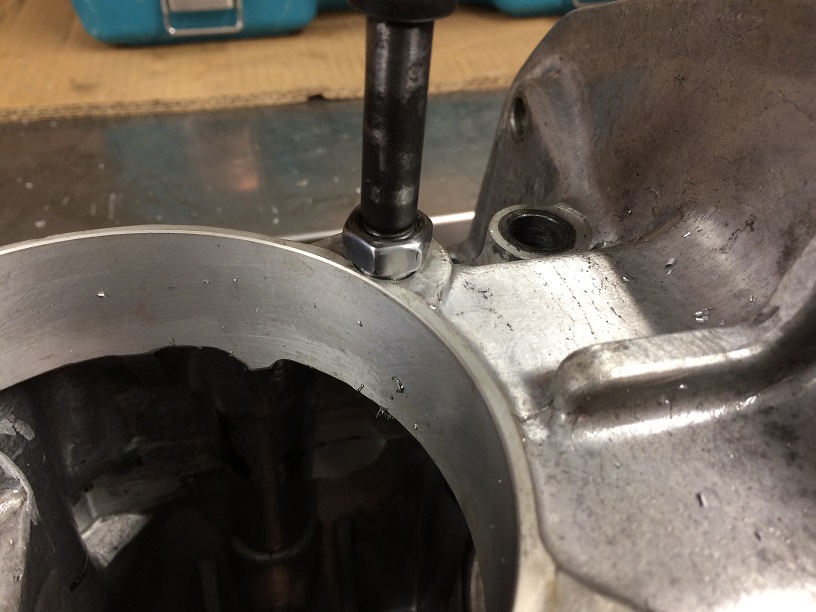 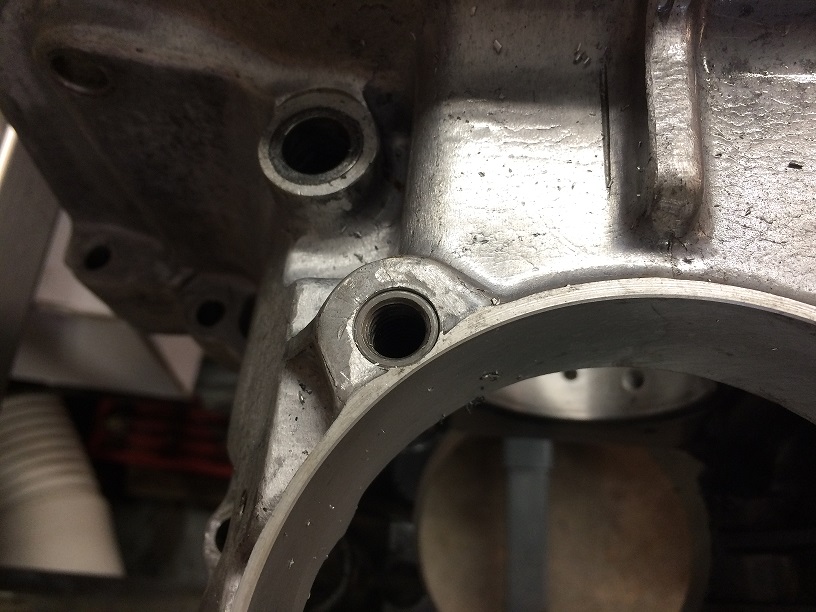 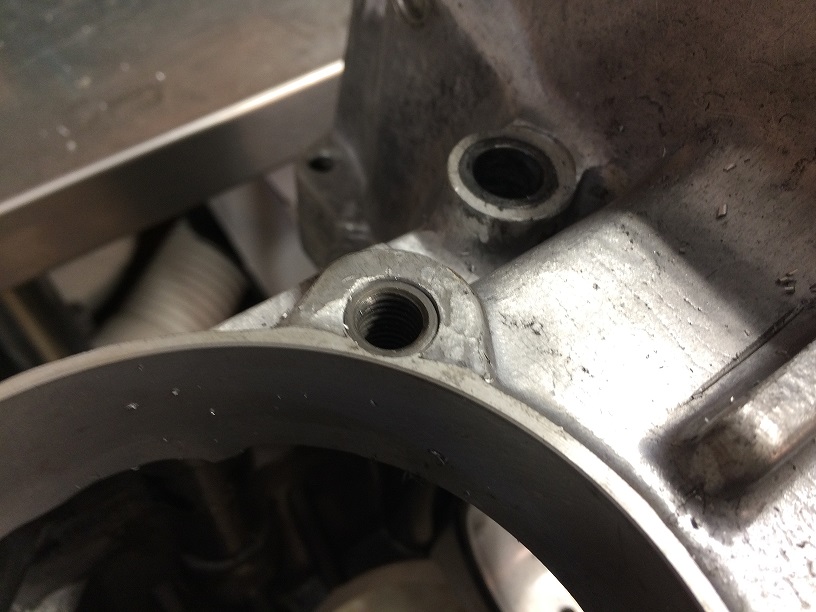 |
|
|
|
| Mblizzard |
May 1 2019, 09:19 AM
Post
#32
|
|
Advanced Member Group: Members Posts: 3,033 Joined: 28-January 13 From: Knoxville Tn Member No.: 15,438 Region Association: South East States |
QUOTE(Bills914-4 @ May 1 2019, 06:49 AM) QUOTE(Mblizzard @ May 1 2019, 09:57 AM) Bill, On the Timesert install, I have the RaceWare install tool but I don't think it does anything for ensuring that it is flush. Supposedly no machining is required. I have not tried to install them but it does seem like the lip on top will prevent a flush install. What are the tools you are referring to? It's just a 1/2 ball mill (for making recess c'bore / in slo-mo hand drill ) a bolt (matches threads on studs/ coarse end ) a nut with part of the hex turned down dia. smaller then the timesert shoulder plus a tap for chasing thread (makes easier install ) the tool that comes with the studs & serts is for locking the serts in once you bury them . it spreads the bottom of the serts so they don't back out . one at time you bury it , if it's good then remove put loctite then rebury it ,then use tool that comes with the serts , I hope this helps Bill D. ps let me know if you decide to do yourself, I'll send you the tools Very smart! I don't have the ball mill but is a cheap purchase. I can make up a similar bolt assuming there is nothing special about the nut on the end? But don't have the tap. Not sure what the stock bolts thread size and pattern are but can likely find or use a stock bolt from the back side to clean the threads. Great insight! Will let you know if I cant put together or if it turns out to be more costly than I expect. |
|
|
|
| Mblizzard |
May 13 2019, 08:45 AM
Post
#33
|
|
Advanced Member Group: Members Posts: 3,033 Joined: 28-January 13 From: Knoxville Tn Member No.: 15,438 Region Association: South East States |
Well still waiting on the machine shop.
Making some progress. Got the cam gear on and prepped up my new = UK made (Jonesy) oil sump and temp sender cover. As a quick note, I was unable to get any conductivity due to the coating on the oil temp cover. Cleaned the threads of the coating and sanded a small spot on the inside of the cover near the bolt holes to be sure the sender could reach ground. Mocked up my CFR oil coiler. Really nice stuff from Chris Foley. I was running AN 8 lines on old cooler but going to AN 10 seems like a huge increase in size. The built in thermostat in this is just amazing and Chris even provides a flap to block off air flow to the stock oi cooler location. Seems like this should help head temps as well. l 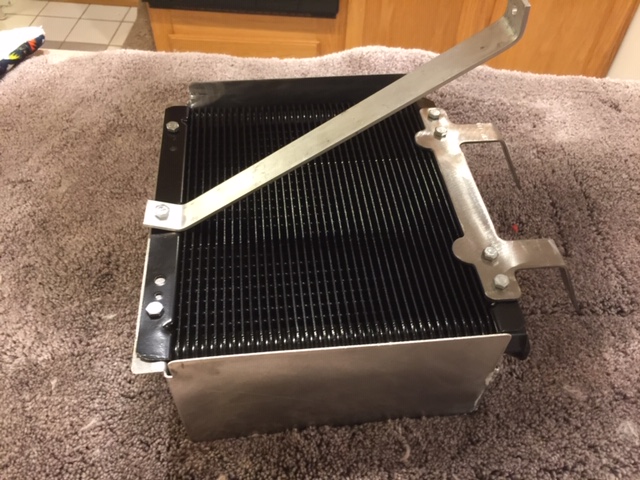  |
|
|
|
| Mblizzard |
May 13 2019, 12:47 PM
Post
#34
|
|
Advanced Member Group: Members Posts: 3,033 Joined: 28-January 13 From: Knoxville Tn Member No.: 15,438 Region Association: South East States |
double
|
|
|
|
| Mblizzard |
Jun 20 2019, 06:57 PM
Post
#35
|
|
Advanced Member Group: Members Posts: 3,033 Joined: 28-January 13 From: Knoxville Tn Member No.: 15,438 Region Association: South East States |
Well finally got my case back from shop.
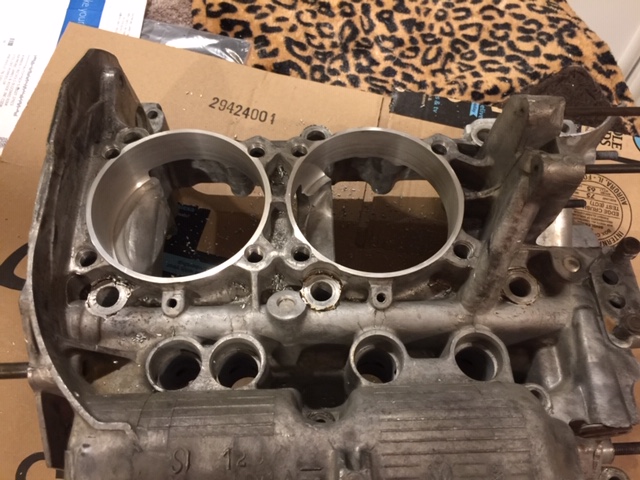 Have some substantial 102 mm holes that Nickies fit into nicely. 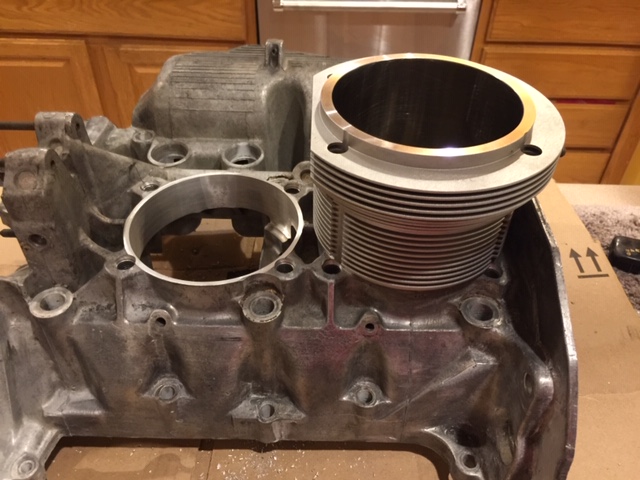 Let the build begin. |
|
|
|
| 914werke |
Jun 20 2019, 08:54 PM
Post
#36
|
|
"I got blisters on me fingers" Group: Members Posts: 10,034 Joined: 22-March 03 From: USofA Member No.: 453 Region Association: Pacific Northwest |
|
|
|
|
| DRPHIL914 |
Jun 21 2019, 07:46 AM
Post
#37
|
|
Dr. Phil Group: Members Posts: 5,764 Joined: 9-December 09 From: Bluffton, SC Member No.: 11,106 Region Association: South East States |
(IMG:style_emoticons/default/piratenanner.gif)
awesome! looking good, you've go less than 3 months to get that thing back in your car and down the road! (IMG:style_emoticons/default/poke.gif) now lets see some assembly!! |
|
|
|
| Betty |
Jun 21 2019, 07:23 PM
Post
#38
|
|
Driver Group: Members Posts: 511 Joined: 10-December 04 From: Hurst, TX Member No.: 3,255 Region Association: South East States |
GO MIKE, GO MIKE, GO MIKE!!! You can DO it!!! (IMG:style_emoticons/default/cheer.gif) (IMG:style_emoticons/default/smash.gif) (IMG:style_emoticons/default/cheer.gif) (IMG:style_emoticons/default/smilie_pokal.gif) (IMG:style_emoticons/default/cheer.gif) (IMG:style_emoticons/default/aktion035.gif) (IMG:style_emoticons/default/cheer.gif) (IMG:style_emoticons/default/driving.gif)
|
|
|
|
| Mark Henry |
Jun 21 2019, 07:43 PM
Post
#39
|
|
that's what I do! Group: Members Posts: 20,065 Joined: 27-December 02 From: Port Hope, Ontario Member No.: 26 Region Association: Canada |
QUOTE(Mblizzard @ Jun 20 2019, 08:57 PM) Well finally got my case back from shop. Have some substantial 102 mm holes that Nickies fit into nicely. Let the build begin. Bigger...the 102 uses the standard 103mm cylinder size bore. I didn't see the need for timeserts/casesavers but with the ARP headstuds you would be wise to run a thread reforming tap through them. |
|
|
|
| Mblizzard |
Jun 24 2019, 08:08 AM
Post
#40
|
|
Advanced Member Group: Members Posts: 3,033 Joined: 28-January 13 From: Knoxville Tn Member No.: 15,438 Region Association: South East States |
QUOTE(Mark Henry @ Jun 21 2019, 05:43 PM) QUOTE(Mblizzard @ Jun 20 2019, 08:57 PM) Well finally got my case back from shop. Have some substantial 102 mm holes that Nickies fit into nicely. Let the build begin. Bigger...the 102 uses the standard 103mm cylinder size bore. I didn't see the need for timeserts/casesavers but with the ARP headstuds you would be wise to run a thread reforming tap through them. Yes I was just test fitting them. Followed Bills direction on the method for getting the Time Certs to sit flush. Apparently the ARP bolts are smaller than stock and use an insert. Quick question. Is there a need for a gasket between the case and the cylinder and where to get them? Len is going to cut my heads to get the correct compression ratio. Was going to check the deck height but just thought I might need a gasket. |
|
|
|
|
1 User(s) are reading this topic (1 Guests and 0 Anonymous Users)
0 Members:

|
Lo-Fi Version | Time is now: 2nd May 2024 - 11:10 PM |
Invision Power Board
v9.1.4 © 2024 IPS, Inc.