|
|
|
Porsche, and the Porsche crest are registered trademarks of Dr. Ing. h.c. F. Porsche AG.
This site is not affiliated with Porsche in any way. Its only purpose is to provide an online forum for car enthusiasts. All other trademarks are property of their respective owners. |
|
|

  |

| nihil44 |
 Aug 21 2019, 12:39 AM Aug 21 2019, 12:39 AM
Post
#1
|
|
Member  Group: Members Posts: 157 Joined: 28-January 12 From: Brisbane, Australia Member No.: 14,058 Region Association: None |
The wet soda blaster took to the door plate despite my efforts to mask it off and requesting him to avoid the area.
I see 914rubber sells a replacement kit of plate and pins. As I understand it, the pins are a type of spiral nail. What is the recognised for removal of these and also re installation? Thanks in advance <a href="https://s1258.photobucket.com/user/nihil44/media/IMGP3172_zpskajmxihe.jpg.html" target="_blank"><img src="https://i1258.photobucket.com/albums/ii532/nihil44/IMGP3172_zpskajmxihe.jpg" border="0" alt=" photo IMGP3172_zpskajmxihe.jpg"/></a> |
   |

 
|
| nihil44 |
Aug 21 2019, 12:56 AM
Post
#2
|
|
Member Group: Members Posts: 157 Joined: 28-January 12 From: Brisbane, Australia Member No.: 14,058 Region Association: None |
Sorry. Messed up the transfer from Photobucket. Hope this works
(IMG:http://www.914world.com/bbs2/uploads_offsite/i1258.photobucket.com-14058-1566370609.1.jpg) |
|
|
|
| defianty |
Aug 21 2019, 01:34 AM
Post
#3
|
|
Senior Member Group: Members Posts: 659 Joined: 9-August 06 From: Essex, UK Member No.: 6,621 Region Association: None |
I managed to push the pins out from the access hole behind the speaker with a flatted screwdriver. Once I'd pushed them out a little I then pulled them out with a pair of pliers.
|
|
|
|
| Specracer |
Aug 21 2019, 03:49 AM
Post
#4
|
|
Member Group: Members Posts: 100 Joined: 27-March 17 From: SE Mass Member No.: 20,970 Region Association: None |
+1, I used a small screwdriver to get it started, plastic body tools to edge each "nail" out further, pliers to finish it if needed. I was able to reuse the fasteners
|
|
|
|
| defianty |
Aug 21 2019, 04:14 AM
Post
#5
|
|
Senior Member Group: Members Posts: 659 Joined: 9-August 06 From: Essex, UK Member No.: 6,621 Region Association: None |
QUOTE(Specracer @ Aug 21 2019, 10:49 AM)  +1, I used a small screwdriver to get it started, plastic body tools to edge each "nail" out further, pliers to finish it if needed. I was able to reuse the fasteners Yes, I reused mine too. Theyu went in just as tightly as they were originally. |
|
|
|
| rgalla9146 |
Aug 21 2019, 05:52 AM
Post
#6
|
|
Advanced Member Group: Members Posts: 4,545 Joined: 23-November 05 From: Paramus NJ Member No.: 5,176 Region Association: None |
Push or lever the pins out from the back.
Use a razor to lift the plate. Don't use a plier on the pins. Re-use the pins Attached image(s) 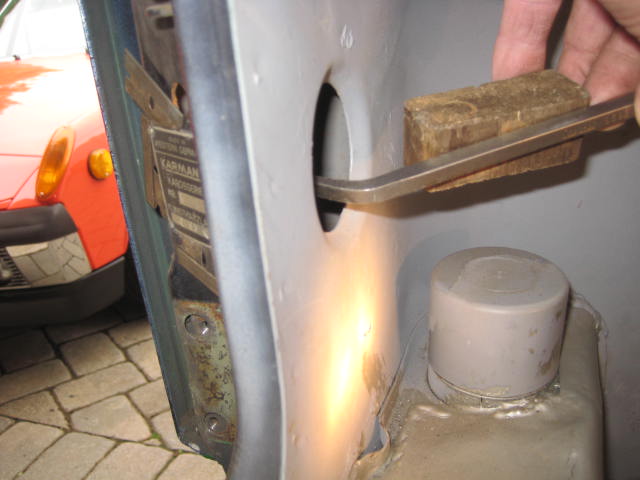 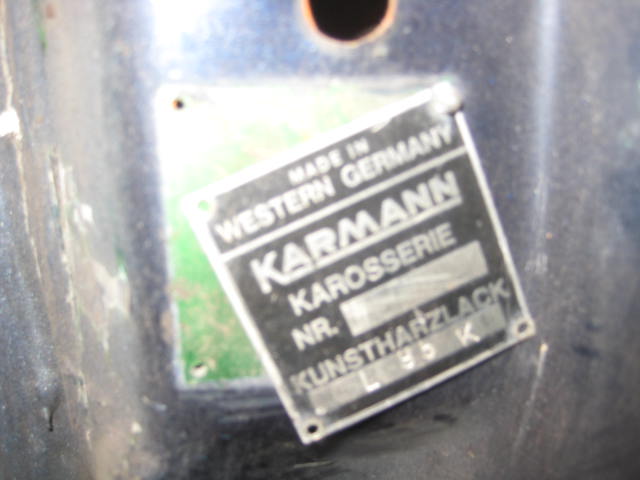
|
|
|
|
| dr914@autoatlanta.com |
Aug 21 2019, 07:54 AM
Post
#7
|
|
914 Guru Group: Members Posts: 7,832 Joined: 3-January 07 From: atlanta georgia Member No.: 7,418 Region Association: None |
we have the new pins and the badges if you cannot reuse yours, we use a small hammer and dolly to flare the new pins
|
|
|
|
| iankarr |
Aug 21 2019, 09:40 AM
Post
#8
|
|
The wrencher formerly known as Cuddy_K Group: Members Posts: 2,472 Joined: 22-May 15 From: Heber City, UT Member No.: 18,749 Region Association: Intermountain Region |
QUOTE(rgalla9146 @ Aug 21 2019, 07:52 AM) Push or lever the pins out from the back. Use a razor to lift the plate. Don't use a plier on the pins. Re-use the pins Palma green metallic is a great color... (IMG:style_emoticons/default/wink.gif) |
|
|
|
| rgalla9146 |
Aug 21 2019, 12:38 PM
Post
#9
|
|
Advanced Member Group: Members Posts: 4,545 Joined: 23-November 05 From: Paramus NJ Member No.: 5,176 Region Association: None |
QUOTE(cuddy_k @ Aug 21 2019, 11:40 AM) QUOTE(rgalla9146 @ Aug 21 2019, 07:52 AM) Push or lever the pins out from the back. Use a razor to lift the plate. Don't use a plier on the pins. Re-use the pins Palma green metallic is a great color... (IMG:style_emoticons/default/wink.gif) Light Ivory is a far greater more period correct color. (IMG:style_emoticons/default/beerchug.gif) I should get a Karmann tag and stamp it to indicate the current fabulous shade. Hey Ian.... looks like rain for tonight. |
|
|
|
| nihil44 |
Aug 21 2019, 01:48 PM
Post
#10
|
|
Member Group: Members Posts: 157 Joined: 28-January 12 From: Brisbane, Australia Member No.: 14,058 Region Association: None |
Thanks for all the replies.
Your help is much appreciated David |
|
|
|
| Specracer |
Aug 21 2019, 02:14 PM
Post
#11
|
|
Member Group: Members Posts: 100 Joined: 27-March 17 From: SE Mass Member No.: 20,970 Region Association: None |
I should have said, the pliers are needle nose (small) and you softly grab the main part of the nail (once nail is most of the way out), with out pressure, and then have the outward force on the back side of the nail head.
QUOTE(rgalla9146 @ Aug 21 2019, 07:52 AM) Don't use a plier on the pins. |
|
|
|
| 914werke |
Aug 21 2019, 05:23 PM
Post
#12
|
|
"I got blisters on me fingers" Group: Members Posts: 10,037 Joined: 22-March 03 From: USofA Member No.: 453 Region Association: Pacific Northwest |
The fastener is actually a screw so a twisting force will help when installing or removing
|
|
|
|
|
1 User(s) are reading this topic (1 Guests and 0 Anonymous Users)
0 Members:

|
Lo-Fi Version | Time is now: 4th May 2024 - 09:57 AM |
Invision Power Board
v9.1.4 © 2024 IPS, Inc.