|
|
|
Porsche, and the Porsche crest are registered trademarks of Dr. Ing. h.c. F. Porsche AG.
This site is not affiliated with Porsche in any way. Its only purpose is to provide an online forum for car enthusiasts. All other trademarks are property of their respective owners. |
|
|


| Sway Bar |
 Dec 18 2019, 05:50 PM Dec 18 2019, 05:50 PM
Post
#1
|
|
Member  Group: Members Posts: 88 Joined: 17-December 19 From: Okanagan Valley, Great White North Member No.: 23,743 Region Association: None |
Greetings...long time lurker first time poster.
After staying in the shadows for a little while watching and learning I figure I'd finally take the plunge and say hello and show progress of my latest undertaking. I've spend the last many years over on the 'Bird' in regards to my old 911 and other projects but it was time to try something slightly different and get back into a 914. I say get back since I had one as a young university man and was my version of a low brow Risky Business (IMG:style_emoticons/default/sunglasses.gif) I wasn't necessarily looking for a 914 but a few things fell into place that made me finally take the plunge 1) There was what seemed a really decent roller nearby 2) I had a friend of friend offer me the spoils of a left over failed conversion attempt 3) I have the 2.4L from my 911 sitting in a box doing me no good And finally I'm also and avid DIYer. I'm no pro by any means. I drive a desk for work, but I grew up always trying to build and do things on our own so it does come a little naturally and with the complete satisfaction of my 911 journey why not another. I'm also in Canada so when winter hits I need to figure out something else to do besides watch hockey and drink beer (not that there is anything wrong with that) (IMG:style_emoticons/default/lol-2.gif) Anyway, this is a great forum, love the resources, banter, etc, and figured I'd share another car/build. So, of course we all love pictures...this is what I started with. Kinda of a barn/garage find. 1972, no motor/trans, rough interior, some sort of re-spray, prior right fender accident. Key point was that besides the hell hole I couldn't find too many problem areas at first glance. So, comment away, constructive criticism is always welcome and I'm sure to reach out with a bunch of questions since I haven't figured out a few items yet for the conversion process. Cheers, Marlon 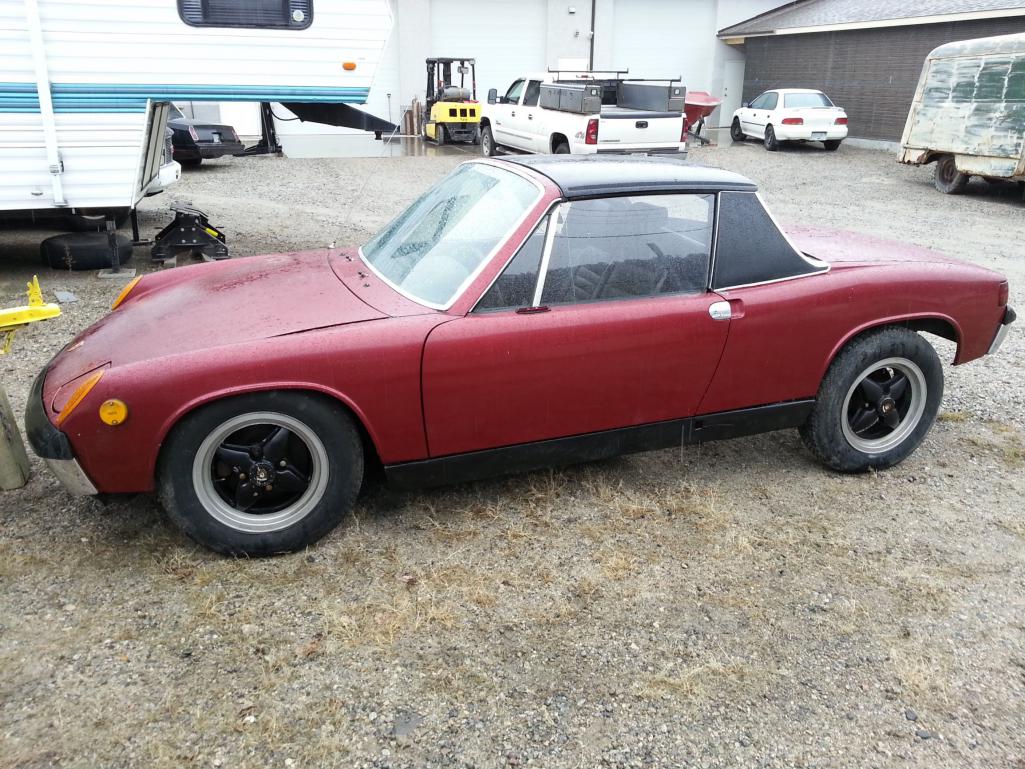 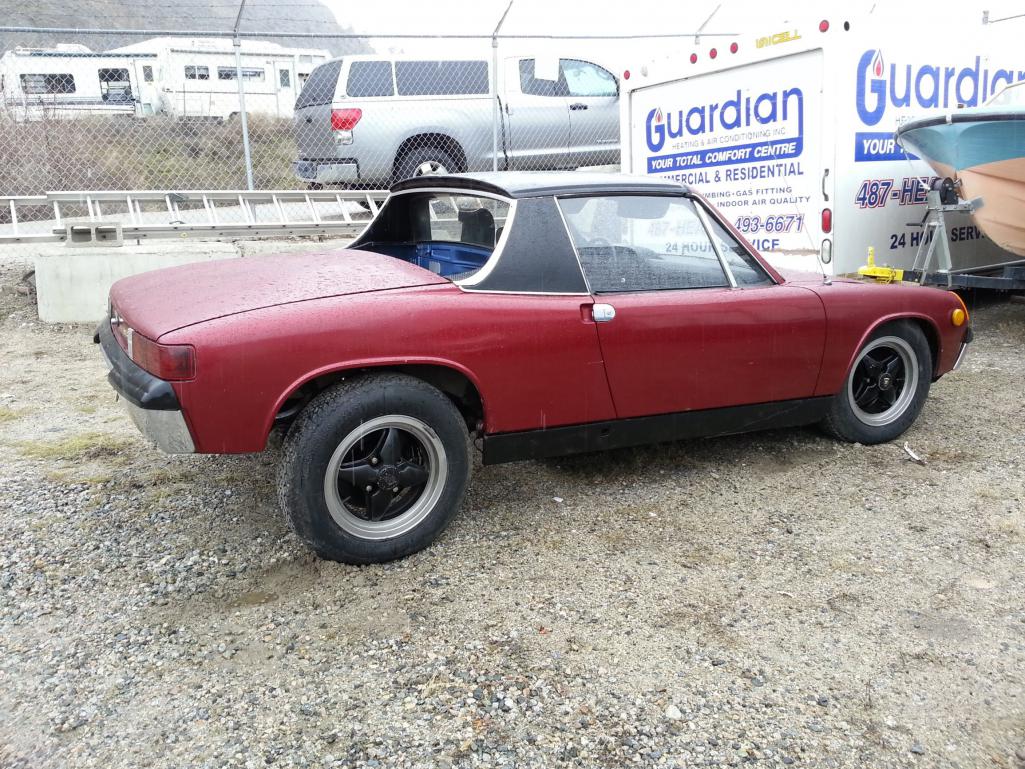 |
   |

 
|
  |
Replies(60 - 79)
| Sway Bar |
Jan 27 2020, 04:28 PM
Post
#61
|
|
Member Group: Members Posts: 88 Joined: 17-December 19 From: Okanagan Valley, Great White North Member No.: 23,743 Region Association: None |
QUOTE(mbseto @ Jan 27 2020, 01:52 PM)  Was going to say welcome to 914world, but it looks like you'll be done here shortly! Haa, well not that easy...this is all the big stuff and looks the most impressive. I started a list of all the little items I still need, especially for the conversion portion that I've never done and it's a little daunting. I figure a month or two and I'll be done the 'easy' stuff (it's all relative) then I'll be asking the real questions. |
|
|
|
| mbseto |
Jan 28 2020, 01:42 PM
Post
#62
|
|
Senior Member Group: Members Posts: 1,253 Joined: 6-August 14 From: Cincy Member No.: 17,743 Region Association: North East States |
It's looking great!
|
|
|
|
| Mark Henry |
Jan 28 2020, 03:12 PM
Post
#63
|
|
that's what I do! Group: Members Posts: 20,065 Joined: 27-December 02 From: Port Hope, Ontario Member No.: 26 Region Association: Canada |
Sway bar I invite you to join the FB Porsche 914 Canada group. Quite a few BC and Alberta members.
https://www.facebook.com/groups/29383151434.../?ref=bookmarks |
|
|
|
| Sway Bar |
Jan 31 2020, 08:56 PM
Post
#64
|
|
Member Group: Members Posts: 88 Joined: 17-December 19 From: Okanagan Valley, Great White North Member No.: 23,743 Region Association: None |
QUOTE(Mark Henry @ Jan 28 2020, 01:12 PM) Sway bar I invite you to join the FB Porsche 914 Canada group. Quite a few BC and Alberta members. https://www.facebook.com/groups/29383151434.../?ref=bookmarks Thanks for the invite...maybe finally a reason to join FB? (IMG:style_emoticons/default/unsure.gif) |
|
|
|
| Sway Bar |
Jan 31 2020, 09:08 PM
Post
#65
|
|
Member Group: Members Posts: 88 Joined: 17-December 19 From: Okanagan Valley, Great White North Member No.: 23,743 Region Association: None |
Started some of the interior fit and finish. Dash was next up. Decided to keep the basket weave but wanted a radio delete so used a good portion from the existing door cards to refinish the front; new vinyl on top.
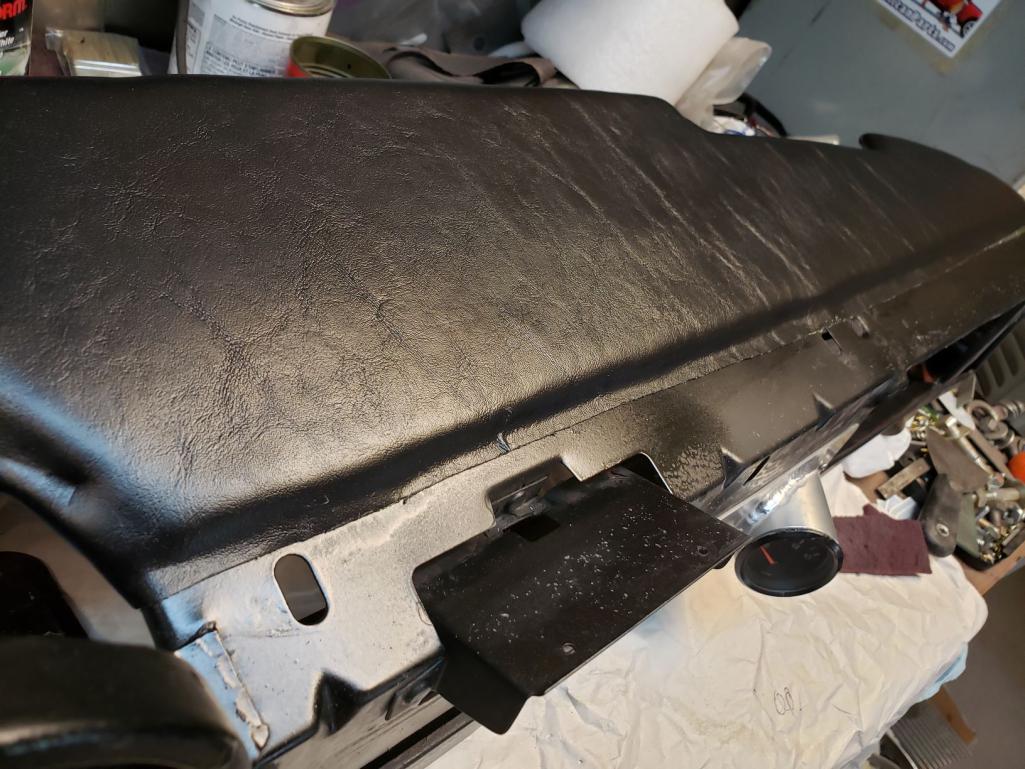  I had a friend give me what I believe is a 914-6 fuel tank gauge and I thought that would look good in the GT racing position. Not quite sure if I am happy with just the simple direct on the dash install. I may have to experiment with it partially behind the weave with only the gauge stock sticking through.   |
|
|
|
| Sway Bar |
Feb 10 2020, 12:57 PM
Post
#66
|
|
Member Group: Members Posts: 88 Joined: 17-December 19 From: Okanagan Valley, Great White North Member No.: 23,743 Region Association: None |
Winter came back with a vengeance so kinda cold in the garage to get much done; hit -29C/-20F. Brrrrr.
Could have been worse like the east coast of Canada which got 12-15 foot snow drifts. Did manage to do a few simple things.   Buttoned up the oil cooler and installed front lines.  |
|
|
|
| Sway Bar |
Apr 17 2020, 11:48 AM
Post
#67
|
|
Member Group: Members Posts: 88 Joined: 17-December 19 From: Okanagan Valley, Great White North Member No.: 23,743 Region Association: None |
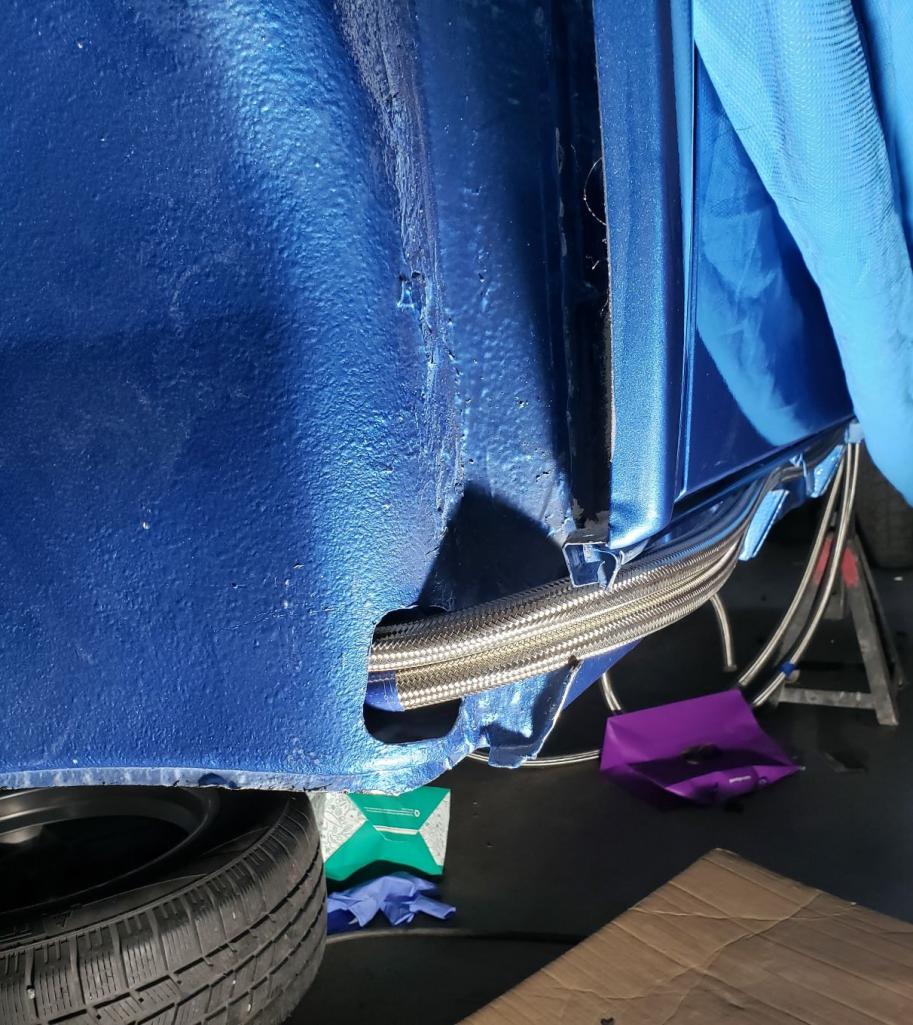
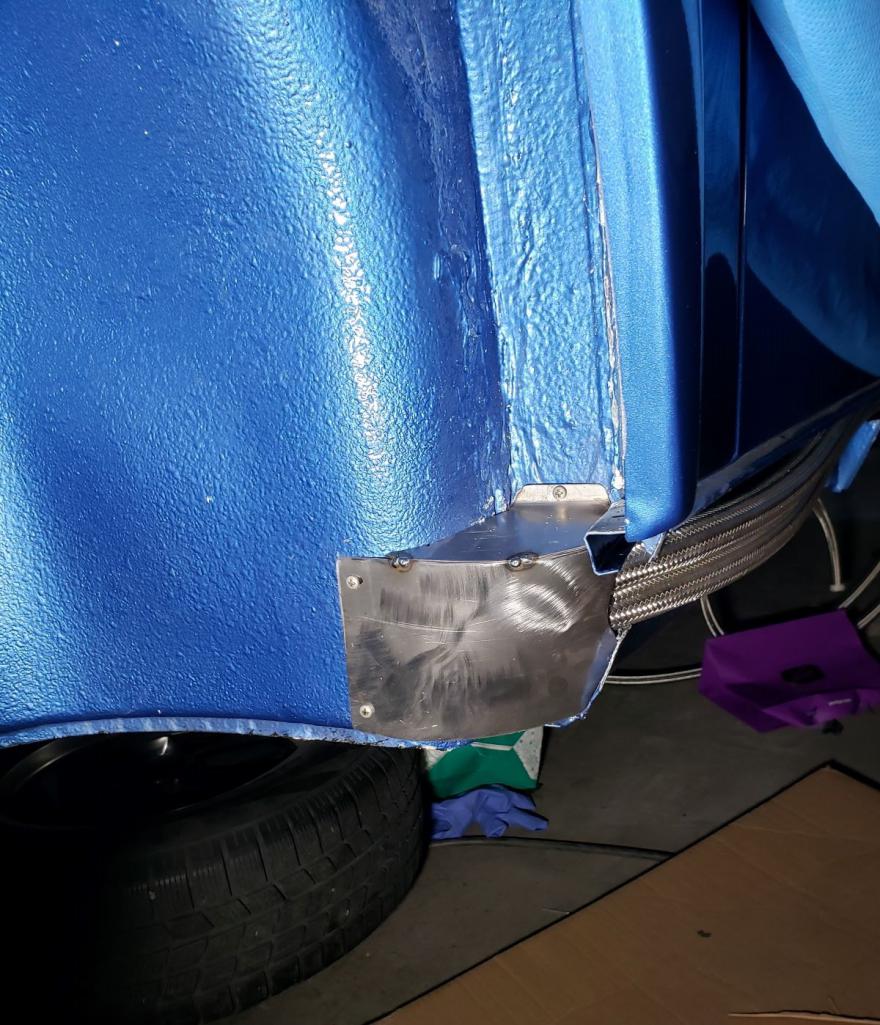
Been a while since I added at least some sort progress pic if any are interested. Life does sometime get in the way of these projects and they do become secondary, especially in these new unique times, but I still managed to get time in here and there.
Still making up things on the fly...decided to go with just the braided oil lines along the rocker for the oil cooler. I gather if eventually I wanted steel lines I could retro fit but this seems to do the trick. One thing this project has done is made my welding and fabrication skill improve. Needed some sort of covers and figure I could make something up. Rather pleased on how they turned out. 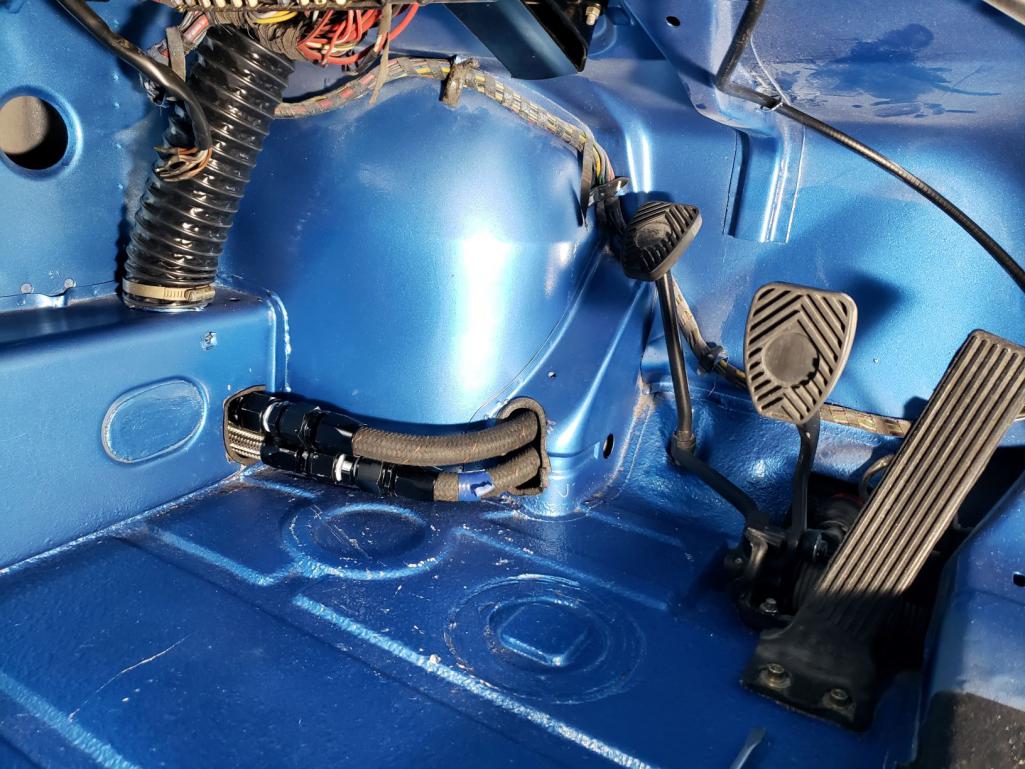 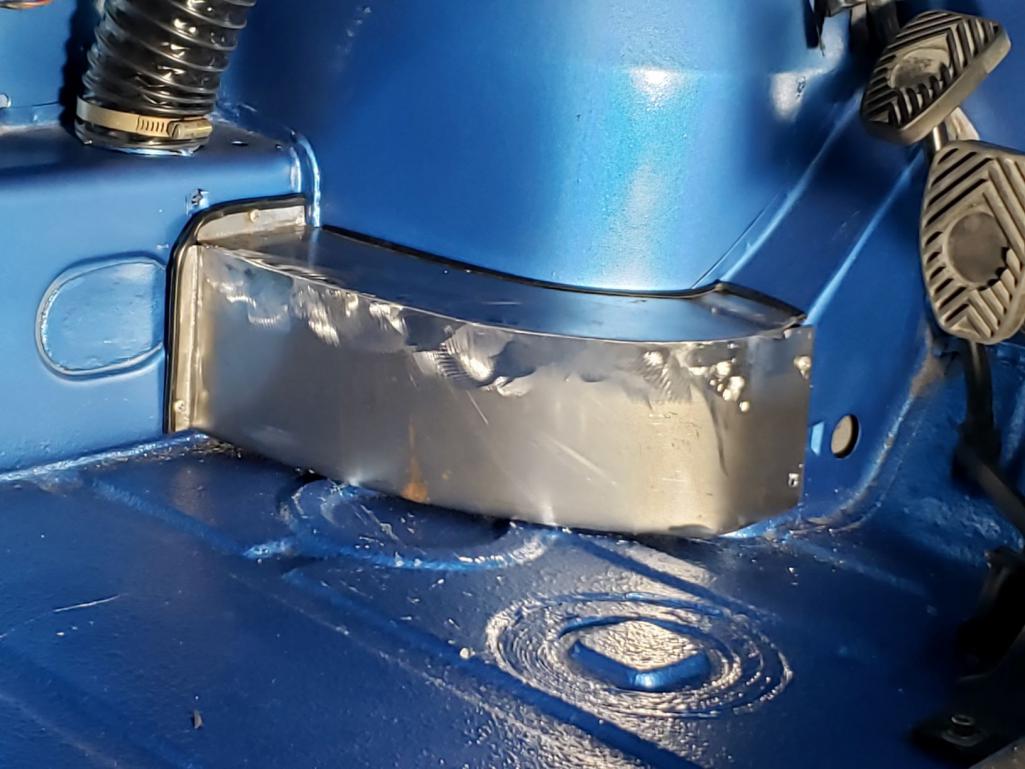  |
|
|
|
| Sway Bar |
Apr 17 2020, 11:55 AM
Post
#68
|
|
Member Group: Members Posts: 88 Joined: 17-December 19 From: Okanagan Valley, Great White North Member No.: 23,743 Region Association: None |
I think some sort of fiber glass cover may have been on the real GT's. Didn't really want any weather, rocks, or small critters flying into the inner rockers so this cover turned out pretty good. Eventually when I mix up some paint for touch ups I'll give this a once over.
   Attached thumbnail(s)  
|
|
|
|
| ndfrigi |
Apr 17 2020, 12:06 PM
Post
#69
|
|
Advanced Member Group: Members Posts: 2,928 Joined: 21-August 11 From: Orange County Member No.: 13,474 Region Association: Southern California |
wow less than 4 mos. and it already looks amazing! Surely by summer and if this crisis is done, that beautiful car will be nice to drive! Congratulations!
|
|
|
|
| Sway Bar |
Apr 17 2020, 12:16 PM
Post
#70
|
|
Member Group: Members Posts: 88 Joined: 17-December 19 From: Okanagan Valley, Great White North Member No.: 23,743 Region Association: None |
Used a couple of mounts to keep the lines in order and so they won't sag too much since they are not rigid lines. Now I just have to sort out what I need to do at the rear end. I probably just end up using a mocal thermostat since i have one on hand.
 In the mean time this cocoon came and eventually turned into this butterfly (sorry for the cheese) I knew his reputation proceeded him but Ben's craftsmanship is top notch. Such a great piece to hide away in the fender (IMG:style_emoticons/default/biggrin.gif)  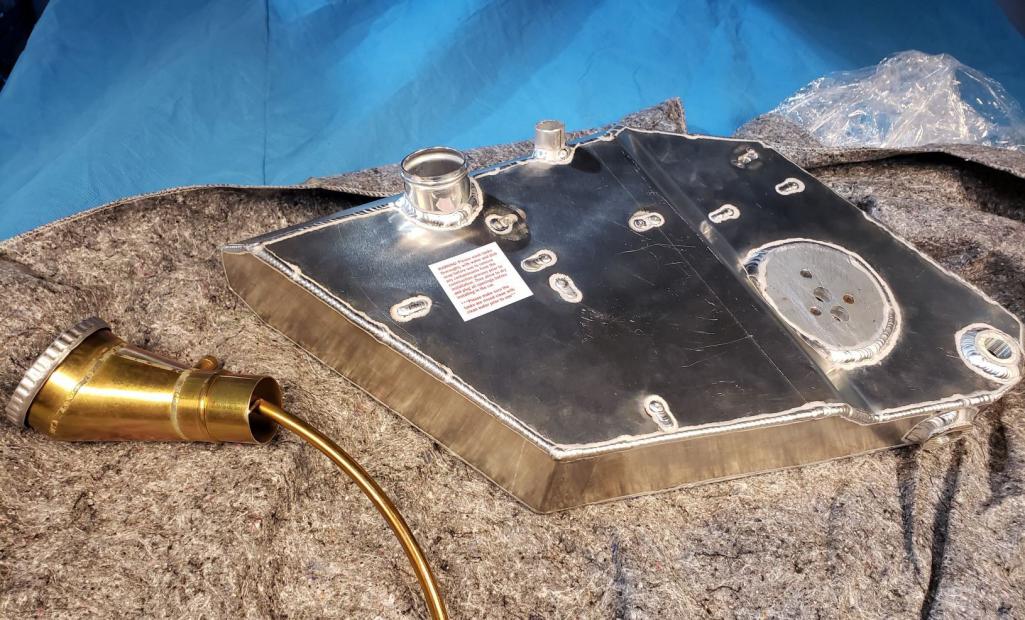 |
|
|
|
| Cairo94507 |
Apr 17 2020, 12:29 PM
Post
#71
|
|
Michael Group: Members Posts: 9,762 Joined: 1-November 08 From: Auburn, CA Member No.: 9,712 Region Association: Northern California |
Great progress and work. (IMG:style_emoticons/default/beerchug.gif)
|
 |
|
| Sway Bar |
Apr 17 2020, 12:58 PM
Post
#72
|
|
Member Group: Members Posts: 88 Joined: 17-December 19 From: Okanagan Valley, Great White North Member No.: 23,743 Region Association: None |
So, I drilled a big hole in the hood and need to put in the filler. The kits are great but man at my exchange rate it's a lot of cheddar to spend for just a fuel filler. I did my own home built filler and dog bowl ( I actually used a real dog bowl) on my 911 so I figure I could do the same on the teener. It's actually a lot simpler. I made a bolt on flange to bolt through the existing splash guard and then onto the tank. So, just an additional gasket is required in between.
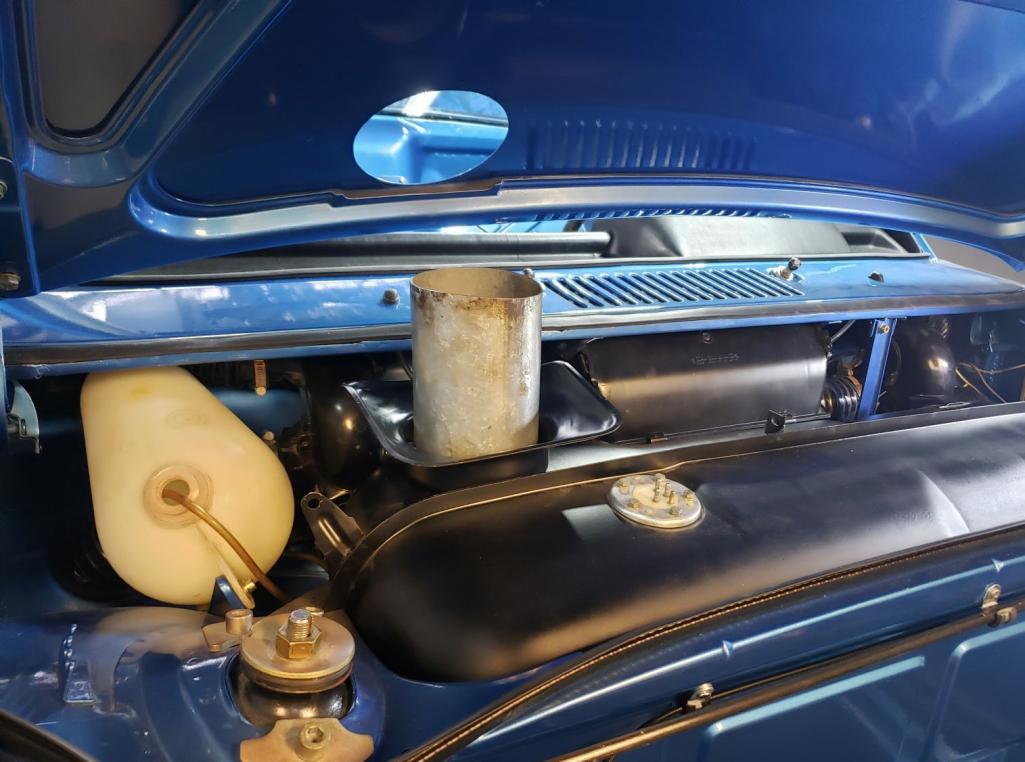 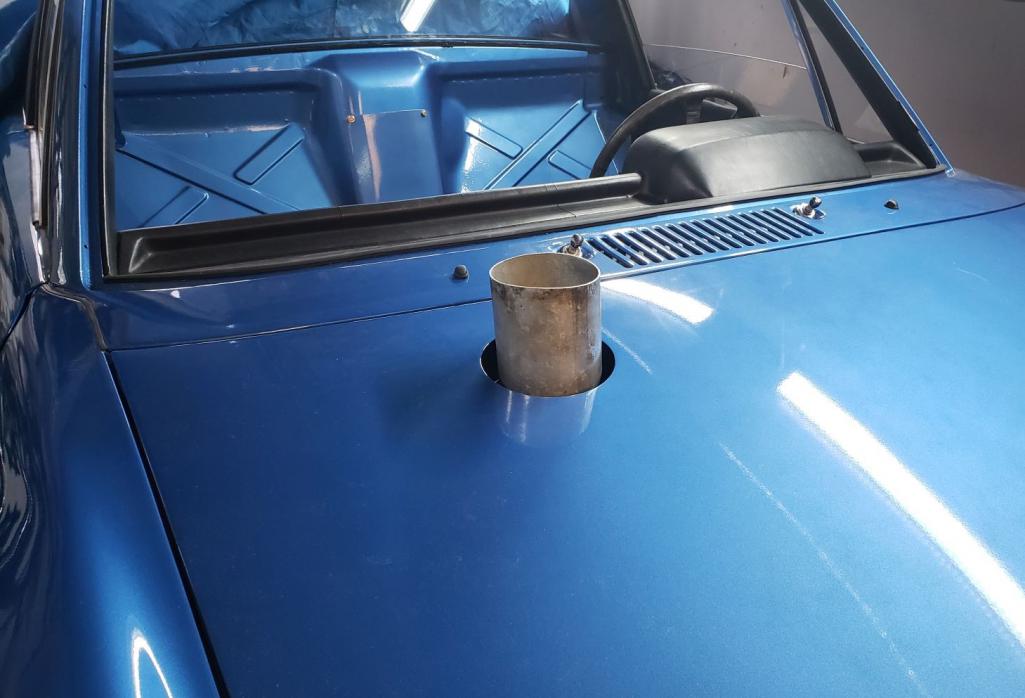 The filler tube is left over from my last project and happens to be underground conduit that I found at a scrap yard and everything lines up great. I did buy the fuel cap and bung since those are the nice and shinny pieces. The bung needed to be welded on with a slight degree change in order to have the cap line up all properly and centered. 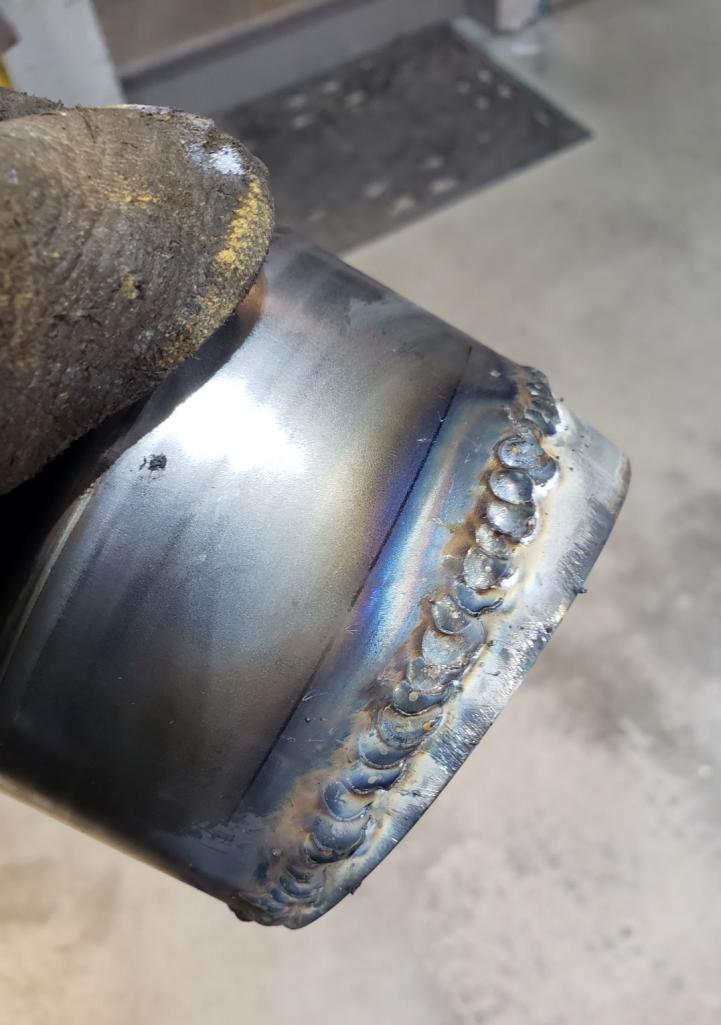 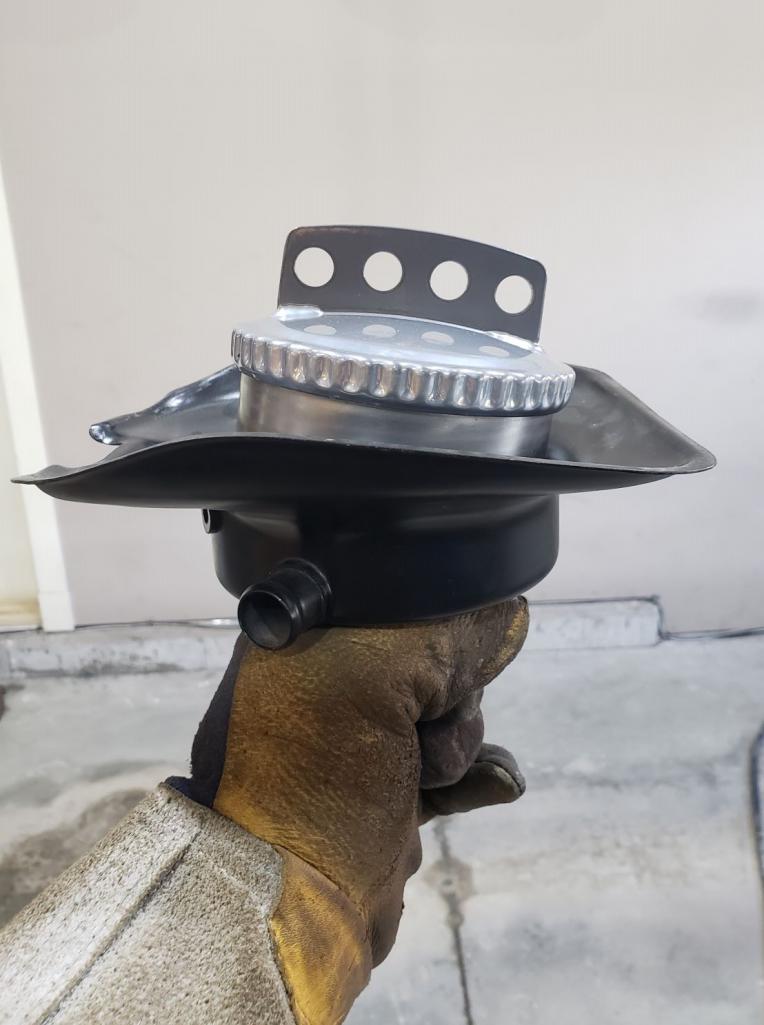 Welds are no where as nice as Ben's work or many others but does the job and I only found one pin hole once I was done. Finally, bolted in and the rubber flange again is left over rubber from the previous build and happens to be some side or rear window rubber from a wrecked Ford Explorer. It's large enough to actually cushion and seal against the hood using the existing spill guard and has the right 'pinch seam?' to go around. To some it may be a bit ghetto, but I think it looks the part, does the job, and when the hood is down I think it looks good.  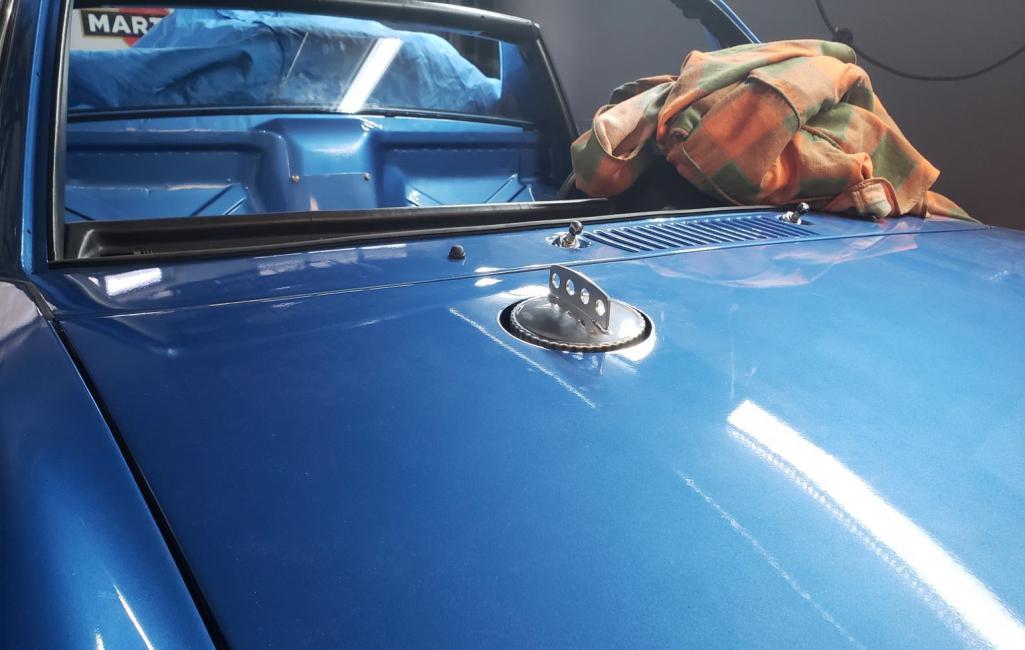 |
|
|
|
| Sway Bar |
Apr 22 2020, 02:47 PM
Post
#73
|
|
Member Group: Members Posts: 88 Joined: 17-December 19 From: Okanagan Valley, Great White North Member No.: 23,743 Region Association: None |
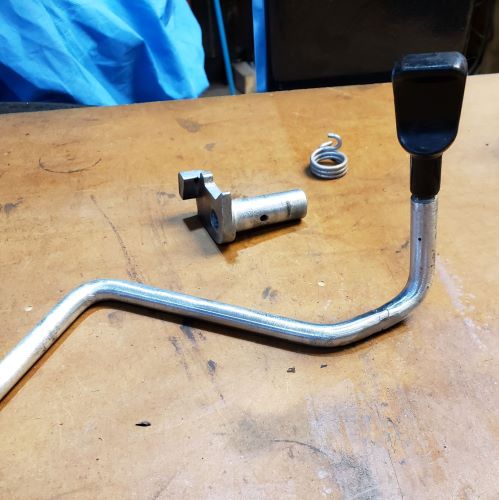
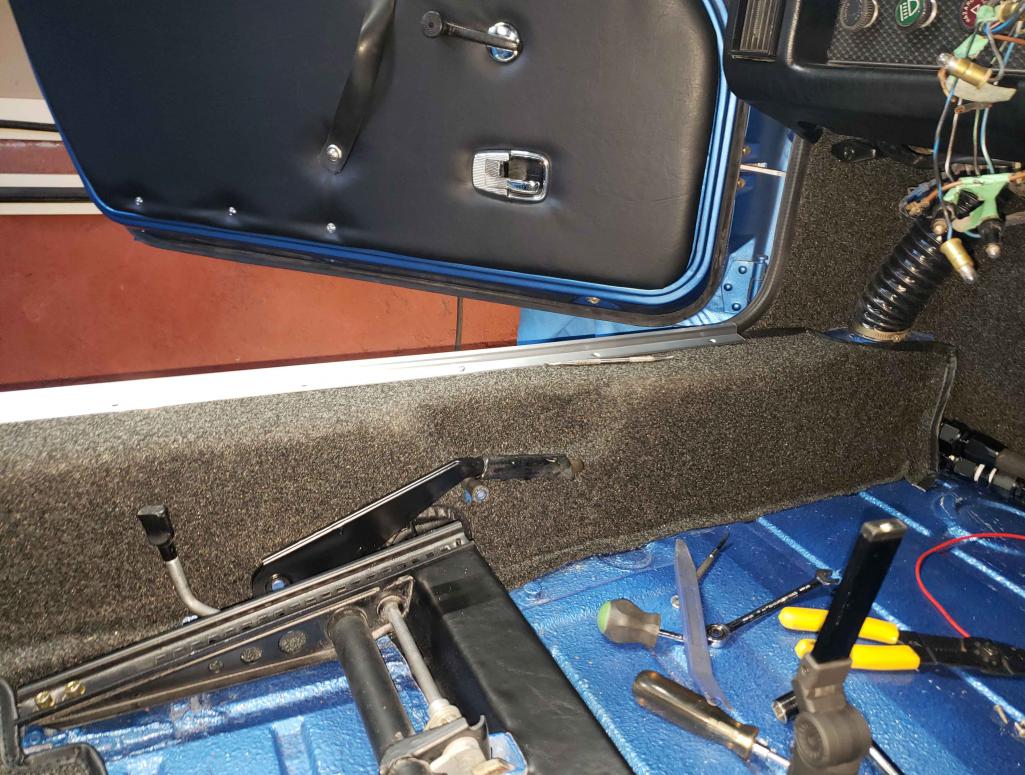
Got a few other little items out of the way. Since this was a roller with a few loose parts, I found out I had 2 driver side seats mounts/tilts. I couldn't find one locally so decided to save a few bucks and kill 2 hours and converted one to a passenger side.
  Continuing the saving money idea I made my own version of simple RS style door cards...made friends with a little lady at the fabric store and she used her 'membership' for a big discount on the vinyl. All in, the door cards cost about $45.00 in materials. That's like $12.95 USD (IMG:style_emoticons/default/lol-2.gif) 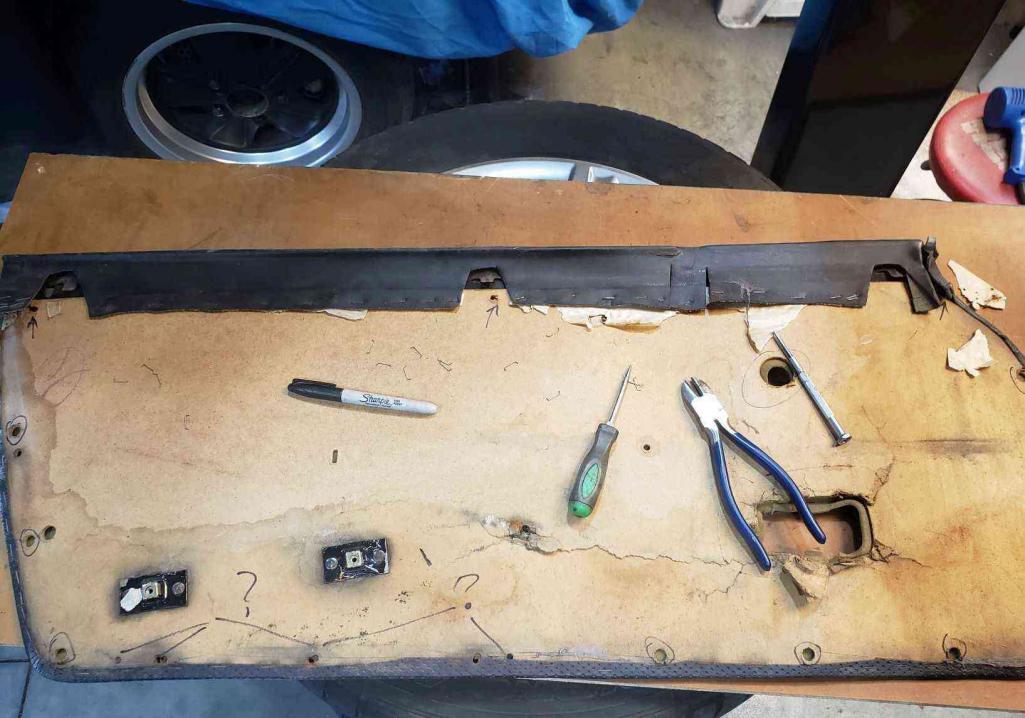 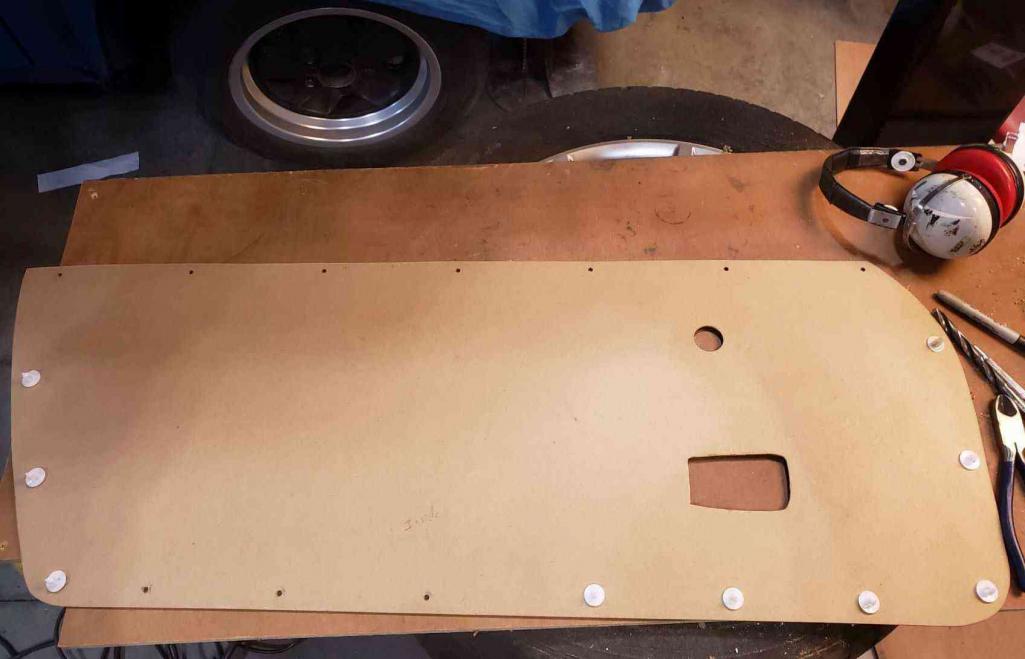 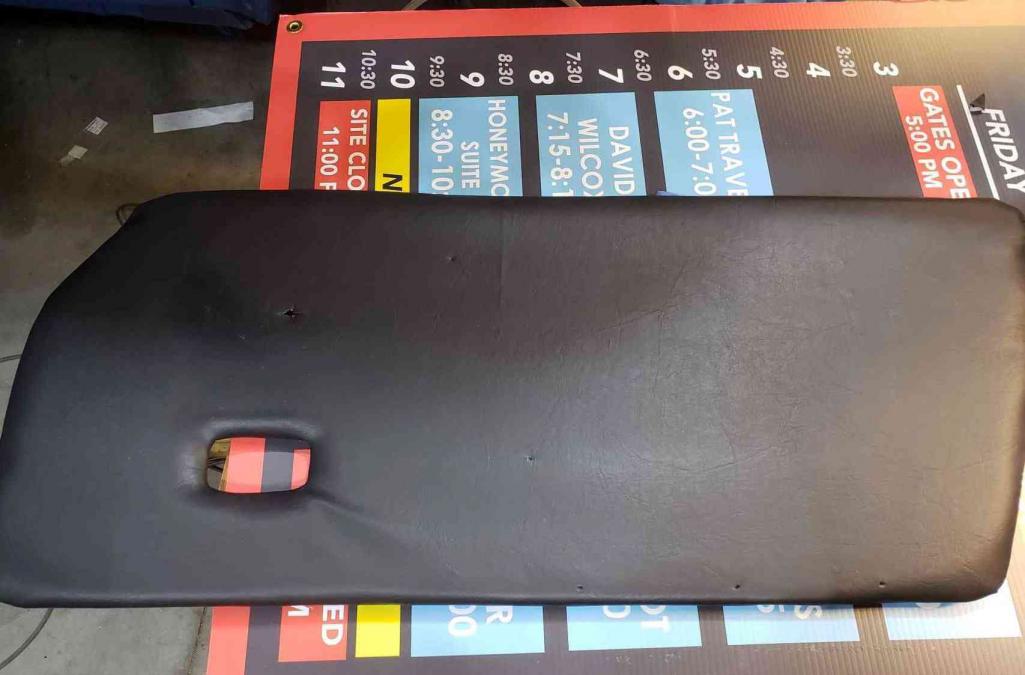 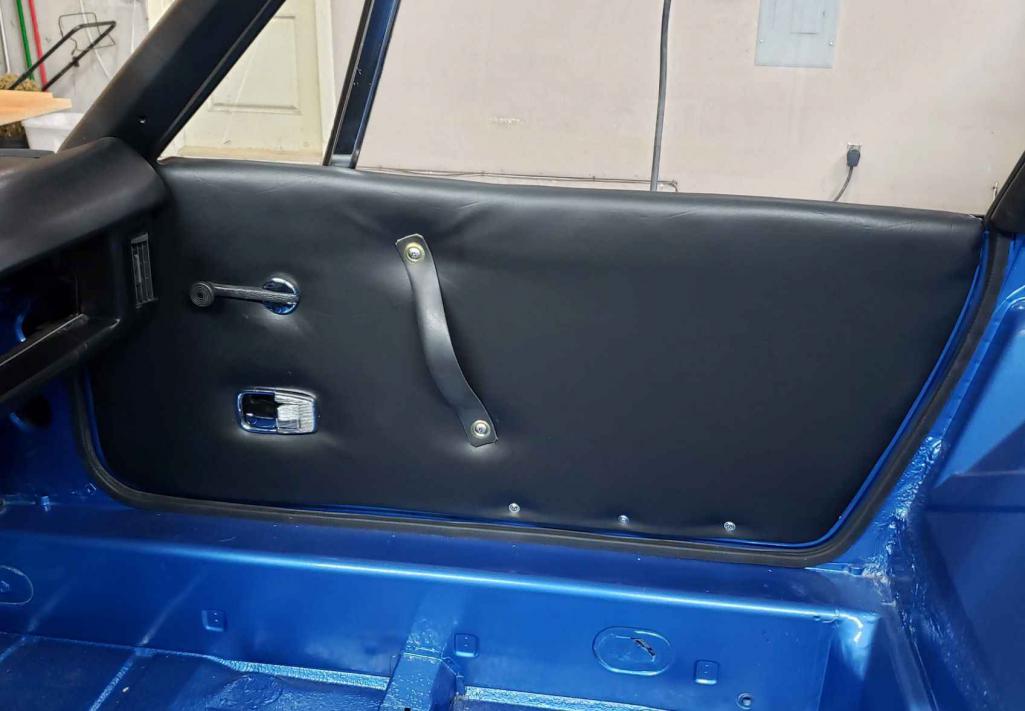 Attached thumbnail(s) 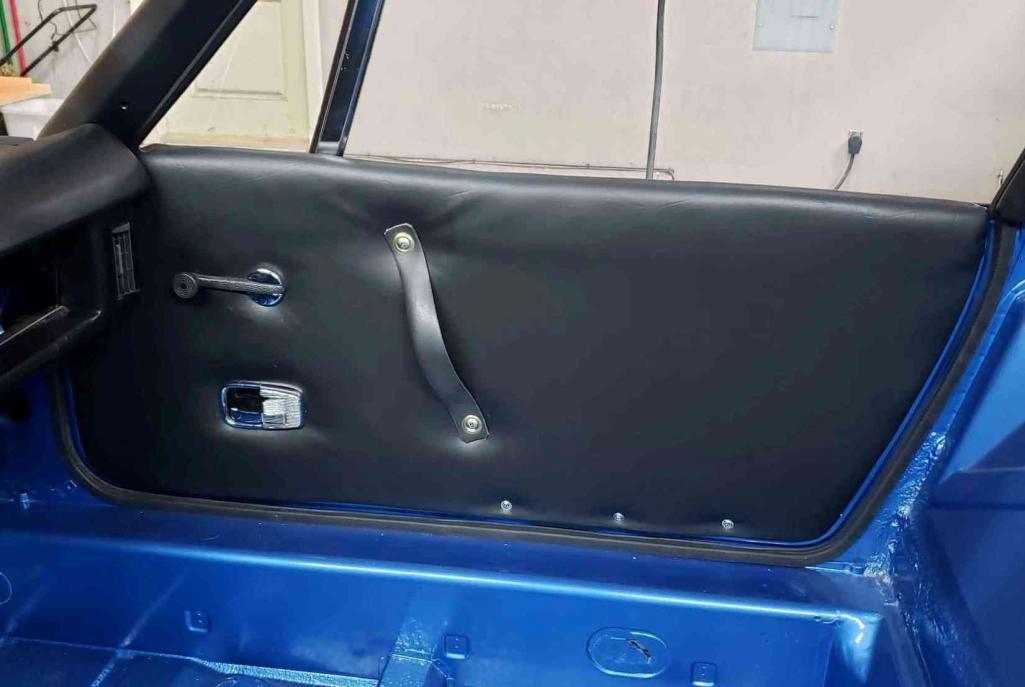
|
|
|
|
| Sway Bar |
Apr 22 2020, 03:19 PM
Post
#74
|
|
Member Group: Members Posts: 88 Joined: 17-December 19 From: Okanagan Valley, Great White North Member No.: 23,743 Region Association: None |
Decided to do something that shows big quick results to keep the steam going. I had ordered the lightweight carpet kit and since hopefully I'm done making too much dust I wanted to see some instant results.
 Carpeted the oil line cover I made and then made a custom cut foot board to fit accordingly. 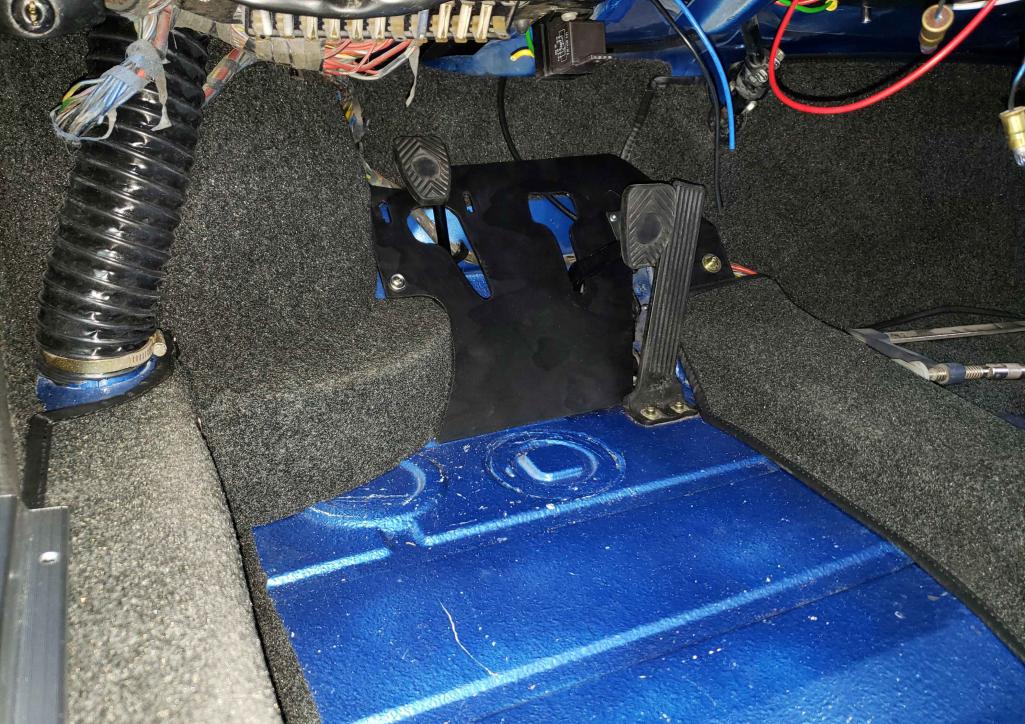 I over carpeted a few areas since I'm not putting in speakers or the covers/grills. Trying to leave a little of that bare racer feeling. 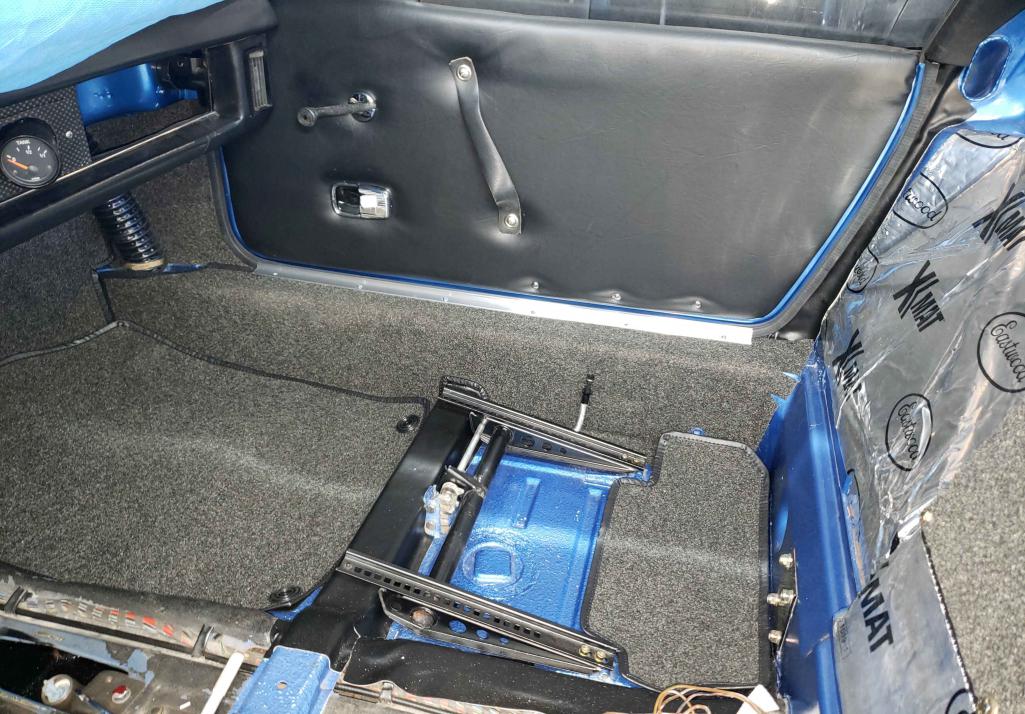  List of to do's is getting shorter but still oh so long. |
|
|
|
| Big Len |
Apr 22 2020, 05:49 PM
Post
#75
|
|
Senior Member Group: Members Posts: 1,747 Joined: 16-July 13 From: Edgewood, New Mexico Member No.: 16,126 Region Association: Southwest Region |
Your list of "to do's" looks very well done.
|
|
|
|
| Sway Bar |
Apr 24 2020, 12:08 PM
Post
#76
|
|
Member Group: Members Posts: 88 Joined: 17-December 19 From: Okanagan Valley, Great White North Member No.: 23,743 Region Association: None |
QUOTE(Big Len @ Apr 22 2020, 04:49 PM) Your list of "to do's" looks very well done. Appreciate it...so far so good. Now I'm getting into the final third of it. My helper decided to give me a hand with what's been under my work bench for the last 4 years. 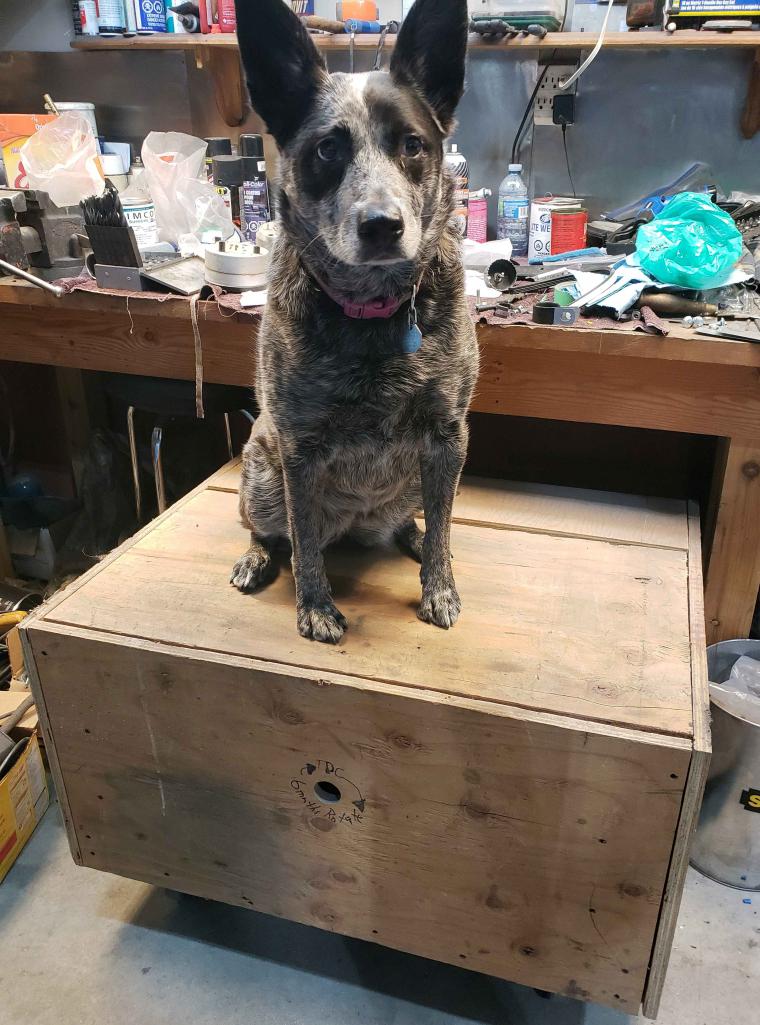 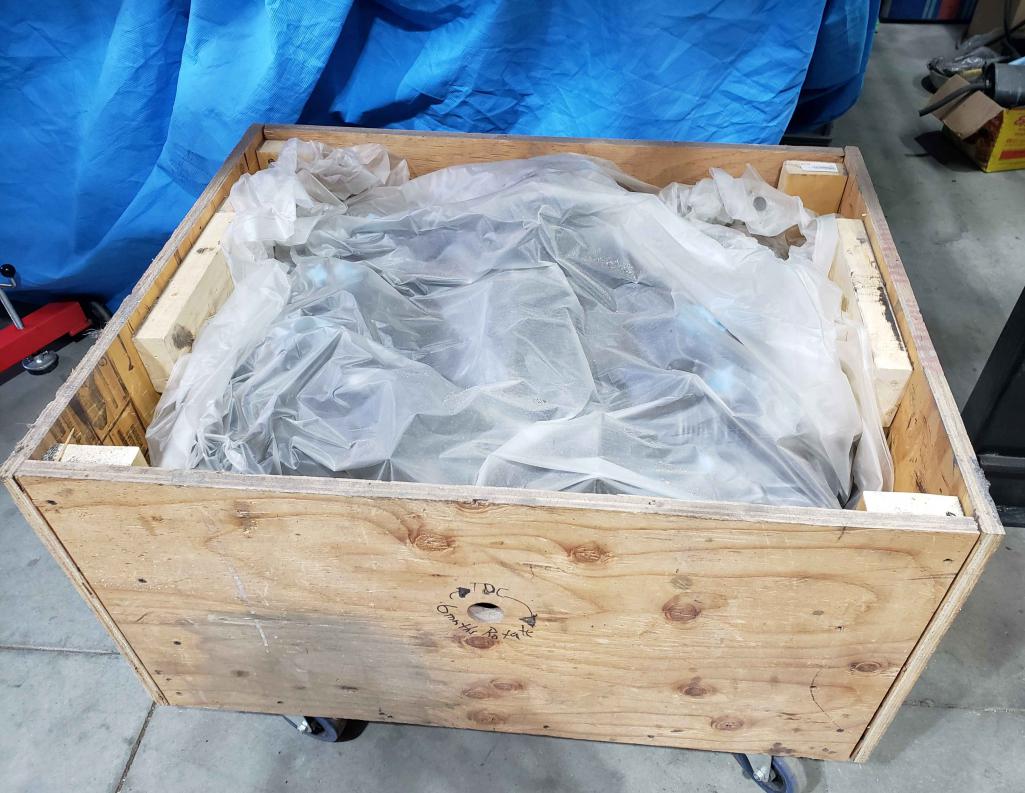 This is what is left of of my 2.4L MFI motor. 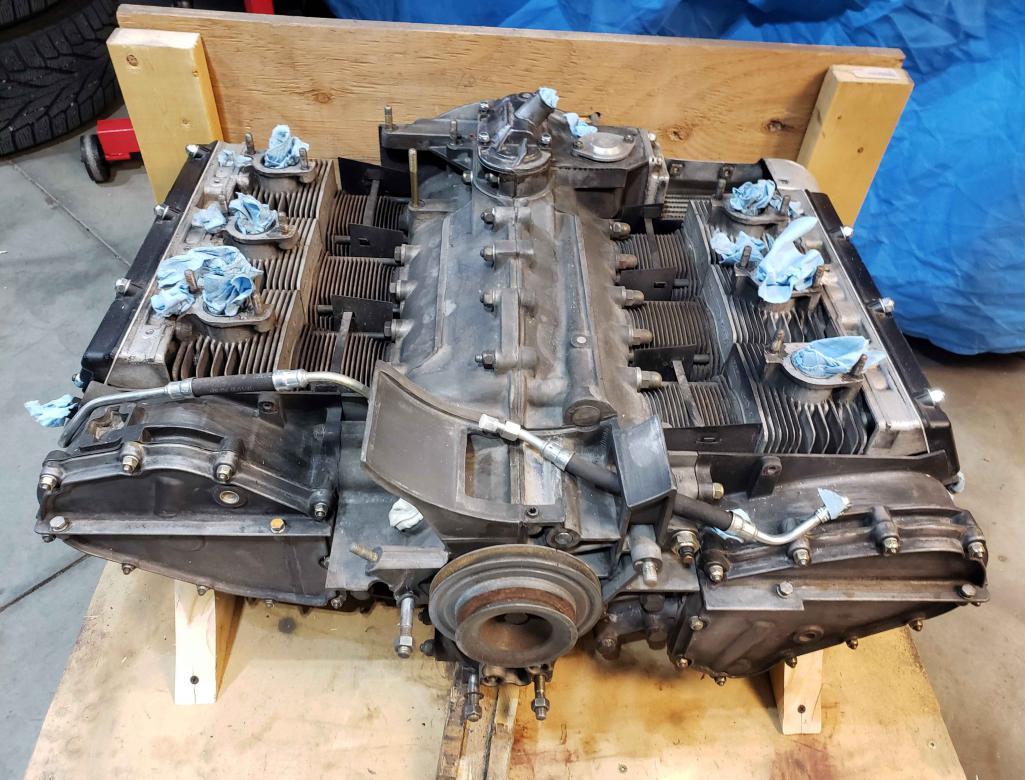 I robbed the top end and induction to build a 3.0L MFI a few years ago. That motor is a riot and sounds awesome. For fun here it is finished before installation. It's the first motor I had ever built. The idea was to make it look exactly like the 2.4. One has to know what to look for or very closely to notice. Learned a lot about MFI and it's tuning. 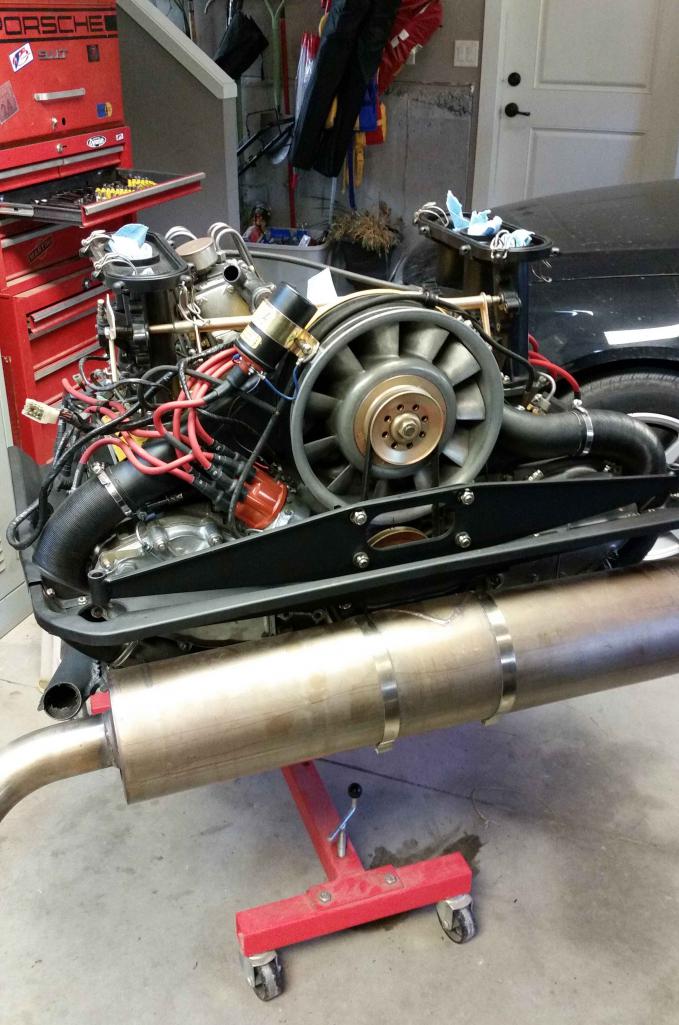 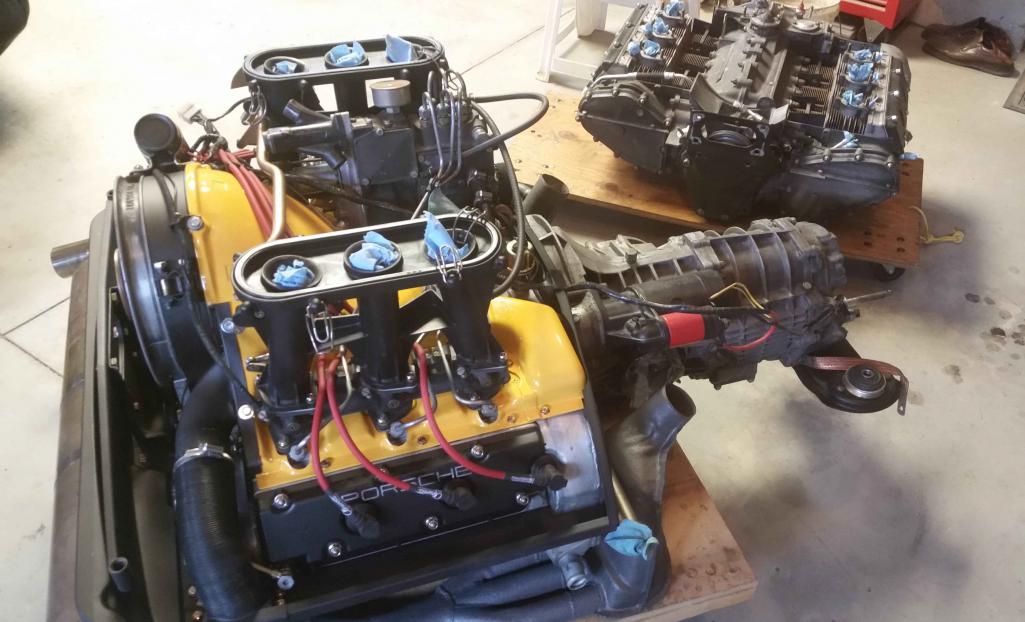 I almost have enough MFI components to go that route again, but I think for simplicity and to stay 'close' to the original idea I'll probably use Carbs. Way easier and faster results for sure. |
|
|
|
| FourBlades |
Apr 25 2020, 08:36 AM
Post
#77
|
|
From Wreck to Rockin Group: Members Posts: 2,054 Joined: 3-December 07 From: Brevard, FL Member No.: 8,414 Region Association: South East States |
This is such an amazing build! (IMG:style_emoticons/default/first.gif) You have gotten so much done in a relatively short time. Lots of cool custom touches. John |
|
|
|
| Sway Bar |
Oct 7 2020, 03:22 PM
Post
#78
|
|
Member Group: Members Posts: 88 Joined: 17-December 19 From: Okanagan Valley, Great White North Member No.: 23,743 Region Association: None |
Well I guess after a summer of 'the world changes' I can post a few updates. I spent more time on other cars, projects, driving or hiding from the general public etc. than working on the Blue Bird
Now that fall has officially hit and winter will be here the car is basically done (IMG:style_emoticons/default/idea.gif) ..... kinda got my timing wrong. I did have to step away for a bit. It seemed like it was fighting me all the way with the last items on my list. Some of that was my fault as I engineered on the fly; who would have thought you need to install the bottom oil line before installing the oil tank, can't use Ben's great pressure side oil line with a PMS mount, why can't I use the 914 seat mounts for my custom seats, and why is the 914-6 specific PMS throttle cable 1.5 inches to long? just to name a few. Anyway, everything is solvable with time (and money, which I was trying to limit to stay reasonably close to my original budget) So, for those that may be interested in some pic's: Took my 2.4 long block and scrounged some top item items to make it a running motor. I haven't driven it an inch yet and I'm thinking a 2.7L since it's a direct bolt in but lets get this done first. 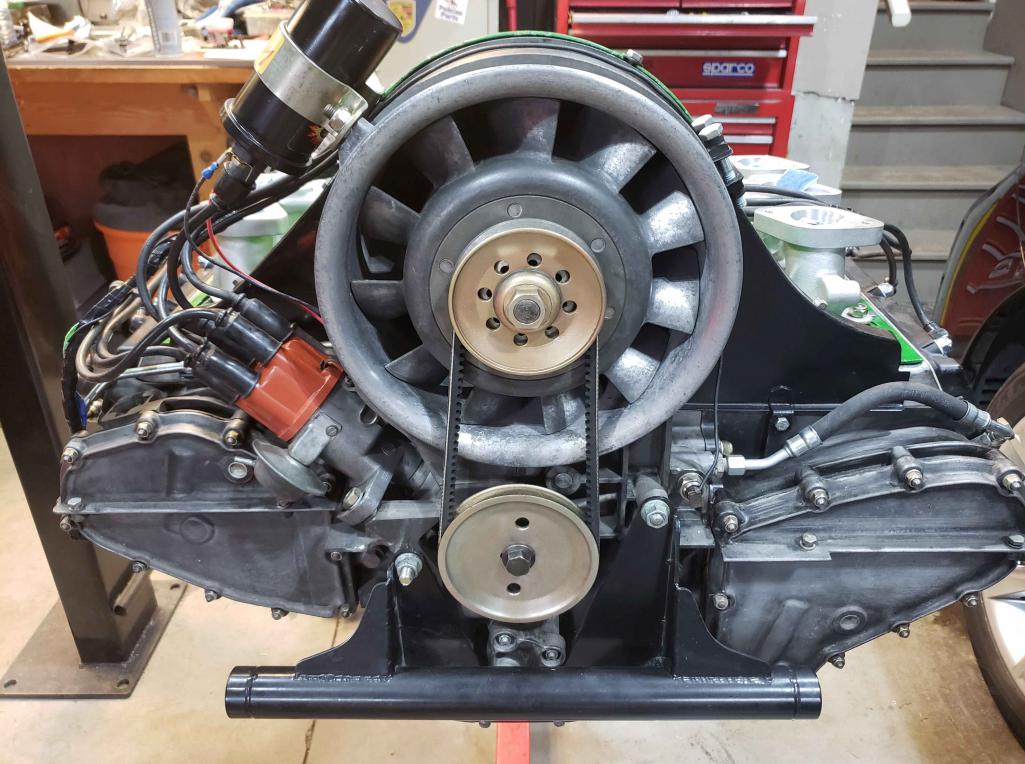 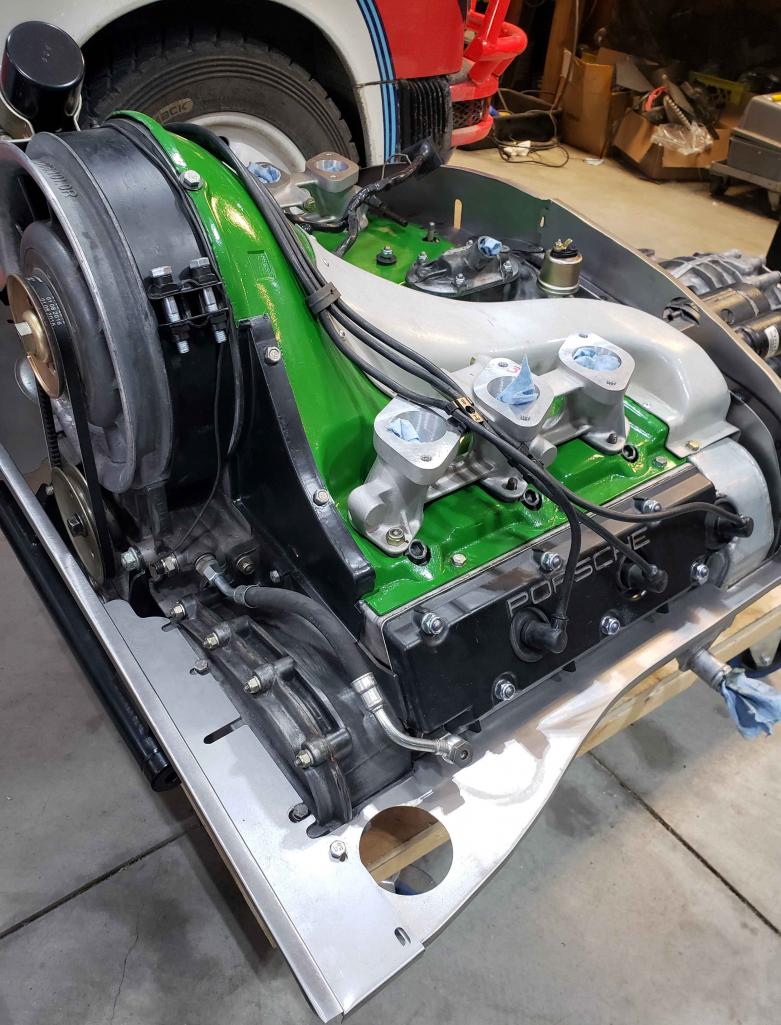 Lego for adults...assembled some carbs 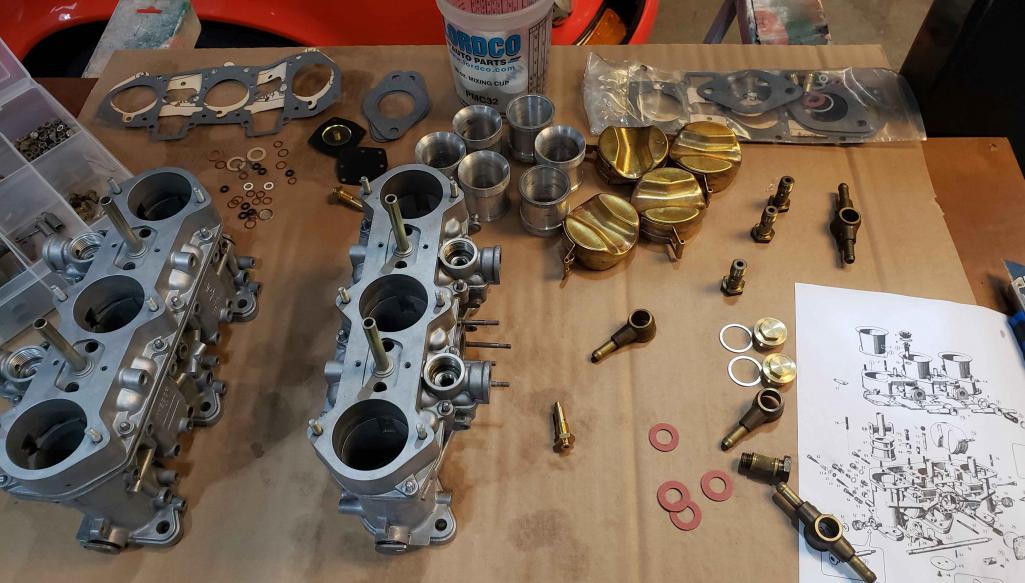 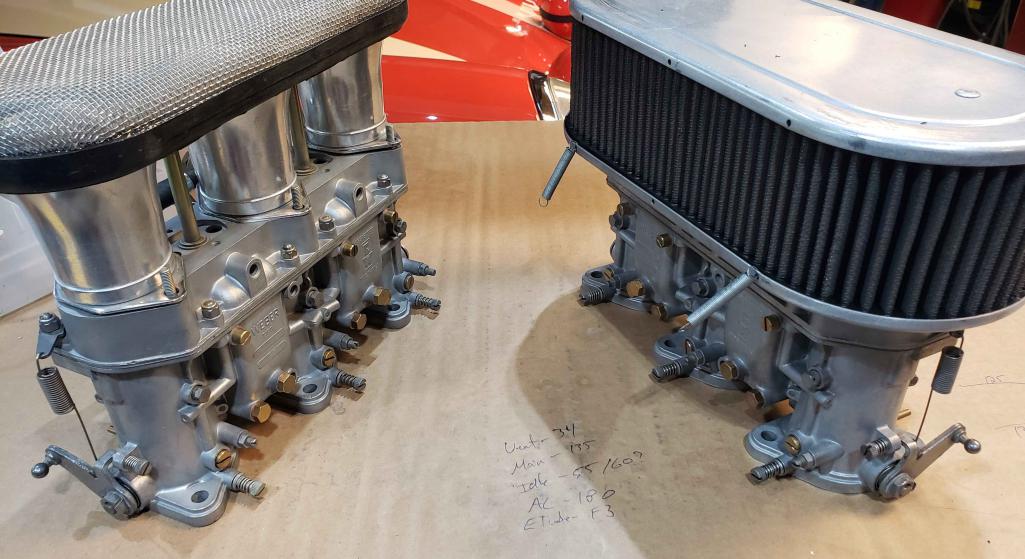 Stuck the motor and transmission together. I think carbs always looked so cool, regardless of how terrible they are to tune, run, keep running well and so forth... 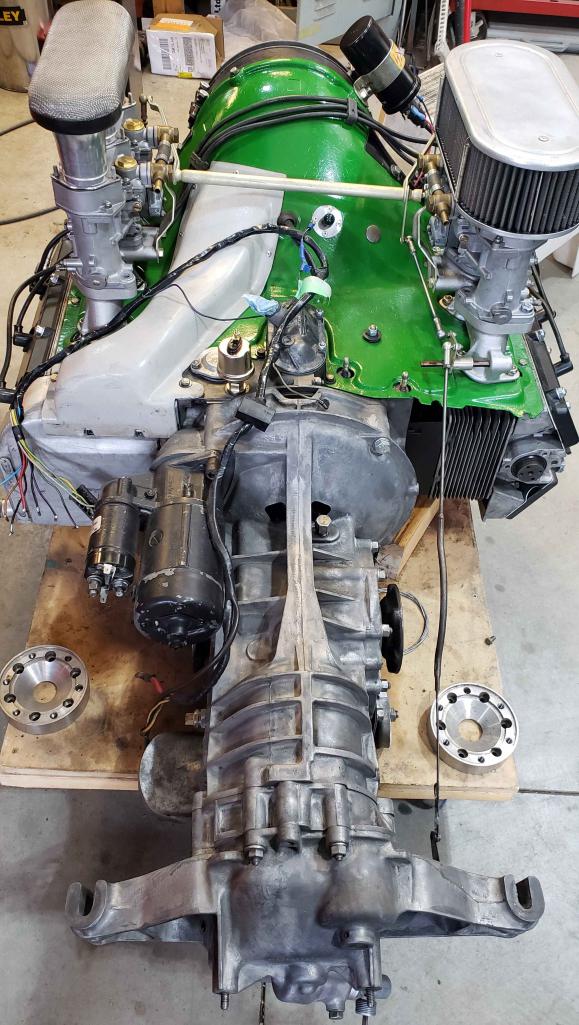 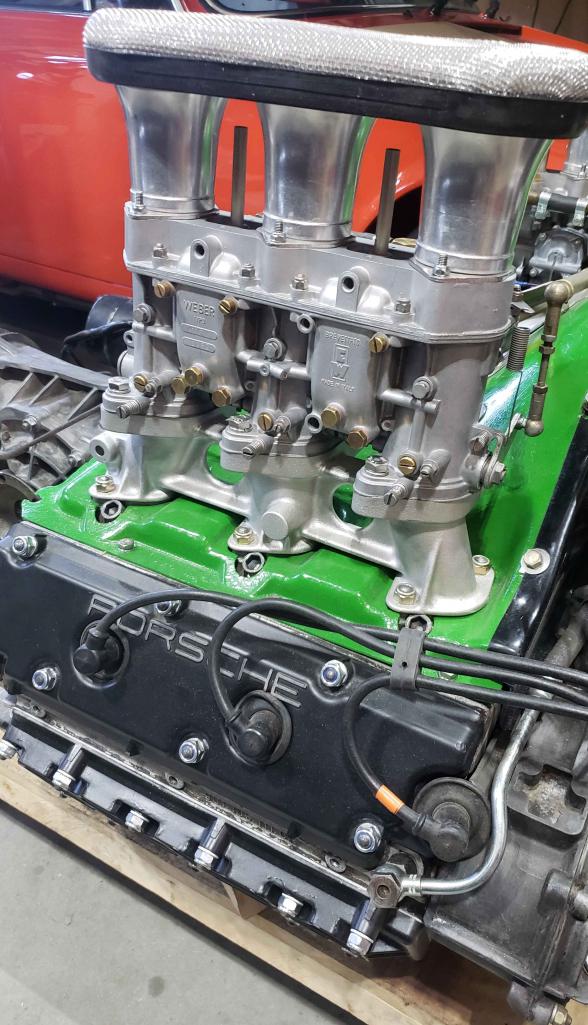 |
|
|
|
| Sway Bar |
Oct 7 2020, 03:32 PM
Post
#79
|
|
Member Group: Members Posts: 88 Joined: 17-December 19 From: Okanagan Valley, Great White North Member No.: 23,743 Region Association: None |
Couple of last motor compartment prep items before I installed the motor. I used a mocal thermostat so made a mount and tried to keep the lines tidy. Also since I had no relay panel I would have to figure out wiring etc. Went with a solid state external voltage regulator that I mounted in a up and out of the way area...used and existing bolt hole even (IMG:style_emoticons/default/smile.gif)
And since I had headers, plugged the mouse holes and finished off some fuel lines. Now I was ready to install the motor. 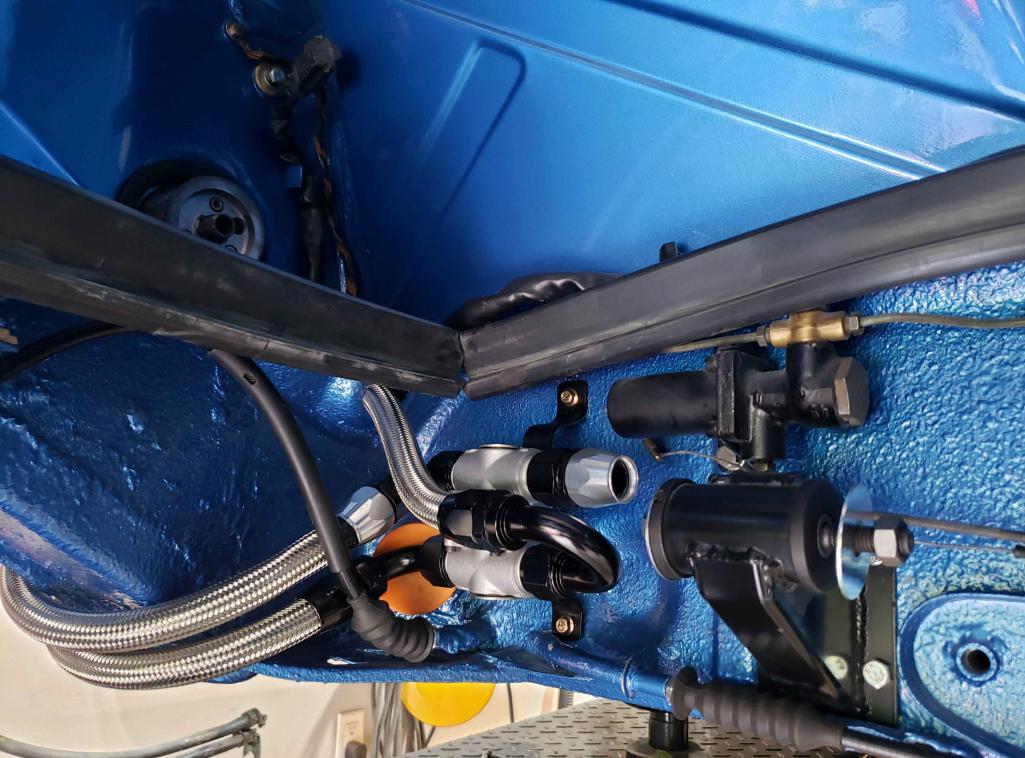 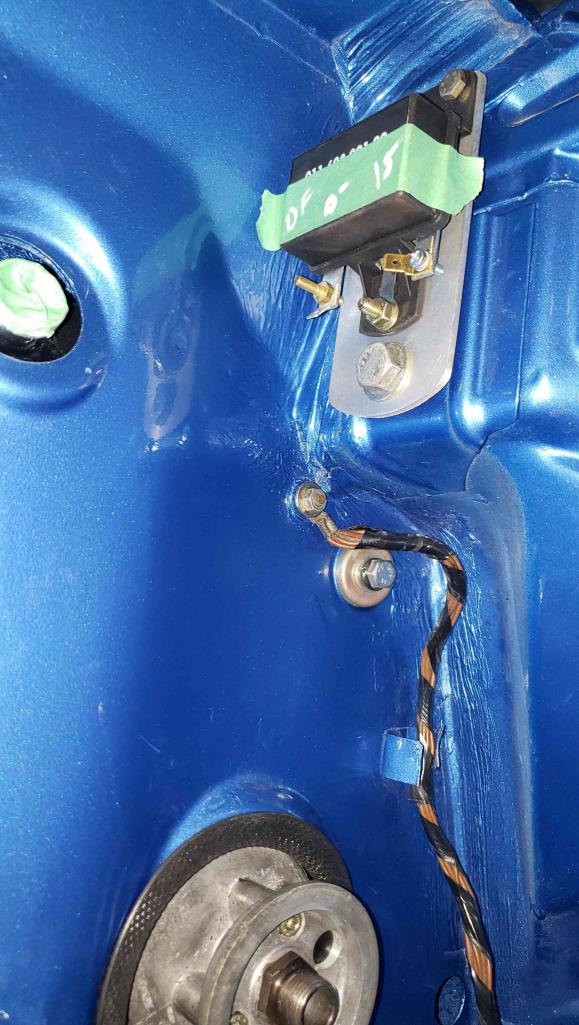 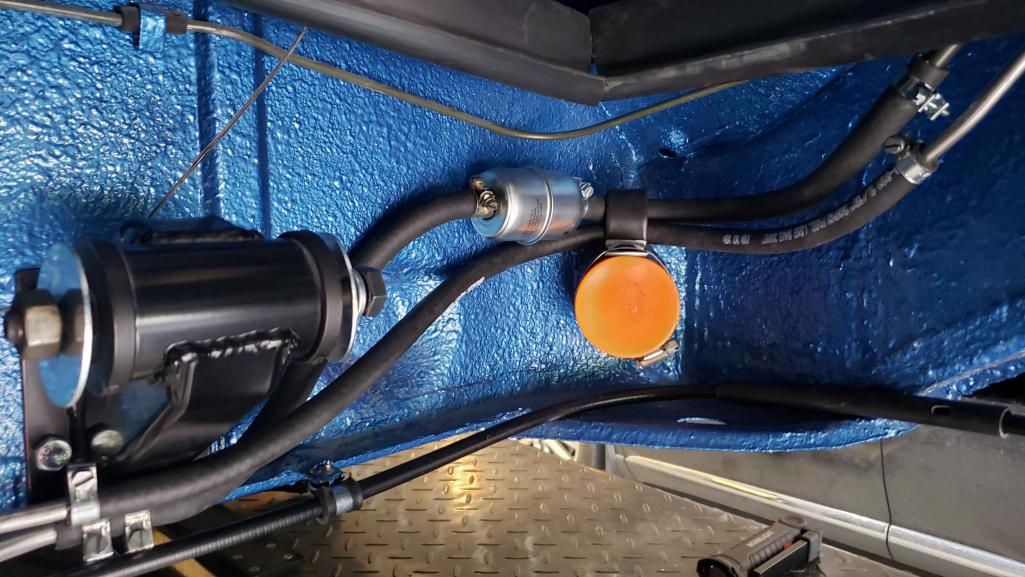 |
|
|
|
| Gint |
Oct 7 2020, 04:21 PM
Post
#80
|
|
Mike Ginter Group: Admin Posts: 16,075 Joined: 26-December 02 From: Denver CO. Member No.: 20 Region Association: Rocky Mountains |
QUOTE(Sway Bar @ Oct 7 2020, 02:22 PM) I did have to step away for a bit. I totally get that. That looks seriously nice man. |
|
|
|
|
1 User(s) are reading this topic (1 Guests and 0 Anonymous Users)
0 Members:

|
Lo-Fi Version | Time is now: 18th May 2024 - 08:15 AM |
Invision Power Board
v9.1.4 © 2024 IPS, Inc.