|
|
|
Porsche, and the Porsche crest are registered trademarks of Dr. Ing. h.c. F. Porsche AG.
This site is not affiliated with Porsche in any way. Its only purpose is to provide an online forum for car enthusiasts. All other trademarks are property of their respective owners. |
|
|

  |

| Snebs2 |
 Jan 14 2020, 09:57 PM Jan 14 2020, 09:57 PM
Post
#1
|
|
Newbie  Group: Members Posts: 11 Joined: 7-April 16 From: Washington Member No.: 19,870 Region Association: Pacific Northwest |
Can someone send me a picture of how this goes back together. Just the The aluminum seal the fuzzy and the rubber part. I cannot make heads or tails from the diagram online.
  |
   |

 
|
| Mikey914 |
Jan 15 2020, 01:07 AM
Post
#2
|
|
The rubber man Group: Members Posts: 12,782 Joined: 27-December 04 From: Hillsboro, OR Member No.: 3,348 Region Association: None |
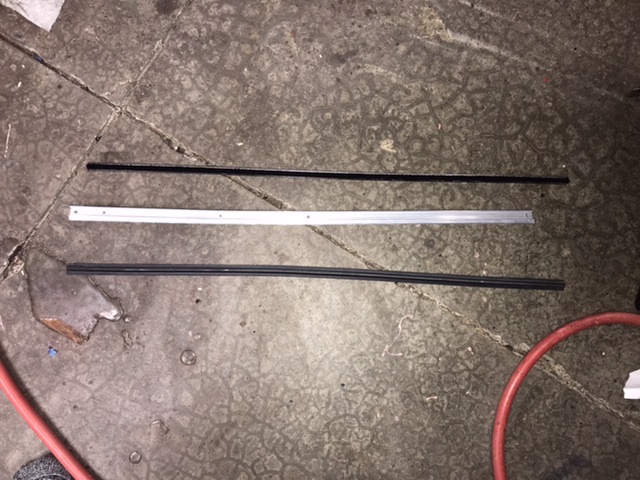
The fuzzey with the metal back goes into the larger aluminum channel The bulb from the other scraper goes into the C shape at the top to hold the rubber against the glass.
This shows the fuzzey strip with metal installed close up but you get the idea Attached image(s) 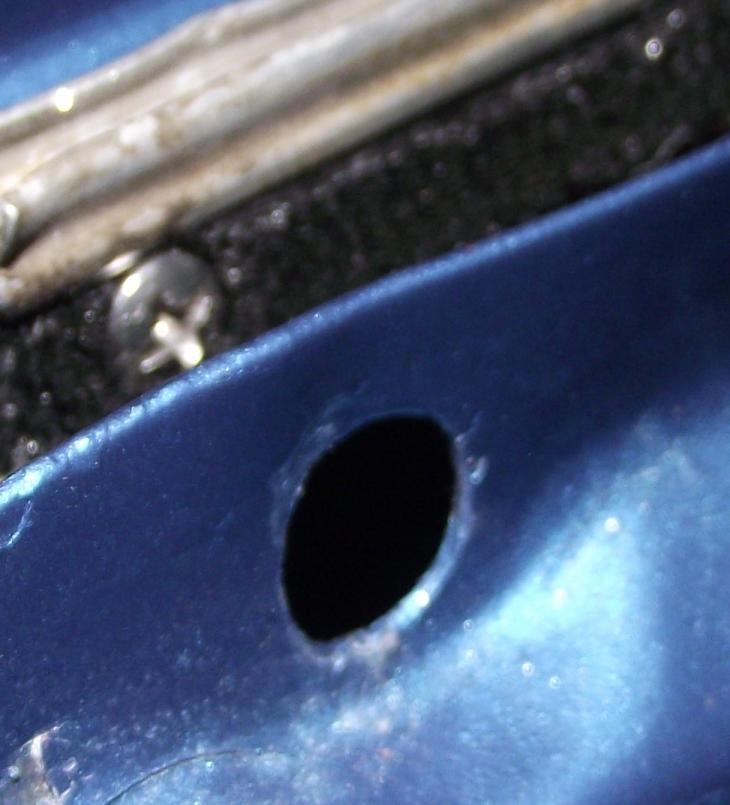
|
|
|
|
| Mikey914 |
Jan 15 2020, 01:08 AM
Post
#3
|
|
The rubber man Group: Members Posts: 12,782 Joined: 27-December 04 From: Hillsboro, OR Member No.: 3,348 Region Association: None |
To locate the screw holes, put the fuzzey in the aluminum track and drill from the back side through the holes into the fuzzey. You can put int a screw to set, trim the end, and install.
|
|
|
|
| Mikey914 |
Jan 15 2020, 01:11 AM
Post
#4
|
|
The rubber man Group: Members Posts: 12,782 Joined: 27-December 04 From: Hillsboro, OR Member No.: 3,348 Region Association: None |
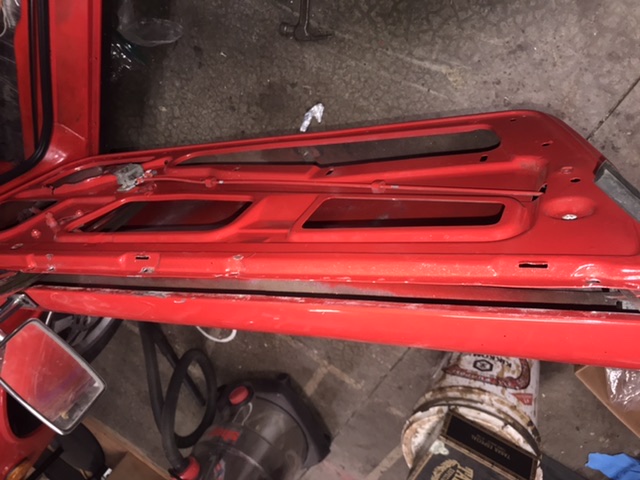
hard to see from the 1st pic which outer you have, But here is mine with the early scraper installed on that late door (end cap gives it away).
The outer scrapes go on after the window is assembled. Attached image(s) 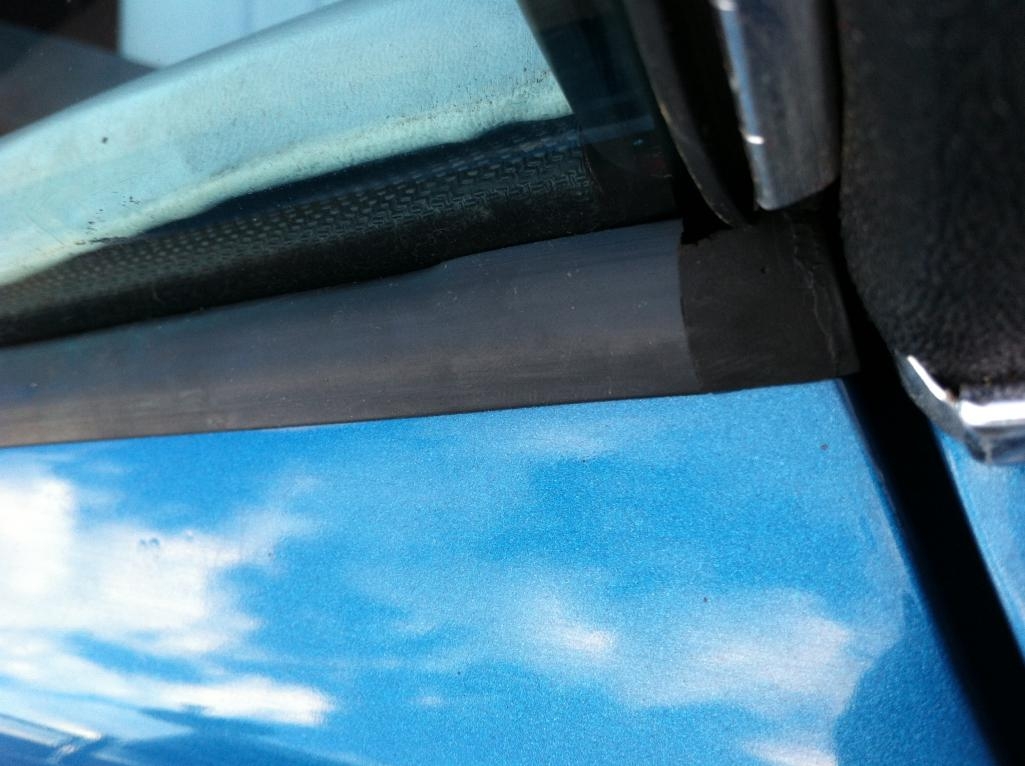
|
|
|
|
| Snebs2 |
Jan 15 2020, 07:26 PM
Post
#5
|
|
Newbie Group: Members Posts: 11 Joined: 7-April 16 From: Washington Member No.: 19,870 Region Association: Pacific Northwest |
Thank you for your pictures and your insight that is what I needed I am back on track at least with the doors...lol
(IMG:style_emoticons/default/smash.gif) |
|
|
|
| Mikey914 |
Jan 16 2020, 01:39 AM
Post
#6
|
|
The rubber man Group: Members Posts: 12,782 Joined: 27-December 04 From: Hillsboro, OR Member No.: 3,348 Region Association: None |
No problem, the doors can get a little hard. Especially if you try to install out of sequence.
|
|
|
|
|
1 User(s) are reading this topic (1 Guests and 0 Anonymous Users)
0 Members:

|
Lo-Fi Version | Time is now: 13th June 2026 - 04:28 AM |
Invision Power Board
v9.1.4 © 2026 IPS, Inc.