|
|
|
Porsche, and the Porsche crest are registered trademarks of Dr. Ing. h.c. F. Porsche AG.
This site is not affiliated with Porsche in any way. Its only purpose is to provide an online forum for car enthusiasts. All other trademarks are property of their respective owners. |
|
|

  |

| mgarrison |
 Dec 22 2020, 01:59 PM Dec 22 2020, 01:59 PM
Post
#41
|
|
Member  Group: Members Posts: 416 Joined: 14-February 20 From: Chandler, AZ Member No.: 23,922 Region Association: Southwest Region |
Finished another patch section. Right side was difficult for some reason, but got it filled in finally...
 I cut out the back of the center tunnel so I could remove the stock tubing that I will not need with the Subaru engine and trans. Also gives me a decent opportunity to clean it out as best I can, and paint with the Easton inside frame rail paint to prevent any future rust. 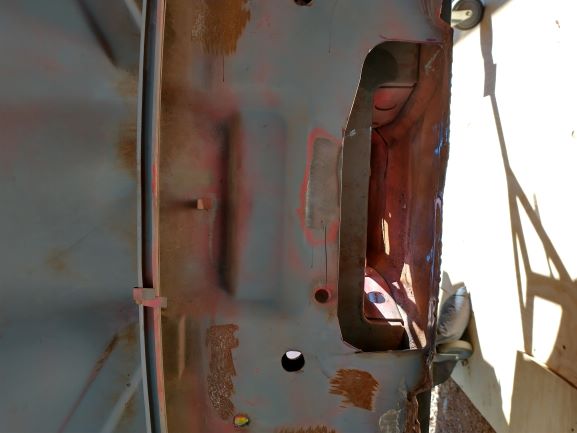 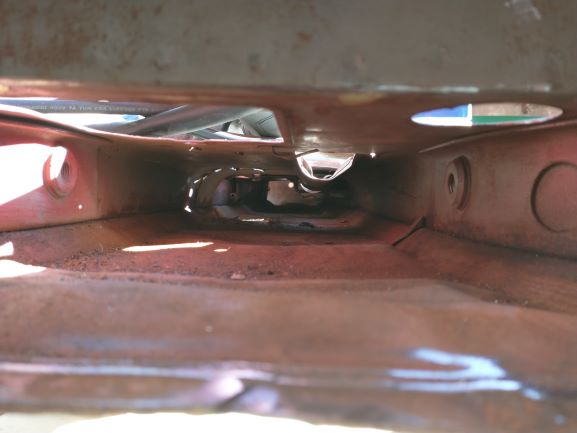 |
   |

 
|
| mgarrison |
Dec 23 2020, 05:40 PM
Post
#42
|
|
Member Group: Members Posts: 416 Joined: 14-February 20 From: Chandler, AZ Member No.: 23,922 Region Association: Southwest Region |
Completed one more small patch. Was a total PITA to weld! Starting to feel like a bad trend...aren't you supposed to improve with practice??? (IMG:style_emoticons/default/confused24.gif)
 Received my replacement handbrake parts from AA. Trying to locate them based off the spot welds I drilled out as I did not find any reference as to how to exactly locate them. Need to drill the holes for the rosette welds... 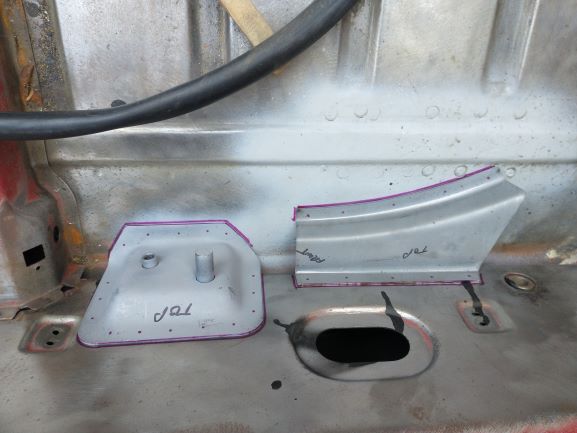 |
|
|
|
| djway |
Dec 23 2020, 06:22 PM
Post
#43
|
|
Senior Member Group: Members Posts: 787 Joined: 16-October 15 From: Riverside Member No.: 19,266 Region Association: Southern California |
I hear ya on the supposed to get better with practice idea. I discovered one time my little welder needed maintenance and another time the metal was not as clean which caused headaches. Keep on trucking.
I like the clean look removing the engine shelf. I may have to borrow that idea... |
|
|
|
| mgarrison |
Dec 30 2020, 09:56 AM
Post
#44
|
|
Member Group: Members Posts: 416 Joined: 14-February 20 From: Chandler, AZ Member No.: 23,922 Region Association: Southwest Region |
Another small update. Progress seems SO SLOW, but I keep trying to plod along!
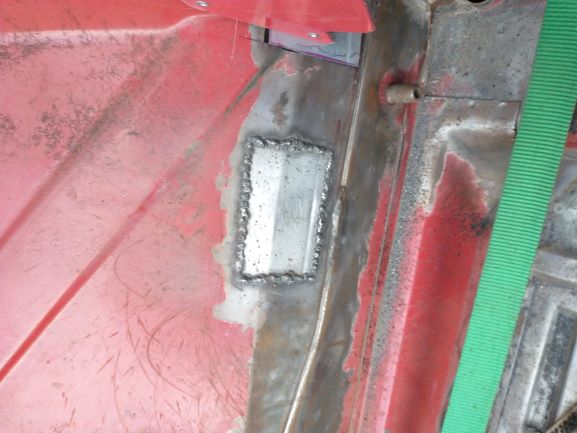
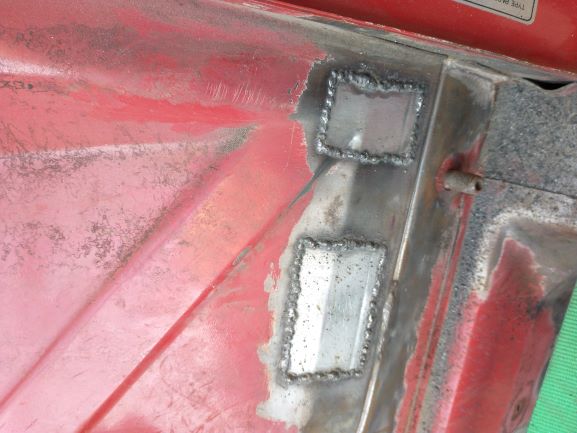
Once I opened things up with the air saw, I tried to get a better look inside the inner long/suspension console area/frame rail/WTH do they call this area! looks better than I thought it might in there - I know many of you would love to have a 914 with this little rust, so I am grateful. I wire brushed inside as best I could, then vacuumed it out with the shop vac, then sprayed the Eastwood inside frame rail paint in there everywhere I could reach with the little nozzle: 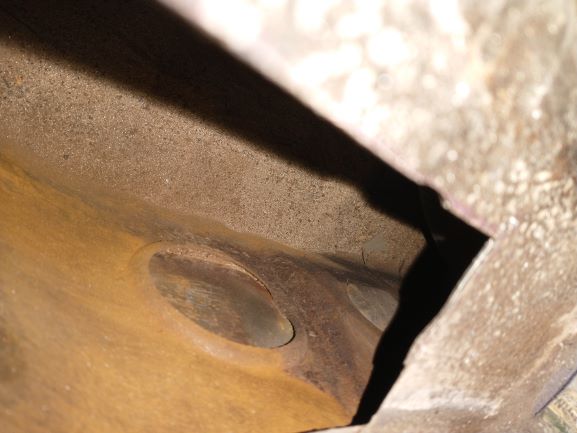 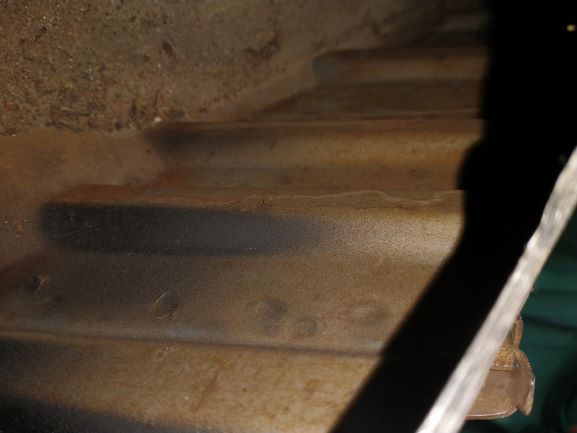 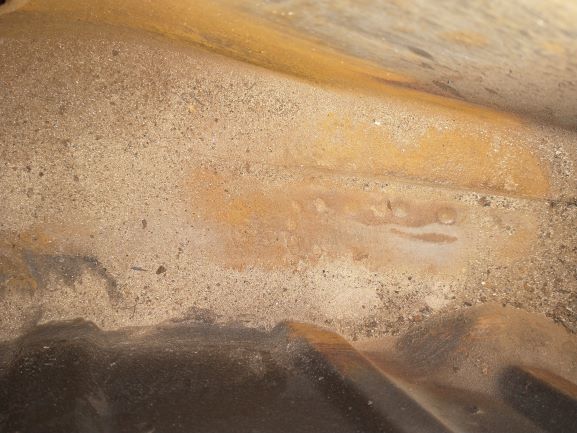 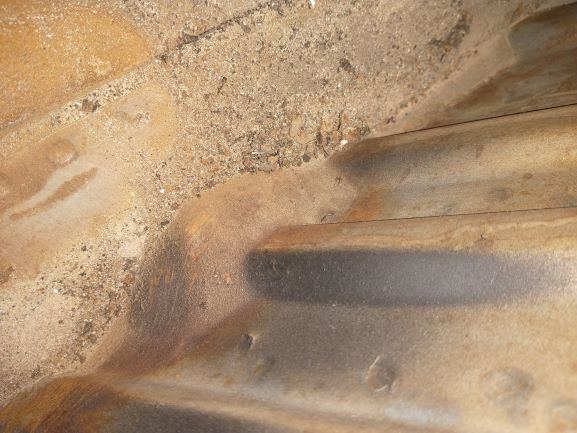 Some of what I have repaired/resurrected on 914World is simply incredible - some real talent out there! I treated all the rust I could get to with rust inhibiter, and then shot it with weld through primer. It took me quite a while to get my patch shaped, and then fit just right so that I had some chance of being able to weld it in without total disaster occurring (due to my cheap welder, and very limited skills): 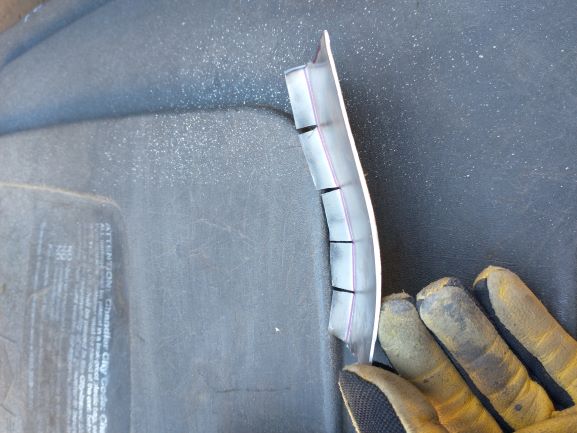 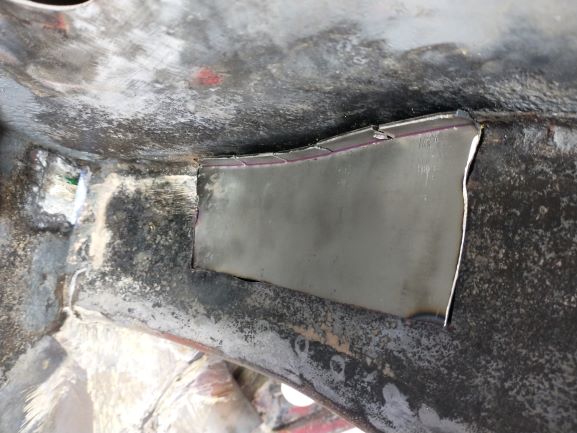 My initial welds to tack in place were rather embarrassing! I could not get my welding helmet back into the corner by the firewall far enough to really see exactly what I was doing, and the patch was sloping away from me too. A bit of blind welding ensued! 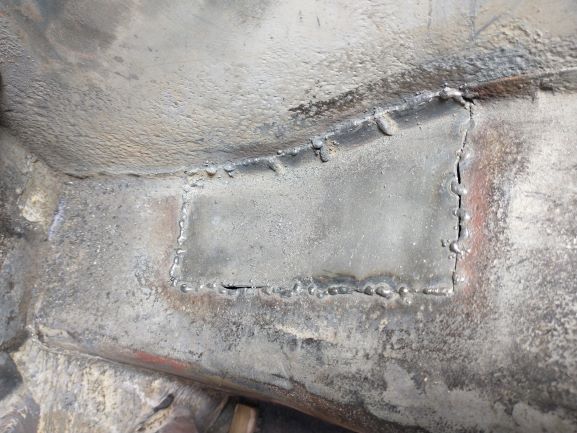 But after grinding a bit, and filling a bit, and grinding some more, and filling. You get the idea...It will have to do: 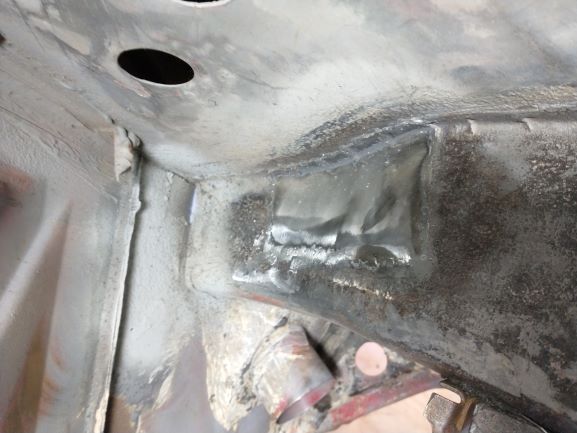 My patch on the inner fender came out ok, but sure not great - not sure how you hold/clamp a piece like this in place so that it stays really flat. I think I should have used my butt weld clamps to keep it flatter, oh well... 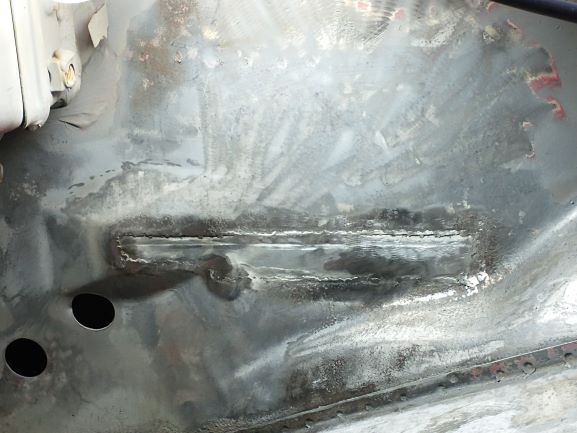 The patch on the upper portion between the seats came out much better, but still needs a little grinding to make it blend in better. 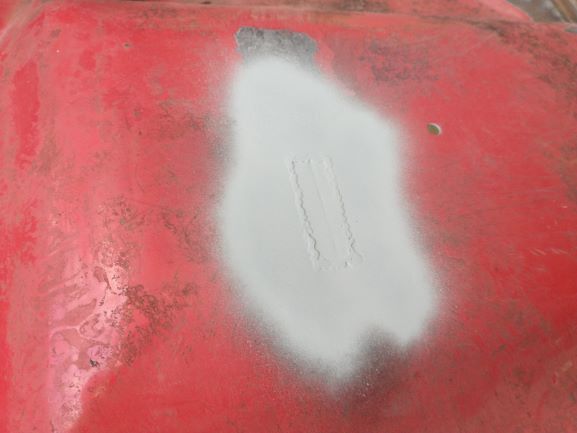 I drilled the holes in my parking brake pieces, and did my first Rosette welds. I believe they came out ok, and they seem solid. Rosette welds seem much easier than the butt welds on thin metal!  Next up is the frunk floor panel, and then the Mad Dog Inner Long kit...Inch by bloody inch! (IMG:style_emoticons/default/sawzall-smiley.gif) |
|
|
|
| mgarrison |
Jan 16 2021, 11:00 AM
Post
#45
|
|
Member Group: Members Posts: 416 Joined: 14-February 20 From: Chandler, AZ Member No.: 23,922 Region Association: Southwest Region |
I've been taking pictures as I work, but getting them from my phone, to Google drive, then to the laptop, then resized to post...You get the idea!
Finally have the "frunk" mostly finished. I feel like I'm sooooo sloooooow. But progress is progress! I had to piece in the gap at the front of the frunk floor where too much was cut out. I got some new snips that work much better, so getting the patches cut was much quicker. Half the gap tacked:  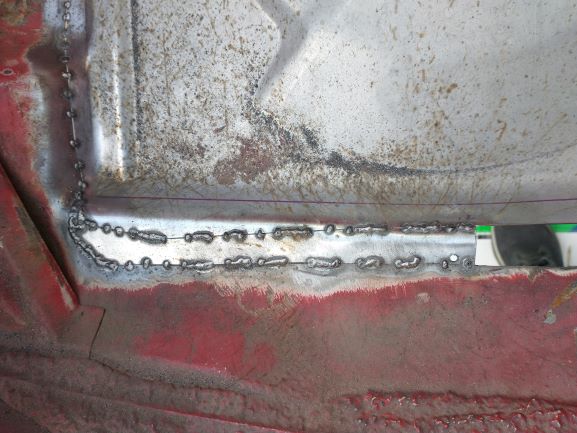 And the other half: 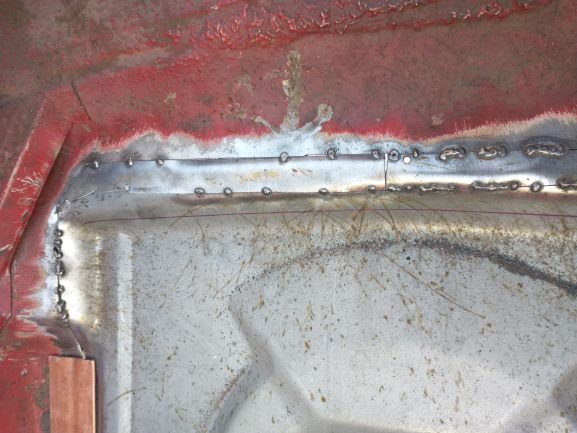 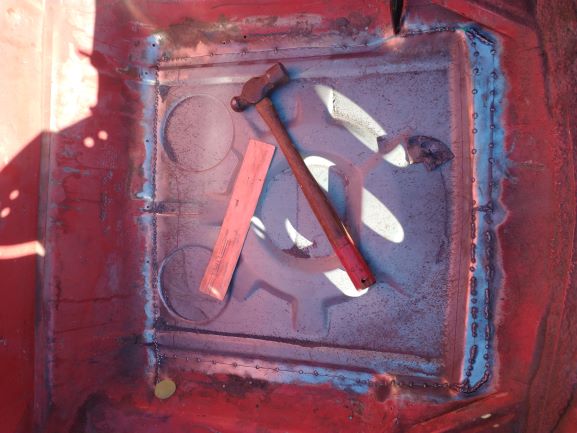 I kept hearing the Taylor Swift song "Death by a thousand cuts" in my head, but it transformed to "Death (of my back) by a thousand tacks" in my addled brain!  As I was making progress tacking things in, I ran out of welding wire. I had more in the drawer, but it was the good Lincoln stuff. Oddly enough the Lincoln wire gave me more trouble than the cheap HF stuff I was using! Does anyone with more welding experience know why this started happening when I switched to the Lincoln wire? 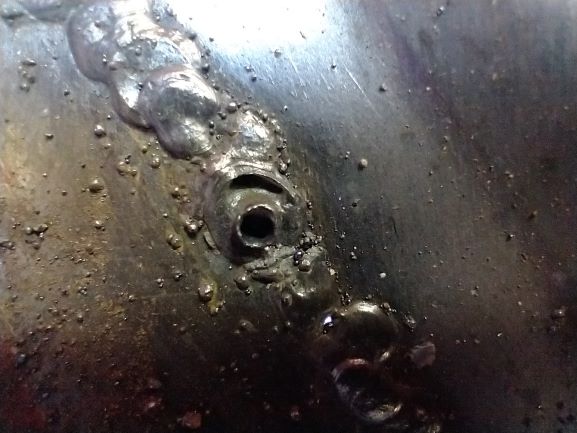  Both are .030 wire. I did not change my settings, etc. Just started getting these crazy craters in some of the tacks! I fiddled with the amps and wire speed and finally got things working better. Almost like the Lincoln wire burned hotter and I could not get my welder set low enough for the thin sheet metal... 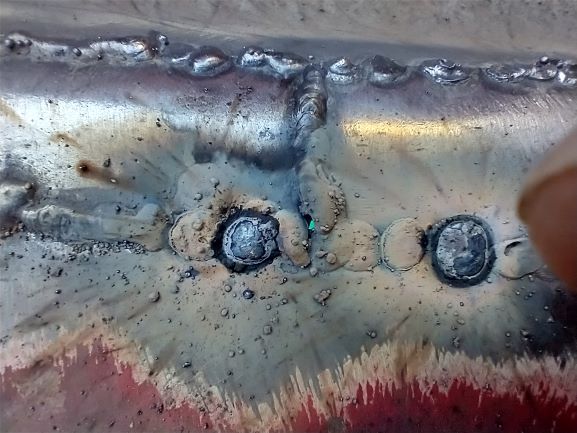 I sprayed a small section of my test color. Then covered it with clear. Then sanded a bit with 800 grit to removed orange peel. Then finally buffed it out with a random buffer. It looked pretty good, at first. Over time this happened! 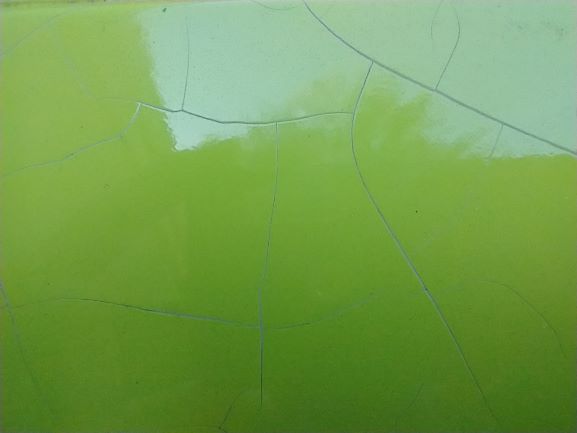 For those with more experience; have you seen this happen before? What would cause it to occur? It looked fine at first, but after a couple of weeks its like the paint shrank, cracked, and exposed the primer underneath! Back to the frunk floor. I started grinding down some of my welds to see how it was going to turn out. I needed a little break from welding, and to catch my breath before I dealt with a few problem spots: 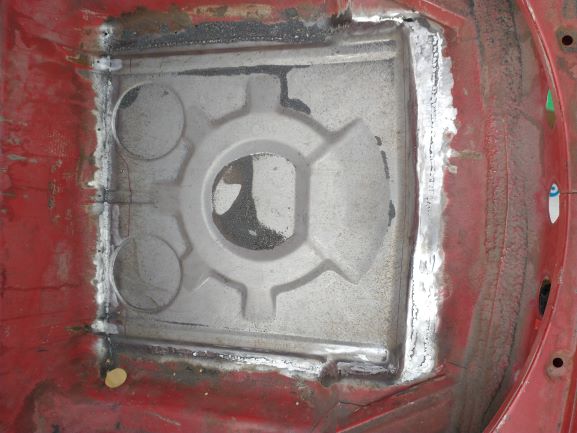 My first problem area was near the drivers side front A-arm mount. They cut out the frunk floor right up against the edge of the mount, which made me nervous welding. Some of the metal just did not seem to want to be welded, or I was not good enough to get it welded, so I ended up using a hole saw to remove the problem section. I then patched it in which was a challenge as it was rather curved. 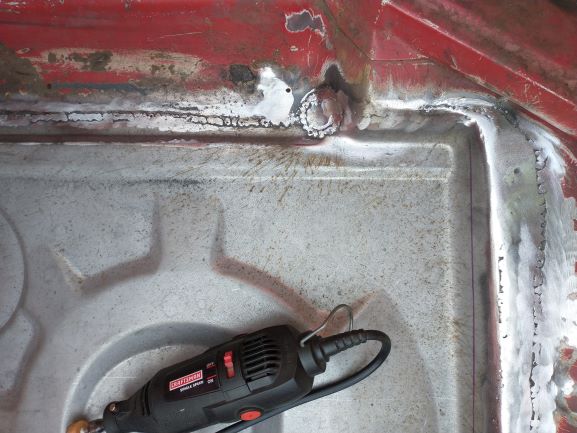 Another difficult spot was near the hole they cut for the AC lines on the passenger side near the rear of the frunk floor. Metal just did not want to weld together, despite the lack of rust, etc. 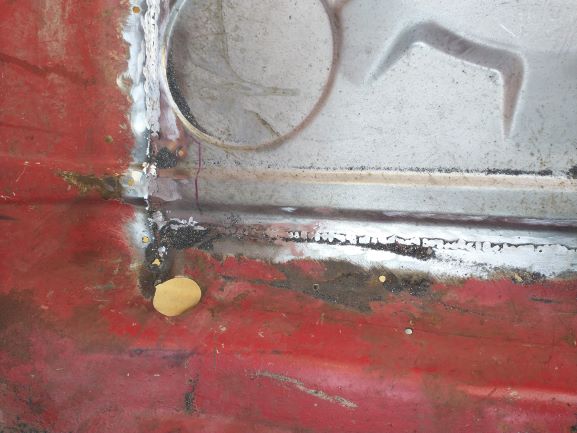 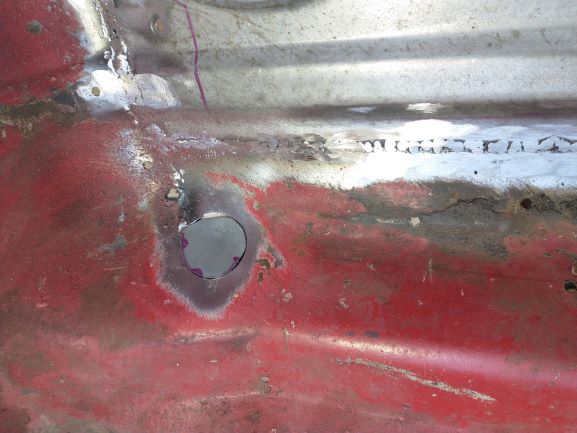 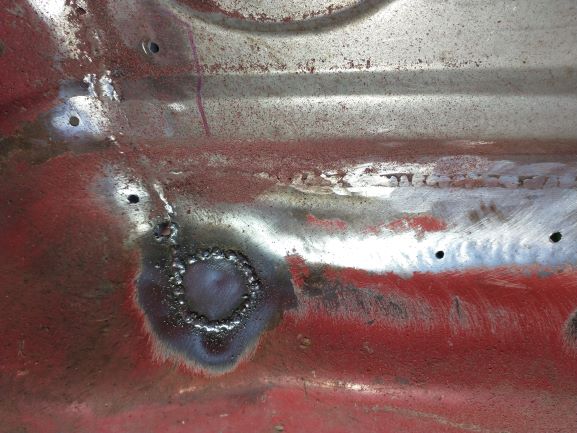 Whoever did the AC installation on this car was rather rough to put it mildly! Not sure what in the world they did with these two mounting holes (assuming they were for the strap/bracket holding the condenser down to the frunk floor), but they tore up the steel so bad I just ended up cutting them both out with the hole saw and patching them up! 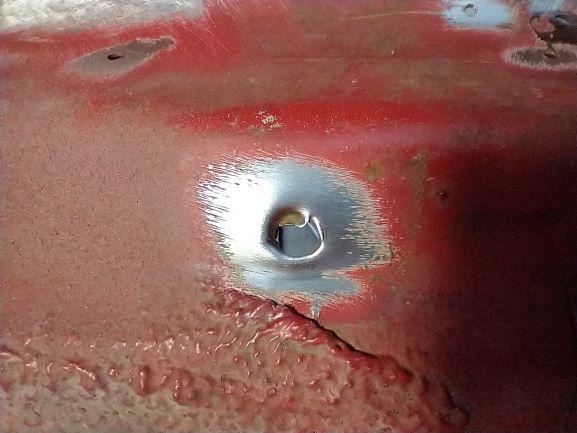 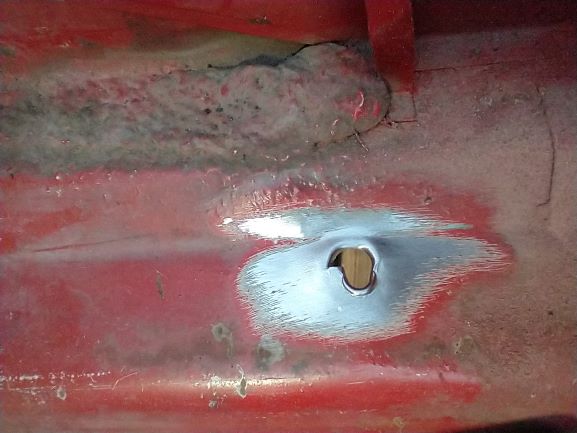 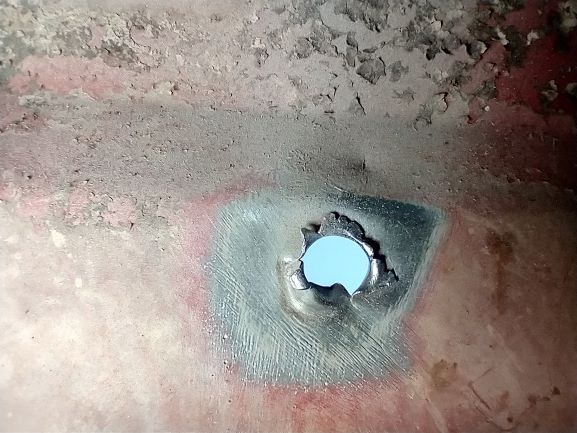 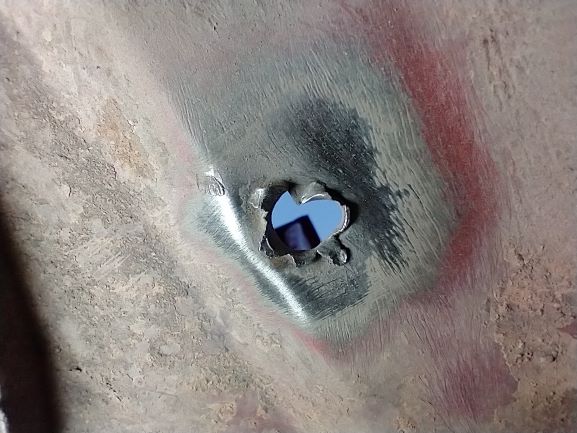 Getting better at cutting out these little patches! 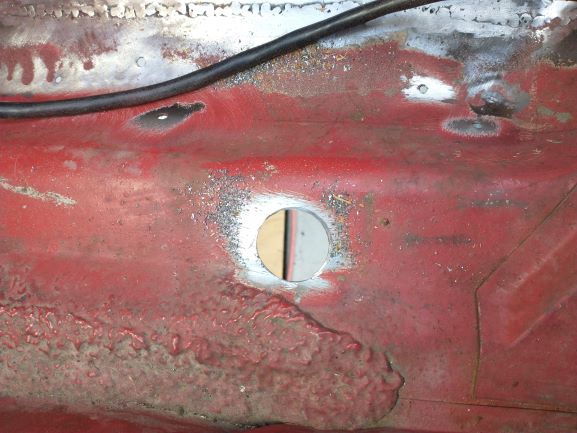  I read on 914World where someone smashed a copper pipe, and used it as backing while welding thin sheet metal. It seems to work rather well to absorb the heat, and is an easy way to back up these little patches - thanks to whoever it was for that tip! Here's my setup for patching the nasty AC mounting holes. You can just see the flat copper pipe on top of the 4x4, pressed up against the bottom of the frunk floor: 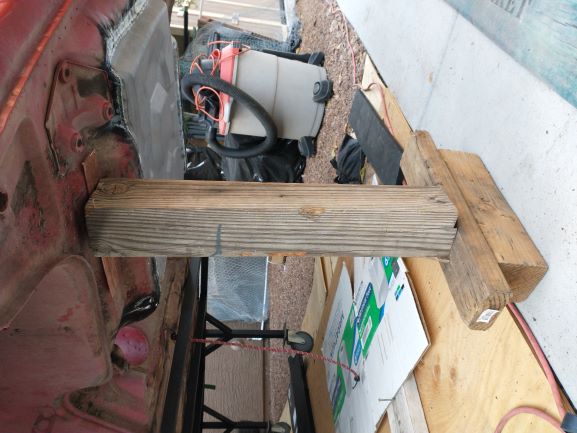 From the top side, it looks like this, and helps keep the patch in place and flush: 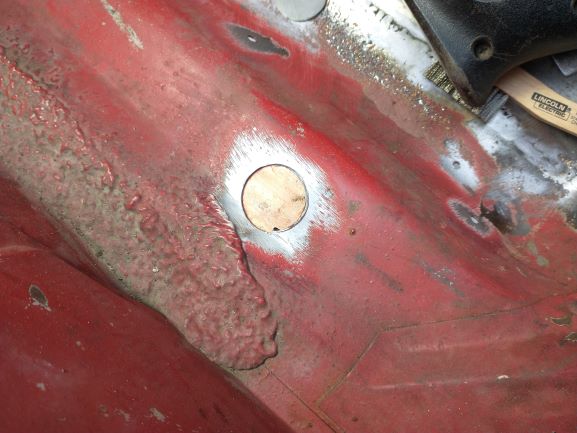 Starting to tack the patch in, and had the dang crater issues again! Arrrgggg.  Settled down and it came out ok in the end. Just had to fill those craters with a really quick tack since they went clear through! 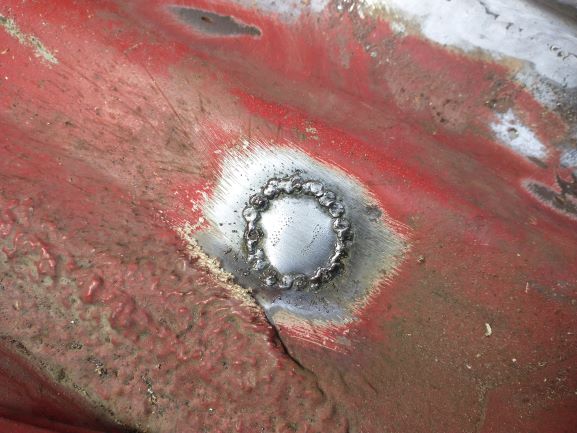 Got my welds ground down good enough, I guess - I'm going to use rubberized undercoating on the trunk floors to seal, protect, and give it a bit of texture to hide my less than idea repair work. I made sure to get the paintable kind of undercoating so I can spray it body color if I decide I dont like the black. Gave it a quick coat of primer top & bottom to keep it protected. 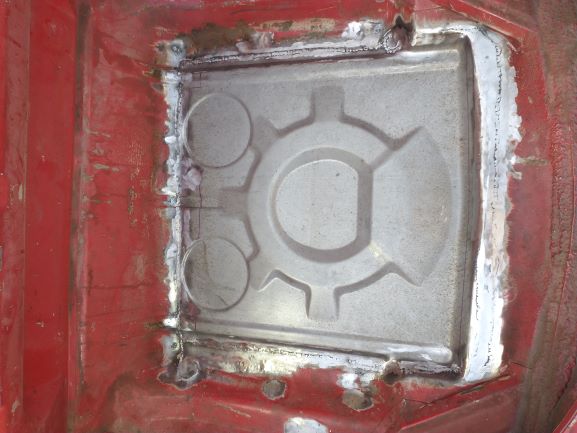 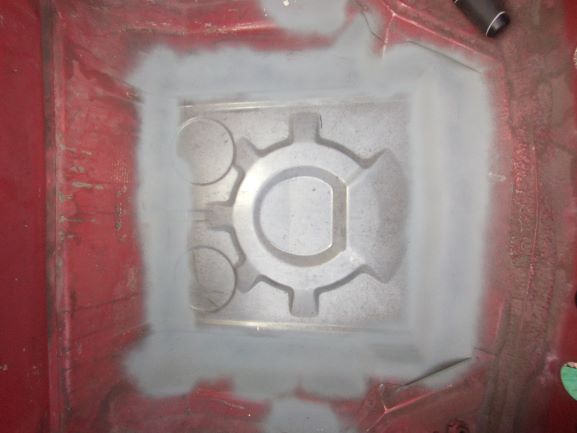 Then spent an hour or so starting to remove some of the seam sealer to ensure nothing was hiding under it anywhere. Found an odd spot that I first thought was rust under there, but turned out to be a missed spot weld or some other oddity - you can just see it on the right edge of the seam, about 2" inches below the hole for the AC line. 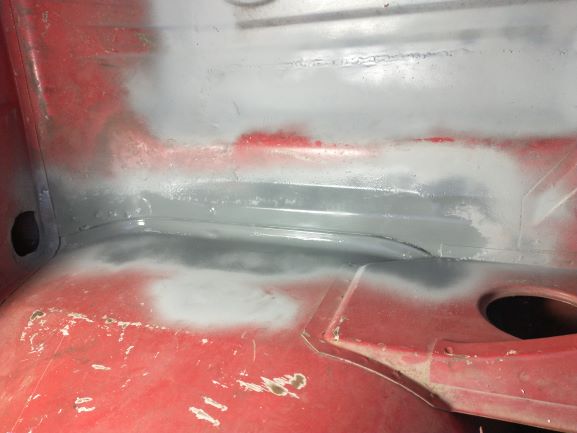 |
|
|
|
| 914forme |
Jan 16 2021, 09:43 PM
Post
#46
|
|
Times a wastin', get wrenchin'! Group: Members Posts: 3,899 Joined: 24-July 04 From: Dayton, Ohio Member No.: 2,388 Region Association: None |
You need a sealer step for the paint and even then bad things can happen and these cracks will reappear.
@MB911 - look above at the welding question about the weld wire difference. To me it looks like you drawing up contaminates from the back side of the weld. But Ben is the expert. |
|
|
|
| 76-914 |
Jan 16 2021, 09:46 PM
Post
#47
|
|
Repeat Offender & Resident Subaru Antagonist Group: Members Posts: 13,896 Joined: 23-January 09 From: Temecula, CA Member No.: 9,964 Region Association: Southern California |
QUOTE(914forme @ Jan 16 2021, 07:43 PM)  You need a sealer step for the paint and even then bad things can happen and these cracks will reappear. @MB911 - look above at the welding question about the weld wire difference. To me it looks like you drawing up contaminates from the back side of the weld. But Ben is the expert. (IMG:style_emoticons/default/agree.gif) but why did it change when he changed spools? Is it possible that a spool is contaminated? Maybe not enough shielding gas? Watching for Ben's reply. I do see lots os splatter around those suspect areas! (IMG:style_emoticons/default/popcorn[1].gif) |
|
|
|
| mb911 |
Jan 17 2021, 07:26 AM
Post
#48
|
|
914 Guru Group: Members Posts: 7,781 Joined: 2-January 09 From: Burlington wi Member No.: 9,892 Region Association: Upper MidWest |
QUOTE(76-914 @ Jan 16 2021, 07:46 PM) QUOTE(914forme @ Jan 16 2021, 07:43 PM) You need a sealer step for the paint and even then bad things can happen and these cracks will reappear. @MB911 - look above at the welding question about the weld wire difference. To me it looks like you drawing up contaminates from the back side of the weld. But Ben is the expert. (IMG:style_emoticons/default/agree.gif) but why did it change when he changed spools? Is it possible that a spool is contaminated? Maybe not enough shielding gas? Watching for Ben's reply. I do see lots os splatter around those suspect areas! (IMG:style_emoticons/default/popcorn[1].gif) What number designation wire are you using? Just because it's. 030 doesn't mean its the same wire. It also does look like your drawing in contaminates. |
 |
|
| mgarrison |
Jan 17 2021, 09:15 AM
Post
#49
|
|
Member Group: Members Posts: 416 Joined: 14-February 20 From: Chandler, AZ Member No.: 23,922 Region Association: Southwest Region |
Thanks guys. Its an inexpensive, gasless, DC inverter welder. I got the HF version since its was $75 less than the same thing at HD/Lowes. Don't want to mess with tanks, and I'm working outside. The label is gone from the Lincoln wire, so not sure on the exact details...
Thanks! Mike |
|
|
|
| mb911 |
Jan 17 2021, 12:29 PM
Post
#50
|
|
914 Guru Group: Members Posts: 7,781 Joined: 2-January 09 From: Burlington wi Member No.: 9,892 Region Association: Upper MidWest |
QUOTE(mgarrison @ Jan 17 2021, 07:15 AM) Thanks guys. Its an inexpensive, gasless, DC inverter welder. I got the HF version since its was $75 less than the same thing at HD/Lowes. Don't want to mess with tanks, and I'm working outside. The label is gone from the Lincoln wire, so not sure on the exact details... Thanks! Mike There a really over 25 different kinds of Lincoln innershield wire, you may have gotten something that is metal core, composite, or even solid wire. My guess is you got the wrong wire. |
|
|
|
| tazz9924 |
Jan 18 2021, 02:09 PM
Post
#51
|
|
Senior Member Group: Members Posts: 755 Joined: 31-May 15 From: Mooresville NC Member No.: 18,779 Region Association: None |
QUOTE(mb911 @ Jan 17 2021, 10:29 AM) QUOTE(mgarrison @ Jan 17 2021, 07:15 AM) Thanks guys. Its an inexpensive, gasless, DC inverter welder. I got the HF version since its was $75 less than the same thing at HD/Lowes. Don't want to mess with tanks, and I'm working outside. The label is gone from the Lincoln wire, so not sure on the exact details... Thanks! Mike There a really over 25 different kinds of Lincoln innershield wire, you may have gotten something that is metal core, composite, or even solid wire. My guess is you got the wrong wire. I agree looks like you have mig wire instead of flux core |
|
|
|
| mgarrison |
Jan 24 2021, 09:51 AM
Post
#52
|
|
Member Group: Members Posts: 416 Joined: 14-February 20 From: Chandler, AZ Member No.: 23,922 Region Association: Southwest Region |
A little more progress, I guess. Struggling with the very slow pace of my progress.
I switched back to a new spool of HF wire - still sealed with the label so that I could verify exactly what it was! Really struggling to get things consistent! I did not touch the settings when welding this patch for one of the AC holes, but the welds seem all over the map... 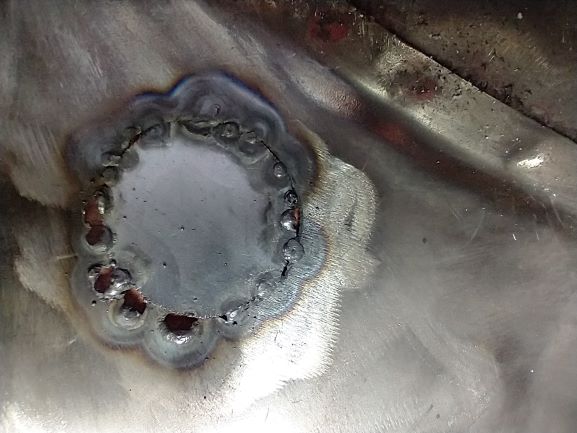 Going to regroup and try to get settings dialed on some scrap metal before any more welding! Cleaned out the seam sealer in the frunk area under the gas tank. Just minor surface rust, thankfully! 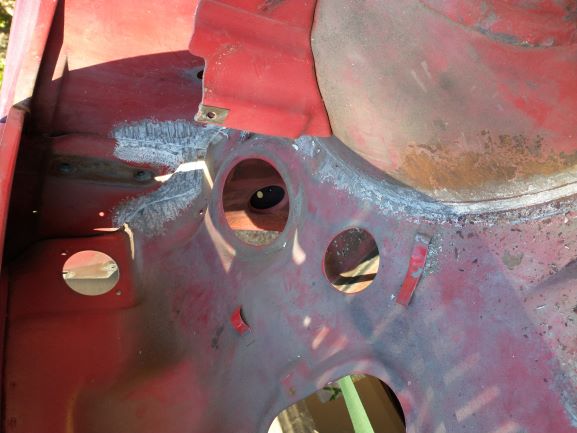 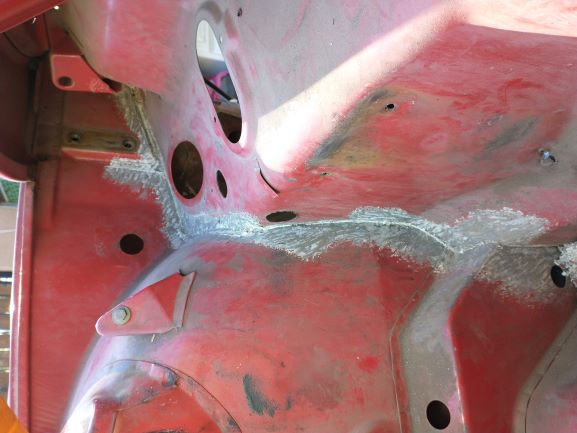 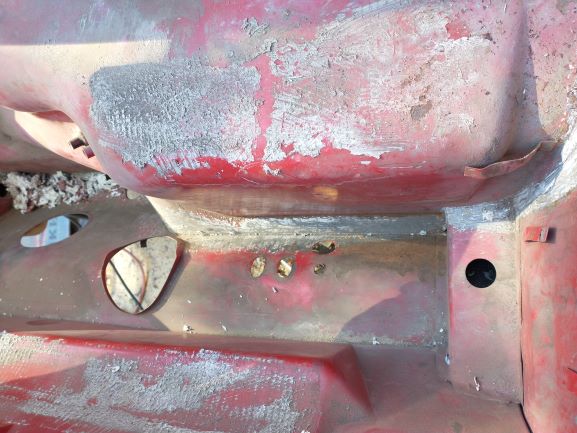 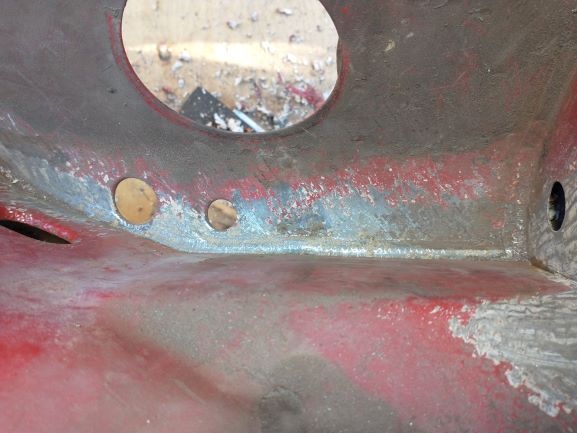 I'm really feeling way too old for some of this work! I walked funny for a bit after getting this last section done...  I went back and cleaned off my failed paint test. At least the sail is solid and filler free! 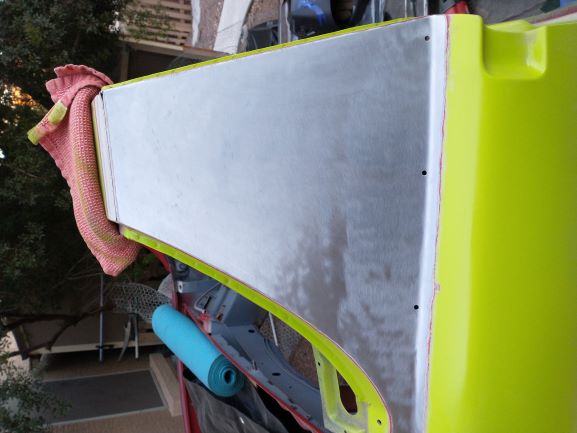 Moved on to the seam sealer in the trunk. Had some rust hiding under it back there and a bit of heavier surface rust in the rear of the trunk to treat. 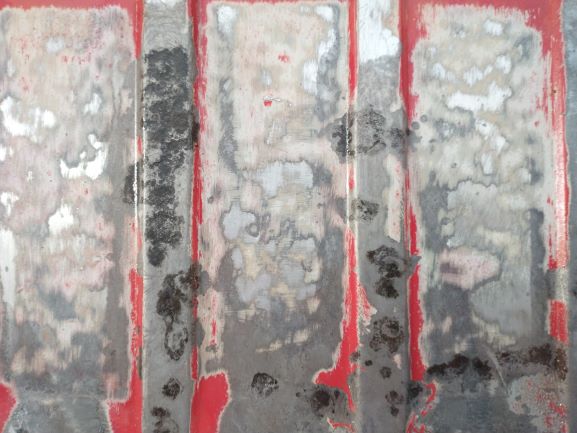 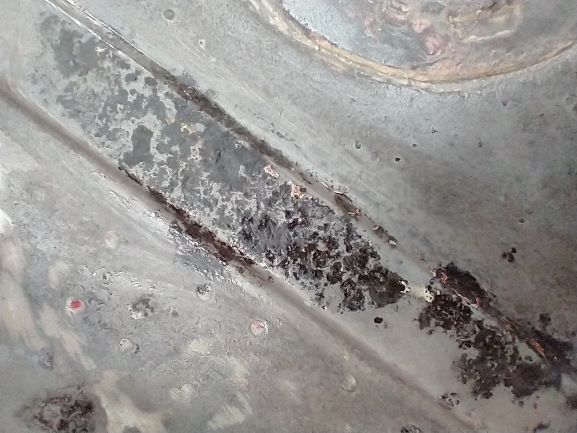 Question; When you treat rust with the acid treatment/converter and it turns black, is it good to go? Or, do you need to try and wire brush it more to remove the black? Uncovered the body number in the right, rear of the trunk. Seems like stamping the number created a low spot which caused the area to rust, go figure! 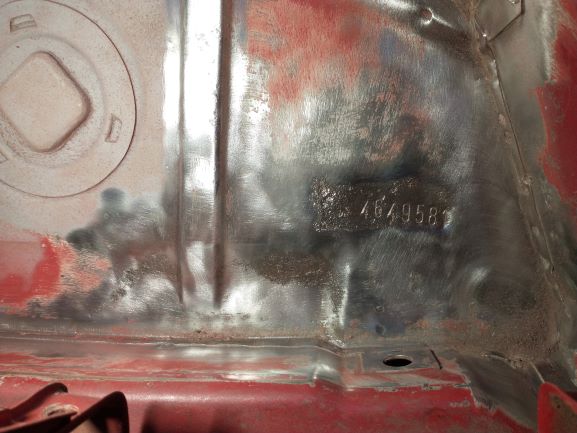 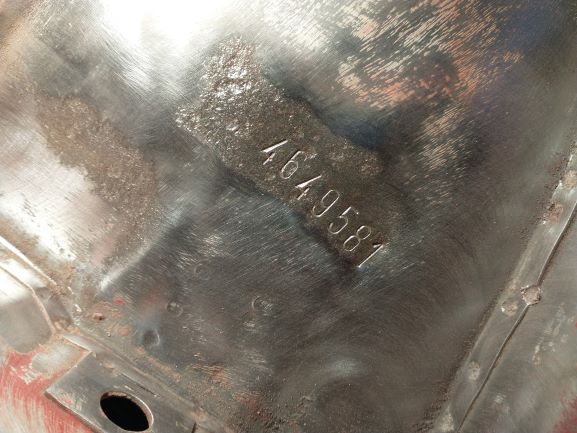 I removed the factory jack mount since I do not have the factory jack, and may need to trim, or open some of this area for the Subaru intake, etc. I hope not, but we will see. 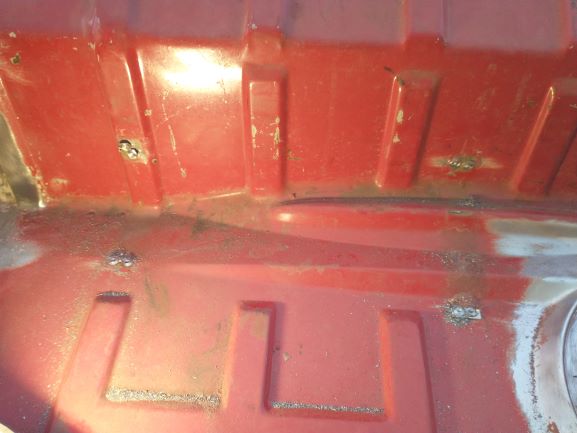 I want to use rubberized undercoating on at least the trunk floors to texture them, and to help a bit with road noise. I made sure to get the paintable kind in case I do not like them black. I read on the label that it needs to be sprayed on bare or primed metal. WOOHOO, more flap disk/wire brush work! 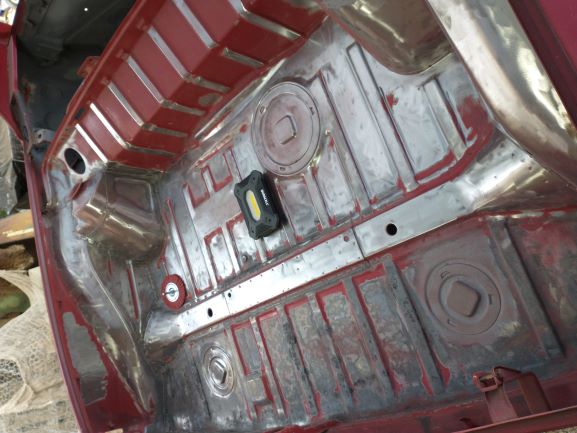 It's raining for the next couple of days, so no chance to work until things dry out again... (IMG:style_emoticons/default/sad.gif) |
|
|
|
| mb911 |
Jan 24 2021, 10:14 AM
Post
#53
|
|
914 Guru Group: Members Posts: 7,781 Joined: 2-January 09 From: Burlington wi Member No.: 9,892 Region Association: Upper MidWest |
Well remember you are using flux core on sheet metal so it is really a challenge. I think it looks great for the equipment being used. I can tell you that I have seen much worse.
|
|
|
|
| mgarrison |
Jan 25 2021, 03:16 PM
Post
#54
|
|
Member Group: Members Posts: 416 Joined: 14-February 20 From: Chandler, AZ Member No.: 23,922 Region Association: Southwest Region |
Tack weld question; when you are tacking sheet metal, are you doing a small circle with the tip/wire, or staying still/in one spot for the tack?
I've been moving in a small circle for my tacks, but maybe that's causing me issues... (IMG:style_emoticons/default/confused24.gif) |
|
|
|
| mb911 |
Jan 25 2021, 03:35 PM
Post
#55
|
|
914 Guru Group: Members Posts: 7,781 Joined: 2-January 09 From: Burlington wi Member No.: 9,892 Region Association: Upper MidWest |
No circling for what your tacking
|
|
|
|
| Cairo94507 |
Jan 25 2021, 03:46 PM
Post
#56
|
|
Michael Group: Members Posts: 10,667 Joined: 1-November 08 From: Auburn, CA Member No.: 9,712 Region Association: Northern California |
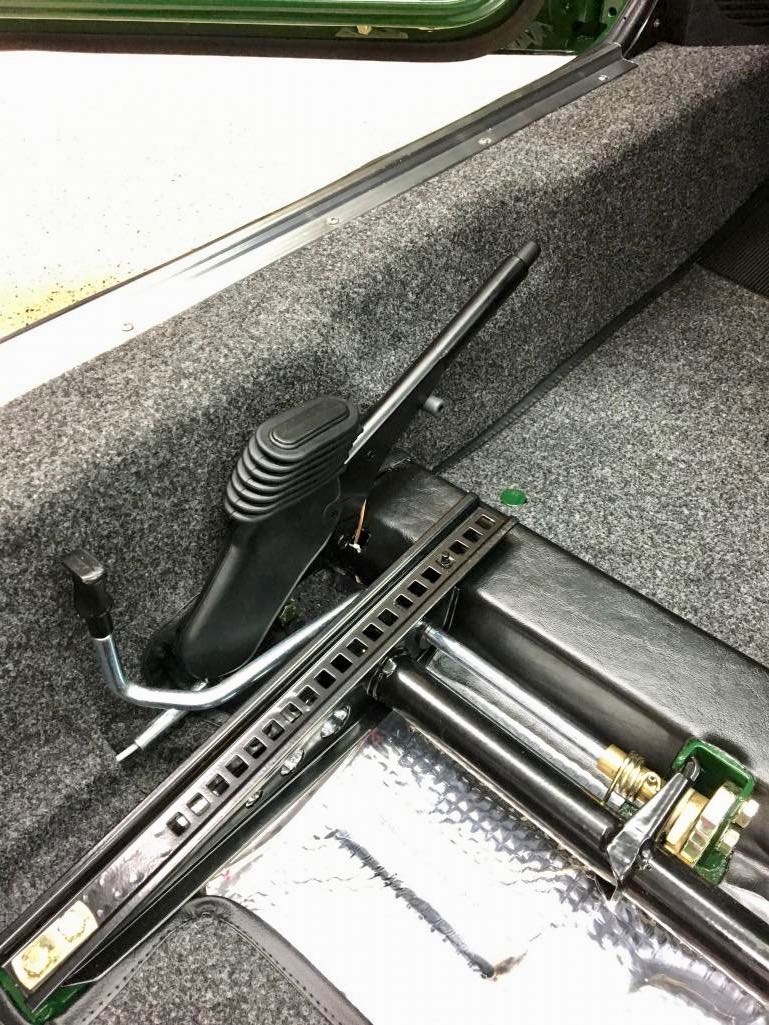
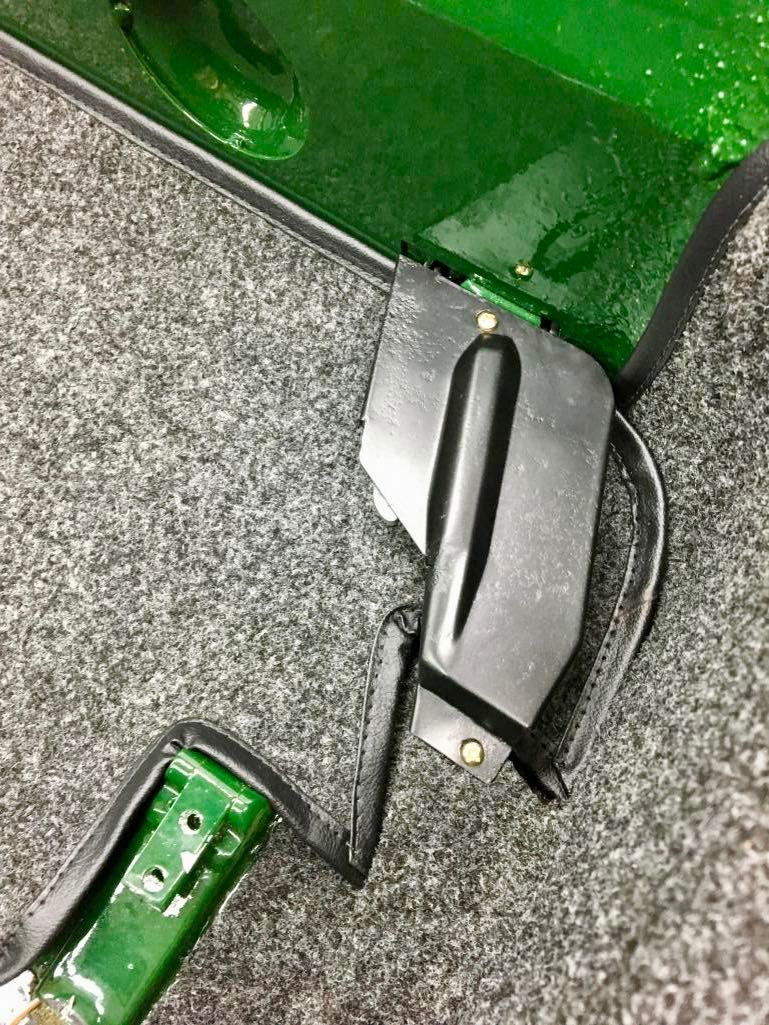
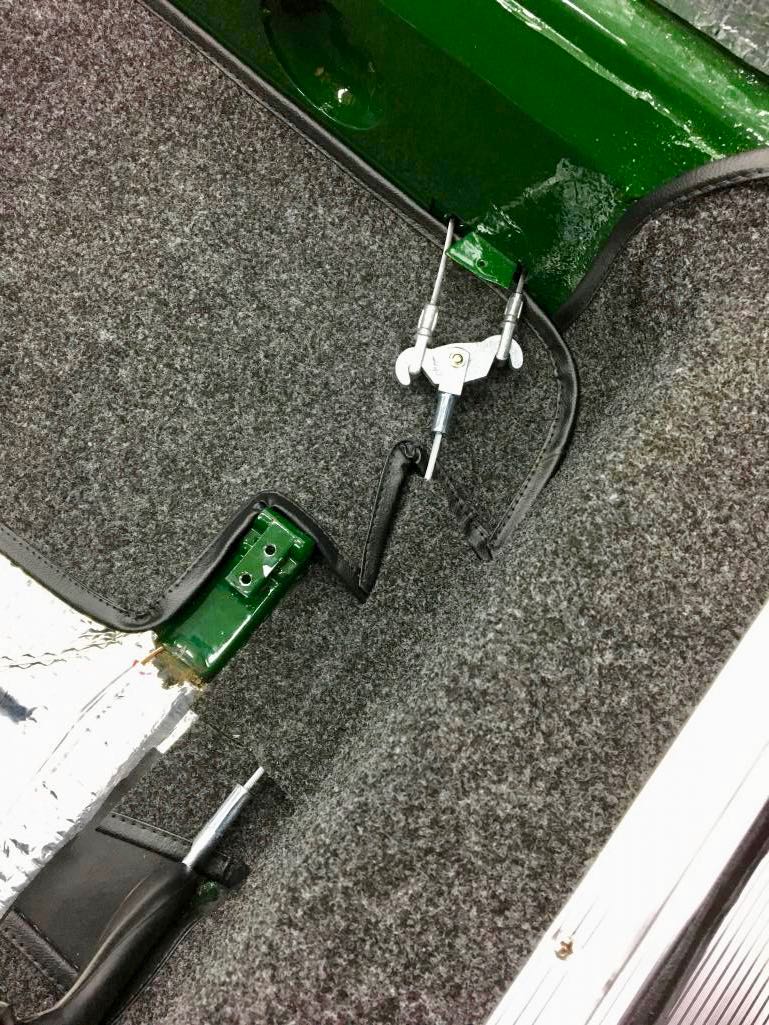
@mgarrison - Here are a few photos of my e-brake mechanism, hopefully it helps confirm location for you:
   |
|
|
|
| djway |
Jan 25 2021, 11:21 PM
Post
#57
|
|
Senior Member Group: Members Posts: 787 Joined: 16-October 15 From: Riverside Member No.: 19,266 Region Association: Southern California |
Check all the connections on your welder.
Especially check everything with the ground clamp. Make sure all connections are clean and tight and the clamp surfaces are clean. I discovered that was an issue once. Also check inside where the wire feeds into the torch tube and make sure that is all clean. Now back to your regularly scheduled welding.... |
|
|
|
| mgarrison |
Jan 26 2021, 09:45 AM
Post
#58
|
|
Member Group: Members Posts: 416 Joined: 14-February 20 From: Chandler, AZ Member No.: 23,922 Region Association: Southwest Region |
Thanks for the tips guys! I'm going to practice on some scrap, and try to get my settings dialed in...again. I will also double-check all the connections, and clean the welder up. Appreciate the advise!
|
|
|
|
| mgarrison |
Feb 3 2021, 04:39 PM
Post
#59
|
|
Member Group: Members Posts: 416 Joined: 14-February 20 From: Chandler, AZ Member No.: 23,922 Region Association: Southwest Region |
More trunk work - that took a lot longer than I anticipated! Safely covered with some primer for now. Need to figure out what/how/where I want to coat it with...Still debating the paintable rubberized uncoating vs. spray bedliner vs. body color. Want to hide my welds/repairs/treated rust and make it look at least decent...
  Let's call it finished! 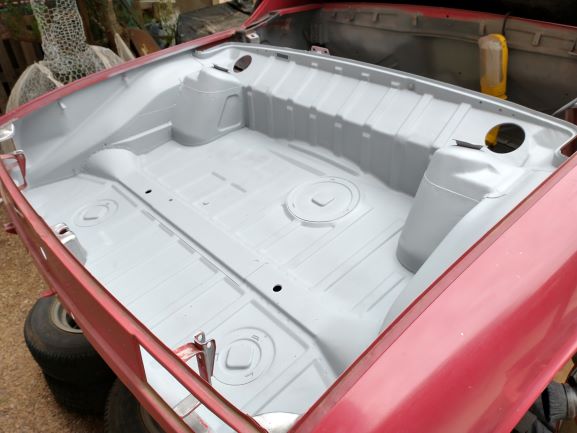 Got the center tunnel wire brushed out as best I could. Treated it with rust converter, let it sit overnight, brushed it again, let it sit and then rinsed it out good. Vacuumed it with wet/dry vac, and then took the lawn blower to it to dry everything as much as possible. Added a quick coat of primer after hitting it with a wire brush again to remove any residue from the rust treatment. 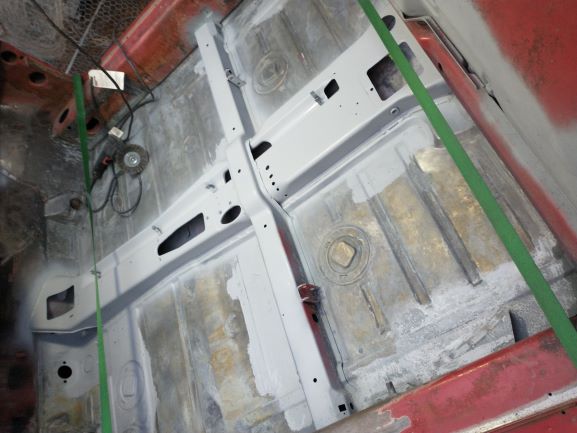 Waiting on more primer and more internal frame paint to finish up the tunnel and floors... (IMG:style_emoticons/default/popcorn[1].gif) Attached image(s) 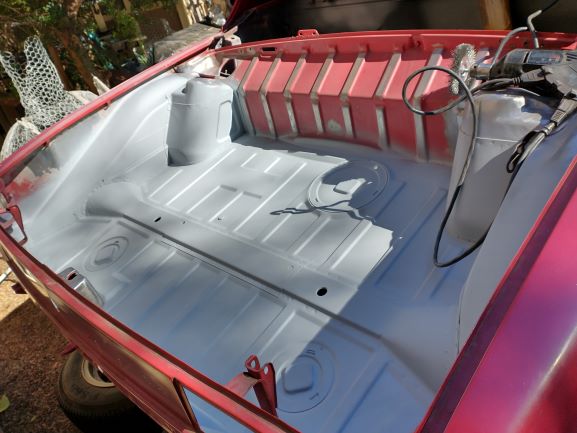 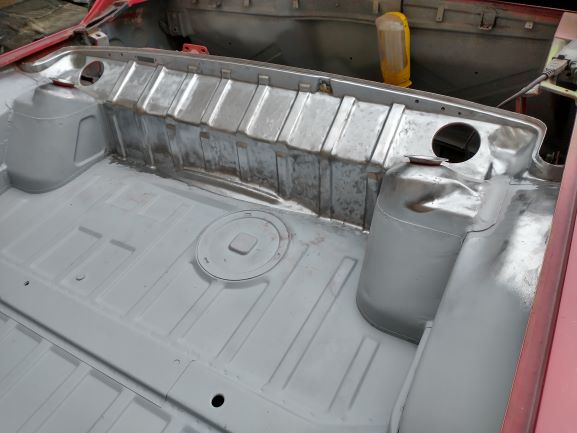 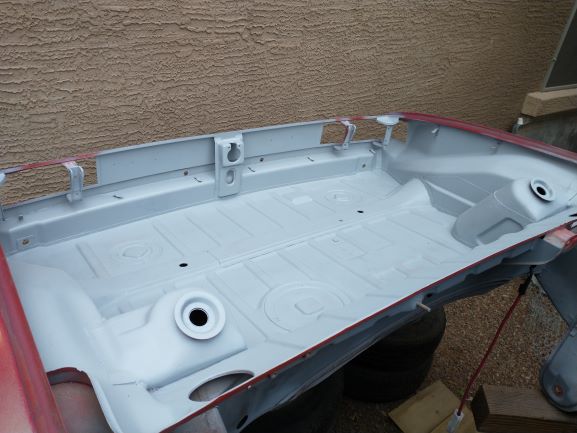
|
|
|
|
| mgarrison |
Feb 3 2021, 07:39 PM
Post
#60
|
|
Member Group: Members Posts: 416 Joined: 14-February 20 From: Chandler, AZ Member No.: 23,922 Region Association: Southwest Region |
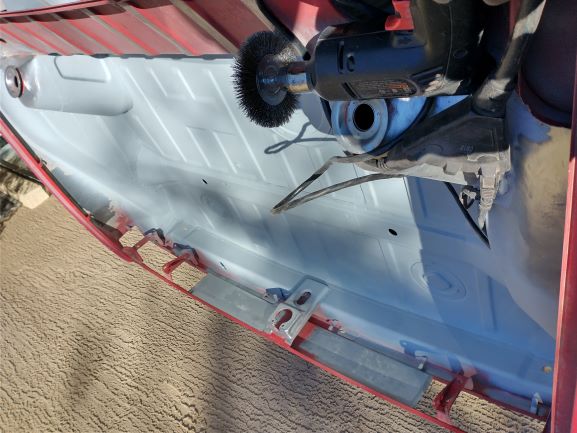
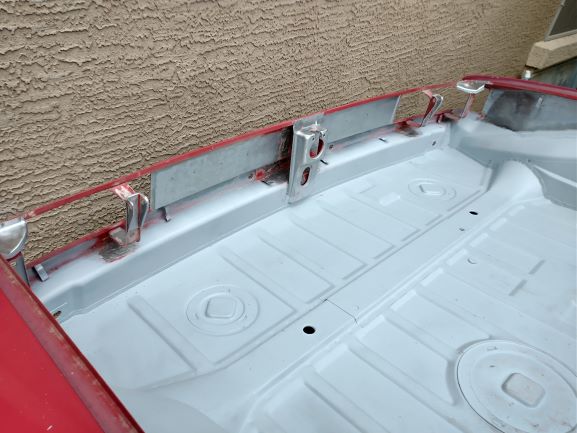
The last thing I did last night was check the weather forecast. It said a 1% chance of rain, so I left the tarp off the 914 so it could air out after the rinse, vacuum, and blow dry of the center tunnel. Thinking I should go buy a lottery ticket - it rained for all off maybe 3 minutes this morning! More wire brush time...
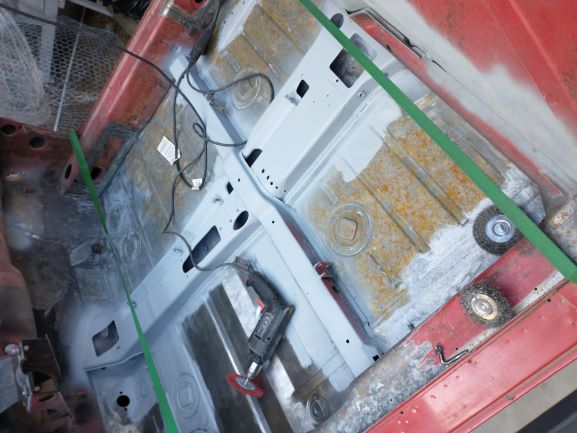 I tried these fiber wheels/brushes from HF. They work pretty well where there's light rust, or you just want to remove paint without chewing up the metal underneath. 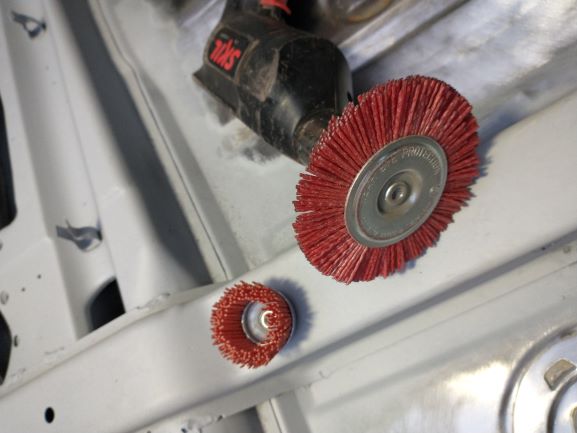 Some decent results with the fiber wheels. Prepping for the Mad Dog inner long stiffener. 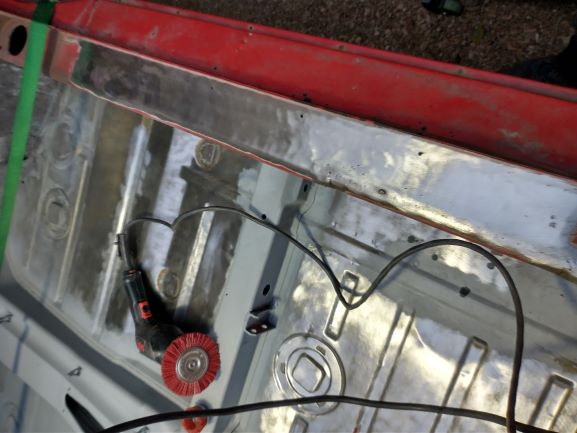 Lost my light for tonight... |
|
|
|
|
2 User(s) are reading this topic (2 Guests and 0 Anonymous Users)
0 Members:

|
Lo-Fi Version | Time is now: 11th June 2026 - 04:49 PM |
Invision Power Board
v9.1.4 © 2026 IPS, Inc.