|
|
|
Porsche, and the Porsche crest are registered trademarks of Dr. Ing. h.c. F. Porsche AG.
This site is not affiliated with Porsche in any way. Its only purpose is to provide an online forum for car enthusiasts. All other trademarks are property of their respective owners. |
|
|

  |

| 914e |
 May 12 2020, 12:43 AM May 12 2020, 12:43 AM
Post
#21
|
|
Member  Group: Members Posts: 496 Joined: 21-February 20 From: Arizona Member No.: 23,951 Region Association: Southwest Region |
My poor car's wiring harness has been butchered. It has been spliced, chewed on, torn, chopped and who knows what else.
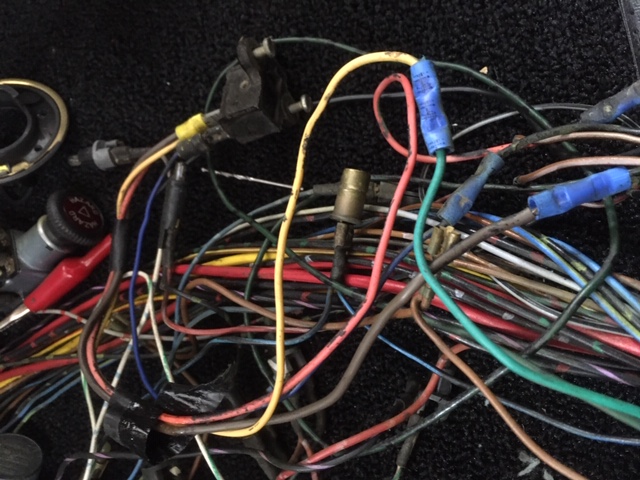 With everything else going on I have been slowly tracing down the wiring problems. Splices everywhere, you have to love splices that as you trace wire 6" later you have another splice. 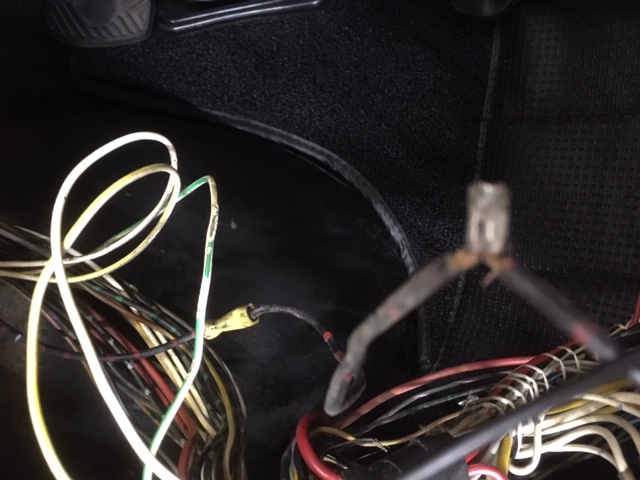 The fairly heavy black with red wire confused me looking at the schematics till I remembered the later model's fuel pump is in the front. I kept wondering why it was in the front part of the harness. The new "fuel" will require a bit heavier gauge cable so I won't be use that one anyway.  I finally sorted out the headlight motors. A few feet of harness is missing for the drivers side front lights. New harnesses from 914 rubber are just long enough to repair most of it. I have most of it sorted out, now I just need to fix the splices and rewrap the harness. |
   |

 
|
| 914e |
May 24 2020, 01:31 AM
Post
#22
|
|
Member Group: Members Posts: 496 Joined: 21-February 20 From: Arizona Member No.: 23,951 Region Association: Southwest Region |
After my daughter rebuilt the CV joints she was too busy the last few weeks of school to help on the car. If she had time she might have reminded me to order all the parts I needed, before I tried to put it back together. First mistake was I forgot to order Schnorr washers. Oh well the half shaft was in, I ordered the washers which nobody in the whole state has on a Saturday.
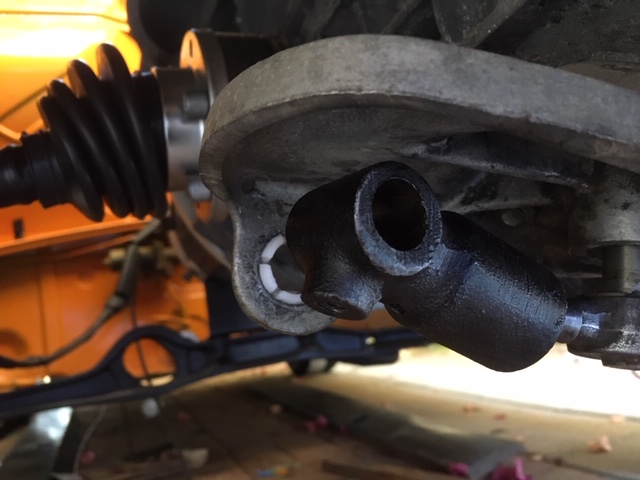 My transaxle had a pretty bad leak from the speedo bushing, so when Mike released the new double seal version I snapped one up. I at least made sure I could get the fill plug out, the bad news was I could barely even touch the gear oil. (IMG:style_emoticons/default/sad.gif) The good news is I didn't lose a drop from my quart low transaxle. I only had a pint in the garage so I added what I had. It wasn't full, but it didn't leak so I had some misguided hope. Some how though all this I had the pull down the half shaft of the transaxle again the tore the gasket. (IMG:style_emoticons/default/headbang.gif) I was hoping the put in the shift linkage but it would be in the way. Ordered extra CV joint gaskets, and extra washers just to have them. Picked some gear oil during week. I topped up the gear oil, put on the CV joint gasket, bolted in the the half shaft. Put in the shift linkage and had both end connected, looked up and noticed I forgot the cover. Disconnect the linkage go find the cover, slide it on and think there should a rubber boot. I must have that boot somewhere, I dig though all my boxes of parts can't find it. We go grab some lunch. After lunch I look through my orders to see if have ordered one, I had not. I add it to a new order. (Can I claim 914 rubber and AA as a dependents?) I go back out to car the pull the linkage back out till I can get the boot. To find a fresh puddle of gear oil. It is pouring out the the output shaft seal. At two in the afternoon on Saturday nobody open has that seal. Autohaus had them in stock but they are only open during the week. Looking at the weather I see that mid week was dropping back into the 90's. Since work has dropped back down to just insane, I decide to take a day off midweek after I get the parts. The parts arrive, I pull the half shaft again. I pull the output shaft and seal, put in the new seal. Looking at the output shaft, it seems strange me that Porsche would have left the casting rough so close the the seal. I start cleaning up the shaft to put it back only to find that it not casting . It is rock hard Arizona desert that had combined with gear oil to make one of the best epoxies you can find. After about 30 minutes I was able to remove it. With it cleaned up reinstalled it, the half shaft, linkage, torqued everything with ALL the parts installed. So far after a few days still bone dry. |
|
|
|
| 914e |
Oct 12 2020, 09:45 PM
Post
#23
|
|
Member Group: Members Posts: 496 Joined: 21-February 20 From: Arizona Member No.: 23,951 Region Association: Southwest Region |
After over 5 months of brutal summer I have finally been able work on the car the last two weekends. We had started on the seats about the time @iankarr released his video on redoing the seats. At the time I was worried I would finish before he released the 2nd half. (IMG:style_emoticons/default/lol-2.gif) As luck would have he had plenty of time.
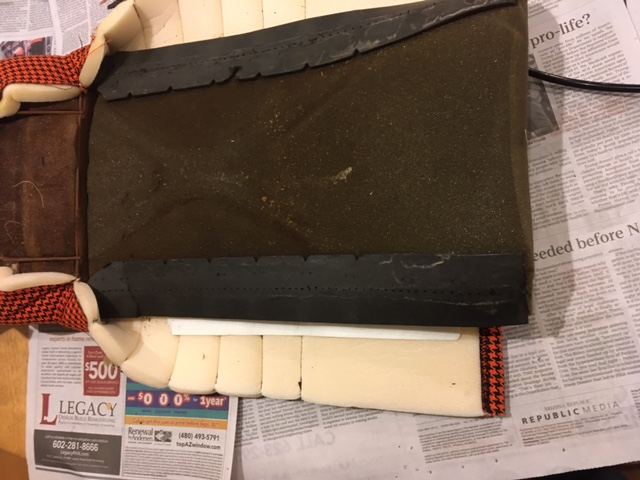 We did add something that works good here. Seat heaters are more than enough to keep you warm in the two to three weeks of Arizona winter. 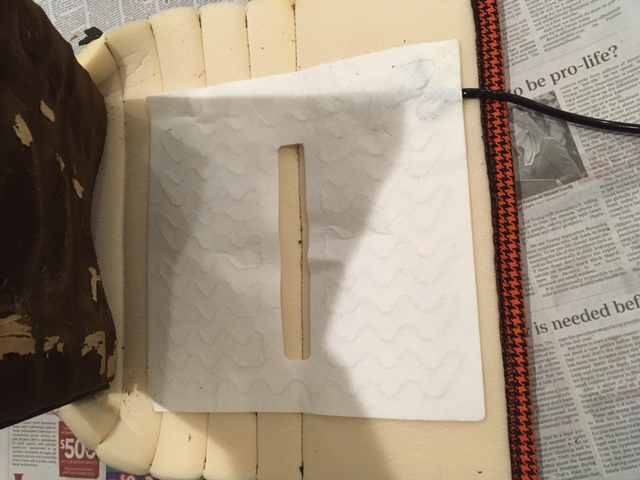 I thought I took pictures of the finished seat, I guess I have to take one tomorrow |
|
|
|
| 914e |
Jul 5 2022, 01:41 AM
Post
#24
|
|
Member Group: Members Posts: 496 Joined: 21-February 20 From: Arizona Member No.: 23,951 Region Association: Southwest Region |
It only took me 18 months to post the next day.
The inspector has approved the seats. 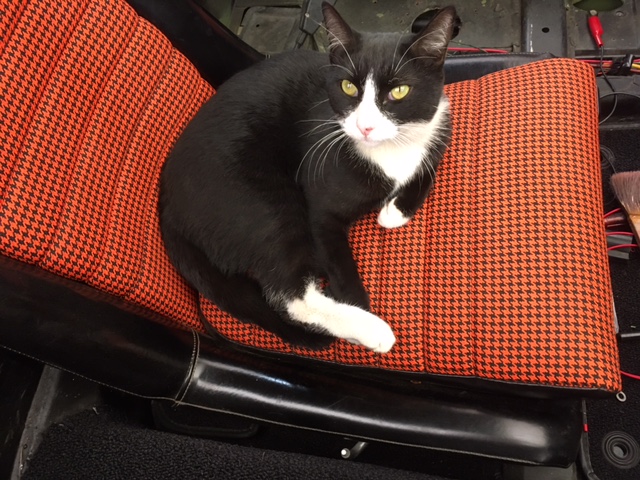 I still need to work on the interior. 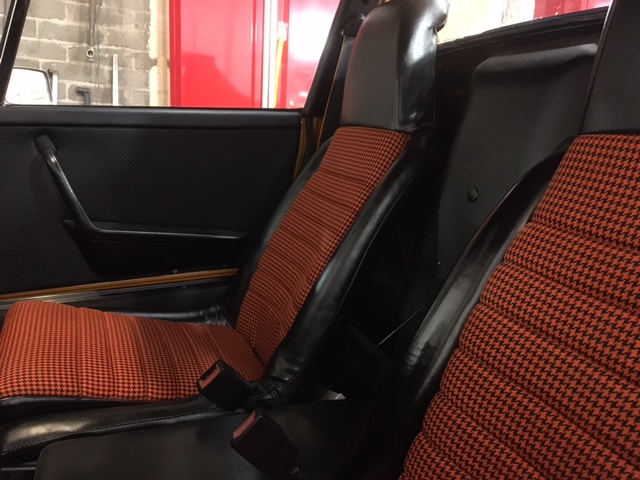 |
|
|
|
| 914e |
Jul 14 2022, 11:44 PM
Post
#25
|
|
Member Group: Members Posts: 496 Joined: 21-February 20 From: Arizona Member No.: 23,951 Region Association: Southwest Region |
I decided to drill a bunch of holes in the car.
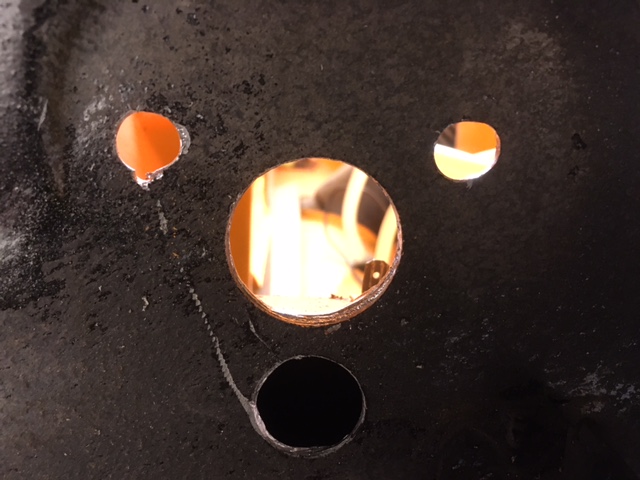 To add the front sway-bar. 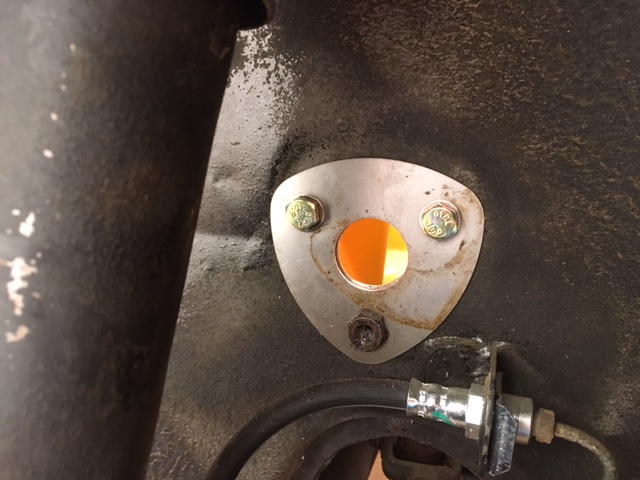 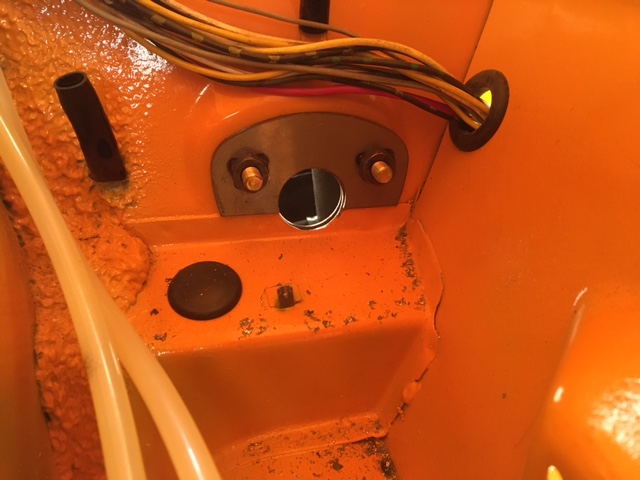 Cleaned it up flapper wheel for welding 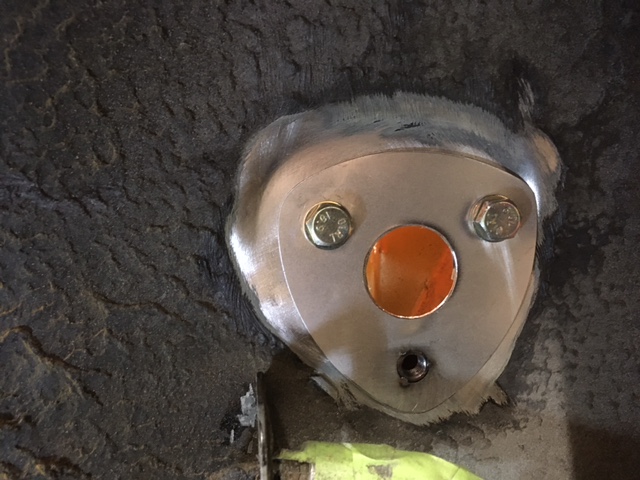 Not the prettiest weld but I think it will hold 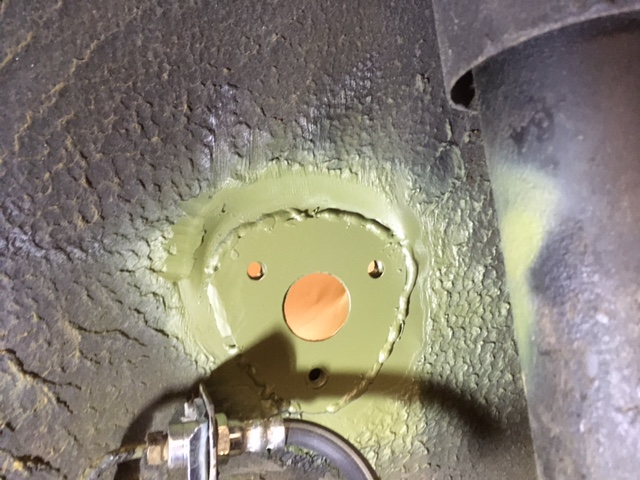 |
|
|
|
| Root_Werks |
Jul 15 2022, 09:35 AM
Post
#26
|
|
Village Idiot Group: Members Posts: 8,326 Joined: 25-May 04 From: About 5NM from Canada Member No.: 2,105 Region Association: Pacific Northwest |
I feel your pain what you have to clean up wiring wise. My 914 was a rats nest, took days to sort through everything, mostly remove or undo everything PO did. Yuck. End product is well worth the work.
|
|
|
|
| 914e |
Jul 19 2022, 10:55 PM
Post
#27
|
|
Member Group: Members Posts: 496 Joined: 21-February 20 From: Arizona Member No.: 23,951 Region Association: Southwest Region |
QUOTE(Root_Werks @ Jul 15 2022, 08:35 AM)  I feel your pain what you have to clean up wiring wise. My 914 was a rats nest, took days to sort through everything, mostly remove or undo everything PO did. Yuck. End product is well worth the work. I think there are two thing all 914's have rust and wiring messed up by previous owner. I have it all working now I have make it pretty. |
|
|
|
| 914e |
Aug 30 2022, 11:53 PM
Post
#28
|
|
Member Group: Members Posts: 496 Joined: 21-February 20 From: Arizona Member No.: 23,951 Region Association: Southwest Region |
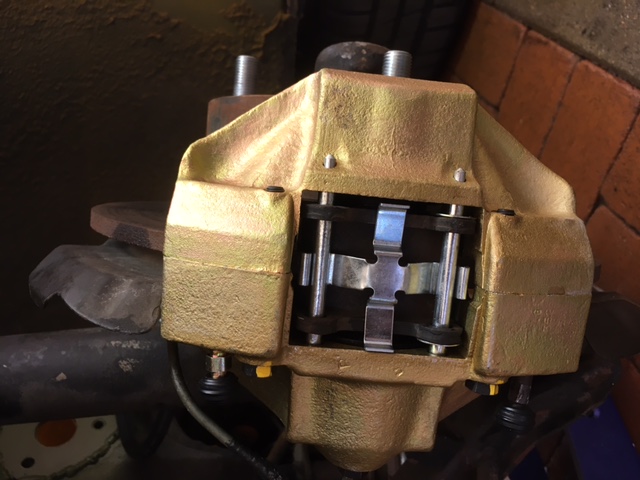
After welding in the sway-bar mounts, I install rebuilt front calipers from PMB to match the rears.
  |
|
|
|
| seanpaulmc |
Aug 31 2022, 05:51 AM
Post
#29
|
|
Member Group: Members Posts: 303 Joined: 6-December 16 From: Orlando, FL Member No.: 20,649 Region Association: South East States |
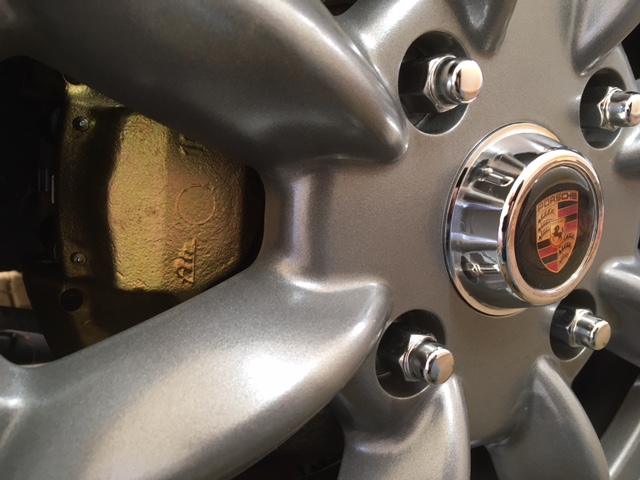
QUOTE(914e @ Aug 31 2022, 01:53 AM) After welding in the sway-bar mounts, I install rebuilt front calipers from PMB to match the rears. Nice! VTO wheels? Size? Tire size? Full view picture please. |
|
|
|
| 914e |
Aug 31 2022, 11:39 PM
Post
#30
|
|
Member Group: Members Posts: 496 Joined: 21-February 20 From: Arizona Member No.: 23,951 Region Association: Southwest Region |
QUOTE(seanpaulmc @ Aug 31 2022, 04:51 AM) Nice! VTO wheels? Size? Tire size? Full view picture please. @seanpaulmc Yes, VTO wheels they are 16 x7 with 195/55 Michelin Pilot Sport A/S 3 Plus tires. They are custom color off one the other model of wheels. The custom color was very reasonable. 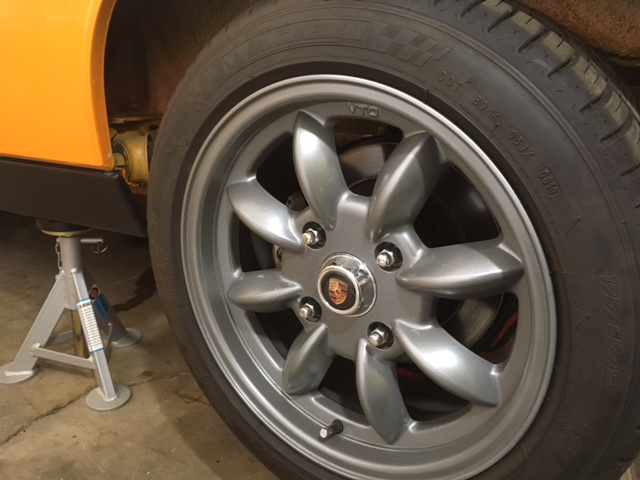 |
|
|
|
| seanpaulmc |
Sep 1 2022, 06:27 AM
Post
#31
|
|
Member Group: Members Posts: 303 Joined: 6-December 16 From: Orlando, FL Member No.: 20,649 Region Association: South East States |
Thanks! Love it!!
QUOTE(914e @ Sep 1 2022, 01:39 AM) QUOTE(seanpaulmc @ Aug 31 2022, 04:51 AM) Nice! VTO wheels? Size? Tire size? Full view picture please. @seanpaulmc Yes, VTO wheels they are 16 x7 with 195/55 Michelin Pilot Sport A/S 3 Plus tires. They are custom color off one the other model of wheels. The custom color was very reasonable. |
|
|
|
| TRS63 |
Sep 2 2022, 01:23 PM
Post
#32
|
|
Member Group: Members Posts: 316 Joined: 14-September 20 From: Germany - Stuttgart Member No.: 24,690 Region Association: Europe |
|
|
|
|
| 914e |
Sep 2 2022, 09:45 PM
Post
#33
|
|
Member Group: Members Posts: 496 Joined: 21-February 20 From: Arizona Member No.: 23,951 Region Association: Southwest Region |
I'm still way behind on posts. I was having issues the 25 year old DC motor and controller. I had always planned to replace it with modern AC motor from the beginning when I found the car.
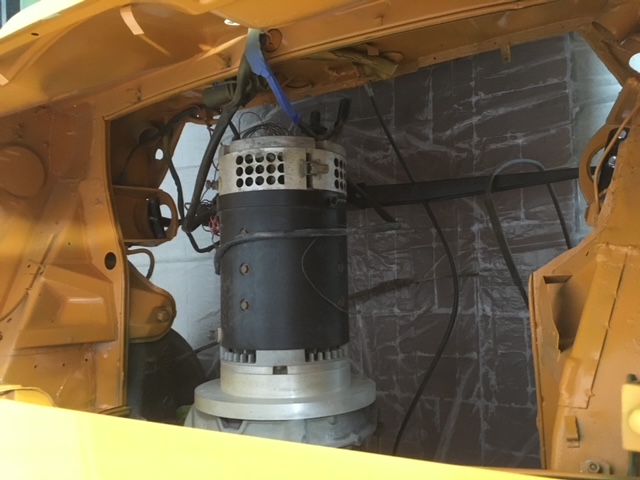 So I decide it was a good time to upgrade the motor. 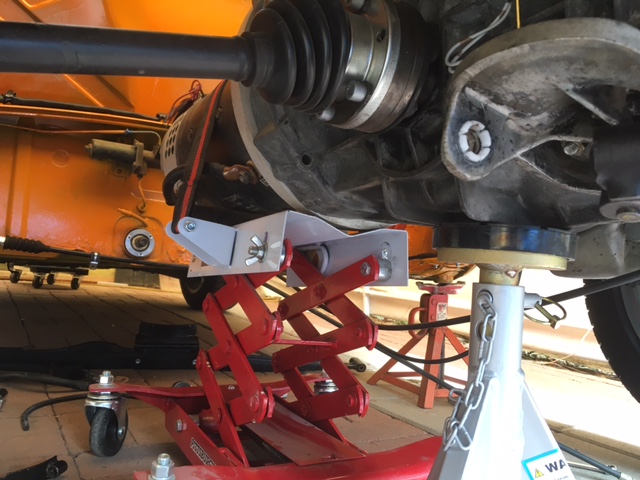 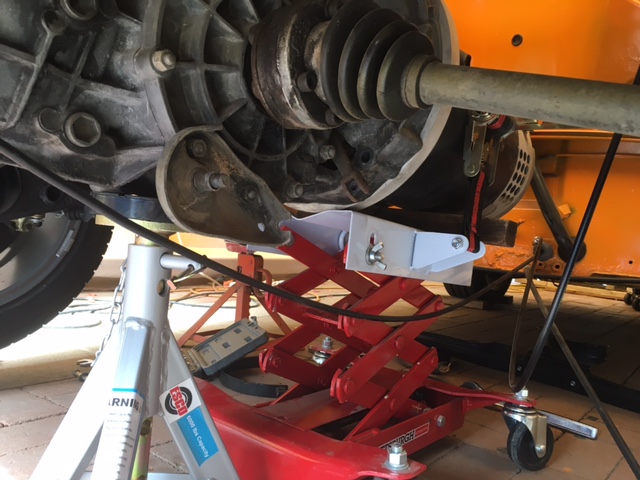 The lightweight aluminum flywheel is an interference fit to the hub so it needed to be heated in the oven while my wife was not looking. 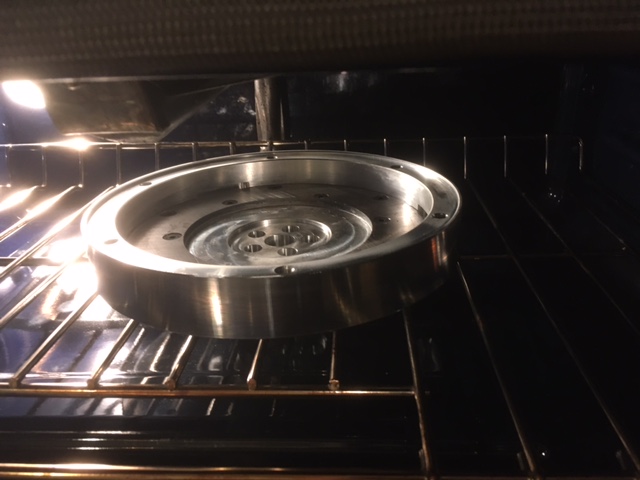 |
|
|
|
| 914e |
Sep 2 2022, 09:49 PM
Post
#34
|
|
Member Group: Members Posts: 496 Joined: 21-February 20 From: Arizona Member No.: 23,951 Region Association: Southwest Region |
A side by side of the old DC motor and the new AC motor.
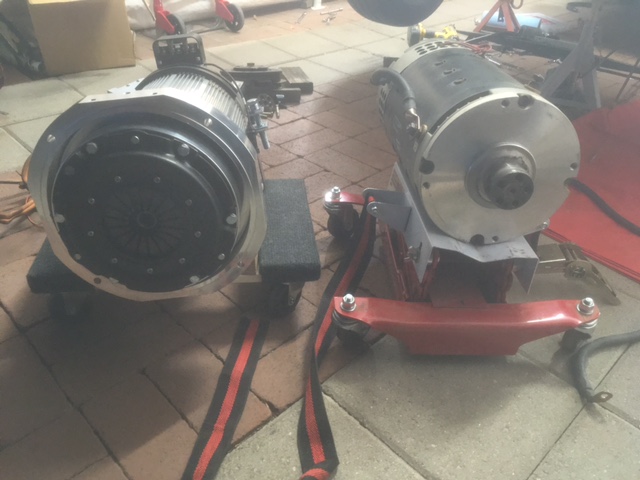 a few specs Rated Torque: 173 Lb Ft Rated Power: 120 HP Max RPM: 8,000 Air Cooled |
|
|
|
| 914e |
Sep 2 2022, 09:58 PM
Post
#35
|
|
Member Group: Members Posts: 496 Joined: 21-February 20 From: Arizona Member No.: 23,951 Region Association: Southwest Region |
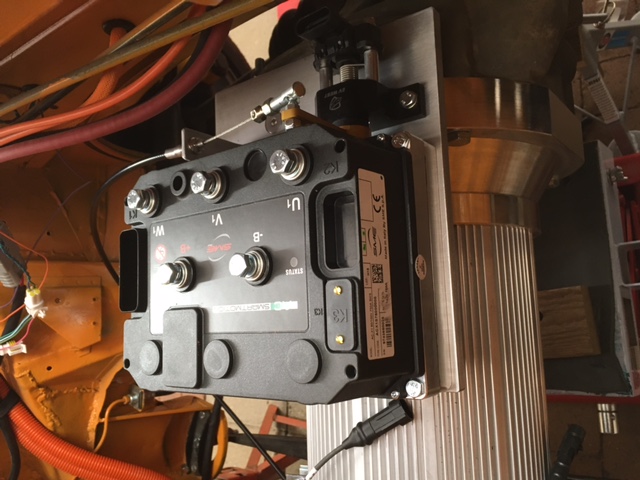
Then I needed to fabricate the mounting plate the inverter/ controller and the throttle.
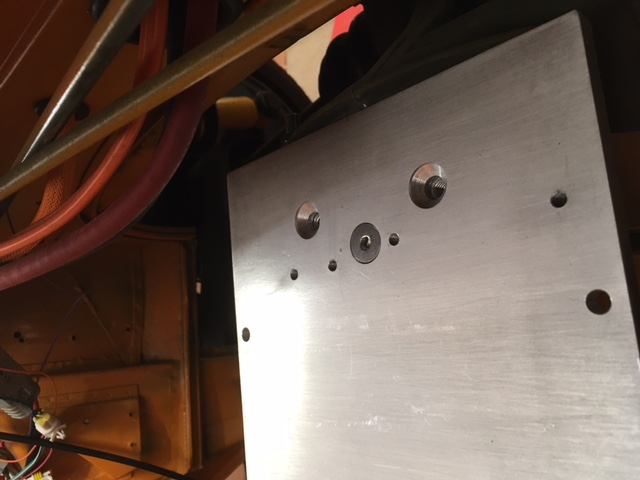 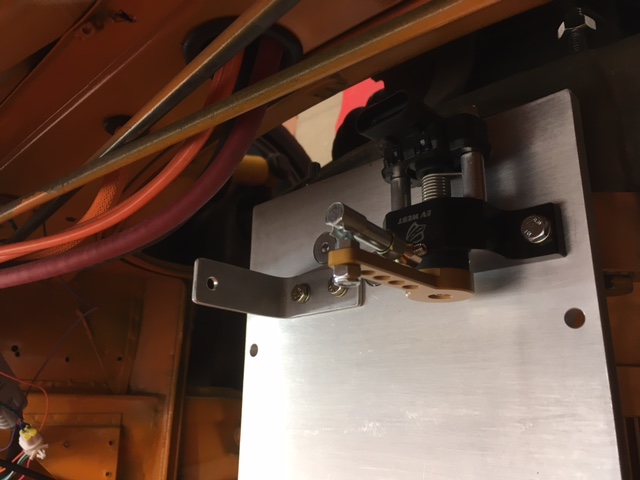 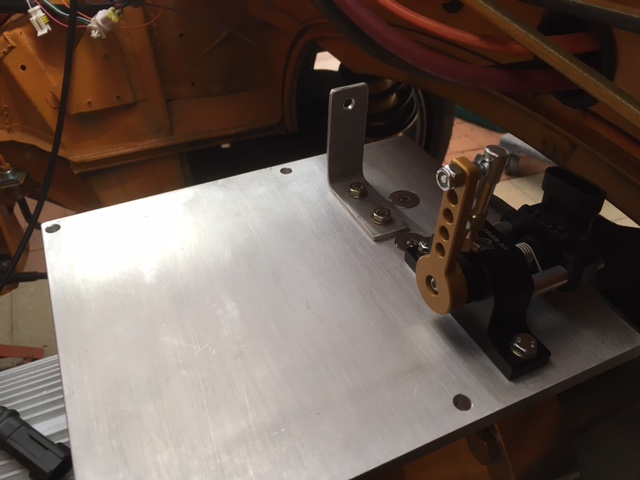  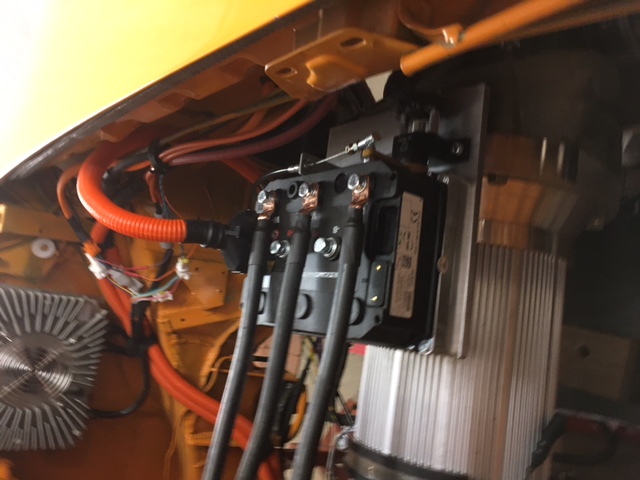 Of course after I had pulled the old motor and was cleaning it up and noticed the brushes did not move at all. That ultrafine Arizona dust had settled in brush holders and pretty much locked them into place. That explained the strange issues I was having.it was a struggle to work them loose. 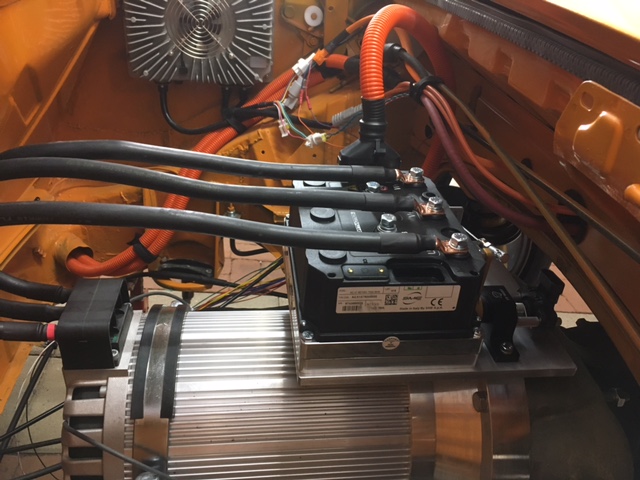 |
|
|
|
| 914e |
Sep 2 2022, 10:07 PM
Post
#36
|
|
Member Group: Members Posts: 496 Joined: 21-February 20 From: Arizona Member No.: 23,951 Region Association: Southwest Region |
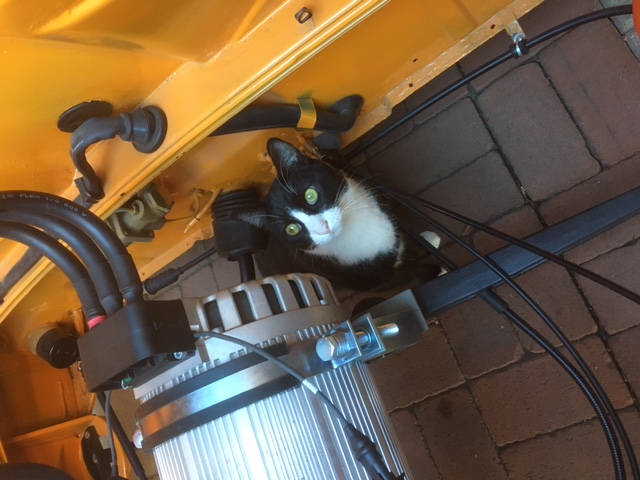
Of course the car had to be throughly inspected.
 |
|
|
|
| 914e |
Sep 2 2022, 10:17 PM
Post
#37
|
|
Member Group: Members Posts: 496 Joined: 21-February 20 From: Arizona Member No.: 23,951 Region Association: Southwest Region |
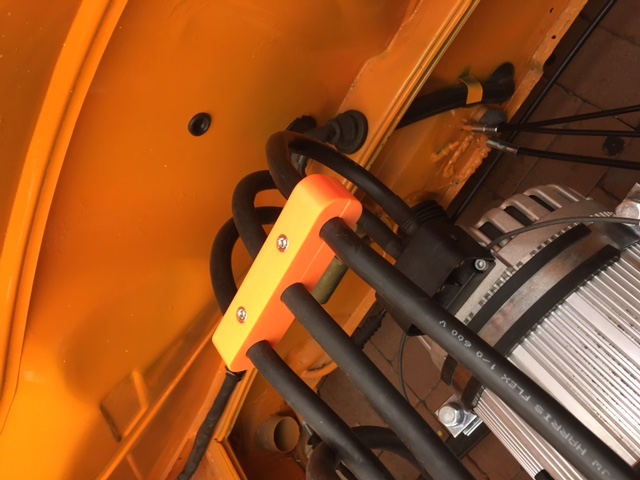
My son designed and printed a cable loom to dress the cables.
 |
|
|
|
| 914e |
Sep 2 2022, 10:29 PM
Post
#38
|
|
Member Group: Members Posts: 496 Joined: 21-February 20 From: Arizona Member No.: 23,951 Region Association: Southwest Region |
The battery box required some arts and crafts or CAD AKA Cardboard Aid Design. Being a professional I stepped it up to foam-core.
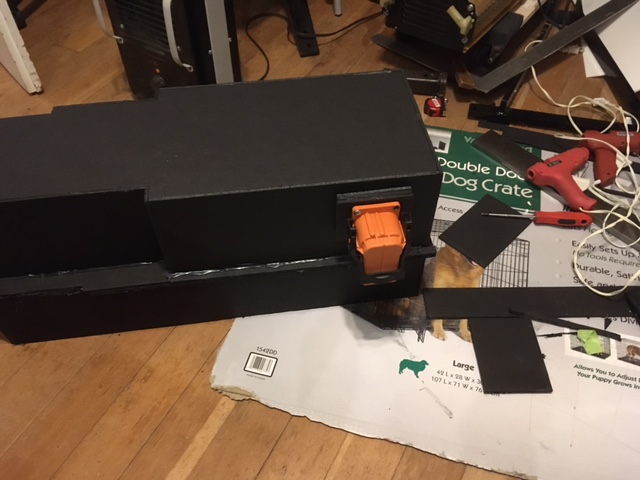 This the large DC power connector shell.  Inside the battery box is two Chevy Volt modules. There will be a box on each side of the motor. 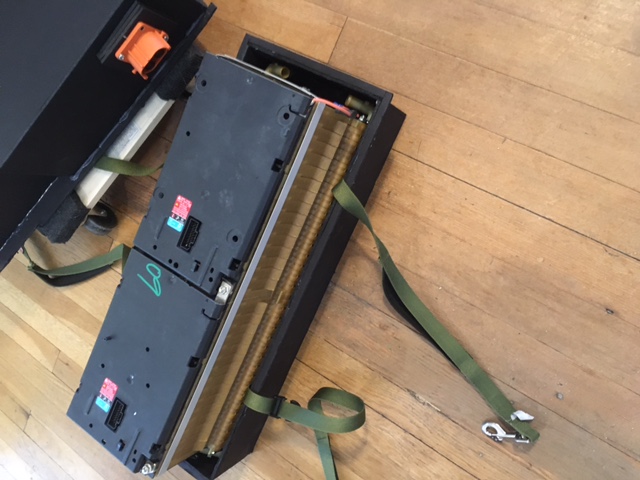  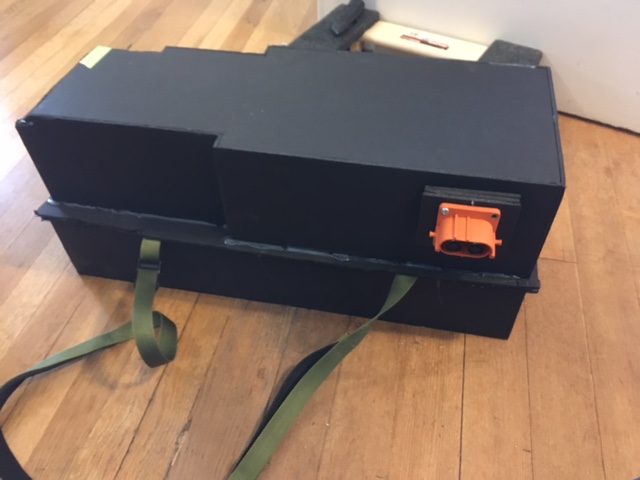 The first box in the car. 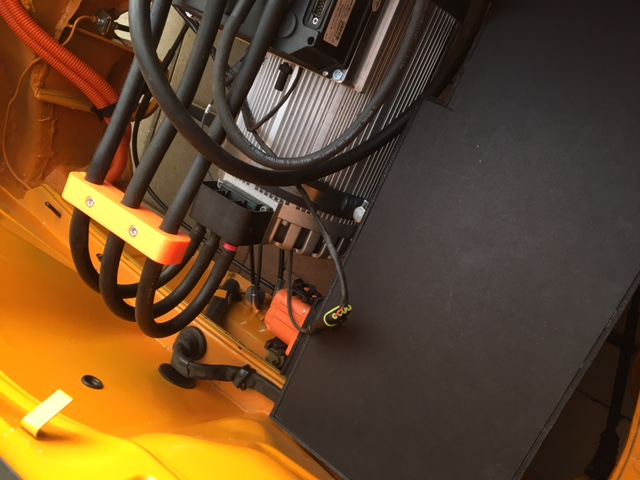 From the other side. 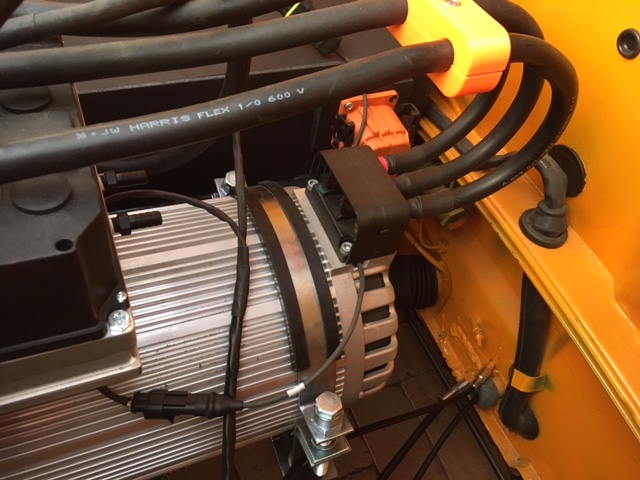 With both boxes in, it is tight fit. 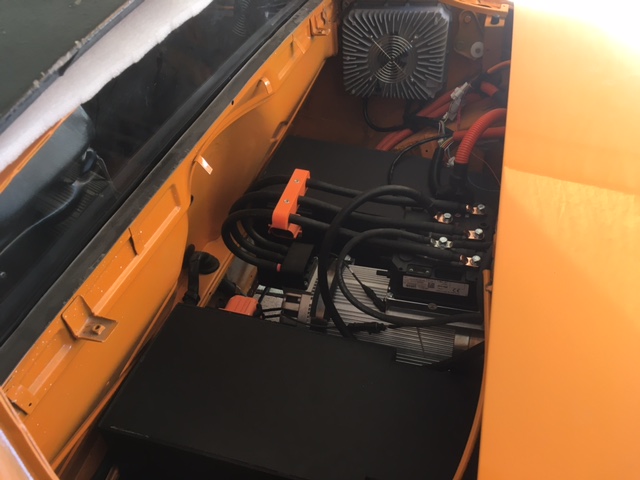 |
|
|
|
|
1 User(s) are reading this topic (1 Guests and 0 Anonymous Users)
0 Members:

|
Lo-Fi Version | Time is now: 24th May 2024 - 06:18 PM |
Invision Power Board
v9.1.4 © 2024 IPS, Inc.