|
|
|
Porsche, and the Porsche crest are registered trademarks of Dr. Ing. h.c. F. Porsche AG.
This site is not affiliated with Porsche in any way. Its only purpose is to provide an online forum for car enthusiasts. All other trademarks are property of their respective owners. |
|
|

  |

| Stoddy |
 Jun 13 2020, 04:35 PM Jun 13 2020, 04:35 PM
Post
#1
|
|
All things Porsche!  Group: Members Posts: 53 Joined: 30-May 18 From: Monmouth (UK) Member No.: 22,173 Region Association: England |
Hello all, I hope everyone is well and safe.
Here in the U.K, THE COLONEL is coming along. Question. Do I cut the rear section of the trunk floor out near the middle, or is there a seem to un stich? I see the spot welds along the sides and the rear edge, but can’t see a join near the middle section. Any advice as usual, most welcome. Cheers, Stoddy (IMG:style_emoticons/default/beer.gif) Attached image(s) 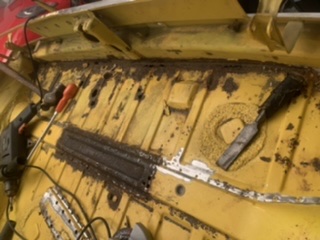
|
   |

 
|
| 9146C |
Jun 13 2020, 05:03 PM
Post
#2
|
|
Member Group: Members Posts: 228 Joined: 14-September 19 From: US Member No.: 23,460 Region Association: None |
Restoration Design have a "how-to" video:
https://www.youtube.com/watch?v=GBmJkP8I_rI Depending on who you bought your replacement panel from. I went with the RD panel and cut out on the leading/inboard side of the cross brace (closest to the engine bay). The RD panel required a little additional metal work for me, but, otherwise worked out well. |
|
|
|
| bkrantz |
Jun 13 2020, 09:20 PM
Post
#3
|
|
914 Guru Group: Members Posts: 7,766 Joined: 3-August 19 From: SW Colorado Member No.: 23,343 Region Association: Rocky Mountains |
I cut just aft of the cross brace flange, and then made a lap joint with the replacement panel.
|
|
|
|
| Stoddy |
Jun 15 2020, 05:17 PM
Post
#4
|
|
All things Porsche! Group: Members Posts: 53 Joined: 30-May 18 From: Monmouth (UK) Member No.: 22,173 Region Association: England |
Thanks gents, I haven’t bought the replacement panel yet, so guess that’s the next step!
Best, Stoddy. |
|
|
|
| 9146C |
Jun 15 2020, 06:22 PM
Post
#5
|
|
Member Group: Members Posts: 228 Joined: 14-September 19 From: US Member No.: 23,460 Region Association: None |
If I had to do it again, I would do what @bkrantz recommends, with a slight modification: rather than a lap joint, I would butt the joint in the middle of the "ledge" of the bottom cross brace such that half of the original floor pan is resting on the "middle" of the ledge and the new pan rests on the other half...just need to be careful cutting the old pan out and not cutting through the bottom cross brace ledge. The end result welding/grinding will be much cleaner. You can then also add some beads to the underside of the cross brace/new pan.
After reading your other post, there is no factory seam to undo, the trunk pan was installed as one piece. Good luck! |
|
|
|
| barefoot |
Jun 16 2020, 10:30 AM
Post
#6
|
|
Senior Member Group: Members Posts: 1,274 Joined: 19-March 13 From: Charleston SC Member No.: 15,673 Region Association: South East States |
My panel from AA, here's how much I used:
Note I cut out the bracket attachments for the muffler heat shield to save them. 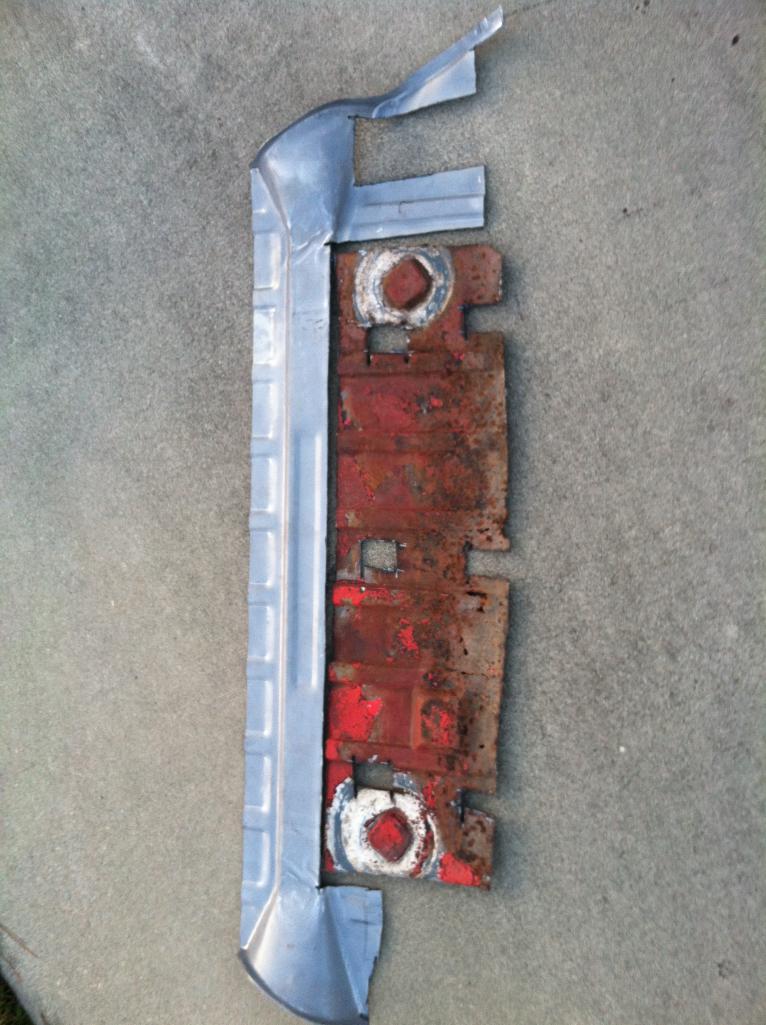 |
|
|
|
| SA-914 |
Jun 16 2020, 10:52 AM
Post
#7
|
|
Member Group: Members Posts: 125 Joined: 30-June 14 From: San Antonio,tx Member No.: 17,566 Region Association: Southwest Region |
I still needed to cut out a bit more on the right...
 |
|
|
|
| SA-914 |
Jun 16 2020, 10:55 AM
Post
#8
|
|
Member Group: Members Posts: 125 Joined: 30-June 14 From: San Antonio,tx Member No.: 17,566 Region Association: Southwest Region |
RD panel
Attached File(s)  RD_trunk.pdf ( 1.74mb )
Number of downloads: 44
RD_trunk.pdf ( 1.74mb )
Number of downloads: 44 |
|
|
|
| cary |
Jun 16 2020, 11:26 AM
Post
#9
|
|
Advanced Member Group: Members Posts: 3,900 Joined: 26-January 04 From: Sherwood Oregon Member No.: 1,608 Region Association: Pacific Northwest |
My .02c for today, less is more. Only replace what is needed.
Don't go into the corners unless its needed. But pull all the seam sealer and check for rust. You'll find some loose spots. My preferred method is the butt joint after taking off the flange. |
|
|
|
| Lg914 |
Jun 17 2020, 05:19 PM
Post
#10
|
|
Member Group: Members Posts: 53 Joined: 4-July 19 From: Lake Geneva Member No.: 23,275 Region Association: None |
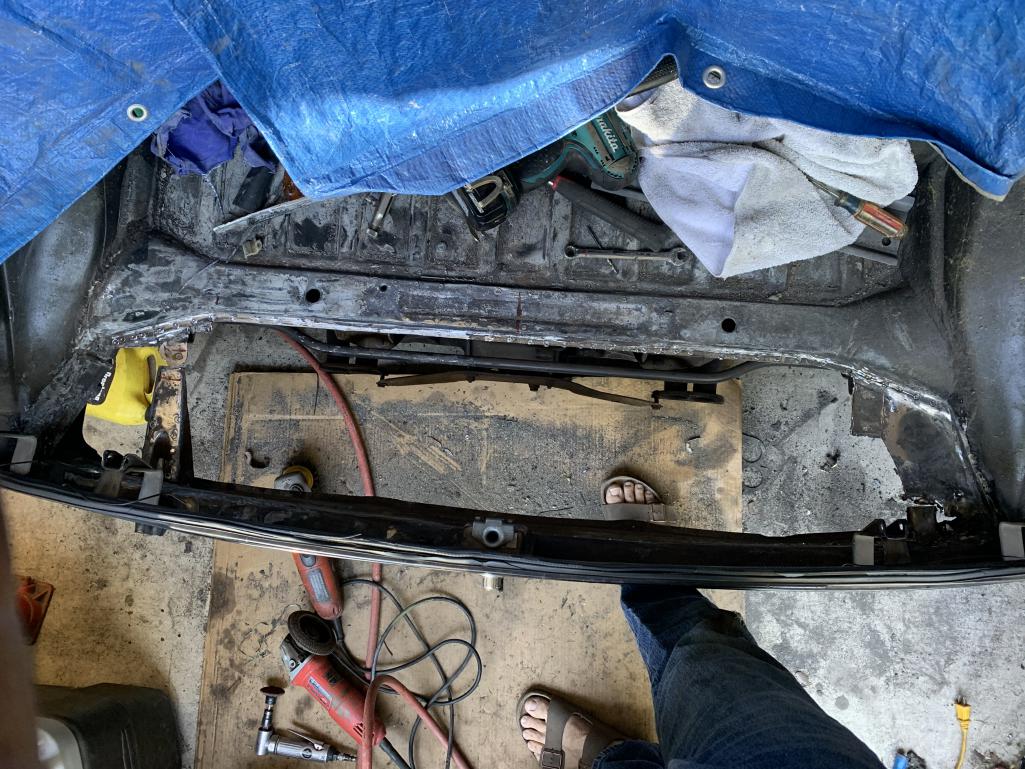
We found it easiest to remove the back section of the trunk pan. There was some rust hiding in the corners under the sea sealer. We got this part from restoration design and were happy with the quality. Some of their products are not this nice. Auto Atlanta has a longer panel if that is what you need.
Attached thumbnail(s) 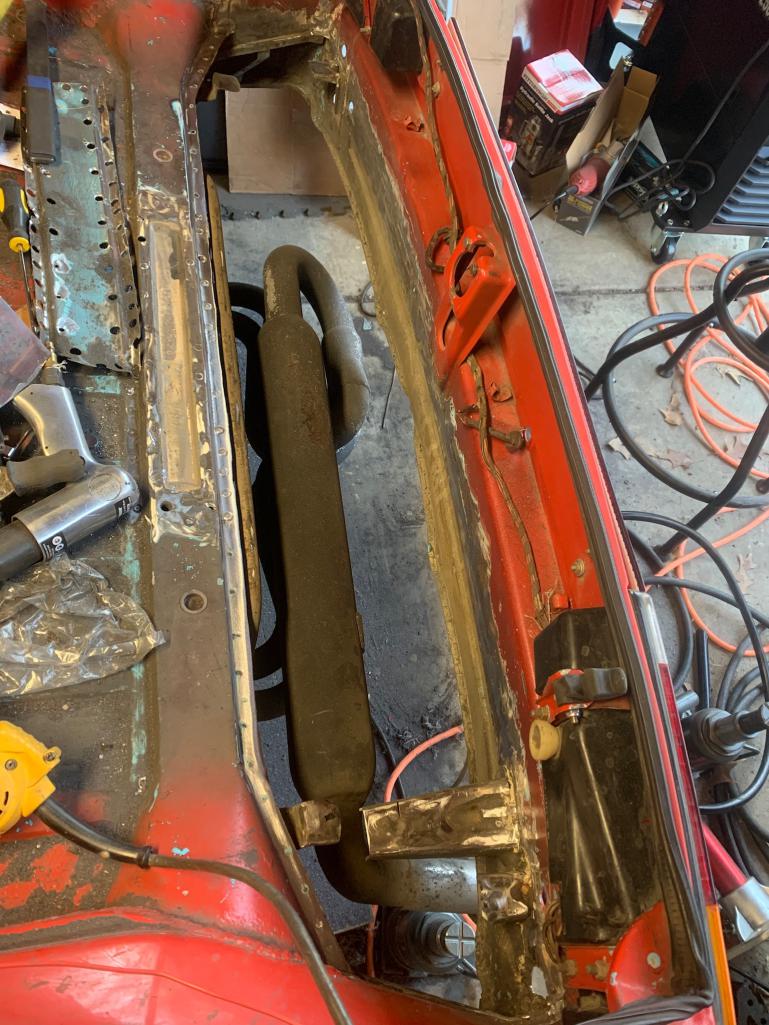 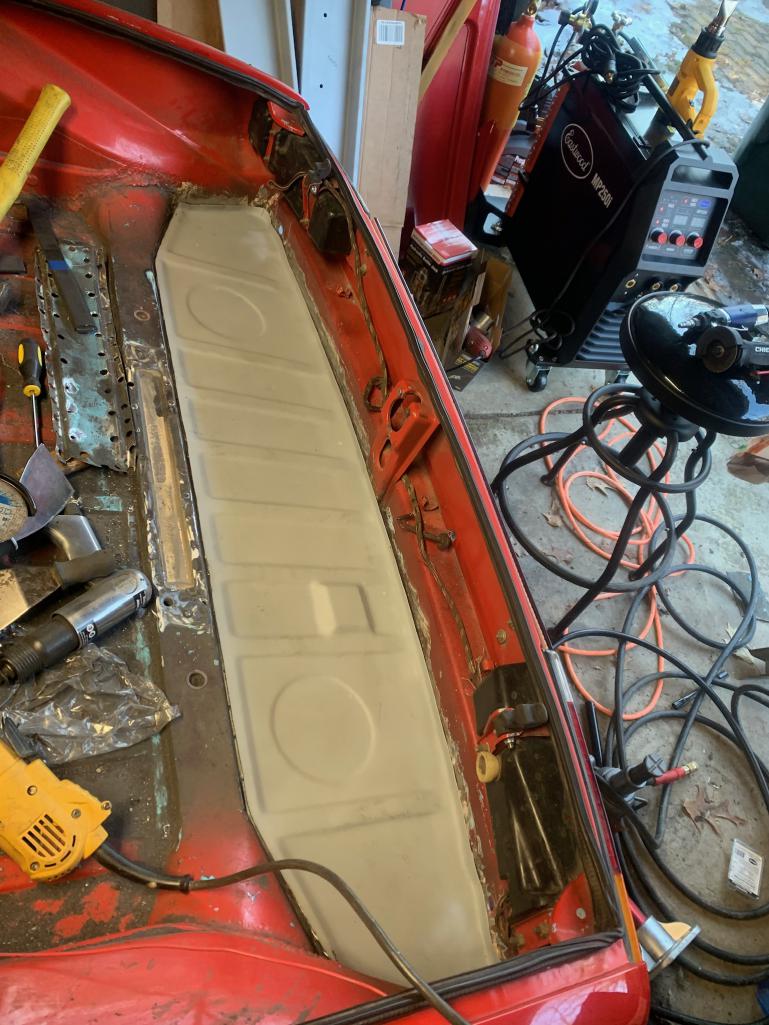
|
|
|
|
| Montreal914 |
Jun 17 2020, 08:56 PM
Post
#11
|
|
Senior Member Group: Members Posts: 1,559 Joined: 8-August 10 From: Claremont, CA Member No.: 12,023 Region Association: Southern California |
Above is exactly what I am currently doing. Seems like it's rear trunk floor season... (IMG:style_emoticons/default/smile.gif)
|
|
|
|
|
1 User(s) are reading this topic (1 Guests and 0 Anonymous Users)
0 Members:

|
Lo-Fi Version | Time is now: 16th May 2024 - 10:27 PM |
Invision Power Board
v9.1.4 © 2024 IPS, Inc.