|
|
|
Porsche, and the Porsche crest are registered trademarks of Dr. Ing. h.c. F. Porsche AG.
This site is not affiliated with Porsche in any way. Its only purpose is to provide an online forum for car enthusiasts. All other trademarks are property of their respective owners. |
|
|

  |

| BillC |
 Feb 13 2024, 08:13 AM Feb 13 2024, 08:13 AM
Post
#141
|
|
Senior Member  Group: Members Posts: 732 Joined: 24-April 15 From: Silver Spring, MD Member No.: 18,667 Region Association: MidAtlantic Region |
QUOTE(bkrantz @ Feb 12 2024, 09:47 PM)  Did you seal the bolt for the thermostat pulley? Yup, small amount of sealant on the threads prior to screwing in the bolt. |
   |

 
|
| BillC |
Feb 17 2024, 07:10 PM
Post
#142
|
|
Senior Member Group: Members Posts: 732 Joined: 24-April 15 From: Silver Spring, MD Member No.: 18,667 Region Association: MidAtlantic Region |
The last of the engine parts came in -- thermostat & related parts from Awesome Powdercoat, and the oil pressure relief valve from Tangerine Racing. Here's a pic of the thermostat installed:
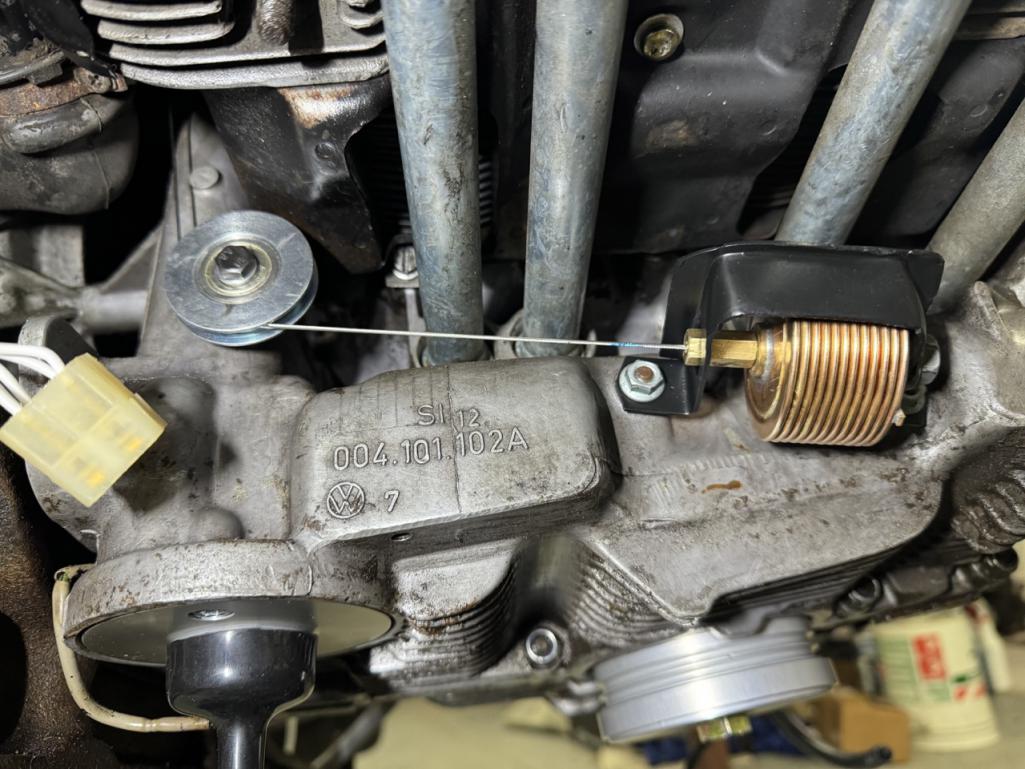 The thermostat itself from Awesome Powdercoat is a very nice piece. Unfortunately, his bracket needed quite a bit of finessing for everything to fit & line up correctly. And the pulley he sells is a storm door roller that seems to be a little smaller than the original -- I had to file the cable hole in the sheet metal aft about 3/16" to keep the cable from dragging. Fortunately, the oil pressure relief valve went right in place with no issue, once I found the tool I made years ago for unscrewing the retaining bolt. No pics of that though, since there isn't anything to see once it's all in. |
|
|
|
| BillC |
Mar 18 2024, 05:36 PM
Post
#143
|
|
Senior Member Group: Members Posts: 732 Joined: 24-April 15 From: Silver Spring, MD Member No.: 18,667 Region Association: MidAtlantic Region |
Lots of other things going on, now that winter is ending, but I have made some progress on the 914.
Since my last update, I have been preparing the engine compartment so the engine can be reinstalled. So far, I have scraped out and replaced cracked seam sealer, treated more areas with rust converter, installed new seals around the engine tin opening and finished installing the stainless steel fuel lines. Here are a couple of pics: 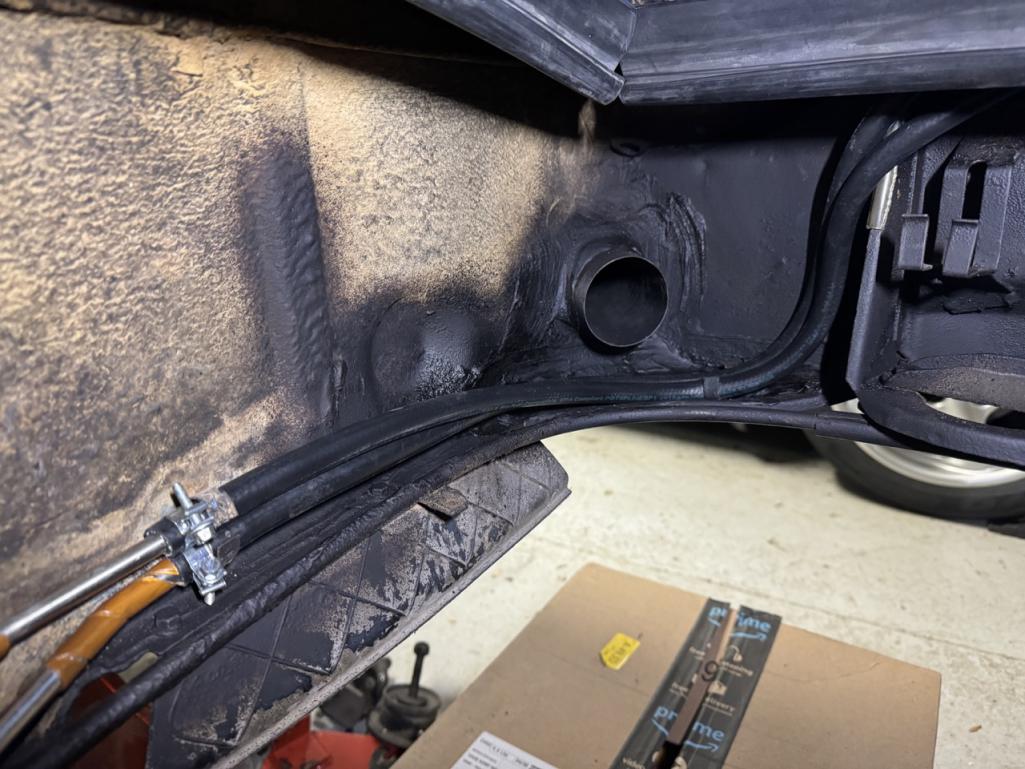 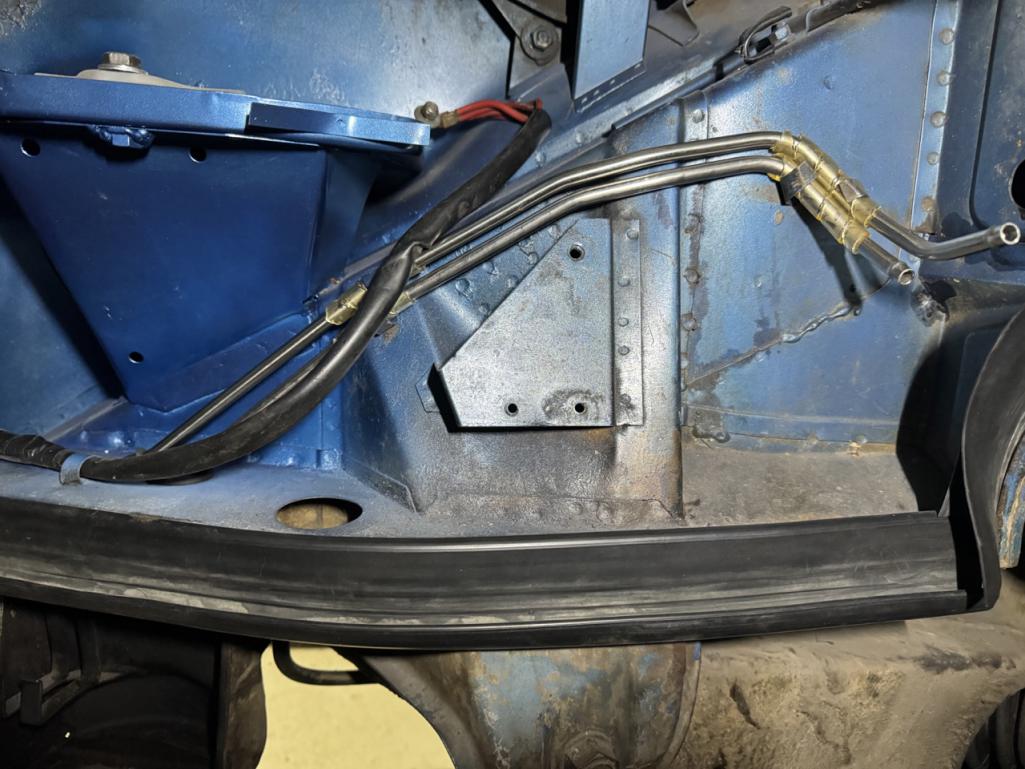 |
|
|
|
| windforfun |
Mar 18 2024, 06:04 PM
Post
#144
|
|
Advanced Member Group: Members Posts: 2,099 Joined: 17-December 07 From: Blackhawk, CA Member No.: 8,476 Region Association: None |
What rust converter did you use? POR-15?
(IMG:style_emoticons/default/beer3.gif) (IMG:style_emoticons/default/beer3.gif) (IMG:style_emoticons/default/beer3.gif) |
|
|
|
| BillC |
Mar 18 2024, 06:43 PM
Post
#145
|
|
Senior Member Group: Members Posts: 732 Joined: 24-April 15 From: Silver Spring, MD Member No.: 18,667 Region Association: MidAtlantic Region |
QUOTE(windforfun @ Mar 18 2024, 08:04 PM) What rust converter did you use? POR-15? (IMG:style_emoticons/default/beer3.gif) (IMG:style_emoticons/default/beer3.gif) (IMG:style_emoticons/default/beer3.gif) POR-15 isn't a rust converter, it's a paint. It may seal rust from moisture, but it doesn't actually do anything to the rust (except stick to it). Plus, I've heard plenty of bad stories about POR-15 failures. I'm using this: 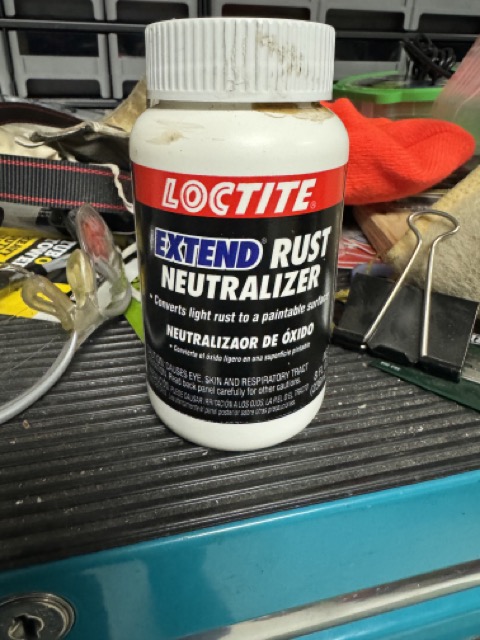 It chemically converts rust to a different iron compound that is chemically inert as well as sealing the surface. There are other brands with the same action, this is what the FLAPS had on the shelf. |
|
|
|
| windforfun |
Mar 18 2024, 07:36 PM
Post
#146
|
|
Advanced Member Group: Members Posts: 2,099 Joined: 17-December 07 From: Blackhawk, CA Member No.: 8,476 Region Association: None |
Ditto on that. So how does this stuff convert rust to a different compound? How does this stuff work better that POR-15? Just curious.
https://en.wikipedia.org/wiki/Corrosion I remember now, it converts rust into what? Now I can't remember. Plutonium perhaps. (IMG:style_emoticons/default/lol-2.gif) (IMG:style_emoticons/default/lol-2.gif) (IMG:style_emoticons/default/lol-2.gif) https://en.wikipedia.org/wiki/Rust_converter |
|
|
|
| windforfun |
Mar 18 2024, 07:47 PM
Post
#147
|
|
Advanced Member Group: Members Posts: 2,099 Joined: 17-December 07 From: Blackhawk, CA Member No.: 8,476 Region Association: None |
See item # 4:
https://mechanicbase.com/reviews/best-rust-converter/ And Bob's your uncle ("Mission Impossible - Dead Reckoning" IIRC.) |
|
|
|
| bkrantz |
Mar 18 2024, 10:17 PM
Post
#148
|
|
914 Guru Group: Members Posts: 8,716 Joined: 3-August 19 From: SW Colorado Member No.: 23,343 Region Association: Rocky Mountains |
Nice work. You might want to miter the corners of the engine compartment seals so they will close up tightly when the engine is in place.
|
|
|
|
| barefoot |
Mar 19 2024, 12:24 PM
Post
#149
|
|
Senior Member Group: Members Posts: 1,517 Joined: 19-March 13 From: Charleston SC Member No.: 15,673 Region Association: South East States |
QUOTE(BillC @ Mar 18 2024, 08:43 PM) QUOTE(windforfun @ Mar 18 2024, 08:04 PM) What rust converter did you use? POR-15? (IMG:style_emoticons/default/beer3.gif) (IMG:style_emoticons/default/beer3.gif) (IMG:style_emoticons/default/beer3.gif) POR-15 isn't a rust converter, it's a paint. It may seal rust from moisture, but it doesn't actually do anything to the rust (except stick to it). Plus, I've heard plenty of bad stories about POR-15 failures. I'm using this: It chemically converts rust to a different iron compound that is chemically inert as well as sealing the surface. There are other brands with the same action, this is what the FLAPS had on the shelf. I'll second that, the Loctite stuff did the trick, turns the surface a dull black. Barefoot |
|
|
|
| 914_Tcup |
Mar 19 2024, 10:03 PM
Post
#150
|
|
Newbie Group: Members Posts: 18 Joined: 24-November 23 From: T-Town (Tulsa OK) Member No.: 27,754 Region Association: Southwest Region |
I am so impressed by the way you documented your work...I (we) owe you for this!
Thank You. (IMG:style_emoticons/default/first.gif) You showed me the amount of misery and pleasure I have ahead, but knowing there are these different methods in solving the problems gives me hope in restoring my car. Do you have a post somewhere about your "Boxster"? I am looking at purchasing one, but want to see what others who wrench on them think. (IMG:style_emoticons/default/popcorn[1].gif) |
|
|
|
| BillC |
Mar 20 2024, 07:34 AM
Post
#151
|
|
Senior Member Group: Members Posts: 732 Joined: 24-April 15 From: Silver Spring, MD Member No.: 18,667 Region Association: MidAtlantic Region |
QUOTE(bkrantz @ Mar 19 2024, 12:17 AM) You might want to miter the corners of the engine compartment seals so they will close up tightly when the engine is in place. That's a good suggestion. However, I think I'll wait until after the engine is in, just so I don't accidentally trim too much off. IIRC, the factory actually installed hog rings to keep the corners closed. QUOTE(914_Tcup @ Mar 20 2024, 12:03 AM) Do you have a post somewhere about your "Boxster"? I am looking at purchasing one, but want to see what others who wrench on them think. (IMG:style_emoticons/default/popcorn[1].gif) The Boxster is a '99 that I bought as a failed restoration and turned into a Spec Boxster race car. The guy I bought the car from bought it from an estate sale, but quickly realized it needed more work than was financially effective -- the roof was torn, the a/c shot, clutch slipped, old brakes & bearings, mice had moved into the center console, etc. This was perfect for a race car donor, since it was all stuff that would be removed or replaced in the conversion process. Being a newer car, it is a little more complicated to work on (as a street car) than a 914. But the best part is virtually no rust -- the factory rust protection was greatly improved over the intervening 26 years. As a race car, though, it is fairly simple to work on, since most of the complicated stuff (a/c, heat, folding roof, interior, radio, etc.) has been removed. Sorry, no post about the car, though. However, I did write a 2-part article about the conversion a couple of years ago for the local PCA chapter magazine, Der Vorganger. If anyone is really interested, I can see about copy/pasting it here. |
|
|
|
| BillC |
Mar 24 2024, 04:06 PM
Post
#152
|
|
Senior Member Group: Members Posts: 732 Joined: 24-April 15 From: Silver Spring, MD Member No.: 18,667 Region Association: MidAtlantic Region |
In today's episode of "Trying to work on the 914 while life gets in the way", I finished wiring up the third brake light. I wanted to make sure I could remove the engine lid without having to remove all the wiring, and also to connect it to the car without modifying the factory harness.
First step was installing a plug at the base of the engine lid, so I can unplug the wires if the lid has to come out. I bought a Deutsch connector kit and crimp tool on amazon, and was pleasantly surprised at how well the crimp tool works. 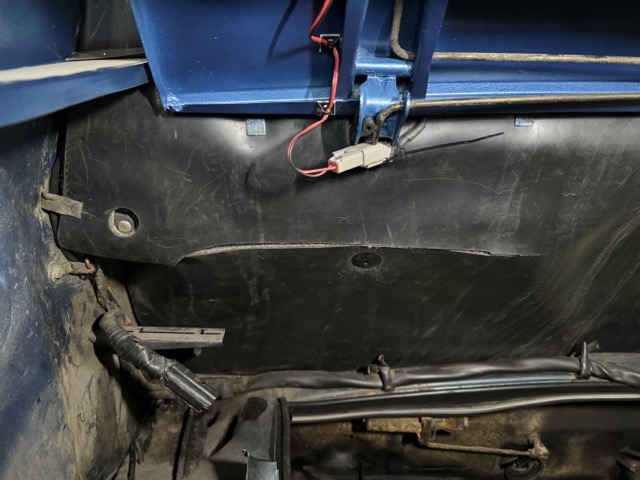 For the wiring, I bought a roll of dual-conductor 16-ga wire in a black sheath, and ran it under the firewall padding and along the factory harness. Then, I used these piggyback connectors to tie into the left, rear brake light: 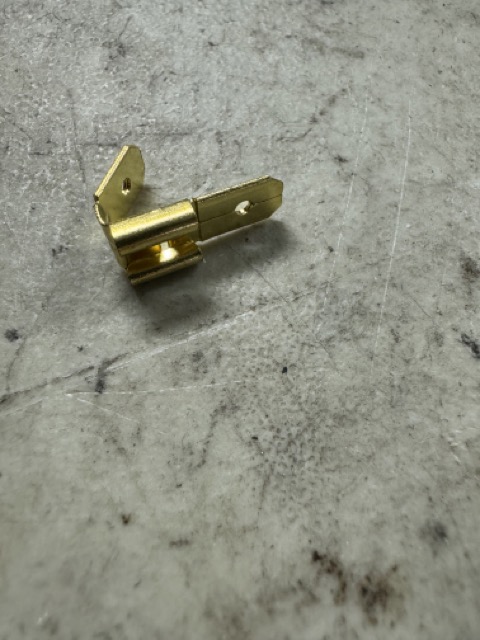 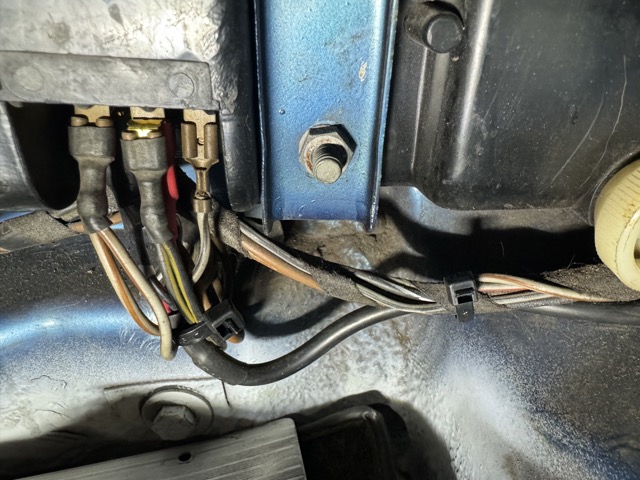 I made sure to heatshrink some insulation over the piggybacks, just to help keep things from shorting. Finally, here's a pic of the 3rd light lit up: 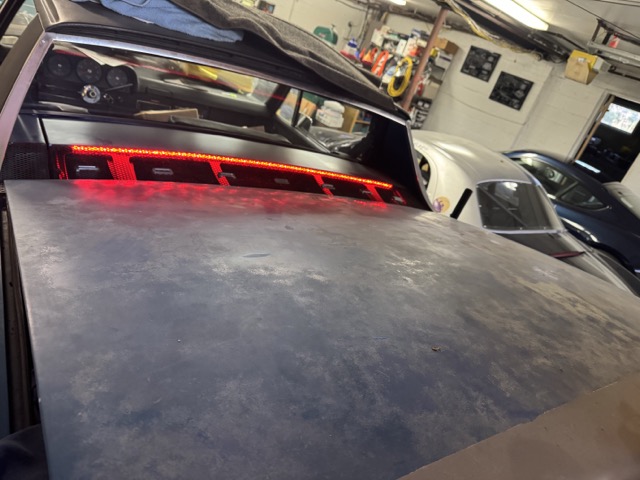 The trunk lid isn't closed, which is why it looks a little funky. |
|
|
|
| FlacaProductions |
Mar 24 2024, 06:52 PM
Post
#153
|
|
Advanced Member Group: Members Posts: 2,230 Joined: 24-November 17 From: LA Member No.: 21,628 Region Association: Southern California |
Worthwhile addition - nice work.
|
 |
|
| bkrantz |
Mar 24 2024, 08:28 PM
Post
#154
|
|
914 Guru Group: Members Posts: 8,716 Joined: 3-August 19 From: SW Colorado Member No.: 23,343 Region Association: Rocky Mountains |
Very cool.
|
|
|
|
| BillC |
May 19 2024, 01:49 PM
Post
#155
|
|
Senior Member Group: Members Posts: 732 Joined: 24-April 15 From: Silver Spring, MD Member No.: 18,667 Region Association: MidAtlantic Region |
It's been a while since I've posted an update, but I've gotten a number of little things done in preparation for the engine re-install.
First was to treat the rust in the pedal footwell and in the center console. There wasn't much, but now is the time to prevent big problems in the future. I wire-brushed the area and then painted it with the Loctite rust converter. Once it has another day to dry, I'll spray paint the area. 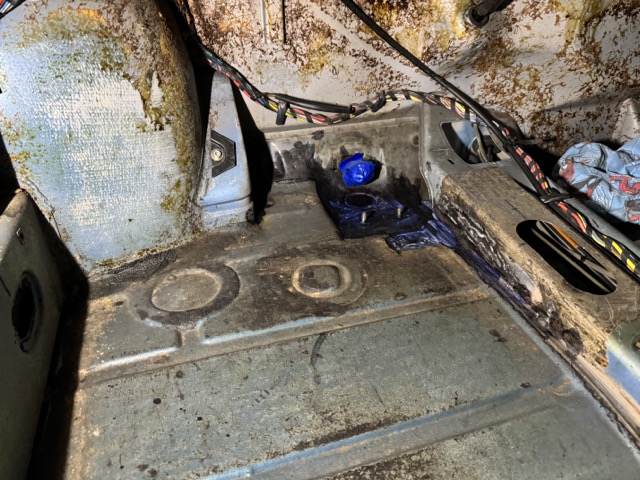 Here's the rebuilt pedal cluster to be installed, after painting and running new cables: 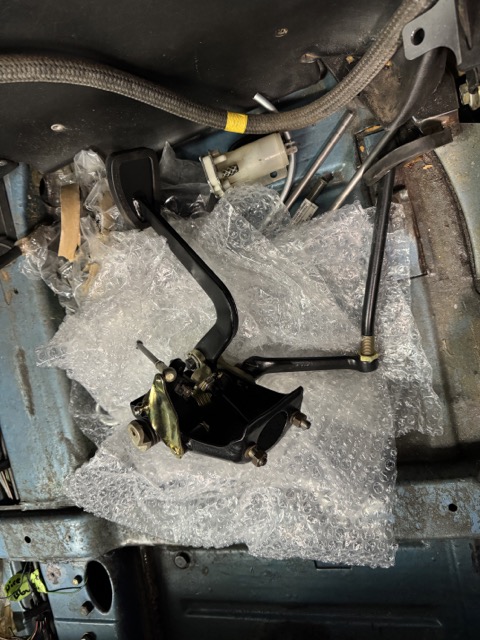 Then, I installed the rebuilt relay board I bought years ago, as well as the heater blower. This board must have come from a later model 914, because it doesn't have the embedded threaded brass insert for the retaining post. 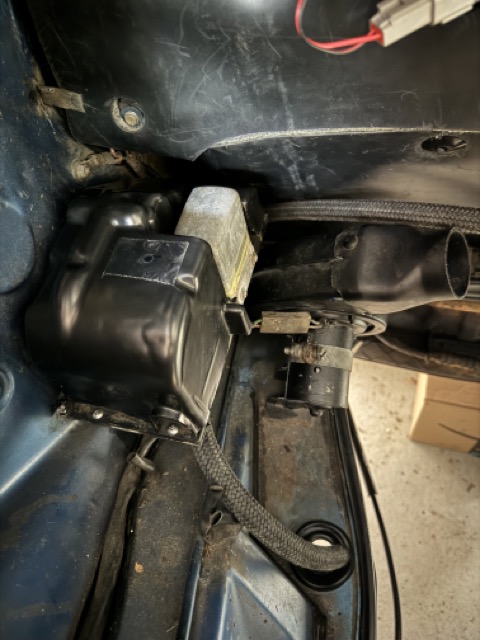 The tape on the top of the cover is because I did a meticulous job measuring and melting a hole in the cover for the retaining post with a soldering iron, using the old relay board as a model, which has the brass insert. Only too discover the new board didn't have it when I went to install the post, because I didn't bother looking first ( (IMG:style_emoticons/default/headbang.gif) ). So, rather than throwing the cover out, I just put a piece of packing tape over the hole, figuring I could always remove the tape if I get a different relay board. While I was under and inside the car, I installed a new speedometer cable. The old cable seemed like it was okay, but I had the new cable and this is the easiest time to install it, before all the other stuff goes back in. I started at the speedo and worked my way back for removal. I tied a string to the end of the old cable prior to pulling it out, so I could use it to pull the new cable into the right places.  The clutch, accelerator and heater control cables will go inside the center tunnel after I paint -- no need to have them in the way while painting, and they shouldn't be painted anyway. Then, I installed a new plastic shift-rod bushing in the firewall (not shown), and new brass bushings in the shift linkage. 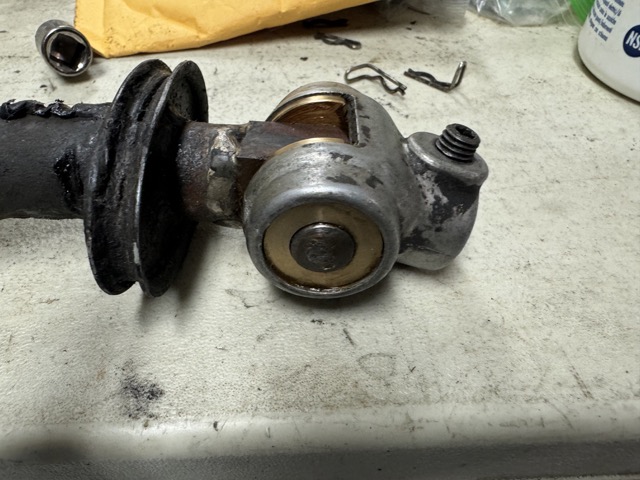 Final bit this weekend is a scent-removal treatment, since the rust treatment needs more time to dry before I can paint. The passenger compartment has always smelled a bit "funky" since I got the car. I've tried a number of things, including "pet odor" removers and other sprays -- there was some improvement, but not enough. Last year, I ran across an ad for something called "Dead Scent", which sounded interesting. So, now it's in the car, doing it's thing. I'll follow up with how well (or not) it performs. 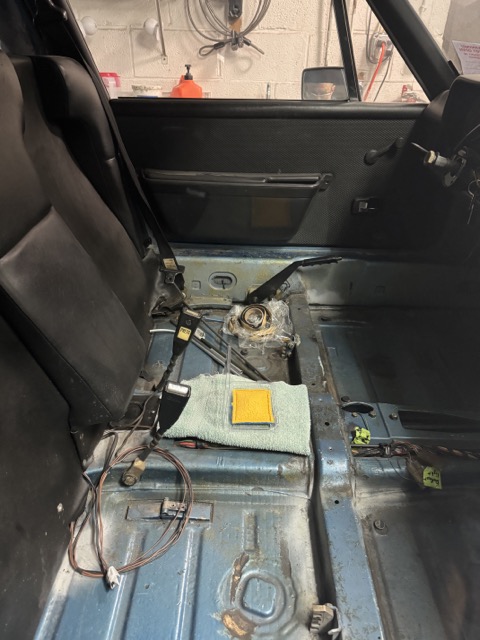 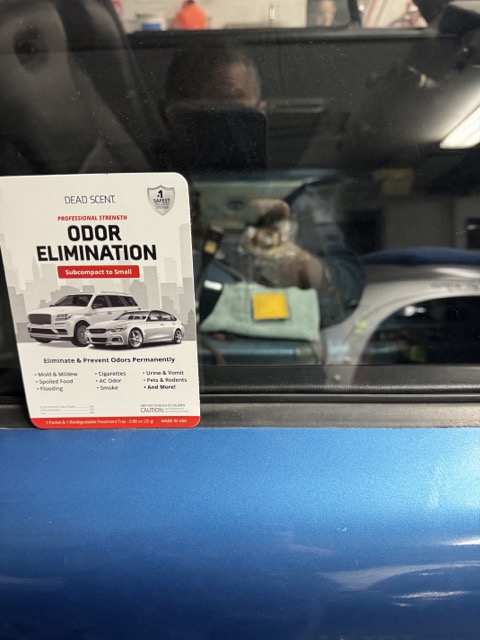 |
|
|
|
| BillC |
May 19 2024, 02:07 PM
Post
#156
|
|
Senior Member Group: Members Posts: 732 Joined: 24-April 15 From: Silver Spring, MD Member No.: 18,667 Region Association: MidAtlantic Region |
As an aside, while working on the above, I also spent some time organizing parts in preparation for installation. And discovered that I really need a better way to organize parts purchases and keeping track of what I have vs what I need -- turns out that all those 914Rubber sales are great for getting multiples of things I already had. You know, the whole impromptu "while I'm buying, let's throw that in too, so I won't have to pay shipping in the future" thing. (IMG:style_emoticons/default/headbang.gif)
Turns out I have multiple sets of exhaust gaskets, intake gaskets and runner hoses, clutch cable rollers and too many other things. I'll probably hold a clearance sale once the car's done, just to make some room in the house. |
|
|
|
| Geezer914 |
May 19 2024, 04:22 PM
Post
#157
|
|
Geezer914 Group: Members Posts: 2,315 Joined: 18-March 09 From: Salem, NJ Member No.: 10,179 Region Association: North East States |
Very nice work! Very methodical and professional! Best of luck with your restoration. When all the body work is complete, take a break and start replacing suspension parts, warn bushings, tie rods, wheel bearings, rebuild calipers, rear wheel bearings, and suspension arm bushings and rear axle bearings. It never ends. I've had my 914 for 15 years, and finally all I have to do is routine maintenance and it's a blast to drive!!!
|
|
|
|
| ClayPerrine |
May 19 2024, 05:31 PM
Post
#158
|
|
Life's been good to me so far..... Group: Admin Posts: 16,545 Joined: 11-September 03 From: Hurst, TX. Member No.: 1,143 Region Association: NineFourteenerVille |
RE: your relay board.
All of the relay boards have the boss for the brass insert, but they dropped the insert, the shaft and the knob in 75. Take the old relay board and use a bolt and socket to extract the brass insert. Then press it into the new relay board. Put a drop of super glue in the hole before pressing in the insert. |
|
|
|
| Montreal914 |
May 19 2024, 06:52 PM
Post
#159
|
|
Advanced Member Group: Members Posts: 2,135 Joined: 8-August 10 From: Claremont, CA Member No.: 12,023 Region Association: Southern California |
QUOTE(BillC @ Mar 18 2024, 04:36 PM) (IMG:style_emoticons/default/idea.gif) You might want to revisit how those rubber hoses go around the engine body mount. Way too many fire post recently... (IMG:style_emoticons/default/sad.gif) |
|
|
|
| BillC |
May 20 2024, 05:51 AM
Post
#160
|
|
Senior Member Group: Members Posts: 732 Joined: 24-April 15 From: Silver Spring, MD Member No.: 18,667 Region Association: MidAtlantic Region |
QUOTE(Montreal914 @ May 19 2024, 08:52 PM) QUOTE(BillC @ Mar 18 2024, 04:36 PM) (IMG:style_emoticons/default/idea.gif) You might want to revisit how those rubber hoses go around the engine body mount. Way too many fire post recently... (IMG:style_emoticons/default/sad.gif) @Montreal914 Are you referring to the how the hoses route over the engine mount sheet metal? If so, I slit a length of vinyl tubing and put it over the edge of the sheet metal, to protect the hoses. You can see it in the pic, it's the silverish bit running vertically on the upper part of the mount, just in front of the old fuel filter mount. |
|
|
|
|
2 User(s) are reading this topic (2 Guests and 0 Anonymous Users)
0 Members:

|
Lo-Fi Version | Time is now: 14th June 2026 - 08:46 PM |
Invision Power Board
v9.1.4 © 2026 IPS, Inc.