|
|
|
Porsche, and the Porsche crest are registered trademarks of Dr. Ing. h.c. F. Porsche AG.
This site is not affiliated with Porsche in any way. Its only purpose is to provide an online forum for car enthusiasts. All other trademarks are property of their respective owners. |
|
|

  |

| Front yard mechanic |
 Nov 28 2024, 07:16 AM Nov 28 2024, 07:16 AM
Post
#181
|
|
Senior Member  Group: Members Posts: 1,451 Joined: 23-July 15 From: New Mexico Member No.: 18,984 Region Association: None |
I’ve built mine by the book ! I just dont have the book
|
   |

 
|
| GregAmy |
Nov 28 2024, 07:25 AM
Post
#182
|
|
Advanced Member Group: Members Posts: 2,677 Joined: 22-February 13 From: Middletown CT Member No.: 15,565 Region Association: North East States |
QUOTE(Front yard mechanic @ Nov 28 2024, 08:16 AM)  I’ve built mine by the book ! I just dont have the book (IMG:style_emoticons/default/smilie_pokal.gif) Hell, I've looked back on some things I did to my current car five years prior and cringed... But at least I'm confident in saying it made sense at the time and it wasn't bass-ackwards hackage... Not my work (and not my 914): 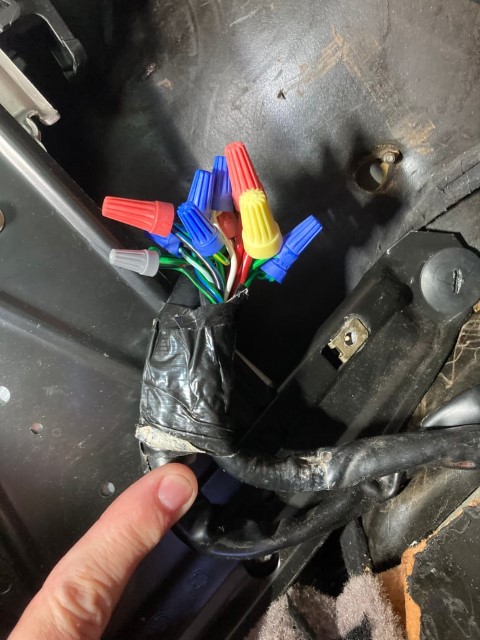 |
|
|
|
| BillC |
Dec 1 2024, 07:28 PM
Post
#183
|
|
Senior Member Group: Members Posts: 732 Joined: 24-April 15 From: Silver Spring, MD Member No.: 18,667 Region Association: MidAtlantic Region |
Spent the last couple of days working on the car, trying to see about rearranging the fuel pump and filter. I removed the tank, pump and filter, and then spent quite a while futzing around trying to figure out some place to mount both in the tunnel with the steering rack. Despite trying multiple different locations, ended up deciding that I still preferred how everything fit under the tank. Yeah, I know that means I'll have to pull the tank to change the fuel filter, but honestly, how often to y'all change your filter anyway?
I did make one change to the hoses. Originally, I had cobbled up some brass fittings to go from the 3/8" tank outlet to the 1/2" fuel pump inlet. This time, while I had everything apart, I decided to make an adapter out of a piece of 303 stainless I had left over from a past project. Here it is just before cutting it off: 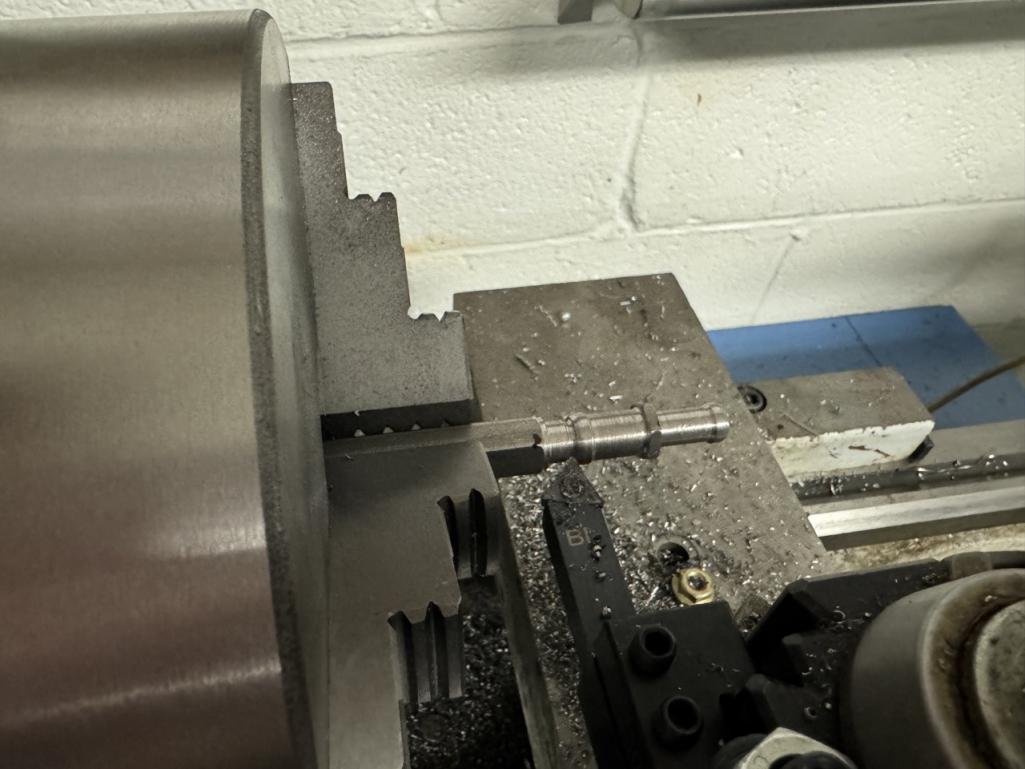 Here's the reinstallation, before putting the tank back in: 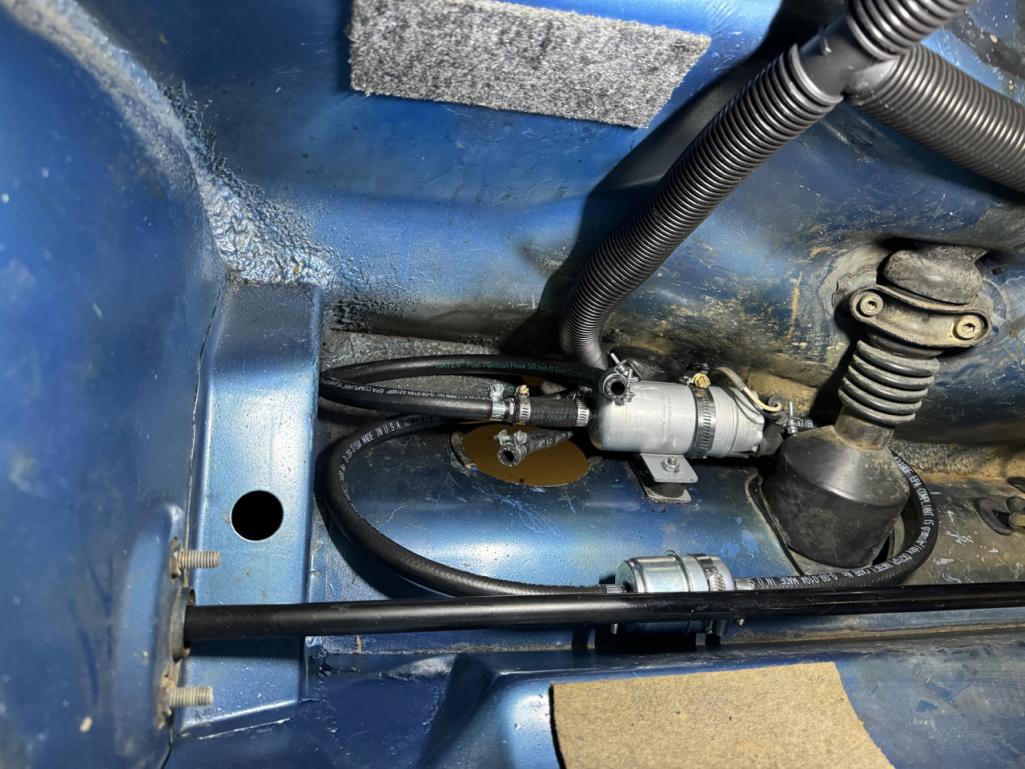 Just a little annoyed that I spent two days getting back to where I was before I started. (IMG:style_emoticons/default/headbang.gif) And, since it seems like I'm actually getting close(-ish) to starting this, I ordered a new battery: 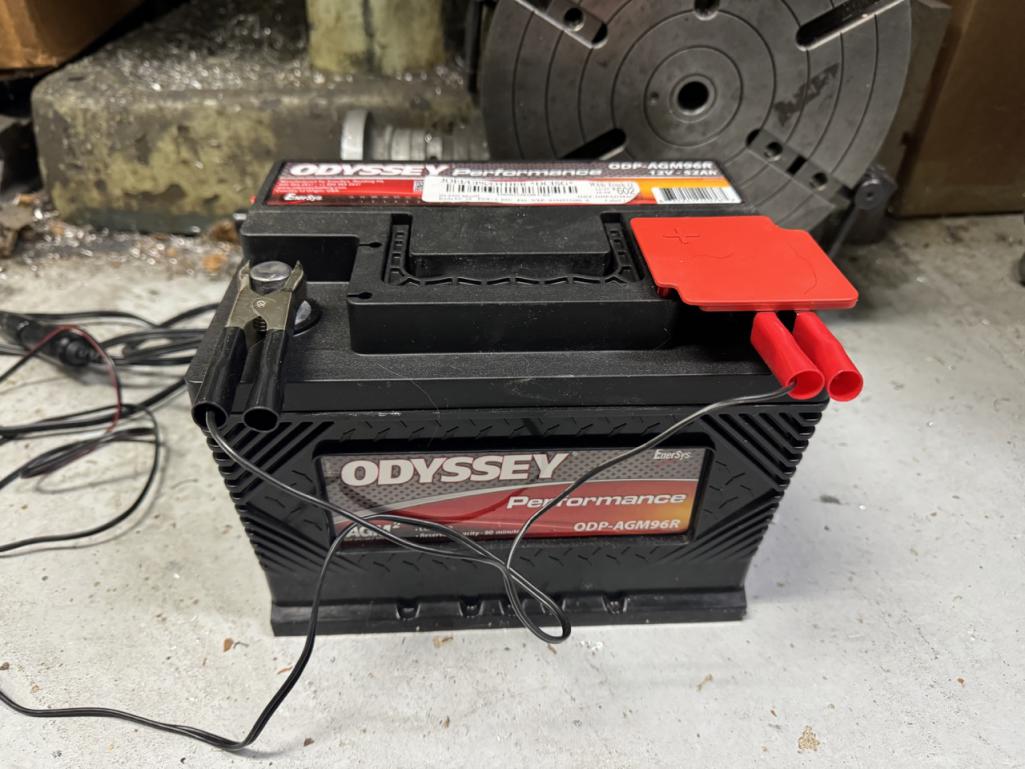 Decided to go with AGM, even though it was twice the price of flooded. |
|
|
|
| BillC |
Dec 8 2024, 07:40 PM
Post
#184
|
|
Senior Member Group: Members Posts: 732 Joined: 24-April 15 From: Silver Spring, MD Member No.: 18,667 Region Association: MidAtlantic Region |
And we are making progress! (IMG:style_emoticons/default/beer.gif) For the first time in 4 1/2 years, the car is back on the ground! (IMG:style_emoticons/default/piratenanner.gif) (IMG:style_emoticons/default/cheer.gif)
 In addition to finally getting it back on its wheels, I finished reinstalling the rest of the fuel injection parts (ECU, MPS, etc). I also reinstalled the steering wheel and wooden pedal board. I just need to reinstall the seats and get some fuel, and then I can try to start it. |
|
|
|
| Montreal914 |
Dec 8 2024, 08:59 PM
Post
#185
|
|
Advanced Member Group: Members Posts: 2,135 Joined: 8-August 10 From: Claremont, CA Member No.: 12,023 Region Association: Southern California |
|
|
|
|
| BillC |
Dec 14 2024, 02:54 PM
Post
#186
|
|
Senior Member Group: Members Posts: 732 Joined: 24-April 15 From: Silver Spring, MD Member No.: 18,667 Region Association: MidAtlantic Region |
Well, I have good news and bad news.
First, the good news: IT'S RUNNING! (IMG:style_emoticons/default/piratenanner.gif) (IMG:style_emoticons/default/cheer.gif) (IMG:style_emoticons/default/driving.gif) 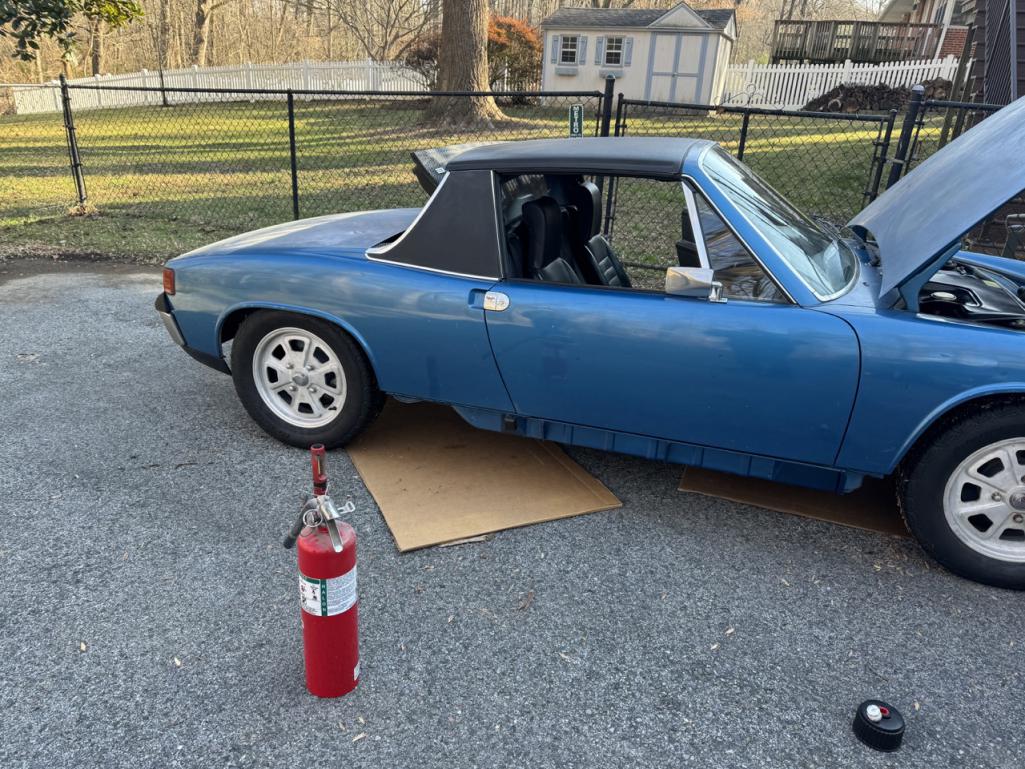 I had my son standing by with the fire extinguisher, as I put gas in it and then started it. It fired right up. (IMG:style_emoticons/default/beer.gif) And, when it warmed up, I set the timing. Then, we took it for a short drive, about 2 miles or so. That is now the furthest I've driven the car. The bad news: the car has issues. First, the idle is high, like around 1800-2000 RPM. It was originally around 3000, but I found the idle bypass screw on the throttle body and turned it all the way in, which go it down to 1800-ish. I did check that the AAR valve was working (it is), and I even pulled off the hose to it and plugged it with my thumb, but all it did was confirm the valve closed like it was supposed to. I'm going to re-read how to set the timing and try doing it again. Maybe it's not right yet. Otherwise, I may have a vacuum leak somewhere. Second, and potentially bigger issue: 4th gear is locked up somehow. I can get into all the other gears (R, 1, 2, 3, 5), but 4th will only make a loud grind. Once we got home, I stopped on a slight hill to do more testing. I pushed the clutch in and then cycled through each of the gears -- when I let off the brake, the car would roll forward in all gears except 4th. Anyone have any ideas about 4th gear? Could something have jammed up while the trans was sitting? I stored it in the basement on a couple of blocks with the bellhousing down. I did fill the transmission, according to Dr. Evil's instructions, so it shouldn't be a lubrication issue. Any suggestions for breaking it loose without having to pull the tranny? |
|
|
|
| Jack Standz |
Dec 14 2024, 03:32 PM
Post
#187
|
|
Senior Member Group: Members Posts: 827 Joined: 15-November 19 From: Happy Place (& surrounding area) Member No.: 23,644 Region Association: None |
Dr, Evil has instructions how to adjust the shifter, so there's a place to get helpful information (think it's under his signature in his posts).
But, first you could take the plastic cover off the shifter console on the side of the transmission. Have your son shift it through all the gears (or setup your camera and record yourself shifting through all the gears). Just a guess, but it might just require an adjustment to the shifter position on the shift rod inside the tunnel. Could also be worn out bushings in the shift linkage. Of course, someday you'll want to go through the transmission and replace all the consumables like dogteeth, synchros, worn sliders, bad bearings, etc. Grinding and difficulty getting into gear can also be caused by a clutch that needs to be adjusted. But, this is more likely to show up as grinding in 1st and/or second because those synchros get more wear than 4th or 5th. |
|
|
|
| BillC |
Dec 14 2024, 04:50 PM
Post
#188
|
|
Senior Member Group: Members Posts: 732 Joined: 24-April 15 From: Silver Spring, MD Member No.: 18,667 Region Association: MidAtlantic Region |
It's not the clutch and it's not the gear shift linkage. It's gotta be something inside the trans.
|
|
|
|
| FlacaProductions |
Dec 14 2024, 10:13 PM
Post
#189
|
|
Advanced Member Group: Members Posts: 2,230 Joined: 24-November 17 From: LA Member No.: 21,628 Region Association: Southern California |
Paging @Dr Evil
|
|
|
|
| BillC |
Dec 15 2024, 09:09 AM
Post
#190
|
|
Senior Member Group: Members Posts: 732 Joined: 24-April 15 From: Silver Spring, MD Member No.: 18,667 Region Association: MidAtlantic Region |
QUOTE(FlacaProductions @ Dec 14 2024, 11:13 PM) Yup. Sent him a PM right after I posted above. If anyone knows, it's him. |
|
|
|
| Dr Evil |
Dec 15 2024, 12:27 PM
Post
#191
|
|
Send me your transmission! Group: Members Posts: 23,044 Joined: 21-November 03 From: Loveland, OH 45140 Member No.: 1,372 Region Association: MidAtlantic Region |
QUOTE(BillC @ Dec 15 2024, 11:09 AM) QUOTE(FlacaProductions @ Dec 14 2024, 11:13 PM) Yup. Sent him a PM right after I posted above. If anyone knows, it's him. I replied, but agree this is internal and needs the stack to be pulled to investigate and rectify. Nothing external will cause this. |
|
|
|
| BillC |
Dec 15 2024, 12:27 PM
Post
#192
|
|
Senior Member Group: Members Posts: 732 Joined: 24-April 15 From: Silver Spring, MD Member No.: 18,667 Region Association: MidAtlantic Region |
I just spent a bunch of time under the car, trying to diagnose the transmission. And I think I finally figured out what's going on inside there.
I readjusted the clutch cable, but it was fine. I then readjusted the shift linkage, using instructions found here:
However, when playing with the shifter in various gears, I noticed the shift lever would go noticeably further forward in 4th than 2nd or reverse. To double-check, I went under the car and measured how far the shift rod on the trans console moved. Here are some pics: Second gear: 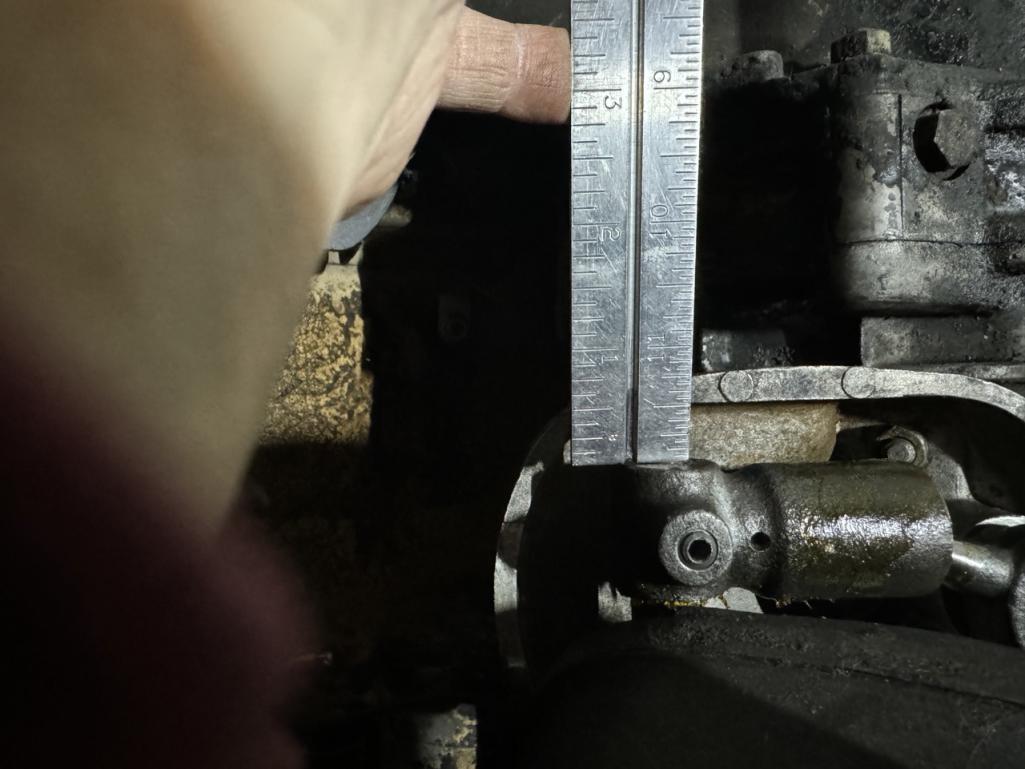 Fourth gear: 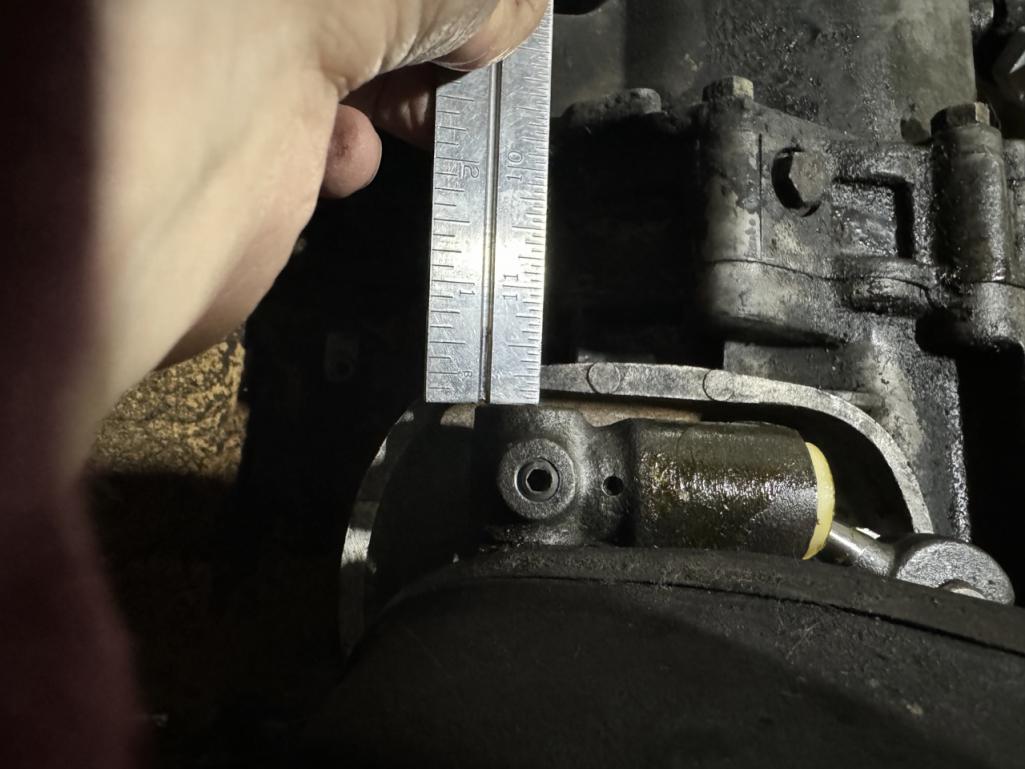 For additional testing, I lifted one rear wheel and then shifted the car through the gears. In all gears except 4th, the wheel tried to turn the engine when I pushed the wheel, as expected. However, in 4th, I heard a ratcheting/clanking noise inside the transmission. But, when I moved the shift lever back to the same distance that 2nd had stopped, the car was in 4th and now the wheel tried to move the engine, as it should. So, the problem appears to be that the slider for 4th gear is overshooting 4th and rubbing on the case or another gear, instead of stopping when on the gear (like all the others). Any ideas on how to fix this? Bonus points if it can be fixed without pulling the trans! |
|
|
|
| 930cabman |
Dec 15 2024, 03:09 PM
Post
#193
|
|
Advanced Member Group: Members Posts: 4,704 Joined: 12-November 20 From: Buffalo Member No.: 24,877 Region Association: North East States |
bent fork?
hate to say it, what it sounds like |
|
|
|
| Jack Standz |
Dec 15 2024, 04:22 PM
Post
#194
|
|
Senior Member Group: Members Posts: 827 Joined: 15-November 19 From: Happy Place (& surrounding area) Member No.: 23,644 Region Association: None |
Well, if you've ruled out external issues, then sure, take the transmission apart. Although I have seen a PO grind down the limiting plate inside the shifter, which could maybe allow 4th gear to get pushed too far by the shift rod? but, the fore/aft adjustment on the shift rod shouldn't make 4th gear position go too far while not doing the same to reverse and 2nd.
For bonus points: the gear stack can be removed with the transmission still in the car by removing the "nosecone" (or is it tailcone?). But, overall it probably just makes more sense to remove the transmission and/or engine. |
|
|
|
| Dr Evil |
Dec 15 2024, 05:13 PM
Post
#195
|
|
Send me your transmission! Group: Members Posts: 23,044 Joined: 21-November 03 From: Loveland, OH 45140 Member No.: 1,372 Region Association: MidAtlantic Region |
QUOTE(BillC @ Dec 15 2024, 02:27 PM) I just spent a bunch of time under the car, trying to diagnose the transmission. And I think I finally figured out what's going on inside there. I readjusted the clutch cable, but it was fine. I then readjusted the shift linkage, using instructions found here:
However, when playing with the shifter in various gears, I noticed the shift lever would go noticeably further forward in 4th than 2nd or reverse. To double-check, I went under the car and measured how far the shift rod on the trans console moved. Here are some pics: Second gear: Fourth gear: For additional testing, I lifted one rear wheel and then shifted the car through the gears. In all gears except 4th, the wheel tried to turn the engine when I pushed the wheel, as expected. However, in 4th, I heard a ratcheting/clanking noise inside the transmission. But, when I moved the shift lever back to the same distance that 2nd had stopped, the car was in 4th and now the wheel tried to move the engine, as it should. So, the problem appears to be that the slider for 4th gear is overshooting 4th and rubbing on the case or another gear, instead of stopping when on the gear (like all the others). Any ideas on how to fix this? Bonus points if it can be fixed without pulling the trans! Makes no sense, still internal. The internal shift rods are limited in movement by the forks hitting the engagement parts of each gear. If 5 is fine, then the fork is not likely loose because the same fork affects 4th and 5th. The only place for slop like that is at the shifter comb inside. Someone may have tried to adjust the rods and did so incorrectly. Since you are an optimist, pull the shift console off of the trans and look up at the rods when in neutral. Should be a uniform notch made by all 3. Bet you 4-5 is rotated, or something is very wrong with the shift comb on your console (best case scenario). |
|
|
|
| BillC |
Dec 16 2024, 07:16 PM
Post
#196
|
|
Senior Member Group: Members Posts: 732 Joined: 24-April 15 From: Silver Spring, MD Member No.: 18,667 Region Association: MidAtlantic Region |
Here's the new plan going forward:
A smoke machine is scheduled to be delivered tomorrow. Finding and fixing the leak(s) is the task for this upcoming weekend. I'm shipping a spare trans to Dr. Evil for rebuild. Once I get it back, it'll get swapped into the car and the one that's in there now will get scheduled for rebuild at some point. This way, I can still move the car if I need to -- after so long on jackstands, I am reluctant to put it back up so soon. |
|
|
|
| BillC |
Dec 19 2024, 10:15 AM
Post
#197
|
|
Senior Member Group: Members Posts: 732 Joined: 24-April 15 From: Silver Spring, MD Member No.: 18,667 Region Association: MidAtlantic Region |
I ended up ordering this smoke machine, and it finally arrived last night. It's a bit more expensive than most of the suggestions in the other thread, but it has a ton of adapters. If it doesn't work well, it will go back and I'll try something else. And, if it does work well, I'm sure I'll find other uses for it.
So, the plan for Saturday is to find any leaks and fix them. |
|
|
|
| Root_Werks |
Dec 19 2024, 01:56 PM
Post
#198
|
|
Village Idiot Group: Members Posts: 9,002 Joined: 25-May 04 From: About 15NM from Canada Member No.: 2,105 Region Association: Pacific Northwest |
Nice progress!
Bummer to hear about 4th. Don't burn too much time trying to resolve with linkage and such. Know anyone with a decent used sideshift you can swap in? If so, I'd do it, then have your box rebuilt or issue corrected. At least you can drive it. Nice thing about 914's is a tranny swap is pretty easy. |
|
|
|
| BillC |
Dec 21 2024, 04:35 PM
Post
#199
|
|
Senior Member Group: Members Posts: 732 Joined: 24-April 15 From: Silver Spring, MD Member No.: 18,667 Region Association: MidAtlantic Region |
The smoke machine arrived a couple of days ago, along with smoke fluid.
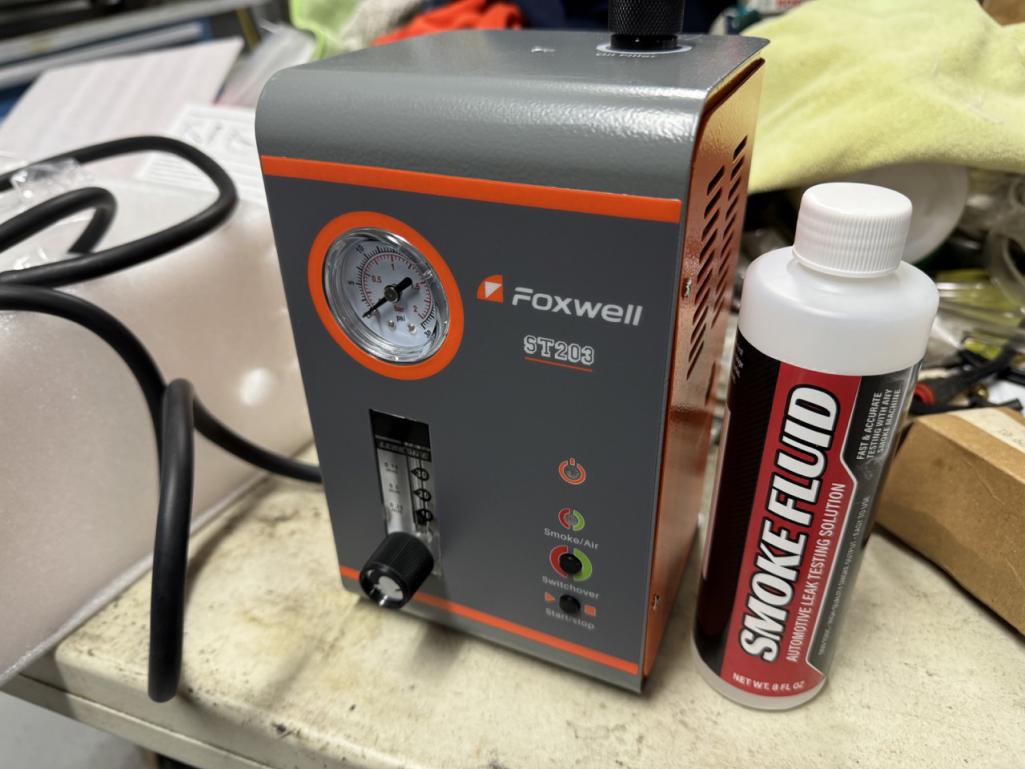 Yeah, I know I could have used baby oil instead, but my babies have all grown up and I no longer need to lubricate them, so we're out of that. (IMG:style_emoticons/default/tongue.gif) The adapters that came with the machine were very useful. There's an expanding bladder plug that fit very nicely in the top of the throttle body. Made it easy to hook up the machine. Only needed to plug the hose to the AAR. Turns out the driver's side fuel injectors weren't seated properly: 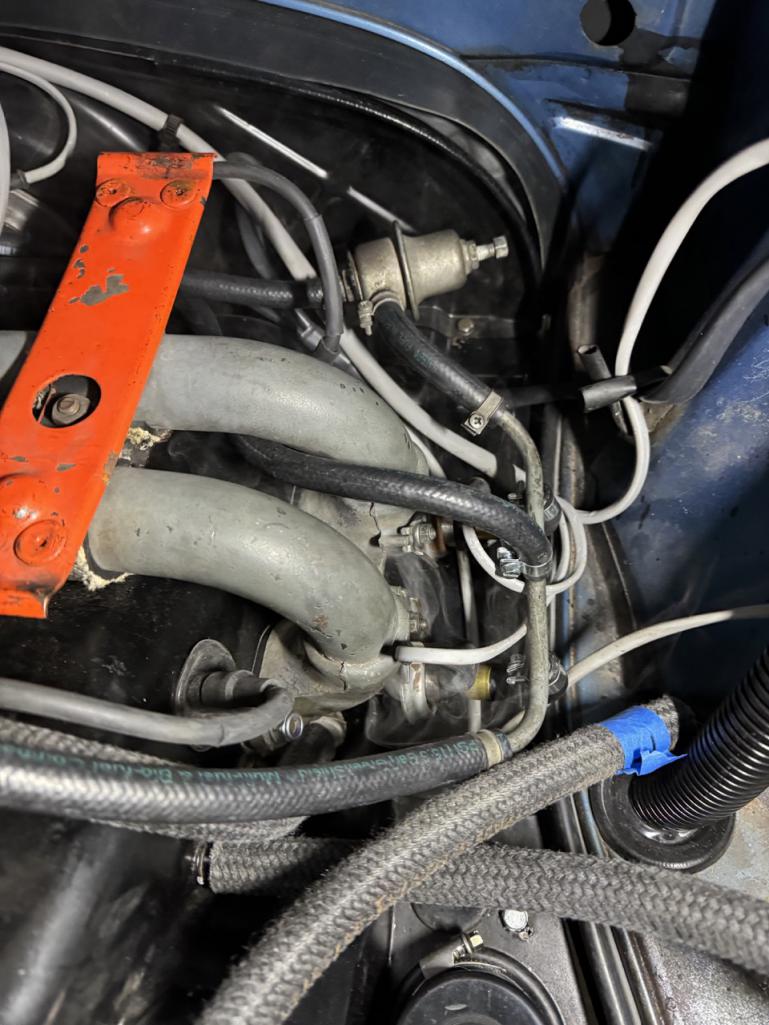 So I took the injectors out, double-checked the seals were still in good shape (they were, since they were brand-new a couple of months ago), and reinstalled them. Once the injectors were re-seated, I turned the smoke machine back on, to verify they were sealing properly (they were). That's when I noticed smoke from both sides of the throttle body, through the shaft openings. 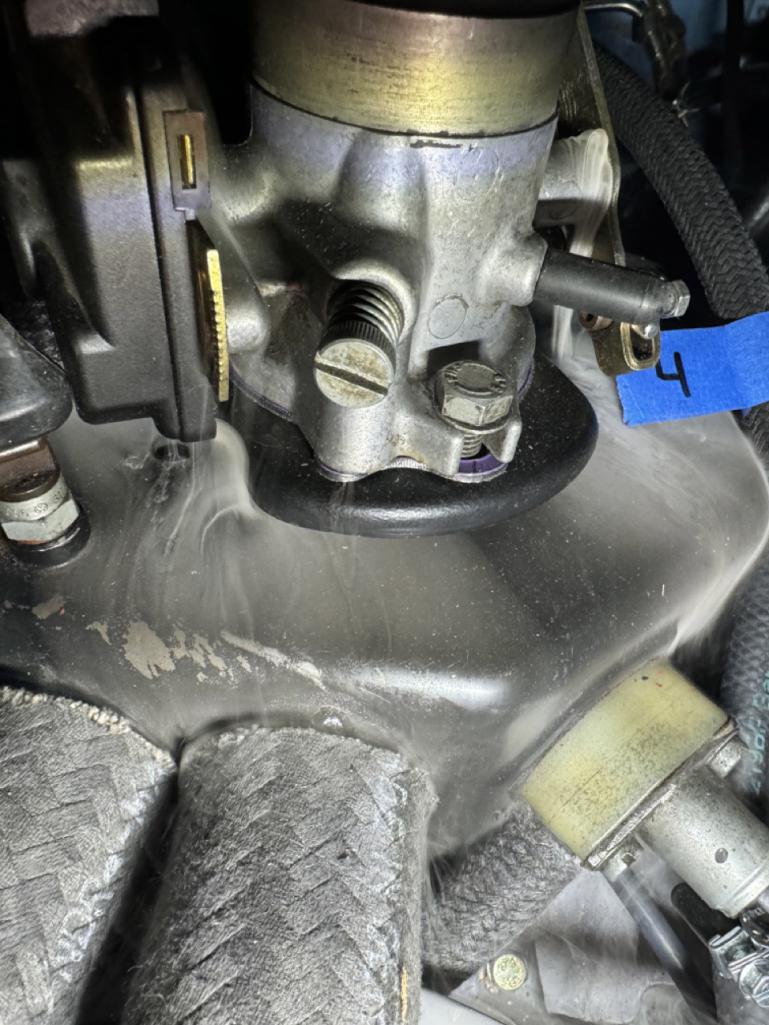 My first thought was the TB shaft bore must be worn out. Then I realized the smoke had no where else to go except there. So, I decided to just start the car and see if I could adjust the idle. Once it completely warmed up and the AAR closed, I had no problem adjusting the idle to around 950-ish. (IMG:style_emoticons/default/piratenanner.gif) Could have even gone a little lower if I had wanted. Once that was done and everything buttoned back up again, my wife and I went for a drive! (IMG:style_emoticons/default/driving.gif) We only went to a local gas station to fill up, but that was another 6 miles on a car that did nothing but sit for my first 4.5 years with it. Also, my other orders finally came in. I already installed the LED headlights. (IMG:style_emoticons/default/aktion035.gif) Tomorrow, I'll work on hooking up the new heater booster fan hoses from 914 Rubber and installing the new seat belts from Seat Belt Planet. |
|
|
|
| BillC |
Dec 22 2024, 06:57 PM
Post
#200
|
|
Senior Member Group: Members Posts: 732 Joined: 24-April 15 From: Silver Spring, MD Member No.: 18,667 Region Association: MidAtlantic Region |
Had more time to work on the car today.
First was installing the new seatbelts from seatbeltplanet.com . Decent kit, mostly plug&play, but did require some modifications. First, a few of the mounting holes needed to be opened up a little to use the stock mounting bolts. The bottom seat belt tabs needed to be opened just a little to fit the plastic bushings. And, the center latches needed to be drilled out as well; 14mm would work, but the 9/16" drill I had was close enough. Second, the kit does not include the bent wire guides that are used on the stock seatbelts. These guides are important because the space the seatbelt reel away from the firewall, and they also keep the belt from rubbing. While I could have cut the old belts to get the guides off, there's no way I could have gotten the guides onto the new belts without modification. So, I modified them. (IMG:style_emoticons/default/happy11.gif) I used a cutoff wheel in the dremel to slice through the factory welding. 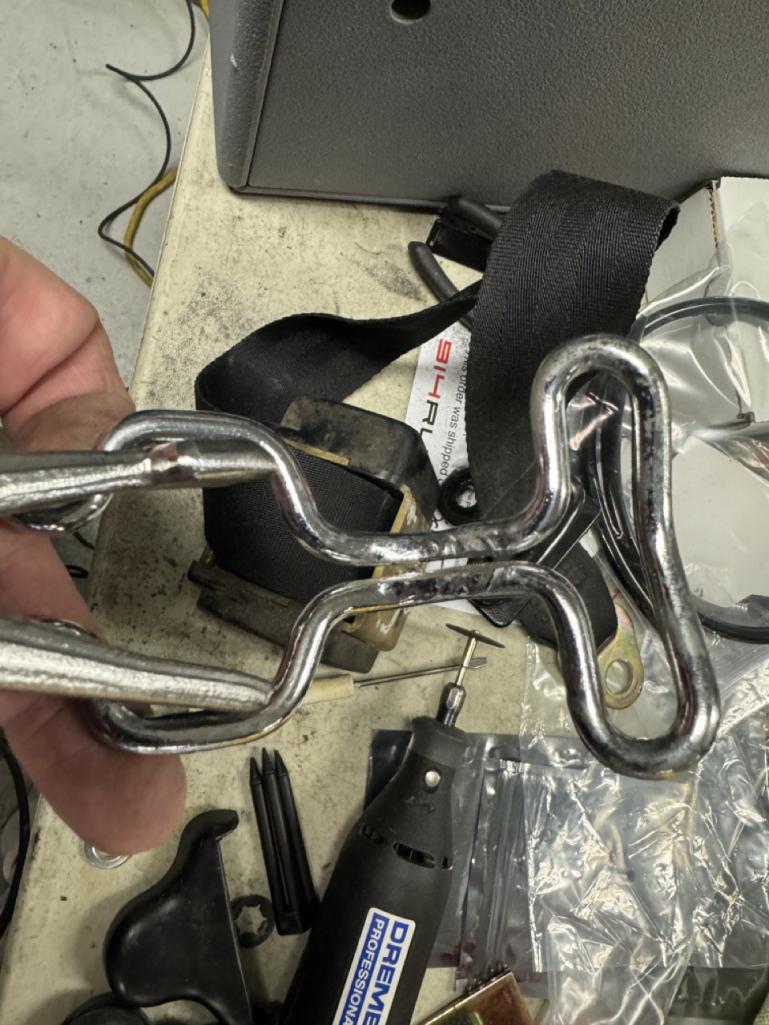 Then, I was able to spread the guide to get it off the old belt and onto the new belt. Once that was done, they mounted just like the stock reels. And, after it was all done, it looks pretty much stock. 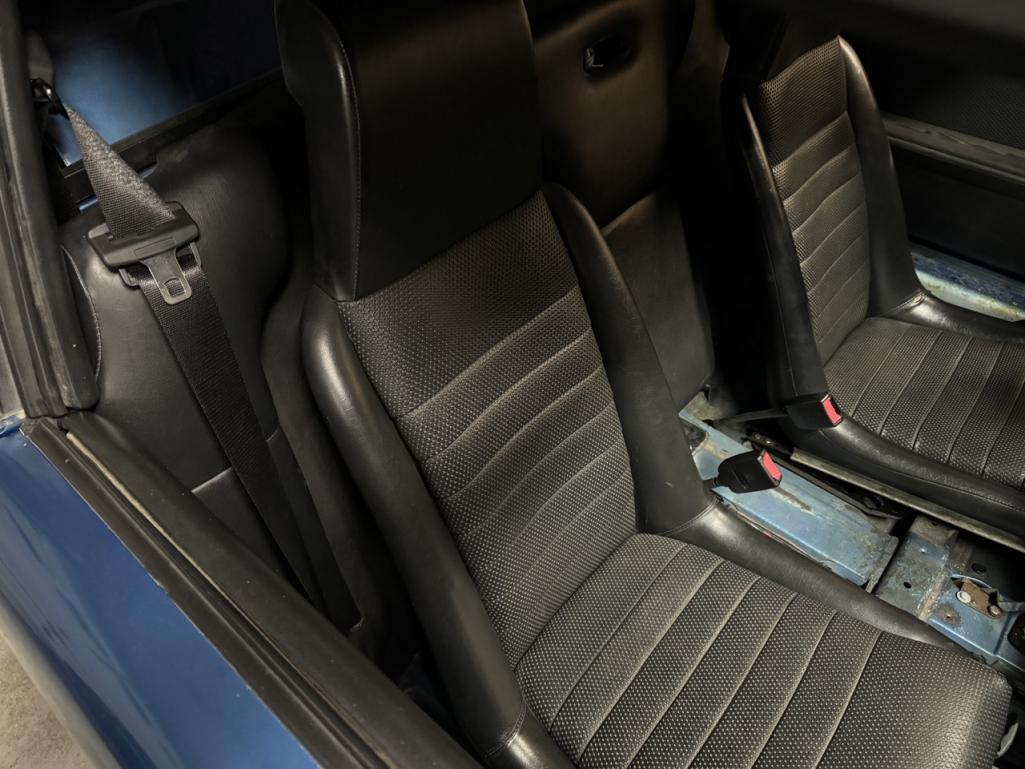 Only difference is the new seatbelt latches don't have any wiring. Unplugging the old latches had the effect of disabling the warning buzzer, so I'm okay with that. I could have used the new belts with the old latches, but the catch tabs didn't fit very well into the latches, and the old-style side release buttons are supposedly not very secure compared to the new-style end buttons. Then, I installed the fire extinguisher mount I got from Ben ( @mb911 ). Fortunately, this was a pretty straight-forward installation. I first mounted Ben's bracket, then I placed the fire extinguisher on the bracket. Once the FE was located, I took the bracket off and drilled mounting holes for the FE bracket on Ben's bracket. Then, everything bolted into place. 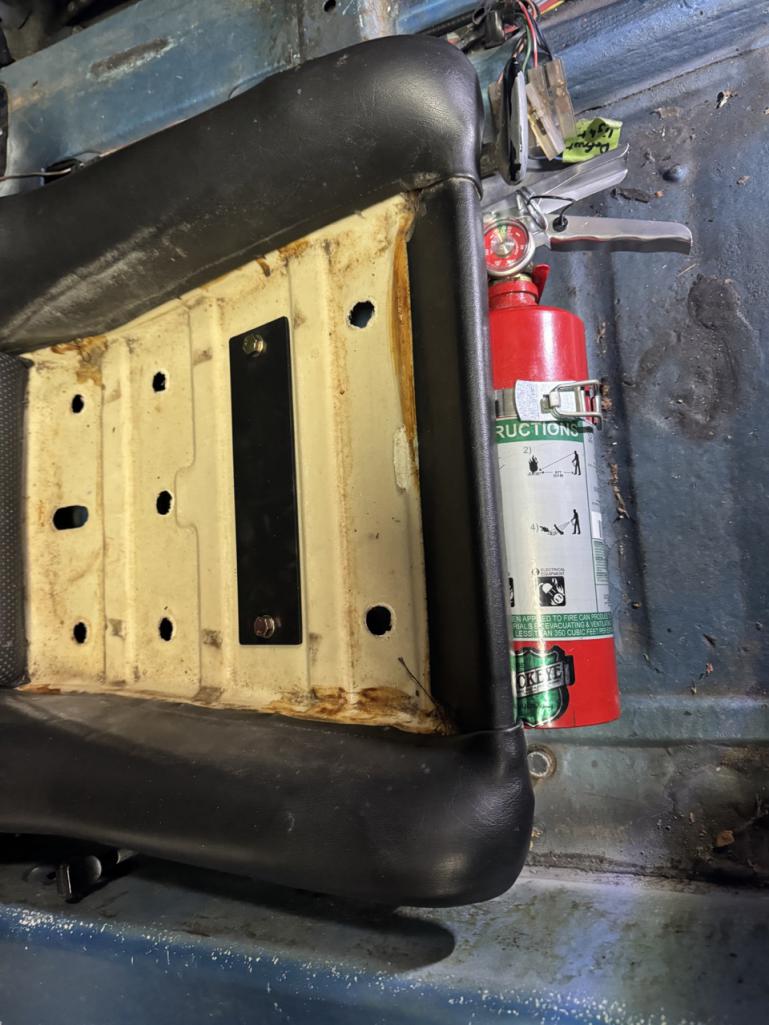 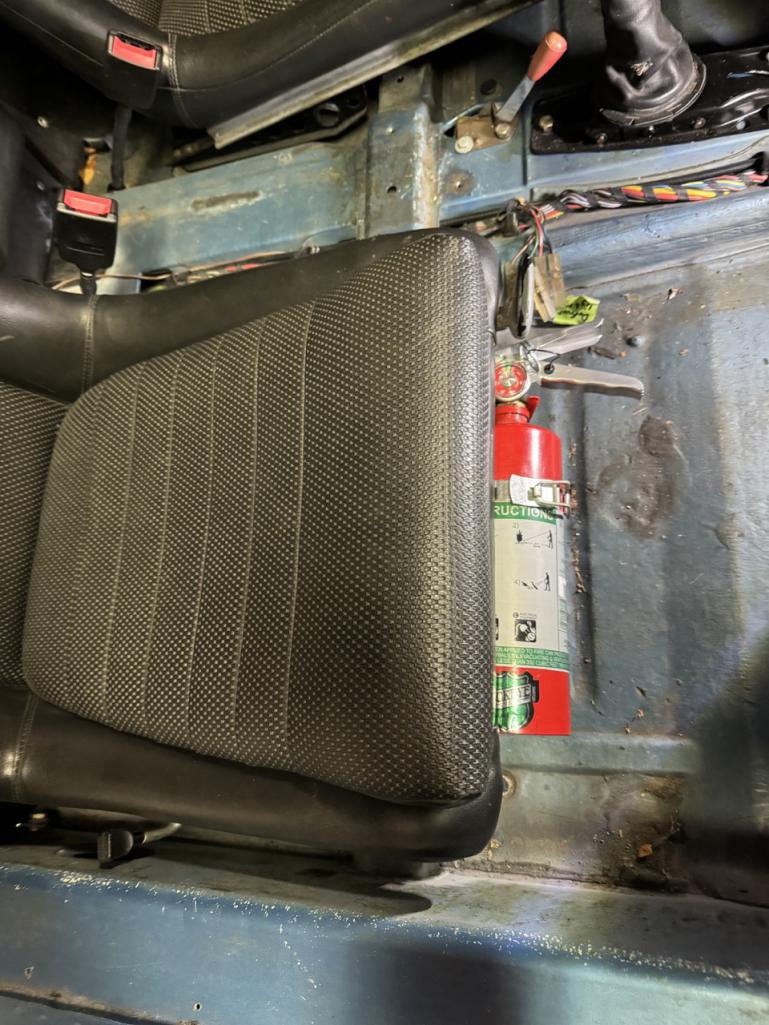 |
|
|
|
|
2 User(s) are reading this topic (1 Guests and 0 Anonymous Users)
1 Members: SO.O.C914er

|
Lo-Fi Version | Time is now: 14th June 2026 - 10:26 PM |
Invision Power Board
v9.1.4 © 2026 IPS, Inc.