|
|
|
Porsche, and the Porsche crest are registered trademarks of Dr. Ing. h.c. F. Porsche AG.
This site is not affiliated with Porsche in any way. Its only purpose is to provide an online forum for car enthusiasts. All other trademarks are property of their respective owners. |
|
|

  |

| BillC |
 Jun 28 2025, 05:06 PM Jun 28 2025, 05:06 PM
Post
#241
|
|
Senior Member  Group: Members Posts: 732 Joined: 24-April 15 From: Silver Spring, MD Member No.: 18,667 Region Association: MidAtlantic Region |
QUOTE(BillC @ Jun 23 2025, 05:25 PM)  QUOTE(FlacaProductions @ Jun 22 2025, 07:24 PM) Seized hands might just do it in for good but if you're up for messing around, you probably can't break it any more than it already is! Try these links: https://forums.pelicanparts.com/porsche-911...ock-repair.html https://www.912bbs.org/forum/threads/kienzl...k-repair.62594/ Hope it helps - I love those little clocks for some reason. Thank you very much for those links. I have contact cleaner and clock oil on order, so I might it a go next week, to open up the clock and see if I can get it working again -- as you said, it's unlikely I'll break it any more. (IMG:style_emoticons/default/smash.gif) (IMG:style_emoticons/default/welder.gif) (IMG:style_emoticons/default/biggrin.gif) Well, I opened up the clock, and have good news and bad news. The good news is that the low-temp solder is intact. The bad news is the clock doesn't run because the mechanism is heavily rusted. So, I ordered a repro clock from AA. Someone had already been inside this clock, because the warranty plastic was already broken off. |
   |

 
|
| FlacaProductions |
Jun 28 2025, 06:00 PM
Post
#242
|
|
Advanced Member Group: Members Posts: 2,230 Joined: 24-November 17 From: LA Member No.: 21,628 Region Association: Southern California |
Shoot. Good try!
|
|
|
|
| BillC |
Aug 31 2025, 04:13 PM
Post
#243
|
|
Senior Member Group: Members Posts: 732 Joined: 24-April 15 From: Silver Spring, MD Member No.: 18,667 Region Association: MidAtlantic Region |
Did some more maintenance on the 914, fixed the oil temp gauge and got bit by the DAPO once again.
On the drive we took after installing the center console, I noticed that the oil temp gauge didn't work. So, yesterday, I got out the multimeter and started testing. I started by pulling the gauge and checking the signal wire for continuity, but no joy. Hmmm, problem located, now to find the open. I first checked the connection at the other end of the console harness, and that was okay. Next step was to climb under the car and make sure the wire from the sensor was intact, and it was. Last place to check was the connection in the engine compartment -- of course, that connection is under the wiring harness which is under the ECU, essentially a real bear to get to. I unbolted the ECU and moved it out of the way, and discovered I forgot to plug the sensor wire into the harness. Oops. (IMG:style_emoticons/default/headbang.gif) (IMG:style_emoticons/default/headbang.gif) It was a pain to get plugged in, but it is now and I actually saw the needle move on the gauge when I turned on the ignition -- very promising. Can't test drive until I finish the other project I'm working on. So, the hood never really fit properly since I got the car. It was off-center and also pushed up along the sides. I read something a while ago that some aftermarket gaskets were too thick, so I ordered a factory gasket to replace it. When I pulled the old gasket, I discovered some rust and a bunch of old glue. 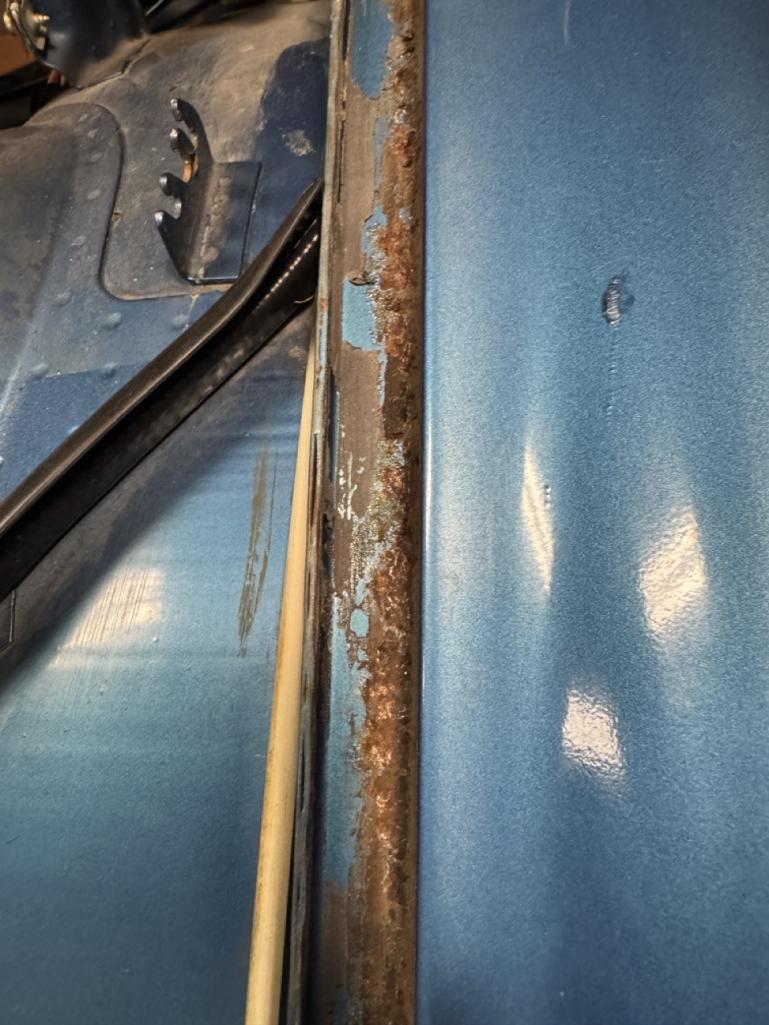 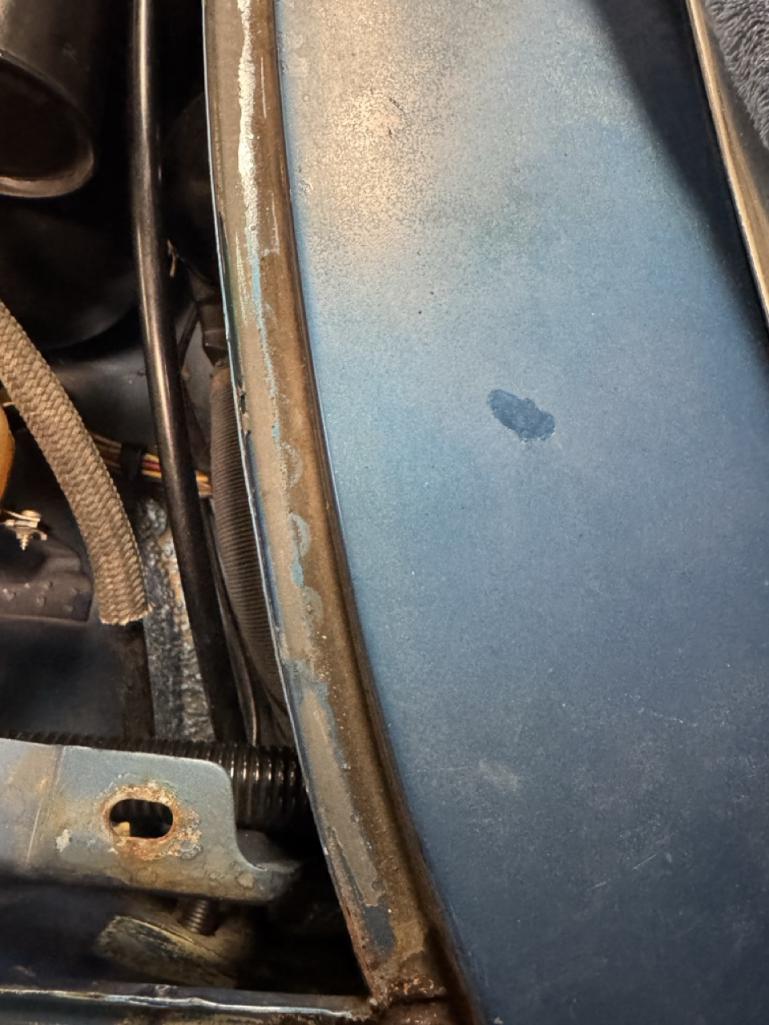 So, first step was to remove the old glue. I tried rubbing it out, as described in a 914Rubber video, but that glue was well-stuck. I did some googling, and found a number of posts recomending 3M Low VOC Adhesive Remover, so I bought a can. It did work (slowly) on the old glue, but it turned out to be better at removing the paint than the glue. (IMG:style_emoticons/default/headbang.gif) 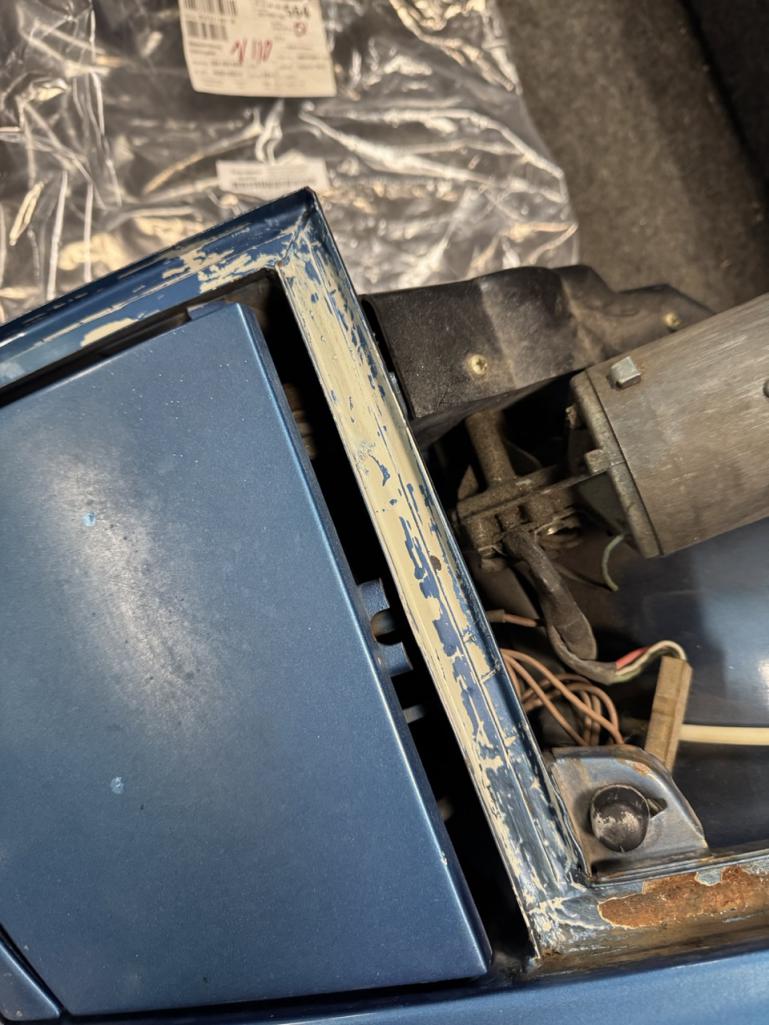 At that point, I decided to see if anything else I already had would remove the glue. Believe-it-or-not, CRC Brakleen worked great! -- it softened the glue almost immediately, and did not attack the paint nearly as much as the adhesive remover. 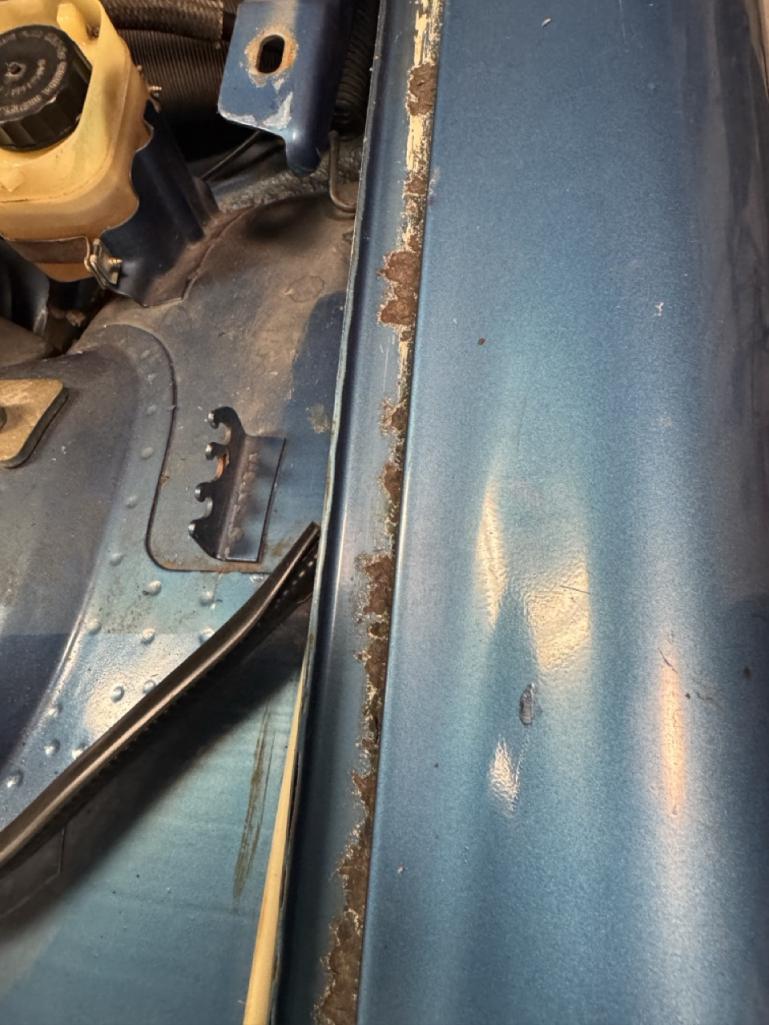 Then, I scraped the rust down and then painted it with the Loctite Rust Converter. I let it dry overnight, and then primed the treated spots. Then, I masked off the channels and painted them. 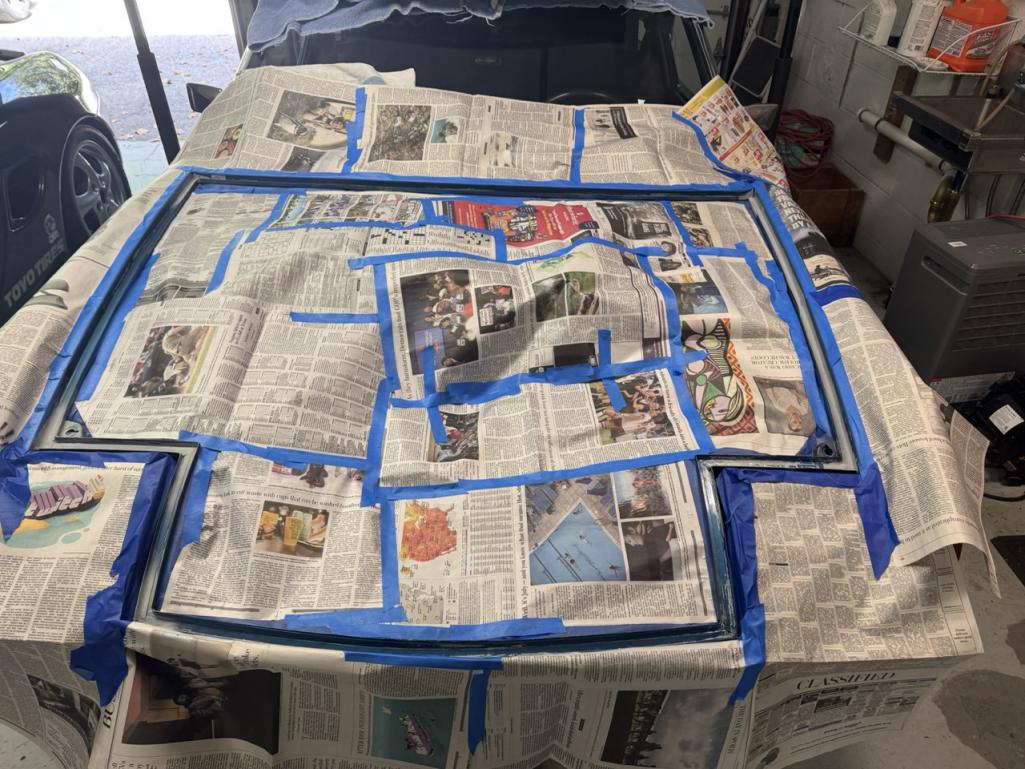 After the second coat, I removed the masking and reinstalled the bumper. 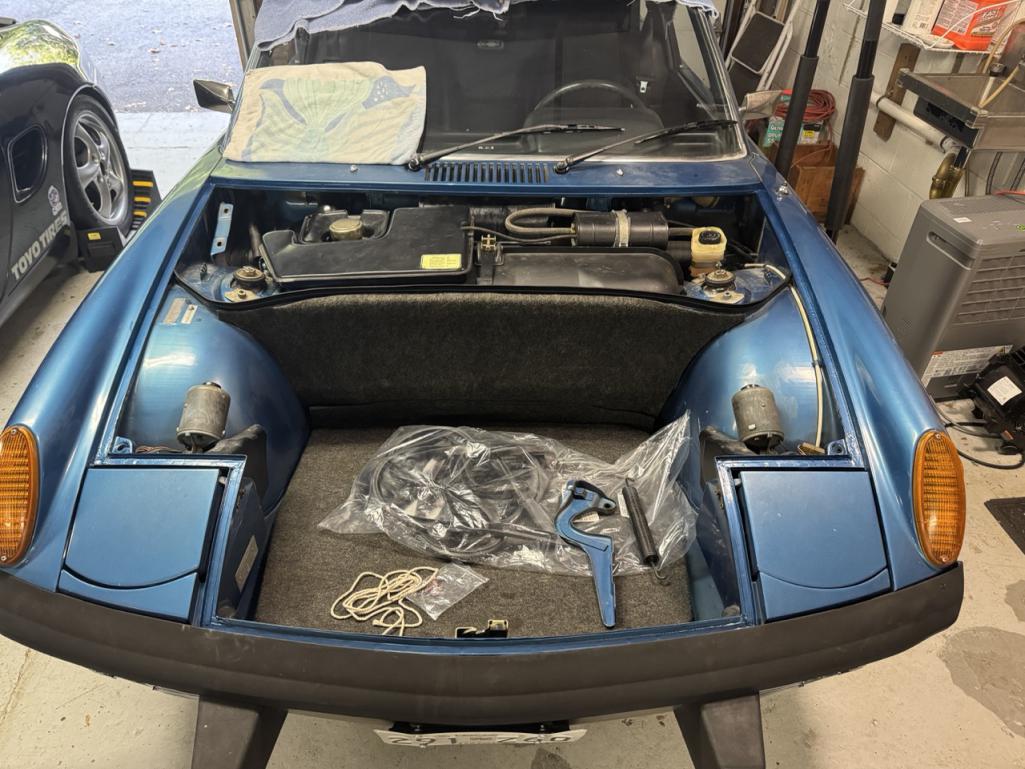 While I was working on the channels, I checked the hood hinges and discovered the DAPO surprise -- the driver's side hinge bracket was messed up. Apparently the hinge bolt snapped off at some point. So, they drilled it out, off-center of course, and then shoved an SAE bolt into the hole. Now I'm looking for a replacement bracket. I could fix this one, but I would have to weld it up first and then re-drill it centered. This is my fallback plan if I can't find a replacement bracket in a reasonable time. |
|
|
|
| BillC |
Sep 1 2025, 04:05 PM
Post
#244
|
|
Senior Member Group: Members Posts: 732 Joined: 24-April 15 From: Silver Spring, MD Member No.: 18,667 Region Association: MidAtlantic Region |
Now that the paint is dry, I installed the new seal:
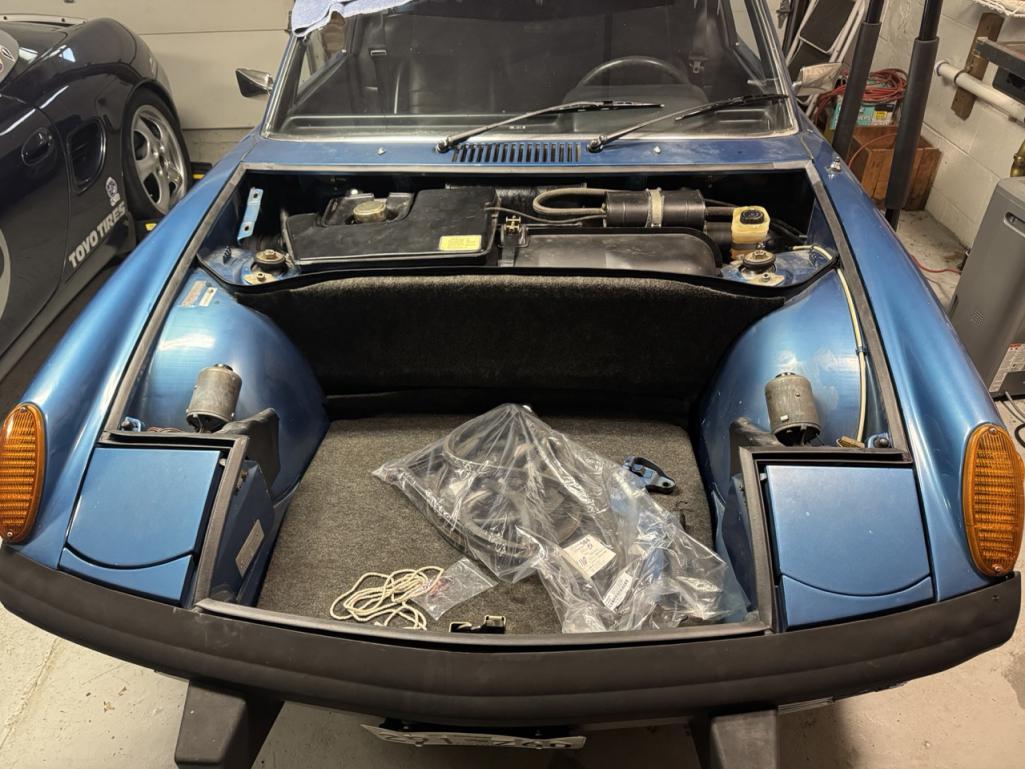 It's just fitted in place, without glue. I'm thinking about not gluing it in, since I read a suggestion a while ago about pulling the seal to let the channel dry if the car gets caught in the rain. |
|
|
|
| Chad911sc |
Sep 1 2025, 05:24 PM
Post
#245
|
|
Member Group: Members Posts: 322 Joined: 24-September 24 From: Florida Member No.: 28,374 Region Association: South East States |
I replaced my front hood seal a few months ago and did not glue mine in. It stays perfectly in place without it. I bought mine from 914 Rubber.
|
|
|
|
| Rob-O |
Sep 1 2025, 05:30 PM
Post
#246
|
|
Senior Member Group: Members Posts: 1,317 Joined: 5-December 03 From: Mansfield, TX Member No.: 1,419 Region Association: Southwest Region |
QUOTE(Chad911sc @ Sep 1 2025, 03:24 PM) I replaced my front hood seal a few months ago and did not glue mine in. It stays perfectly in place without it. I bought mine from 914 Rubber. Same. I installed mine probably ten years ago. No glue. Fits perfect and stays in place. |
|
|
|
| Root_Werks |
Sep 5 2025, 02:24 PM
Post
#247
|
|
Village Idiot Group: Members Posts: 9,002 Joined: 25-May 04 From: About 15NM from Canada Member No.: 2,105 Region Association: Pacific Northwest |
QUOTE(Rob-O @ Sep 1 2025, 04:30 PM) QUOTE(Chad911sc @ Sep 1 2025, 03:24 PM) I replaced my front hood seal a few months ago and did not glue mine in. It stays perfectly in place without it. I bought mine from 914 Rubber. Same. I installed mine probably ten years ago. No glue. Fits perfect and stays in place. Same here, about 4 years ago, 914Rubber, no glue. Holds in just fine. |
|
|
|
| BillC |
Sep 7 2025, 02:34 PM
Post
#248
|
|
Senior Member Group: Members Posts: 732 Joined: 24-April 15 From: Silver Spring, MD Member No.: 18,667 Region Association: MidAtlantic Region |
Finally had a chance to work on another task on the car -- hooking up the windshield washers. I picked up a used pump at Hershey years ago, and had meant to do this while the gas tank was out and there was easy access to everything, but where's the challenge in doing it while it's easy? (IMG:style_emoticons/default/headbang.gif)
I followed @bbrock 's guidance here: http://www.914world.com/bbs2/index.php?showtopic=361176 , and it went easier than when I wired up my previous 914, because the old car didn't have the pre-wiring for the pump in the wiper switch. I found the brown/black wire taped to the wiring harness, just as Brent mentioned. Since I didn't want to modify the harness, I made an extension wire with a male spade on the end. I found an empty spade on a switched fuse in the fuse block and pulled power from there; the wire was run up through grommet where the main harness passes. Since I didn't want to drill any new holes in the car, the relay is bolted to the existing hole in one of the cowl supports -- I found a 5mm bolt, so the hole didn't need to be drilled out. The pump is installed under the reservoir with VHB double-sided tape. I used the VHB tape on my previous car, and the pump was still firmly attached 5 years later when I sold the car. 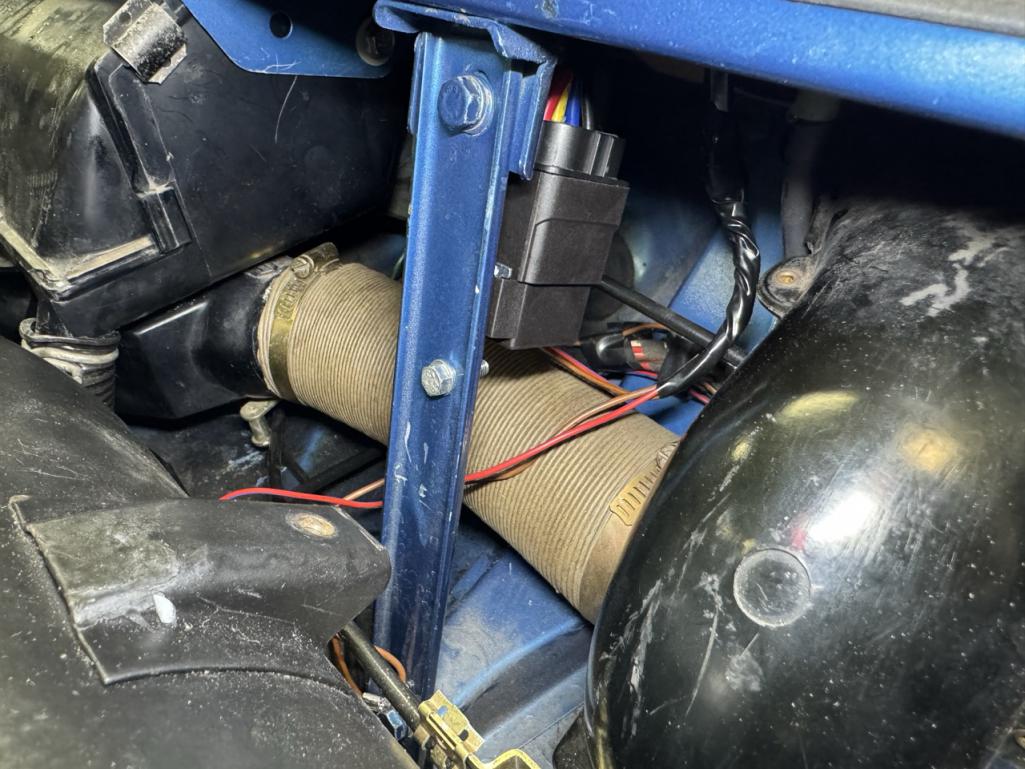  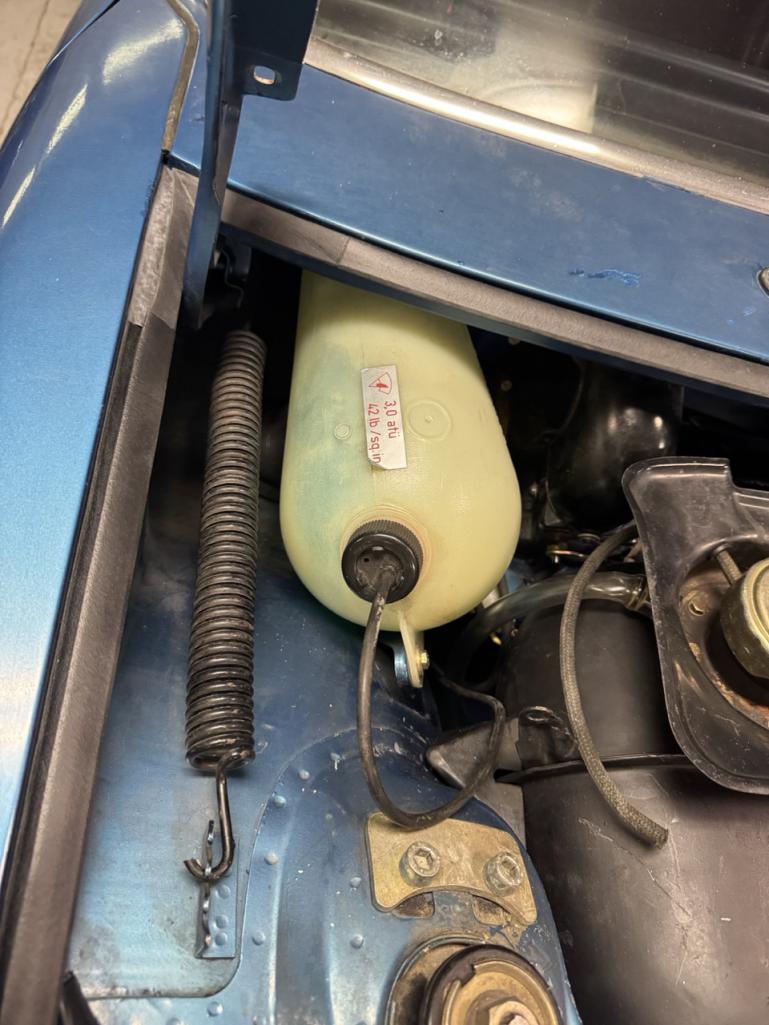 |
|
|
|
| FlacaProductions |
Sep 8 2025, 07:57 AM
Post
#249
|
|
Advanced Member Group: Members Posts: 2,230 Joined: 24-November 17 From: LA Member No.: 21,628 Region Association: Southern California |
I used VHB double-sided tape to mount my pump 5 years ago and it's still solid.
|
|
|
|
| BillC |
Sep 16 2025, 03:59 PM
Post
#250
|
|
Senior Member Group: Members Posts: 732 Joined: 24-April 15 From: Silver Spring, MD Member No.: 18,667 Region Association: MidAtlantic Region |
Between waiting for the parts and spray paint to arrive, and being at the Summit Point Club Race last weekend, I wasn't able to get the hood reinstalled until last night.
Here's the "new" bracket (cleaned, de-rusted, and painted) next to the old one: 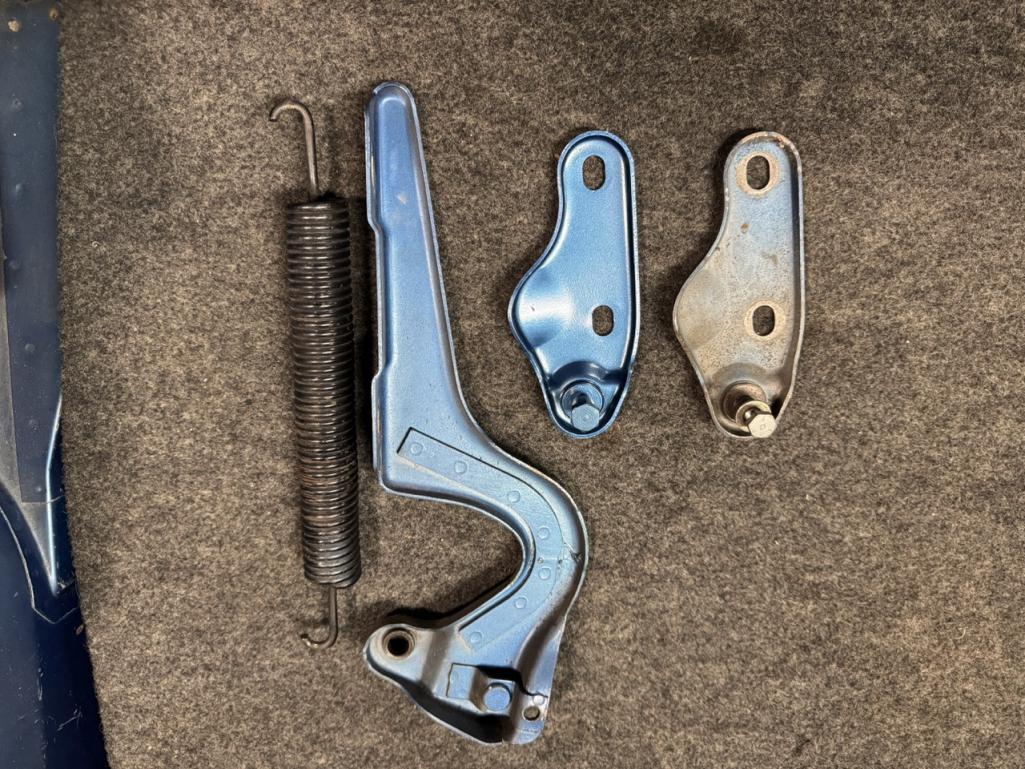 And the hood hinge installed: 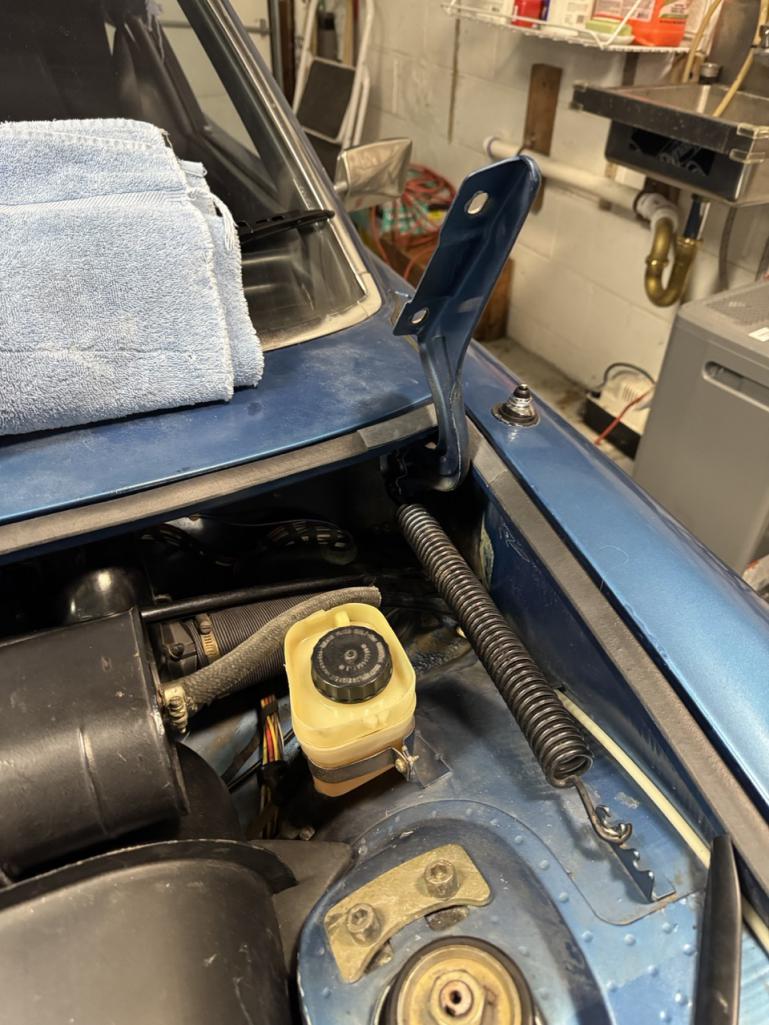 And with the hood itself installed: 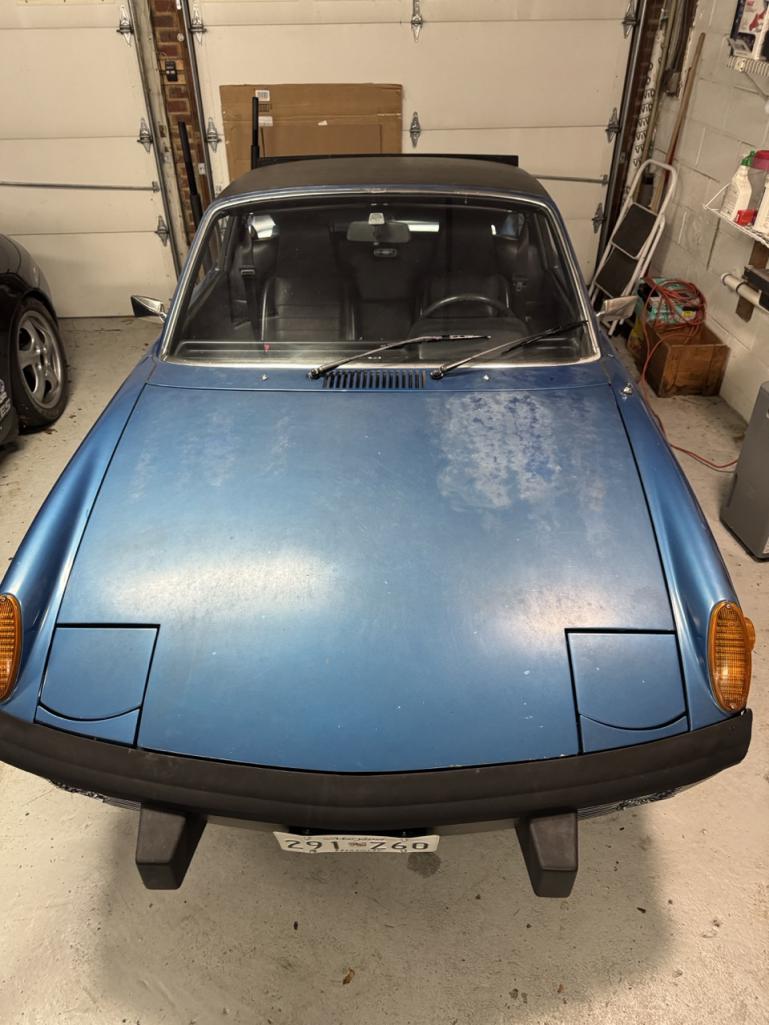 My son and I spent about 1/2 hour tweaking the positioning of the hood. It isn't perfect, but much better than before. |
|
|
|
| BillC |
Apr 15 2026, 04:04 PM
Post
#251
|
|
Senior Member Group: Members Posts: 732 Joined: 24-April 15 From: Silver Spring, MD Member No.: 18,667 Region Association: MidAtlantic Region |
It's been a while since I've done any work on my 914, but something just happened that has me a bit excited.
If you dig back into this thread a ways, you'll find where I was complaining about not being able to get the car to idle properly using the original D-Jet system. It turned out that the problem is when the PO had the engine rebuilt, they installed a carb cam which isn't fully compatible with D-Jet -- I can get it to idle reliably, but only at 1600 RPM, which turns out to be remarkably annoying. About a year ago, James at PMB Performance contacted me about a drop-in/bolt-on modern fuel injection system they were developing for 914s. Since it's an MS3 based system, it would cure all my idle and drivability issues. And ... this arrived yesterday: 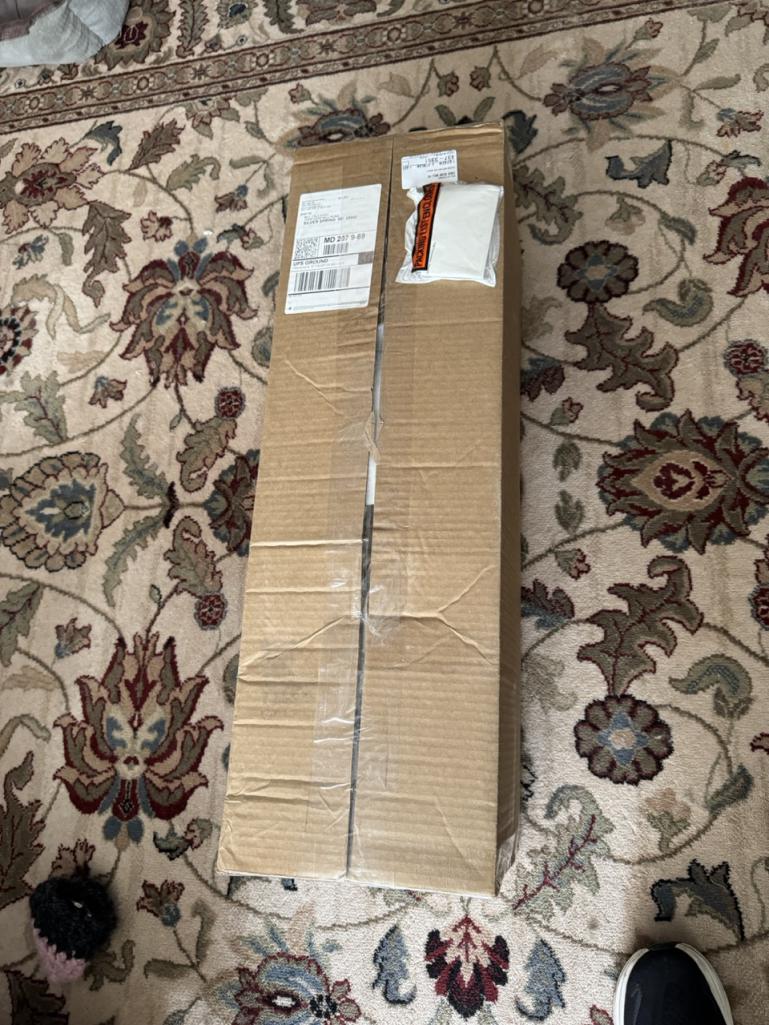 (IMG:style_emoticons/default/piratenanner.gif) (IMG:style_emoticons/default/cheer.gif) (IMG:style_emoticons/default/smilie_pokal.gif) Inside the box is all of this:  (IMG:style_emoticons/default/piratenanner.gif) (IMG:style_emoticons/default/beer.gif) (IMG:style_emoticons/default/beerchug.gif) (IMG:style_emoticons/default/aktion035.gif) This is the first system to be installed outside of PMB Performance, so it will be a bit of a learning curve for both me and them. It turns out that this system isn't quite a bolt-on, since I need to weld an O2 sensor bung onto the exhaust if I want close-loop operation (which I do). The system will apparently run just fine in open-loop, but I want all the modern bells and whistles. Things are a little busy at the moment, since it's the start of driving/racing season, but I will update this thread as I make progress. The plan is to take lots of pics and detail the process involved. |
|
|
|
| Root_Werks |
Apr 15 2026, 04:24 PM
Post
#252
|
|
Village Idiot Group: Members Posts: 9,002 Joined: 25-May 04 From: About 15NM from Canada Member No.: 2,105 Region Association: Pacific Northwest |
Keep us posted on the MS3 system! Looks pretty straight forward.
I installed a Holley Snipper 2 with Ignition on our early Bronco late last year. Was surprised how clean everything installed and how easy it was to program and setup. Hopefully this system is similar. |
|
|
|
| FlacaProductions |
Apr 15 2026, 04:42 PM
Post
#253
|
|
Advanced Member Group: Members Posts: 2,230 Joined: 24-November 17 From: LA Member No.: 21,628 Region Association: Southern California |
WATCHING THIS HARD.
I talked with James at SMC during the Lit Show weekend about this setup. This might be just the thing I'm looking for.....tell ya what - send it to me and I'll get it right on since I already have the exhaust bung! |
|
|
|
| rjames |
Apr 16 2026, 10:58 AM
Post
#254
|
|
I'm made of metal Group: Members Posts: 4,456 Joined: 24-July 05 From: Shoreline, WA Member No.: 4,467 Region Association: Pacific Northwest |
|
|
|
|
| BillC |
Apr 19 2026, 03:39 PM
Post
#255
|
|
Senior Member Group: Members Posts: 732 Joined: 24-April 15 From: Silver Spring, MD Member No.: 18,667 Region Association: MidAtlantic Region |
Started on the installation today. First step is removing the old fuel injection system.
Here's the "before" picture: 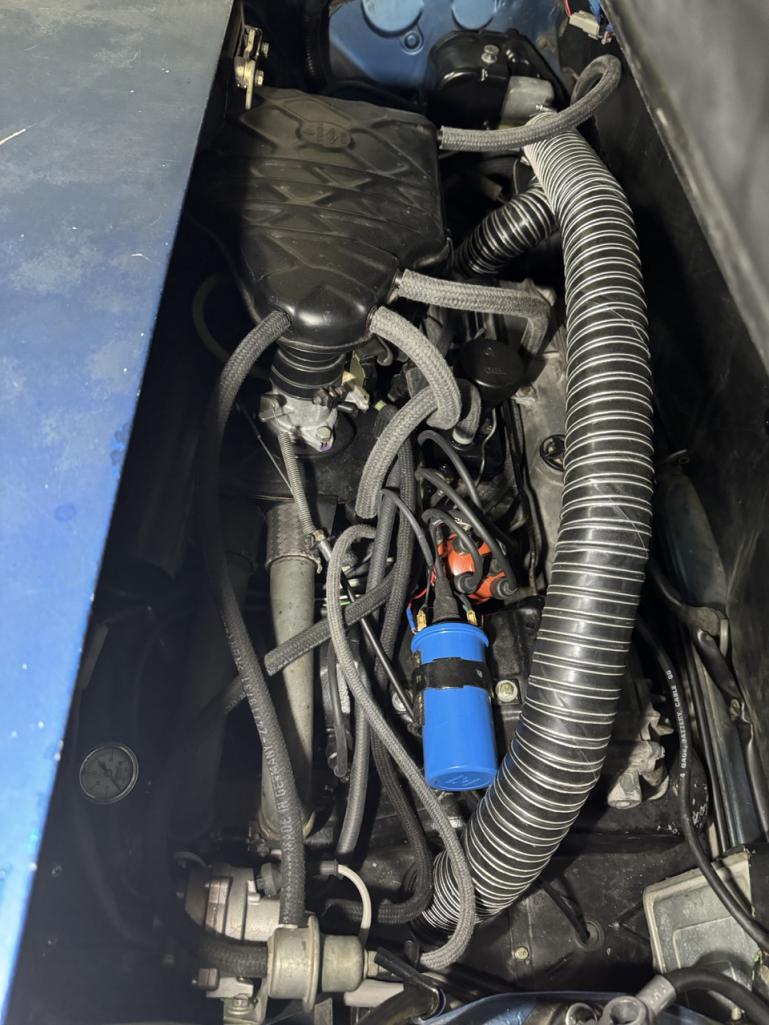 And here's after all the old parts were removed: 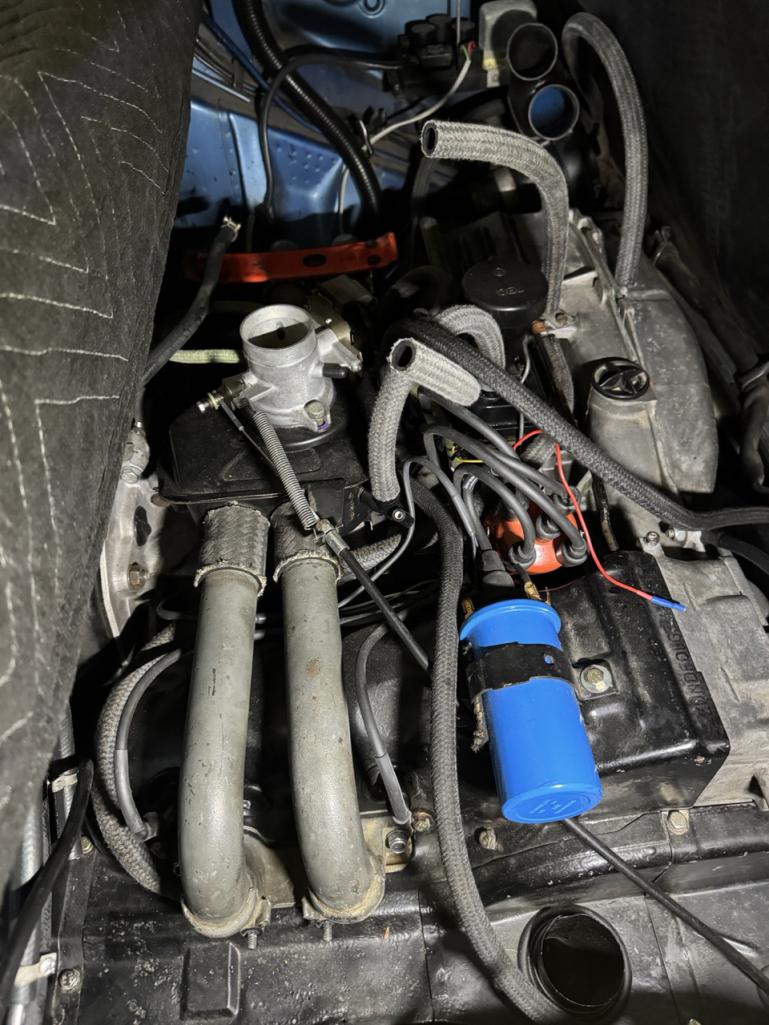 That's about as far as I got today. I ran into some questions, and have to wait until the PMB staff comes in tomorrow to get answers -- I figured it would be better to wait than to either damage something or have to re-do it later. |
|
|
|
| DRPHIL914 |
Apr 19 2026, 03:49 PM
Post
#256
|
|
Dr. Phil Group: Members Posts: 5,945 Joined: 9-December 09 From: Kennesaw, GA Member No.: 11,106 Region Association: South East States |
Bill, question?
What are you using for timing? are they using a different distributor or a crank trigger of some kind? I talked to Eric last year about this and he had said they had a new distributor developed for one of their systems. my 2056 d-jet is the same issue with trying to get a good idle without it being 1200-1400. Anyway good luck with getting all set up, from following their trip recently using the system it seems things are working as desired! |
|
|
|
| FlacaProductions |
Apr 19 2026, 03:51 PM
Post
#257
|
|
Advanced Member Group: Members Posts: 2,230 Joined: 24-November 17 From: LA Member No.: 21,628 Region Association: Southern California |
Excellet - thanks for documenting this! No detail too small!
What have you found so far? |
|
|
|
| BillC |
Apr 19 2026, 07:56 PM
Post
#258
|
|
Senior Member Group: Members Posts: 732 Joined: 24-April 15 From: Silver Spring, MD Member No.: 18,667 Region Association: MidAtlantic Region |
QUOTE(DRPHIL914 @ Apr 19 2026, 05:49 PM) Bill, question? What are you using for timing? are they using a different distributor or a crank trigger of some kind? I talked to Eric last year about this and he had said they had a new distributor developed for one of their systems. my 2056 d-jet is the same issue with trying to get a good idle without it being 1200-1400. They sent a new distributor, which incorporates the cam timing sensor. QUOTE(FlacaProductions @ Apr 19 2026, 05:51 PM) Excellet - thanks for documenting this! No detail too small! What have you found so far? So far, everything has been fairly straightforward. The questions I had were simply about little details missing from the draft instructions -- they are using my feedback to update them as needed. |
|
|
|
| TRP |
Apr 19 2026, 08:43 PM
Post
#259
|
|
Member Group: Members Posts: 402 Joined: 2-September 23 From: Morgan Hill, CA Member No.: 27,559 Region Association: None |
Super cool, will be watching as this goes together.
|
|
|
|
| BillC |
Apr 20 2026, 05:46 PM
Post
#260
|
|
Senior Member Group: Members Posts: 732 Joined: 24-April 15 From: Silver Spring, MD Member No.: 18,667 Region Association: MidAtlantic Region |
I was able to spend a little more time on installation this evening, and installed the Fuel Pressure Regulator (FPR).
This is another bit that isn't quite bolt-on, since the hole in the mounting tab needs to be opened up just a little bit. A moment with a step drill did the trick.  Then, I just had to attach the fittings to the FPR. I also added a pressure gauge, which was previously installed on the old fuel injection system. Then the FPR mounts like the stock FPR. Only difference is I will need to run a vacuum line to the top of the FPR. 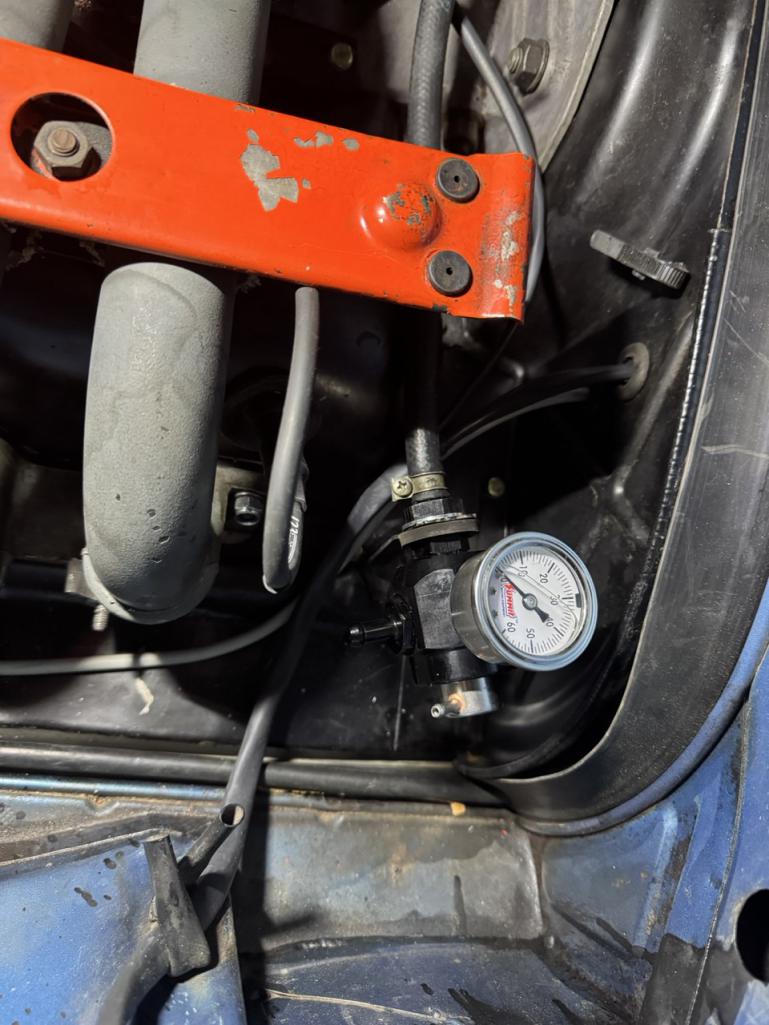 |
|
|
|
|
2 User(s) are reading this topic (1 Guests and 0 Anonymous Users)
1 Members: eradon

|
Lo-Fi Version | Time is now: 15th June 2026 - 01:15 AM |
Invision Power Board
v9.1.4 © 2026 IPS, Inc.