|
|
|
Porsche, and the Porsche crest are registered trademarks of Dr. Ing. h.c. F. Porsche AG.
This site is not affiliated with Porsche in any way. Its only purpose is to provide an online forum for car enthusiasts. All other trademarks are property of their respective owners. |
|
|

  |

| BillC |
 Jul 19 2020, 05:51 AM Jul 19 2020, 05:51 AM
Post
#61
|
|
Senior Member  Group: Members Posts: 732 Joined: 24-April 15 From: Silver Spring, MD Member No.: 18,667 Region Association: MidAtlantic Region |
QUOTE(bkrantz @ Jul 18 2020, 10:33 PM)  Did you consider mounting the pump on the underside of the floor panel (above the steering rack)? Yes, I did. Between the brake lines and the steering rack, there just wasn't enough room in that area to mount the pump with the TR pump mount and have sufficient clearance all around. I also thought about just mounting the pump directly to the sheet metal, but decided I really wanted it to be rubber mounted -- the pump is very loud without rubber isolators. |
   |

 
|
| BillC |
Jul 23 2020, 02:11 PM
Post
#62
|
|
Senior Member Group: Members Posts: 732 Joined: 24-April 15 From: Silver Spring, MD Member No.: 18,667 Region Association: MidAtlantic Region |
So, the parts I've been waiting for finally arrived. With the new drain hoses for the fresh air box in hand, I was able to get the tank re-installed.
The drain hoses are held in by ring clips, which have quite a bit of force. I wasn't able to hold them open reliably and safely with any of my existing tools, so I modified a pair of pliers to work. First step was to take them apart, then to mill a slot in each half. The slot was offset from the center-line of the jaws so the clip would fit properly. 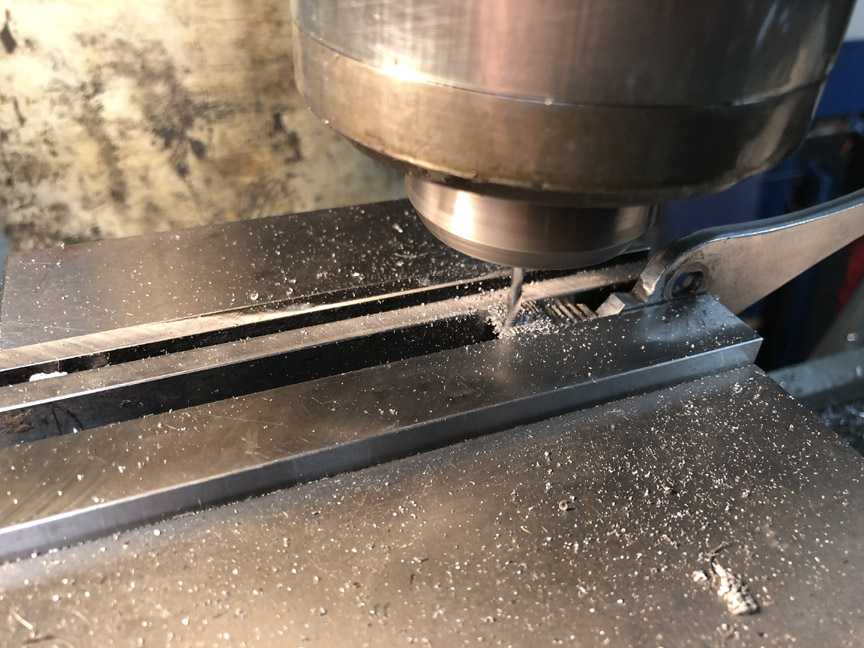 Here are the pliers reassembled and holding a ring clip. They work very nicely. 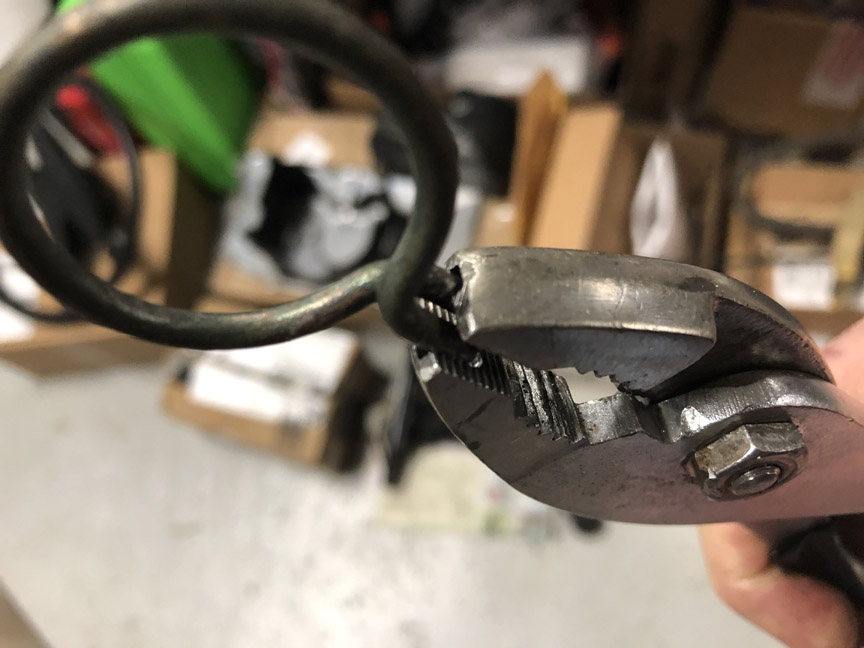 And, a shot with the tank installed and everything mounted back onto it. 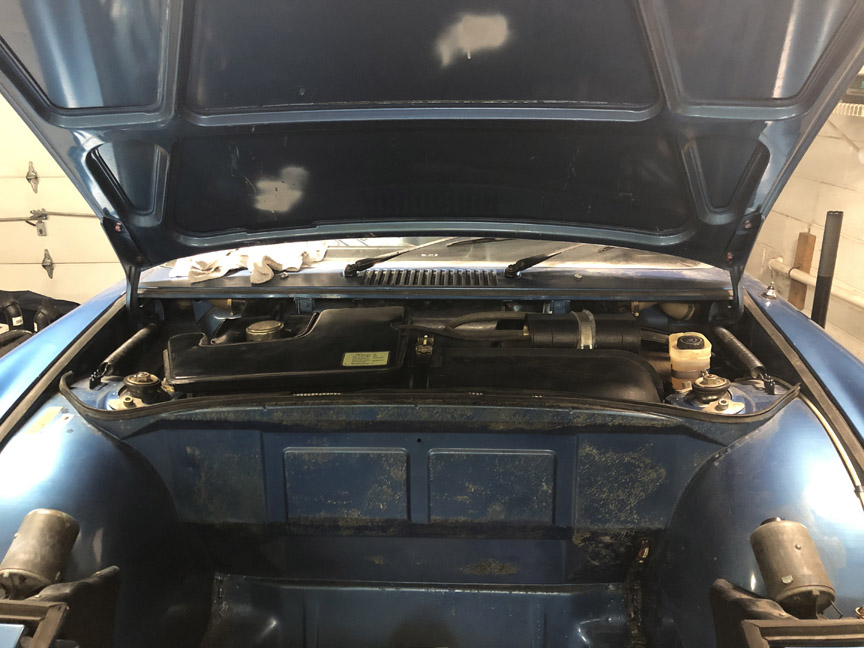 It looks a little high, but I made sure everything fits under the hood with clearance. I didn't bother with pics of the installation process, since it's a standard tank being installed in a more-or-less standard car. The only real annoyance was getting the rubber side pieces positioned properly, since it was rather finicky to get them at the right height. |
|
|
|
| Superhawk996 |
Jul 23 2020, 02:33 PM
Post
#63
|
|
914 Guru Group: Members Posts: 7,886 Joined: 25-August 18 From: Woods of N. Idaho Member No.: 22,428 Region Association: Galt's Gulch |
QUOTE(BillC @ Jul 23 2020, 04:11 PM) Here are the pliers reassembled and holding a ring clip. They work very nicely. (IMG:style_emoticons/default/pray.gif) |
|
|
|
| BillC |
Jul 24 2020, 03:27 PM
Post
#64
|
|
Senior Member Group: Members Posts: 732 Joined: 24-April 15 From: Silver Spring, MD Member No.: 18,667 Region Association: MidAtlantic Region |
Last night, I glued the perlon back on the front bulkhead and put the spare tire and cover back in place.
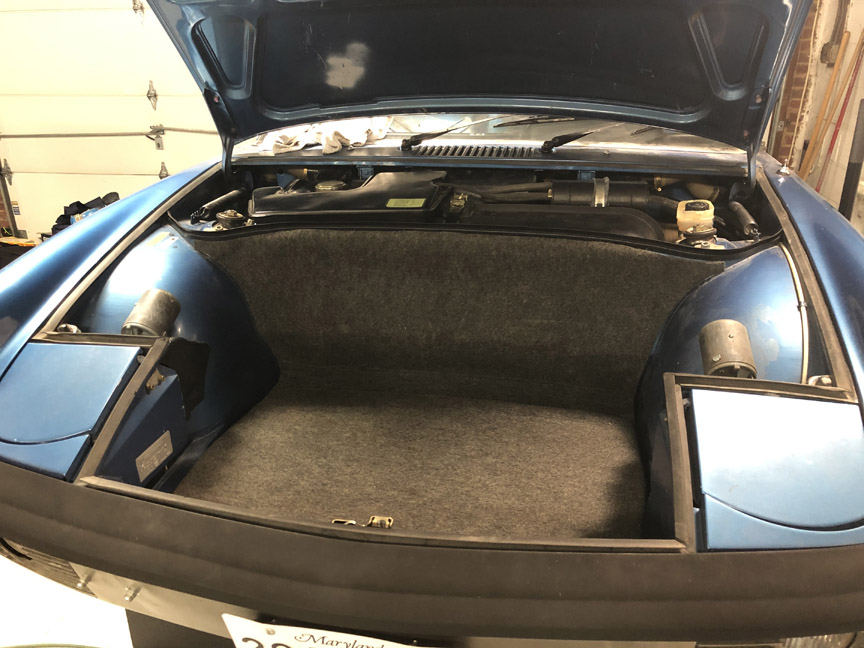 I would have ordered new perlon from 914Rubber, but they're on backorder. I'll replace it with a new one at some point, since there's a chunk cut out of this one below the spare tire cover. |
|
|
|
| BillC |
Jul 26 2020, 10:38 AM
Post
#65
|
|
Senior Member Group: Members Posts: 732 Joined: 24-April 15 From: Silver Spring, MD Member No.: 18,667 Region Association: MidAtlantic Region |
This is what the battery tray looked like:
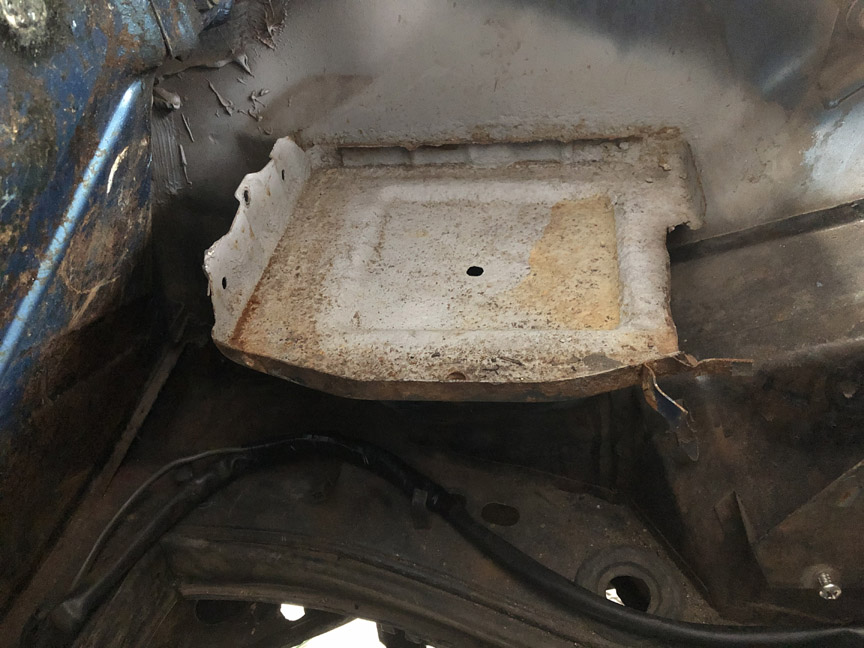 This is the result of old age, not prior-owner abuse, but it still needs to be fixed. So, out it comes. I was really hoping to be able to keep the original tray support, but it was a little too rusty to keep using. So it came out too. Here's the result: 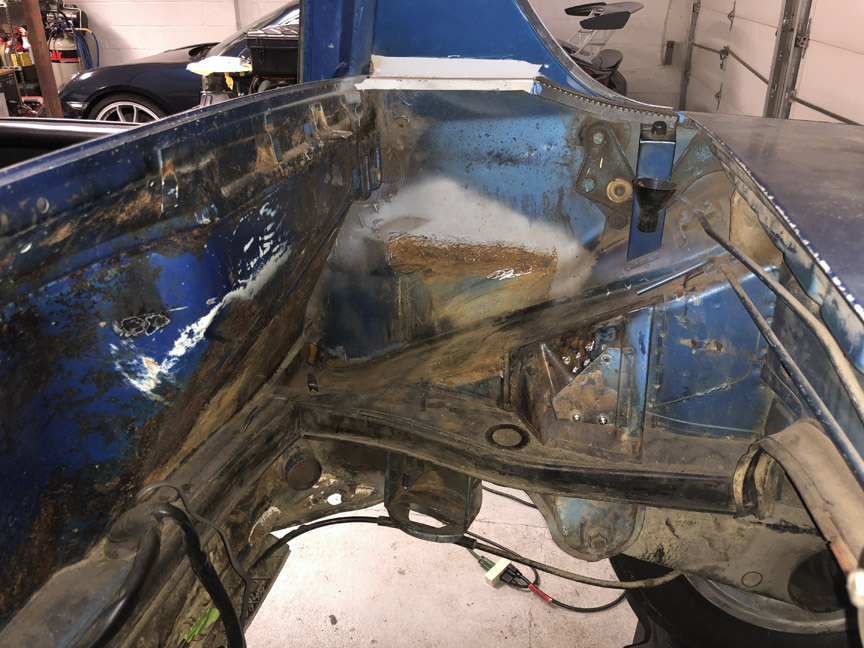 Next step is to clean up the remaining rust and paint it. Then, the new tray and support will be installed. |
|
|
|
| Frankvw |
Jul 27 2020, 01:05 AM
Post
#66
|
|
working on my first 914 ! Group: Members Posts: 653 Joined: 13-April 16 From: Holland, the Netherlands Member No.: 19,896 Region Association: Europe |
good trick with adjusting these pliers !
Question, when you took out the battery tray, did you manage to do that damagefree for the other side ? (outerside of the car) ? (in case someone wanted to replace his/her tray, could that be done without hurting the other side ?) |
|
|
|
| BillC |
Jul 27 2020, 02:20 PM
Post
#67
|
|
Senior Member Group: Members Posts: 732 Joined: 24-April 15 From: Silver Spring, MD Member No.: 18,667 Region Association: MidAtlantic Region |
QUOTE(Frankvw @ Jul 27 2020, 03:05 AM) good trick with adjusting these pliers ! Question, when you took out the battery tray, did you manage to do that damagefree for the other side ? (outerside of the car) ? (in case someone wanted to replace his/her tray, could that be done without hurting the other side ?) It's relatively easy to remove the tray without damaging the outer quarter panel or the inner panel (the one you can see in the pic). I did it by using a dremel tool and grinding through the spot welds inside the battery tray; although it is kinda slow and time consuming. If you're careful, you can get all the spot welds and not damage the car's sheet metal. For re-installation, I will drill holes for plug welds to attach the tray support to the car and the tray to the tray support. I will probably also drill holes through the inside panel, for plug welds to the lip of the tray. However, I'm going to test and make sure I can get my welder nozzle in the space between the inner and outer panels before drilling the holes -- if it doesn't fit properly, I'll have to figure something else out. If you want, I'll take more pictures of the installation process, to show the steps. |
|
|
|
| Frankvw |
Jul 27 2020, 02:25 PM
Post
#68
|
|
working on my first 914 ! Group: Members Posts: 653 Joined: 13-April 16 From: Holland, the Netherlands Member No.: 19,896 Region Association: Europe |
"If you want, I'll take more pictures of the installation process, to show the steps."
That would be great, thank you very much and good luck ! |
|
|
|
| BillC |
Aug 9 2020, 06:32 PM
Post
#69
|
|
Senior Member Group: Members Posts: 732 Joined: 24-April 15 From: Silver Spring, MD Member No.: 18,667 Region Association: MidAtlantic Region |
Well, it's been too long, but I finally had a chance to work on the car again today. I was able to remove most of the rust in the battery tray area, but the wall where the tray attaches was just too far gone. So, I cut out the rust, made a patch and welded it in.
Here's the hole:  Here's the patch next to the cut-out piece: 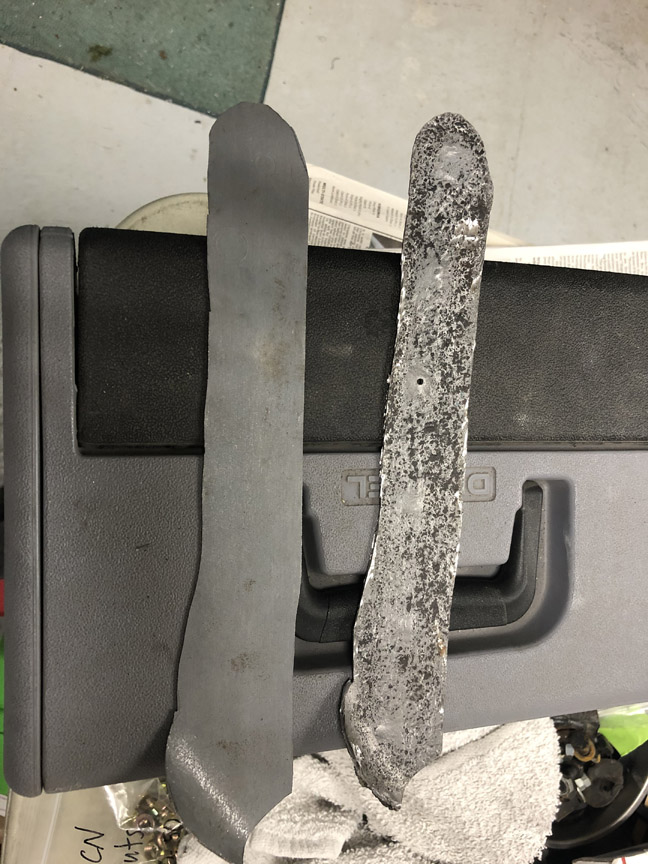 And here's the patch welded in, with some of the grinding done. 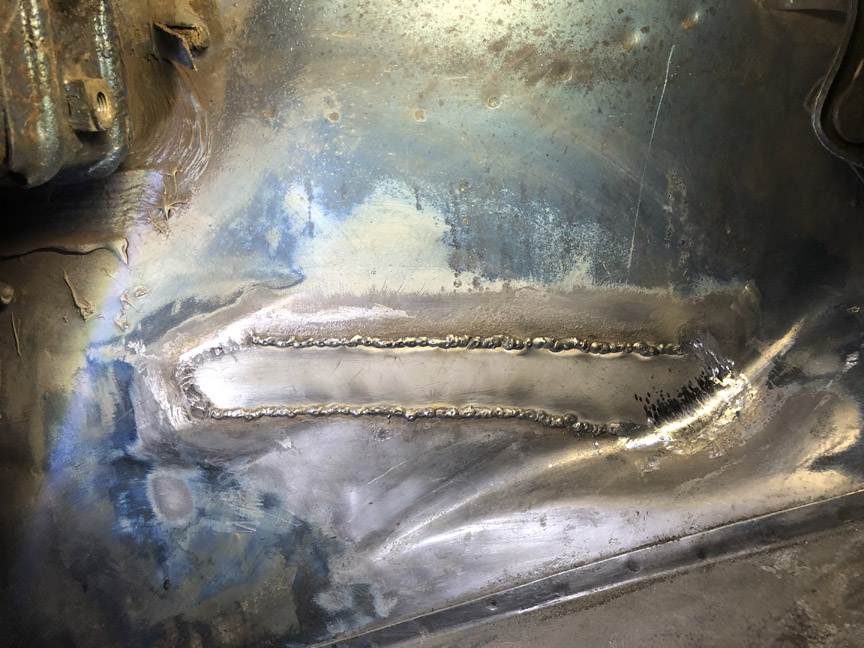 Still need to finish grinding and then paint, before I can install the battery tray. |
|
|
|
| porschetub |
Aug 9 2020, 09:14 PM
Post
#70
|
|
914 Guru Group: Members Posts: 5,122 Joined: 25-July 15 From: New Zealand Member No.: 18,995 Region Association: None |
you have great metal fab skills,well done but expect to find other BS from the PO as after many years I'am still finding ……..
|
|
|
|
| BillC |
Aug 23 2020, 06:02 PM
Post
#71
|
|
Senior Member Group: Members Posts: 732 Joined: 24-April 15 From: Silver Spring, MD Member No.: 18,667 Region Association: MidAtlantic Region |
Didn't plan on it taking so long for this next update, but we've gone back to work full time and it's been pretty busy. Plus, family and life have a tendency to get in the way. But anyway, I did make some progress.
I finished grinding and primed the inner quarter, where the battery tray goes: 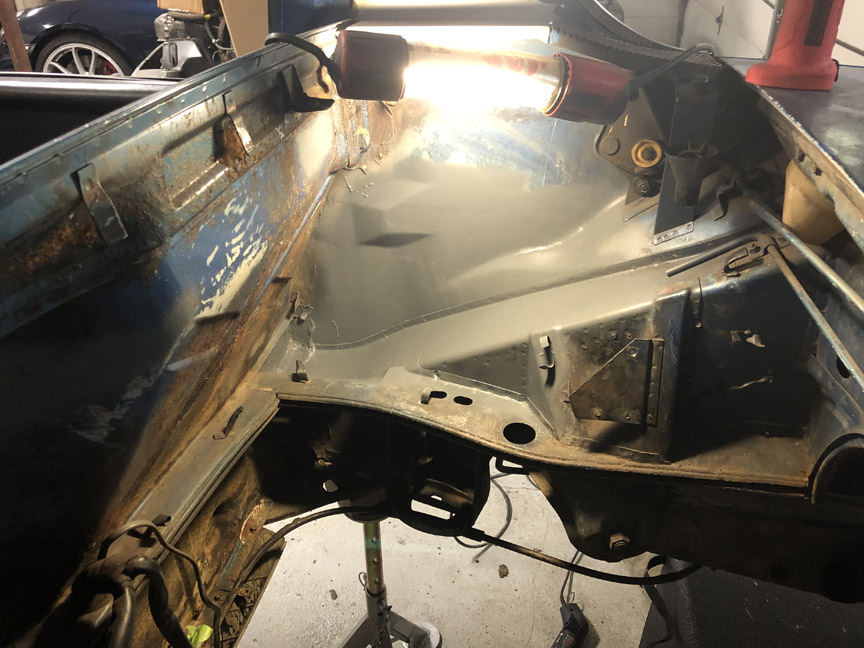 Then I welded a nut into the stand and then pre-drilled it, in preparation for welding:  I then welded the stand in place, using the tray as a guide. I also pre-drilled the inner quarter for plug welding the outside edge of the tray. 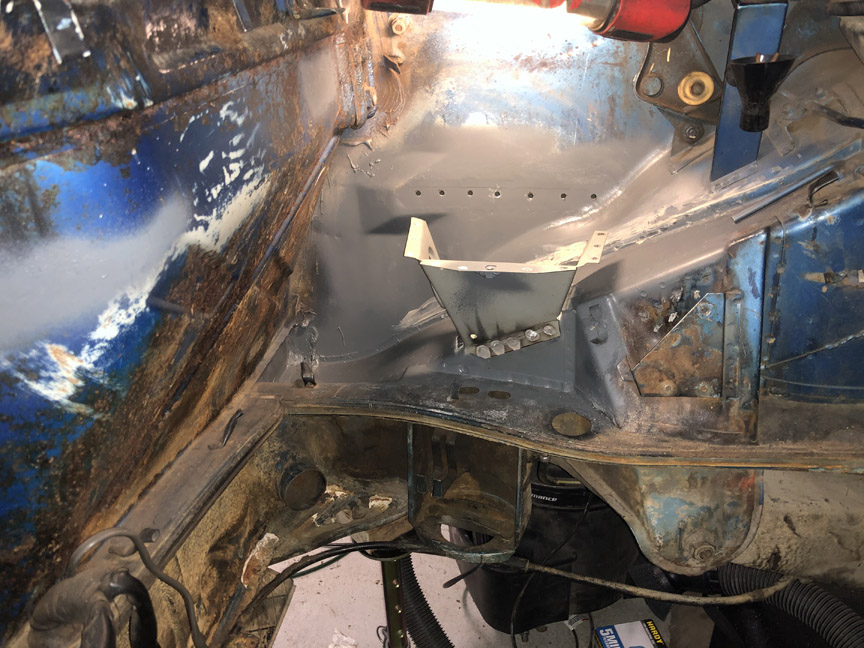 This is what it looks like inside the quarter panel. It's tight in there, but I can get the mig welder nozzle in and make plug welds 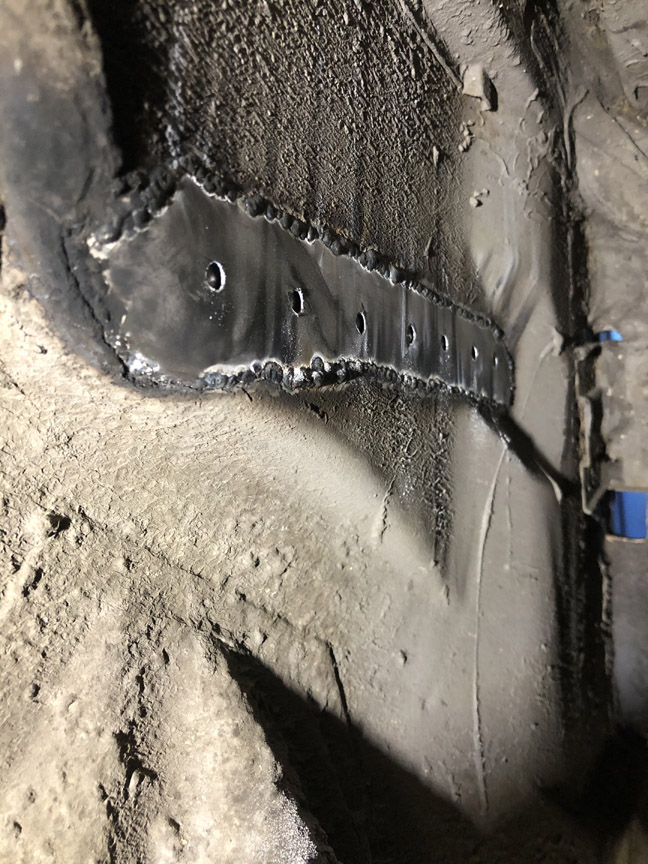 Because it will be such a pain to paint the underside of the tray and inside the stand after the tray is welded in, I pre-painted the tray and inside the stand. 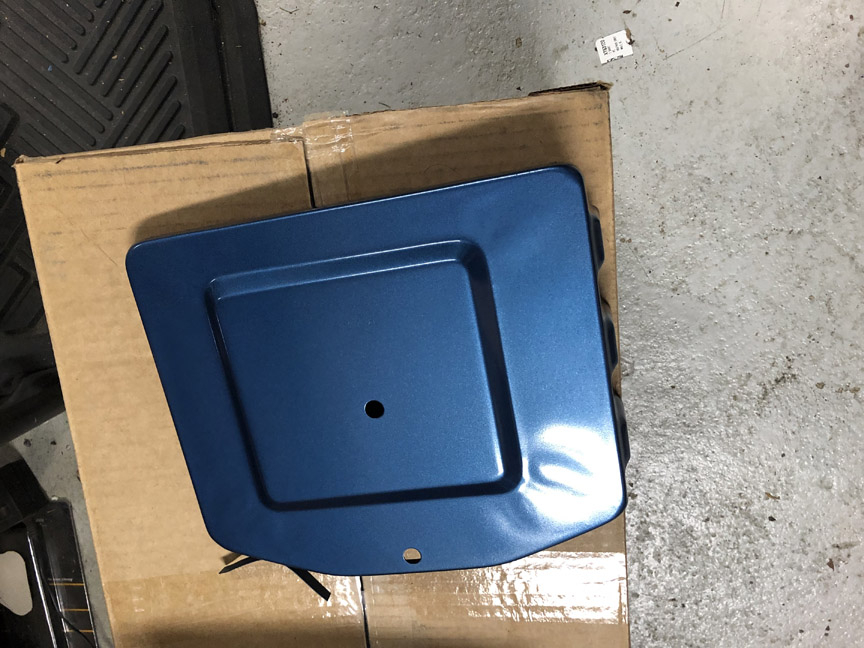 I also drilled the holes for mounting the ECU:  Finally, I welded in the tray.  Here's the inside of the quarter panel, after welding and undercoating. 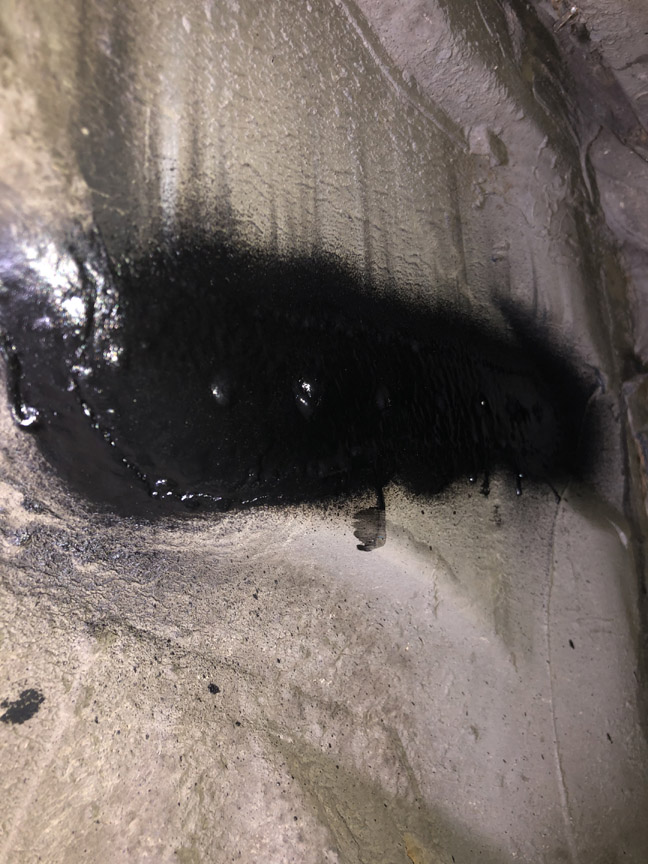 |
|
|
|
| BillC |
Oct 12 2020, 04:01 PM
Post
#72
|
|
Senior Member Group: Members Posts: 732 Joined: 24-April 15 From: Silver Spring, MD Member No.: 18,667 Region Association: MidAtlantic Region |
Well, it's been waaaay too long since I made any progress on the car. Don't really have much of an excuse, except life gets in the way sometimes.
Anyway, I finished and painted the battery tray. I also cleaned up and painted the little metal pieces on either side of the decklid and reinstalled the rear window and trim. Still have a ways to go, but I feel better putting some pieces back on the car. 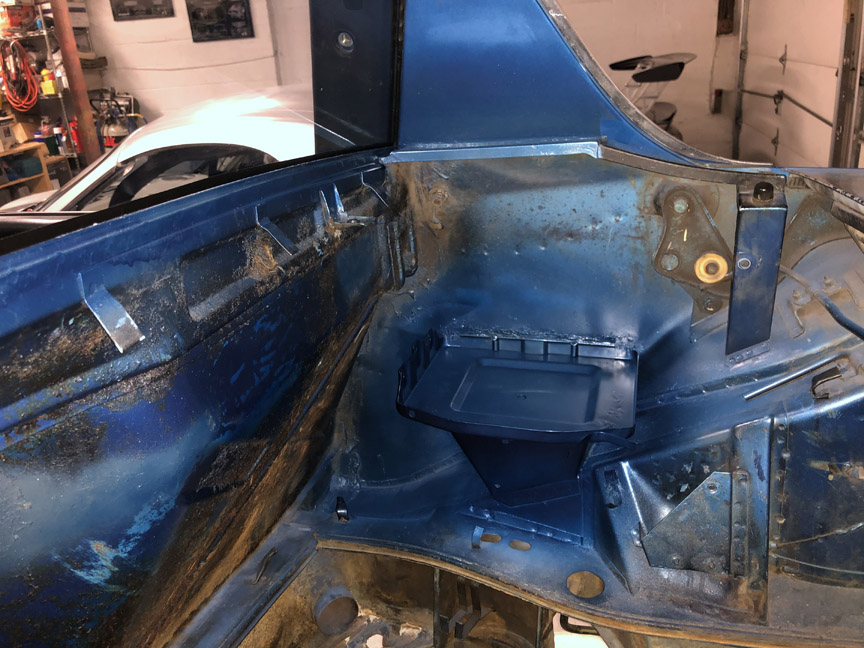 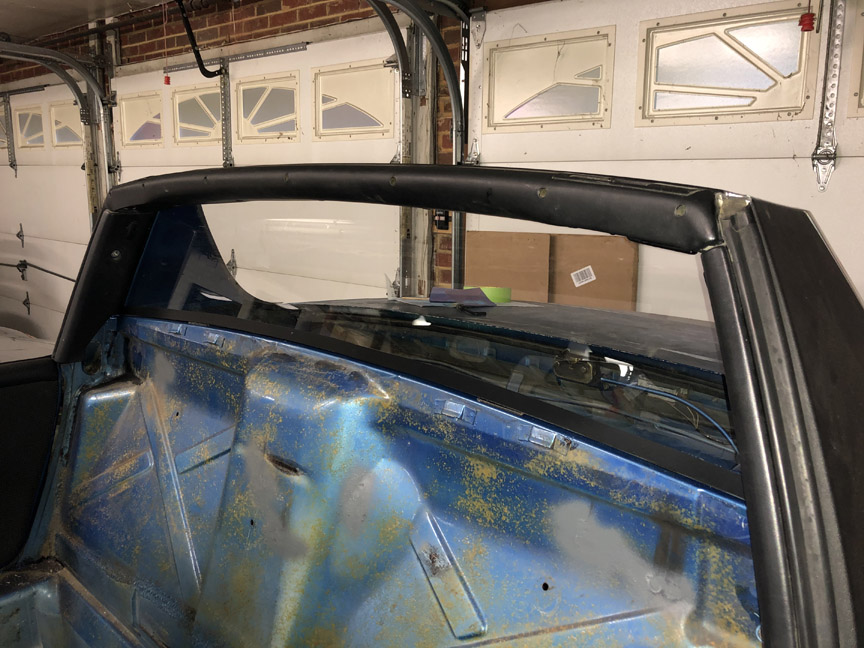 |
|
|
|
| Tdskip |
Oct 13 2020, 09:02 AM
Post
#73
|
|
Advanced Member Group: Members Posts: 3,783 Joined: 1-December 17 From: soCal Member No.: 21,666 Region Association: None |
Nice going, and thanks for the updates!
|
|
|
|
| BillC |
Oct 22 2020, 02:22 PM
Post
#74
|
|
Senior Member Group: Members Posts: 732 Joined: 24-April 15 From: Silver Spring, MD Member No.: 18,667 Region Association: MidAtlantic Region |
It's finally time to take on the last "DAPO" thing I've found (so far) on the body -- the hole in the passenger-side latch panel.
 Sorry, I forgot to take a picture of the rust holes inside the DAPO-hole all welded up. It's done, but you'll just have to trust me that I did it. (IMG:style_emoticons/default/tongue.gif) I was able to buy a patch piece cut out of a donor car. Here's a pic of it trimmed to fit. 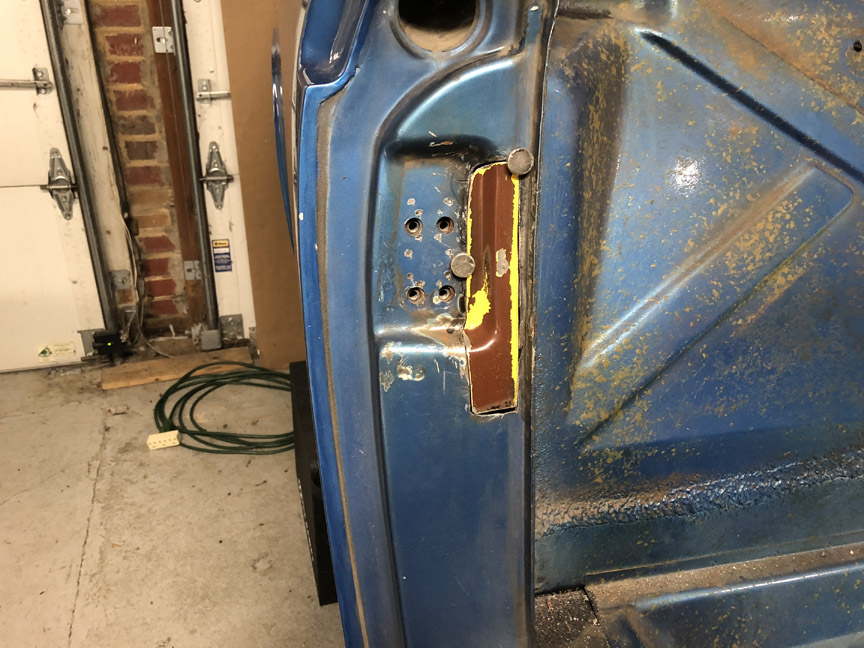 I bead-blasted the patch and painted the backside to protect it. Then, I cleaned the metal around the hole and tacked the patch in place. 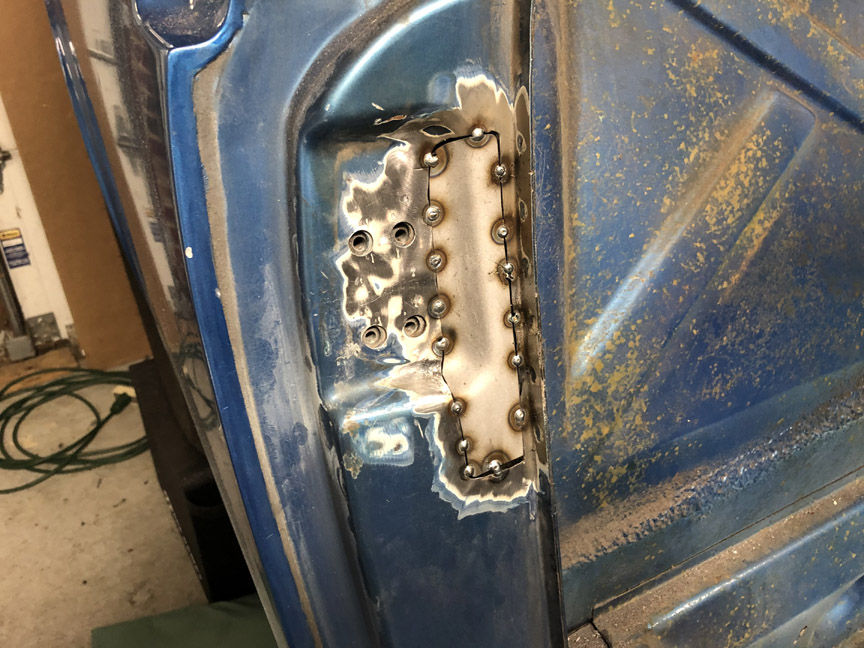 In the next update (whenever that might be), I'll show the second half of patching the hole -- welding, grinding, filling and painting. |
|
|
|
| BillC |
Nov 2 2020, 03:32 PM
Post
#75
|
|
Senior Member Group: Members Posts: 732 Joined: 24-April 15 From: Silver Spring, MD Member No.: 18,667 Region Association: MidAtlantic Region |
I was able to spend some time with the car this weekend, and I finished the passenger-side latch panel.
Here's the patch fully welded in: 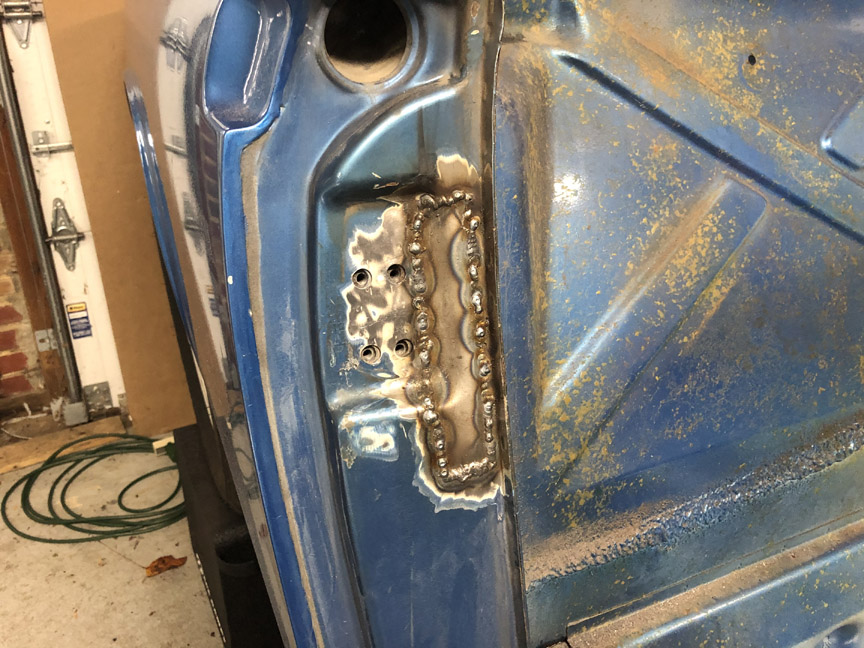 Here's the patch ground down:  Here's the patch filled, primed and painted: 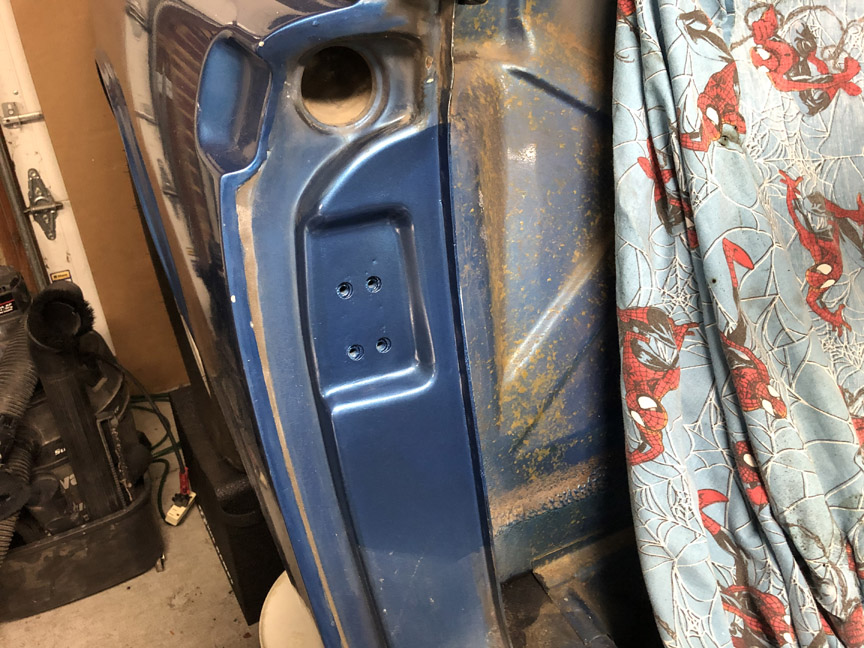 Not the prettiest job, but it will work until I have a chance to do a full restoration some time in the distant future. |
|
|
|
| Cairo94507 |
Nov 2 2020, 04:42 PM
Post
#76
|
|
Michael Group: Members Posts: 10,670 Joined: 1-November 08 From: Auburn, CA Member No.: 9,712 Region Association: Northern California |
Very very nice work. (IMG:style_emoticons/default/smilie_pokal.gif)
|
 |
|
| BillC |
Nov 11 2020, 04:17 PM
Post
#77
|
|
Senior Member Group: Members Posts: 732 Joined: 24-April 15 From: Silver Spring, MD Member No.: 18,667 Region Association: MidAtlantic Region |
I took advantage of the federal holiday to spend a little more quality time with the car today. Today's task was to fix the six bolt holes (3 per side) used to attach the bottom side of the rocker panels. I was hoping that all I would need to do was drill them out with a left-handed bit and everything would be good, but nope, the DAPO had other ideas.
Every single hole had a broken bolt stuck in it, and every single broken bolt had a hole drilled off-center through it. Like this: 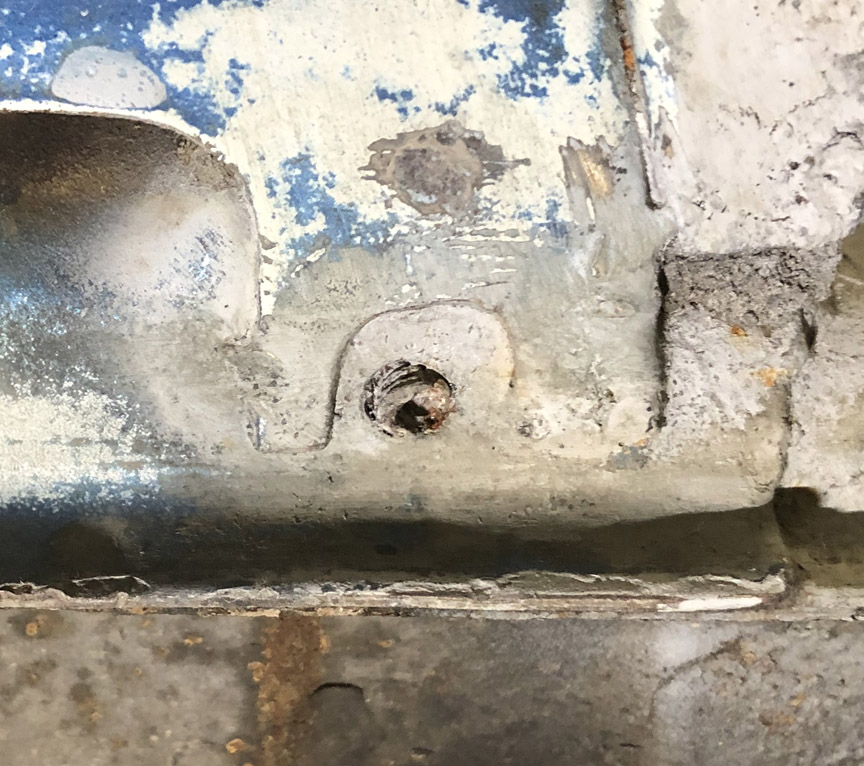 You'd think after boogering up one or two holes, the DAPO would take a step back and try to get better instructions and/or tools for this job (or an f'ing clue), but nope, they charged forward and screwed up all the holes (only one shown for brevity). For five of the holes, I was able to use my dremel tool with a tiny carbide bit to grind out the remnants of the bolt. Then, for each hole, I drilled the hole oversize, tapped it and installed a helicoil. 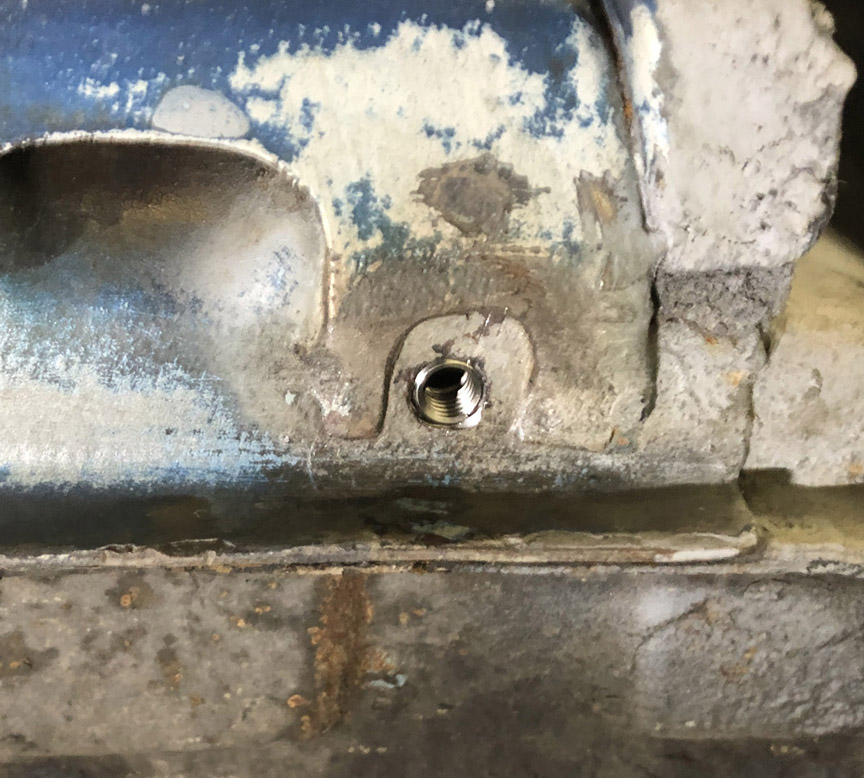 However, one of the DAPO-holes was so far off-center, I had no choice but to grind the hole oversize and weld it up. I then drilled, tapped and installed a helicoil in this hole so it would be consistent with the others. 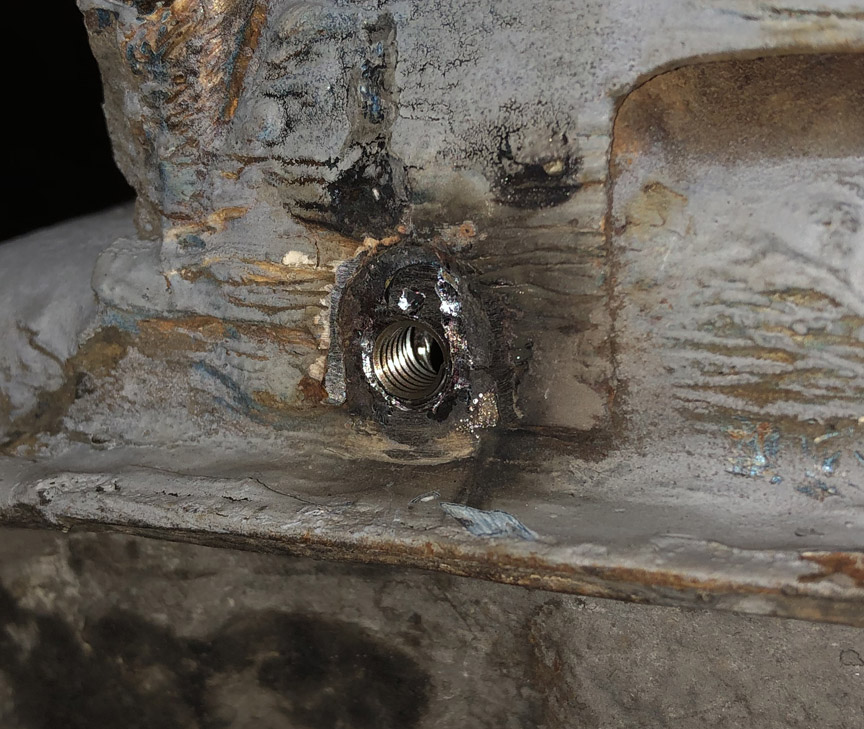 |
|
|
|
| Morph914 |
Nov 11 2020, 08:10 PM
Post
#78
|
|
Member Group: Members Posts: 435 Joined: 22-August 16 From: St Augustine, FL Member No.: 20,326 Region Association: South East States |
Your thread makes me realize how fortunate I was to obtain a clean dry car with no dapo issues to deal with.
Thank you for posting your progress, keep up the good work! Cheers, John |
|
|
|
| BillC |
Nov 28 2020, 10:07 AM
Post
#79
|
|
Senior Member Group: Members Posts: 732 Joined: 24-April 15 From: Silver Spring, MD Member No.: 18,667 Region Association: MidAtlantic Region |
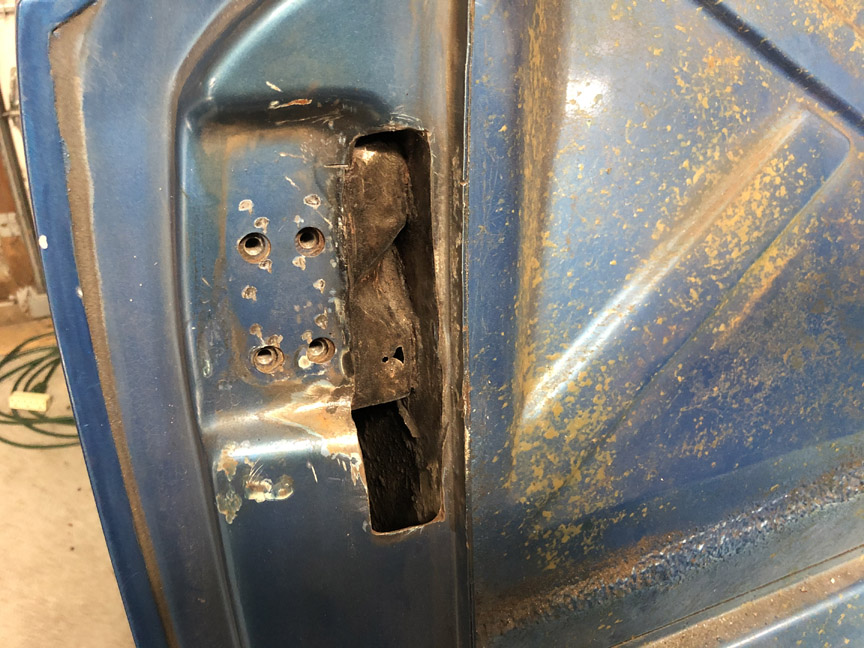
I had some time yesterday to work on the car, so I decided to take care of prepping the passenger-side door for a mirror.
All 914s came from the factory with nut plates for mirror mounts welded inside both sides. However, normally only the driver's side was drilled out for the mirror. A factory passenger-side mirror was a rare option; it seems like most original owners that wanted two side mirrors just installed a pair of aftermarket mirrors. But I want original-style mirrors. All I could find for instructions was to just "drill out" the sheet metal skin so you could screw the mirror to the nut plate. However, there are two issues with that simple guidance: First, you have to locate the holes from the inside to the outside; and Second, with my luck, I'd end up going too deep and drilling the threads out of the nut plate, ruining it as a mounting site. So, here's what I did: First, I unbolted the door and laid it on towels on a workbench. Then, I located the nut plate inside the door -- it's located just outboard of the post between the sliding window and the fixed triangular window. Here's a pic: 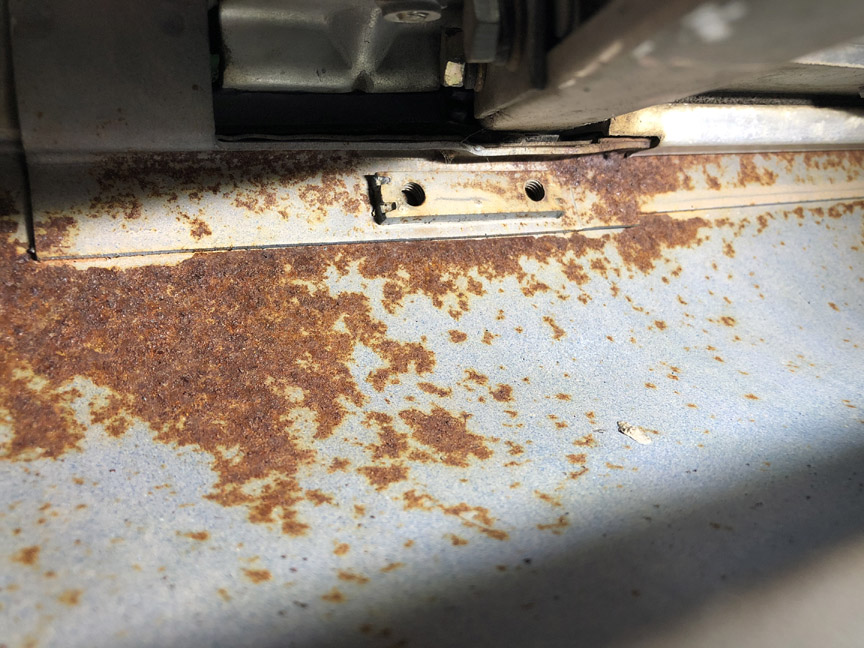 Then, I drilled pilot holes from the inside out. This was the only way I could guarantee getting the outside holes in the right place. It's very tight inside the door, especially with the window frame still installed, so I pulled out every right-angle drill attachment I own -- both of them -- and was able to cobble together a way to drill the pilot holes with a stubby 3/32" bit. Here's what the tool looked like: 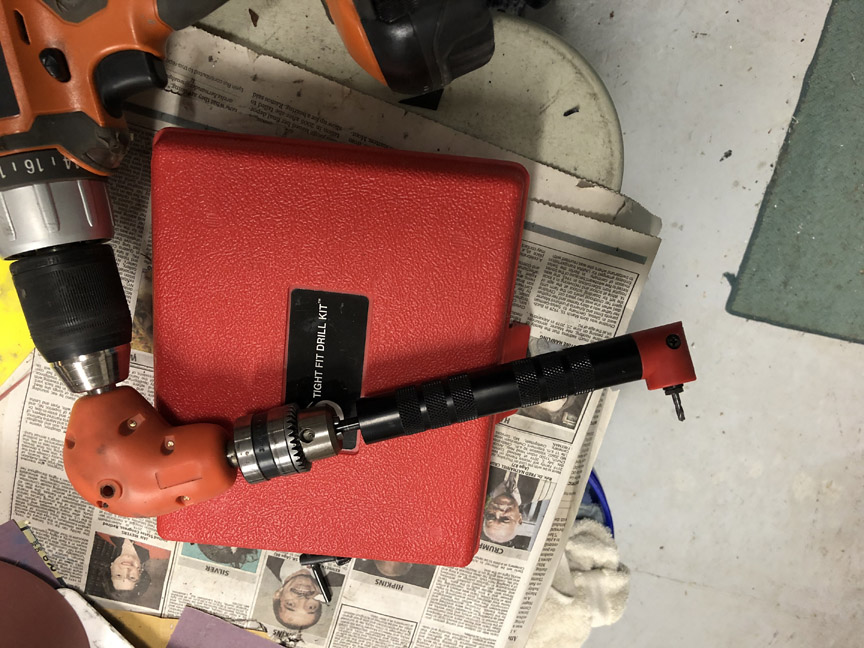 And here's what the pilot holes looked like on the outside: 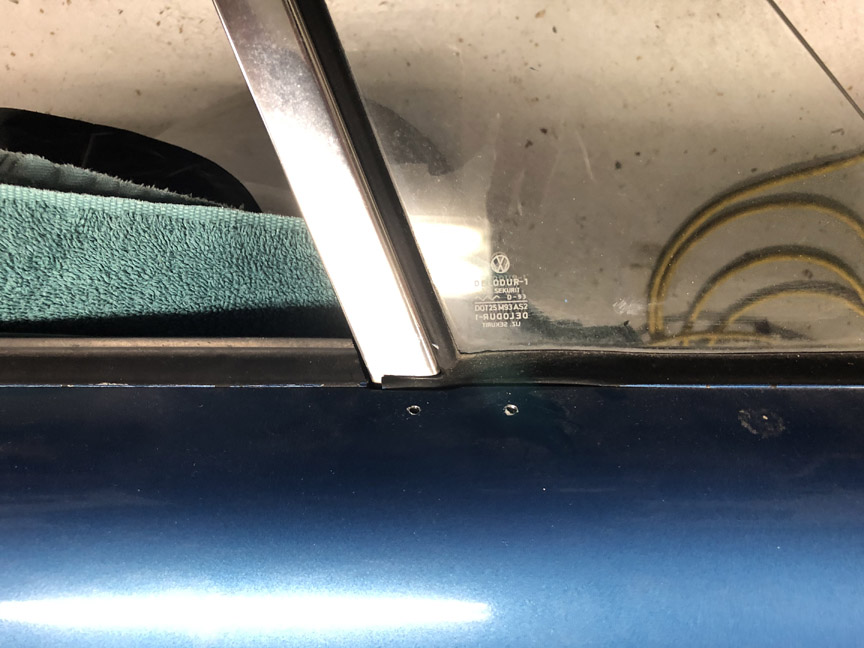 Then, I took my dremel tool with a small pear-shaped cutter bit and carefully ground the holes out to full size. This was actually the most time-consuming part of the project, but it let me make sure the holes were centered on the threads in the nut plate. After grinding, I chased the threads with a 6-1.0 tap and then touched up the paint. Here's the final result: 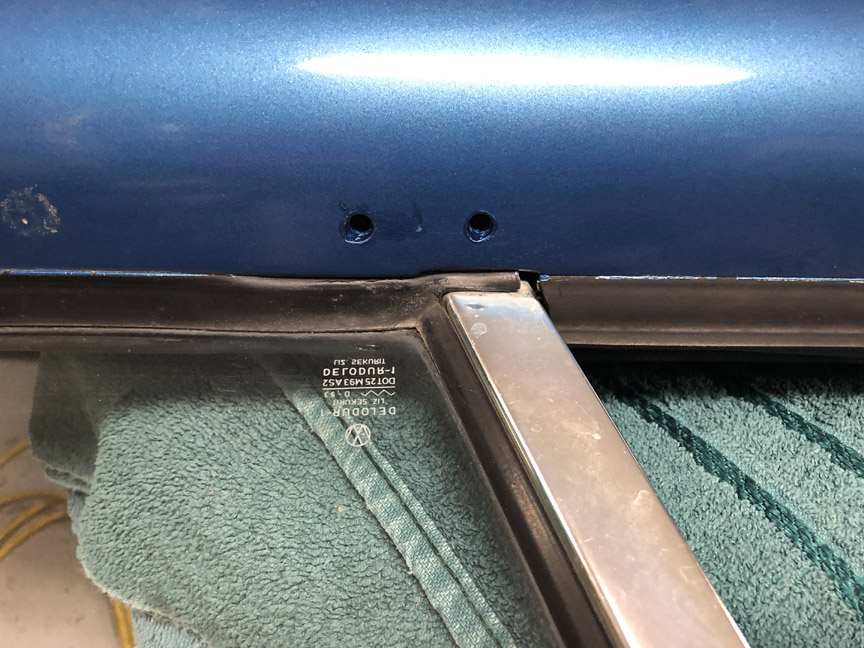 Then, after I was finished with the mirror holes, I went back and painted all the rusty areas inside the door with rust-converter. It's not ideal, but it should stop the door from rusting inside-out before the car can get a full restoration. |
|
|
|
| StarBear |
Nov 28 2020, 10:45 AM
Post
#80
|
|
Advanced Member Group: Members Posts: 2,310 Joined: 2-September 09 From: NJ Member No.: 10,753 Region Association: North East States |
|
|
|
|
|
2 User(s) are reading this topic (2 Guests and 0 Anonymous Users)
0 Members:

|
Lo-Fi Version | Time is now: 14th June 2026 - 06:00 PM |
Invision Power Board
v9.1.4 © 2026 IPS, Inc.