|
|
|
Porsche, and the Porsche crest are registered trademarks of Dr. Ing. h.c. F. Porsche AG.
This site is not affiliated with Porsche in any way. Its only purpose is to provide an online forum for car enthusiasts. All other trademarks are property of their respective owners. |
|
|

  |

| Montreal914 |
 Nov 6 2020, 03:23 PM Nov 6 2020, 03:23 PM
Post
#21
|
|
Advanced Member  Group: Members Posts: 2,112 Joined: 8-August 10 From: Claremont, CA Member No.: 12,023 Region Association: Southern California |
@Cary
Here are a few pictures of the fender patch underside. 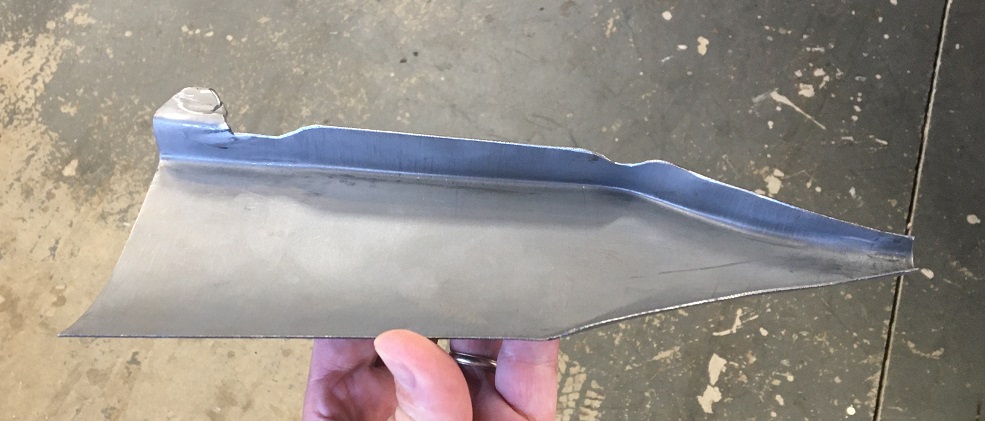 Here we can see the dent, near us to the left 1/3 in the picture, causing the back end to lift up. I don't think the 2/3 area is dented, just the fold creating this shadow. 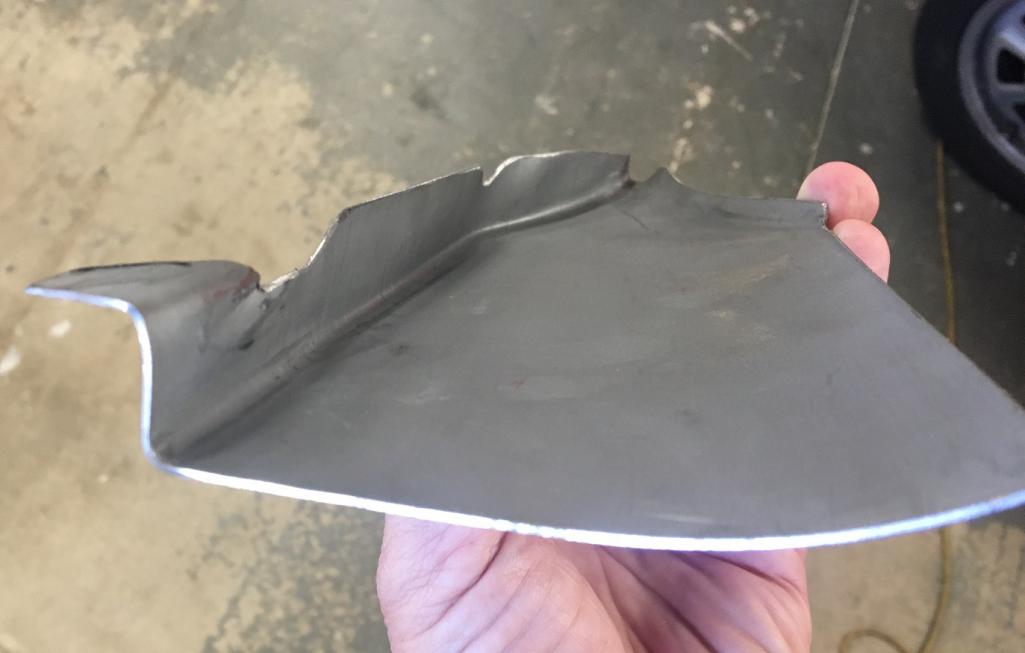 The lines are pretty good when looking a the original piece I removed from the car. Just wished they had folded the door gap edge... 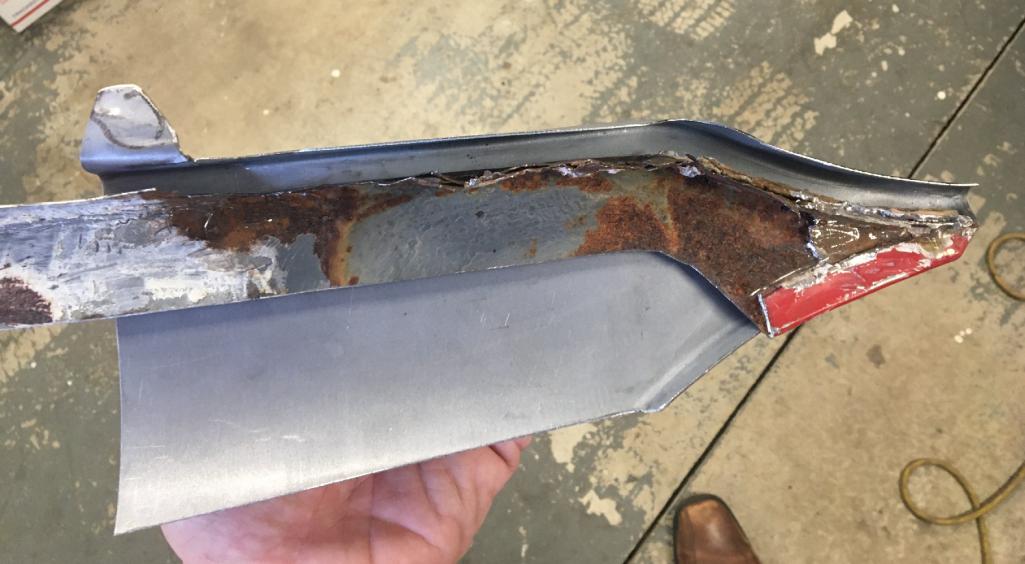 Any final recommendations on the cowl piece? Either I cut across, which minimizes the amount of welding, but there is a risk of trunk line "breakage", or I replace only what is damaged on the car which keeps both the trunk line and the cowl to fender line as i would be welding the new material to unexposed surfaces. Then again, I do need to replace some of the top surface in front of the windshield frame creating a weld parallel to the windshield on the finished surface. Maybe this will cause a lot of distortion... (IMG:style_emoticons/default/headbang.gif) I am ready to go, just need a little hint (IMG:style_emoticons/default/biggrin.gif) All suggestions welcome (IMG:style_emoticons/default/smile.gif) |
   |

 
|
| cary |
Nov 6 2020, 03:49 PM
Post
#22
|
|
Advanced Member Group: Members Posts: 3,900 Joined: 26-January 04 From: Sherwood Oregon Member No.: 1,608 Region Association: Pacific Northwest |
I'd say do the cowl section first.
Then tune the new fender portion to the new cowl. As for the new fender section you'll need to create some dolly strips to tune/reshape the tip. |
|
|
|
| Montreal914 |
Nov 6 2020, 04:08 PM
Post
#23
|
|
Advanced Member Group: Members Posts: 2,112 Joined: 8-August 10 From: Claremont, CA Member No.: 12,023 Region Association: Southern California |
QUOTE(cary @ Nov 6 2020, 01:49 PM)  I'd say do the cowl section first. Then tune the new fender portion to the new cowl. As for the new fender section you'll need to create some dolly strips to tune/reshape the tip. Yes, cowl first, agreed. Would you cut across from the windshield frame to the trunk, or do a patch work keeping as much of the original metal. This is my main hold up right now. Cutting the new piece per my marker lines with multiple welds or just replace a big surface using the left half of the new cowl piece? |
|
|
|
| cary |
Nov 6 2020, 04:24 PM
Post
#24
|
|
Advanced Member Group: Members Posts: 3,900 Joined: 26-January 04 From: Sherwood Oregon Member No.: 1,608 Region Association: Pacific Northwest |
Go big. You wouldn't be happy welding that short flange to the step. It would explode.
Anywhere the material gets shaped/stretched it doesn't like too much heat. 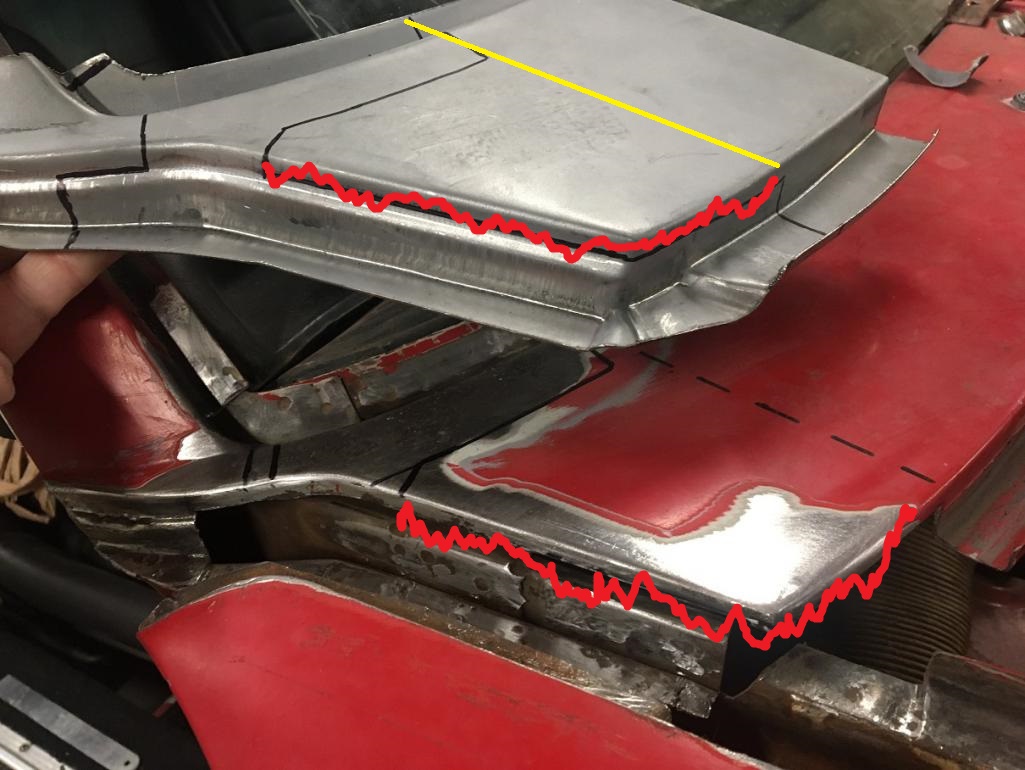 |
|
|
|
| Montreal914 |
Nov 6 2020, 04:33 PM
Post
#25
|
|
Advanced Member Group: Members Posts: 2,112 Joined: 8-August 10 From: Claremont, CA Member No.: 12,023 Region Association: Southern California |
QUOTE(cary @ Nov 6 2020, 02:24 PM) Go big. You wouldn't be happy welding that short flange to the step. It would explode. Anywhere the material gets shaped/stretched it doesn't like too much heat. Perfect! (IMG:style_emoticons/default/beerchug.gif) Go big or go home as they say. (IMG:style_emoticons/default/smile.gif) Will cut the cowl up across and use the new piece. Thank you for the input. (IMG:style_emoticons/default/smilie_pokal.gif) Next posting will be of this accomplishment... (IMG:style_emoticons/default/sawzall-smiley.gif) (IMG:style_emoticons/default/welder.gif) |
|
|
|
| Eric_Shea |
Nov 7 2020, 08:05 AM
Post
#26
|
|
PMB Performance Group: Admin Posts: 19,304 Joined: 3-September 03 From: Salt Lake City, UT Member No.: 1,110 Region Association: Rocky Mountains |
If you leaf through this album, there's a ton of cowl repair pics. Hope that helps:
https://www.facebook.com/media/set/?set=a.1...8193&type=3 E. |
|
|
|
| Montreal914 |
Nov 15 2020, 11:33 AM
Post
#27
|
|
Advanced Member Group: Members Posts: 2,112 Joined: 8-August 10 From: Claremont, CA Member No.: 12,023 Region Association: Southern California |
@Eric_Shea Thank you for the link. Very nice pictures and, as expected, beautiful restoration work! (IMG:style_emoticons/default/smilie_pokal.gif)
Time for a little update at my end. Before installing the new cowl repair piece I had to take care of the rusted corner in the inner fender area. I created a little patch that had many corner and struggled with very limited access to install it. Not the best work, but it will have to do... (IMG:style_emoticons/default/dry.gif) Then I prepped the area with weld through primer. 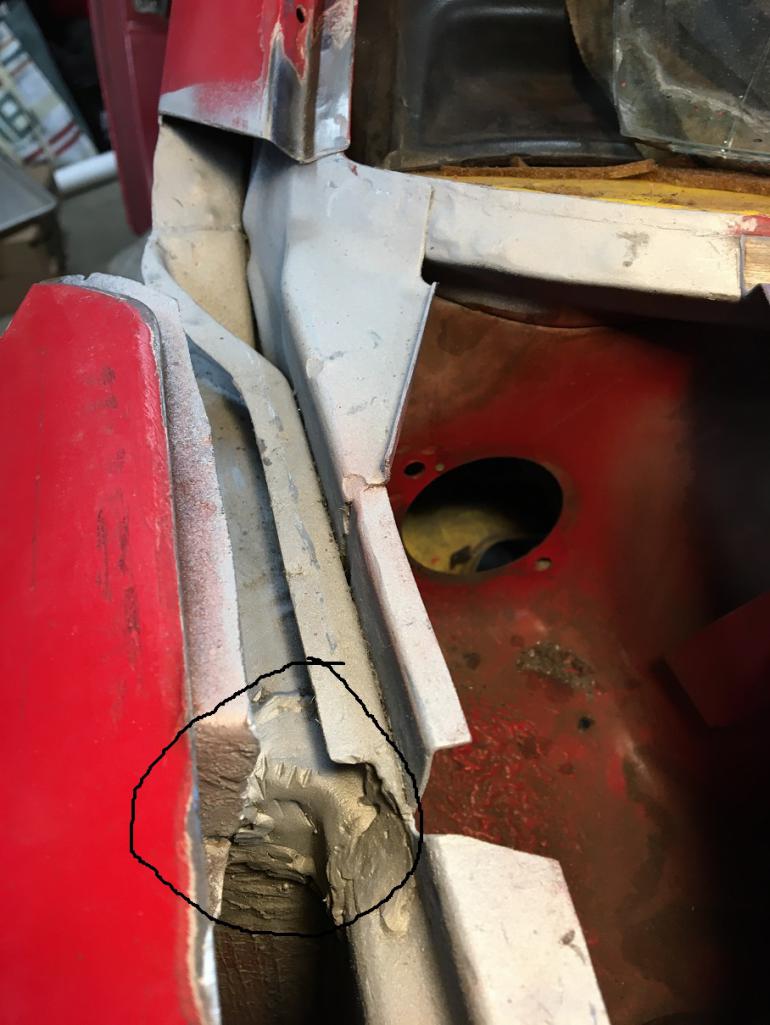 Repair piece ready for install 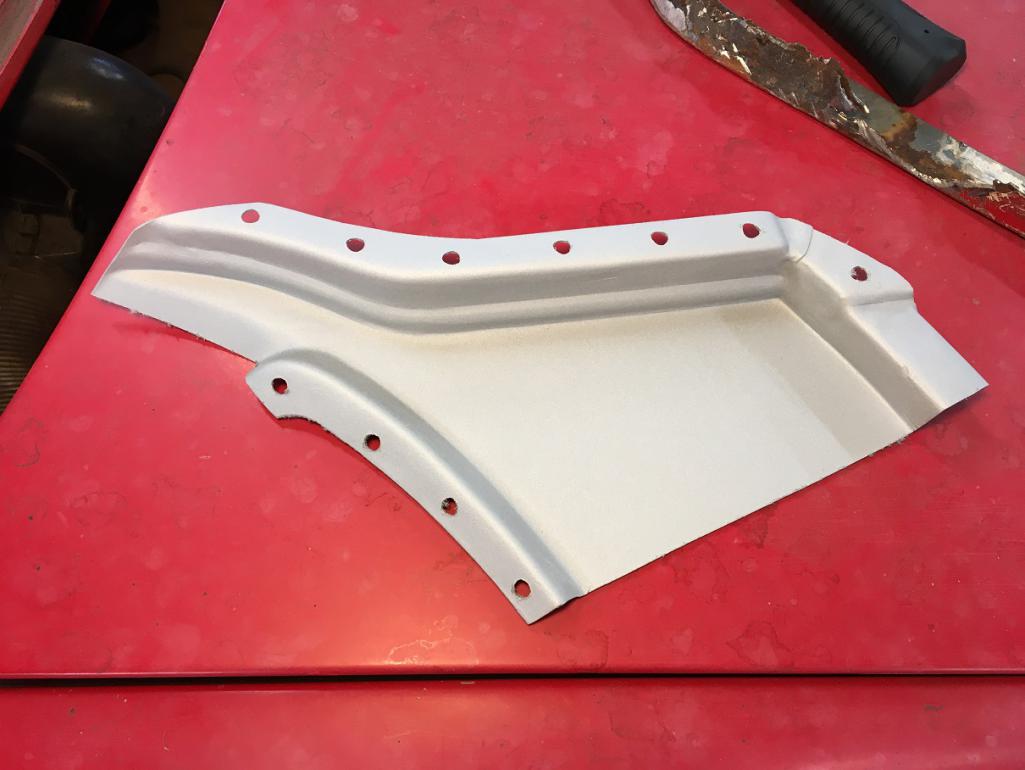 After a lot of trial fit and subtle grinding and filing of both the car and the repair piece, it was time to make the big step of installing the cowl repair piece. After a couple of tacks at the windshield area, I wanted to fit the trunk seal area. 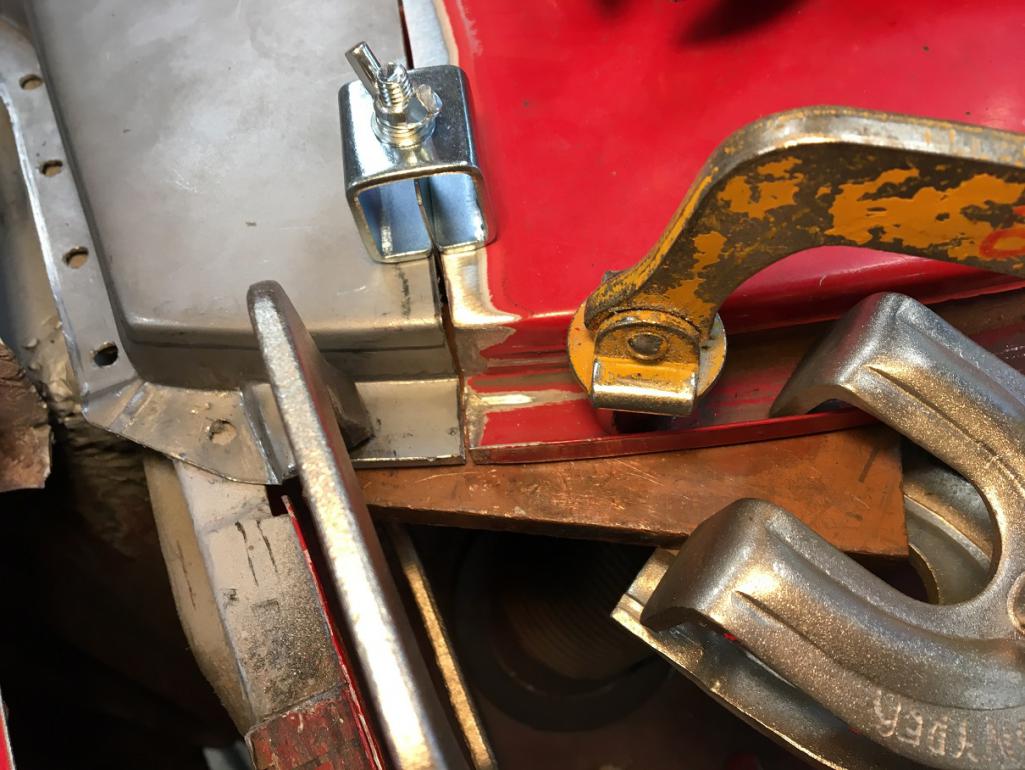 Then checked the result from underneath and wasn't happy with how this was lining up... (IMG:style_emoticons/default/dry.gif) Time to cut and redo that. Original attempt 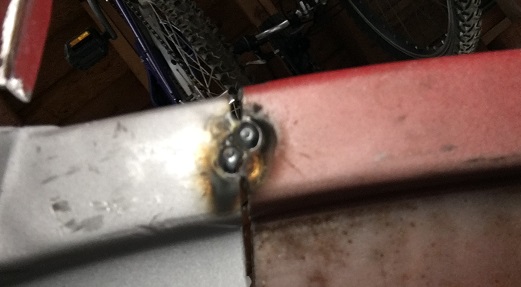 Second try 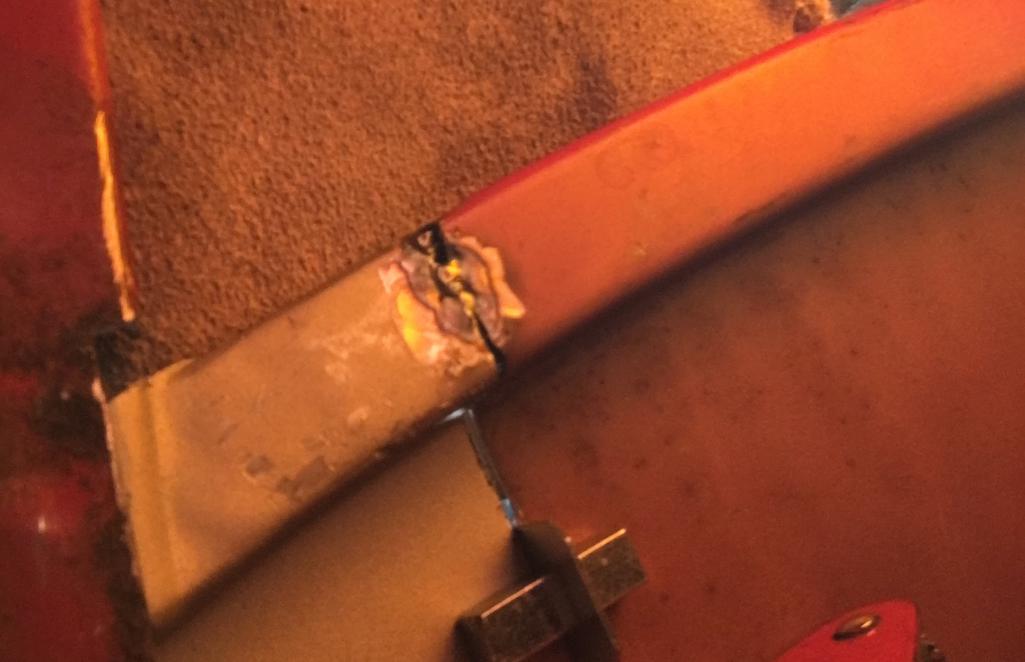 Moving on to more tack welding 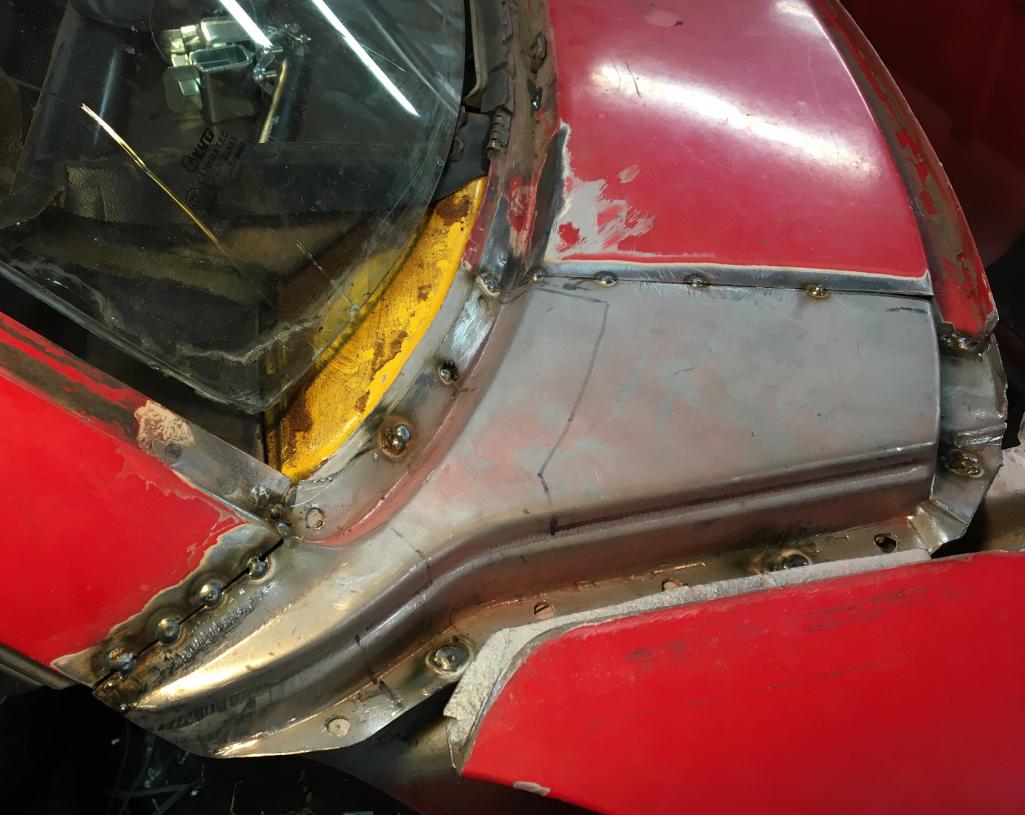 Making sure things are still lined up. Not perfect but I didn't think I had the ability to do better. 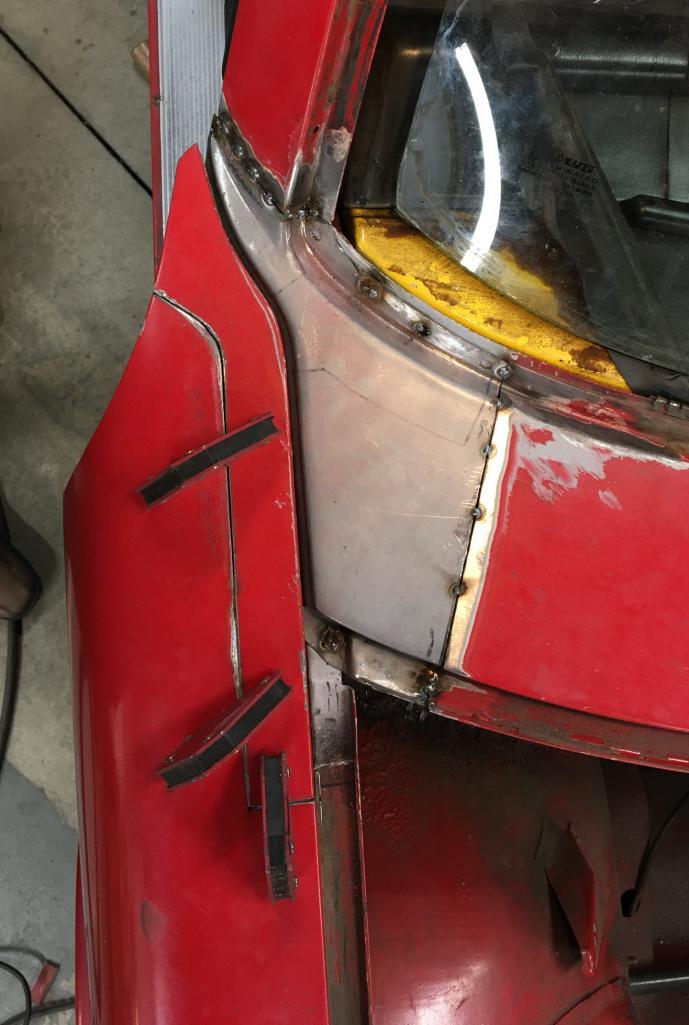 The front edge was a concern and this is where we can see that the reproduction part is not 100% perfect. I was able to raised it up with light taping from underneath but final body work will need to address that area. 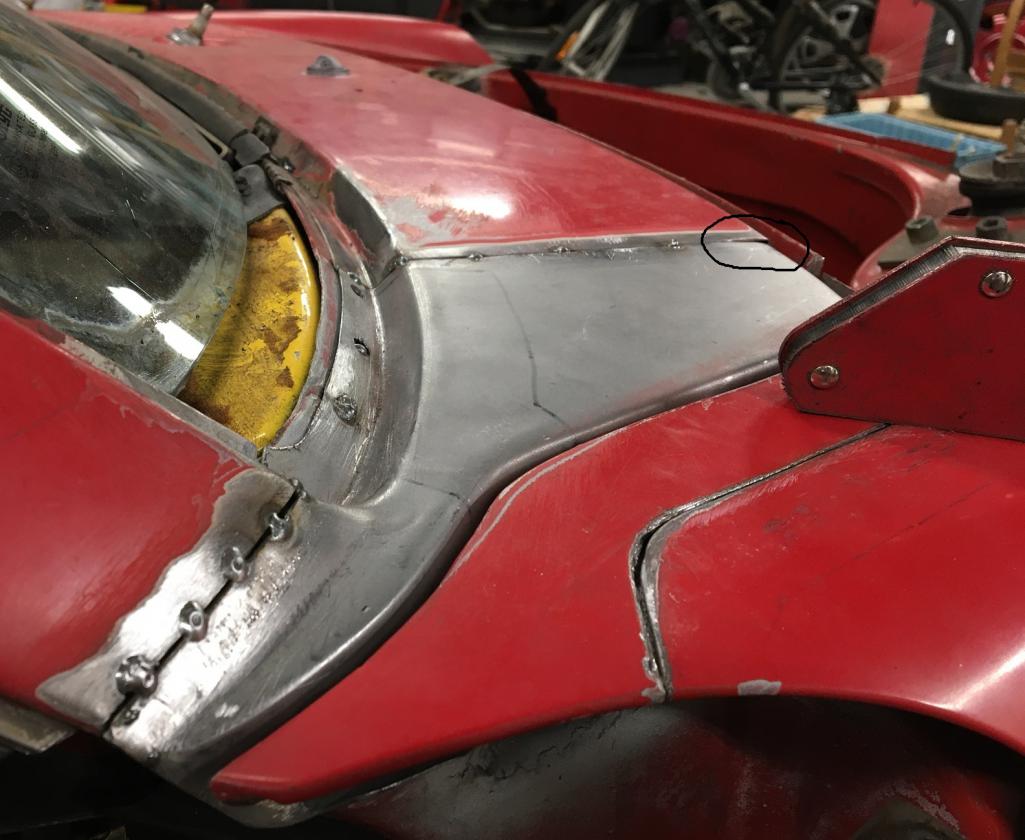 Then, slowly fill the voids between the tack weld, one spot at a time... (IMG:style_emoticons/default/welder.gif) Still have the back edge of the A pillar to complete but this is close to final. As a first attempt to venture into this kind of work I am happy with my accomplishment. Support here was key (IMG:style_emoticons/default/smilie_pokal.gif) @Cary . Hopefully the second part of this repair, fender side, will go well too. 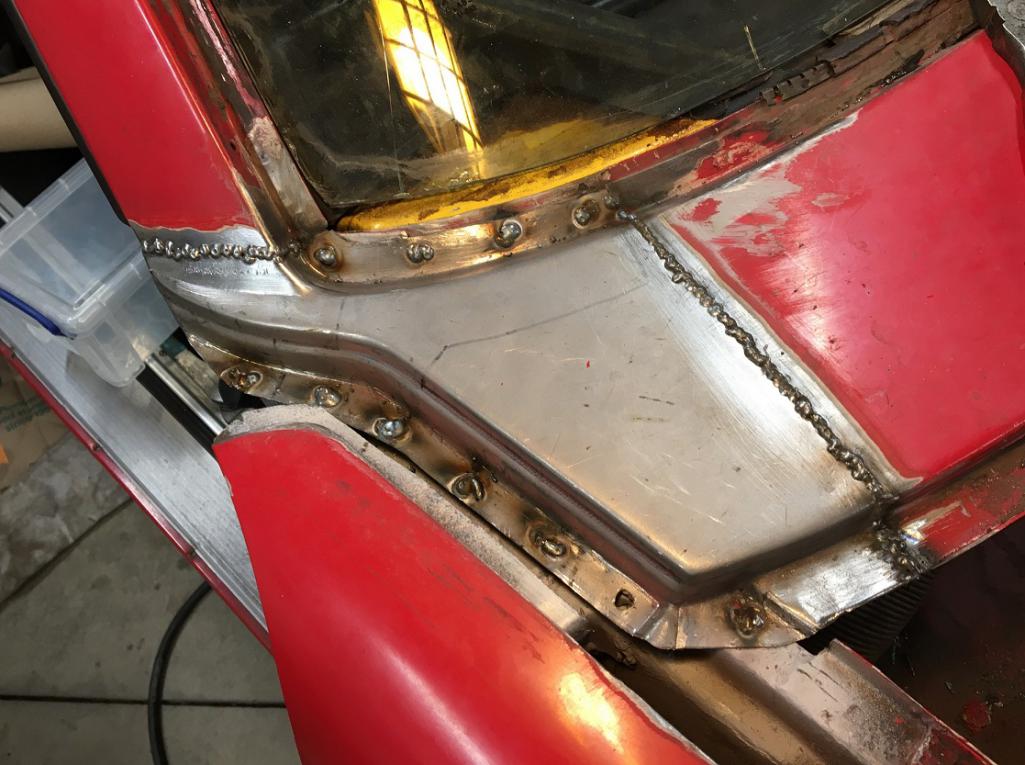  |
|
|
|
| Montreal914 |
Jan 24 2021, 05:42 PM
Post
#28
|
|
Advanced Member Group: Members Posts: 2,112 Joined: 8-August 10 From: Claremont, CA Member No.: 12,023 Region Association: Southern California |
It has been over two months since I posted some progress, time for some update. Things have been moving along pretty well.
The welds of the cowl piece were grinded down and now ready to move on the fender rebuild. 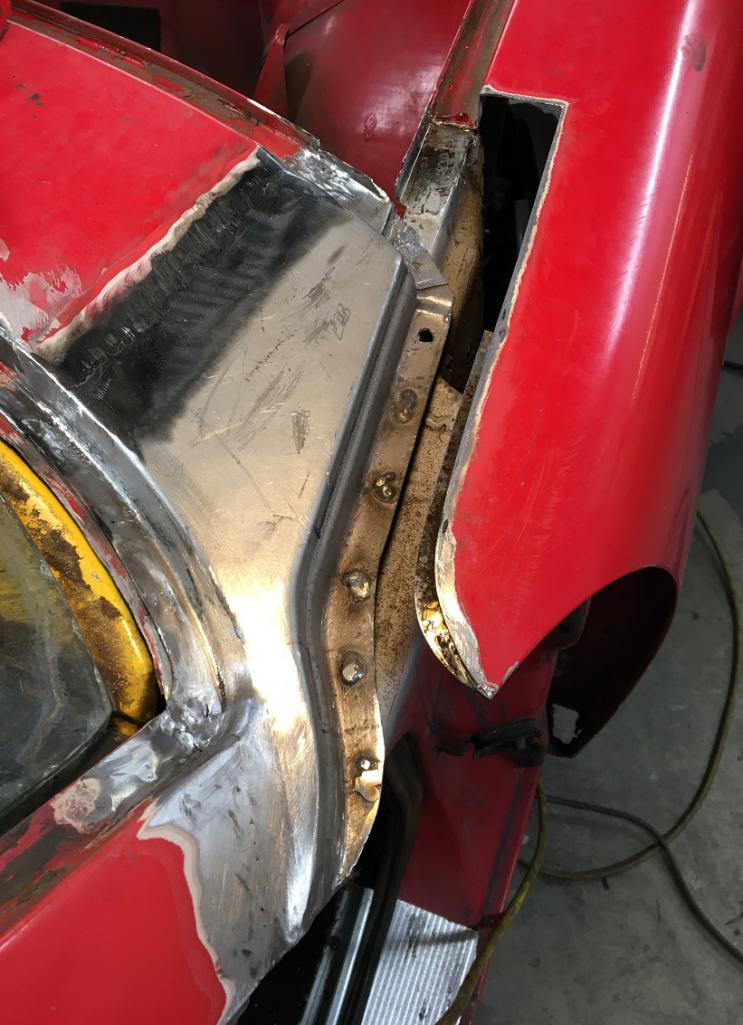 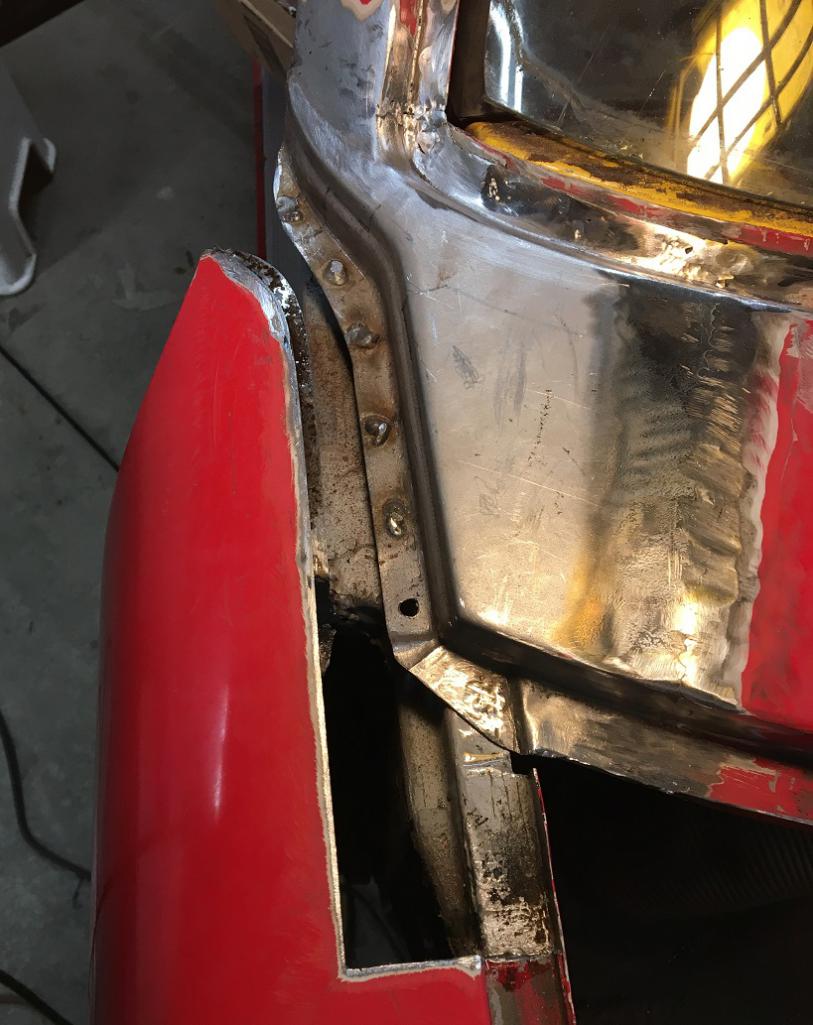 The more I was looking at the AA top repair panel, the less I was attracted to use it. So I decided to hunt for and original front fender upper corner that I could use as a whole, both the inner and outer portion. I was lucky to find this one in decent shape that I started dismantling and preparing. 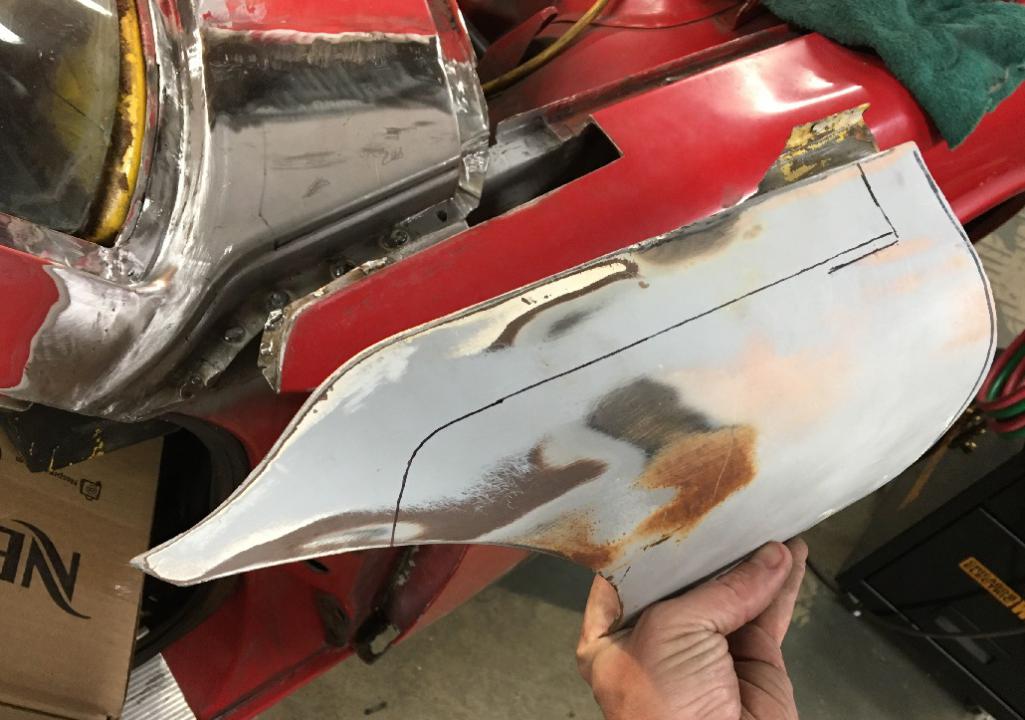 The back side is very good looking on the recycled piece (IMG:style_emoticons/default/smile.gif) especially compared to the original portion next to it... (IMG:style_emoticons/default/rolleyes.gif) 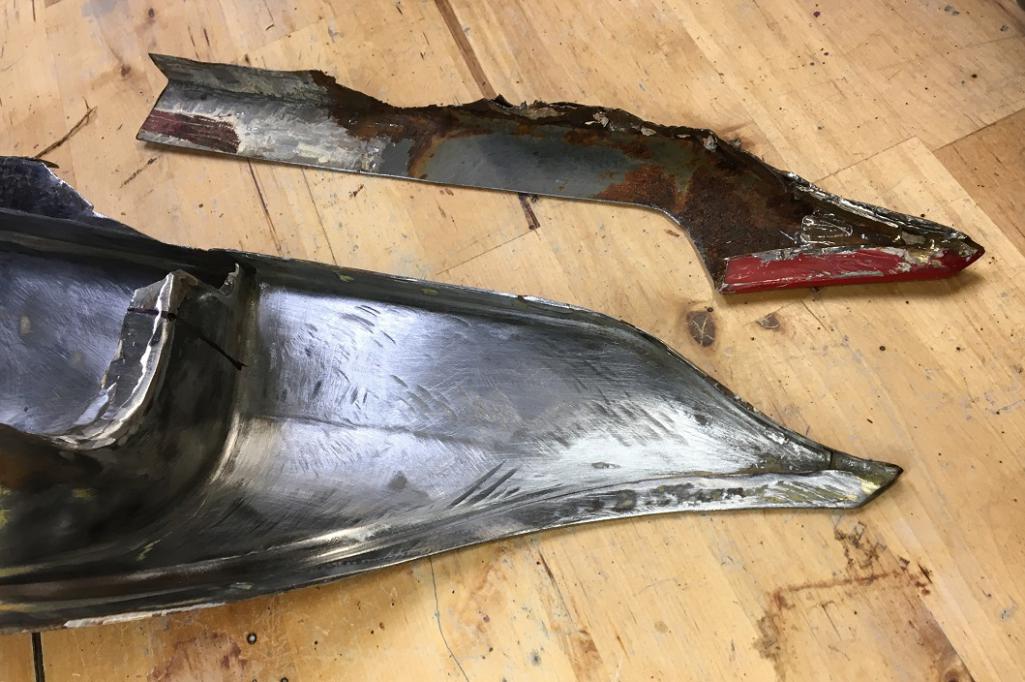 Now, it needed to be cut down to fit on the car. It was also missing a portion of the trunk seal channel, so a little more fabrication and obviously a lot of back and forth to make sure everything fits perfectly. (IMG:style_emoticons/default/smash.gif) 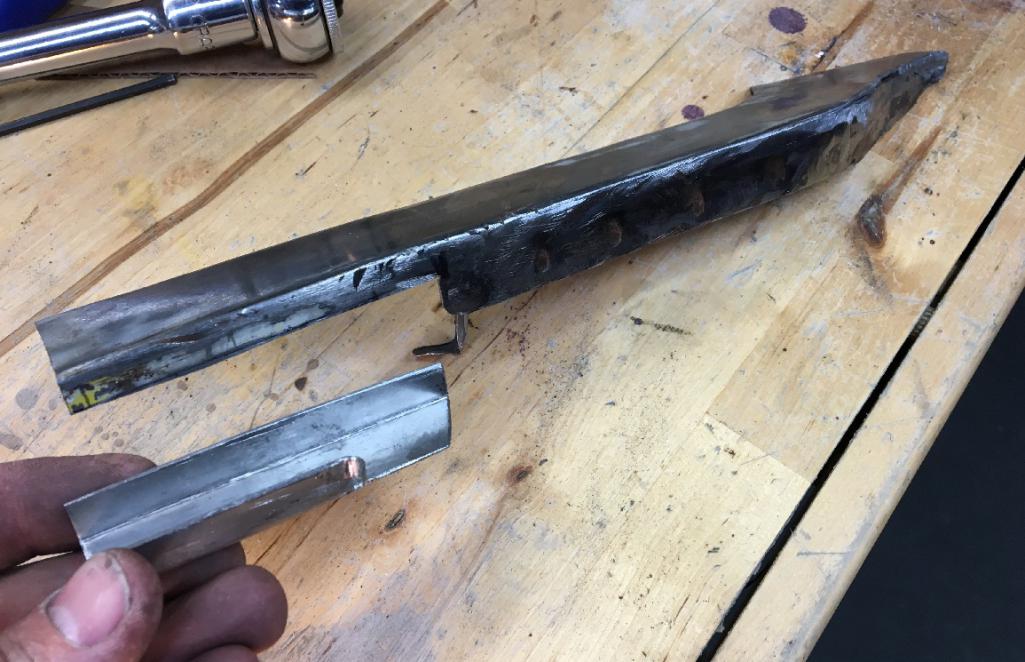 Making progress... 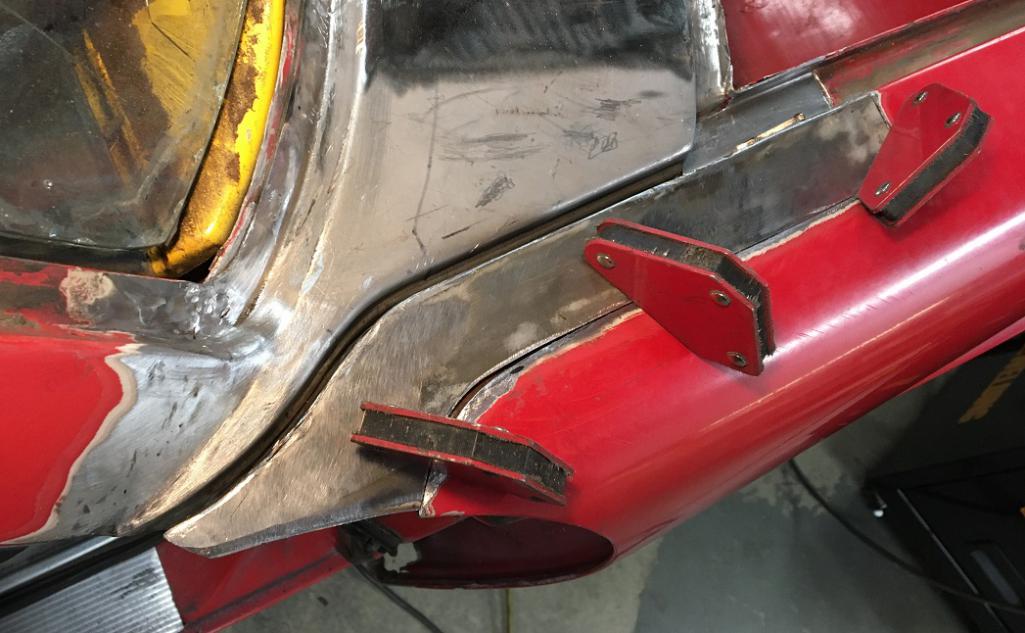 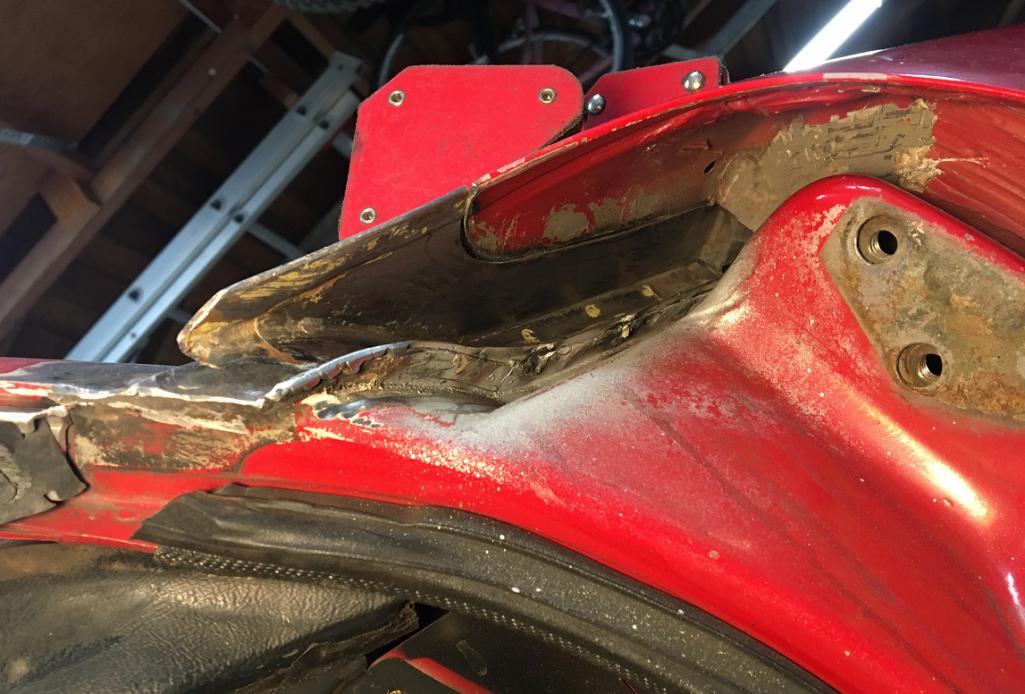 And, once ready, tack welding, making sure the alignment is good. 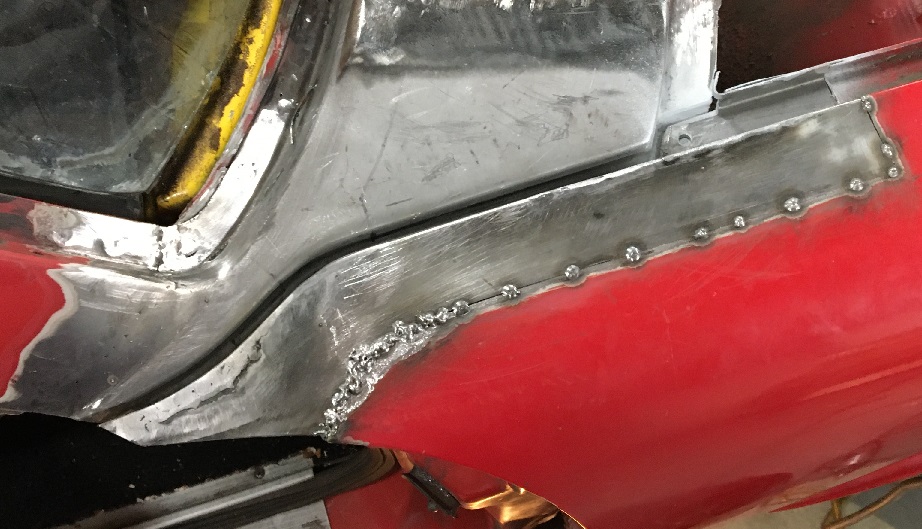 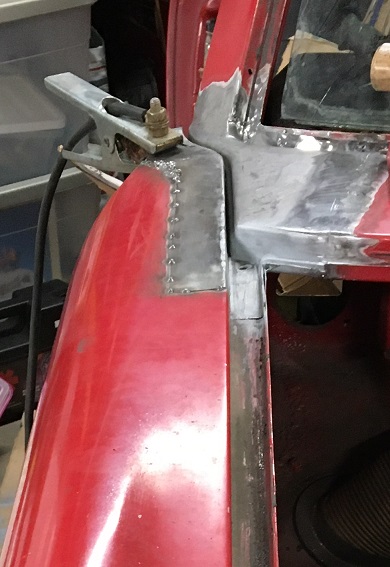 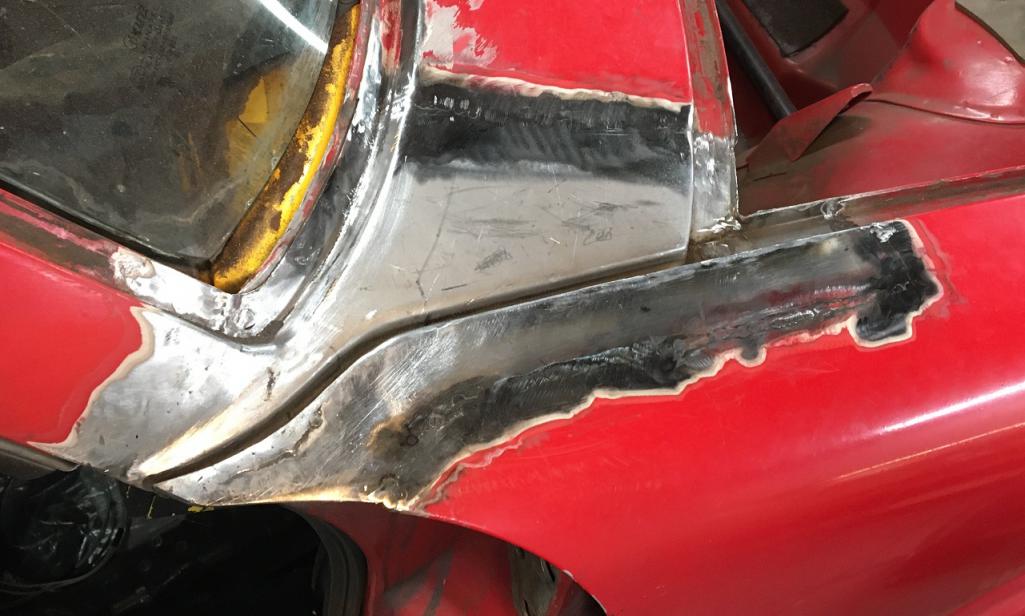 Since there was a little step at the door front edge line, I added some metal and refinished the line accordingly. 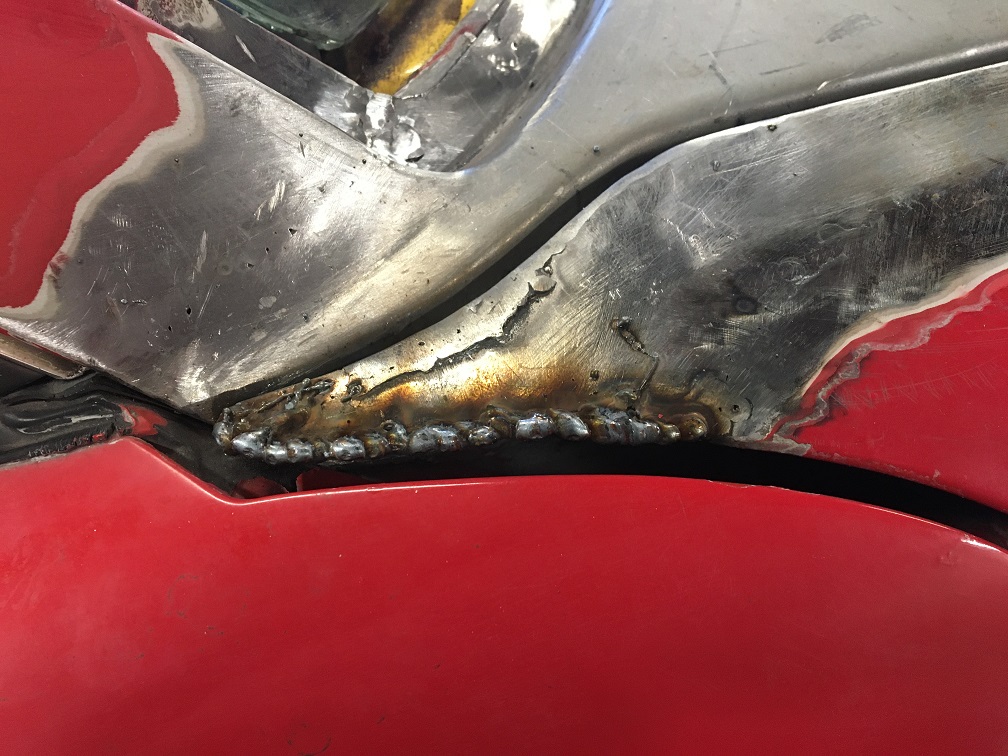 And the end result (IMG:style_emoticons/default/smile.gif) 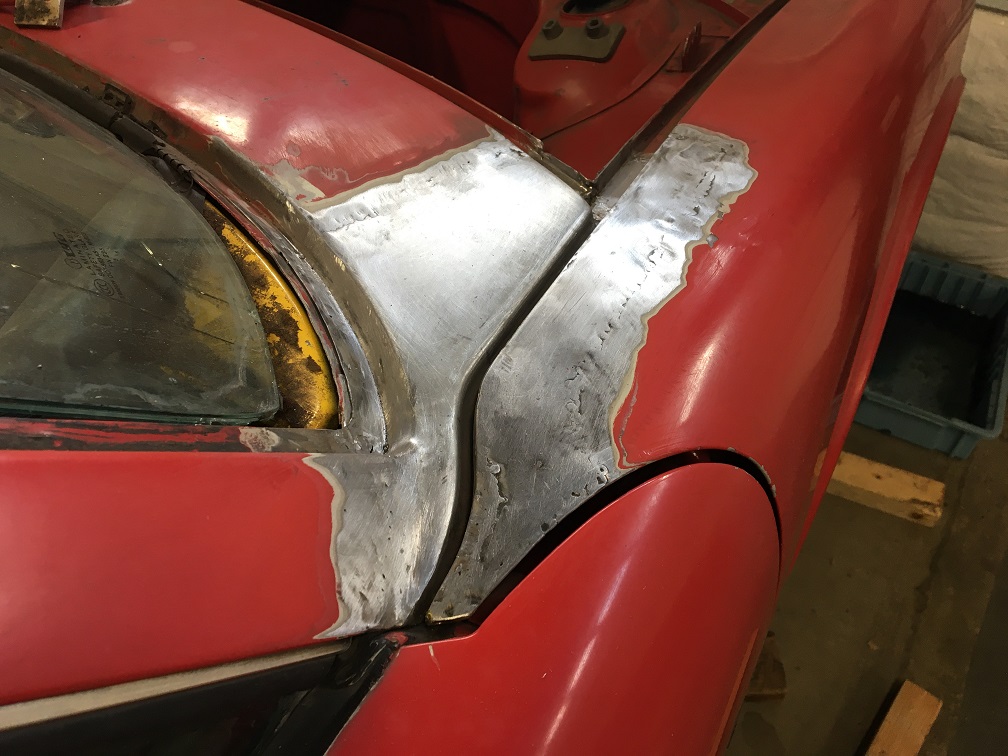 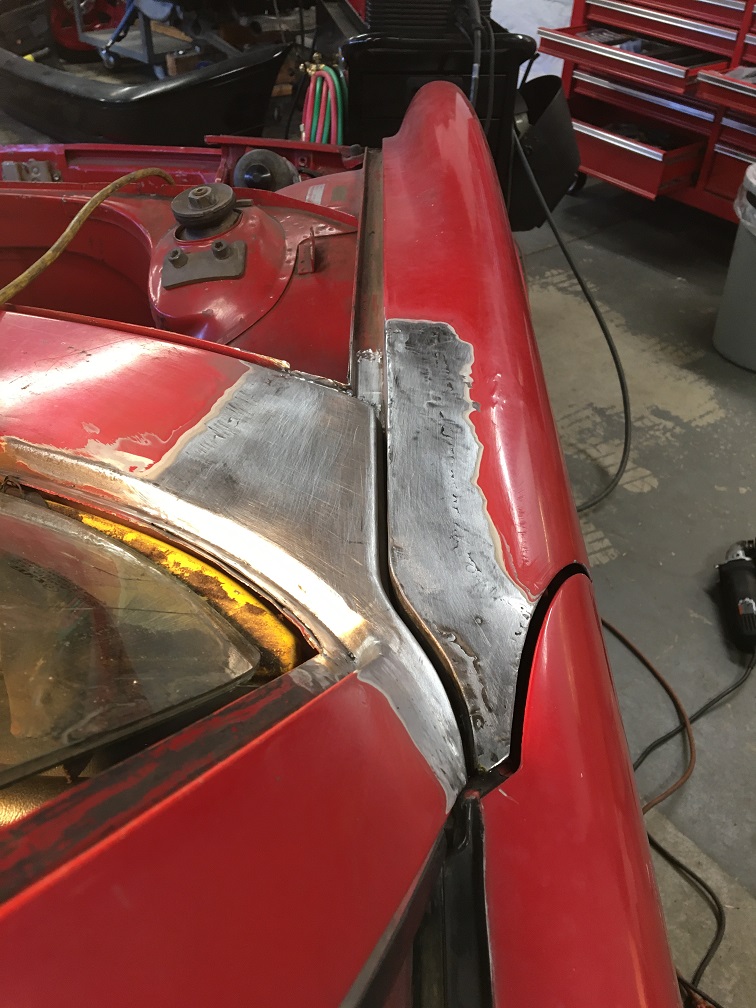 |
|
|
|
| mb911 |
Jan 24 2021, 06:01 PM
Post
#29
|
|
914 Guru Group: Members Posts: 7,766 Joined: 2-January 09 From: Burlington wi Member No.: 9,892 Region Association: Upper MidWest |
Looks great. That is a spot on my car I repaired and ended up with a bit to much gap.. kinda sucks as the car is all painted now. I wanted to find wider welting to fill the gap..
|
|
|
|
| Montreal914 |
Jan 24 2021, 06:04 PM
Post
#30
|
|
Advanced Member Group: Members Posts: 2,112 Joined: 8-August 10 From: Claremont, CA Member No.: 12,023 Region Association: Southern California |
Moving on to the other problem area of this fender... (IMG:style_emoticons/default/dry.gif)
The typical rusted lower point which is located near the doubled up packed with seam sealer, not very surprising... 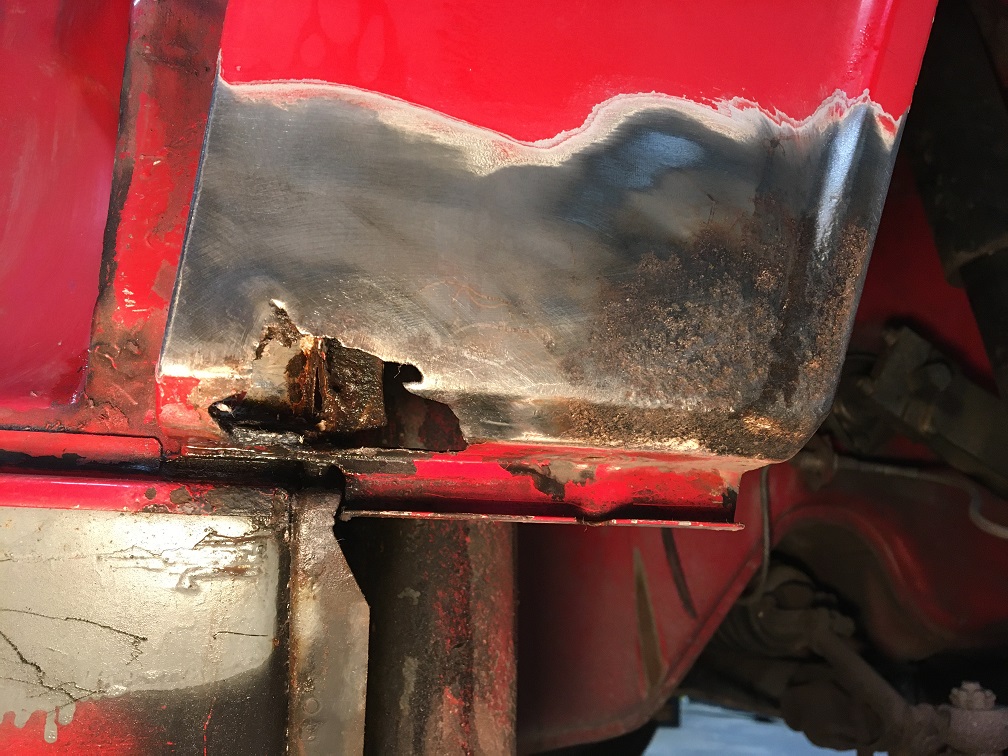 Again, AA sells a repair piece but I prefer using an original piece and got this one (IMG:style_emoticons/default/smile.gif)  After removing all of the unnecessary metal and seam sealer, the parts started to look a lot better. 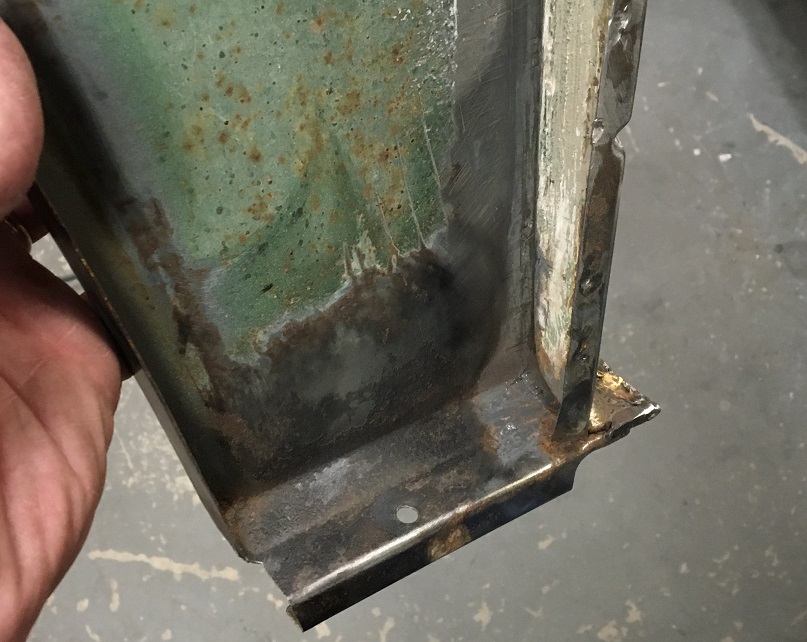 Time to remove the old and replace it with the old. 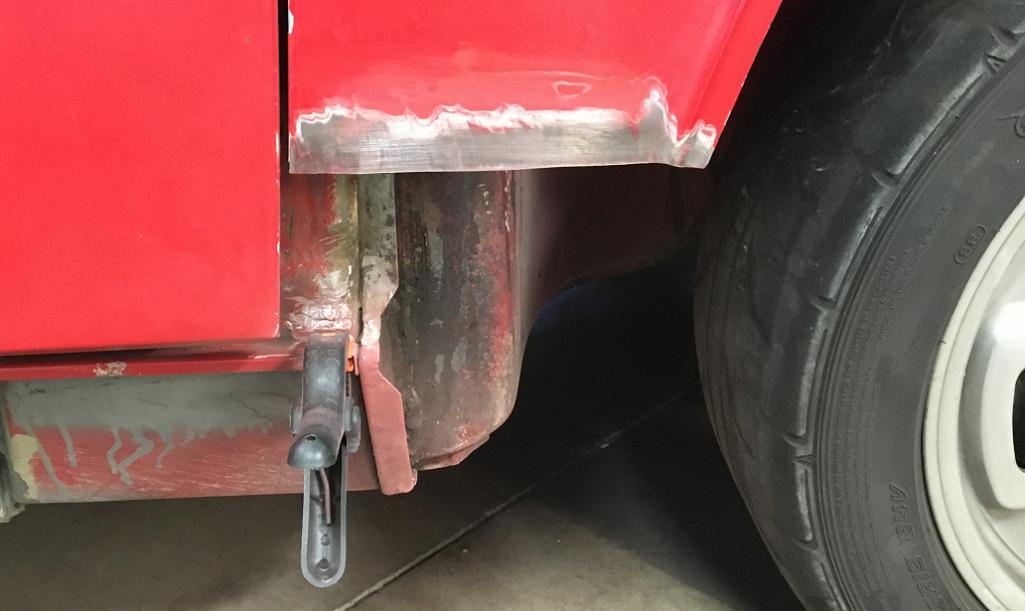 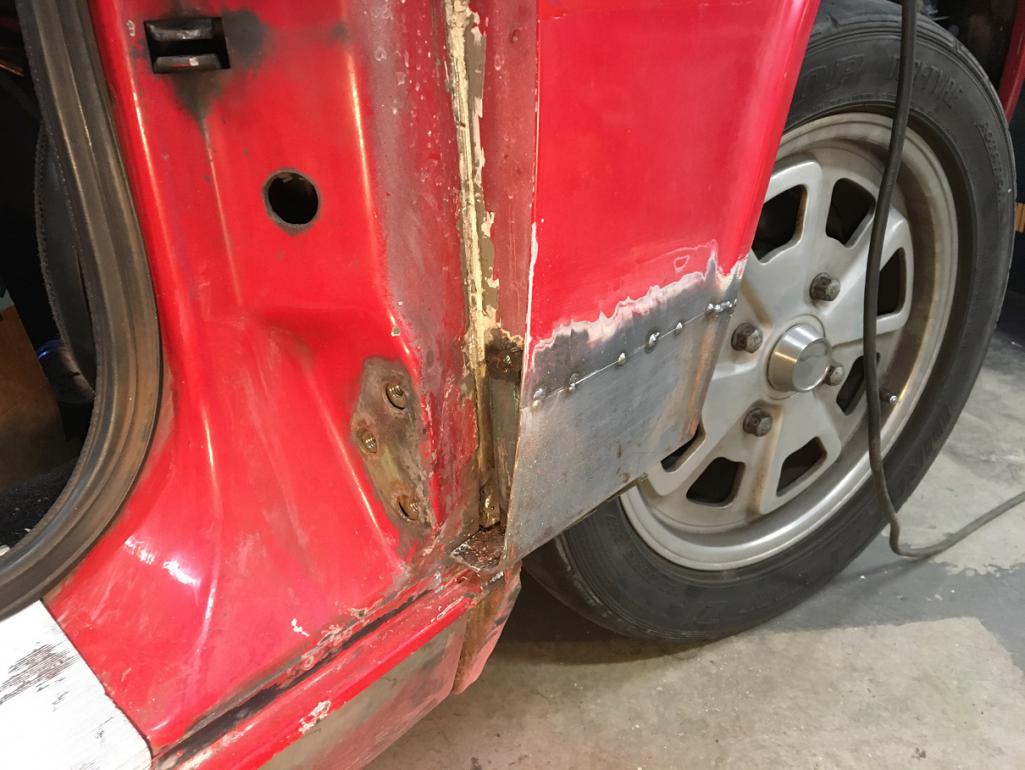 Result: 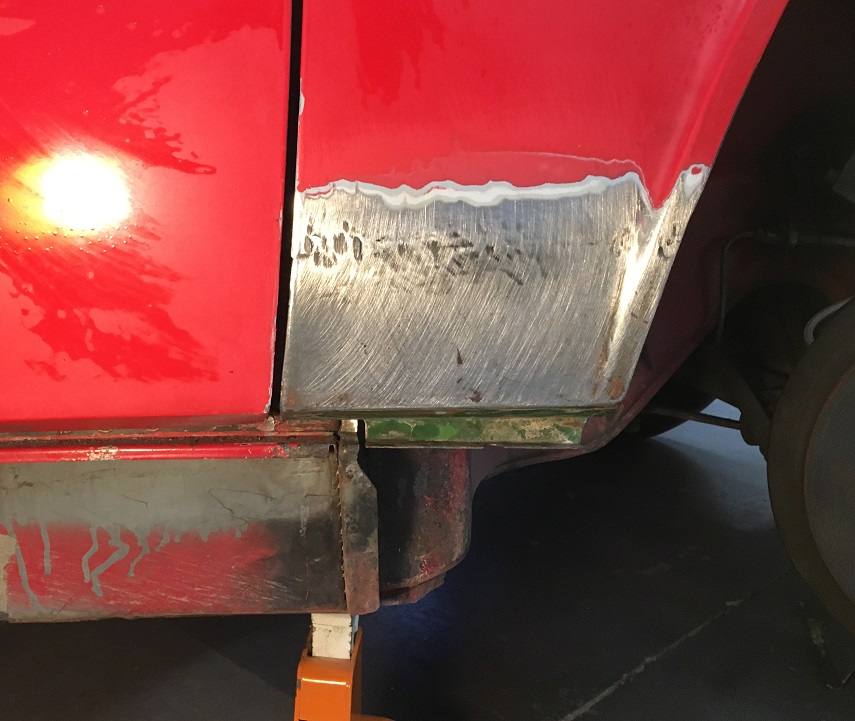 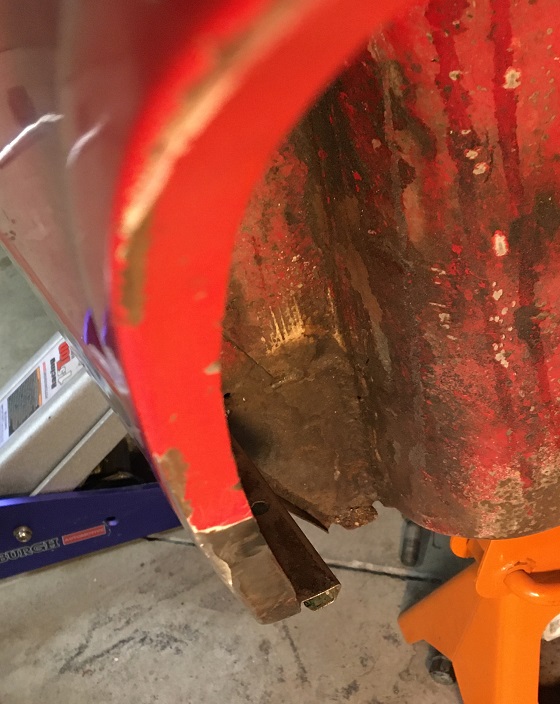 |
|
|
|
| Montreal914 |
Jan 24 2021, 06:10 PM
Post
#31
|
|
Advanced Member Group: Members Posts: 2,112 Joined: 8-August 10 From: Claremont, CA Member No.: 12,023 Region Association: Southern California |
QUOTE(mb911 @ Jan 24 2021, 04:01 PM) Looks great. That is a spot on my car I repaired and ended up with a bit to much gap.. kinda sucks as the car is all painted now. I wanted to find wider welting to fill the gap.. The gap was my concern all along. I am happy with the result, but it is a little wider than before. The Restoration Design cowl piece is very nice, but the radius is larger than stock which is very square. The fender top AA piece has a radius of about 1/8" (IMG:style_emoticons/default/rolleyes.gif) and was way too far for me to use it. That is why I got a piece from an original fender. |
|
|
|
| mb911 |
Jan 24 2021, 06:15 PM
Post
#32
|
|
914 Guru Group: Members Posts: 7,766 Joined: 2-January 09 From: Burlington wi Member No.: 9,892 Region Association: Upper MidWest |
QUOTE(Montreal914 @ Jan 24 2021, 04:10 PM) QUOTE(mb911 @ Jan 24 2021, 04:01 PM) Looks great. That is a spot on my car I repaired and ended up with a bit to much gap.. kinda sucks as the car is all painted now. I wanted to find wider welting to fill the gap.. The gap was my concern all along. I am happy with the result, but it is a little wider than before. The Restoration Design cowl piece is very nice, but the radius is larger than stock which is very square. The fender top AA piece has a radius of about 1/8" (IMG:style_emoticons/default/rolleyes.gif) and was way too far for me to use it. That is why I got a piece from an original fender. My issue was the replacement fender I put on.. It didn't fit well in both locations so I opted to make it better on the curvature of the door.. some day I may have a another go at it but needed to progress forward. |
|
|
|
| Montreal914 |
Jan 24 2021, 06:24 PM
Post
#33
|
|
Advanced Member Group: Members Posts: 2,112 Joined: 8-August 10 From: Claremont, CA Member No.: 12,023 Region Association: Southern California |
Time to switch to the rear fender of that same side. Another classic, the base of the sail panel. There was a couple of bubbles in the paint, so I wasn't surprised to see rust there.
I cut out the bad area and removed the seam sealer packed underneath and around the vent tube.  Then, prepared a repair piece and trial fit  Weld and finish up. I have to say that after fixing the cowl area, this is easy (IMG:style_emoticons/default/smile.gif)  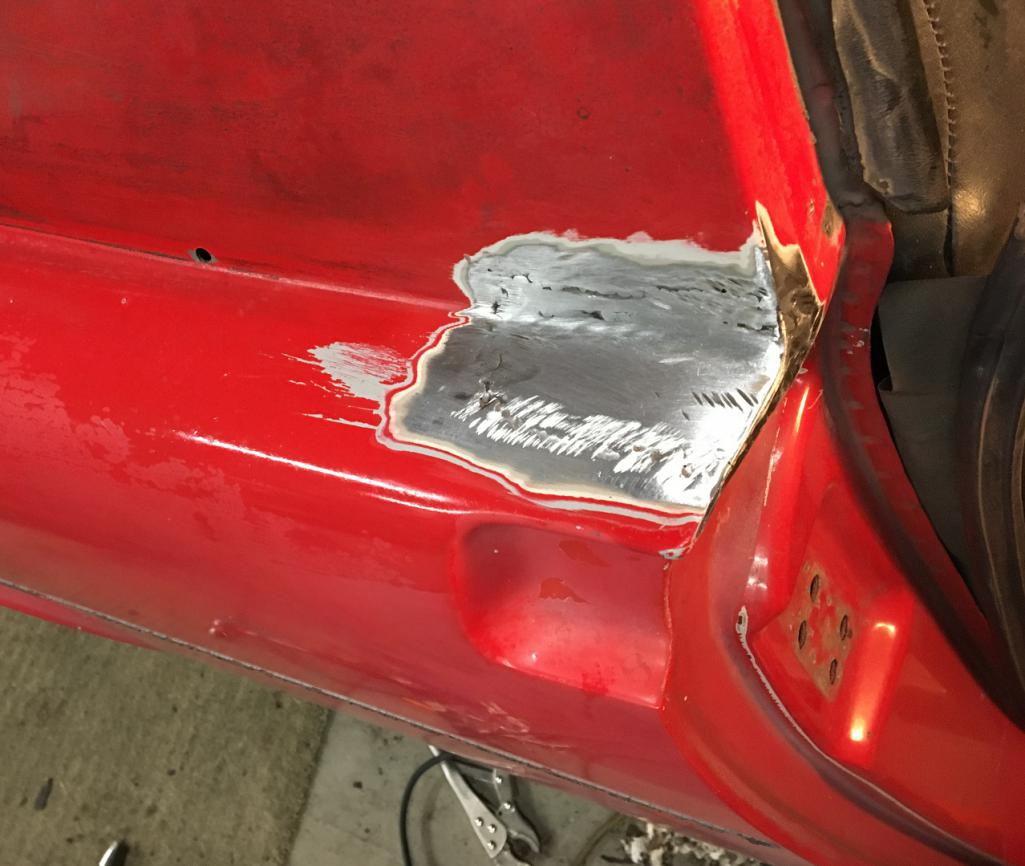 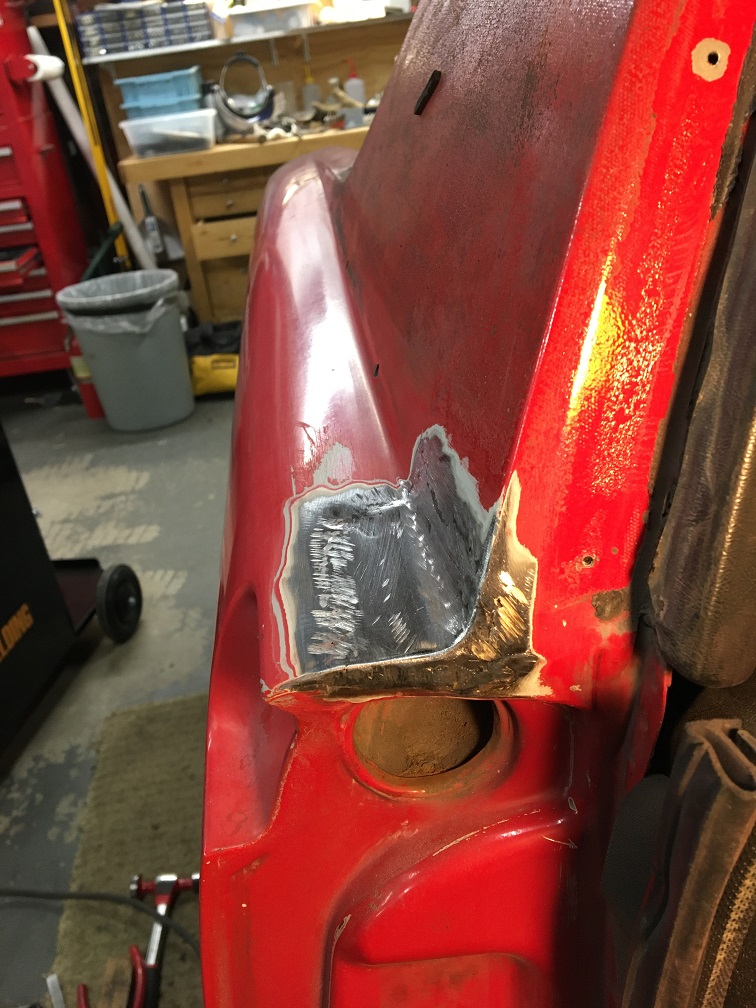 |
|
|
|
| bkrantz |
Jan 24 2021, 08:49 PM
Post
#34
|
|
914 Guru Group: Members Posts: 8,710 Joined: 3-August 19 From: SW Colorado Member No.: 23,343 Region Association: Rocky Mountains |
Nice work--keep it up!
|
|
|
|
| Montreal914 |
Jan 30 2021, 09:07 PM
Post
#35
|
|
Advanced Member Group: Members Posts: 2,112 Joined: 8-August 10 From: Claremont, CA Member No.: 12,023 Region Association: Southern California |
This weeks update:
The door latch bracket deep in the rear fender well needed some help. The cover was rusted on the bottom half. After removing it and threating the area with Ospho, time to start rebuilding. 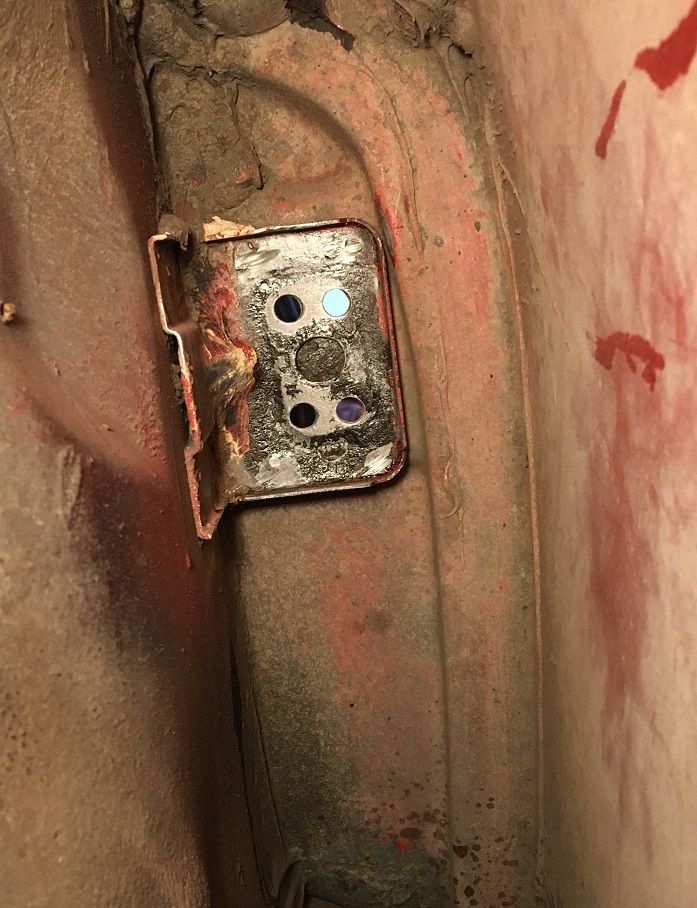 Now with weld through primer and the threaded piece held in place. Good thing i kept on reminding myself to put it there before closing the cover without it, that would have been no fun... 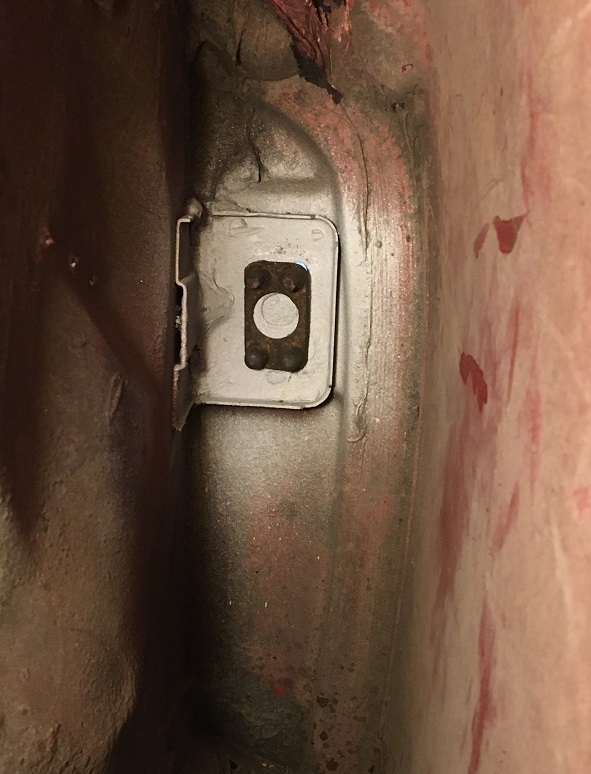 For the cover, I elected to make my own with a template I did, shown here on a spare bracket that didn't end up using. 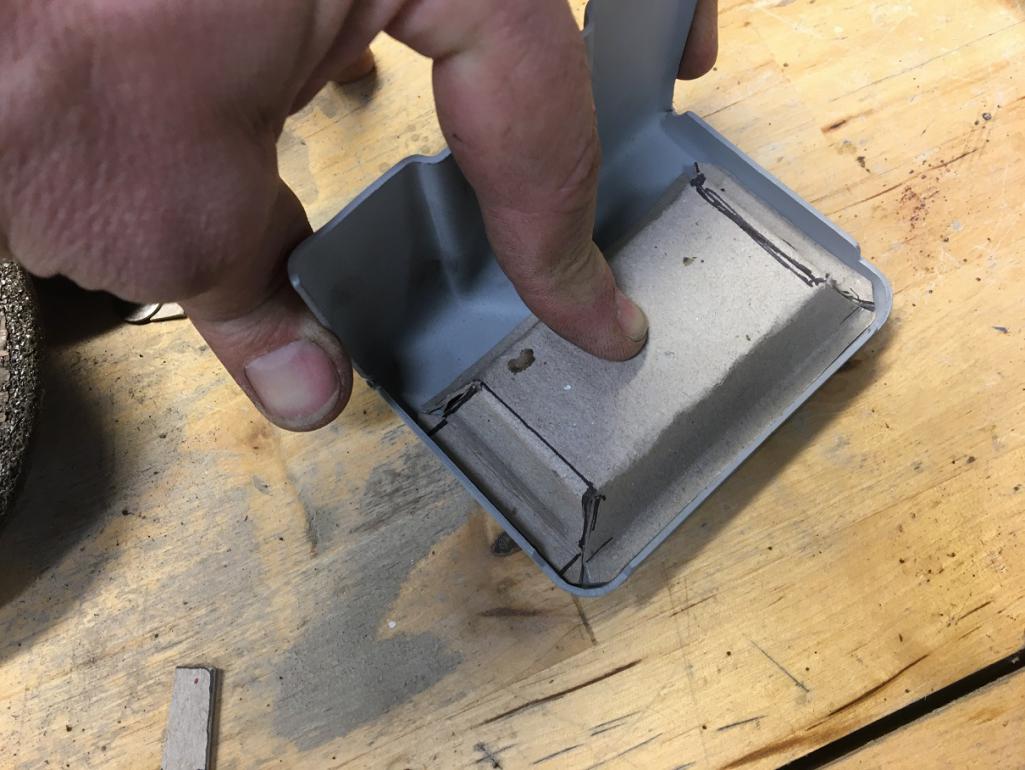 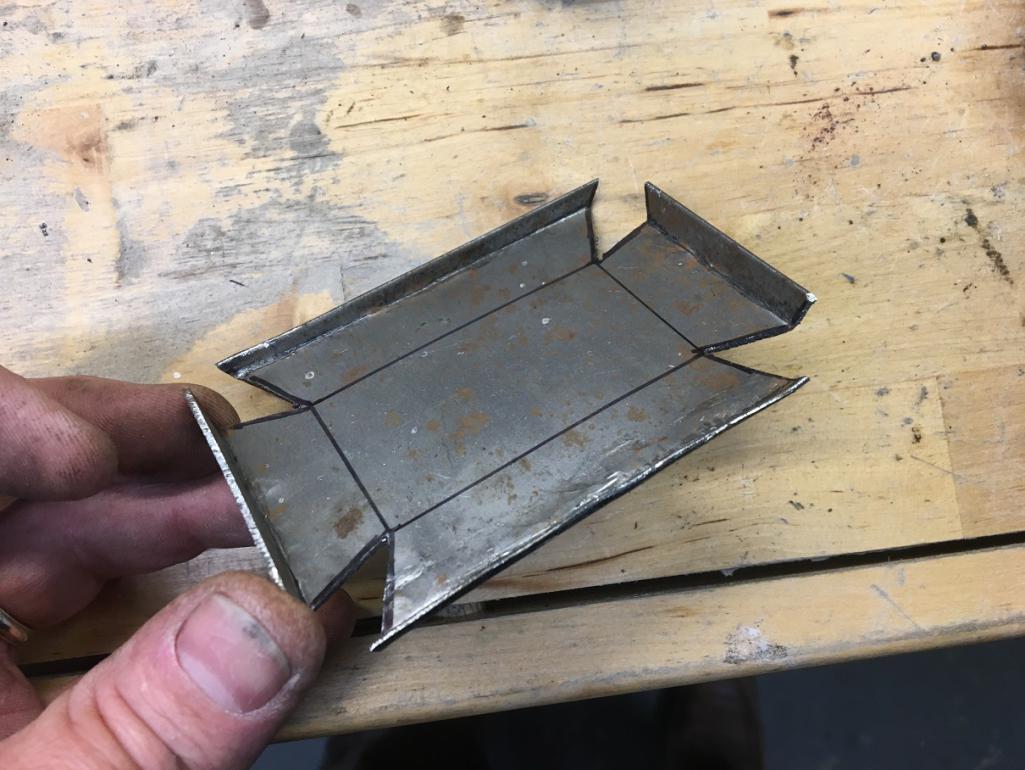 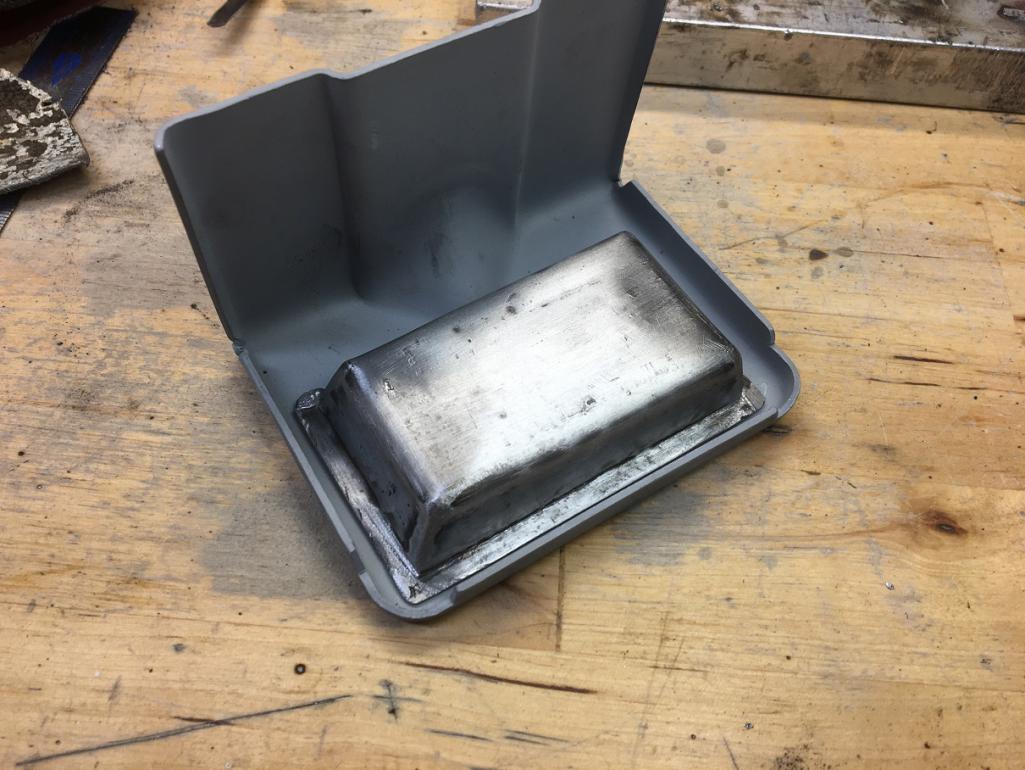 I added a lower opening to spray in some rust protection with a tube later on. Then spray painted with weld through primer 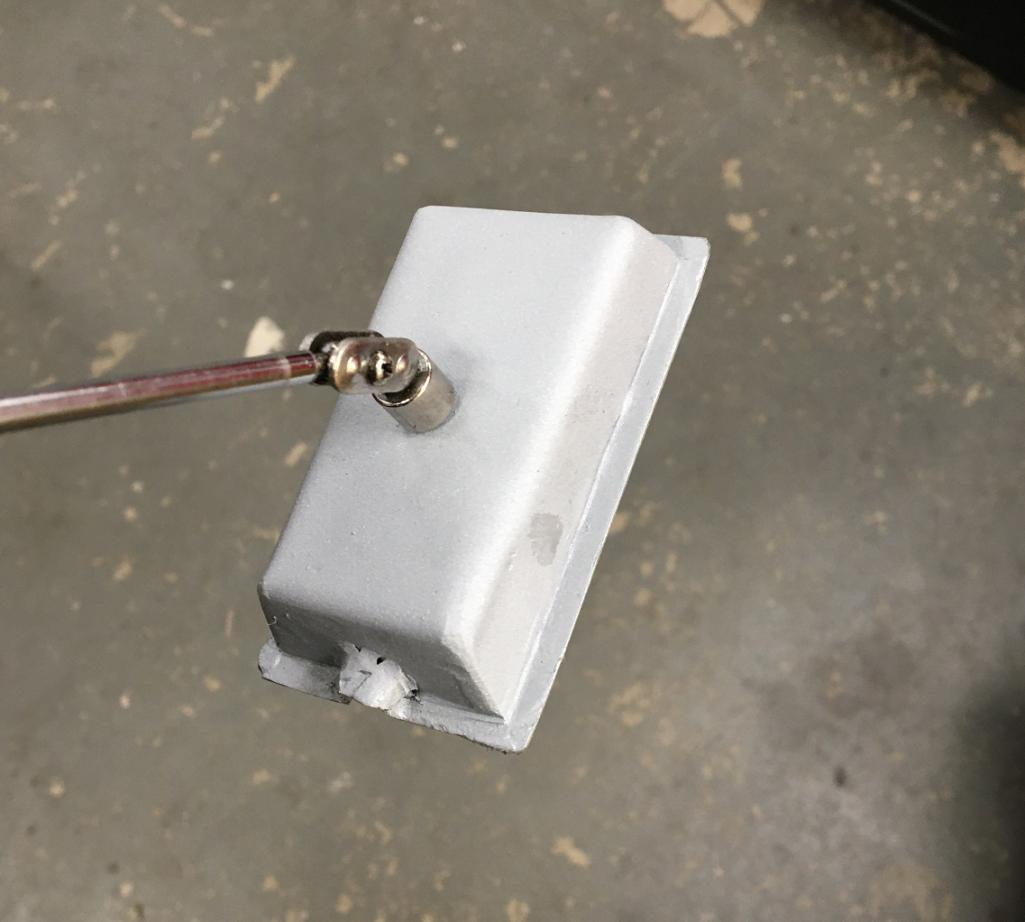 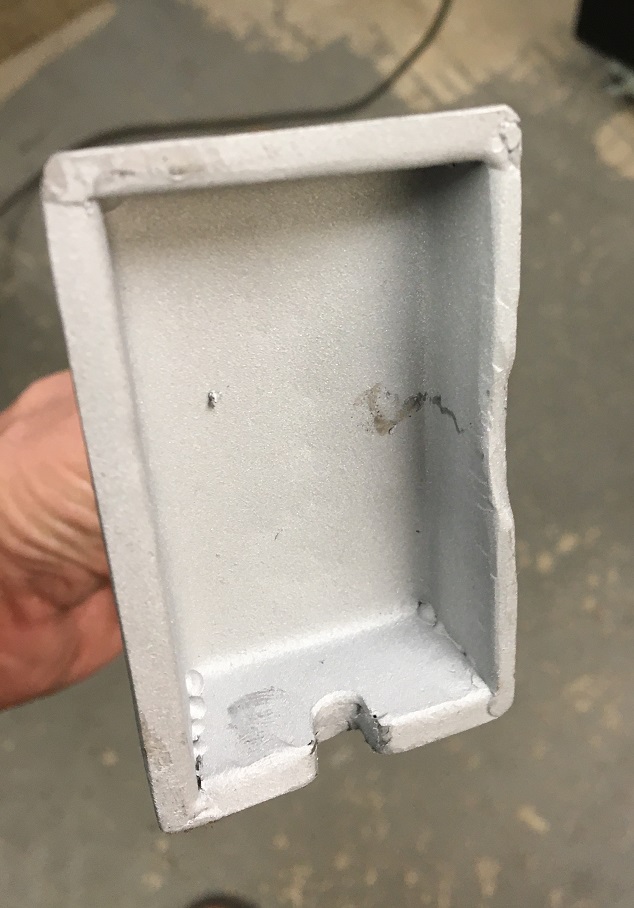 Then held it in place with my telescopic magnet, ready to stretch and weld it afar with my left hand... (IMG:style_emoticons/default/rolleyes.gif) 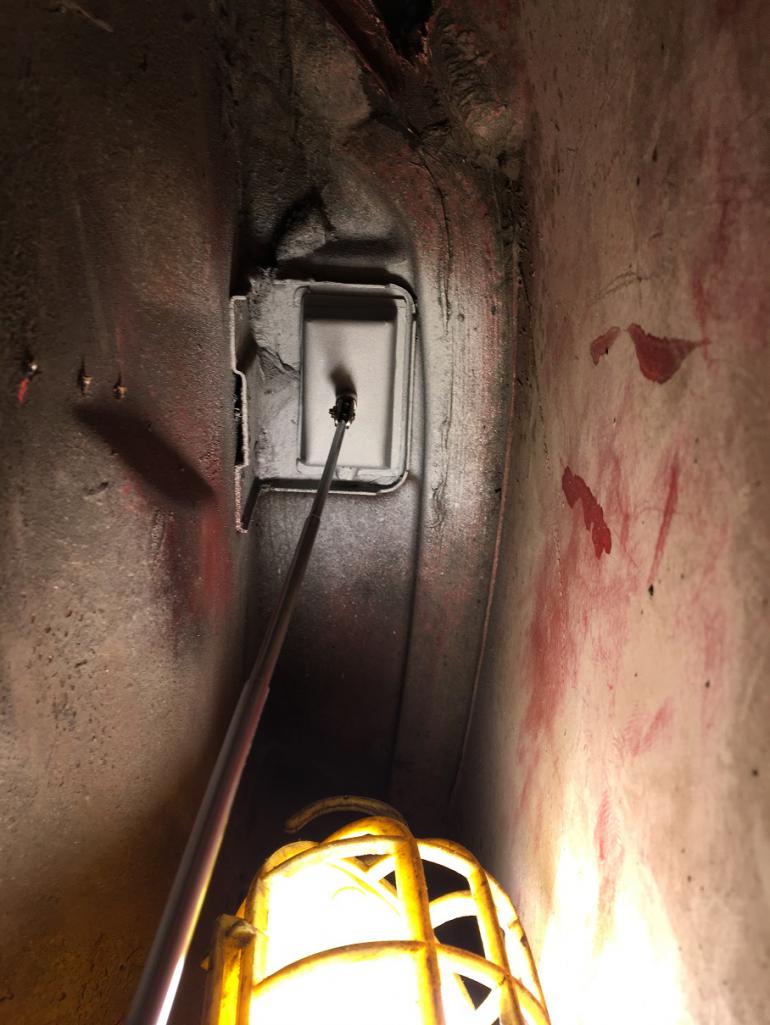 Moving on to the lower fender corner. The one packed with that darn seam sealer that makes things rust... (IMG:style_emoticons/default/headbang.gif) First the lower part: Repair piece, welded, then finished... 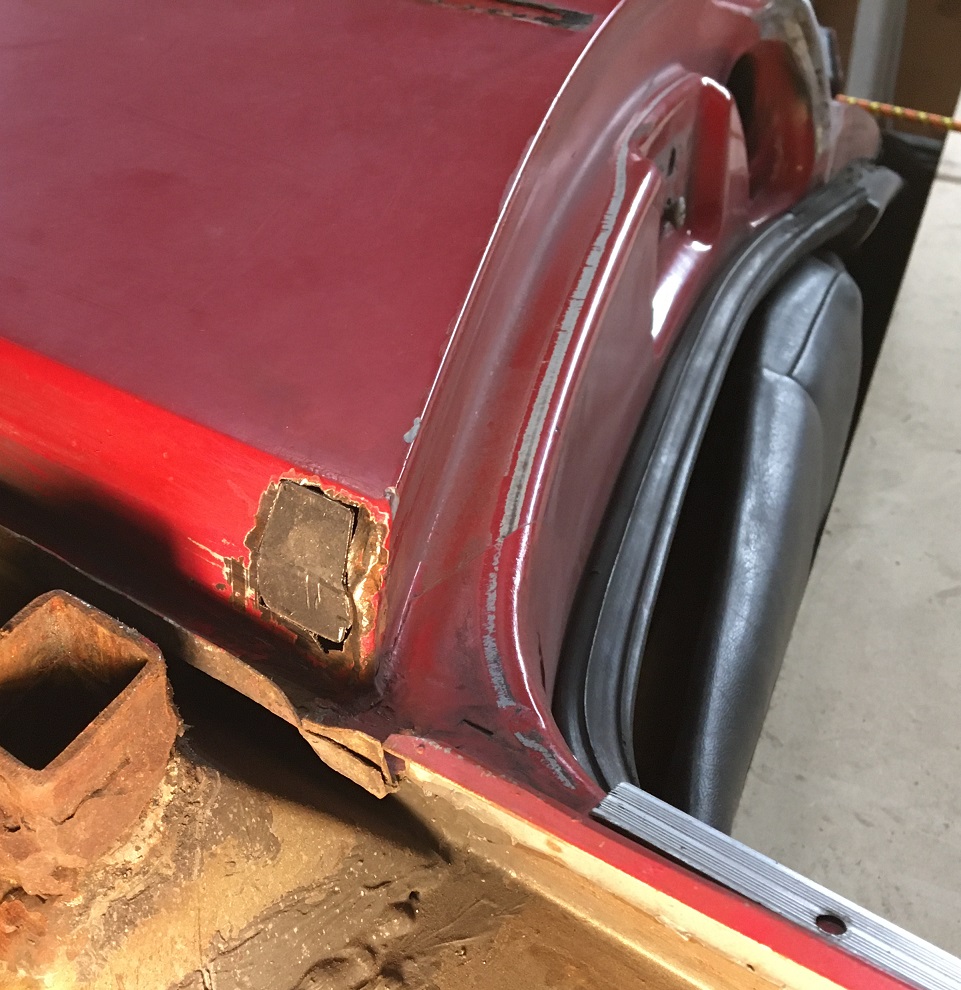 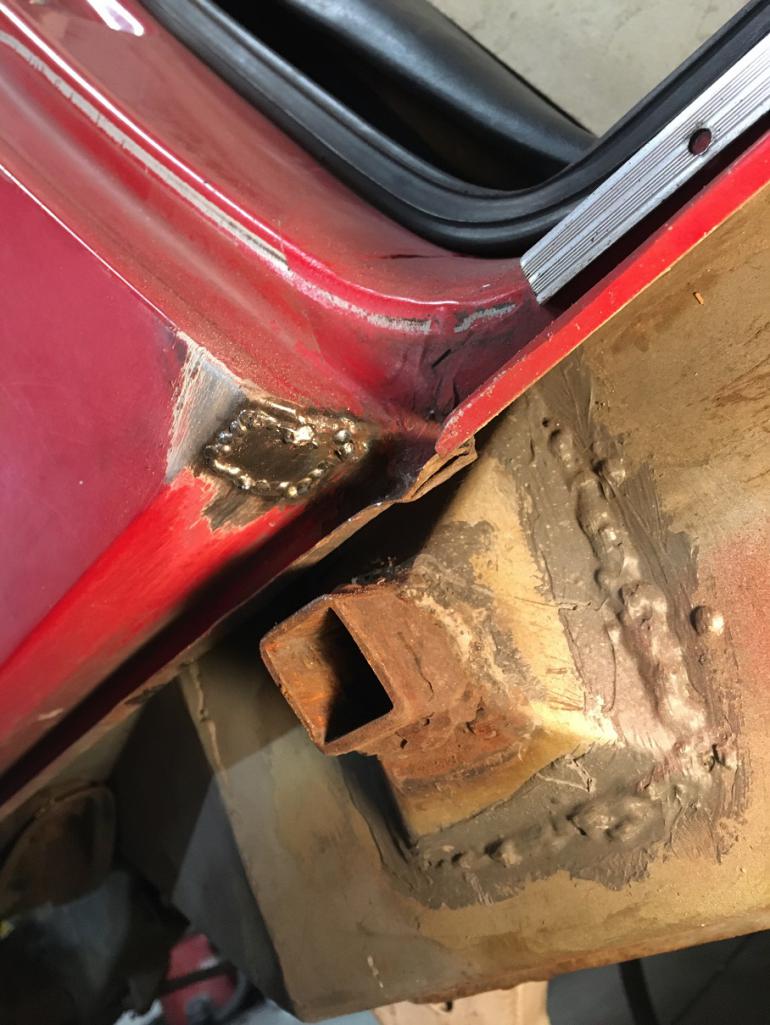 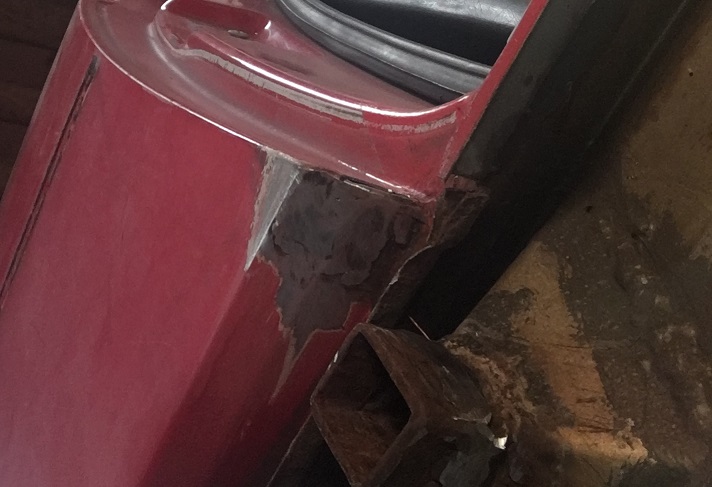 Then the front part: same process... 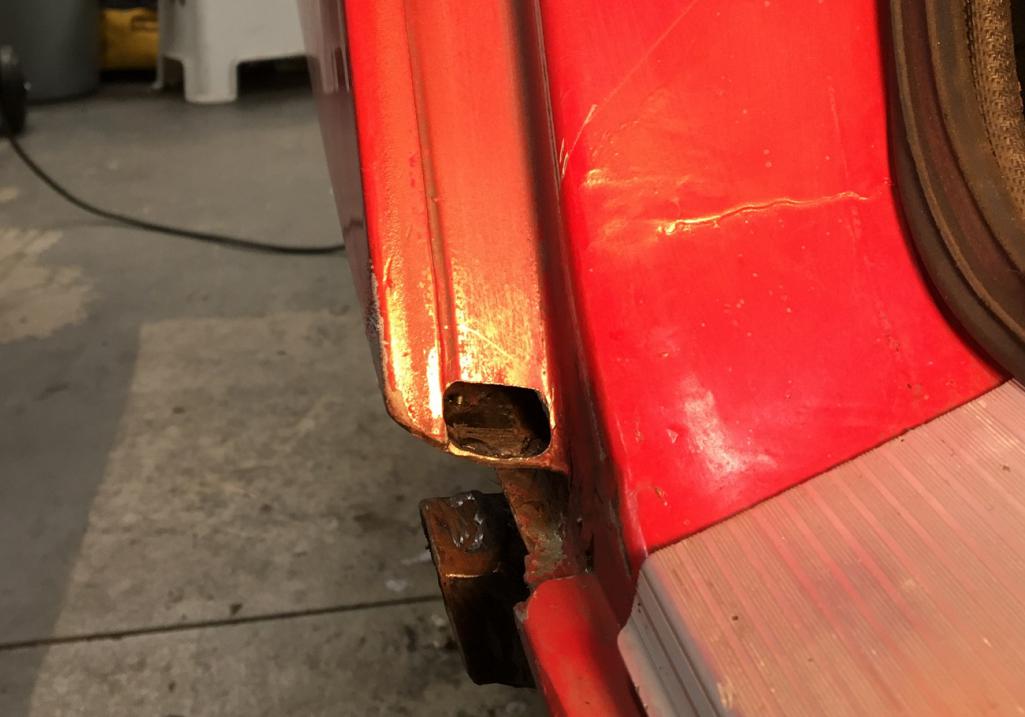 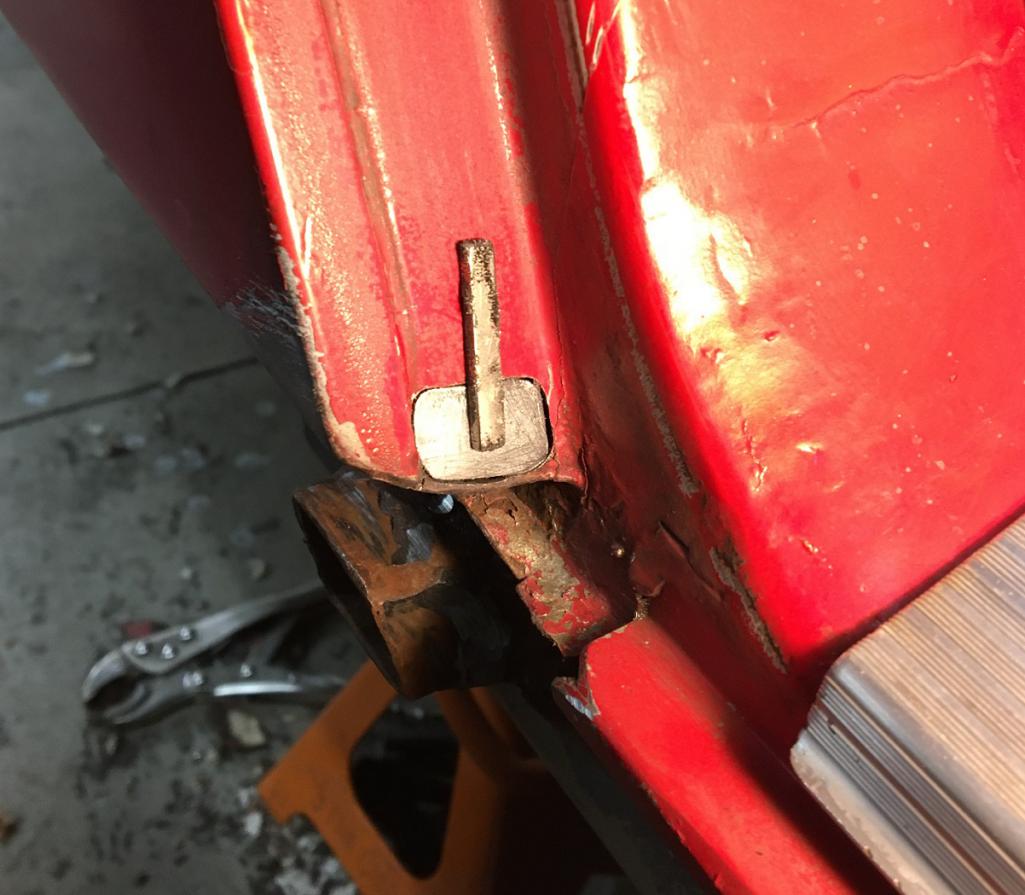 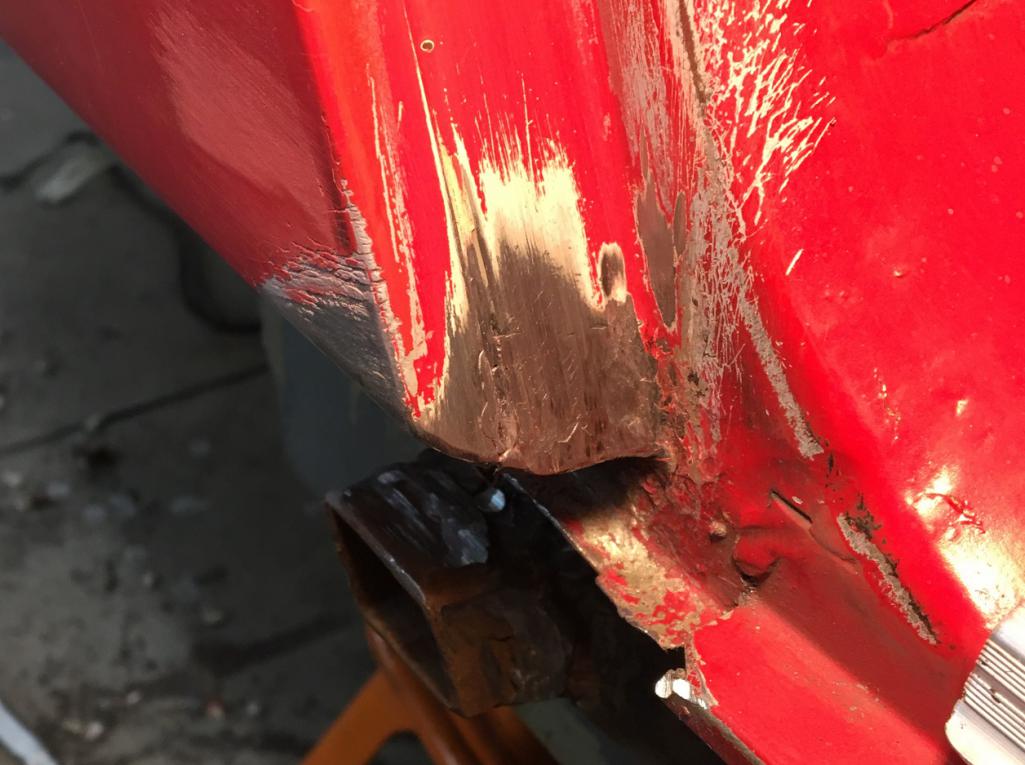 Tomorrow, Sunday, day off (IMG:style_emoticons/default/sunglasses.gif) Next weekend, more cut and repair... (IMG:style_emoticons/default/sawzall-smiley.gif) (IMG:style_emoticons/default/smash.gif) (IMG:style_emoticons/default/welder.gif) |
|
|
|
| Cairo94507 |
Jan 31 2021, 10:18 AM
Post
#36
|
|
Michael Group: Members Posts: 10,640 Joined: 1-November 08 From: Auburn, CA Member No.: 9,712 Region Association: Northern California |
Very nicely done and great attention to detail. (IMG:style_emoticons/default/beerchug.gif)
|
 |
|
| pencap914 |
Feb 17 2021, 06:22 PM
Post
#37
|
|
Member Group: Members Posts: 81 Joined: 16-April 06 Member No.: 5,872 Region Association: Northern California |
Nice work Eric! Looks like my 914 will need a similar repair at the cowl. It looks like a daunting task, but this thread is giving me some inspiration to tackle it.
|
|
|
|
| Montreal914 |
Apr 23 2021, 08:12 PM
Post
#38
|
|
Advanced Member Group: Members Posts: 2,112 Joined: 8-August 10 From: Claremont, CA Member No.: 12,023 Region Association: Southern California |
Fresh update (IMG:style_emoticons/default/smile.gif)
Spent some time finishing the rear trunk floor replacement. First, cutting the crappy rusted through old piece, removing the cross beam reinforcement middle top plate, and brushing the metal clean. 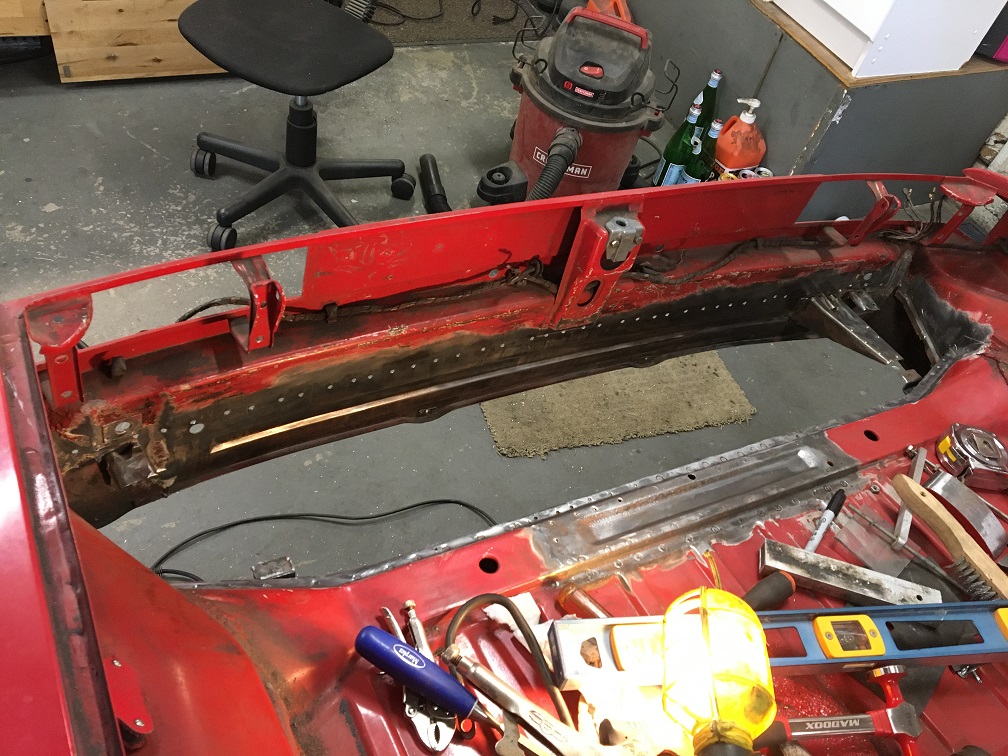 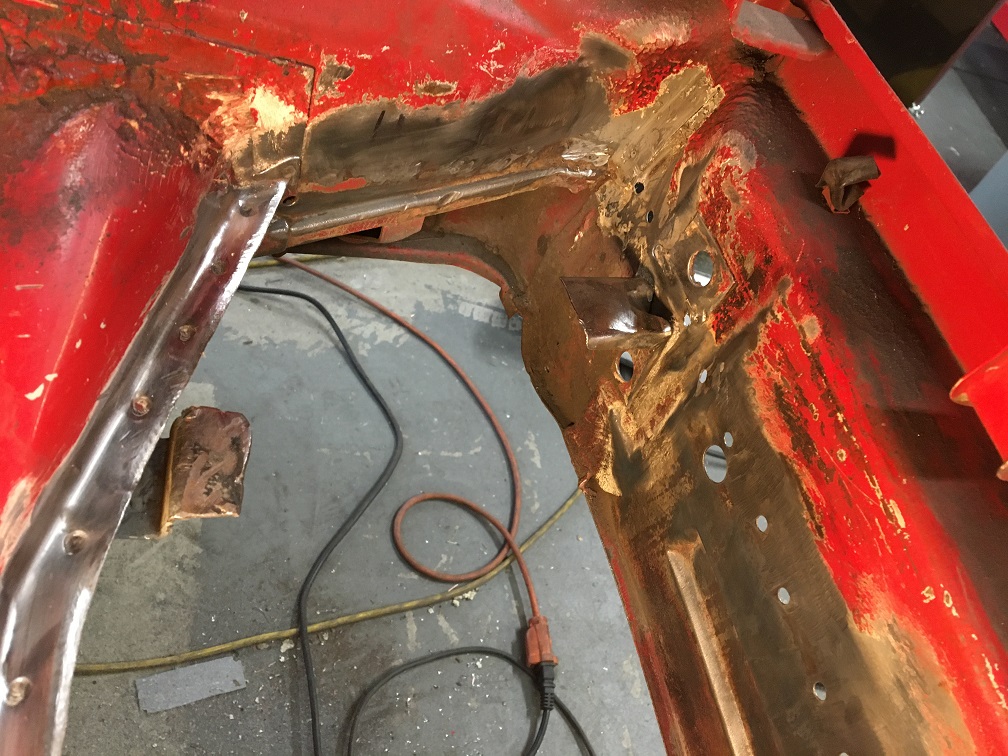 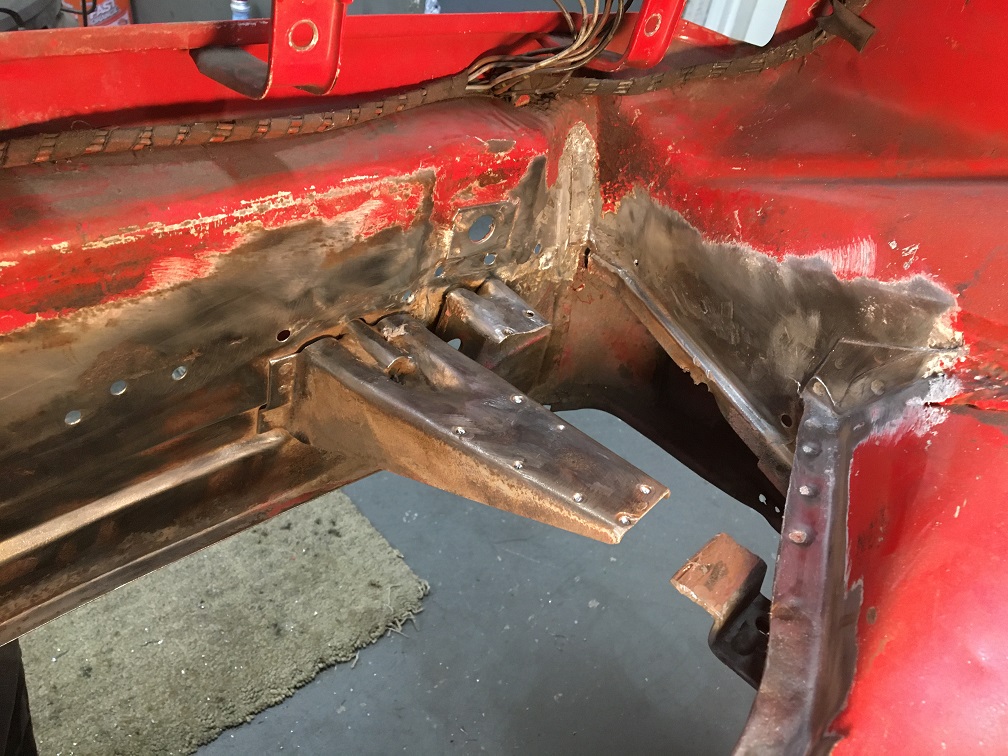 Weld through primer on the weld surfaces. 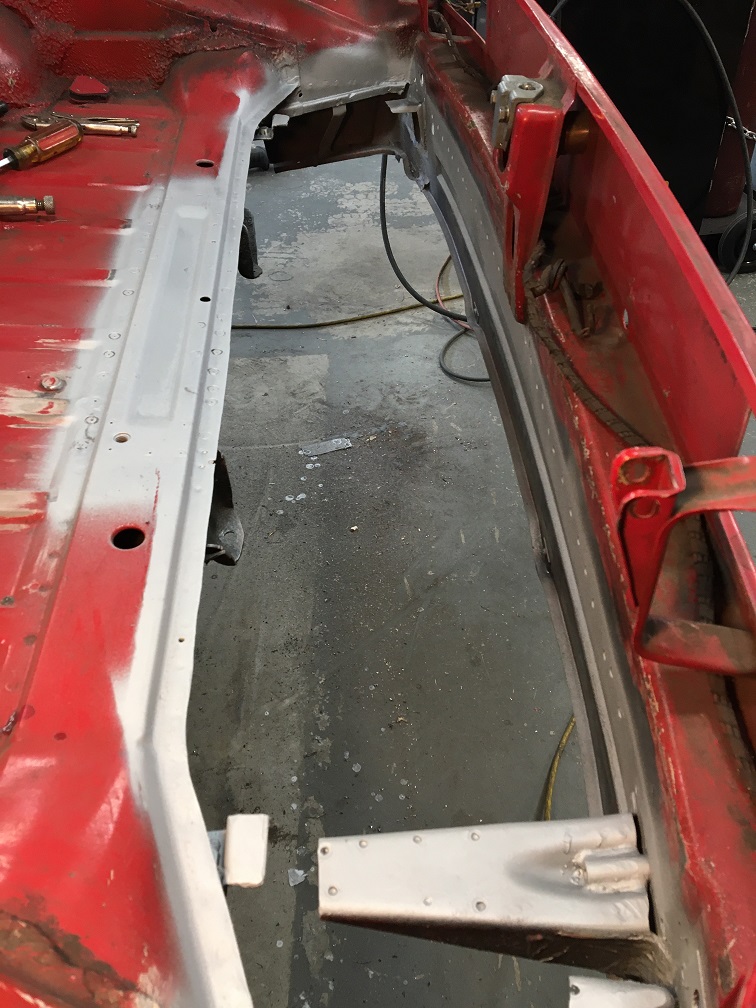 Then the new floor piece from Restoration Design (IMG:style_emoticons/default/smilie_pokal.gif) was fitted with the original chassis number plate. And no, I will not cut open the round ports since I don't have a spot welder that needs to go through them (IMG:style_emoticons/default/biggrin.gif) . This is a daily driver, not a authentic restoration. 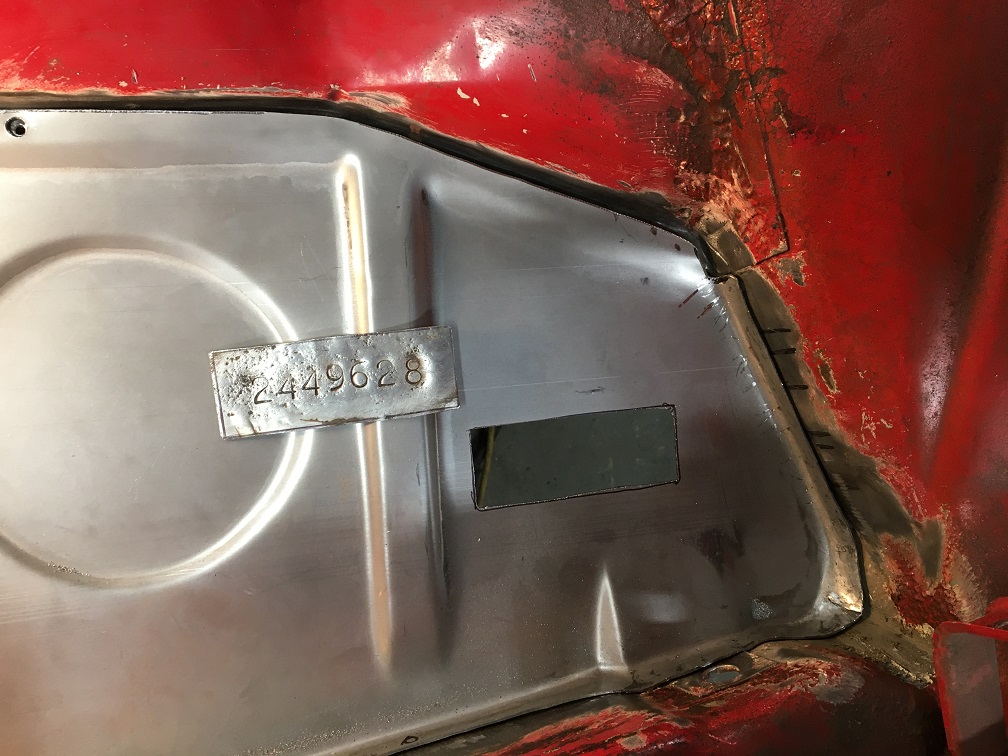 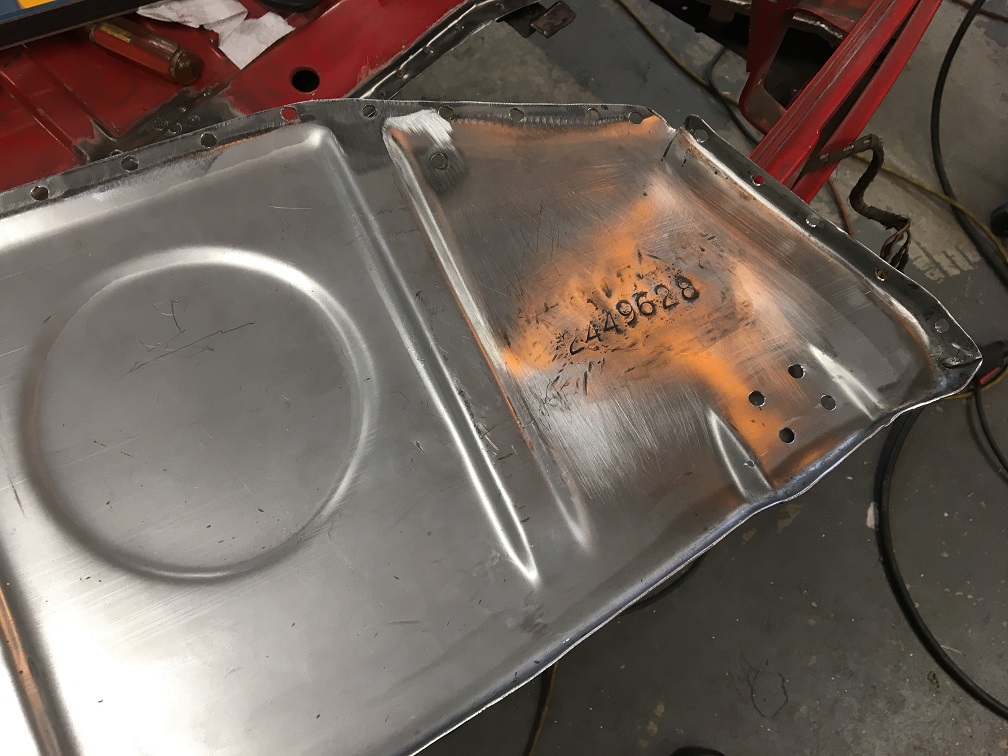 Using the spot welds on the car's back panel as a guide for the floor height, I plug welded the new panel in, then added the recycled reinforcement plate on the cross member. Done. (IMG:style_emoticons/default/smile.gif) 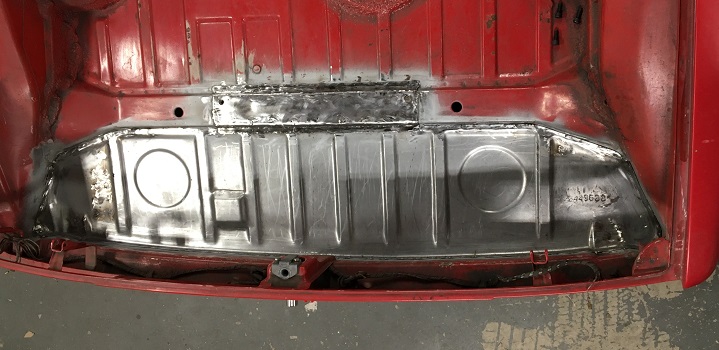 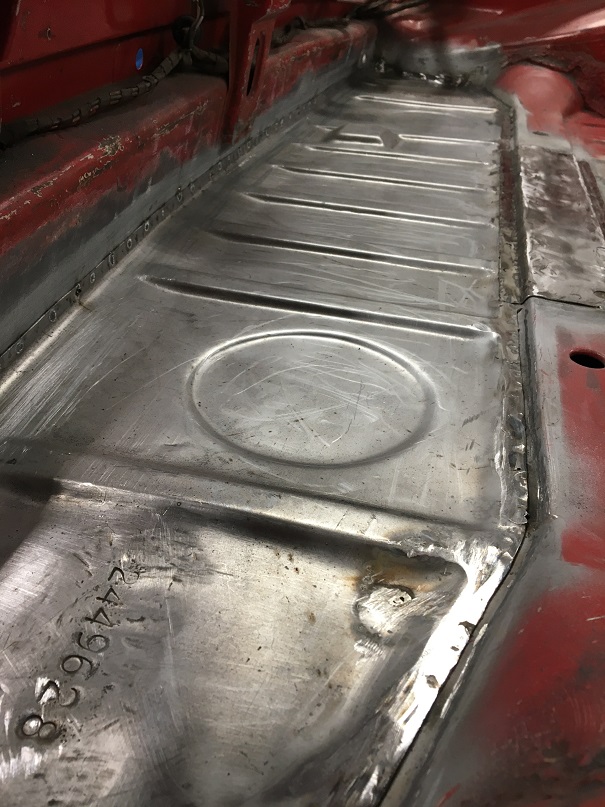 Now for the exhaust heat shield, I elected to screw it to the floor with pan head M6 screws. So I drilled holes and welded M6 nuts on the shield's brackets. 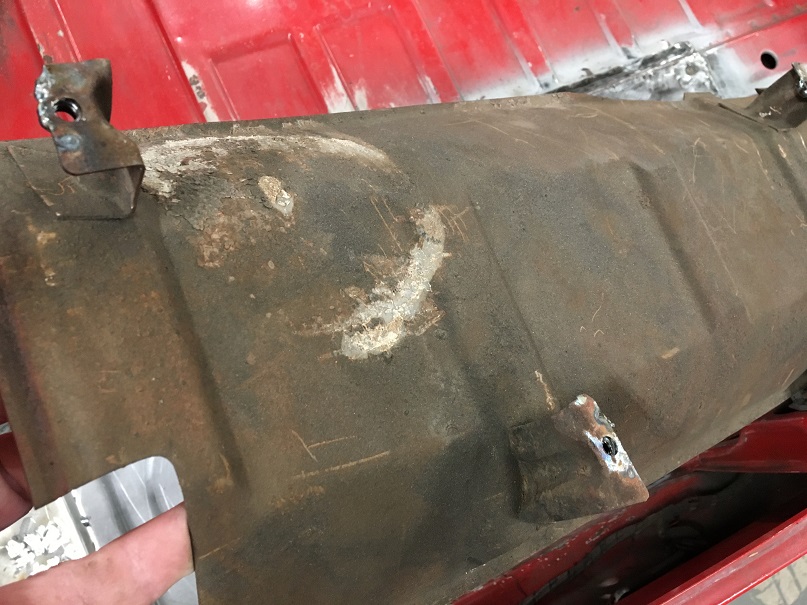 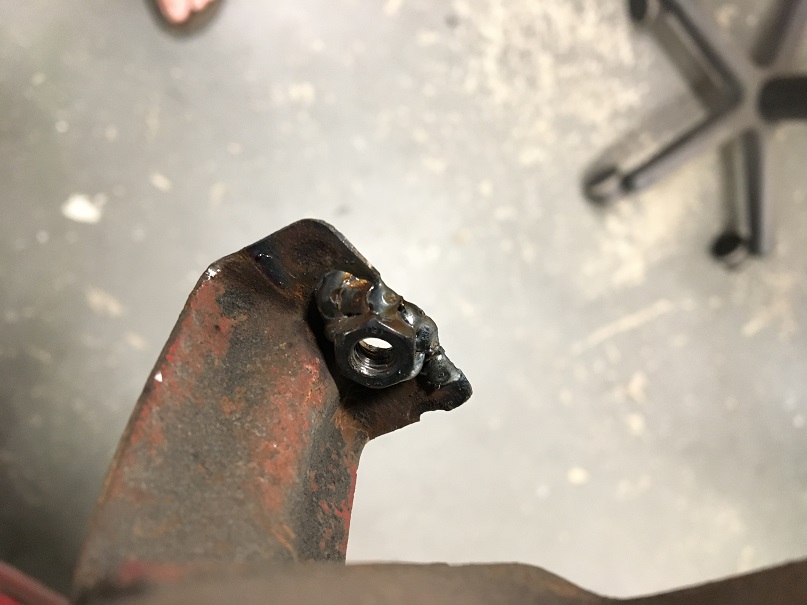 This cardboard template will help me drill the trunk floor in the right spot for the shield's screws.  |
|
|
|
| Montreal914 |
Apr 23 2021, 08:47 PM
Post
#39
|
|
Advanced Member Group: Members Posts: 2,112 Joined: 8-August 10 From: Claremont, CA Member No.: 12,023 Region Association: Southern California |
Battery tray! (IMG:style_emoticons/default/cheer.gif)
Some like to weld it in place, others screw it so they can paint the inside of the support. I chose to install it with screws, which was the long route... (IMG:style_emoticons/default/rolleyes.gif) First, for battery I am using an Odyssey PC925 which is a lot smaller that the stock battery tray. Also, as a requirement from the POC rules, the battery is supposed to be held in place by a cross bar on top. So all this led to this bit of re-engineering of the tray and its support. (IMG:style_emoticons/default/smash.gif) First let's look at the support. I extended the folds, drilled holes and welded M8 nuts (3) on the backside for the tray to attach to. 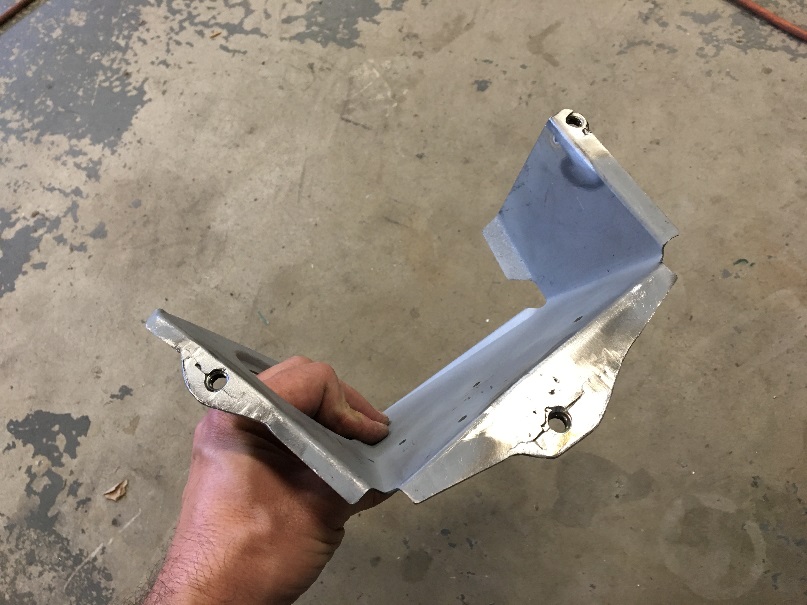 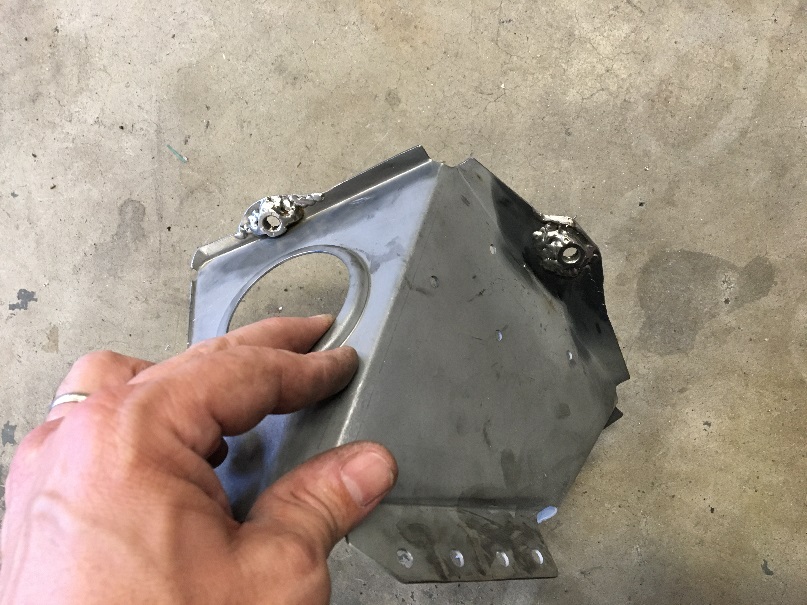 Next the tray was also modified. For the top cross bar, I intend to use 2 M8 treaded rods that will be attached to each side of the tray. The first one will use the nut on the middle of the angle seen in the picture below. The second rod will use the nut where the stock "Z" shaped bracket normally bolts on. Also on the angle, we can see two M8 nuts for through the inner fender anchoring bolts. 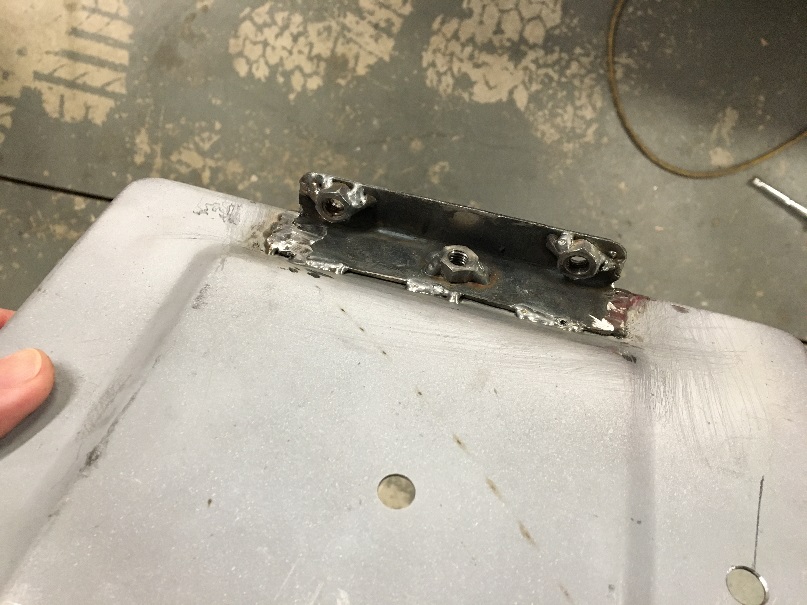 Here the tray rests on its support with the holes lining up to the nuts on the support underneath. As mentioned, the Odyssey battery is smaller and will actually fit between the heads of the front and back screw, and between the threaded rods that will be on each side. 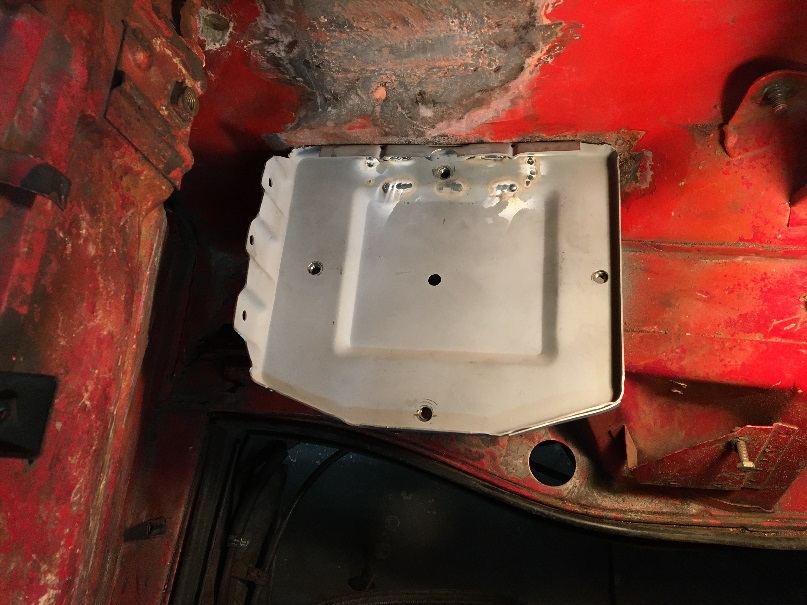 Finally these are the M8 screws through the inner fender 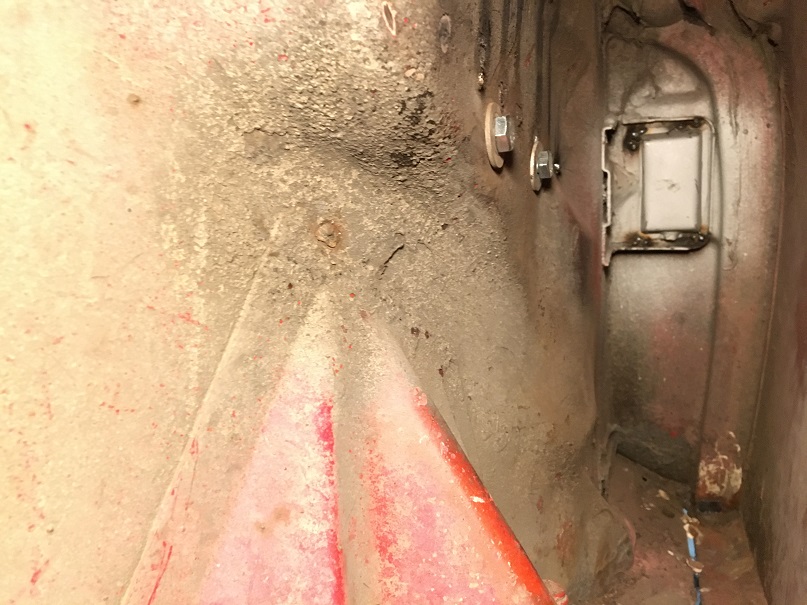 |
|
|
|
| Root_Werks |
Apr 26 2021, 03:24 PM
Post
#40
|
|
Village Idiot Group: Members Posts: 8,987 Joined: 25-May 04 From: About 15NM from Canada Member No.: 2,105 Region Association: Pacific Northwest |
Really like this thread! You've got some skills, inspiring!
|
|
|
|
|
3 User(s) are reading this topic (3 Guests and 0 Anonymous Users)
0 Members:

|
Lo-Fi Version | Time is now: 26th May 2026 - 07:07 AM |
Invision Power Board
v9.1.4 © 2026 IPS, Inc.