|
|
|
Porsche, and the Porsche crest are registered trademarks of Dr. Ing. h.c. F. Porsche AG.
This site is not affiliated with Porsche in any way. Its only purpose is to provide an online forum for car enthusiasts. All other trademarks are property of their respective owners. |
|
|

  |

| 9146C |
 Dec 20 2020, 12:49 PM Dec 20 2020, 12:49 PM
Post
#1
|
|
Member  Group: Members Posts: 228 Joined: 14-September 19 From: US Member No.: 23,460 Region Association: None |
OK...so this weekend I was hoping to install my Sail Panel Kit. (I purchased this months ago from an un-named vendor.)
It seems to me that the material is a little sparse in terms of excess to trim. In my opinion, the replacement side pieces barely overlap the edges. I realize the front and rear trim pieces will cover this, but, I expected to have enough material to cover at least to the lip (as per, I think it was Eric Shea's installation post several years ago - link attached). http://www.914world.com/specs/sail_panel_install.php The length of the top piece also is very tight...about 1/8 - 3/16" overlap to the sail panel piece on each end. (That's not over the end...it's just overlapping the weld seam by that amount.) Does this look normal or should there have been a little more material for "forgiveness"? Attached thumbnail(s) 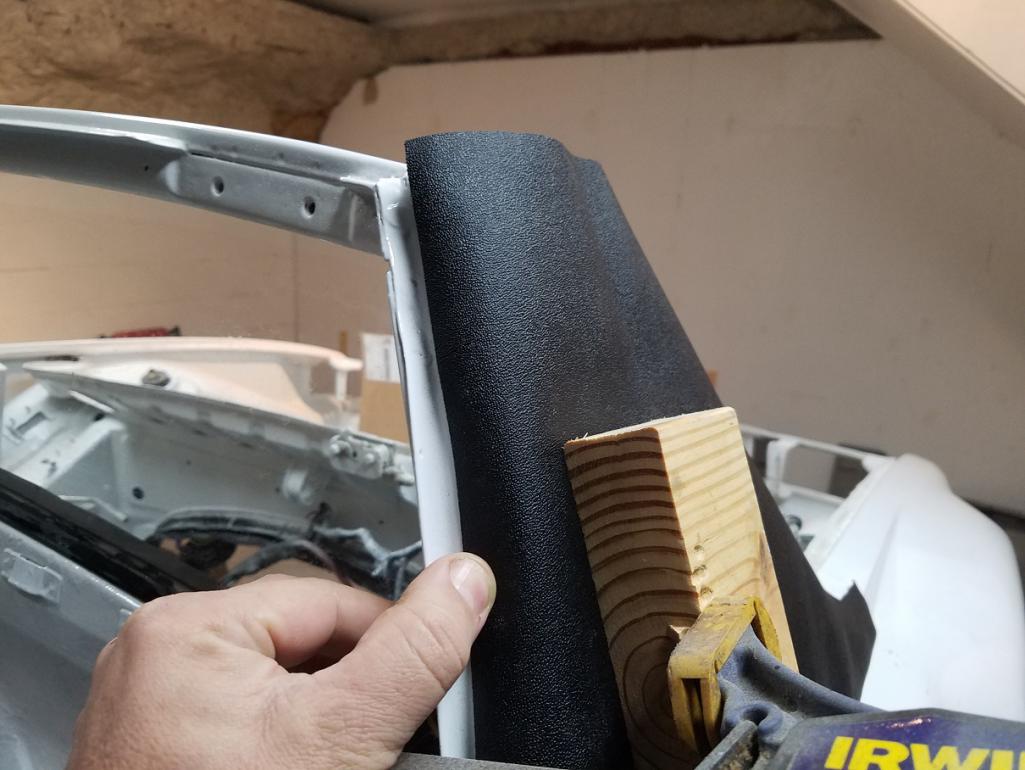 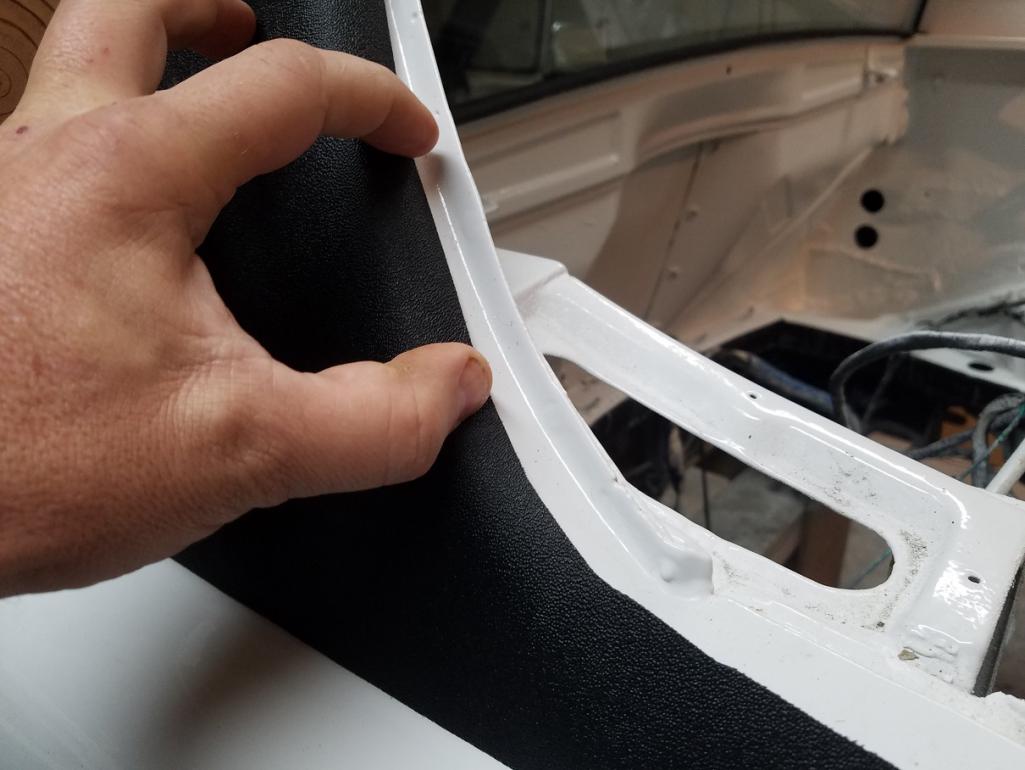
|
   |

 
|
| Aerostatwv |
Dec 20 2020, 01:33 PM
Post
#2
|
|
Member Group: Members Posts: 117 Joined: 13-July 11 From: WV Member No.: 13,315 Region Association: MidAtlantic Region |
Looks like plenty of material. Just use a good spray trim adhesive (I like the 3M products) and you should be just fine.
|
|
|
|
| DRPHIL914 |
Dec 30 2020, 08:51 AM
Post
#3
|
|
Dr. Phil Group: Members Posts: 5,767 Joined: 9-December 09 From: Bluffton, SC Member No.: 11,106 Region Association: South East States |
@9146C did you get this done? I think based on what i can see you should have enough to cover and overlap the edge enough on both front and back, but from your picture, looks like you are overlapping the front more and could slide that back about a 1/4" to get a bit more in the rear.
Phil |
|
|
|
| Cairo94507 |
Dec 30 2020, 09:54 AM
Post
#4
|
|
Michael Group: Members Posts: 9,796 Joined: 1-November 08 From: Auburn, CA Member No.: 9,712 Region Association: Northern California |
I agree with @DRPHIL914 , slide that vinyl over a tiny bit to give a bit more at the back side. You have plenty covering the front side.
I did this on my 2nd Six about 35 years ago.....still remember it. Prepare the sail panel for the vinyl install and make sure it is scuffed and clean to give some bite to the adhesive and use a highly recommended 3M vinyl adhesive. Follow the directions exactly so the vinyl adhesive tacks up on both the sail panel and the vinyl before placing it on the car. Use a nice plastic spreader to work the vinyl down nice and flat. I also used a nice heat lamp (no guns available at the time that I recall) to keep the vinyl workable. Good luck. (IMG:style_emoticons/default/beerchug.gif) |
|
|
|
| DRPHIL914 |
Dec 30 2020, 10:35 AM
Post
#5
|
|
Dr. Phil Group: Members Posts: 5,767 Joined: 9-December 09 From: Bluffton, SC Member No.: 11,106 Region Association: South East States |
QUOTE(Cairo94507 @ Dec 30 2020, 10:54 AM)  I agree with @DRPHIL914 , slide that vinyl over a tiny bit to give a bit more at the back side. You have plenty covering the front side. I did this on my 2nd Six about 35 years ago.....still remember it. Prepare the sail panel for the vinyl install and make sure it is scuffed and clean to give some bite to the adhesive and use a highly recommended 3M vinyl adhesive. Follow the directions exactly so the vinyl adhesive tacks up on both the sail panel and the vinyl before placing it on the car. Use a nice plastic spreader to work the vinyl down nice and flat. I also used a nice heat lamp (no guns available at the time that I recall) to keep the vinyl workable. Good luck. (IMG:style_emoticons/default/beerchug.gif) (IMG:style_emoticons/default/agree.gif) yes i left that out but exactly, i just did mine again this year and finally got it right, but i am a slow learner and did it over 2x, due to bubbles etc. that was a couple issues- poor planning and preparation, and not using the correct adhesive - and have an extra hand and helper . i lined it all up with tape on top bottom and sides, then marked it in multiple locations and then cut the tape so i had land marks to line it up as we re applied it. start at the top , and work your way down, once it touches its a done deal. you cannot lift it back up you would have to start over, so keep it tight pulling out and away, giving just enough slack to slowly press it down and into place, making sure you stay in position and it lines up as you go. Good luck!! |
|
|
|
| 9146C |
Dec 30 2020, 11:45 AM
Post
#6
|
|
Member Group: Members Posts: 228 Joined: 14-September 19 From: US Member No.: 23,460 Region Association: None |
Thank you for the feedback Gentlemen!
I bought a second vinyl kit from 914Rubber...that kit had more material...especially for the sail panel overlap and about 3/8" longer for the top piece. Actually installed yesterday (my first time doing this was 18 years ago when I initially bought this car). I went with 3M 08090 spray adhesive. Turned out well with no bumps/bubbles (so far!). I used a seam roller on the vinyl after application onto the targa bar and a 500W halogen lamp for heat. Thank you again for the feedback! Attached thumbnail(s) 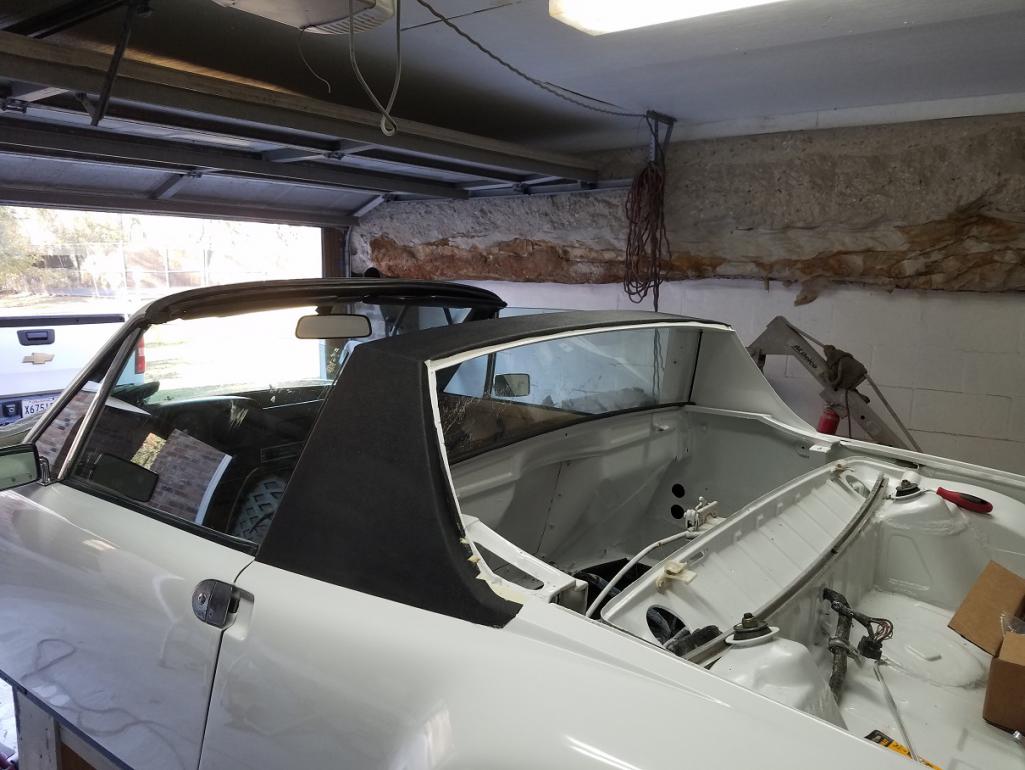
|
|
|
|
| DRPHIL914 |
Dec 30 2020, 12:11 PM
Post
#7
|
|
Dr. Phil Group: Members Posts: 5,767 Joined: 9-December 09 From: Bluffton, SC Member No.: 11,106 Region Association: South East States |
looks great! i also found my set from 914rubber had more material than another company's.
|
|
|
|
|
1 User(s) are reading this topic (1 Guests and 0 Anonymous Users)
0 Members:

|
Lo-Fi Version | Time is now: 29th May 2024 - 02:57 AM |
Invision Power Board
v9.1.4 © 2024 IPS, Inc.