|
|
|
Porsche, and the Porsche crest are registered trademarks of Dr. Ing. h.c. F. Porsche AG.
This site is not affiliated with Porsche in any way. Its only purpose is to provide an online forum for car enthusiasts. All other trademarks are property of their respective owners. |
|
|

  |

| rfinegan |
 Jan 7 2022, 12:10 PM Jan 7 2022, 12:10 PM
Post
#221
|
|
Senior Member  Group: Members Posts: 1,204 Joined: 8-February 13 From: NC Member No.: 15,499 Region Association: MidAtlantic Region |
tomorrow will be pistons rings and cylinders ....for head geometry and clearance checking for 2 new push rods
|
   |

 
|
| rfinegan |
Jan 10 2022, 06:20 AM
Post
#222
|
|
Senior Member Group: Members Posts: 1,204 Joined: 8-February 13 From: NC Member No.: 15,499 Region Association: MidAtlantic Region |
Tips of the Day:
When installing the last lock ring for the pistons pins, place a rag under the piston before installing/ trying to install the lock ring. * Best case, the rag will catch the pin when you drop it or it flys off. * Worst Case, you forgot about the rag and the lock ring falls inside the engine case Good news is it only took 30 mins to pull the piston /cylinder and go fishing with a magnet to get the lock ring out of the case |
|
|
|
| rfinegan |
Jan 15 2022, 11:54 AM
Post
#223
|
|
Senior Member Group: Members Posts: 1,204 Joined: 8-February 13 From: NC Member No.: 15,499 Region Association: MidAtlantic Region |
A big thank you to @rick1952 for the head bolt washers...
Heads are torqued and installed with the air guides on both sides Place the paper in the lifter holes to keep debris out (or in my case dropping a cheese head screw into the engine) learned this the hard way with the piston pin retainer springs 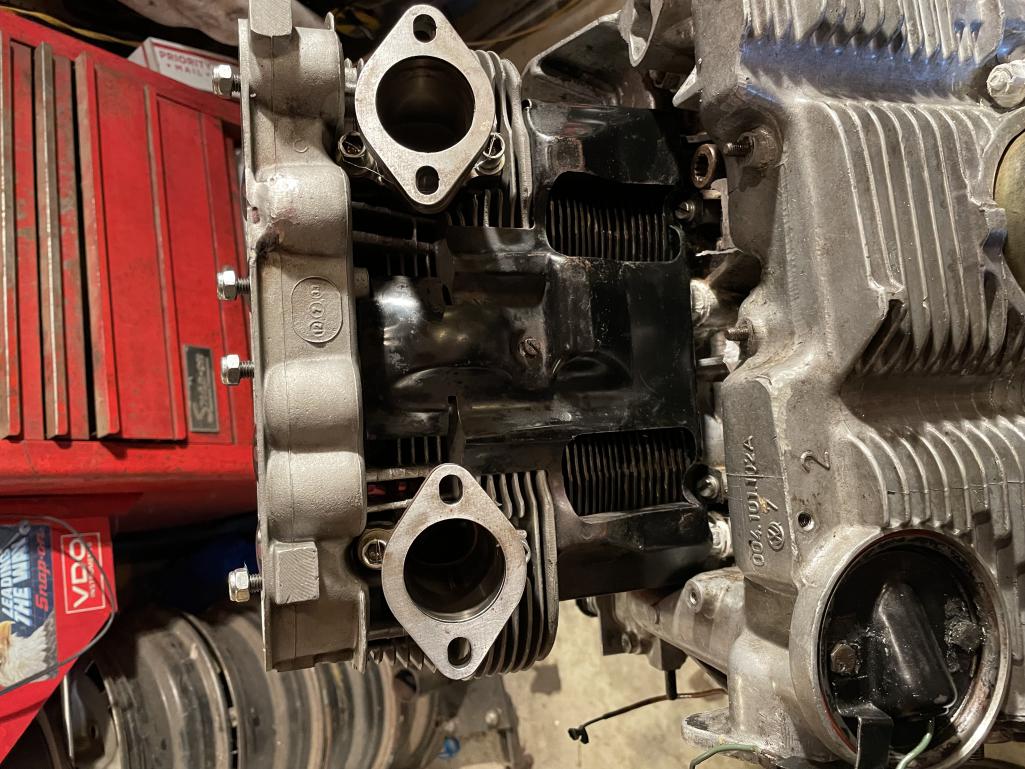 |
|
|
|
| rfinegan |
Jan 15 2022, 11:55 AM
Post
#224
|
|
Senior Member Group: Members Posts: 1,204 Joined: 8-February 13 From: NC Member No.: 15,499 Region Association: MidAtlantic Region |
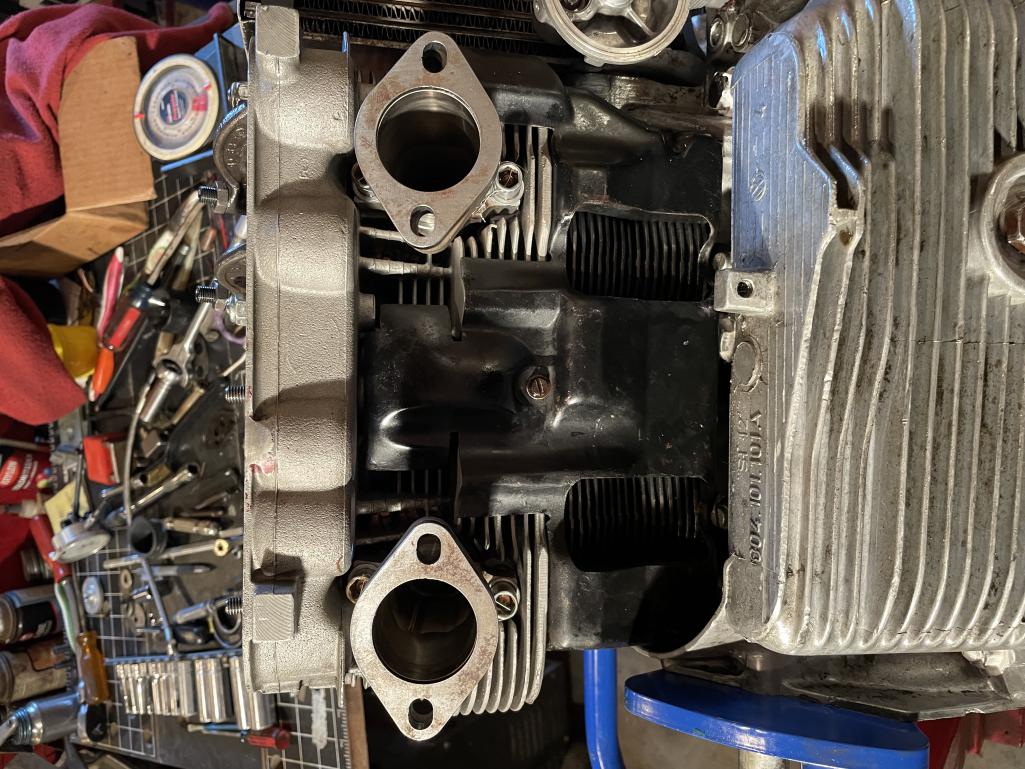
other side:
 |
|
|
|
| 930cabman |
Jan 15 2022, 04:00 PM
Post
#225
|
|
Advanced Member Group: Members Posts: 4,704 Joined: 12-November 20 From: Buffalo Member No.: 24,877 Region Association: North East States |
Looking good. I used a strip of duct tape to cover the lifter holes, cheap, easy and every mechanic should always have some on hand at all times
|
 |
|
| rfinegan |
Jan 16 2022, 09:31 AM
Post
#226
|
|
Senior Member Group: Members Posts: 1,204 Joined: 8-February 13 From: NC Member No.: 15,499 Region Association: MidAtlantic Region |
@930cabman thanks for the tips with the duct tape or painters tape. Also for the support during the build. Getting close as I finish up the valve geometry for the two replacement push rods and checking the clearance of the 911 swivel rocker tips to rockers.
Best Regards -Robert QUOTE(930cabman @ Jan 15 2022, 02:00 PM)  Looking good. I used a strip of duct tape to cover the lifter holes, cheap, easy and every mechanic should always have some on hand at all times |
|
|
|
| Mark Henry |
Jan 16 2022, 09:39 AM
Post
#227
|
|
that's what I do! Group: Members Posts: 20,065 Joined: 27-December 02 From: Port Hope, Ontario Member No.: 26 Region Association: Canada |
QUOTE(930cabman @ Jan 15 2022, 05:00 PM) Looking good. I used a strip of duct tape to cover the lifter holes, cheap, easy and every mechanic should always have some on hand at all times I use an extra large leaf bag and bag the engine whenever I'm not working on it. |
|
|
|
| rfinegan |
Jan 16 2022, 10:34 AM
Post
#228
|
|
Senior Member Group: Members Posts: 1,204 Joined: 8-February 13 From: NC Member No.: 15,499 Region Association: MidAtlantic Region |
@mark henry This is a great tip!
QUOTE(Mark Henry @ Jan 16 2022, 07:39 AM) QUOTE(930cabman @ Jan 15 2022, 05:00 PM) Looking good. I used a strip of duct tape to cover the lifter holes, cheap, easy and every mechanic should always have some on hand at all times I use an extra large leaf bag and bag the engine whenever I'm not working on it. |
|
|
|
| Mark Henry |
Jan 16 2022, 10:43 AM
Post
#229
|
|
that's what I do! Group: Members Posts: 20,065 Joined: 27-December 02 From: Port Hope, Ontario Member No.: 26 Region Association: Canada |
QUOTE(rfinegan @ Jan 16 2022, 11:34 AM) @mark henry This is a great tip! QUOTE(Mark Henry @ Jan 16 2022, 07:39 AM) QUOTE(930cabman @ Jan 15 2022, 05:00 PM) Looking good. I used a strip of duct tape to cover the lifter holes, cheap, easy and every mechanic should always have some on hand at all times I use an extra large leaf bag and bag the engine whenever I'm not working on it. With heads on the bag is too small to bag the engine from front to back, I put it on sideways, valve cover to valve cover and it just fits a /4. For a /6 I cut and tape up two bags together. |
|
|
|
| rfinegan |
Jan 31 2022, 05:53 PM
Post
#230
|
|
Senior Member Group: Members Posts: 1,204 Joined: 8-February 13 From: NC Member No.: 15,499 Region Association: MidAtlantic Region |
COLD OUT SIDE!
Cut and replace the 2 bent push rods. I scribed the OAL length and the cylinder number on each pushrod. So cutting to required length was EZ. Both intake push rod length 10.704in/27.188cm and within 0.001" of each other Next add the push rod tubes and lifters and set up the rocker shafts... |
|
|
|
| Root_Werks |
Feb 1 2022, 10:59 AM
Post
#231
|
|
Village Idiot Group: Members Posts: 9,002 Joined: 25-May 04 From: About 15NM from Canada Member No.: 2,105 Region Association: Pacific Northwest |
Getting closer!
Tried to read back through the thread, you keeping FI or carbs? |
|
|
|
| rfinegan |
Feb 1 2022, 12:45 PM
Post
#232
|
|
Senior Member Group: Members Posts: 1,204 Joined: 8-February 13 From: NC Member No.: 15,499 Region Association: MidAtlantic Region |
I have been happy with the early Italian Weber 44 carbs and the Pierce manifolds... but I do have a set of 40idfs too. Cam shaft is too big for Djet. Maybe ok for LJet (I have one saved if I get tired of carbs)
QUOTE(Root_Werks @ Feb 1 2022, 08:59 AM) Getting closer! Tried to read back through the thread, you keeping FI or carbs? |
|
|
|
| rfinegan |
Feb 2 2022, 07:02 AM
Post
#233
|
|
Senior Member Group: Members Posts: 1,204 Joined: 8-February 13 From: NC Member No.: 15,499 Region Association: MidAtlantic Region |
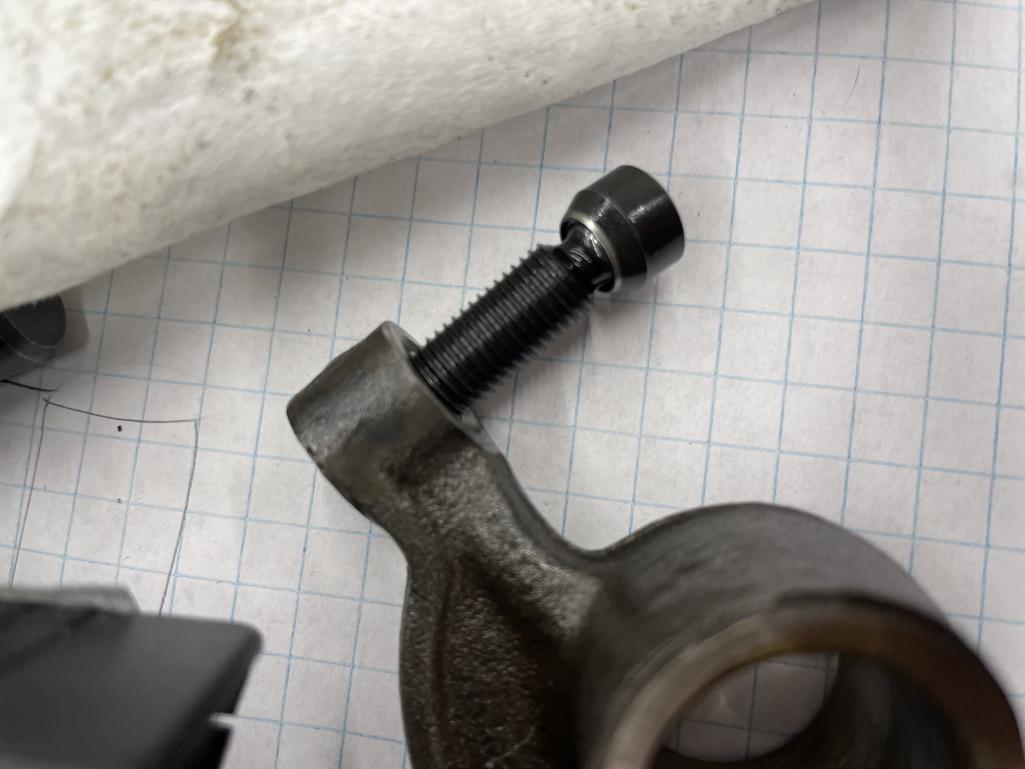
I am not sure if this is the problems the caused my issues but the swivel feet should not touch the rocker arms!
Here is a a pic of the before and after with the addition under cut 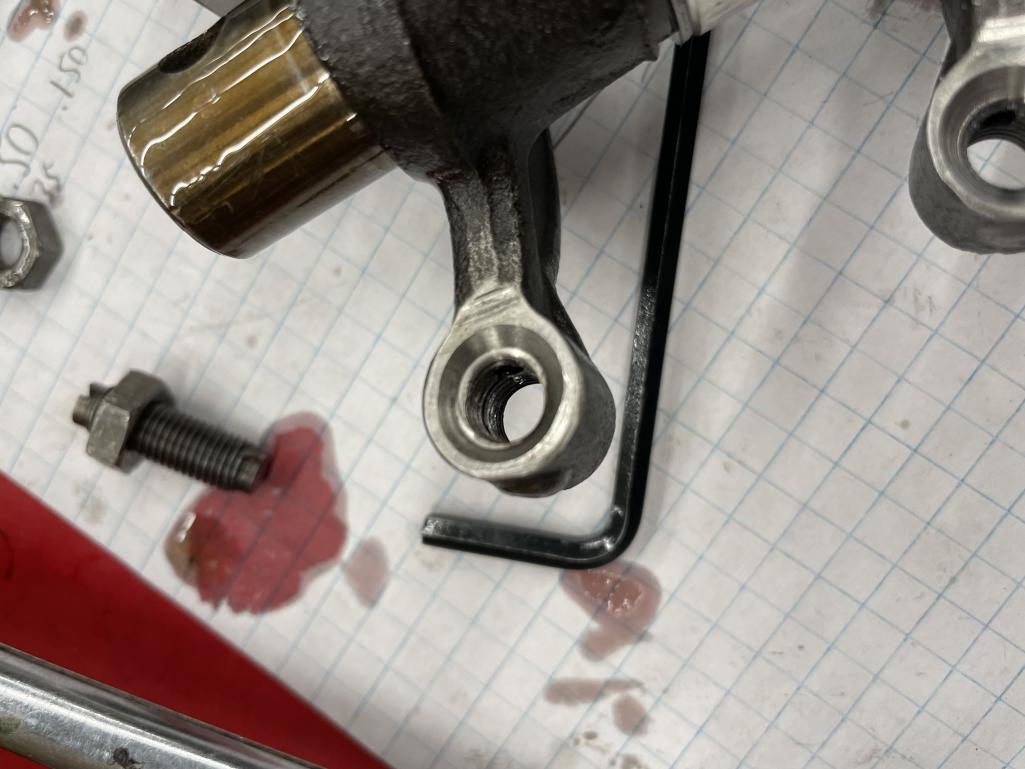 |
|
|
|
| rfinegan |
Feb 2 2022, 07:03 AM
Post
#234
|
|
Senior Member Group: Members Posts: 1,204 Joined: 8-February 13 From: NC Member No.: 15,499 Region Association: MidAtlantic Region |
with additional clearance
 |
|
|
|
| rfinegan |
Feb 2 2022, 07:04 AM
Post
#235
|
|
Senior Member Group: Members Posts: 1,204 Joined: 8-February 13 From: NC Member No.: 15,499 Region Association: MidAtlantic Region |
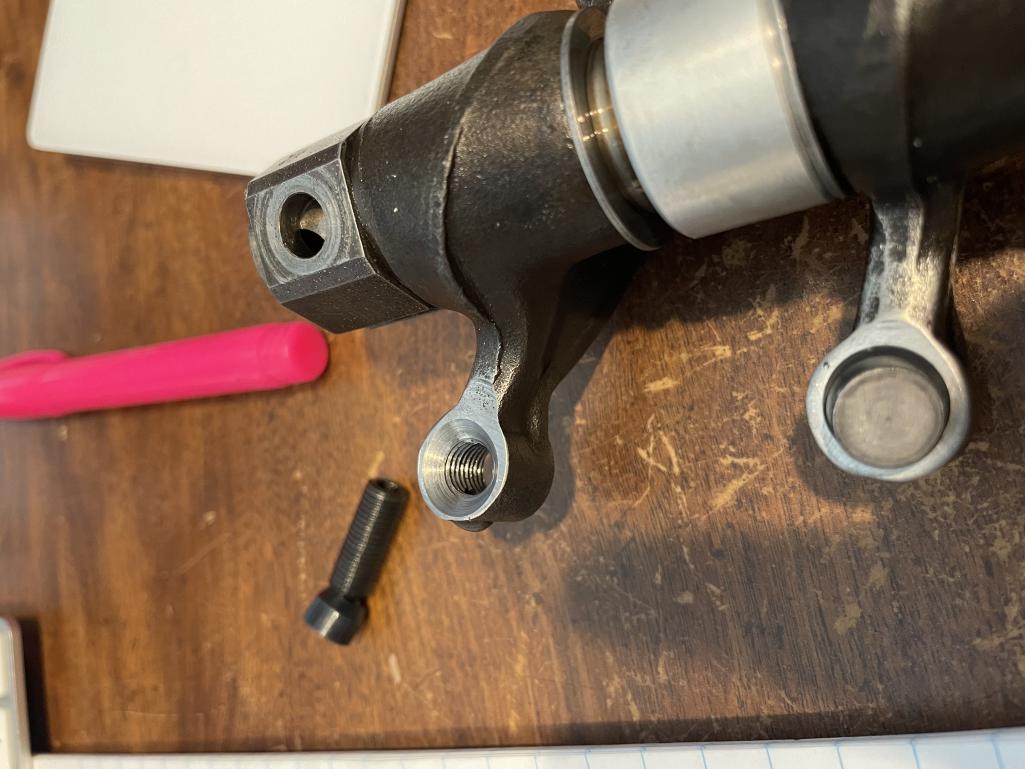
and here is #3 intake (one that bent valve) the pic above on #1 intake
 |
|
|
|
| rfinegan |
Feb 2 2022, 07:09 AM
Post
#236
|
|
Senior Member Group: Members Posts: 1,204 Joined: 8-February 13 From: NC Member No.: 15,499 Region Association: MidAtlantic Region |
After a quick clean up , they will be ready to go back in the heads and button things up with a valve lash of 0.001"-0.002" and new valve cover gaskets. This is for a little extra oil in the elephant feet as the engine breaks in again
|
|
|
|
| 930cabman |
Feb 2 2022, 10:44 AM
Post
#237
|
|
Advanced Member Group: Members Posts: 4,704 Joined: 12-November 20 From: Buffalo Member No.: 24,877 Region Association: North East States |
What is your piston to valve clearance?
|
|
|
|
| rfinegan |
Feb 2 2022, 10:55 AM
Post
#238
|
|
Senior Member Group: Members Posts: 1,204 Joined: 8-February 13 From: NC Member No.: 15,499 Region Association: MidAtlantic Region |
With the new 0.050" valve notches in the pistons I think it end up being :
Intake @ 10 degree first opening. 0.150 in min piston to valve clearance Exhaust 10 degree before closing. 0.118 in min piston to valve clearance |
|
|
|
| 930cabman |
Feb 3 2022, 06:43 PM
Post
#239
|
|
Advanced Member Group: Members Posts: 4,704 Joined: 12-November 20 From: Buffalo Member No.: 24,877 Region Association: North East States |
QUOTE(rfinegan @ Feb 2 2022, 11:55 AM) With the new 0.050" valve notches in the pistons I think it end up being : Intake @ 10 degree first opening. 0.150 in min piston to valve clearance Exhaust 10 degree before closing. 0.118 in min piston to valve clearance Should be fine. Best of luck |
|
|
|
| rfinegan |
Feb 5 2022, 02:25 PM
Post
#240
|
|
Senior Member Group: Members Posts: 1,204 Joined: 8-February 13 From: NC Member No.: 15,499 Region Association: MidAtlantic Region |
Today added the push rod tubes and the rocker arms and mocked up the headers for the thermostat
Addition clearance is needed to mount a thermostat with the use of these headers. SO making a new bracket to check the clearance and function 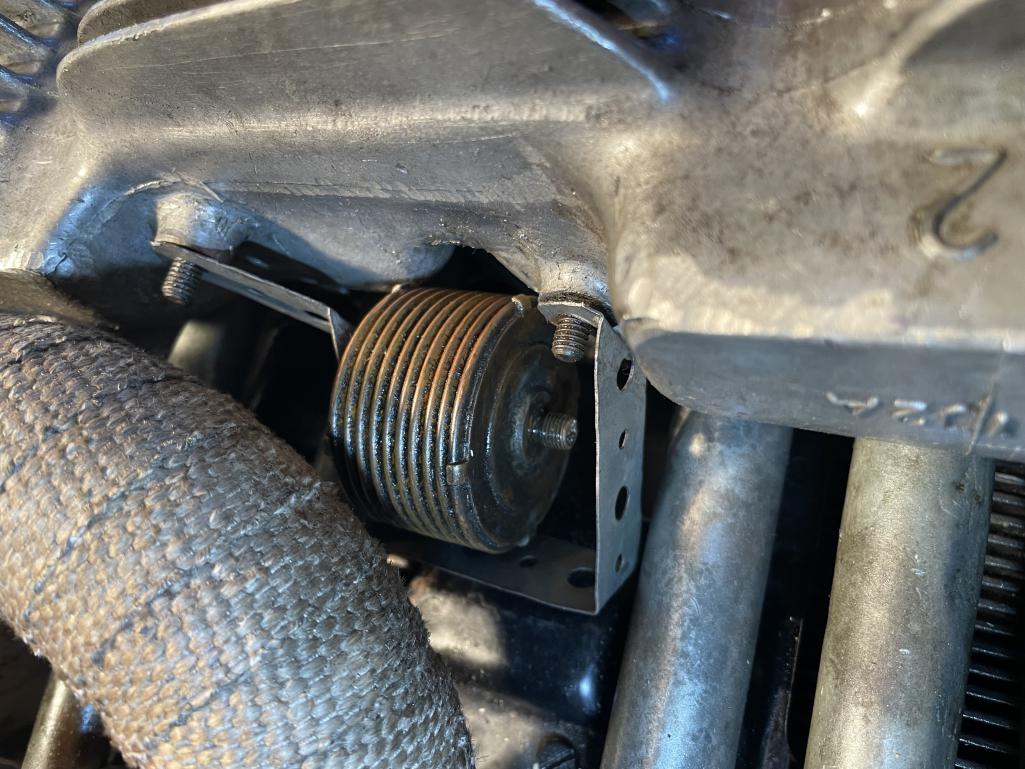 |
|
|
|
|
1 User(s) are reading this topic (1 Guests and 0 Anonymous Users)
0 Members:

|
Lo-Fi Version | Time is now: 15th June 2026 - 04:52 AM |
Invision Power Board
v9.1.4 © 2026 IPS, Inc.