|
|

|
Porsche, and the Porsche crest are registered trademarks of Dr. Ing. h.c. F. Porsche AG.
This site is not affiliated with Porsche in any way. Its only purpose is to provide an online forum for car enthusiasts. All other trademarks are property of their respective owners. |
|
|
  |
| BillJ |
 Jan 26 2021, 03:20 PM Jan 26 2021, 03:20 PM
Post
#1
|
|
Senior Member    Group: Members Posts: 1,091 Joined: 4-March 13 From: charlotte, NC Member No.: 15,610 Region Association: None 
|
When i got my new fuel tank from Dansk it turns out that the rib that runs along the top of the tank is too tall for the mounting strap and guide. This means that when you tighten it down it does a beautiful job of destroying your plastic guide.
Attached thumbnail(s) 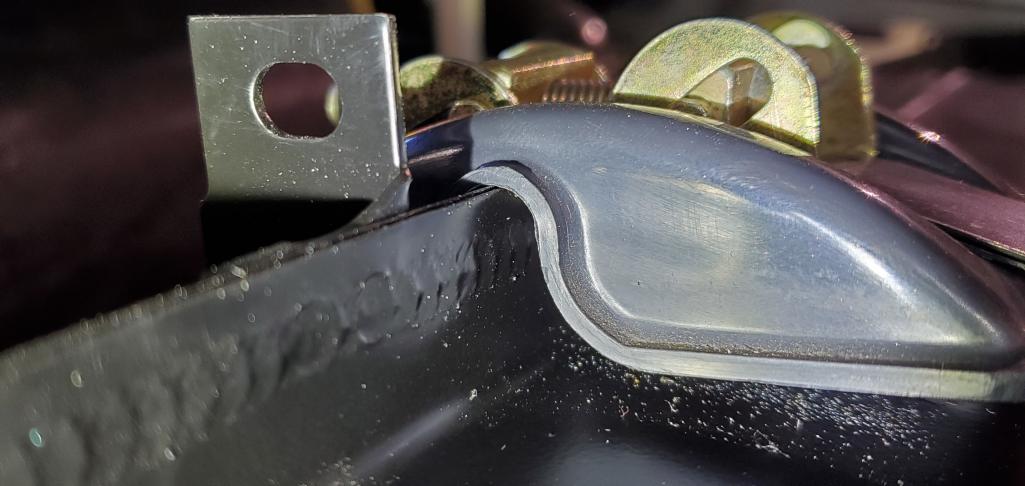 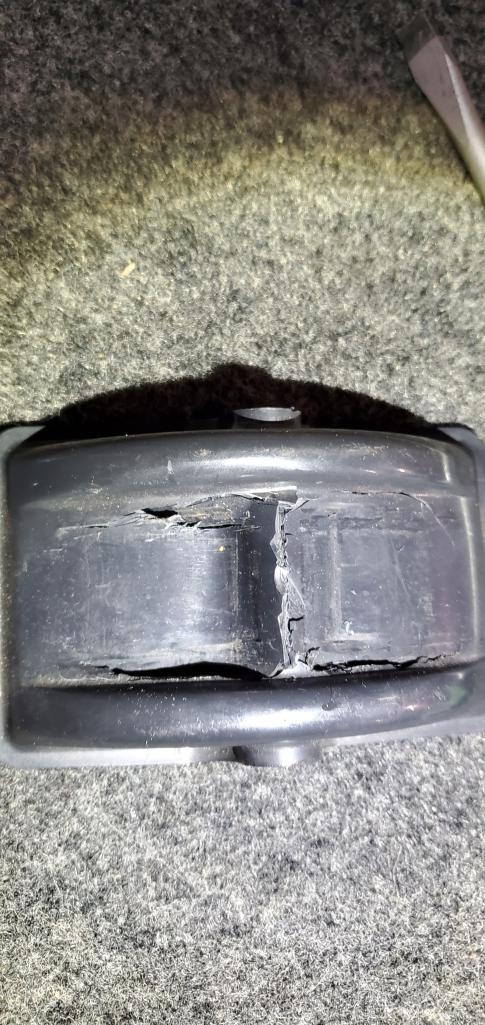
|
| BillJ |
 Jan 26 2021, 03:26 PM Jan 26 2021, 03:26 PM
Post
#2
|
|
Senior Member    Group: Members Posts: 1,091 Joined: 4-March 13 From: charlotte, NC Member No.: 15,610 Region Association: None 
|
A fix is trim off some of the material under the guide but before you hit the weld. Start by marking where the ends of the plastic guide land then taking the tank out.
 You should also replace the fuel filter screen that sits inside the tank if you havent already. I hadnt yet and bought a new one prior to putting fuel in the new tank. It was really brittle.and rusty. It tore to pieces taking it off. Attached thumbnail(s) 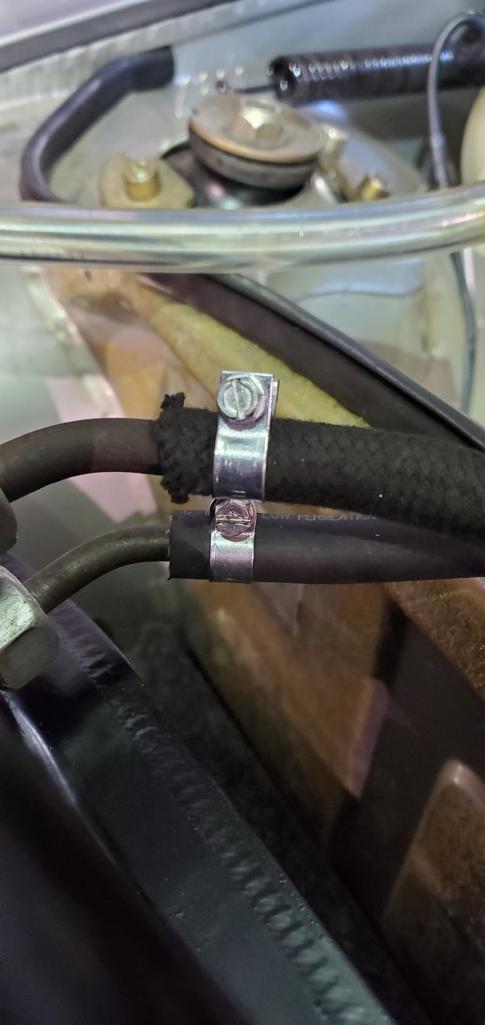 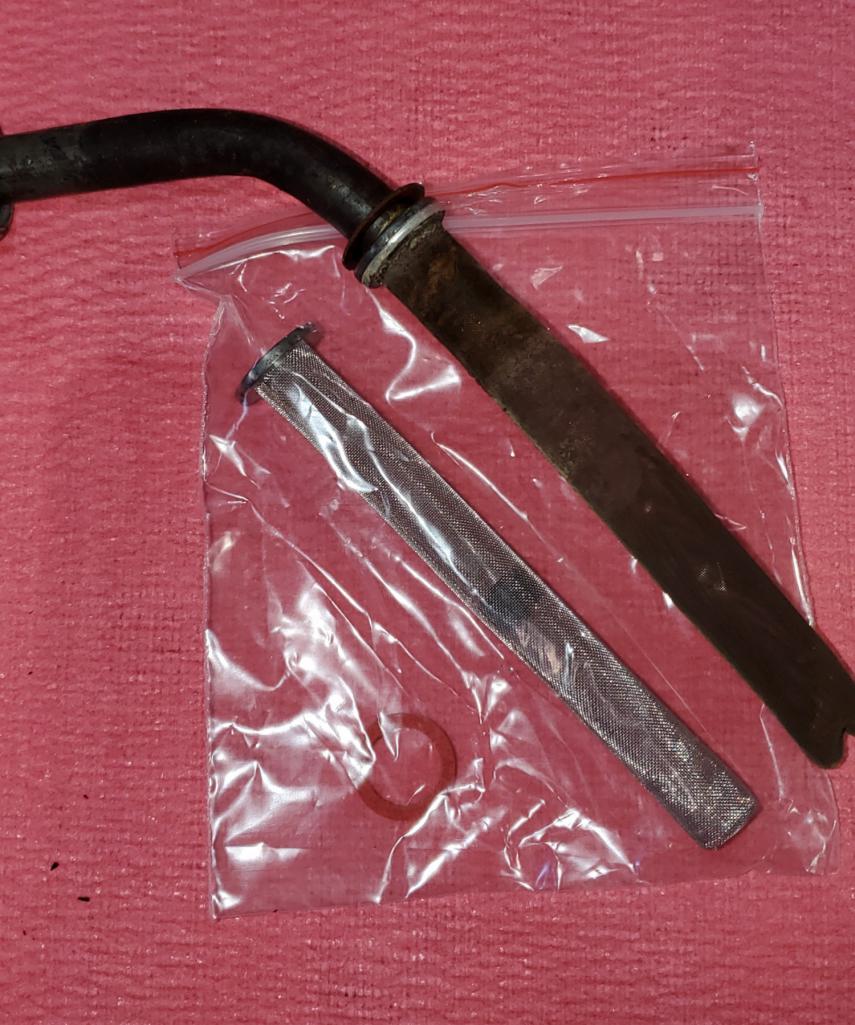 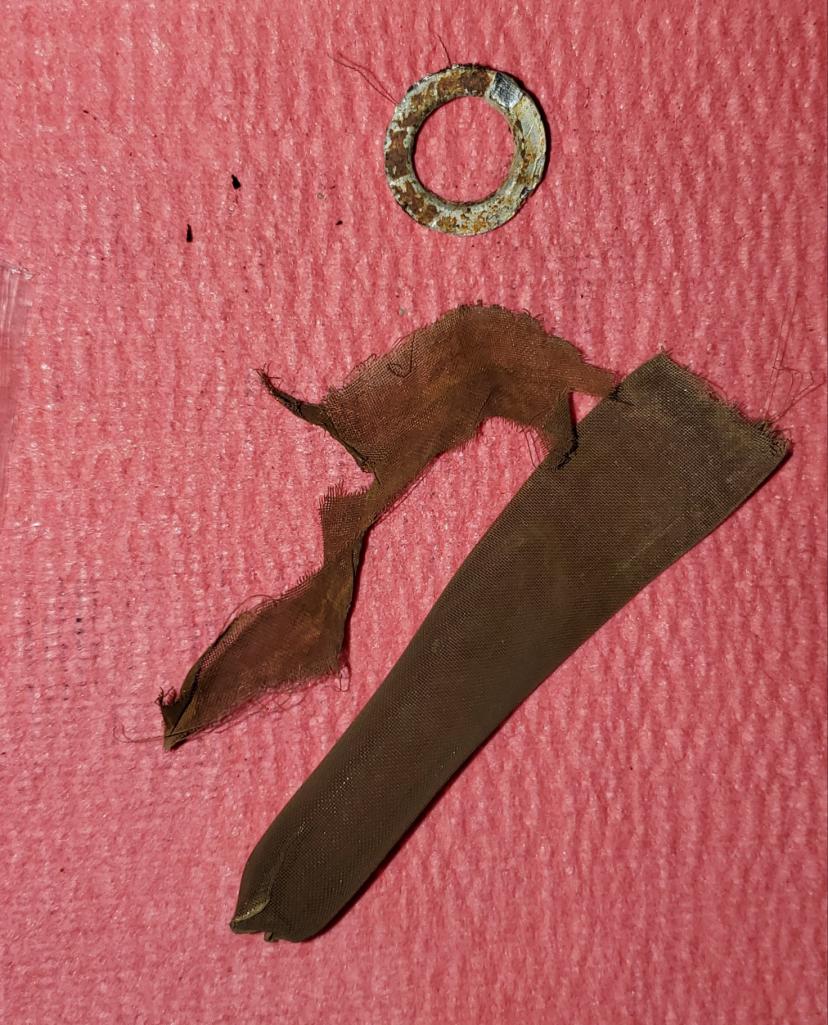
|
| aturboman |
 Jan 26 2021, 03:31 PM Jan 26 2021, 03:31 PM
Post
#3
|
|
Member   Group: Members Posts: 135 Joined: 18-October 11 From: CA Member No.: 13,687 Region Association: None |
Had the same experience with my Dansk tank.
Since the car getting the repro tank isn’t concourse I shimmed the strap bridge with a couple thick pieces of flat rubber pad on each side to raise it enough to clear the taller seam. It’s hardly seen when installed. I did this because I already had my tank and everything else installed and painted and didn’t want to cut metal. |
| BillJ |
 Jan 26 2021, 03:38 PM Jan 26 2021, 03:38 PM
Post
#4
|
|
Senior Member    Group: Members Posts: 1,091 Joined: 4-March 13 From: charlotte, NC Member No.: 15,610 Region Association: None 
|
Next, using a cutting wheel in my case, carefully remove about 10mm or so of material off the rib. Just go slow.
 Once complete paint the exposed metal to prevent rust. Your car has enough already from the factory (IMG:style_emoticons/default/biggrin.gif) Then reassemble and take care to put the hoses back properly. I marked mine to make sure i did that right. Always use fuel line clamps. This is fuel. 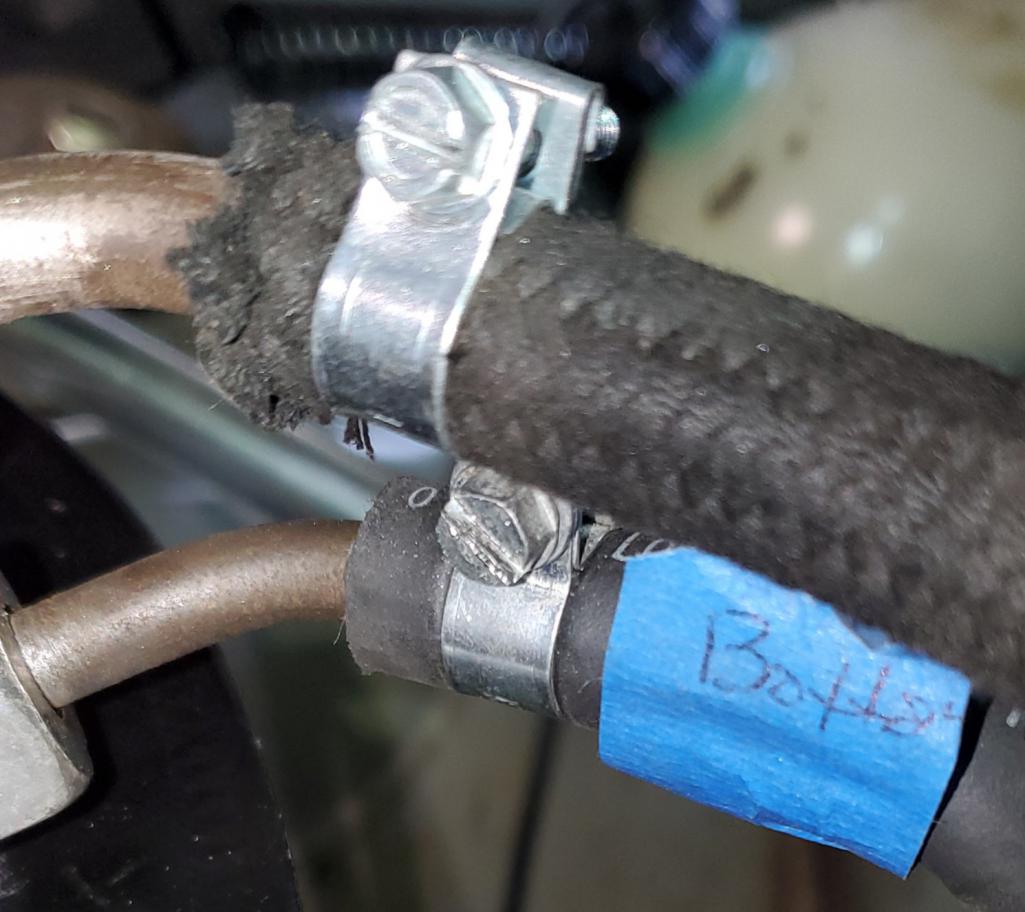 Install tank and enjoy a secure fuel tank. Hope this helps people to tackle this easy project. For me the growing amount of junk inside the old tank made this new tank a no brainer compared to hours of cleaning, sealing, and hoping it worked with the old tank. Attached thumbnail(s) 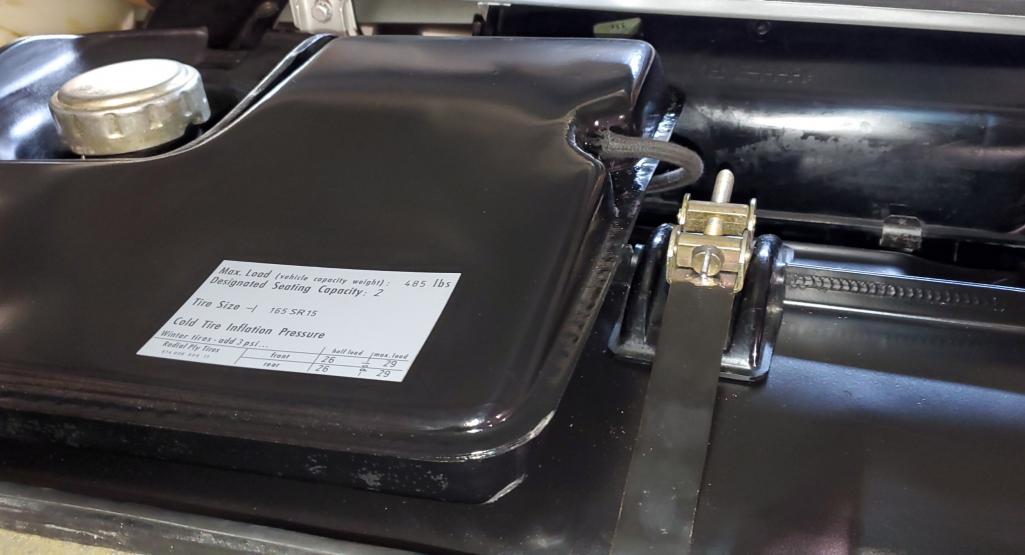
|
| BillJ |
 Jan 26 2021, 03:45 PM Jan 26 2021, 03:45 PM
Post
#5
|
|
Senior Member    Group: Members Posts: 1,091 Joined: 4-March 13 From: charlotte, NC Member No.: 15,610 Region Association: None 
|
I will say you could probably do this with the tank still installed. I am just a chicken when it comes to fuel and hot sparks and metal. Also please note this is not intended to suggest YOU do this, just to illustrate how I did it.
|
| 914Sixer |
 Jan 27 2021, 08:08 PM Jan 27 2021, 08:08 PM
Post
#6
|
|
914 Guru      Group: Members Posts: 8,870 Joined: 17-January 05 From: San Angelo Texas Member No.: 3,457 Region Association: Southwest Region 
|
What about gluing some rubber pads on to the plastic mount on both sides?
Piece of factory style carpet? |
| raynekat |
 Jan 27 2021, 09:53 PM Jan 27 2021, 09:53 PM
Post
#7
|
|
Advanced Member     Group: Members Posts: 2,154 Joined: 30-December 14 From: Coeur d'Alene, Idaho Member No.: 18,263 Region Association: Pacific Northwest 
|
|
| BillJ |
 Jan 27 2021, 10:59 PM Jan 27 2021, 10:59 PM
Post
#8
|
|
Senior Member    Group: Members Posts: 1,091 Joined: 4-March 13 From: charlotte, NC Member No.: 15,610 Region Association: None 
|
Of course if you do this to the tank when you first get it then you are just triming the rib and installing. Just showing an option and helping inform.
|
  |
1 User(s) are reading this topic (1 Guests and 0 Anonymous Users)
0 Members:

|
Lo-Fi Version | Time is now: 26th April 2024 - 04:26 PM |
Invision Power Board
v9.1.4 © 2024 IPS, Inc.


