|
|
|
Porsche, and the Porsche crest are registered trademarks of Dr. Ing. h.c. F. Porsche AG.
This site is not affiliated with Porsche in any way. Its only purpose is to provide an online forum for car enthusiasts. All other trademarks are property of their respective owners. |
|
|


| Morph914 |
 Apr 3 2021, 09:43 AM Apr 3 2021, 09:43 AM
Post
#1
|
|
Member  Group: Members Posts: 435 Joined: 22-August 16 From: St Augustine, FL Member No.: 20,326 Region Association: South East States |
I would take installing the air box 5 times, over putting this seal in. I cannot get it to conform at the top where it makes the bend. (IMG:style_emoticons/default/headbang.gif)
I have tried heating the rubber in this area to get it to conform to the bend without any luck. The 914 rubber piece is reinforced in the exact location that it needs to make the bend. Not sure what to do at this point. (IMG:style_emoticons/default/hissyfit.gif) You can see where the original piece is bent. 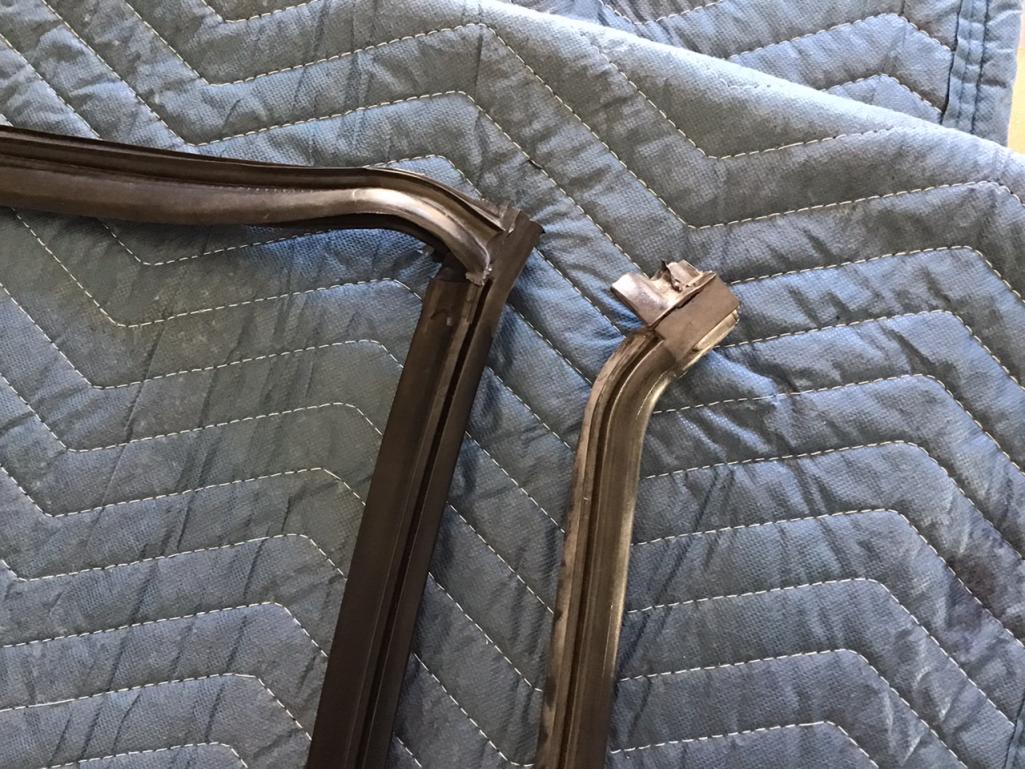 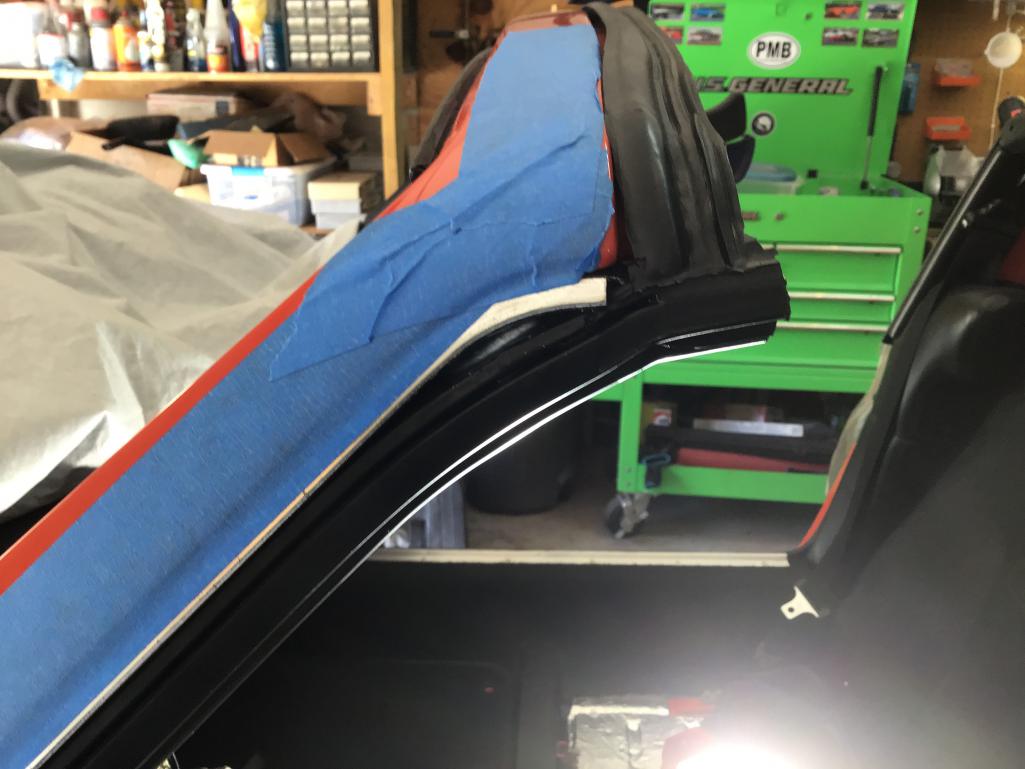 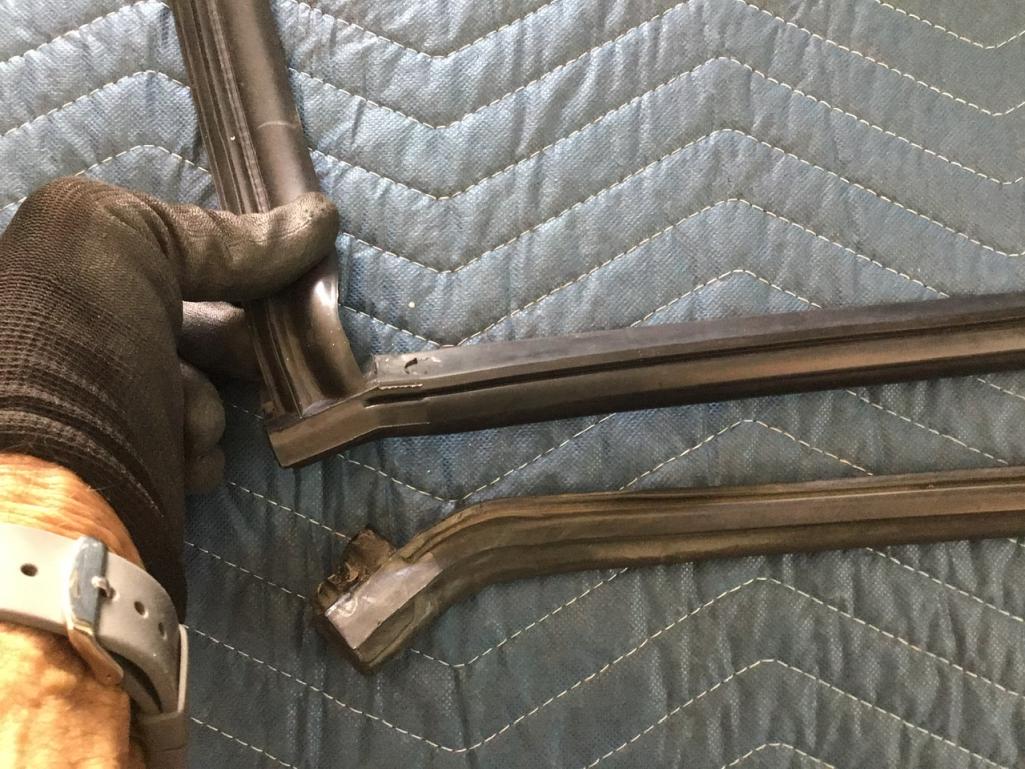 |
   |

 
|
  |
Replies
| forrestkhaag |
Apr 3 2021, 05:36 PM
Post
#2
|
|
Senior Member Group: Members Posts: 935 Joined: 21-April 14 From: Scottsdale, Arizona Member No.: 17,273 Region Association: Southwest Region |
I did this fix very recently and found that there is a small tab or blade of metal on the body at the two channel tops that became my starting point for installation. I pushed the 914 Rubber piece onto that tab, (and there may be a screw involved on some cars) and then proceeded to manhandle the corners into their correct fit.
The middle top of the seal was dangling as were the two channel pieces at that point but the two corners were tight and felt and looked rightish. I used a mixture of fruity soap, hand lotion, green liquid dish soap (color matters) and beer to lube the vertical channels and me and then pushed the interior side into the channel inch by inch with a well rounded 9" long plastic tool (used in the Tiffany method of stained glass/ copper foil artwork). Then with the careful application of more and more beer, and a careful dousing of the lube recipe noted herein, i pushed the exterior side of the channel-rubber into the aluminum channel. From the factory the aluminum channel is crimped to trap the factory seal so gently pry open that part of the channel or you will not get the vertical all in. Lastly, dont have any more beer and get out your new sharp 4" long blade and clamp it in vice grips, dip it in your lube solution and gently saw off the extra seal at the bottom AND NOTE HOW THE DOOR CLOSES TO FIND THE PERFECT ANGLE FOR THE BOTTOM CUT. Sidebar: If you screw it up (IMG:style_emoticons/default/hissyfit.gif) (IMG:style_emoticons/default/sheeplove.gif) , 914 Rubber has more for sale............ (IMG:style_emoticons/default/beerchug.gif) |
|
|
|
Posts in this topic
 Morph914 Main Targa seal Apr 3 2021, 09:43 AM
 AFyrigos I just received a new rubber as well. Haven’t st... Apr 3 2021, 10:17 AM
 Morph914
I just received a new rubber as well. Haven’t s... Apr 3 2021, 12:28 PM mgphoto I did this about a year ago, work from the top dow... Apr 3 2021, 11:39 AM Morph914
I did this about a year ago, work from the top do... Apr 3 2021, 12:30 PM Garland I think when I did mine I left the center part off... Apr 3 2021, 02:30 PM Morph914
I did this fix very recently and found that there... Apr 3 2021, 08:45 PM windforfun Be patient & take another look at the problem. Apr 3 2021, 08:11 PM Mikey914 The rubber can only be molded when it's in it... Apr 4 2021, 04:24 AM Morph914
The rubber can only be molded when it's in it... Apr 4 2021, 11:33 AM sb914 I have never been able to put my targa top on sinc... Apr 4 2021, 11:44 AM Midway
I have never been able to put my targa top on sin... Apr 5 2021, 06:16 AM zfisher6164 See if this helps, the seal went on easier then I ... Apr 4 2021, 11:53 AM Mikey914 This is not an easy seal to replace. The key is to... Apr 4 2021, 04:04 PM windforfun I admire your tenacity. My seals are still kosher... Apr 4 2021, 06:06 PM Literati914
..
In the picture, I have marked where the hard ... Apr 4 2021, 07:48 PM Mikey914
[quote name='Morph914' post='2905445' date='Apr 4... Apr 5 2021, 10:49 PM windforfun Let sleeping dogs sleep. Some things are best lef... Apr 5 2021, 07:09 PM Morph914 Ok, I guess I will need to exchange mine for one t... Apr 6 2021, 10:09 AM Mikey914 That is rubber and part of the corner block. It... Apr 6 2021, 10:38 AM Morph914
That is rubber and part of the corner block. It... Apr 6 2021, 12:09 PM PCH After spending the whole weekend unsuccessfully tr... Apr 6 2021, 12:52 PM horizontally-opposed
After spending the whole weekend unsuccessfully t... Apr 7 2021, 10:12 AM PCH
After spending the whole weekend unsuccessfully ... Apr 7 2021, 11:03 AM Mikey914 The internal joining block should be about 2-1/2... Apr 7 2021, 10:19 AM Morph914
The internal joining block should be about 2-1/2... Apr 7 2021, 07:43 PM 76-914
The internal joining block should be about 2-1/2... Apr 7 2021, 08:07 PM Mikey914 More detail on closure
This is a new seal out of t... Apr 7 2021, 10:34 AM Mikey914 We do appreciate your support and are striving to ... Apr 7 2021, 09:12 PM
Morph914
I just received a new rubber as well. Haven’t s... Apr 3 2021, 12:28 PM mgphoto I did this about a year ago, work from the top dow... Apr 3 2021, 11:39 AM Morph914
I did this about a year ago, work from the top do... Apr 3 2021, 12:30 PM Garland I think when I did mine I left the center part off... Apr 3 2021, 02:30 PM Morph914
I did this fix very recently and found that there... Apr 3 2021, 08:45 PM windforfun Be patient & take another look at the problem. Apr 3 2021, 08:11 PM Mikey914 The rubber can only be molded when it's in it... Apr 4 2021, 04:24 AM Morph914
The rubber can only be molded when it's in it... Apr 4 2021, 11:33 AM sb914 I have never been able to put my targa top on sinc... Apr 4 2021, 11:44 AM Midway
I have never been able to put my targa top on sin... Apr 5 2021, 06:16 AM zfisher6164 See if this helps, the seal went on easier then I ... Apr 4 2021, 11:53 AM Mikey914 This is not an easy seal to replace. The key is to... Apr 4 2021, 04:04 PM windforfun I admire your tenacity. My seals are still kosher... Apr 4 2021, 06:06 PM Literati914
..
In the picture, I have marked where the hard ... Apr 4 2021, 07:48 PM Mikey914
[quote name='Morph914' post='2905445' date='Apr 4... Apr 5 2021, 10:49 PM windforfun Let sleeping dogs sleep. Some things are best lef... Apr 5 2021, 07:09 PM Morph914 Ok, I guess I will need to exchange mine for one t... Apr 6 2021, 10:09 AM Mikey914 That is rubber and part of the corner block. It... Apr 6 2021, 10:38 AM Morph914
That is rubber and part of the corner block. It... Apr 6 2021, 12:09 PM PCH After spending the whole weekend unsuccessfully tr... Apr 6 2021, 12:52 PM horizontally-opposed
After spending the whole weekend unsuccessfully t... Apr 7 2021, 10:12 AM PCH
After spending the whole weekend unsuccessfully ... Apr 7 2021, 11:03 AM Mikey914 The internal joining block should be about 2-1/2... Apr 7 2021, 10:19 AM Morph914
The internal joining block should be about 2-1/2... Apr 7 2021, 07:43 PM 76-914
The internal joining block should be about 2-1/2... Apr 7 2021, 08:07 PM Mikey914 More detail on closure
This is a new seal out of t... Apr 7 2021, 10:34 AM Mikey914 We do appreciate your support and are striving to ... Apr 7 2021, 09:12 PM |
1 User(s) are reading this topic (1 Guests and 0 Anonymous Users)
0 Members:

|
Lo-Fi Version | Time is now: 18th May 2024 - 09:43 PM |
Invision Power Board
v9.1.4 © 2024 IPS, Inc.