|
|
|
Porsche, and the Porsche crest are registered trademarks of Dr. Ing. h.c. F. Porsche AG.
This site is not affiliated with Porsche in any way. Its only purpose is to provide an online forum for car enthusiasts. All other trademarks are property of their respective owners. |
|
|


| Morph914 |
 Apr 3 2021, 09:43 AM Apr 3 2021, 09:43 AM
Post
#1
|
|
Member  Group: Members Posts: 435 Joined: 22-August 16 From: St Augustine, FL Member No.: 20,326 Region Association: South East States |
I would take installing the air box 5 times, over putting this seal in. I cannot get it to conform at the top where it makes the bend. (IMG:style_emoticons/default/headbang.gif)
I have tried heating the rubber in this area to get it to conform to the bend without any luck. The 914 rubber piece is reinforced in the exact location that it needs to make the bend. Not sure what to do at this point. (IMG:style_emoticons/default/hissyfit.gif) You can see where the original piece is bent. 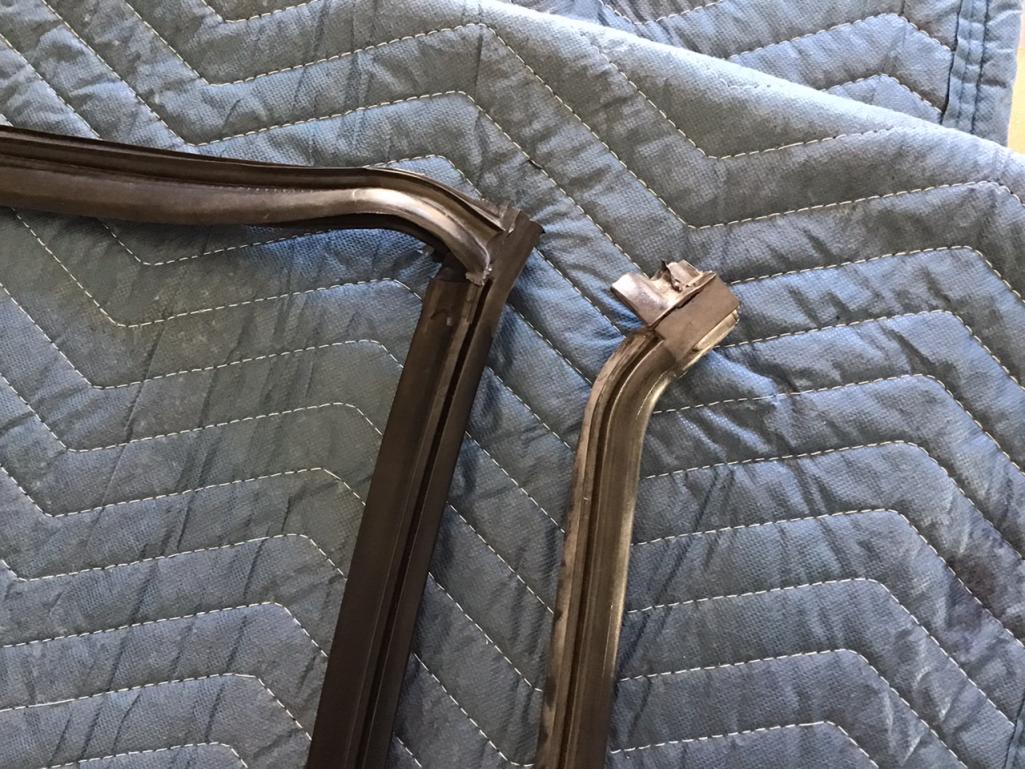 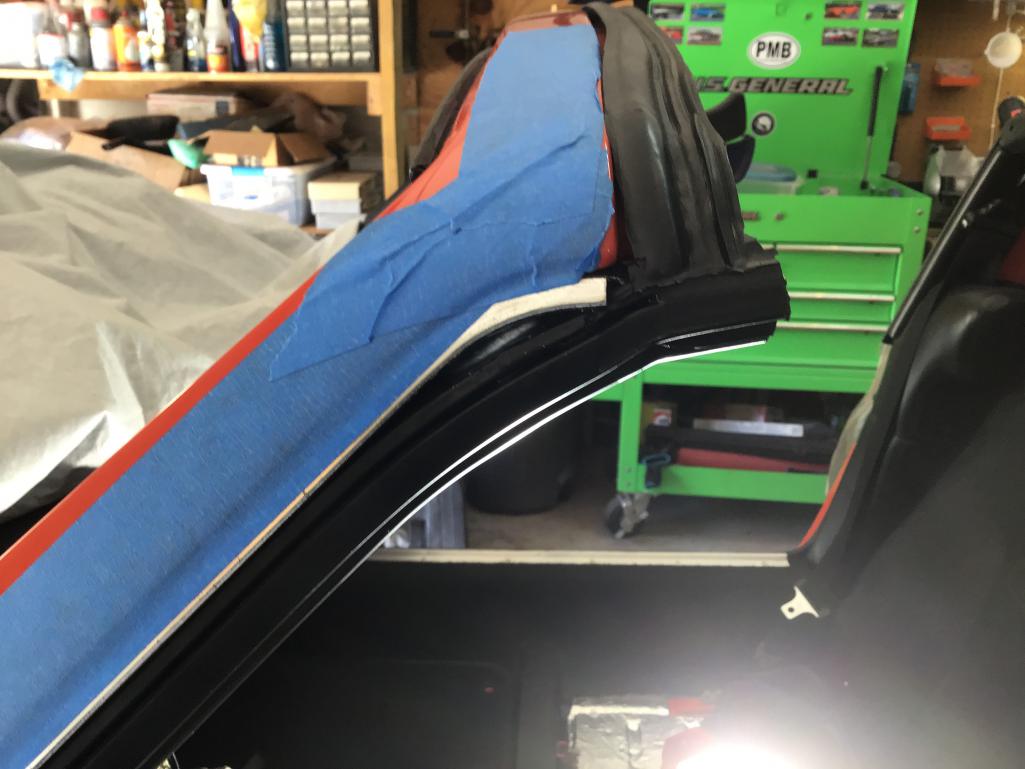 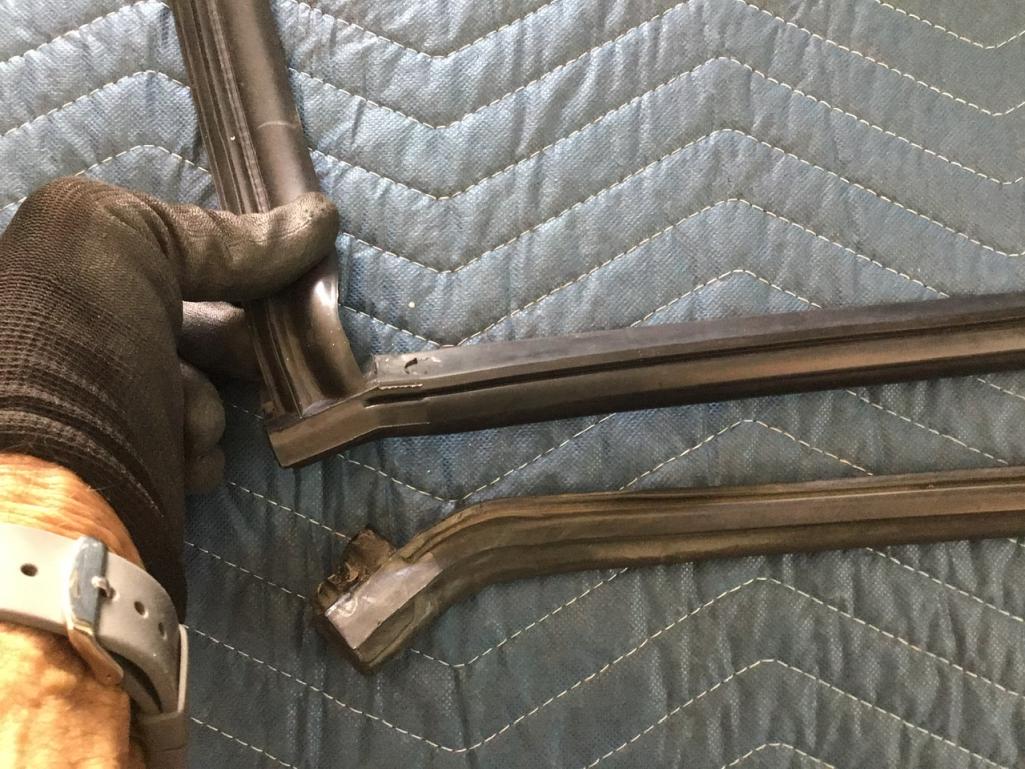 |
   |

 
|
  |
Replies
| Mikey914 |
Apr 4 2021, 04:24 AM
Post
#2
|
|
The rubber man Group: Members Posts: 12,669 Joined: 27-December 04 From: Hillsboro, OR Member No.: 3,348 Region Association: None |
The rubber can only be molded when it's in it's raw form. The heat may make it slightly more pliable, but it's effect is minimal.
The key is doing the sides 1st starting at the top block. Using liquid hand soap Get the back side in 1st by rotating it and pushing in. Slide the block onto the metal "tab". Then push the front rubber lip in by compressing it with a large flat tool You can use a large screw driver if you are careful. This will allow you to put pressure on it. Make sure the next inch or so is engaged in the back and repeat. Also there is a small screw on the inside block of all cars (or at least there should be). You may still have it there if you didn't unscrew as it will break away easily on old brittle seals. Remove this screw and reuse it to install the new seal as it holds the blocks in the corners. For the top start in the center and push on. Soapy water will help here too. Don't pull to one side or the other as you can stretch it while installing and can wind up with too much material if you push hard enough. If you do no problem as you can pull off and start again. It's just best to get it right the 1st time as there is a metal clip internally that holds it on. You will be loosening the clip if you remove and reinstall. Hope this helps Our Wiki page got screwed up and we are having to rebuild it now. Otherwise all this information for install would be on it and I could just point you to it. Mark |
|
|
|
| Morph914 |
Apr 4 2021, 11:33 AM
Post
#3
|
|
Member Group: Members Posts: 435 Joined: 22-August 16 From: St Augustine, FL Member No.: 20,326 Region Association: South East States |
QUOTE(Mikey914 @ Apr 4 2021, 04:24 AM)  The rubber can only be molded when it's in it's raw form. The heat may make it slightly more pliable, but it's effect is minimal. The key is doing the sides 1st starting at the top block. Using liquid hand soap Get the back side in 1st by rotating it and pushing in. Slide the block onto the metal "tab". Then push the front rubber lip in by compressing it with a large flat tool You can use a large screw driver if you are careful. This will allow you to put pressure on it. Make sure the next inch or so is engaged in the back and repeat. Also there is a small screw on the inside block of all cars (or at least there should be). You may still have it there if you didn't unscrew as it will break away easily on old brittle seals. Remove this screw and reuse it to install the new seal as it holds the blocks in the corners. For the top start in the center and push on. Soapy water will help here too. Don't pull to one side or the other as you can stretch it while installing and can wind up with too much material if you push hard enough. If you do no problem as you can pull off and start again. It's just best to get it right the 1st time as there is a metal clip internally that holds it on. You will be loosening the clip if you remove and reinstall. Hope this helps Our Wiki page got screwed up and we are having to rebuild it now. Otherwise all this information for install would be on it and I could just point you to it. Mark I have had success in getting the backside interior lip into the grove using soft soap but it will not stay in at the bend even after getting the exterior lip started. Once I release pressure it simply pops out of the track at the bend. My seal has a hard piece inside that is about 2” long on the left side and smaller on the right side at the exact spot where the bend is supposed to happen. It looks like this is where the top blocks was molded to the vertical part of the seal. This is not allowing it to have flexibility to stay put. I am sorry to be a PITA but out of this entire build this piece has so far given me the most grief. I am not a dumbass hack, this should not be this difficult. In the picture, I have marked where the hard piece is inside the rubber. Is this normal? 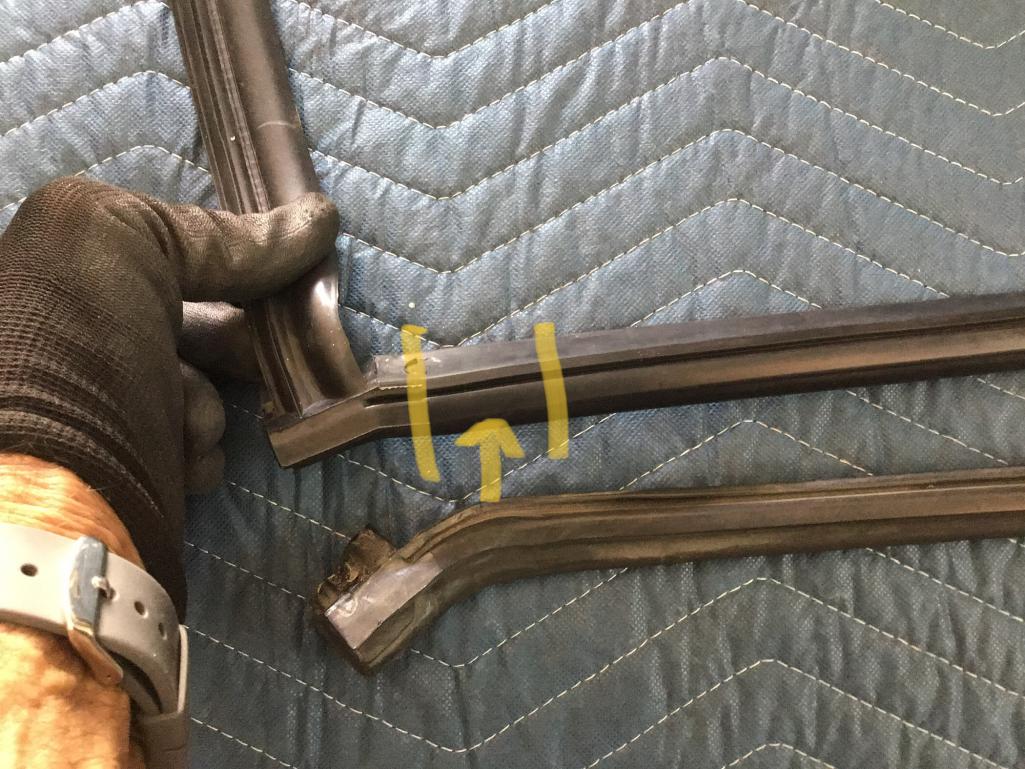 Thanks for taking the time. John |
|
|
|
Posts in this topic
 Morph914 Main Targa seal Apr 3 2021, 09:43 AM
 AFyrigos I just received a new rubber as well. Haven’t st... Apr 3 2021, 10:17 AM
 Morph914
I just received a new rubber as well. Haven’t s... Apr 3 2021, 12:28 PM mgphoto I did this about a year ago, work from the top dow... Apr 3 2021, 11:39 AM Morph914
I did this about a year ago, work from the top do... Apr 3 2021, 12:30 PM Garland I think when I did mine I left the center part off... Apr 3 2021, 02:30 PM forrestkhaag I did this fix very recently and found that there ... Apr 3 2021, 05:36 PM Morph914
I did this fix very recently and found that there... Apr 3 2021, 08:45 PM windforfun Be patient & take another look at the problem. Apr 3 2021, 08:11 PM sb914 I have never been able to put my targa top on sinc... Apr 4 2021, 11:44 AM Midway
I have never been able to put my targa top on sin... Apr 5 2021, 06:16 AM zfisher6164 See if this helps, the seal went on easier then I ... Apr 4 2021, 11:53 AM Mikey914 This is not an easy seal to replace. The key is to... Apr 4 2021, 04:04 PM windforfun I admire your tenacity. My seals are still kosher... Apr 4 2021, 06:06 PM Literati914
..
In the picture, I have marked where the hard ... Apr 4 2021, 07:48 PM Mikey914
[quote name='Morph914' post='2905445' date='Apr 4... Apr 5 2021, 10:49 PM windforfun Let sleeping dogs sleep. Some things are best lef... Apr 5 2021, 07:09 PM Morph914 Ok, I guess I will need to exchange mine for one t... Apr 6 2021, 10:09 AM Mikey914 That is rubber and part of the corner block. It... Apr 6 2021, 10:38 AM Morph914
That is rubber and part of the corner block. It... Apr 6 2021, 12:09 PM PCH After spending the whole weekend unsuccessfully tr... Apr 6 2021, 12:52 PM horizontally-opposed
After spending the whole weekend unsuccessfully t... Apr 7 2021, 10:12 AM PCH
After spending the whole weekend unsuccessfully ... Apr 7 2021, 11:03 AM Mikey914 The internal joining block should be about 2-1/2... Apr 7 2021, 10:19 AM Morph914
The internal joining block should be about 2-1/2... Apr 7 2021, 07:43 PM 76-914
The internal joining block should be about 2-1/2... Apr 7 2021, 08:07 PM Mikey914 More detail on closure
This is a new seal out of t... Apr 7 2021, 10:34 AM Mikey914 We do appreciate your support and are striving to ... Apr 7 2021, 09:12 PM
Morph914
I just received a new rubber as well. Haven’t s... Apr 3 2021, 12:28 PM mgphoto I did this about a year ago, work from the top dow... Apr 3 2021, 11:39 AM Morph914
I did this about a year ago, work from the top do... Apr 3 2021, 12:30 PM Garland I think when I did mine I left the center part off... Apr 3 2021, 02:30 PM forrestkhaag I did this fix very recently and found that there ... Apr 3 2021, 05:36 PM Morph914
I did this fix very recently and found that there... Apr 3 2021, 08:45 PM windforfun Be patient & take another look at the problem. Apr 3 2021, 08:11 PM sb914 I have never been able to put my targa top on sinc... Apr 4 2021, 11:44 AM Midway
I have never been able to put my targa top on sin... Apr 5 2021, 06:16 AM zfisher6164 See if this helps, the seal went on easier then I ... Apr 4 2021, 11:53 AM Mikey914 This is not an easy seal to replace. The key is to... Apr 4 2021, 04:04 PM windforfun I admire your tenacity. My seals are still kosher... Apr 4 2021, 06:06 PM Literati914
..
In the picture, I have marked where the hard ... Apr 4 2021, 07:48 PM Mikey914
[quote name='Morph914' post='2905445' date='Apr 4... Apr 5 2021, 10:49 PM windforfun Let sleeping dogs sleep. Some things are best lef... Apr 5 2021, 07:09 PM Morph914 Ok, I guess I will need to exchange mine for one t... Apr 6 2021, 10:09 AM Mikey914 That is rubber and part of the corner block. It... Apr 6 2021, 10:38 AM Morph914
That is rubber and part of the corner block. It... Apr 6 2021, 12:09 PM PCH After spending the whole weekend unsuccessfully tr... Apr 6 2021, 12:52 PM horizontally-opposed
After spending the whole weekend unsuccessfully t... Apr 7 2021, 10:12 AM PCH
After spending the whole weekend unsuccessfully ... Apr 7 2021, 11:03 AM Mikey914 The internal joining block should be about 2-1/2... Apr 7 2021, 10:19 AM Morph914
The internal joining block should be about 2-1/2... Apr 7 2021, 07:43 PM 76-914
The internal joining block should be about 2-1/2... Apr 7 2021, 08:07 PM Mikey914 More detail on closure
This is a new seal out of t... Apr 7 2021, 10:34 AM Mikey914 We do appreciate your support and are striving to ... Apr 7 2021, 09:12 PM |
1 User(s) are reading this topic (1 Guests and 0 Anonymous Users)
0 Members:

|
Lo-Fi Version | Time is now: 18th May 2024 - 07:50 PM |
Invision Power Board
v9.1.4 © 2024 IPS, Inc.