|
|
|
Porsche, and the Porsche crest are registered trademarks of Dr. Ing. h.c. F. Porsche AG.
This site is not affiliated with Porsche in any way. Its only purpose is to provide an online forum for car enthusiasts. All other trademarks are property of their respective owners. |
|
|

  |

| Shredhead |
 Jan 28 2022, 10:30 AM Jan 28 2022, 10:30 AM
Post
#1
|
|
Member  Group: Members Posts: 115 Joined: 10-August 15 From: CT Member No.: 19,047 Region Association: North East States |
I'd like to completely remove my fog lights, leaving just the wires, in preparation for painting and so I can clean them up on the bench. I'm not sure I see how the wires disconnect and would prefer not to cut them. Any tips?
Attached thumbnail(s) 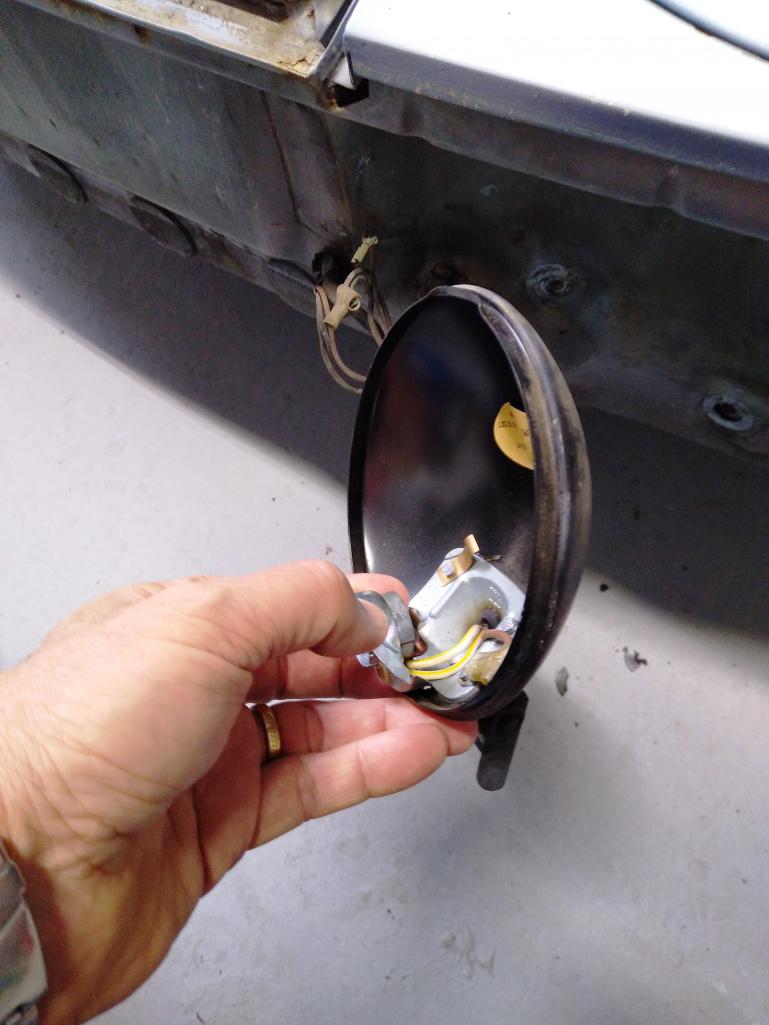
|
   |

 
|
| 914Sixer |
Jan 28 2022, 10:40 AM
Post
#2
|
|
914 Guru Group: Members Posts: 9,356 Joined: 17-January 05 From: San Angelo Texas Member No.: 3,457 Region Association: Southwest Region |
Using a little flat blade, unscrew set screw on bulb holder, be careful not to loose it. Pull out white/yellow wires (solder on ends). Slide off brown ground wire. Pull rubber plug out the housing.
|
|
|
|
| Shredhead |
Jan 28 2022, 02:09 PM
Post
#3
|
|
Member Group: Members Posts: 115 Joined: 10-August 15 From: CT Member No.: 19,047 Region Association: North East States |
QUOTE(914Sixer @ Jan 28 2022, 11:40 AM)  Using a little flat blade, unscrew set screw on bulb holder, be careful not to loose it. Pull out white/yellow wires (solder on ends). Slide off brown ground wire. Pull rubber plug out the housing. So pull the wires out of their solders, right? |
|
|
|
| 76-914 |
Jan 28 2022, 05:00 PM
Post
#4
|
|
Repeat Offender & Resident Subaru Antagonist Group: Members Posts: 13,824 Joined: 23-January 09 From: Temecula, CA Member No.: 9,964 Region Association: Southern California |
The tip of the + wire(s) is soldered but that soldered tip should be held in place by a set screw. Loosen it and it will slip out. Then just pull the spade connector off the ground terminal. Those wires look awfully new for a 50 YO car. Show us the other side of the bulb socket you are holding. Could be a PO did something a little differently when replacing those yellow/while wire(s). (IMG:style_emoticons/default/beerchug.gif)
|
|
|
|
| Shredhead |
Feb 5 2022, 01:22 PM
Post
#5
|
|
Member Group: Members Posts: 115 Joined: 10-August 15 From: CT Member No.: 19,047 Region Association: North East States |
QUOTE(76-914 @ Jan 28 2022, 06:00 PM) The tip of the + wire(s) is soldered but that soldered tip should be held in place by a set screw. Loosen it and it will slip out. Then just pull the spade connector off the ground terminal. Those wires look awfully new for a 50 YO car. Show us the other side of the bulb socket you are holding. Could be a PO did something a little differently when replacing those yellow/while wire(s). (IMG:style_emoticons/default/beerchug.gif) The set screw was right where you said it'd be and the wires popped right out. Without glasses, didn't notice it. (IMG:style_emoticons/default/smile.gif) Thanks for your help. |
|
|
|
|
1 User(s) are reading this topic (1 Guests and 0 Anonymous Users)
0 Members:

|
Lo-Fi Version | Time is now: 7th December 2025 - 12:08 PM |
Invision Power Board
v9.1.4 © 2025 IPS, Inc.