|
|
|
Porsche, and the Porsche crest are registered trademarks of Dr. Ing. h.c. F. Porsche AG.
This site is not affiliated with Porsche in any way. Its only purpose is to provide an online forum for car enthusiasts. All other trademarks are property of their respective owners. |
|
|

  |

| 914werke |
 Jul 17 2022, 12:02 PM Jul 17 2022, 12:02 PM
Post
#41
|
|
"I got blisters on me fingers"  Group: Members Posts: 10,034 Joined: 22-March 03 From: USofA Member No.: 453 Region Association: Pacific Northwest |
|
   |

 
|
| Puebloswatcop |
Jul 17 2022, 12:28 PM
Post
#42
|
|
Senior Member Group: Members Posts: 1,389 Joined: 27-December 14 From: Mineola, Texas Member No.: 18,258 Region Association: Southwest Region |
Pretty nice find. Your work is looking good. Have fun with the new toy.
|
|
|
|
| Montreal914 |
Jul 17 2022, 12:42 PM
Post
#43
|
|
Senior Member Group: Members Posts: 1,544 Joined: 8-August 10 From: Claremont, CA Member No.: 12,023 Region Association: Southern California |
|
|
|
|
| wonkipop |
Jul 17 2022, 06:04 PM
Post
#44
|
|
Advanced Member Group: Members Posts: 4,253 Joined: 6-May 20 From: north antarctica Member No.: 24,231 Region Association: NineFourteenerVille |
QUOTE(nathanxnathan @ Jun 2 2022, 01:08 AM)  QUOTE(flyer86d @ Jun 1 2022, 02:50 PM) Back in the mid 70’s, one of our PCA members had a non appearance group 71 in Bahia Red that was stunning. It looks like you found a good one. All the best! Charlie I love the non appearance group cars. I even like the skinny tires. It has 165's on the 4 1/2 inch steelies — they are all mismatched, 1 might be the original spare. keep up the good work. love your spot welder on the previous page. wouldn't mind having one of those. thought of it a few times fixing up the falcon ute. but hard to think of how to position one in, unless it had 8 foot tongs! (IMG:style_emoticons/default/smile.gif) go the original minimalist look. they were really cool the early base cars. yes to skinny tyres. i put a set of michelin XAS 165s on mine. expensive but fantastic. gives you the beautiful light steering with heaps of feel. not so good in the rain, but i don't do rain driving if i can help it. (IMG:style_emoticons/default/beerchug.gif) |
|
|
|
| rgalla9146 |
Jul 17 2022, 07:51 PM
Post
#45
|
|
Advanced Member Group: Members Posts: 4,545 Joined: 23-November 05 From: Paramus NJ Member No.: 5,176 Region Association: None |
Early 'no appearance group' cars are so cool.......and not appreciated enough.
They're pure and simple. Mine includes performance upgrades. (IMG:style_emoticons/default/smile.gif) Your work is outstanding. Great to see. Attached thumbnail(s) 
|
|
|
|
| nathanxnathan |
Sep 12 2022, 08:40 PM
Post
#46
|
|
Member Group: Members Posts: 274 Joined: 16-February 18 From: Laguna Beach, CA Member No.: 21,899 Region Association: Southern California |
I've got quite a few projects going with the car. I need to start focusing on 1 particular aspect and not spread myself too thin, but there were obstacles to the main plan of getting the front end together so I took on some other stuff while working them out.
I started working on the doors, but I'll leave that for another post. I did a lot of stripping — the door jambs and fenders, headlight buckets, besides the front trunk where I started. I started cleaning up the wires in the rear trunk, getting the overspray off and cleaning up. I've been patching the front cross panel, but I'll go into that in another post once I've got some more progress in that area. For now the big victory is completion of the octisserie. 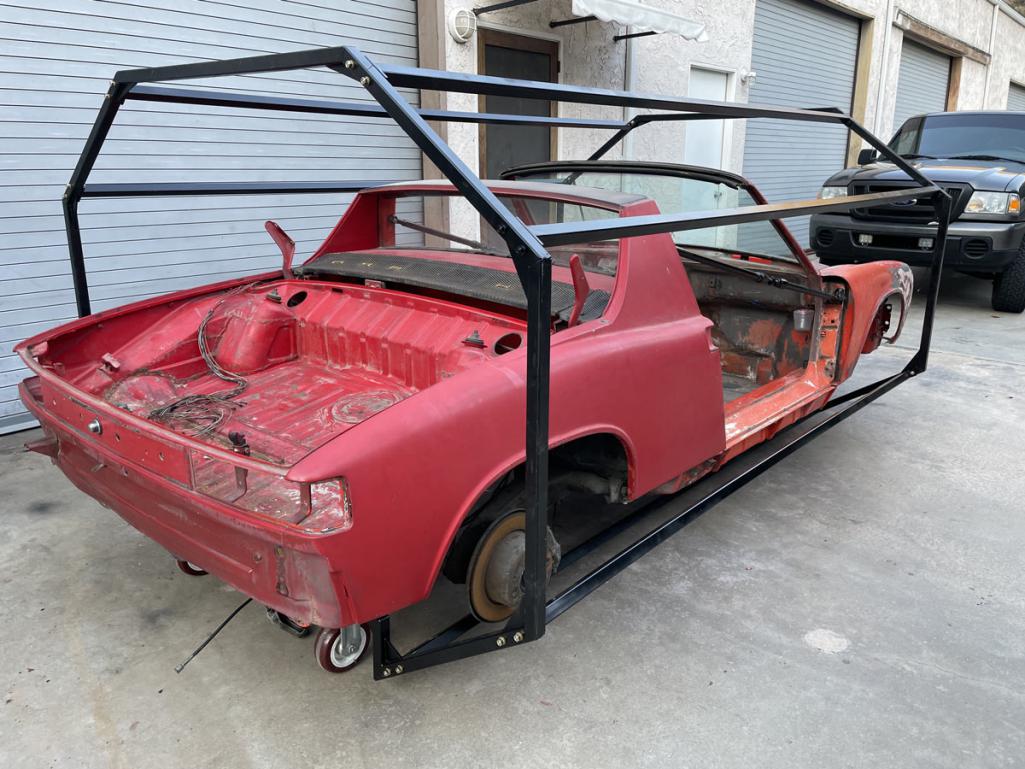 Stripping uncovered some accident damage repair. I got the bondo off the driver side which seems worse overall and was able to slap out most of the problems. Hopefully the passenger side will be similar, and all that bondo will not be necessary.  I started with the Restoration Design plan and modified it to use larger casters that I had laying around. I cut all the joints for a mitered fit using my horizontal bandsaw, and I used 1/4" plate to reinforce the joints. 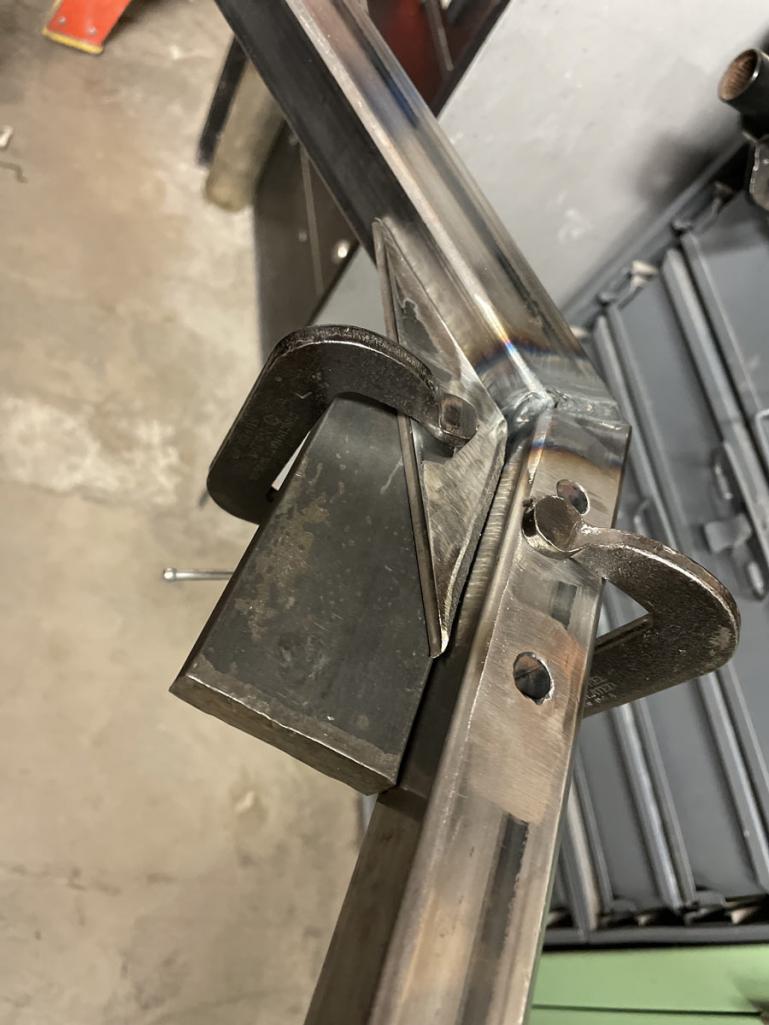 Here's a pdf that has angles and measurements I used in case it helps anyone. It is Adobe Illustrator editable and has a vector of a 914 which is pretty cool. I'm not super sure of the accuracy of the scale — The drawing is 1:1 for everything else and dimensions and angles are marked. Most of what RD had was pretty accurate.  Rotisserie_2c.pdf ( 670.16k )
Number of downloads: 71
Rotisserie_2c.pdf ( 670.16k )
Number of downloads: 71I did the front mounts differently, to not use the factory suspension cross member as part of the rotisserie. I can see now why they used it as this was the trickiest part to locate the mounting holes and determine heights of the standoffs. I made a sort of tool to find the center using my lathe. 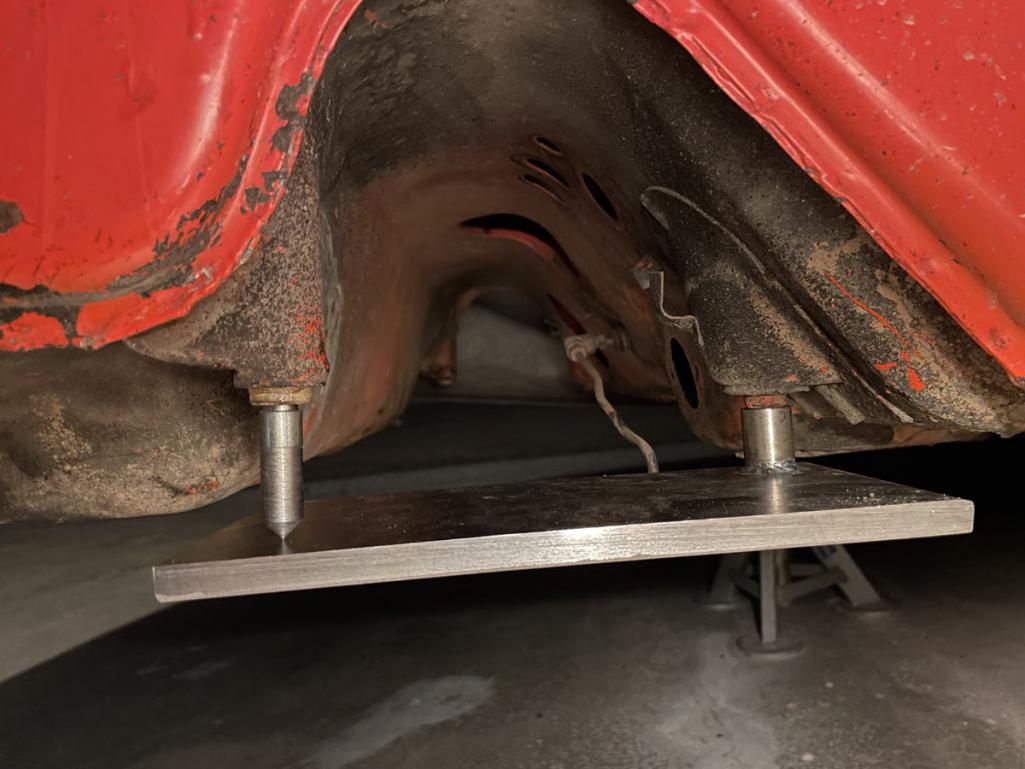 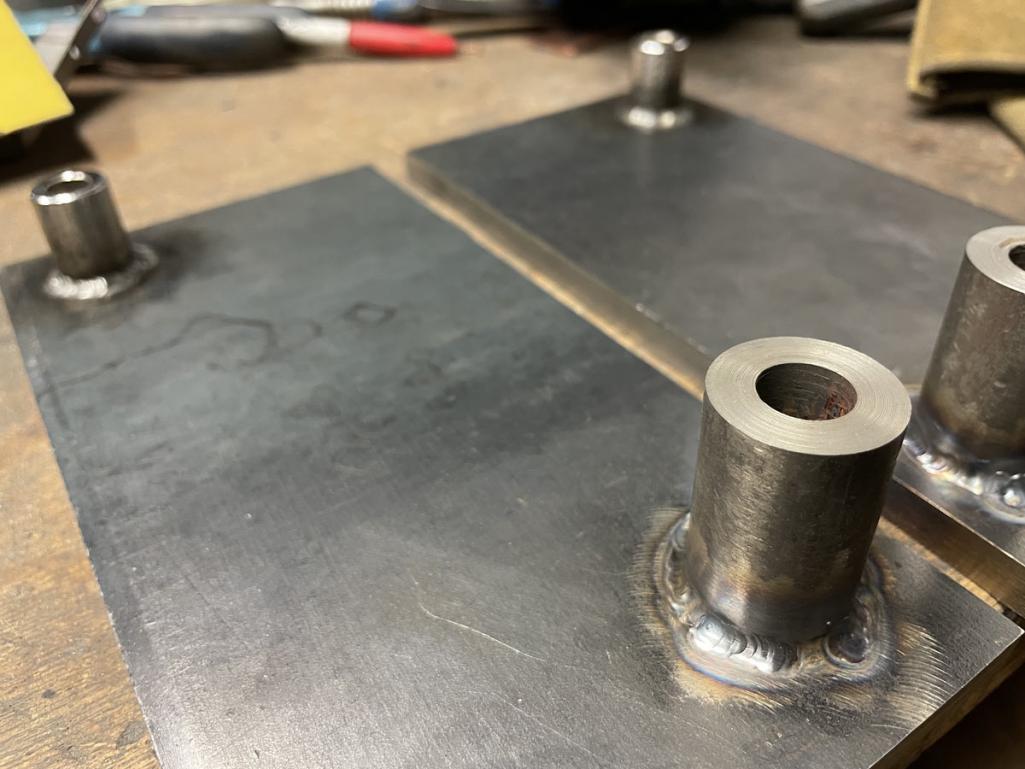 The final.. made the plates to the angle that the suspension mounts wanted to be. I should have used a plumb bob to check vertical as when I welded the front hoop to the plates, it's actually leaning forward. The top is about 1 inch further forward than the back. I made the back angle match the front so all the interties are the same length though. 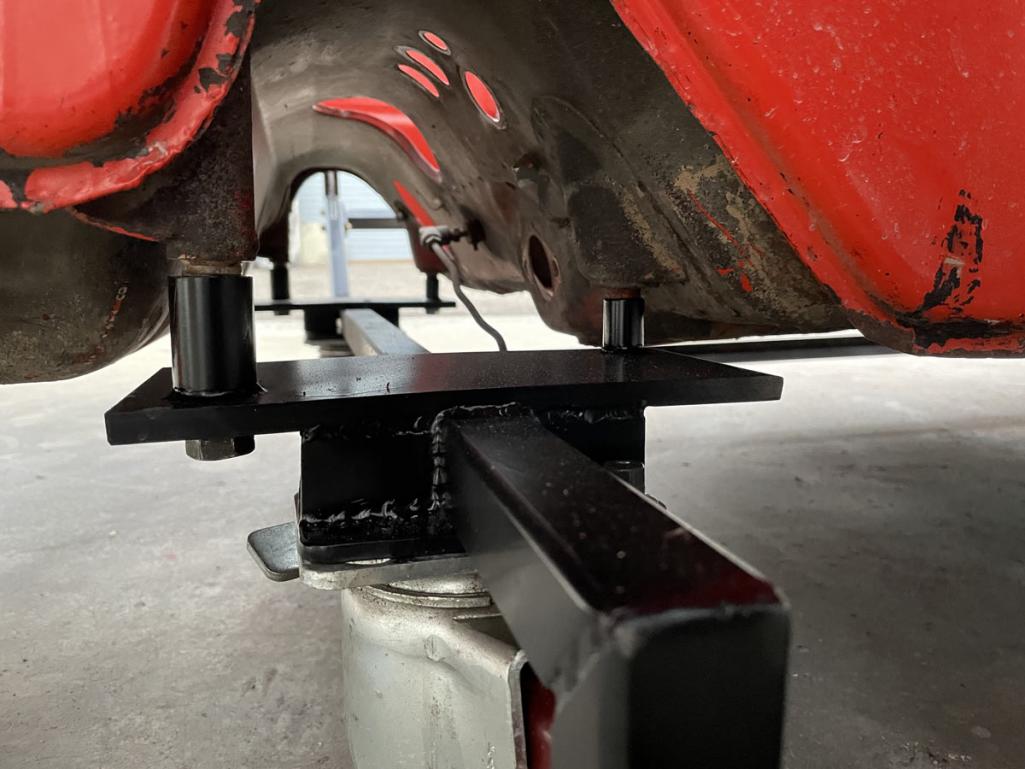 A glimpse of the rear mount. 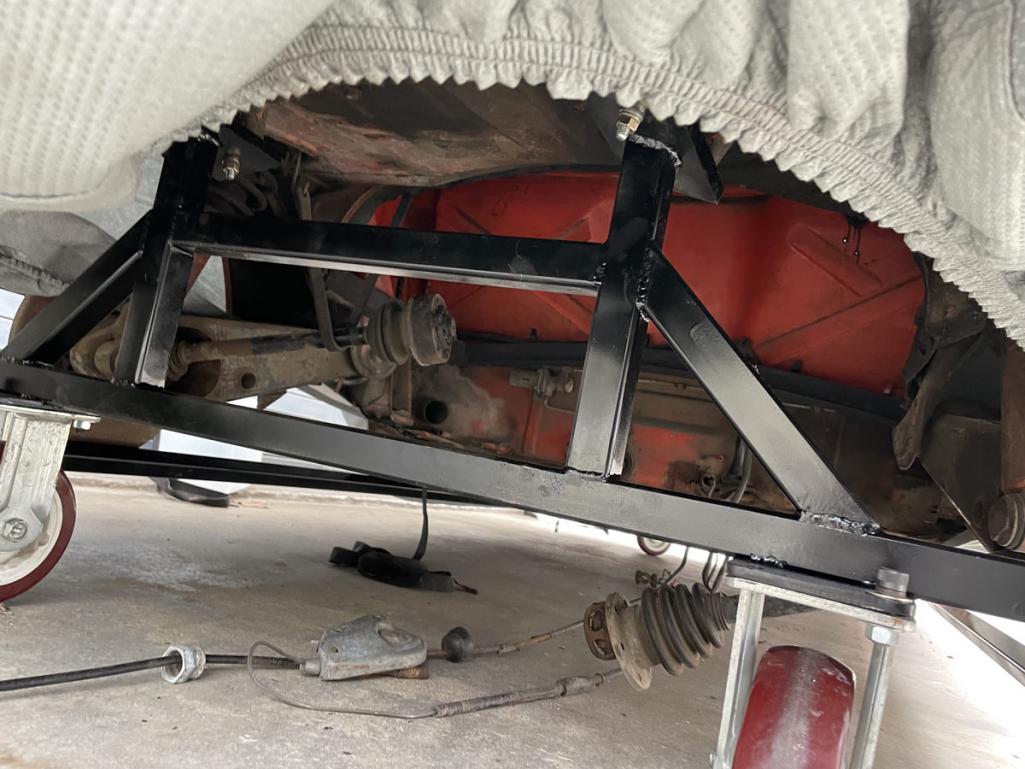 I braced the doors. I wanted to do it so the doors could be fit, but I'm reluctant to weld to the lower A pillars where I can't get behind to treat burnt off paint inside. This heat has been rough. The canopy has offered some help/shade and kept the rain that followed off me these past few days. It's 8' x 8'. Got a cover from carcovers.com which is supposed to be waterproof, though that is questionable. 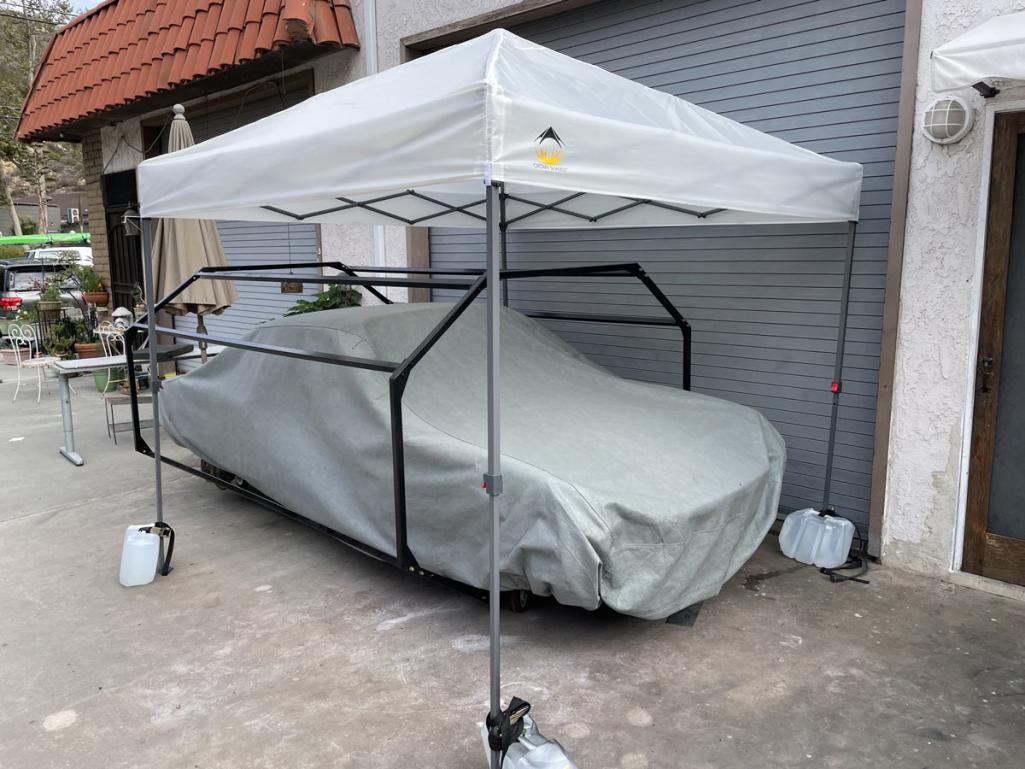 One learning that I was a bit disappointed is that I think I'm too weak in my old age to get it on its side by myself. I can get it to the first angle, but it doesn't stay up, and then the 2nd angle to go vertical, maybe if my child (if I had a child) was under it I could do it, but it's pretty heavy. The rear suspension is still on the car. Next task is focusing on the front cross panel. |
|
|
|
| nathanxnathan |
Mar 21 2024, 11:21 PM
Post
#47
|
|
Member Group: Members Posts: 274 Joined: 16-February 18 From: Laguna Beach, CA Member No.: 21,899 Region Association: Southern California |
I took a break from working on the car. I think reluctance to get into the areas where the front fenders meet up with the cowl, I needed a good long time to prepare for.
So after getting the front cross panel just about ready to go in, which was really a beast of a job for me... I did a bunch of home improvement and worked on some bicycles for like a year. (IMG:style_emoticons/default/biggrin.gif) But to get the thread up to where I'm at presently.. First I remedied a shortcoming with the octisserie. The car sat too low and it was just about unmanageable to put it on its side on my own. So I modified the plan, added some support to raise the car up in the hoops about as far as I could get it. 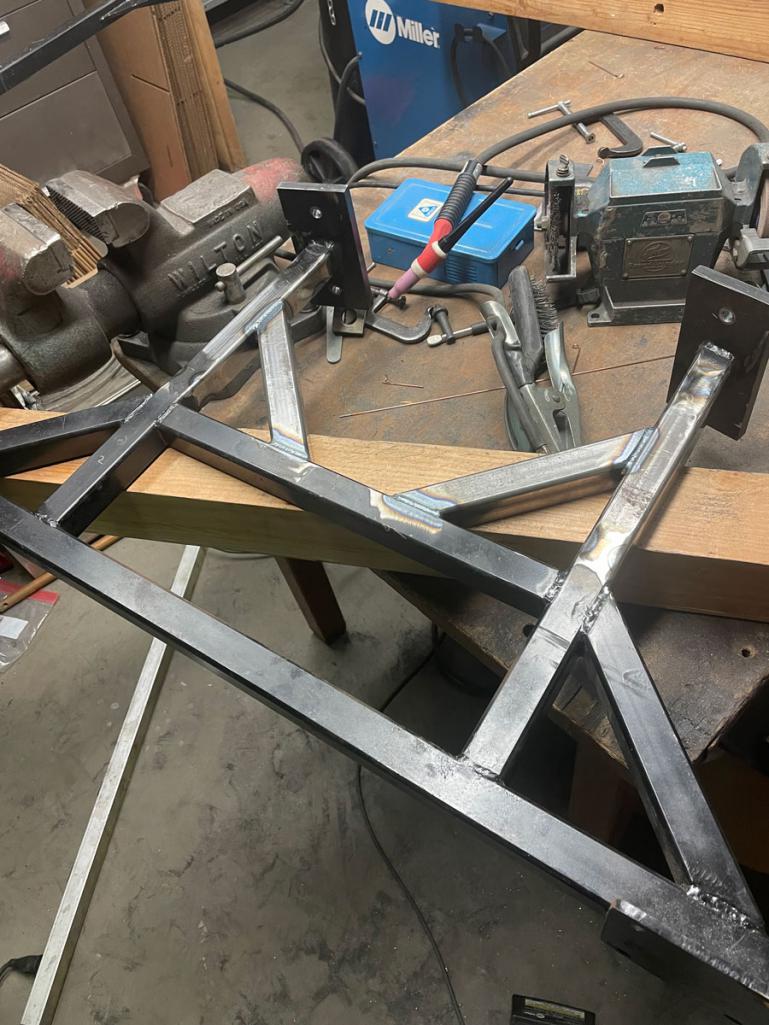 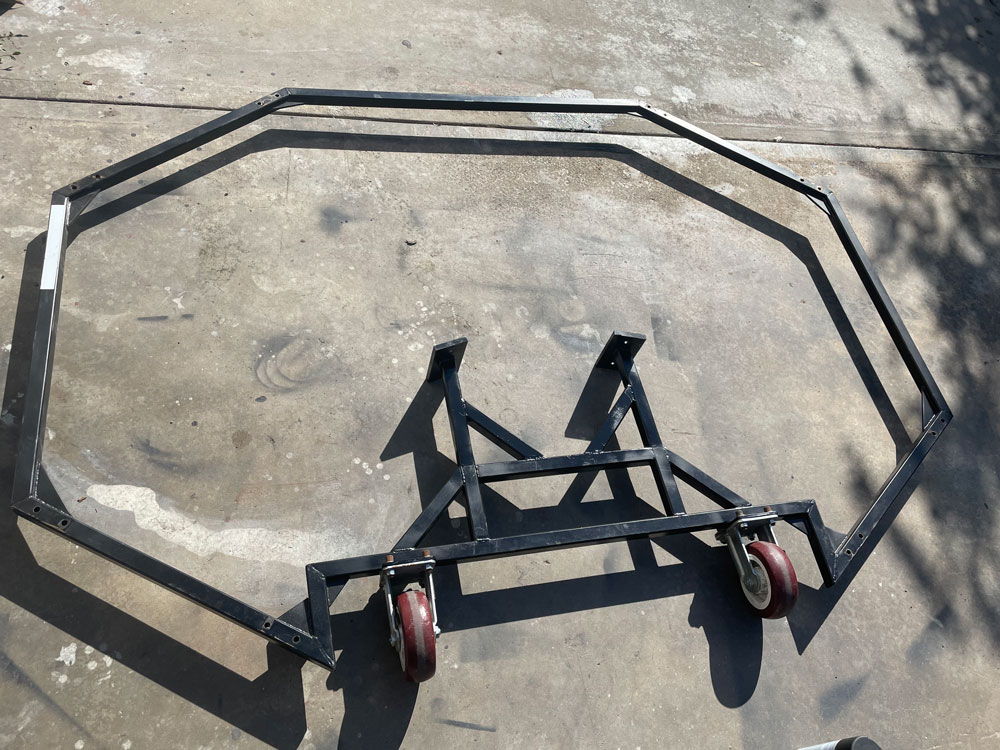 It's still a bit heavy but I can get it on its side now. 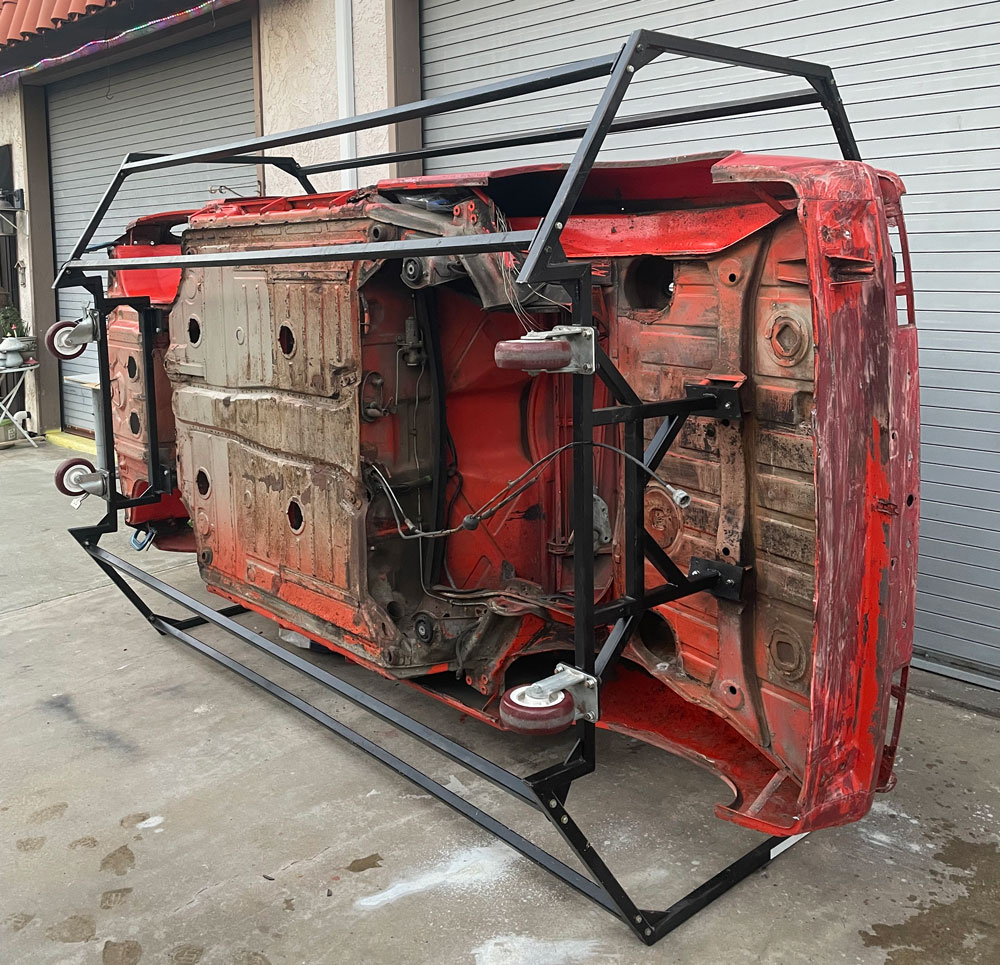 Here's a shot to show how close the windshield frame now comes.  I will put up pics of the work on the front cross panel soon, and then on to the projects at hand. |
|
|
|
| nathanxnathan |
Mar 21 2024, 11:49 PM
Post
#48
|
|
Member Group: Members Posts: 274 Joined: 16-February 18 From: Laguna Beach, CA Member No.: 21,899 Region Association: Southern California |
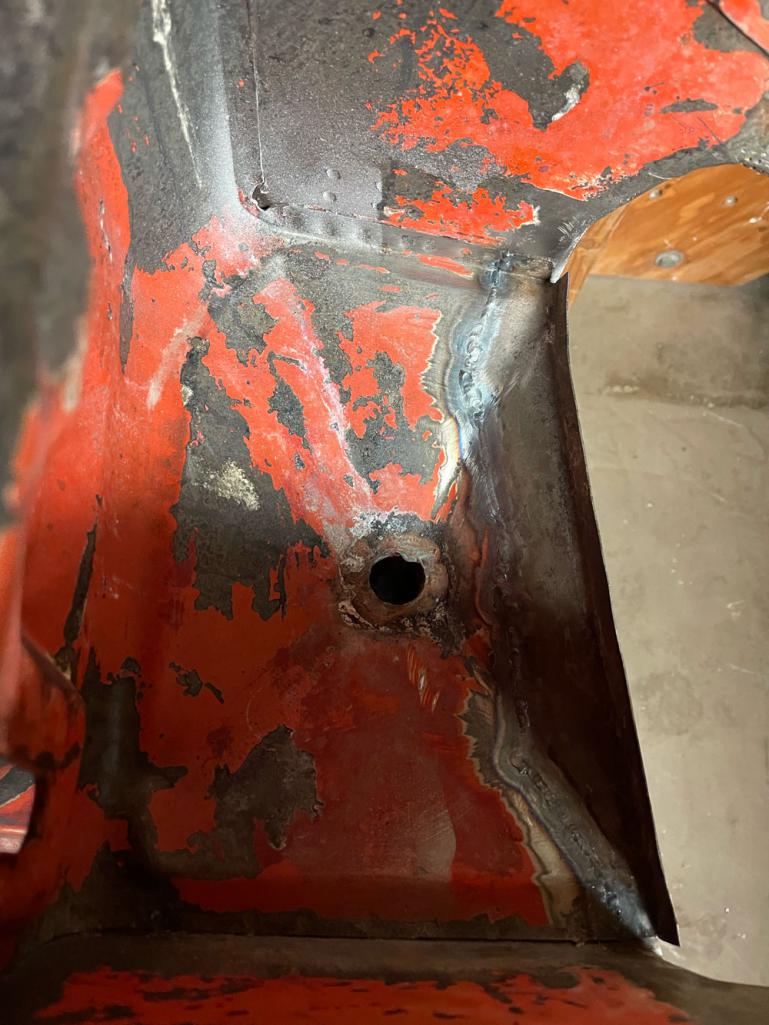
So let's see, the front cross panel. You can see in one of the previous rotisserie shots that I took it off. A little of that story as it looks like I haven't really talked about it here... It gets pretty ugly here.
The car had been in an accident at some point and presumably a repair shop had replaced the front cross panel with a late version. This presents some issues that they didn't handle very well. The late panel does something a bit different on account of the bumper shocks. The headlight buckets are different on late cars I think — so to fill the gap they sort of cut the bottom and bent the inner bits forward. 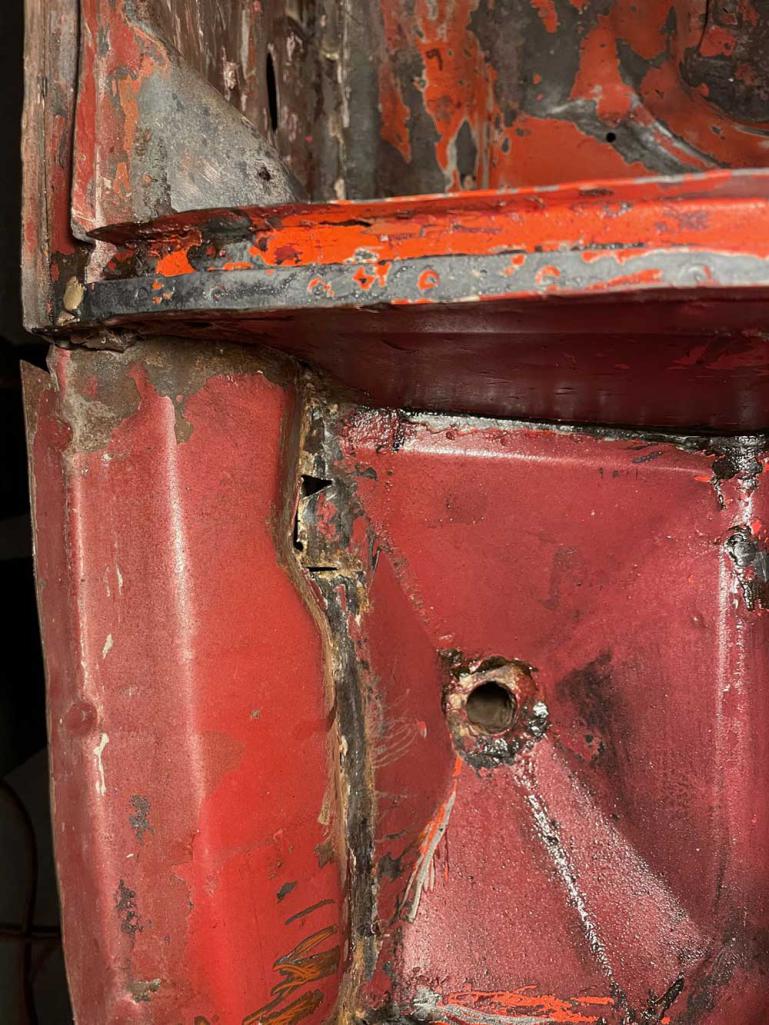 The bottom supports were pretty rough on both sides, maybe brutalized when the shop removed the original, but also some body filler disguising some accident damage. Worse though, the top portion of an early support doesn't go far enough forward to contact the front cross panel and they left a big old gap there. The front of the headlight bucket is in bad shape. 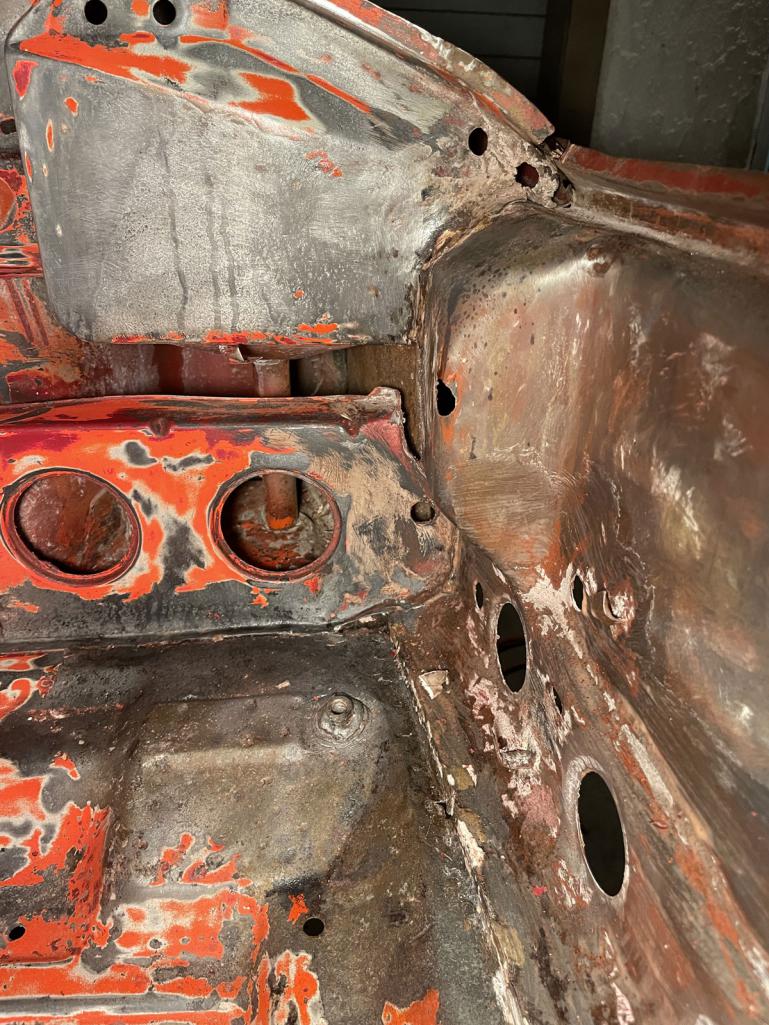 The passenger side was pretty bad, all the brazing was a mess.  Basically every junction of this front cross panel was butchered.  |
|
|
|
| nathanxnathan |
Mar 22 2024, 12:21 AM
Post
#49
|
|
Member Group: Members Posts: 274 Joined: 16-February 18 From: Laguna Beach, CA Member No.: 21,899 Region Association: Southern California |
A forum member here, pezz really helped me out with an early front cross panel. They're a beast to deal with, and he really came through cutting it off and getting it shipped to me.
Here's the thread leading up to that. http://www.914world.com/bbs2/index.php?showtopic=360483 Really epic thing to show up on your doorstep 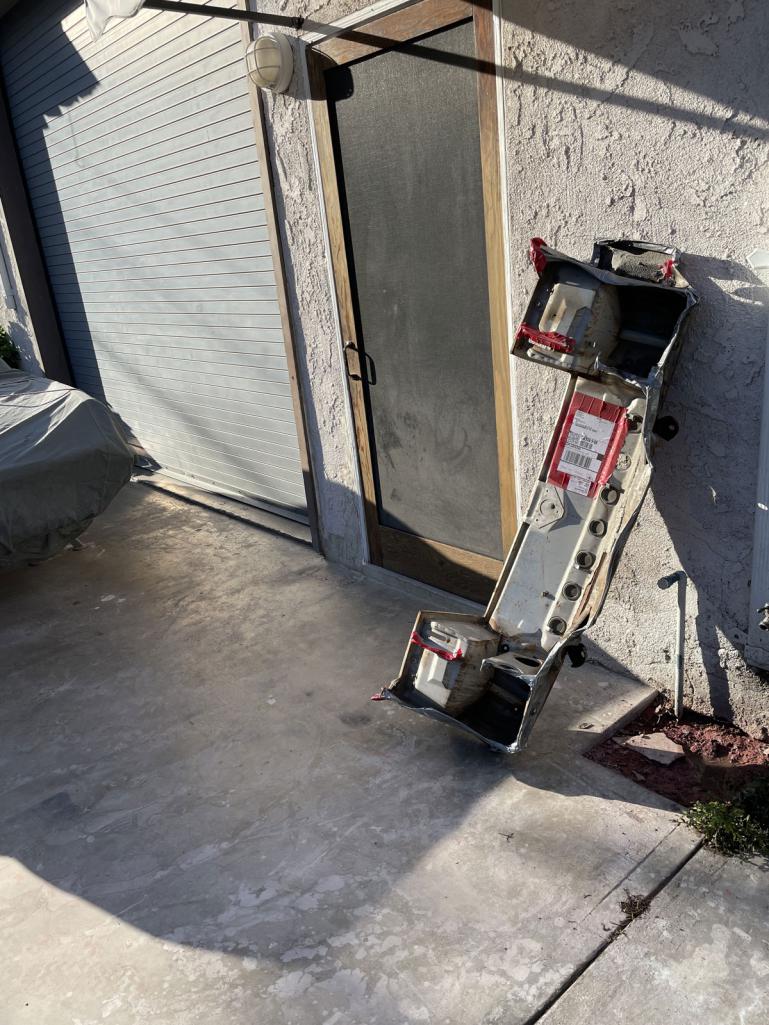 It was tricky, as I wanted to use the ends of the pieces that attach to it to fix what was all messed up on the car, but of coarse keep the panel itself nice. To save both I had to mess up both a little bit, getting them apart. It was relatively easy getting the late panel out of the car. It wasn't held in by that much. Separating the early panel was a lot harder.  I used a hole punch to make fillers.. hundreds of fillers. 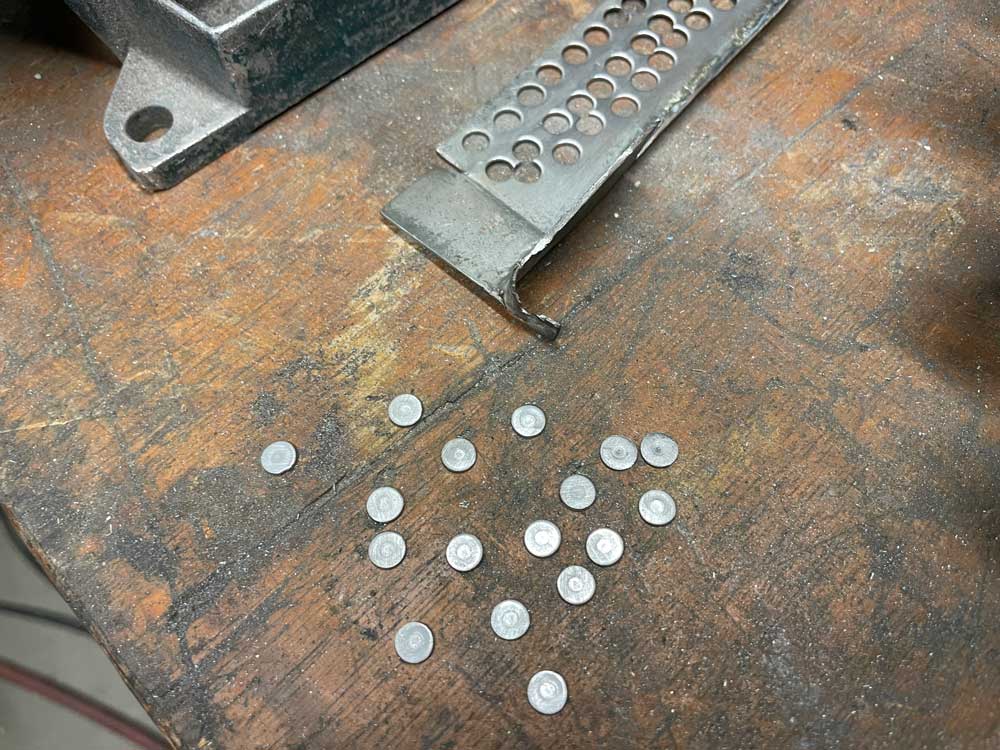 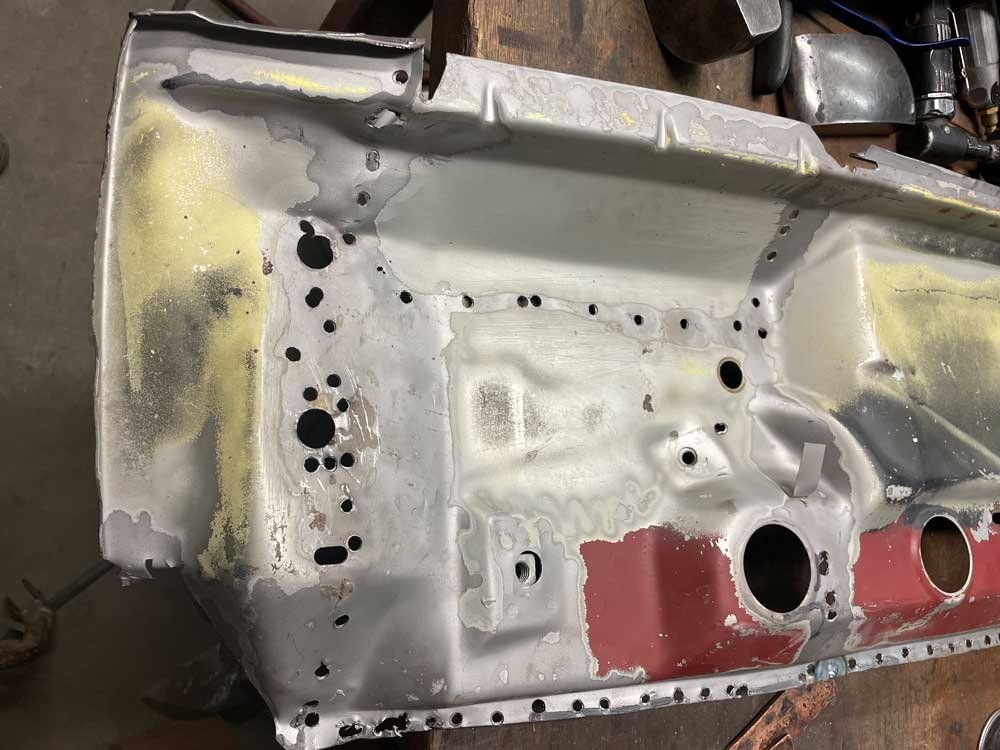 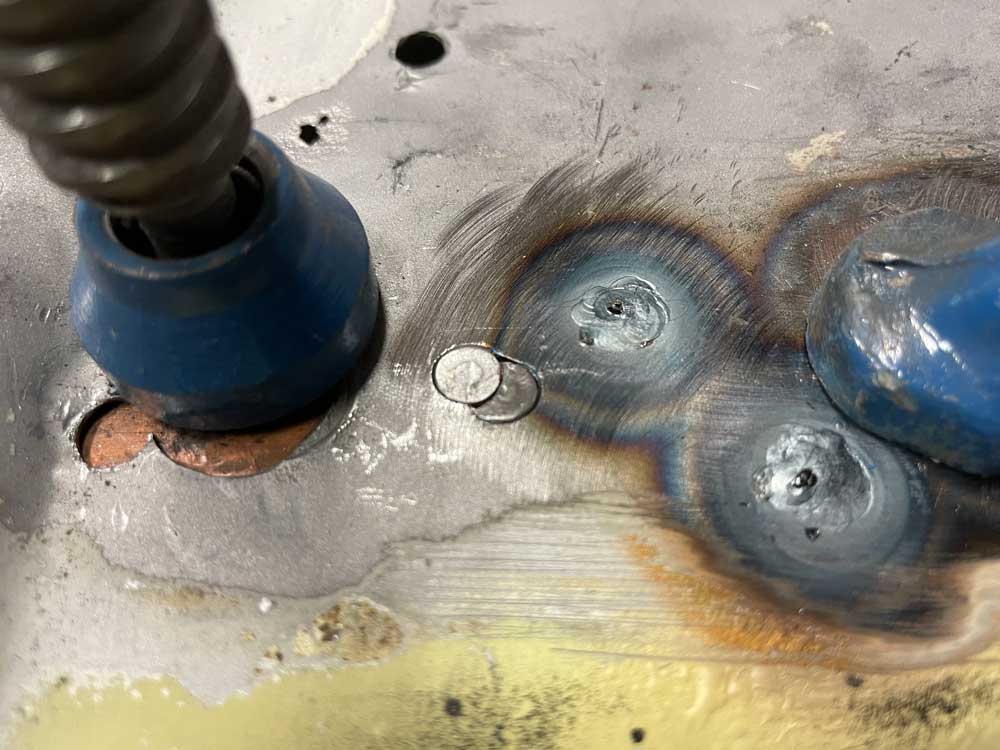 Part of the early panel had been cut off to repair another car, so I had to splice some of the late one into it.. 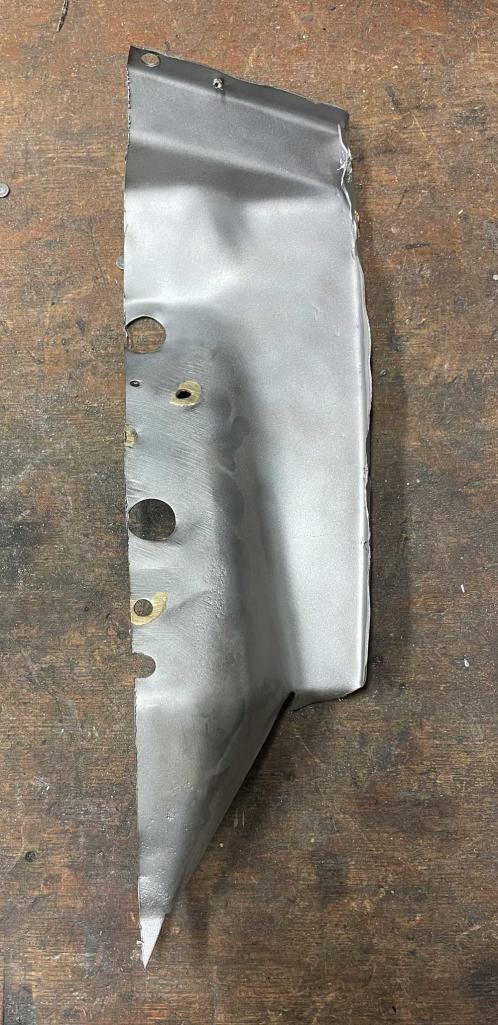 Repairing this panel took a long time... 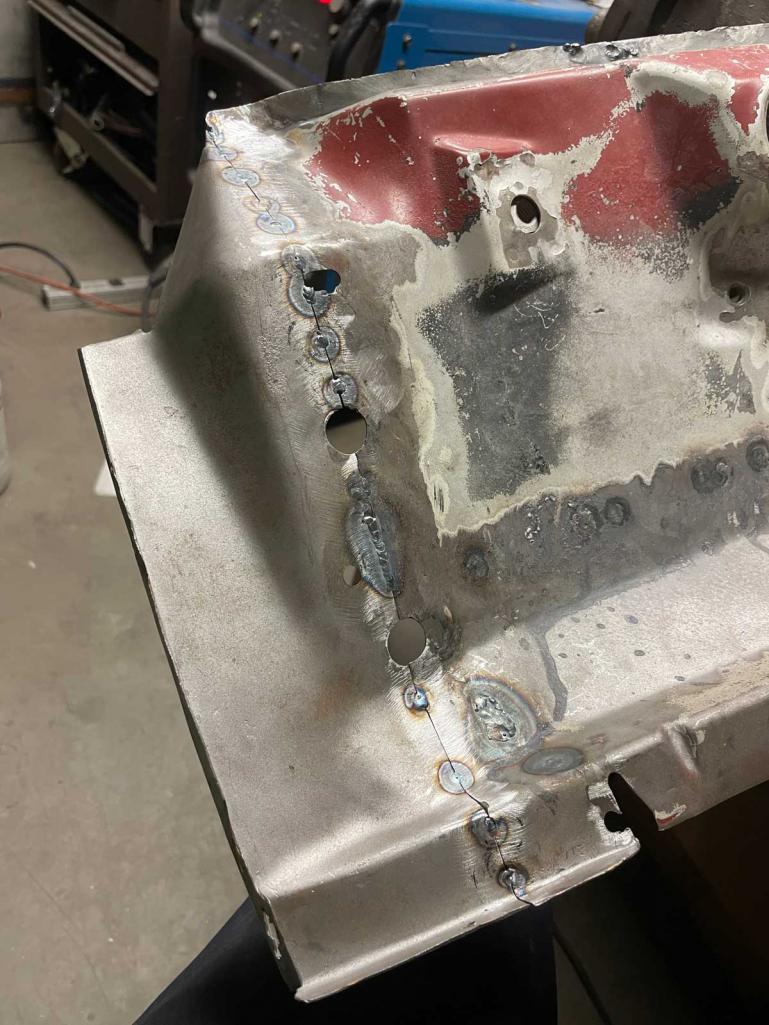 I will post more... |
|
|
|
| nathanxnathan |
Mar 22 2024, 12:36 AM
Post
#50
|
|
Member Group: Members Posts: 274 Joined: 16-February 18 From: Laguna Beach, CA Member No.: 21,899 Region Association: Southern California |
The replacement panel had a number of its own problems.
I had to remove the trunk latch support plate take care of a hole rusted through right above it. 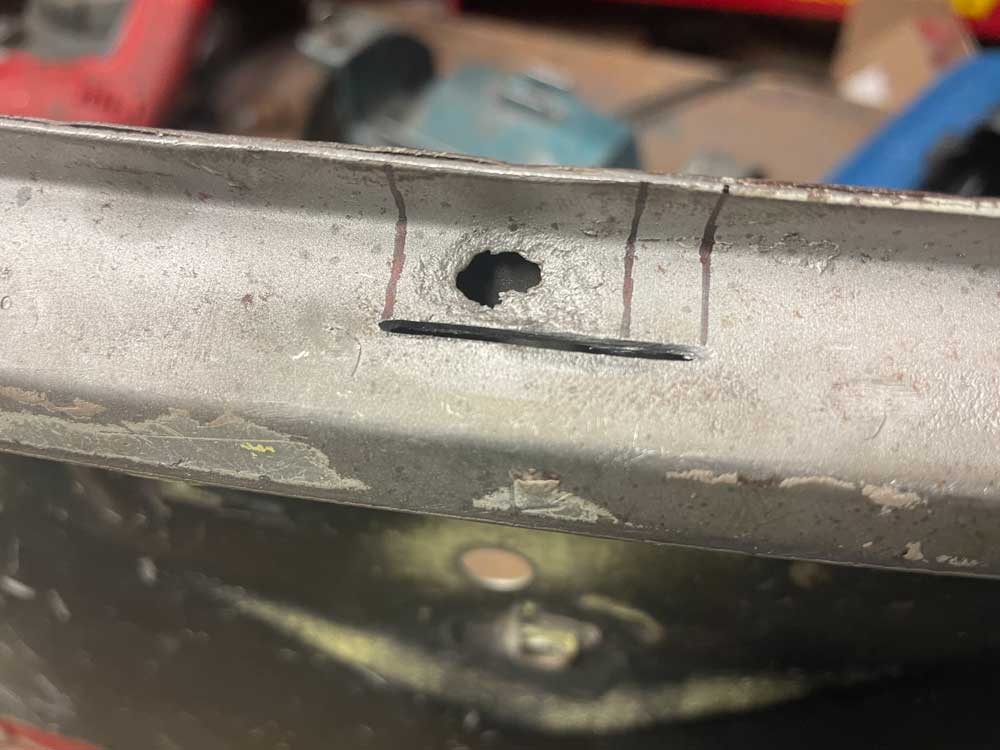 Ugh 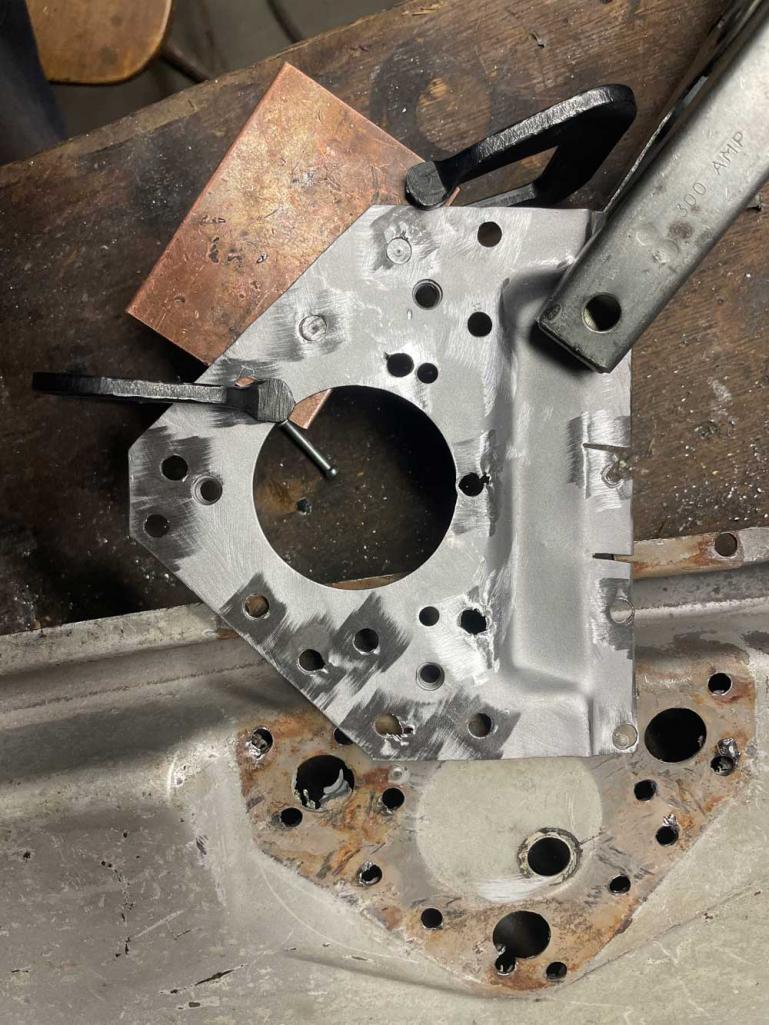 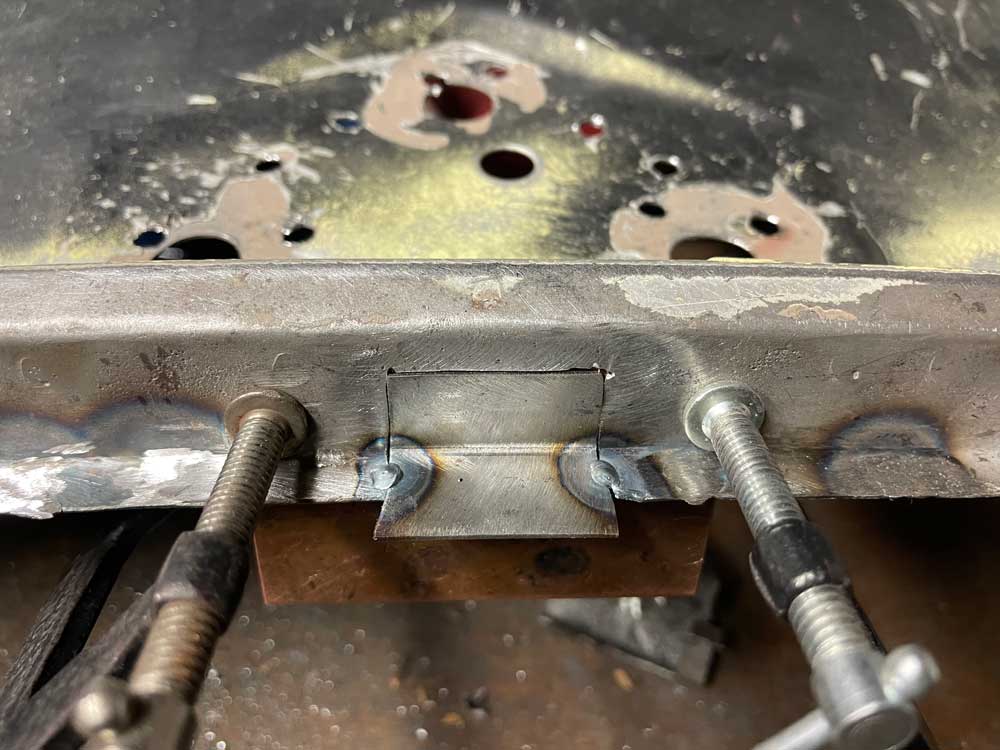 A few spots were rusted thin, and patched in bits to repair. 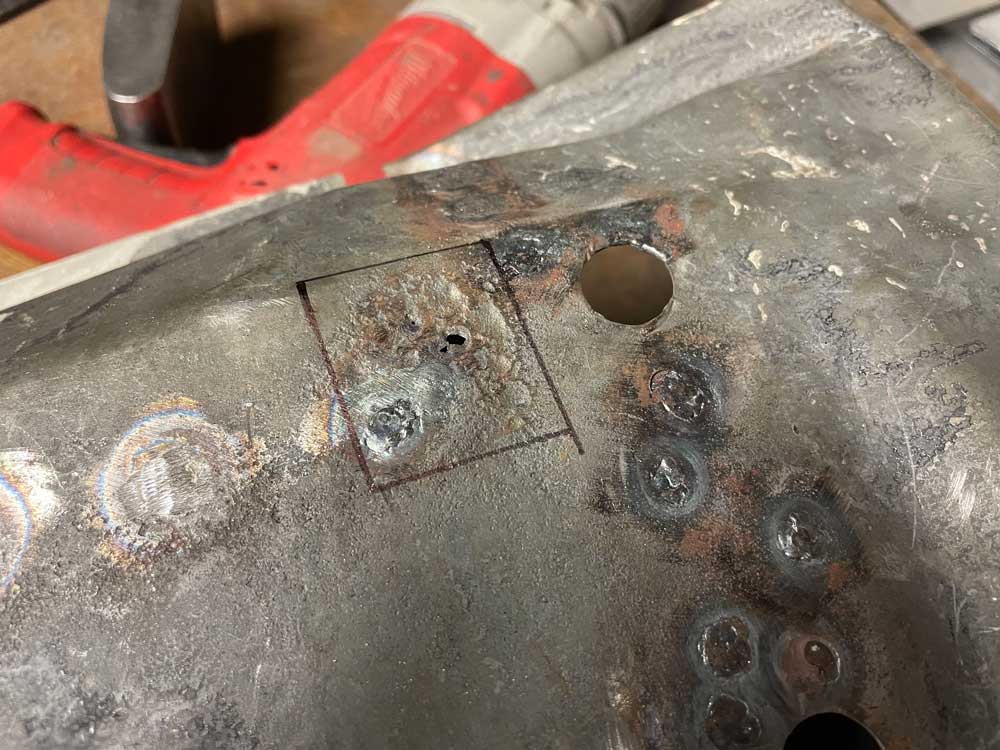 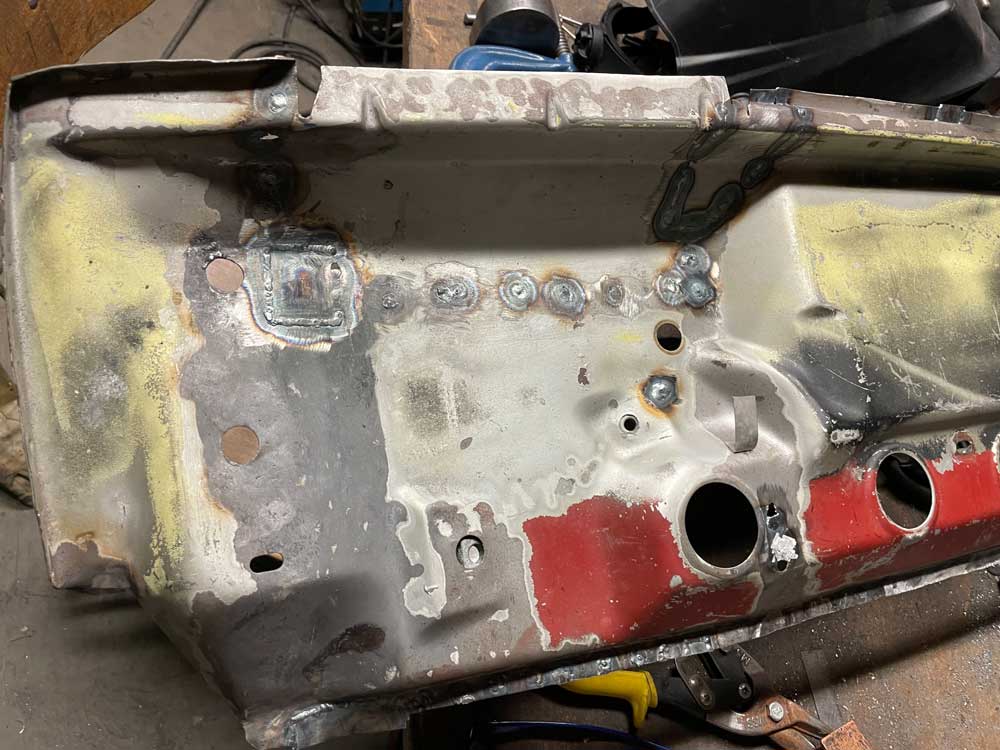 This pic just doesn't do justice to how much went into making this piece whole again. 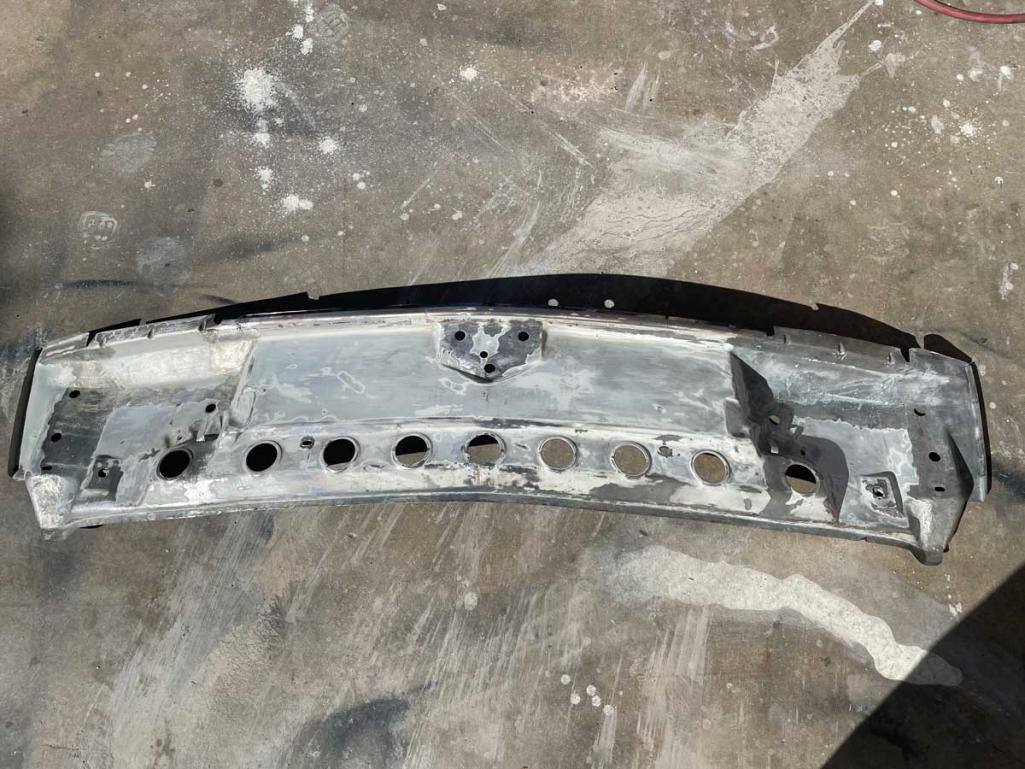 With the panel whole again, I moved on to prepping the car for it. Will post that progress soon. |
|
|
|
| 76-914 |
Mar 22 2024, 01:54 AM
Post
#51
|
|
Repeat Offender & Resident Subaru Antagonist Group: Members Posts: 13,494 Joined: 23-January 09 From: Temecula, CA Member No.: 9,964 Region Association: Southern California |
Welcome back. (IMG:style_emoticons/default/beerchug.gif)
|
|
|
|
| jim_hoyland |
Mar 22 2024, 06:03 AM
Post
#52
|
|
Get that VIN ? Group: Members Posts: 9,270 Joined: 1-May 03 From: Sunset Beach, CA Member No.: 643 Region Association: Southern California |
Nice work Nathan; good to see you back (IMG:style_emoticons/default/smile.gif)
|
 |
|
| Front yard mechanic |
Mar 22 2024, 07:19 AM
Post
#53
|
|
Senior Member Group: Members Posts: 1,157 Joined: 23-July 15 From: New Mexico Member No.: 18,984 Region Association: None |
I wish someone would make the front panel new (IMG:style_emoticons/default/chowtime.gif) good work!
|
|
|
|
| nathanxnathan |
Mar 25 2024, 06:06 PM
Post
#54
|
|
Member Group: Members Posts: 274 Joined: 16-February 18 From: Laguna Beach, CA Member No.: 21,899 Region Association: Southern California |
I'm looking back at pics of the progress. I move pretty slowly, and I feel like it's not worth posting progress, but then if I compare where I'm at now it seems like I've come so far.
To document the work I did on the points that the front cross panel attaches, I guess I should start with some scary pics of the state of things when I first removed the front cross panel. 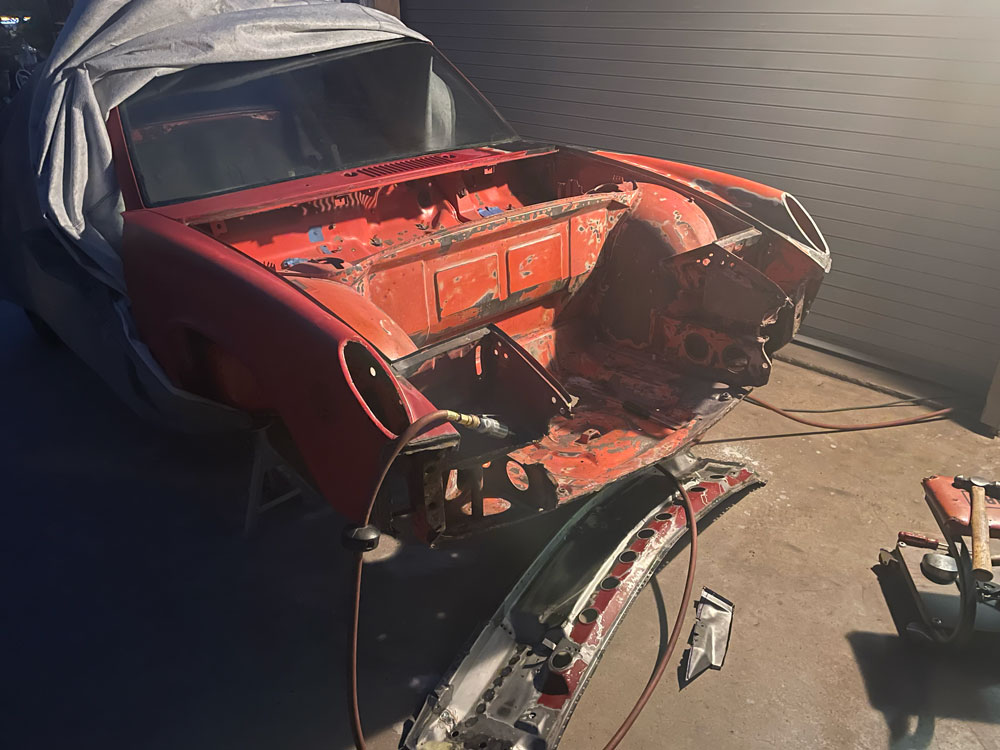 (IMG:style_emoticons/default/icon8.gif)  (IMG:style_emoticons/default/barf.gif)  I made these jig pieces to locate the holes for the headlight lids. I turned dowels to size and welded them to a length of 1/4 inch plate, positioned them based on the replacement nose which everything was in good shape.  The hole position was pretty compromised. I verified the hole position on my 72  The replacements .. a little pitting but I can live with it, it's not too bad. 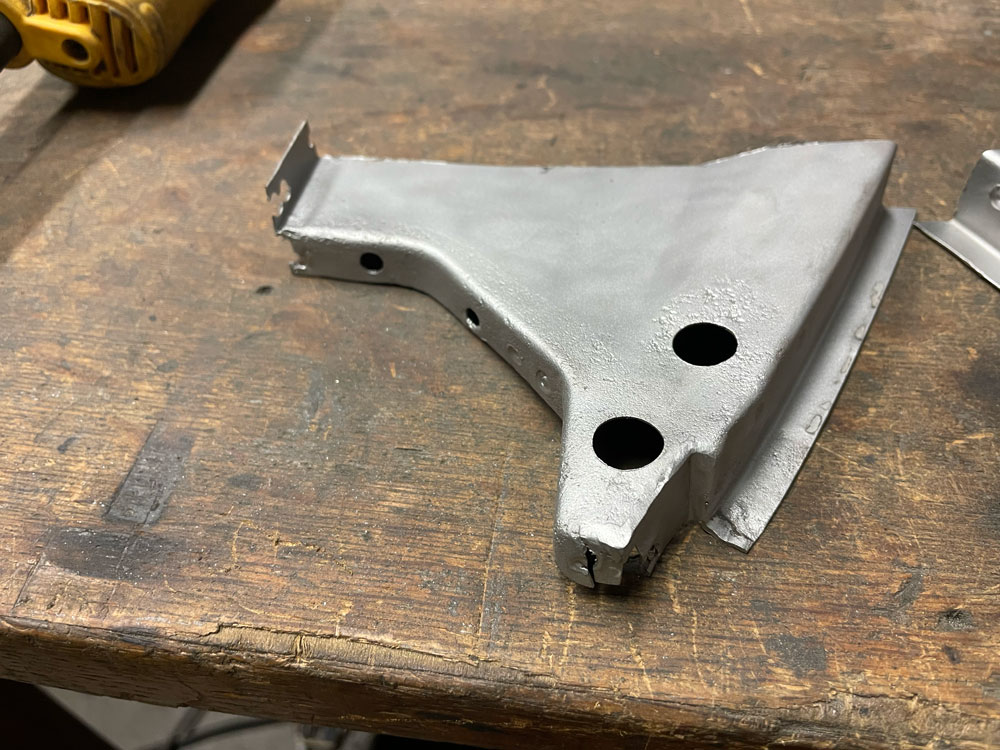 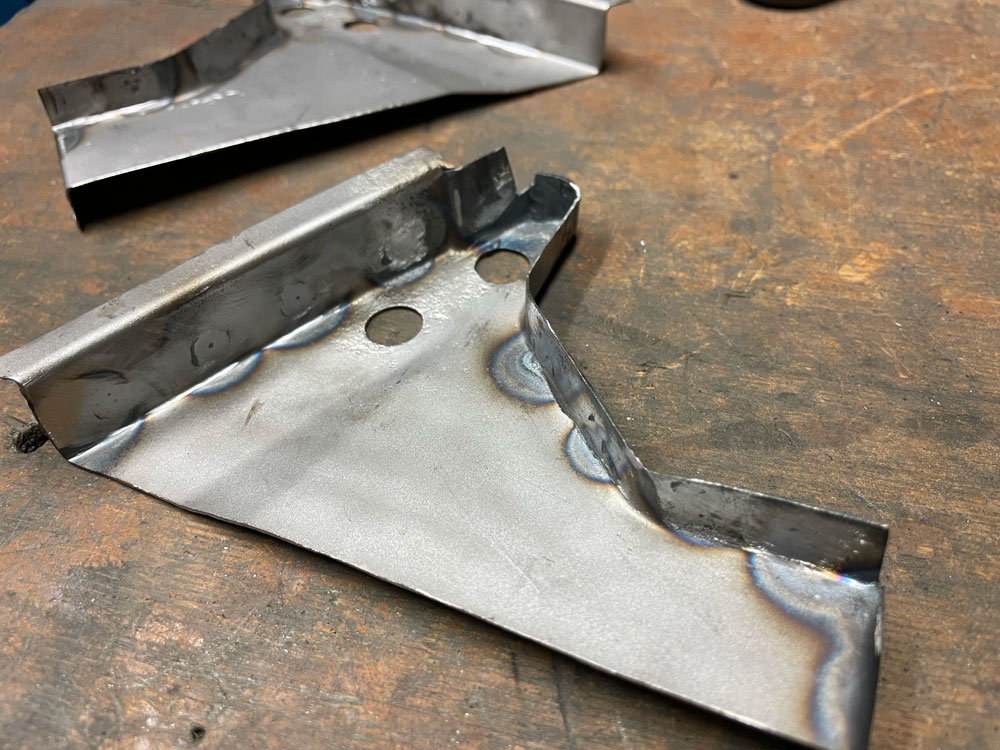 A few repairs and fitting 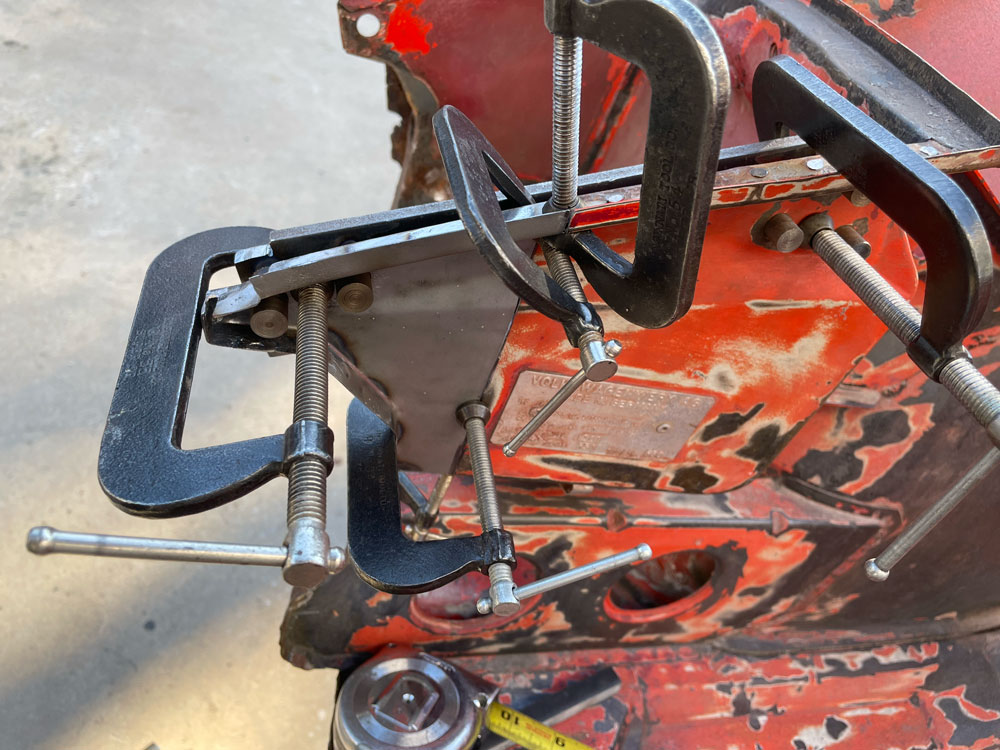 the other side... 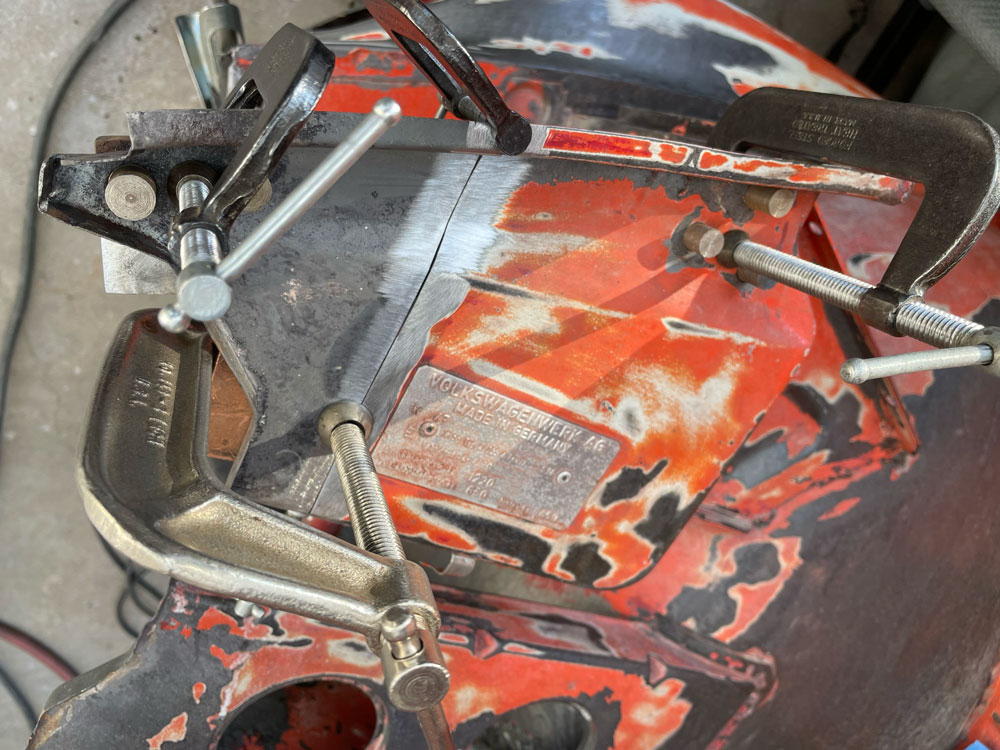 The brazing, the deformation, the ensuing corrosion of the original fronts of the bottoms of the headlight buckets 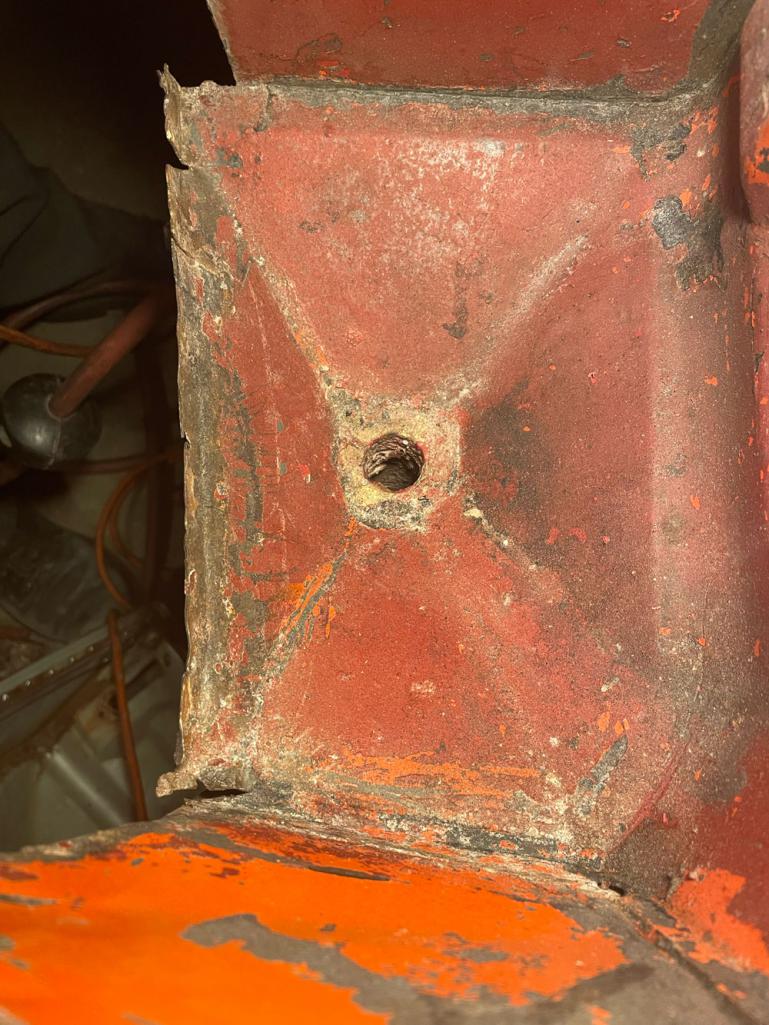 cut out 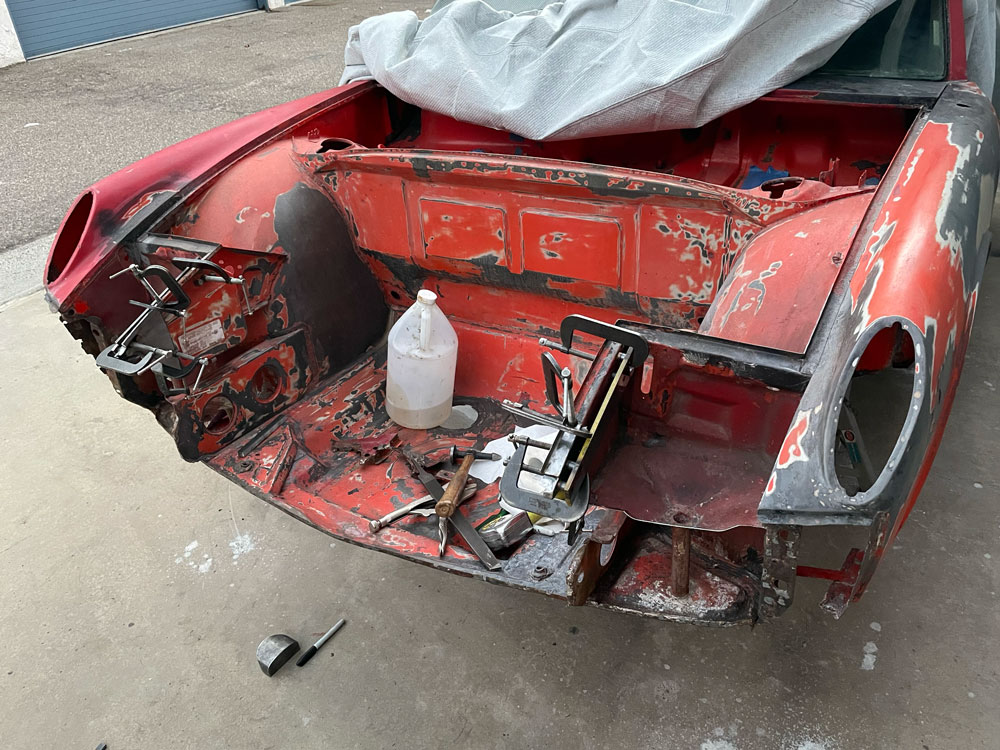 The replacements had issues of their own but better than what came out. 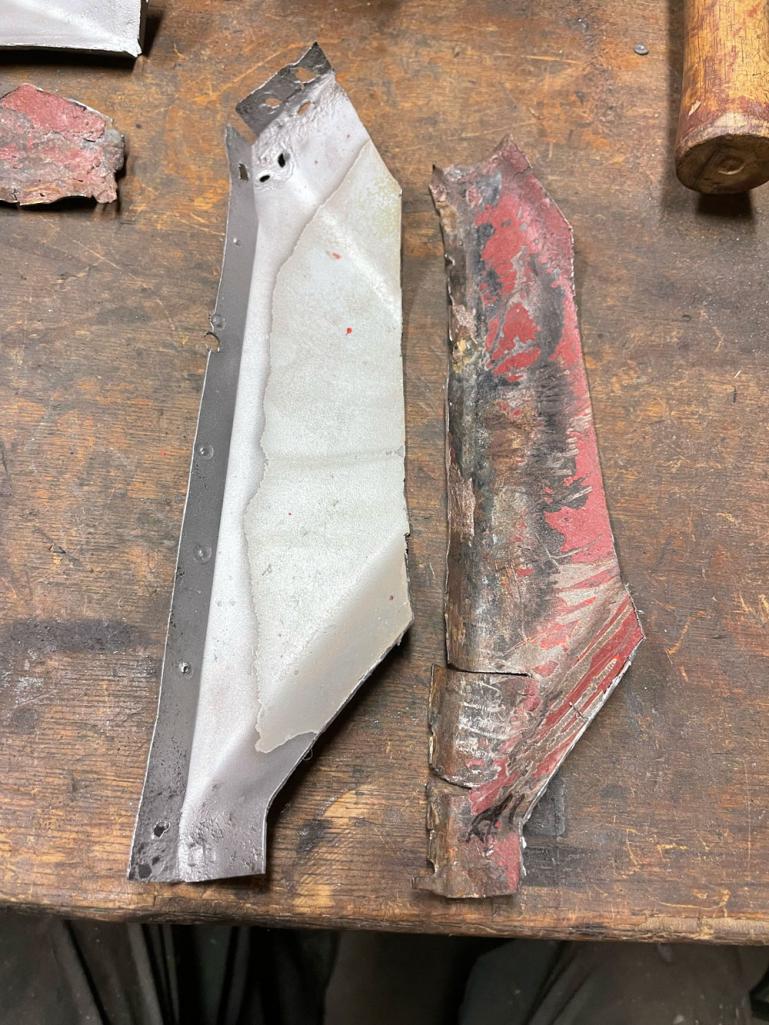 A flexible template ala Wray Schelin 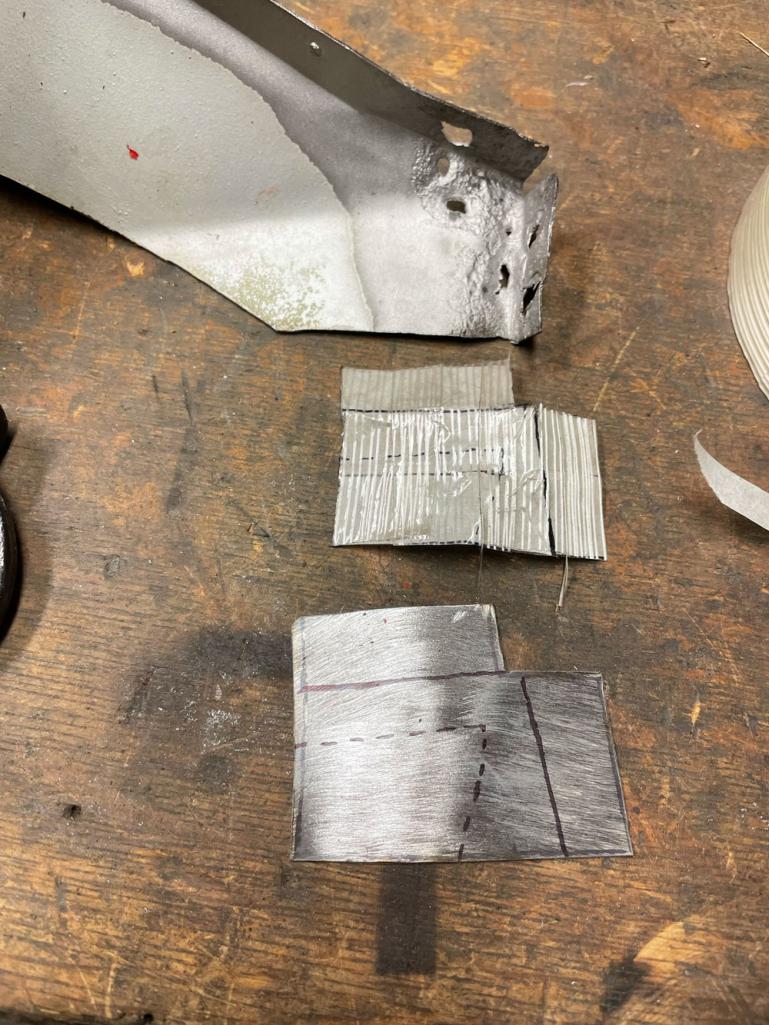 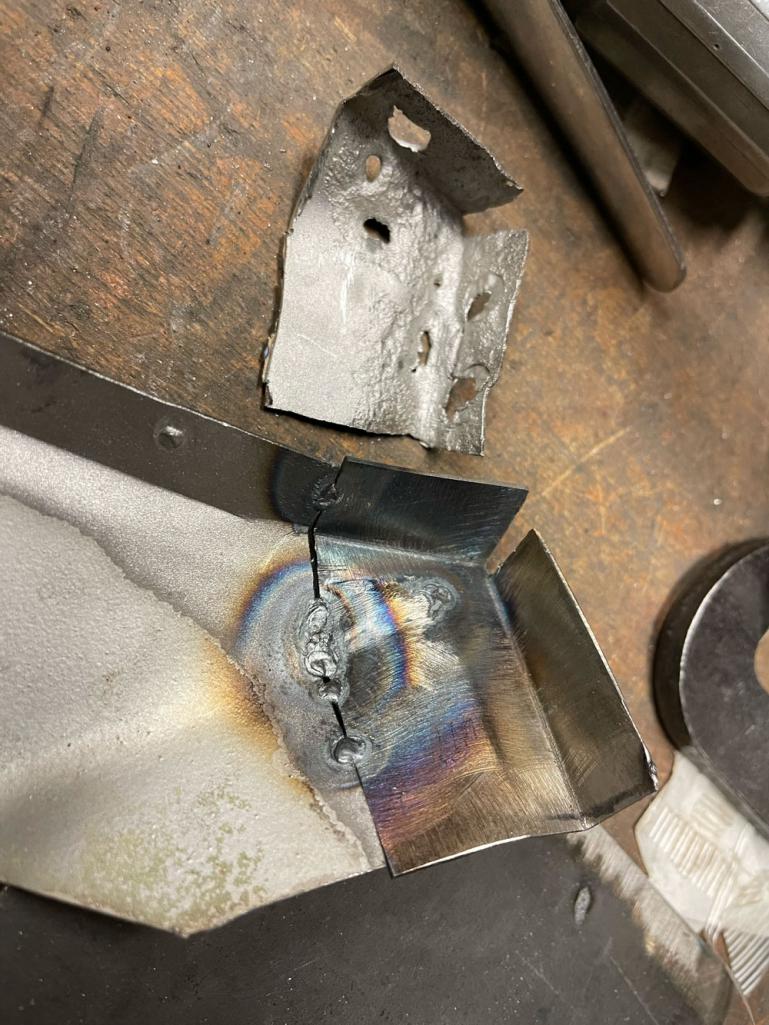 Patched the spot weld holes and rust repaired on both sides 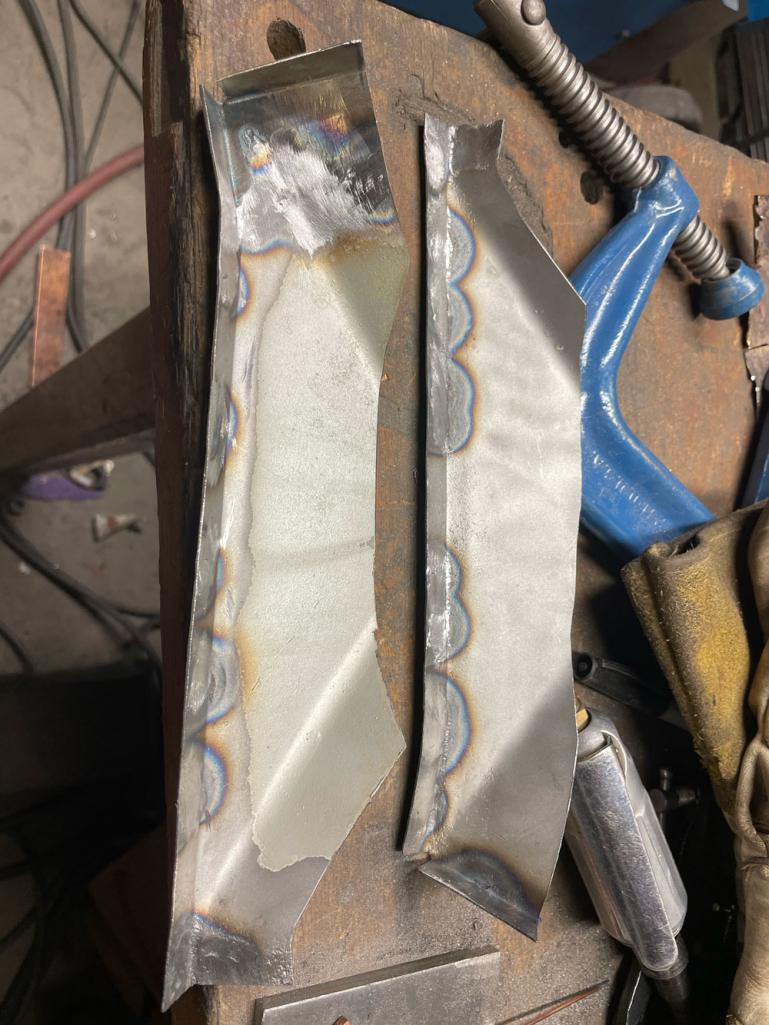 fitting  more to come... |
|
|
|
| nathanxnathan |
Mar 25 2024, 06:17 PM
Post
#55
|
|
Member Group: Members Posts: 274 Joined: 16-February 18 From: Laguna Beach, CA Member No.: 21,899 Region Association: Southern California |
Fitting, ready to weld I think
   Cut off the lower support brace pretty far back on the driver's side on account of the damage. There was a large cut left open at the lower driver side, from the inner fender front to the area below the headlight bucket. 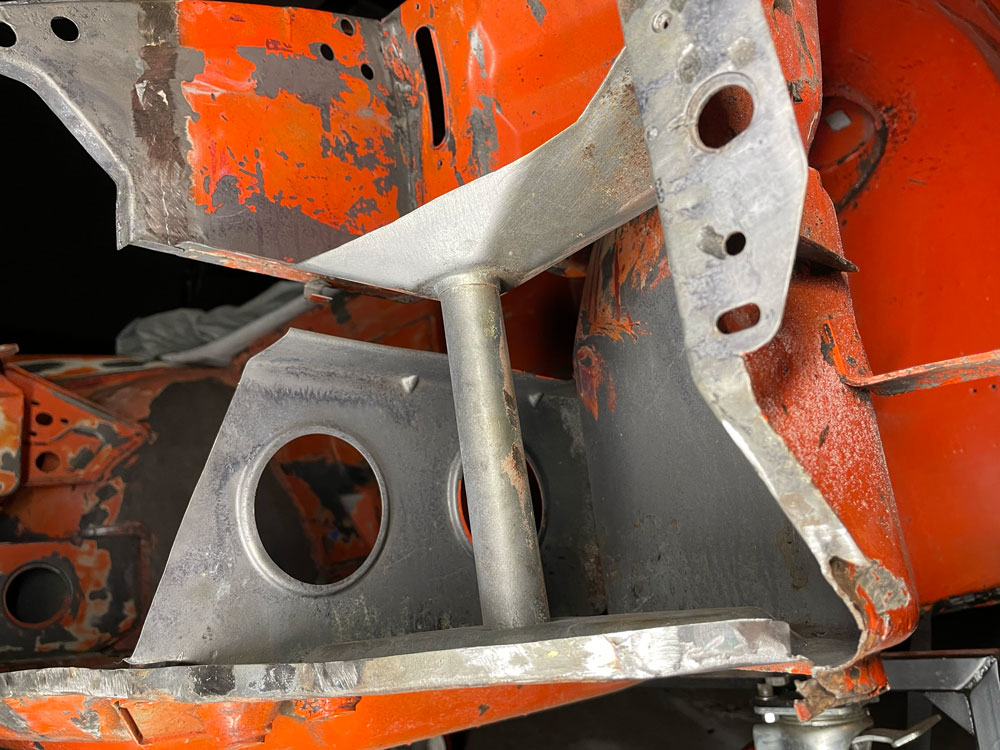 Prepped to patch 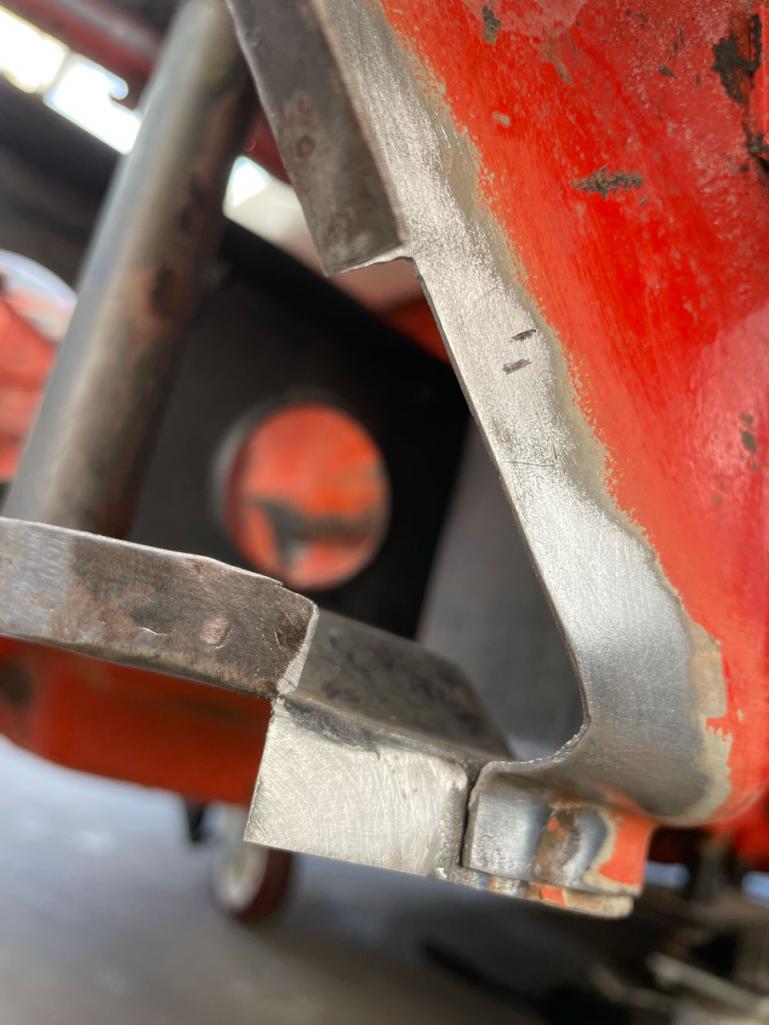 This is the passenger side lower support. It's interesting the original has no hole, I think on account of it being a standard equipment car/no fog lights. Both original and replacement are from 70 model years.  |
|
|
|
| nathanxnathan |
Mar 25 2024, 06:23 PM
Post
#56
|
|
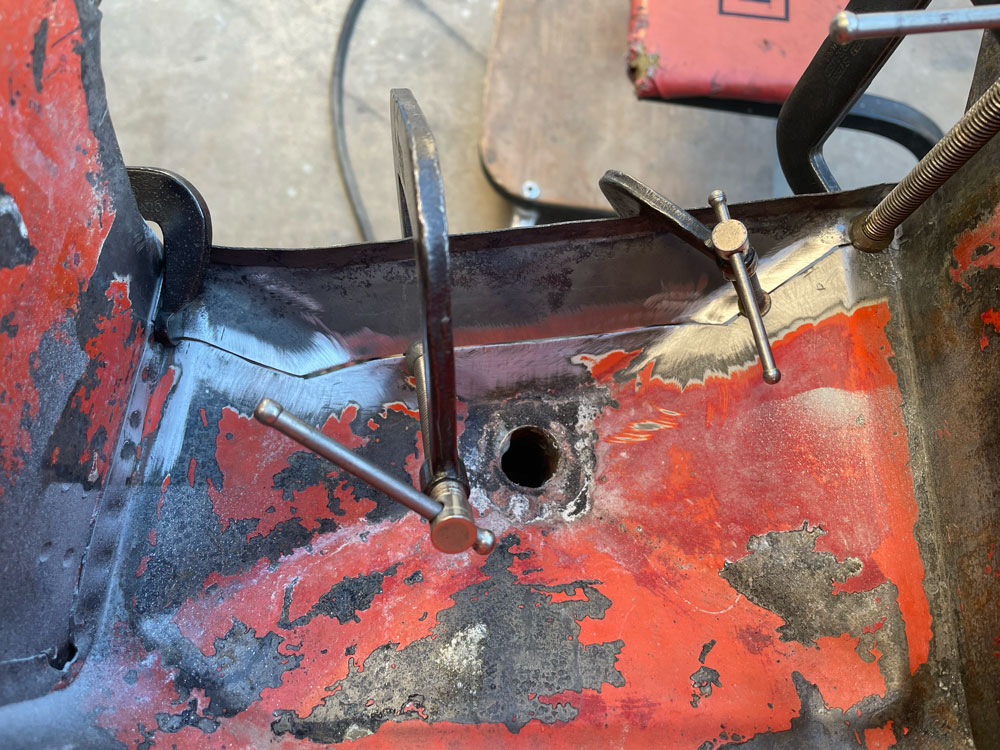
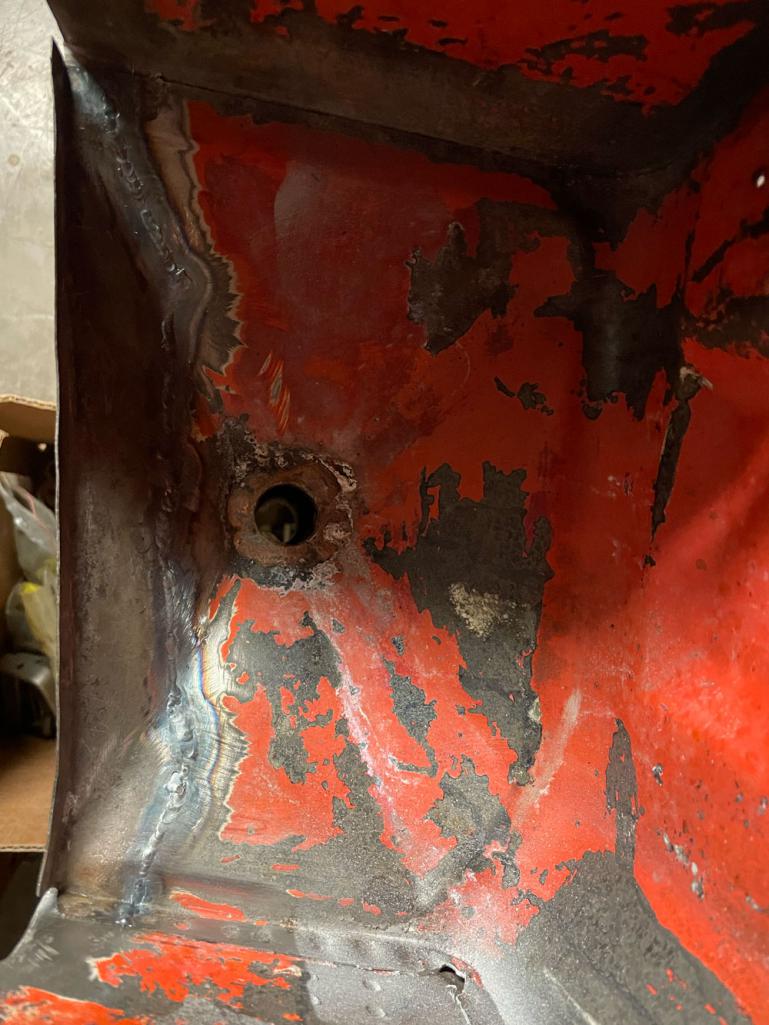
Member Group: Members Posts: 274 Joined: 16-February 18 From: Laguna Beach, CA Member No.: 21,899 Region Association: Southern California |
Fitting up
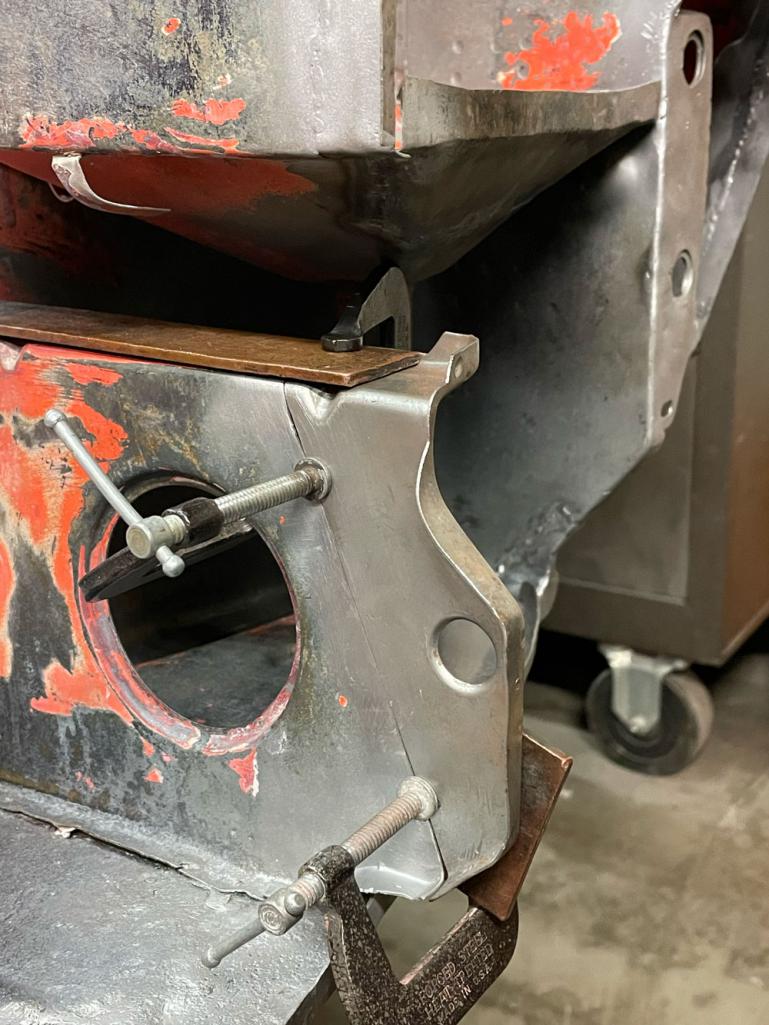 And got that welded in.. Ospho really makes it look like part of the car, for better or worse. 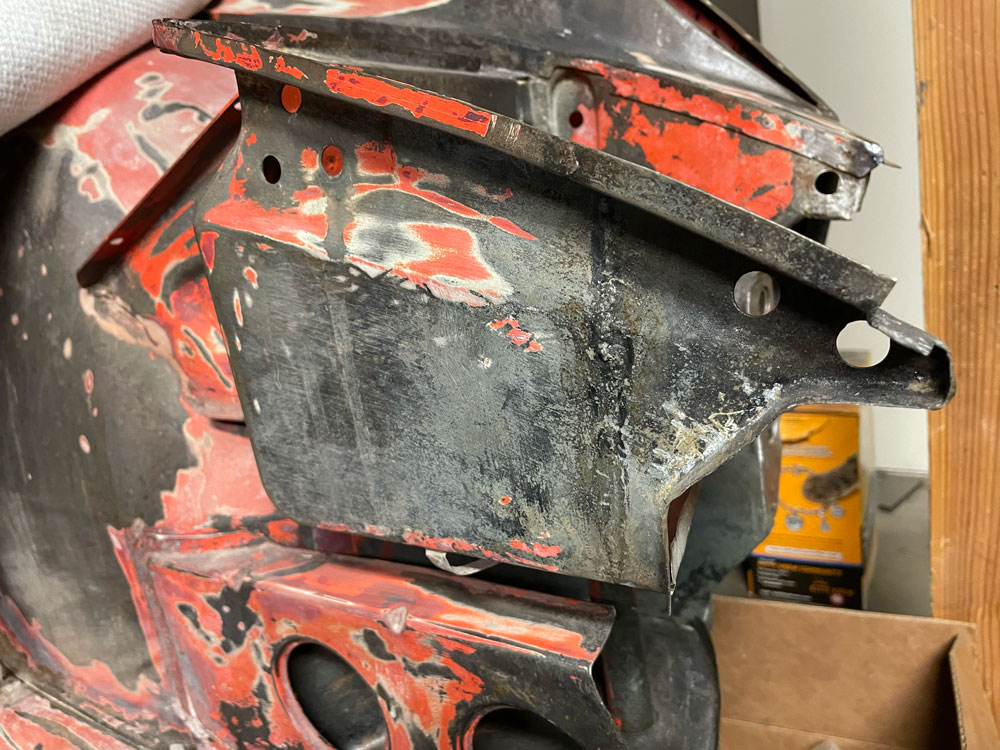 I've used ospho to prevent rust flashing up on stuff, but I kind of wonder if it's going to make things harder than if I'd sprayed 2k primer as I've come along. I've had this notion to try to claim territory by primering as I go along, like an area at a time.. Anyway, I've got specifics on a few more areas where the cross panel connects, but it seems I don't have pics of the resolution as of yet. I'll post that progress soon. |
|
|
|
| Karl R |
Mar 25 2024, 07:24 PM
Post
#57
|
|
Newbie Group: Members Posts: 32 Joined: 25-July 23 From: honolulu Member No.: 27,486 Region Association: Southern California |
Amazing. Makes me wish I could weld. I have a somewhat similar '70. Bad red on top of black. Less rust than yours, I think (hope) but your tangerine is gonna be an awesome color while my black would be almost as bad as the red. Loving the visualizer too!
|
|
|
|
| nathanxnathan |
Mar 26 2024, 12:22 AM
Post
#58
|
|
Member Group: Members Posts: 274 Joined: 16-February 18 From: Laguna Beach, CA Member No.: 21,899 Region Association: Southern California |
QUOTE(Karl R @ Mar 25 2024, 06:24 PM) Amazing. Makes me wish I could weld. I have a somewhat similar '70. Bad red on top of black. Less rust than yours, I think (hope) but your tangerine is gonna be an awesome color while my black would be almost as bad as the red. Loving the visualizer too! Thanks Karl. I'm just ok at welding. Mostly I've tig welded everything. A few spots it's safer to use mig. For the most part I've burnished everything after. I do love the tangerine, such a bright cheerful color. I had a black parts car and all the details fall into shadow while at the same time every little blemish/imperfection shows. I'd almost be tempted to do a color change. |
|
|
|
| nathanxnathan |
Mar 26 2024, 12:53 AM
Post
#59
|
|
Member Group: Members Posts: 274 Joined: 16-February 18 From: Laguna Beach, CA Member No.: 21,899 Region Association: Southern California |
A little diversion today. I got some pieces from Restoration design. I'm not sure what you call this piece. It is a reinforcement for the front of the front suspension.
Here are some pics going way back. 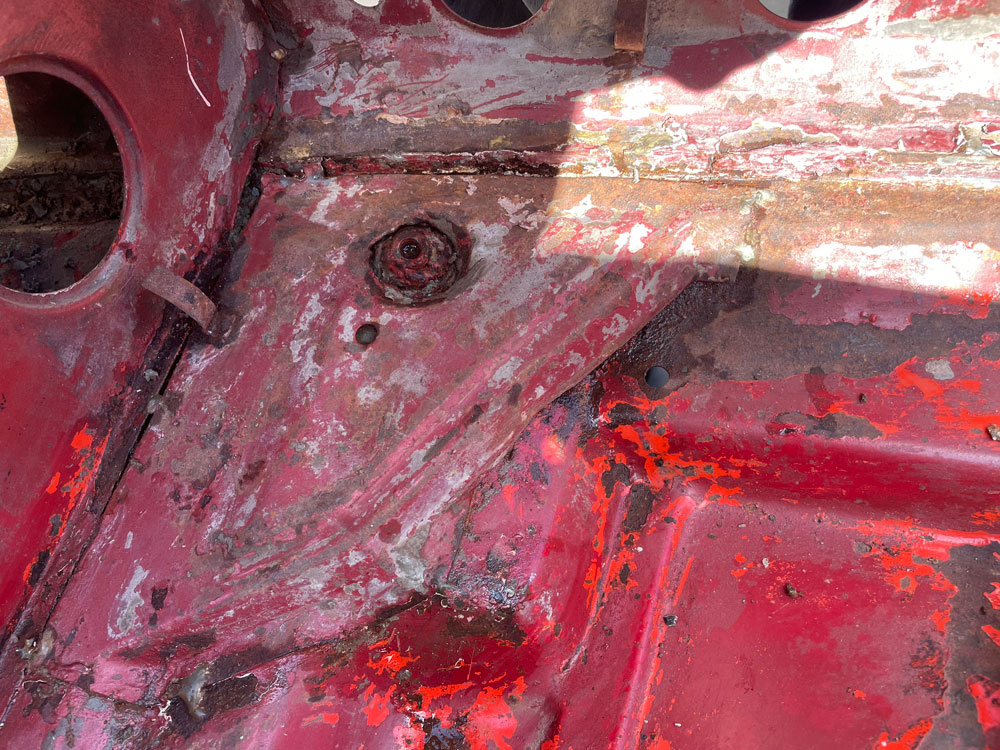 This piece was completely separated from the fat mig bead that holds it to the threaded boss of the suspension mount, and held in about 2 places by little tacked brazings. A little work revealed some nastiness. 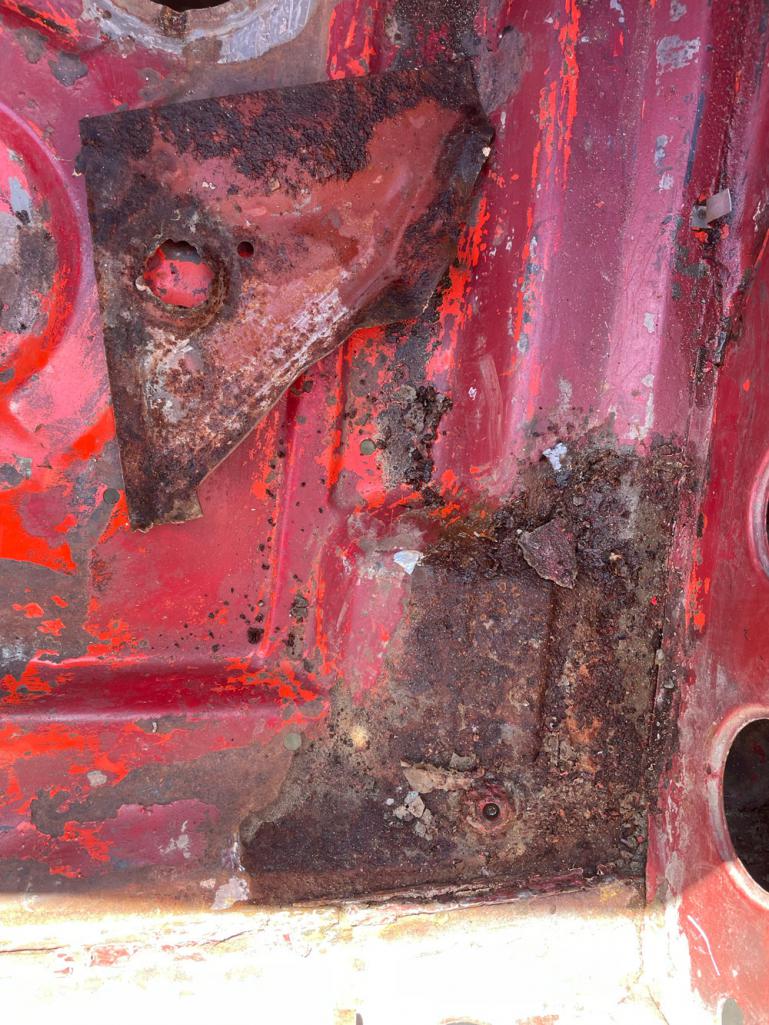 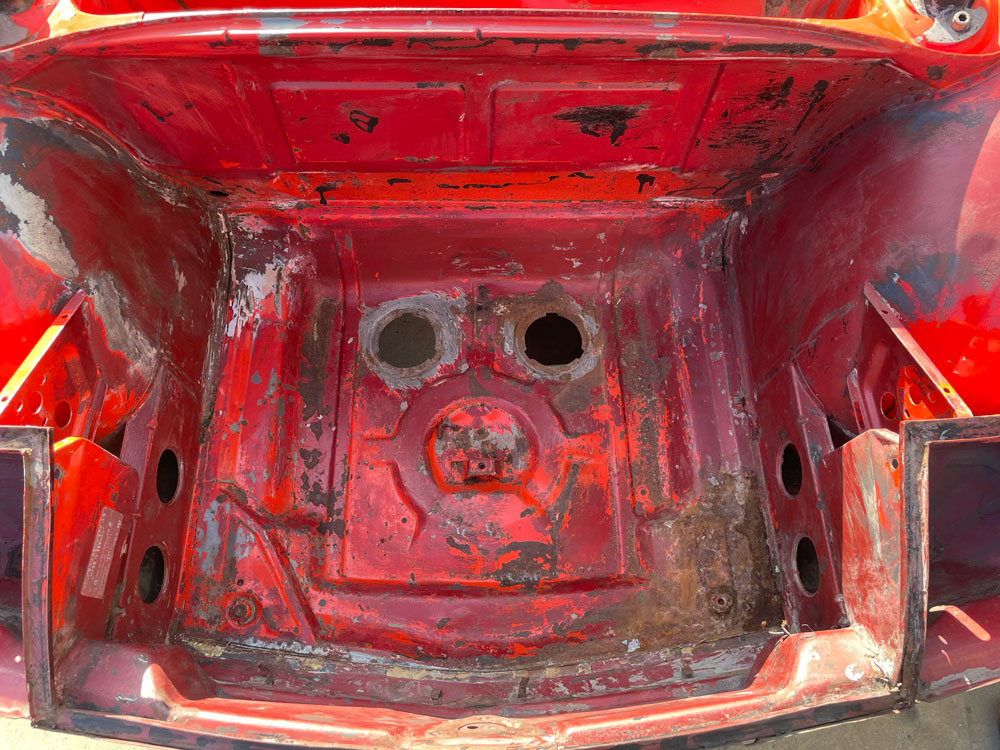 The replacement piece before grinding off the fat bead around the threaded insert  Comparing the replacement to the original, there's about 10mm missing from the one side. I don't know if this is an early late thing or what. 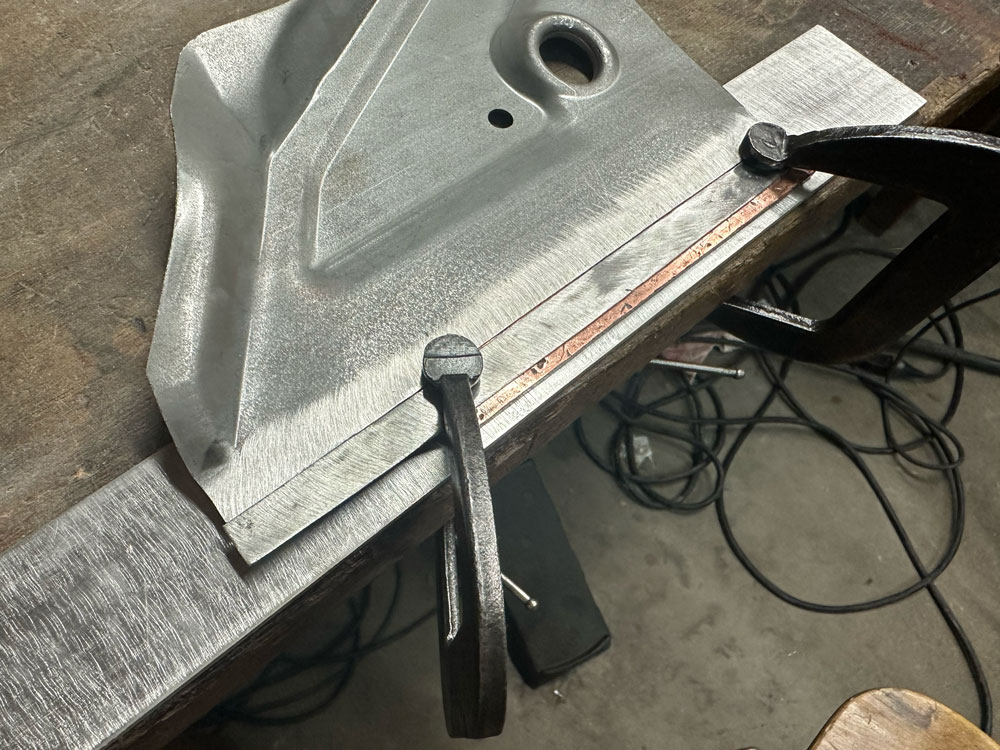 I'm out of practice. I was always a better grinder than a welder anyway. 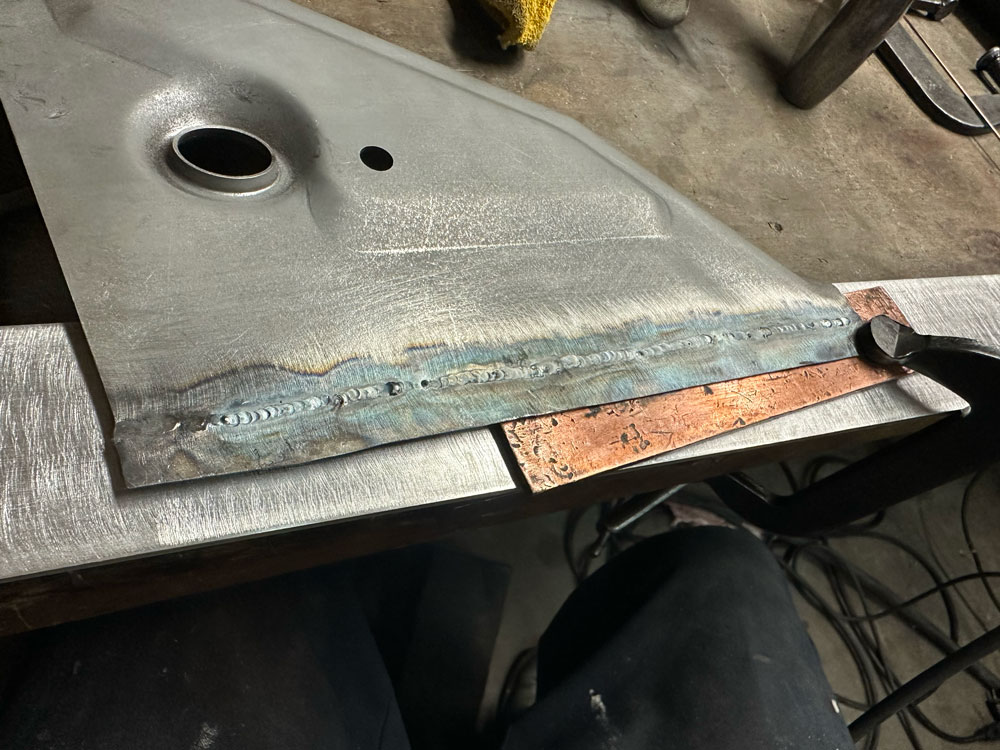 Another flexible template. The part is pretty accurate except the one side being short, the angle of the other side is slightly off, and it's made of the wrong gauge. It's 0.055 " where the original is 0.035". 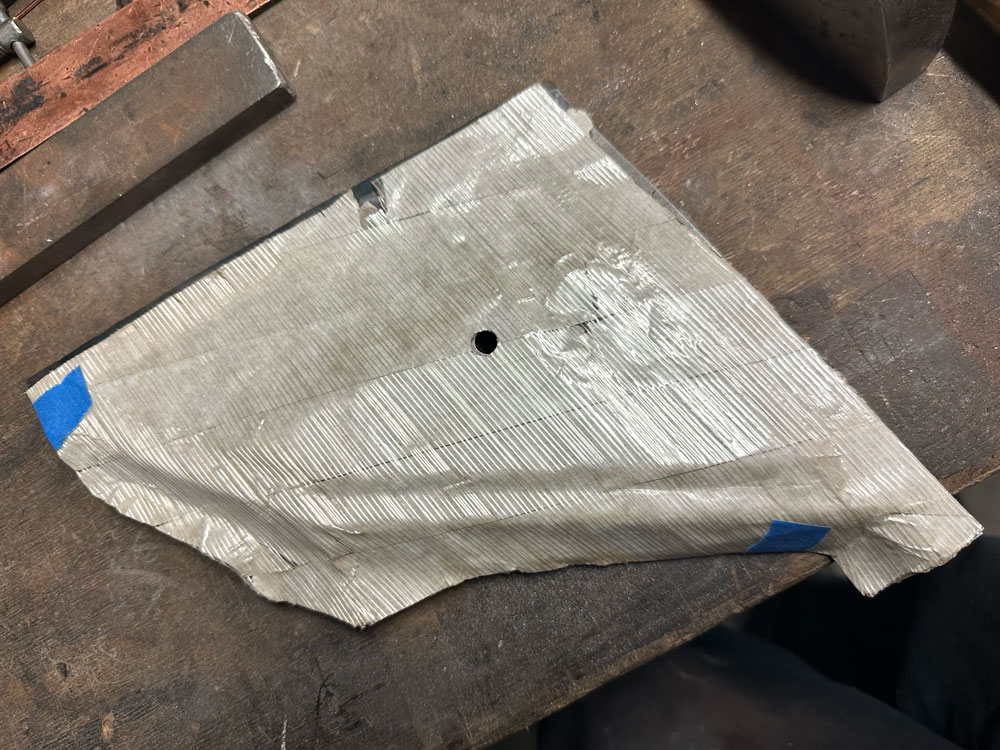 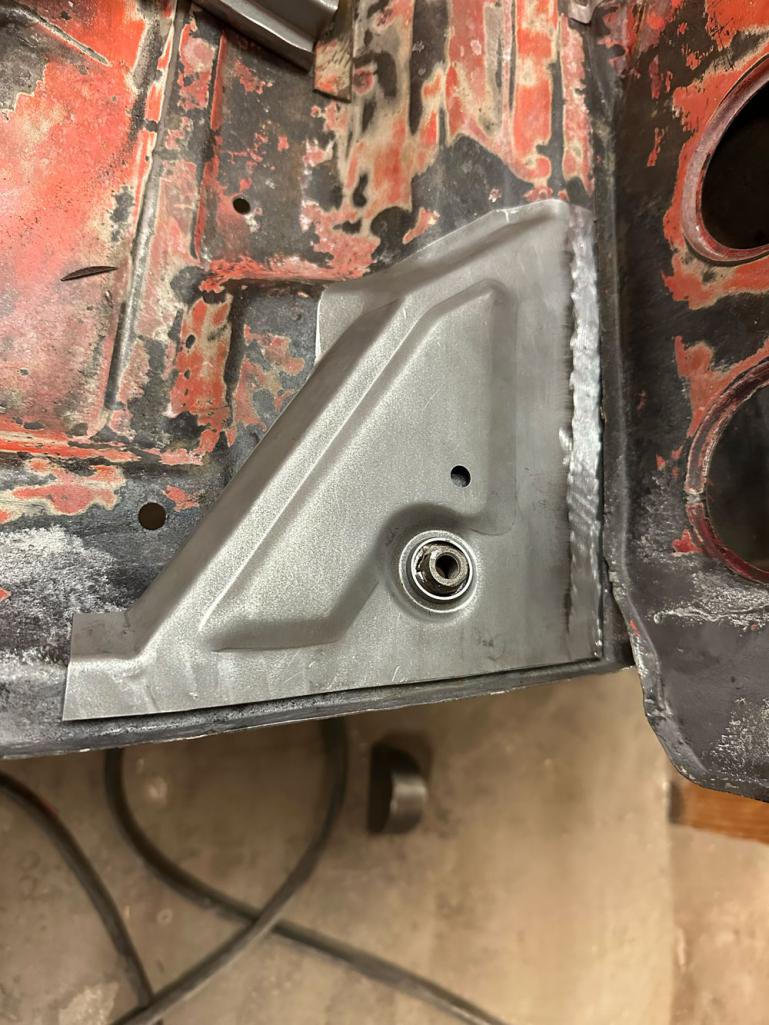 Coming along. You can see the patch in the corner here, too. A bit more burnishing to do. I'm going to selectively primer beneath this piece before it goes in. 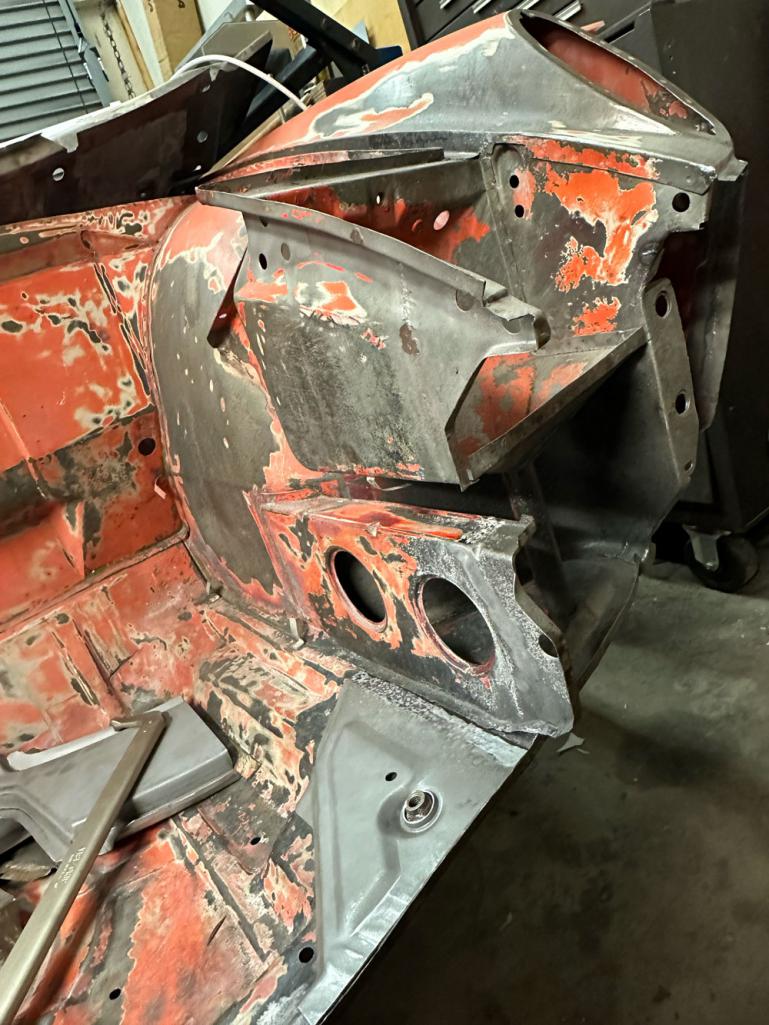 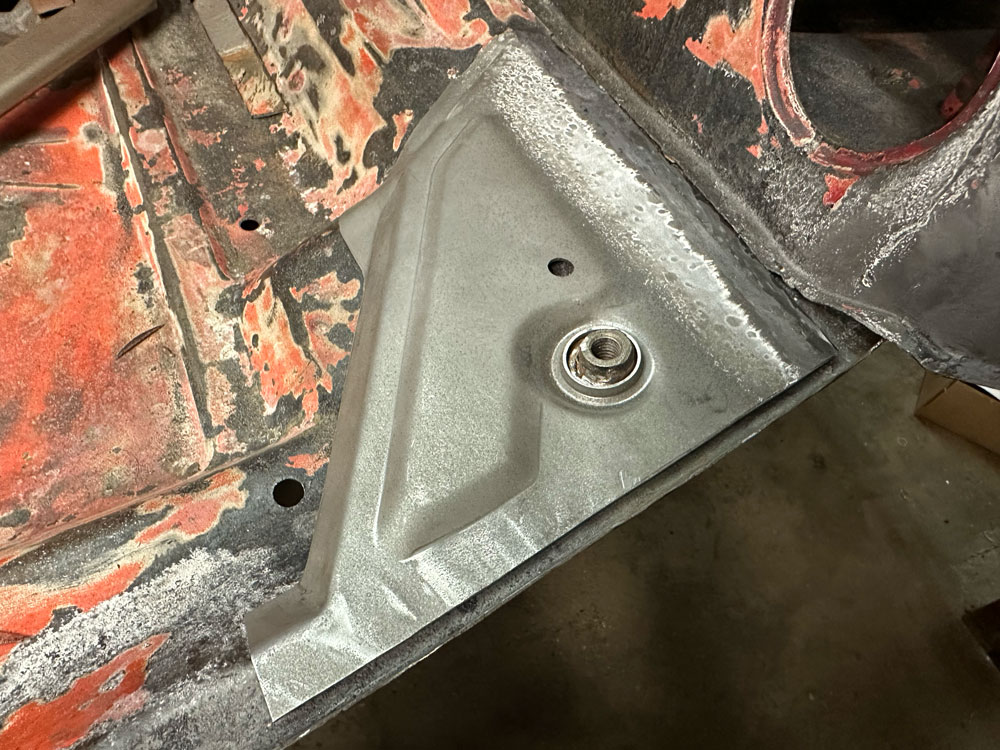 |
|
|
|
| Cairo94507 |
Mar 26 2024, 07:13 AM
Post
#60
|
|
Michael Group: Members Posts: 9,723 Joined: 1-November 08 From: Auburn, CA Member No.: 9,712 Region Association: Northern California |
Great work- you are making terrific progress; keep up the good work. (IMG:style_emoticons/default/beerchug.gif)
|
|
|
|
|
1 User(s) are reading this topic (1 Guests and 0 Anonymous Users)
0 Members:

|
Lo-Fi Version | Time is now: 2nd May 2024 - 04:00 PM |
Invision Power Board
v9.1.4 © 2024 IPS, Inc.