|
|
|
Porsche, and the Porsche crest are registered trademarks of Dr. Ing. h.c. F. Porsche AG.
This site is not affiliated with Porsche in any way. Its only purpose is to provide an online forum for car enthusiasts. All other trademarks are property of their respective owners. |
|
|


| jdamiano |
 Oct 17 2022, 02:07 PM Oct 17 2022, 02:07 PM
Post
#1
|
|
Member  Group: Members Posts: 335 Joined: 18-March 18 From: Jacksonville Member No.: 21,981 Region Association: South East States |
I picked up a mirror I want to use on the passenger side. The base was easy to rotate but I can’t get it to mirror to rotate on the shaft. I took the nut and spring off but it still doesn’t move at all. Anyone know what I need to do?
Attached thumbnail(s) 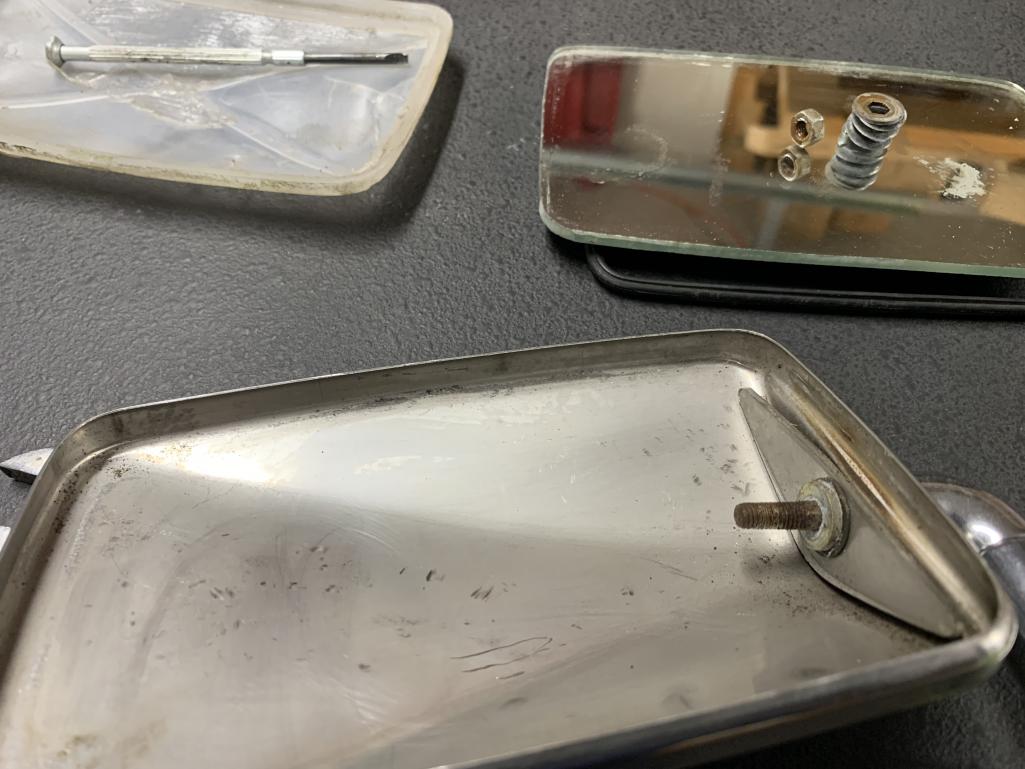
|
   |

 
|
  |
Replies(1 - 9)
| mepstein |
Oct 17 2022, 02:16 PM
Post
#2
|
|
914-6 GT in waiting Group: Members Posts: 19,272 Joined: 19-September 09 From: Landenberg, PA/Wilmington, DE Member No.: 10,825 Region Association: MidAtlantic Region |
Soak the joint in penetrating oil. If it won’t move, remove the glass and get to the joint behind the glass. Do not force it!
Edit. I see you have the glass off already. Penetrating oil behind the washer and then remove the washer. Don’t pry a screwdriver between the washer and the housing. The stainless steel housing is thin and deforms easily. |
|
|
|
| jdamiano |
Oct 17 2022, 02:36 PM
Post
#3
|
|
Member Group: Members Posts: 335 Joined: 18-March 18 From: Jacksonville Member No.: 21,981 Region Association: South East States |
Got it. Lots of WD-40 and a back an forth freed it up. Now I have to drill holes in my door. Scary!
|
|
|
|
| fsh2liv |
Oct 17 2022, 05:42 PM
Post
#4
|
|
Newbie Group: Members Posts: 26 Joined: 22-November 13 From: Colorado Member No.: 16,687 Region Association: Rocky Mountains |
QUOTE(jdamiano @ Oct 17 2022, 12:36 PM)  Got it. Lots of WD-40 and a back an forth freed it up. Now I have to drill holes in my door. Scary! Remove inner door panel and punch from the inside, through the existing nuts. Then drill. |
|
|
|
| mepstein |
Oct 17 2022, 06:59 PM
Post
#5
|
|
914-6 GT in waiting Group: Members Posts: 19,272 Joined: 19-September 09 From: Landenberg, PA/Wilmington, DE Member No.: 10,825 Region Association: MidAtlantic Region |
You can also measure or make a template from the driver side holes.
|
|
|
|
| Jamie |
Oct 17 2022, 08:22 PM
Post
#6
|
|
Senior Member Group: Members Posts: 1,031 Joined: 13-October 04 From: Georgetown,KY Member No.: 2,939 Region Association: South East States |
QUOTE(mepstein @ Oct 17 2022, 04:59 PM) You can also measure or make a template from the driver side holes. But drill tiny holes first to see if you have accurately found the nuts under the door skin. |
 |
|
| Montreal914 |
Oct 17 2022, 09:01 PM
Post
#7
|
|
Senior Member Group: Members Posts: 1,560 Joined: 8-August 10 From: Claremont, CA Member No.: 12,023 Region Association: Southern California |
Yes, that is exactly what I did using a 1/16" drill bit. I ended up pretty close to the center of the tapped holes. I used the features on the driver side door as reference such as the front window track recess in the door top portion. Using masking tape on the passenger door, I created my lines and target to replicate the driver side.
Once the 1/16 hole was done and determined to be within the tapped hole, I gradually opened it up using a Dremel with a small burr since my 1/16" pilot hole wasn't perfectly centered. Here is the result after plugging the useless holes that had been done by one or the POs. 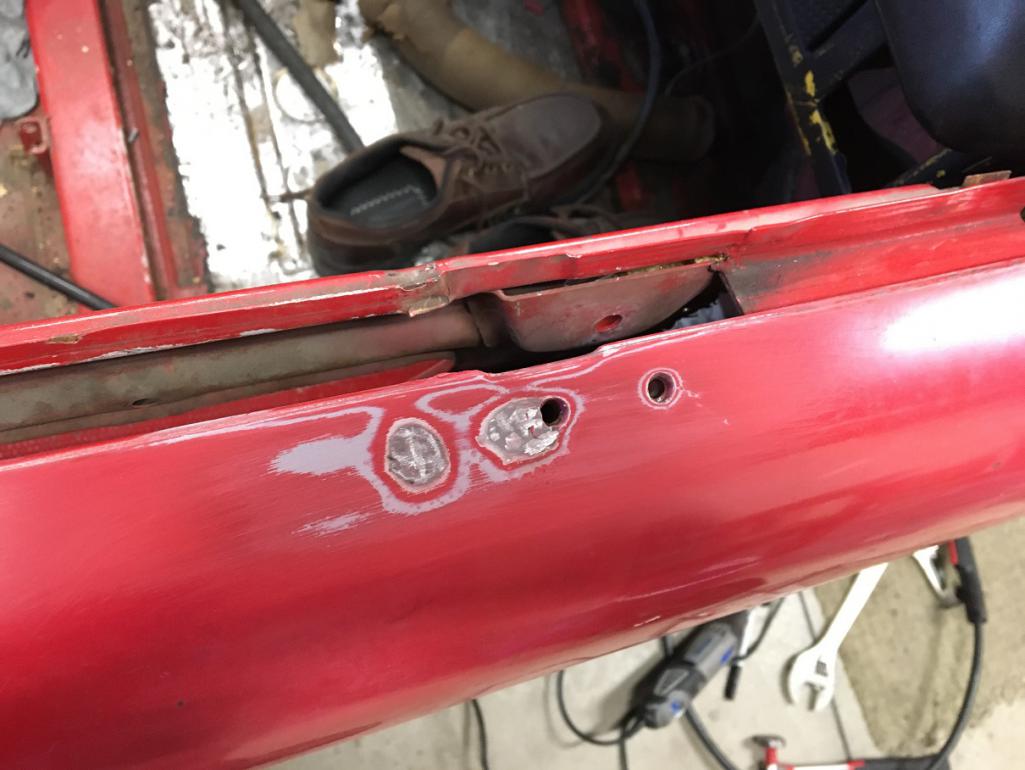 Good luck! (IMG:style_emoticons/default/smash.gif) |
|
|
|
| Cairo94507 |
Oct 18 2022, 07:25 AM
Post
#8
|
|
Michael Group: Members Posts: 9,759 Joined: 1-November 08 From: Auburn, CA Member No.: 9,712 Region Association: Northern California |
Excellent- clean the threads by running a tap through them and you are good to go. (IMG:style_emoticons/default/beerchug.gif)
|
|
|
|
| ConeDodger |
Oct 18 2022, 07:54 AM
Post
#9
|
|
Apex killer! Group: Members Posts: 23,588 Joined: 31-December 04 From: Tahoe Area Member No.: 3,380 Region Association: Northern California |
QUOTE(fsh2liv @ Oct 17 2022, 08:42 PM) QUOTE(jdamiano @ Oct 17 2022, 12:36 PM) Got it. Lots of WD-40 and a back an forth freed it up. Now I have to drill holes in my door. Scary! Remove inner door panel and punch from the inside, through the existing nuts. Then drill. I like this method, but Mepstein method works fine. Just takes more faith. |
|
|
|
| jdamiano |
Oct 18 2022, 01:53 PM
Post
#10
|
|
Member Group: Members Posts: 335 Joined: 18-March 18 From: Jacksonville Member No.: 21,981 Region Association: South East States |
I had faith! Made a template from the drives out of masking tape and drilled them out no problem. Used some touch up paint on the bare metal. Now I just need to screw it on.
Attached thumbnail(s) 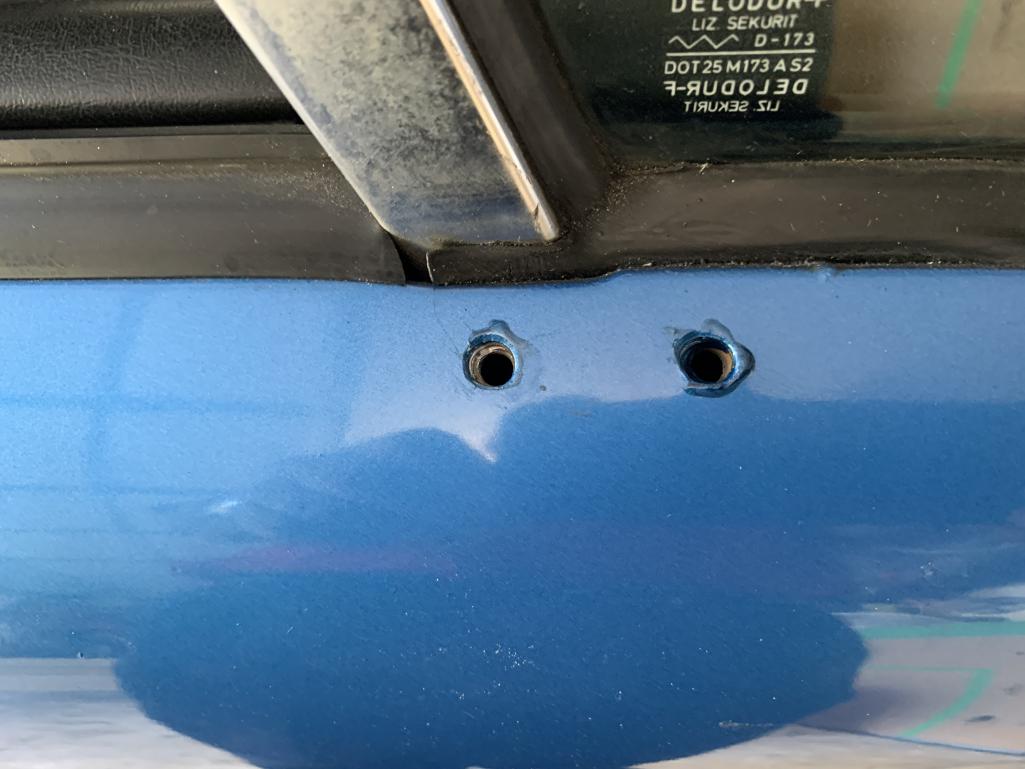
|
|
|
|
|
1 User(s) are reading this topic (1 Guests and 0 Anonymous Users)
0 Members:

|
Lo-Fi Version | Time is now: 17th May 2024 - 04:04 PM |
Invision Power Board
v9.1.4 © 2024 IPS, Inc.