|
|

|
Porsche, and the Porsche crest are registered trademarks of Dr. Ing. h.c. F. Porsche AG.
This site is not affiliated with Porsche in any way. Its only purpose is to provide an online forum for car enthusiasts. All other trademarks are property of their respective owners. |
|
|
  |
| East coaster |
 Apr 18 2023, 03:50 AM Apr 18 2023, 03:50 AM
Post
#101
|
|
Senior Member    Group: Members Posts: 1,903 Joined: 28-March 03 From: Millville, NJ Member No.: 487 Region Association: None 
|
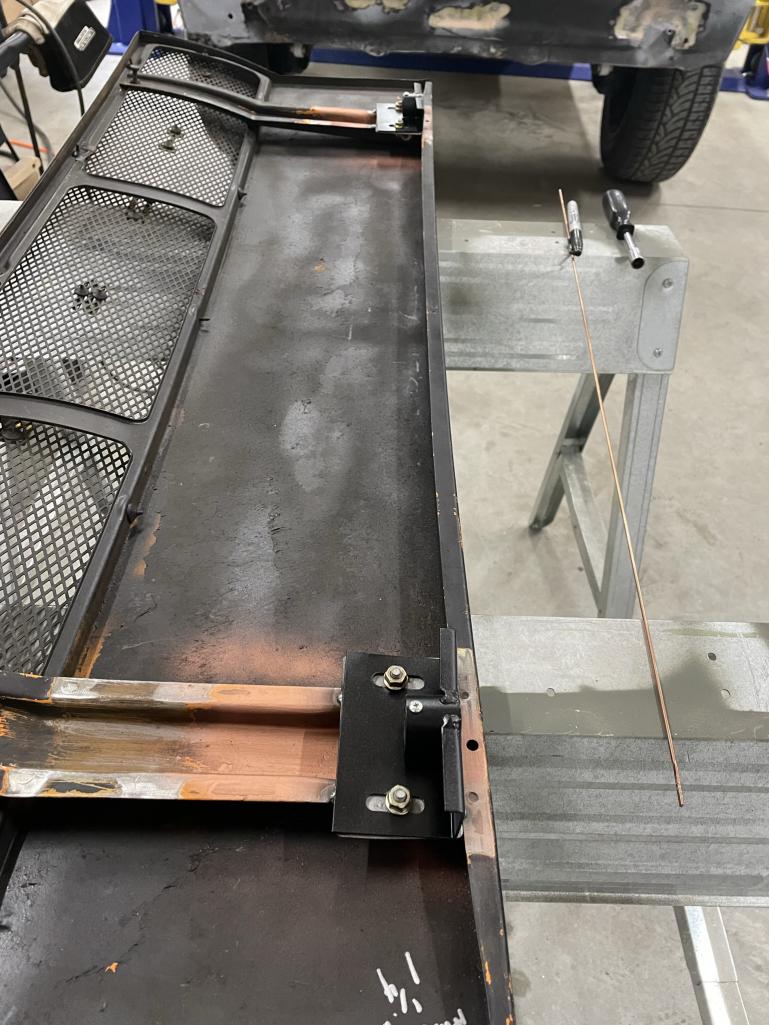
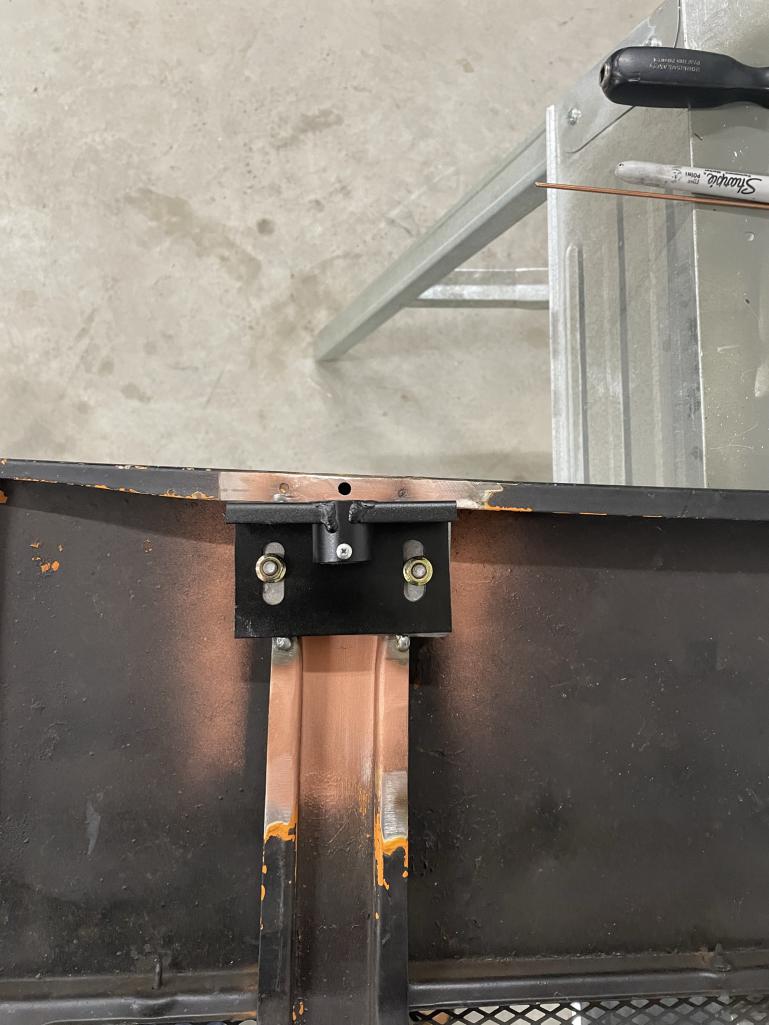
I wanted to make the engine cover removable for better access. I looked at a couple different options and decided on using horizontal pins mounted to the firewall with receivers mounted to the cover.
I made the receivers adjustable in height and alignment. First removed all hinge and torsion bar stuff, then welded plates with 6mm studs at each hinge location. Then I made the receiver parts with elongated slots for adjustment. Inside each part are delrin bushings I made with a female taper to help with pin engagement. The cover slides onto the pins with ease and uses the stock rear latch to secure the cover. Here’s a couple detail pics of the parts…. 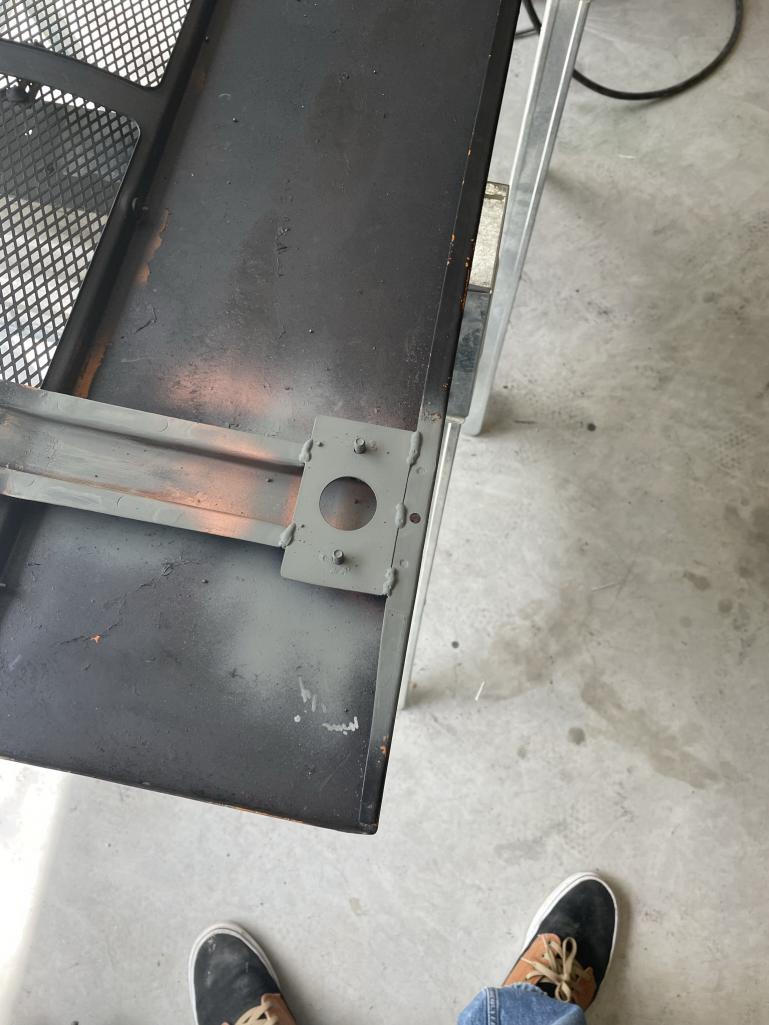 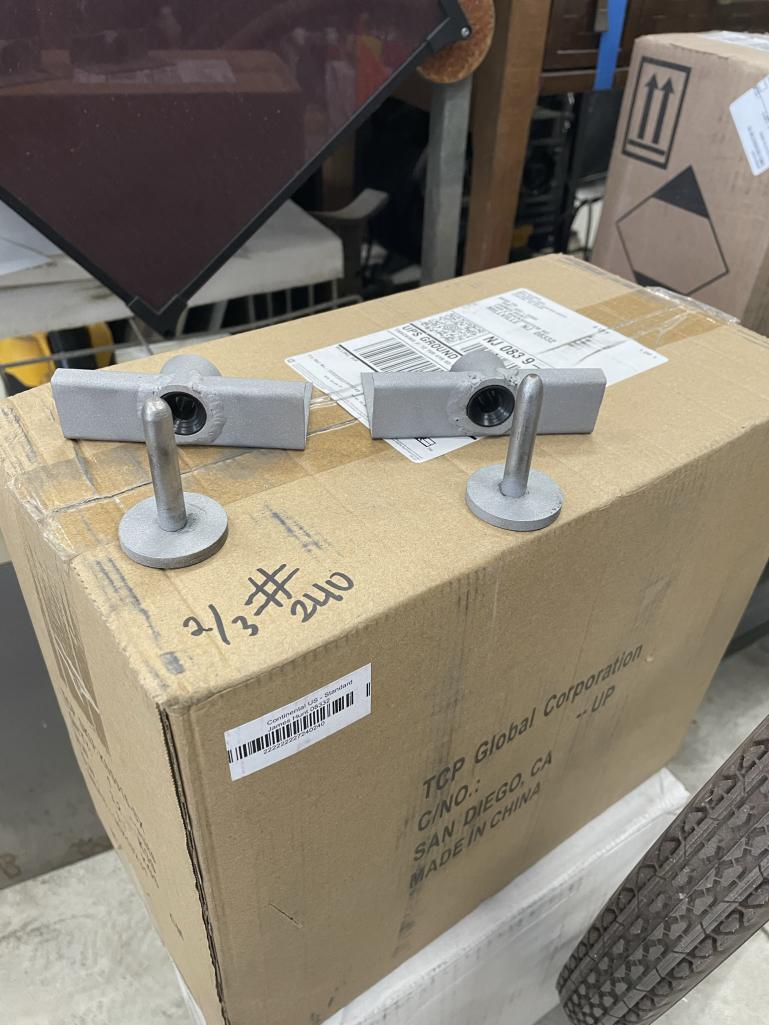 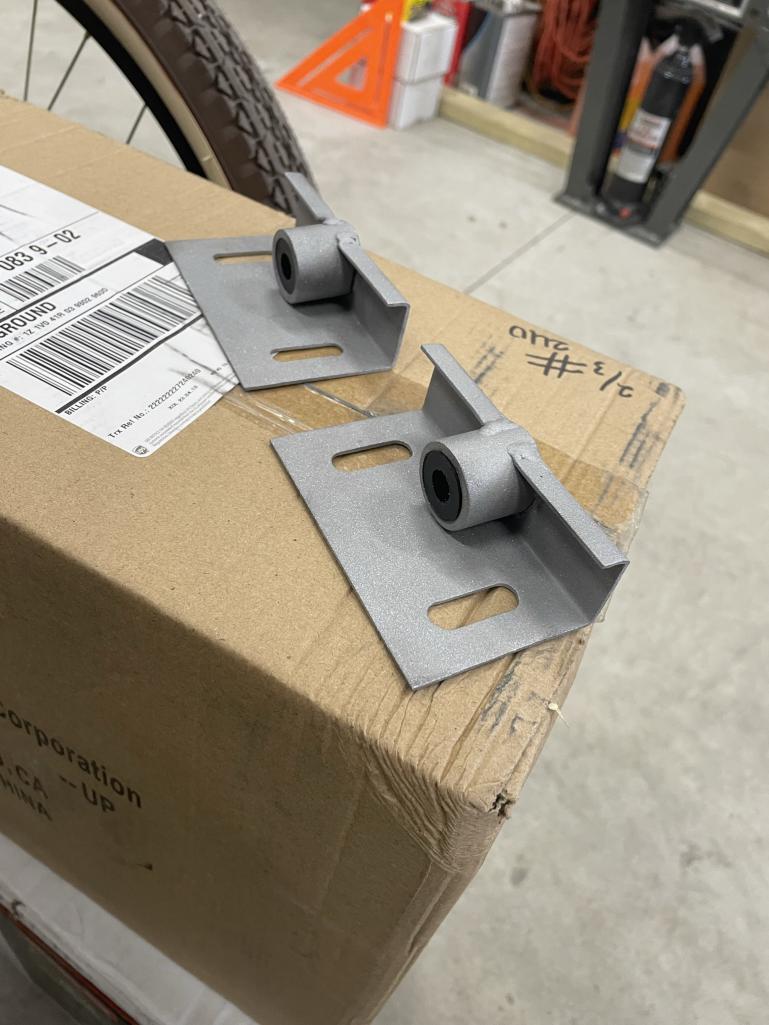 |
| East coaster |
 Apr 18 2023, 03:54 AM Apr 18 2023, 03:54 AM
Post
#102
|
|
Senior Member    Group: Members Posts: 1,903 Joined: 28-March 03 From: Millville, NJ Member No.: 487 Region Association: None 
|
|
| East coaster |
 Apr 18 2023, 03:56 AM Apr 18 2023, 03:56 AM
Post
#103
|
|
Senior Member    Group: Members Posts: 1,903 Joined: 28-March 03 From: Millville, NJ Member No.: 487 Region Association: None 
|
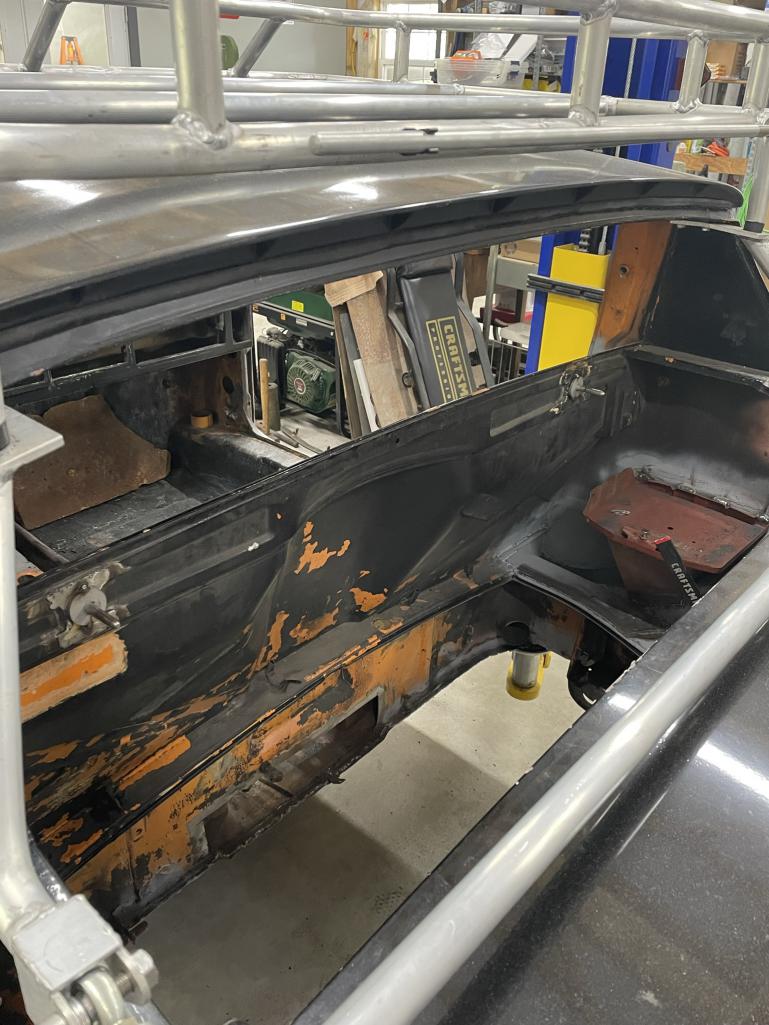
Here it sits on the pins with the rear latch engaged. This is prior to any adjustment of the latch, just a quick test fit.
Attached thumbnail(s) 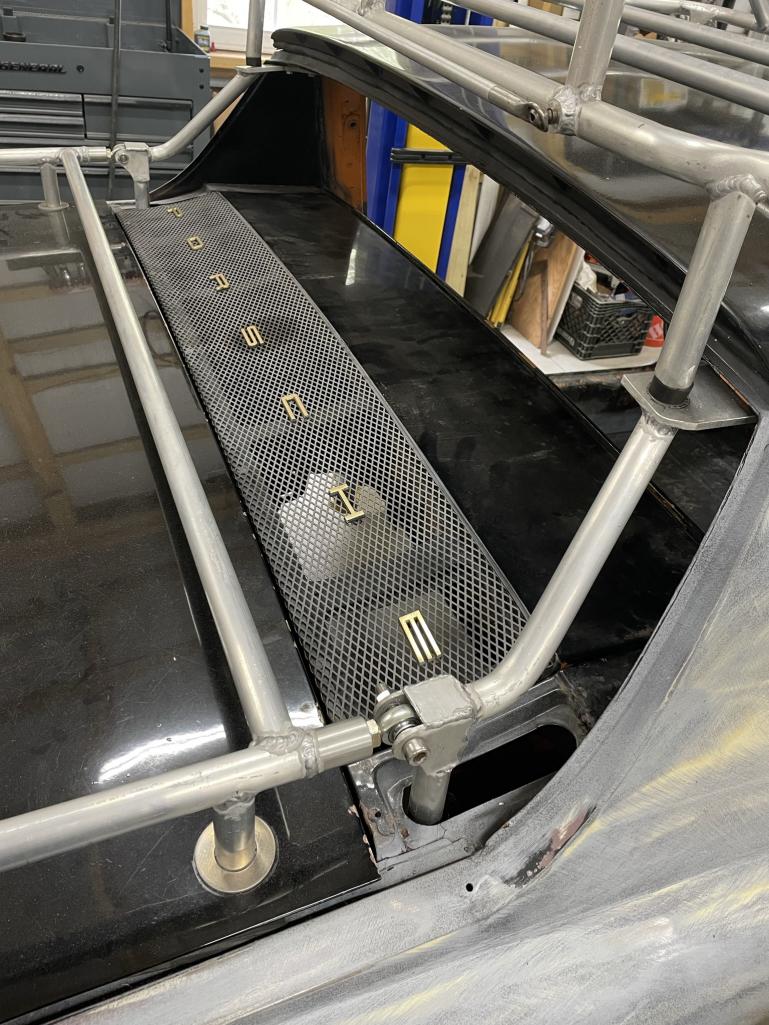
|
| tygaboy |
 Apr 18 2023, 07:46 AM Apr 18 2023, 07:46 AM
Post
#104
|
|
914 Guru      Group: Members Posts: 5,731 Joined: 6-October 15 From: Petaluma, CA Member No.: 19,241 Region Association: Northern California 
|
Nice. I was thinking along those same lines for my catch on my reverse tilt trunk but there was too much angle and distance needed from pin engagement to seating. Do you have to have the trunk open to get the engine lid off?
Either way, I love watching your engineering of all these clever designs. Keep up the awesome work. (IMG:style_emoticons/default/sawzall-smiley.gif) (IMG:style_emoticons/default/smash.gif) (IMG:style_emoticons/default/welder.gif) |
| Retroracer |
 Apr 18 2023, 10:09 AM Apr 18 2023, 10:09 AM
Post
#105
|
|
Senior Member    Group: Members Posts: 649 Joined: 7-July 13 From: Bend OR Member No.: 16,100 Region Association: Pacific Northwest 
|
Looks like you added a prop for the rear of the tilting roof storage frame, as well as bumpers for the landing pads (on the sail underside)? Nice! Liking the pragmatic approach,
- Tony |
| East coaster |
 Apr 18 2023, 12:40 PM Apr 18 2023, 12:40 PM
Post
#106
|
|
Senior Member    Group: Members Posts: 1,903 Joined: 28-March 03 From: Millville, NJ Member No.: 487 Region Association: None 
|
Nice. I was thinking along those same lines for my catch on my reverse tilt trunk but there was too much angle and distance needed from pin engagement to seating. Do you have to have the trunk open to get the engine lid off? Either way, I love watching your engineering of all these clever designs. Keep up the awesome work. (IMG:style_emoticons/default/sawzall-smiley.gif) (IMG:style_emoticons/default/smash.gif) (IMG:style_emoticons/default/welder.gif) Thank you! I angled the pins on the firewall so it will come up as it slides back. I can remove/install without opening the trunk lid. It didn’t take much angle to allow me to clear the trunk lid. I thought this was going to be more of a problem and had already been thinking of pivoting receivers if this didn’t workout, but thankfully I was able to keep it simple. I retired this year and I’m just having fun with the fab aspects of this project…..it’s nice to finally have time. |
| East coaster |
 Apr 19 2023, 05:26 AM Apr 19 2023, 05:26 AM
Post
#107
|
|
Senior Member    Group: Members Posts: 1,903 Joined: 28-March 03 From: Millville, NJ Member No.: 487 Region Association: None 
|
Looks like you added a prop for the rear of the tilting roof storage frame, as well as bumpers for the landing pads (on the sail underside)? Nice! Liking the pragmatic approach, - Tony Yup, I added a prop at the rear of the roof rack to hold it up for targa removal/install. I wanted to use gas shocks but the geometry just isn’t there, so I went old school and simple. The stainless heim joint at the end of the prop is a spare jetski part I mod’d to adapt to the alum prop rod. 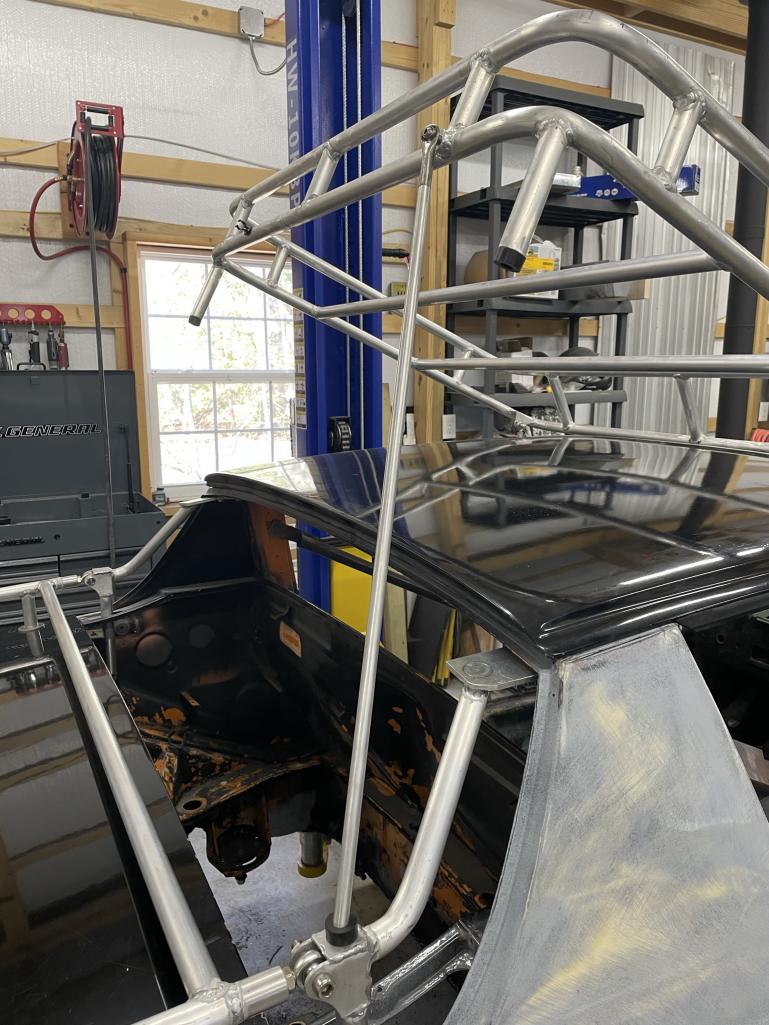 |
| tygaboy |
 Apr 19 2023, 08:03 AM Apr 19 2023, 08:03 AM
Post
#108
|
|
914 Guru      Group: Members Posts: 5,731 Joined: 6-October 15 From: Petaluma, CA Member No.: 19,241 Region Association: Northern California 
|
Super duper awesome. I want to move to your neighborhood and be your shop helper. Such a cool build.
|
| brant |
 Apr 19 2023, 10:44 AM Apr 19 2023, 10:44 AM
Post
#109
|
|
914 Wizard           Group: Members Posts: 12,113 Joined: 30-December 02 From: Colorado Member No.: 47 Region Association: Rocky Mountains 

|
nice job on the engine lid
we did something similar back a few years ago shown fully in my vintage race car build thread in my signature. we tried to minimize weight so tried to build it the lightest we could. Attached thumbnail(s) 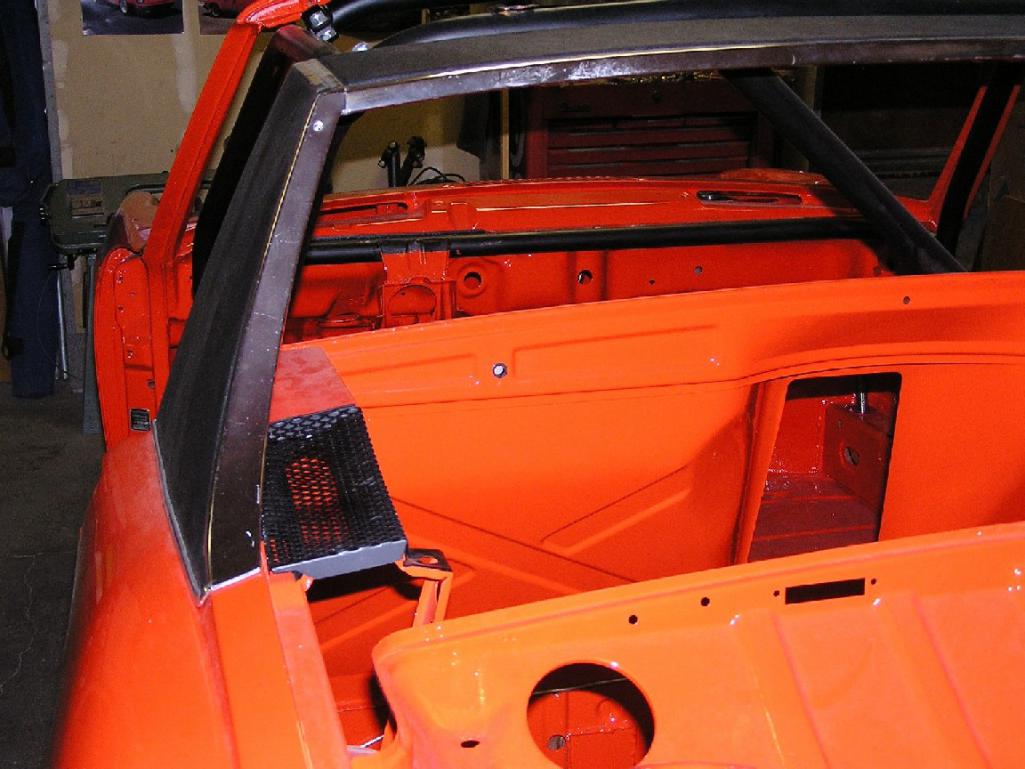 Attached image(s) 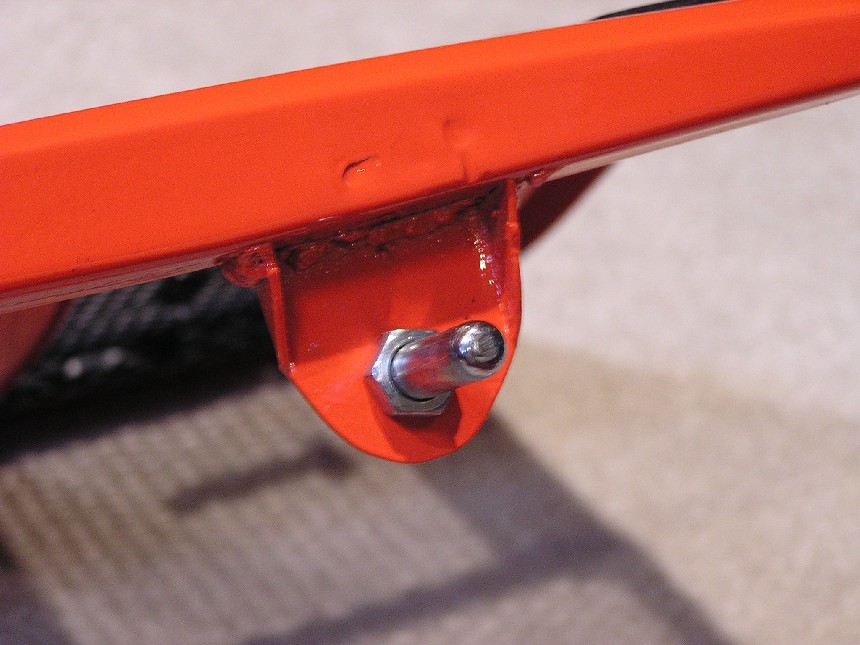
|
| East coaster |
 Apr 19 2023, 06:18 PM Apr 19 2023, 06:18 PM
Post
#110
|
|
Senior Member    Group: Members Posts: 1,903 Joined: 28-March 03 From: Millville, NJ Member No.: 487 Region Association: None 
|
|
| East coaster |
 Apr 20 2023, 07:05 PM Apr 20 2023, 07:05 PM
Post
#111
|
|
Senior Member    Group: Members Posts: 1,903 Joined: 28-March 03 From: Millville, NJ Member No.: 487 Region Association: None 
|
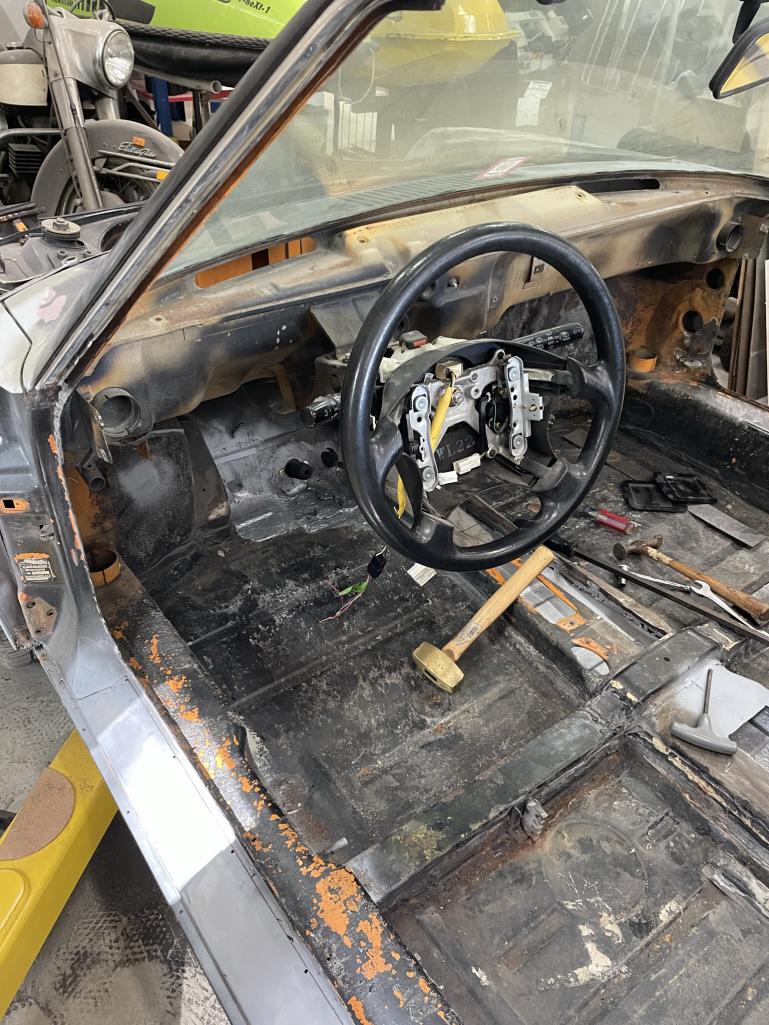
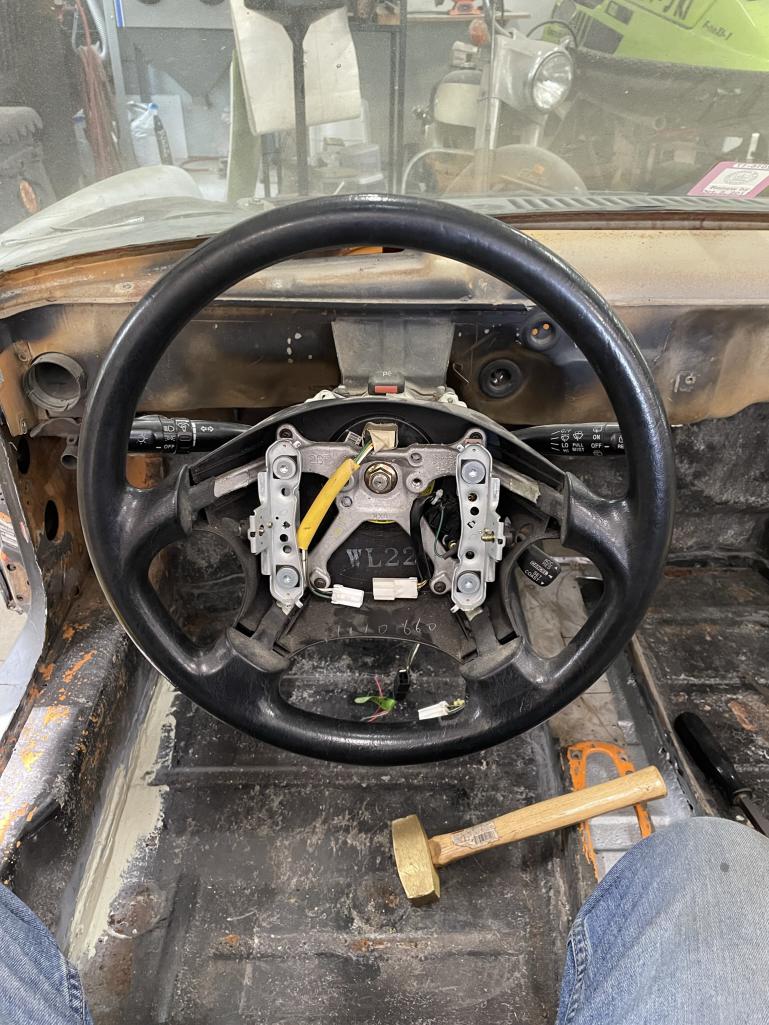
Decided to tackle my steering column today. Since I’m using the complete Subaru wiring harness I wanted to maintain all the stalk controls for wipers, lights, etc.
To support this I had to make a “Porsuaru” steering column. I used the outer portion of the Subaru column and the inner portion of the 914 column and, after determining the correct length, welded them together. Next was making a Porsuaru steering shaft. Same concept, use the 914 bottom and Subaru top. The Suby shaft is hollow and the 914 solid. Once I determined the exact length I machined the 914 shaft to fit into the Suby shaft to ensue good alignment. I welded the two shafts together, and for extra insurance, I welded a collar over the joint. The length is a little critical in that the shaft is encapsulated between snap rings at each end(since 914 snap ring is at bottom and Suby is at the top. So now there’s rings at each end). Attached thumbnail(s) 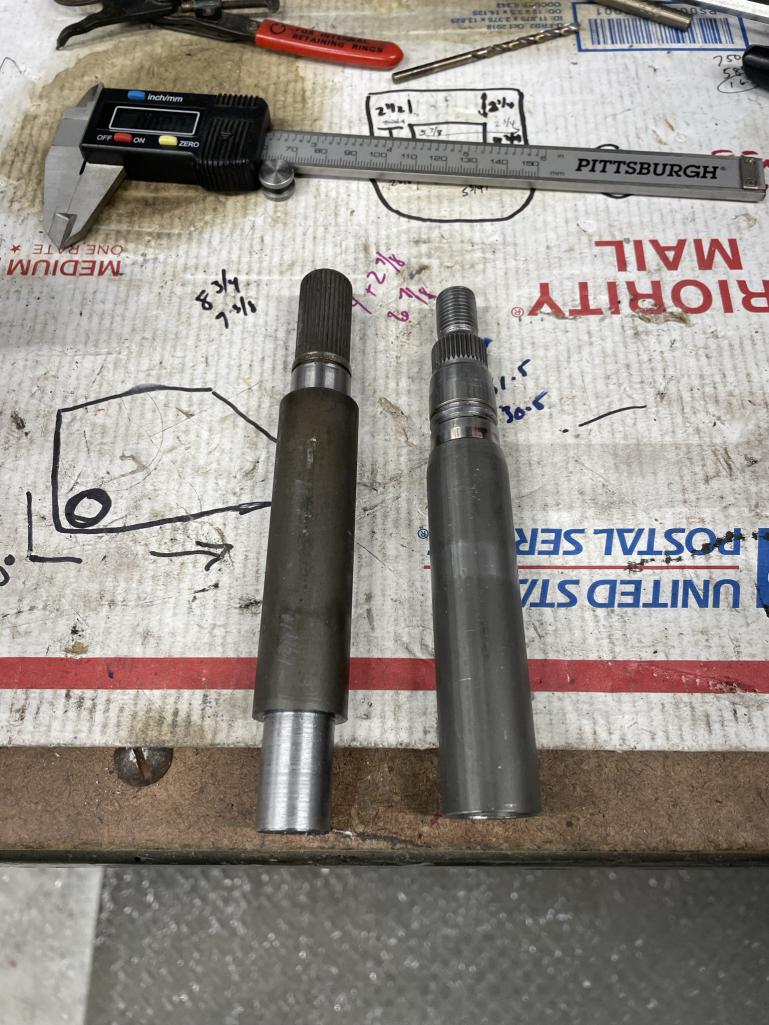 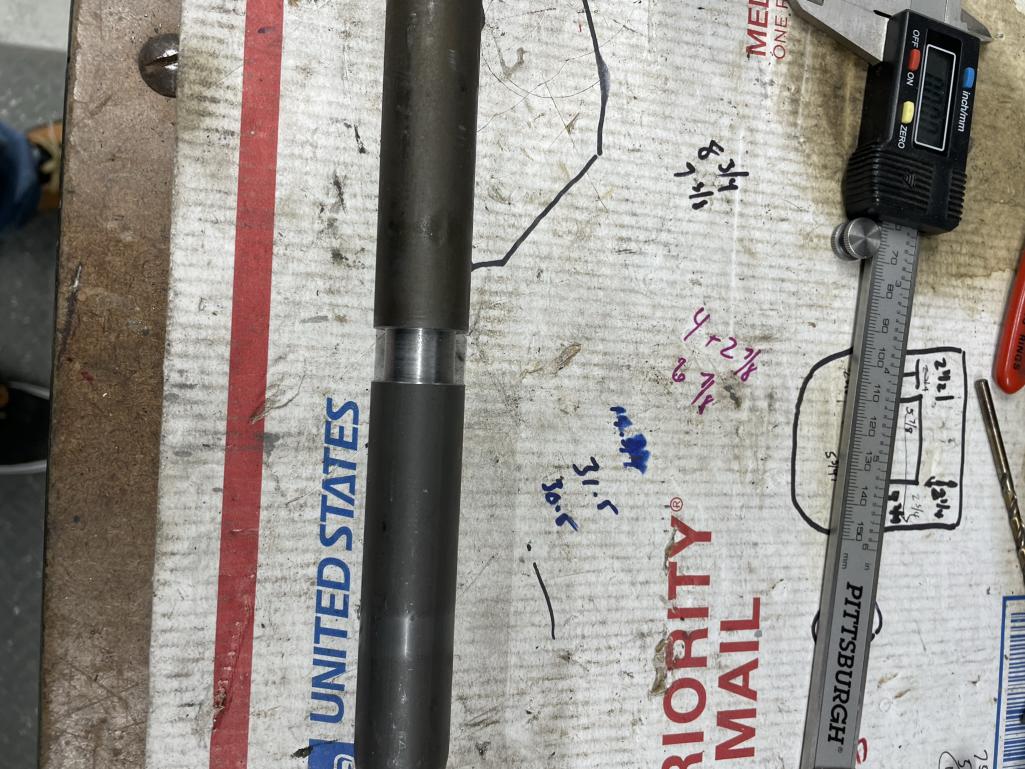 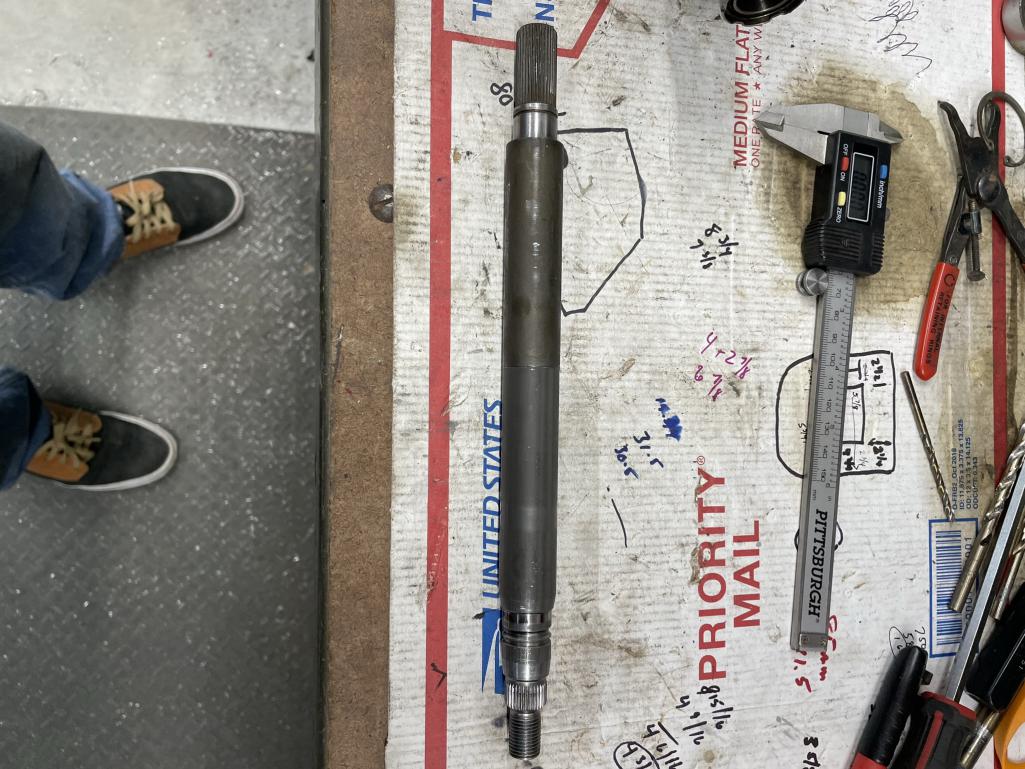
|
| East coaster |
 Apr 20 2023, 07:07 PM Apr 20 2023, 07:07 PM
Post
#112
|
|
Senior Member    Group: Members Posts: 1,903 Joined: 28-March 03 From: Millville, NJ Member No.: 487 Region Association: None 
|
More….
Attached thumbnail(s) 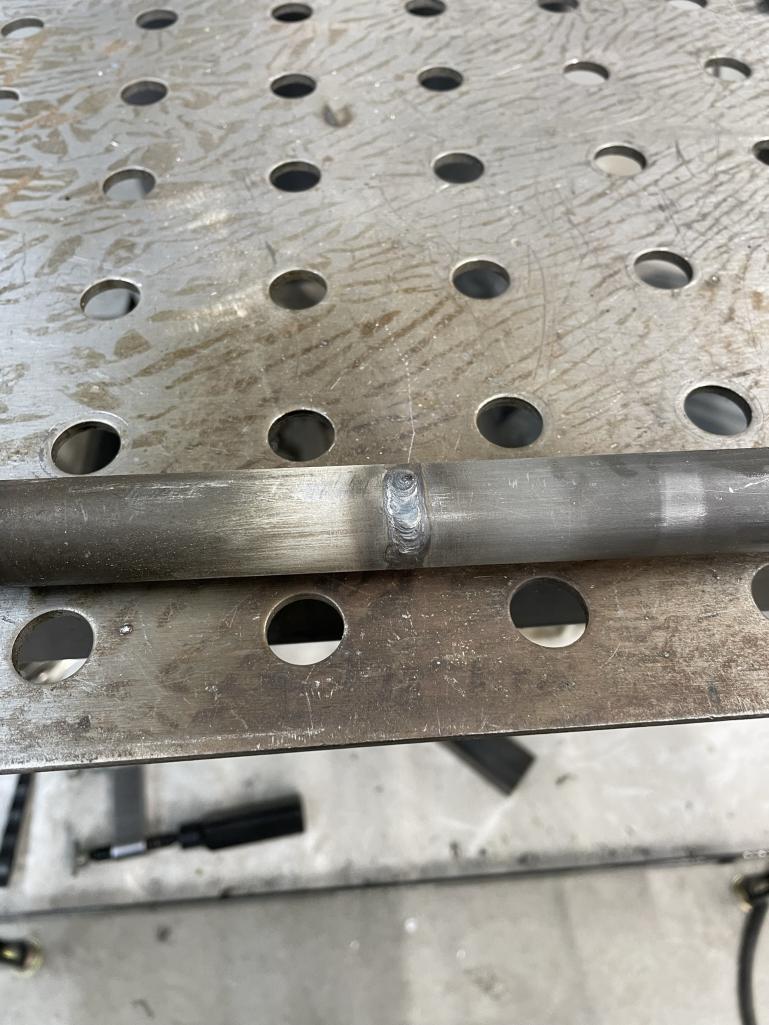 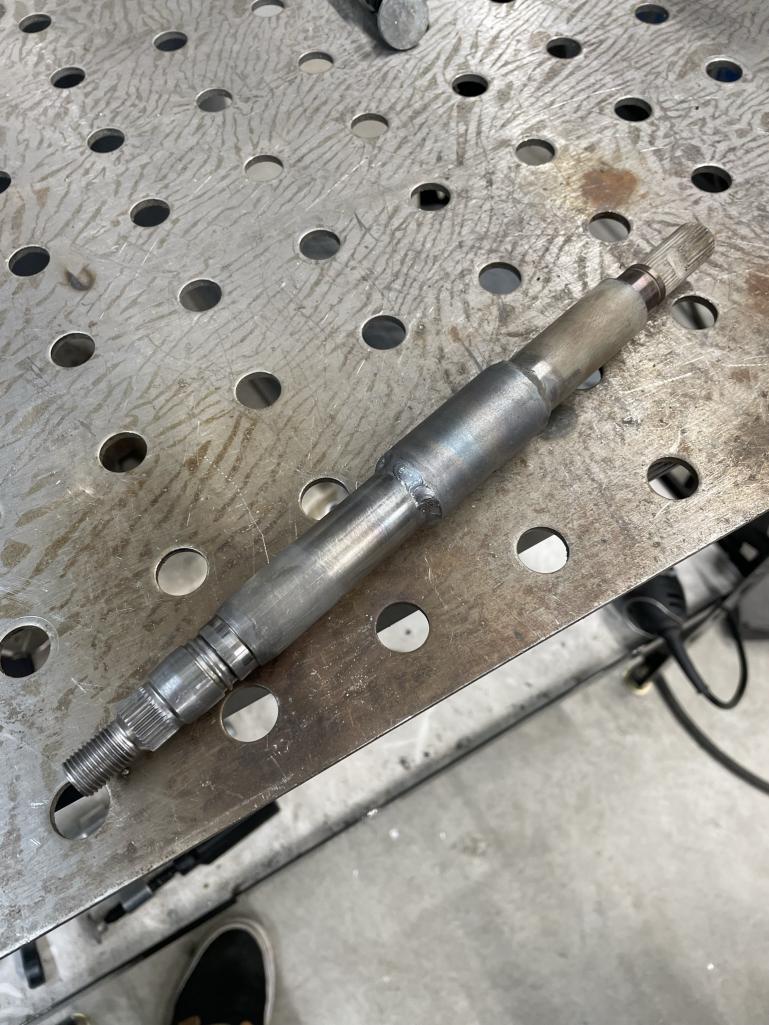 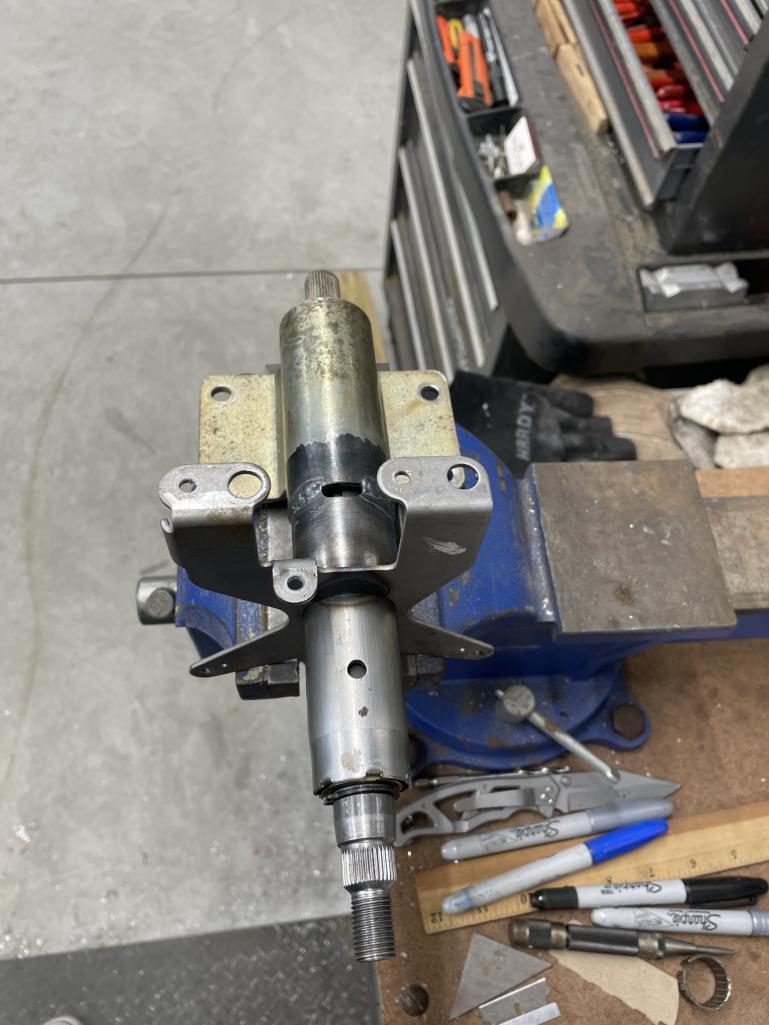
|
| East coaster |
 Apr 20 2023, 07:08 PM Apr 20 2023, 07:08 PM
Post
#113
|
|
Senior Member    Group: Members Posts: 1,903 Joined: 28-March 03 From: Millville, NJ Member No.: 487 Region Association: None 
|
|
| East coaster |
 Apr 23 2023, 06:46 PM Apr 23 2023, 06:46 PM
Post
#114
|
|
Senior Member    Group: Members Posts: 1,903 Joined: 28-March 03 From: Millville, NJ Member No.: 487 Region Association: None 
|
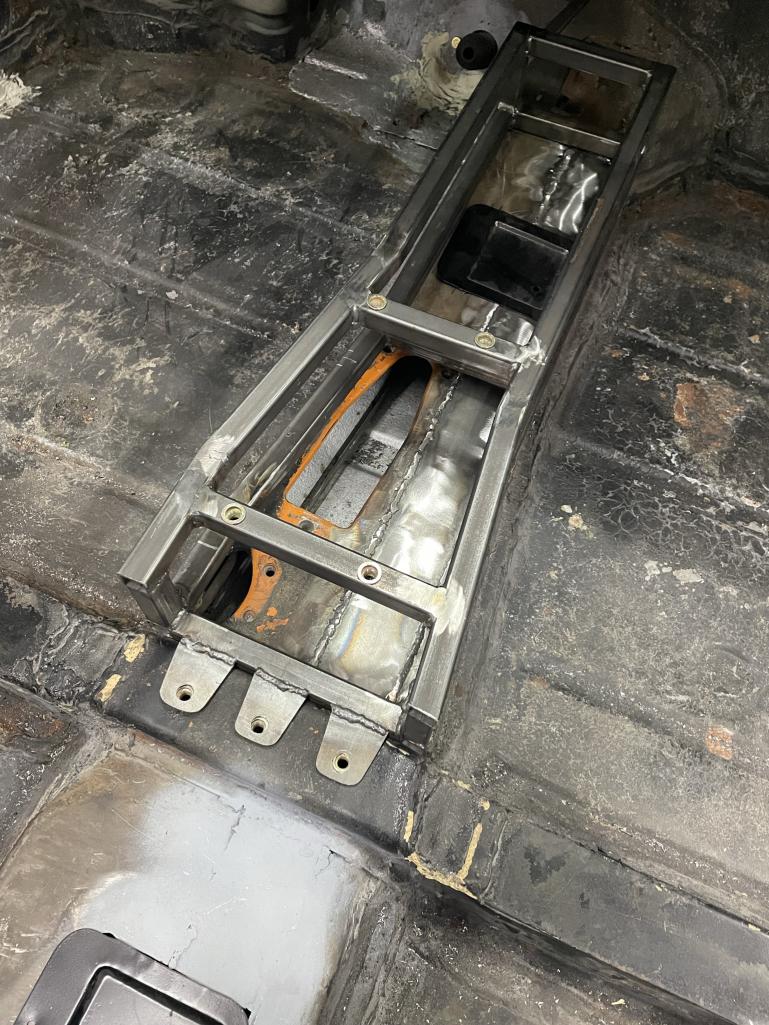
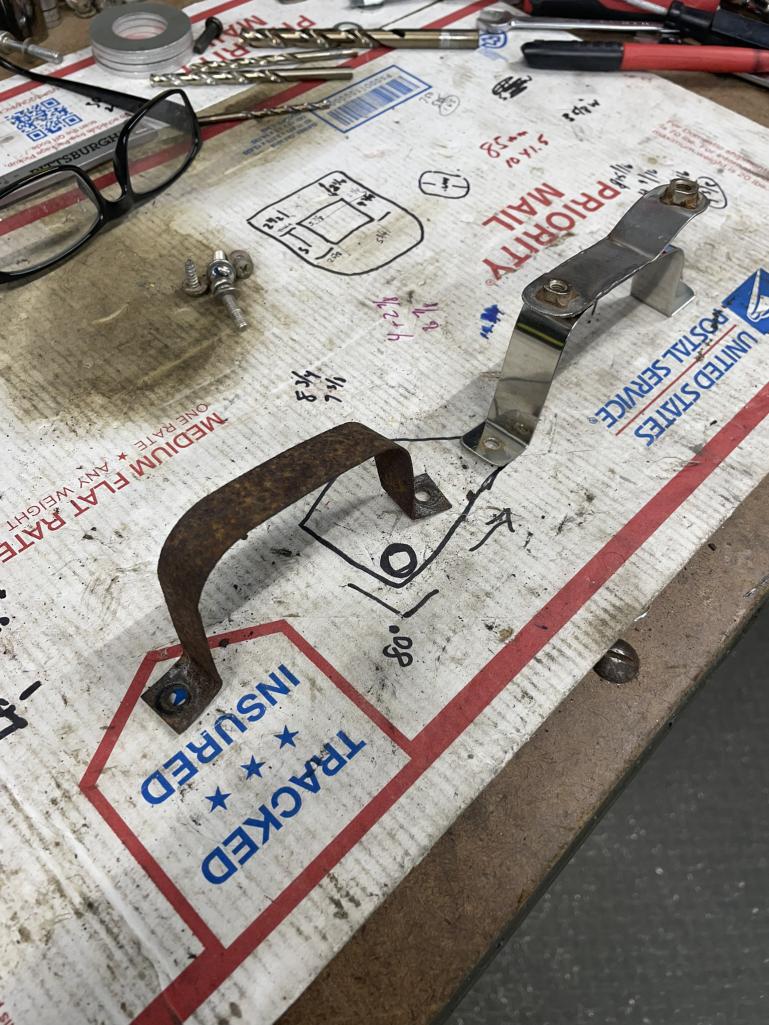
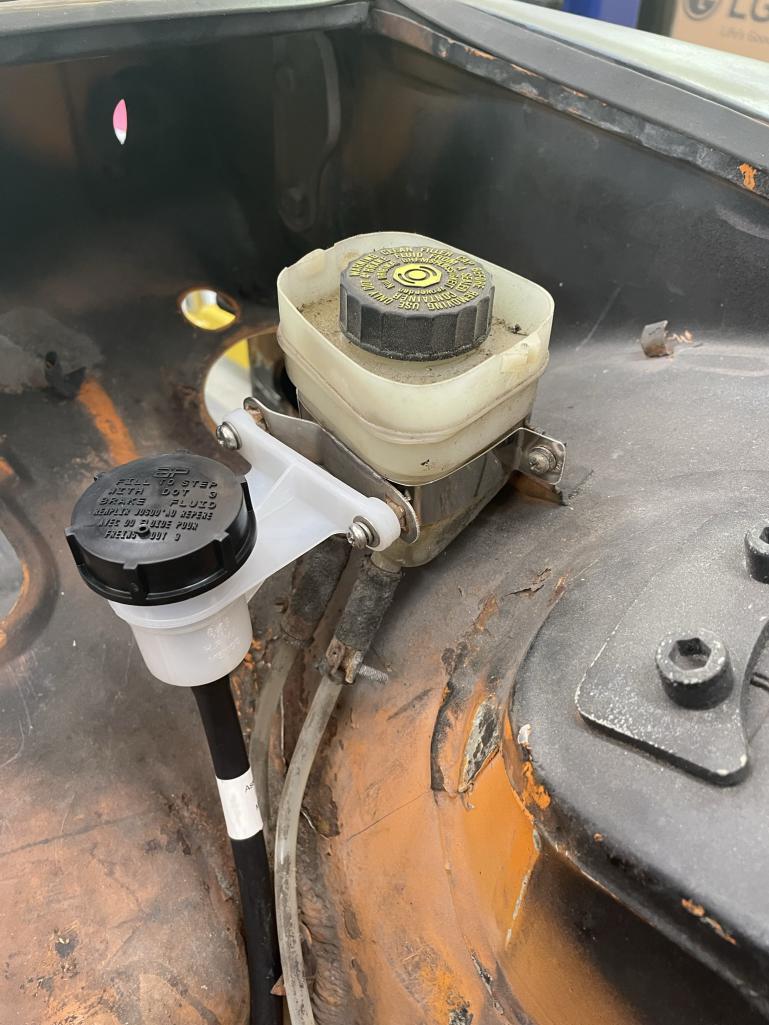
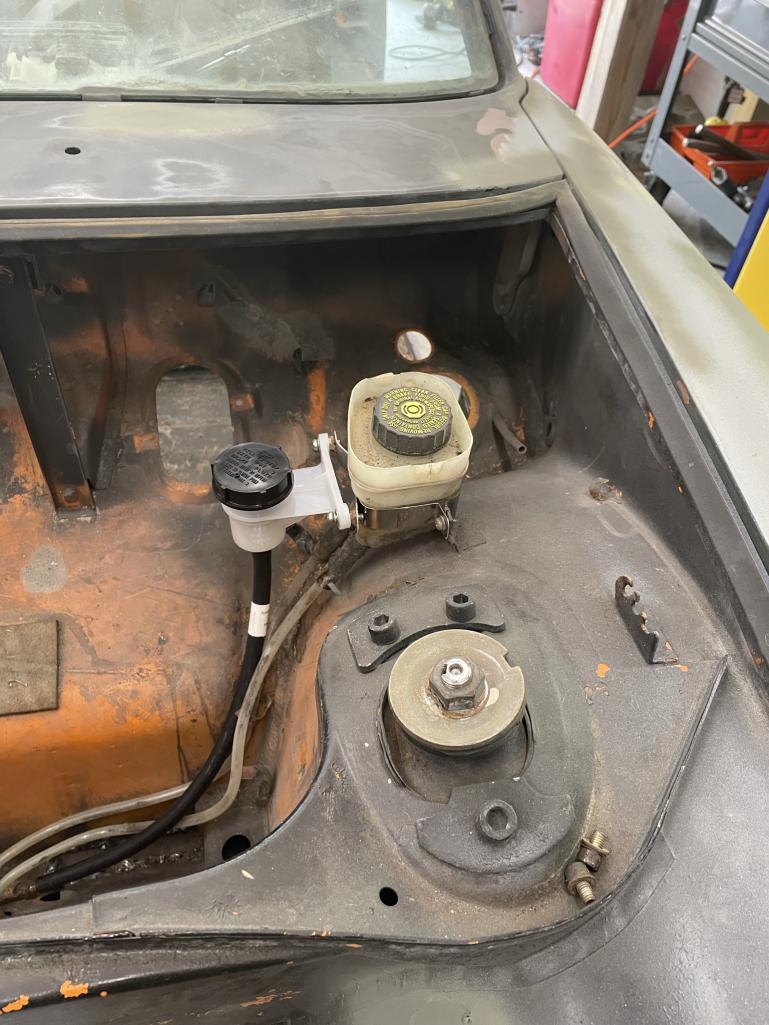
Some simple little updates today. Since I’m going with a hydraulic clutch I needed a place for a reservoir. The original bracket for my brake reservoir was a rusty POS, so I made a new stainless bracket. Then I fab’d a bracket for the clutch reservoir and welded them together……a small simple project with good results.
   |
| East coaster |
 Apr 23 2023, 06:49 PM Apr 23 2023, 06:49 PM
Post
#115
|
|
Senior Member    Group: Members Posts: 1,903 Joined: 28-March 03 From: Millville, NJ Member No.: 487 Region Association: None 
|
Also…..The beast got to see the light of day today, so I couldn’t resist a pic. I know the flares will be polarizing for some…….but hey, it’s my project (IMG:style_emoticons/default/smile.gif)
Attached thumbnail(s) 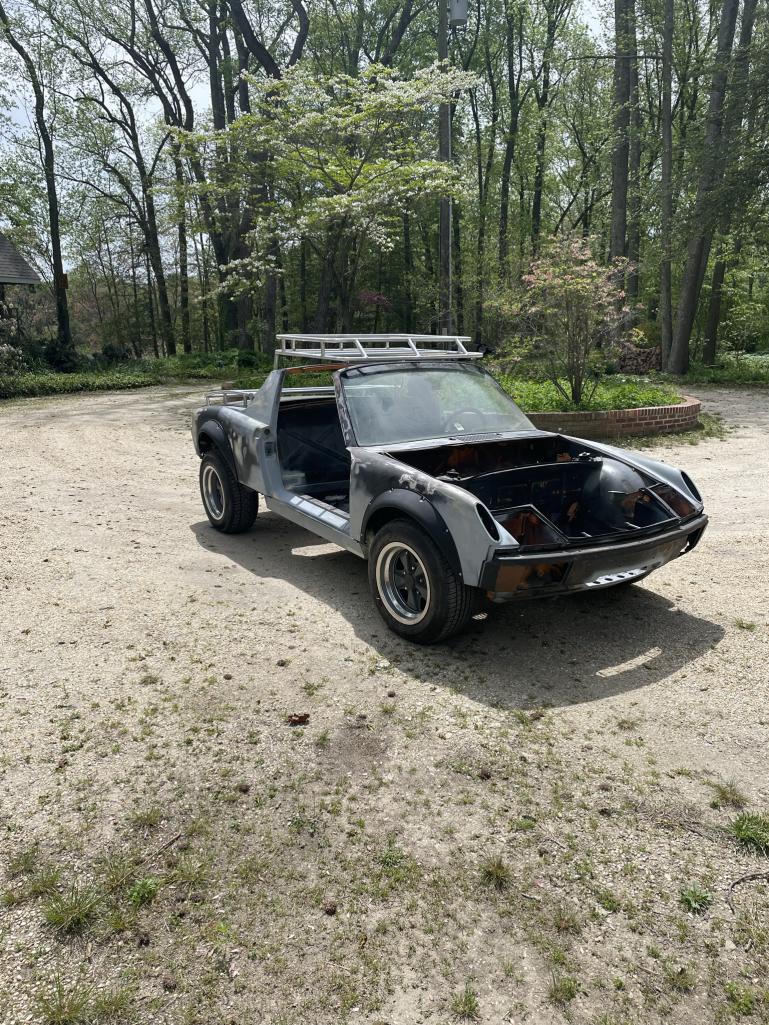
|
| East coaster |
 Apr 30 2023, 06:33 PM Apr 30 2023, 06:33 PM
Post
#116
|
|
Senior Member    Group: Members Posts: 1,903 Joined: 28-March 03 From: Millville, NJ Member No.: 487 Region Association: None 
|
|
| East coaster |
 May 4 2023, 07:48 PM May 4 2023, 07:48 PM
Post
#117
|
|
Senior Member    Group: Members Posts: 1,903 Joined: 28-March 03 From: Millville, NJ Member No.: 487 Region Association: None 
|
|
| Retroracer |
 May 5 2023, 08:30 AM May 5 2023, 08:30 AM
Post
#118
|
|
Senior Member    Group: Members Posts: 649 Joined: 7-July 13 From: Bend OR Member No.: 16,100 Region Association: Pacific Northwest 
|
Really enjoying the build, great progress. IMHO, the flares look great, really suits the Safari look - and as you point out: your car, your choices!
- Tony |
| Chris H. |
 May 5 2023, 09:31 AM May 5 2023, 09:31 AM
Post
#119
|
|
Senior Member     Group: Members Posts: 4,070 Joined: 2-January 03 From: Chicago 'burbs Member No.: 73 Region Association: Upper MidWest 
|
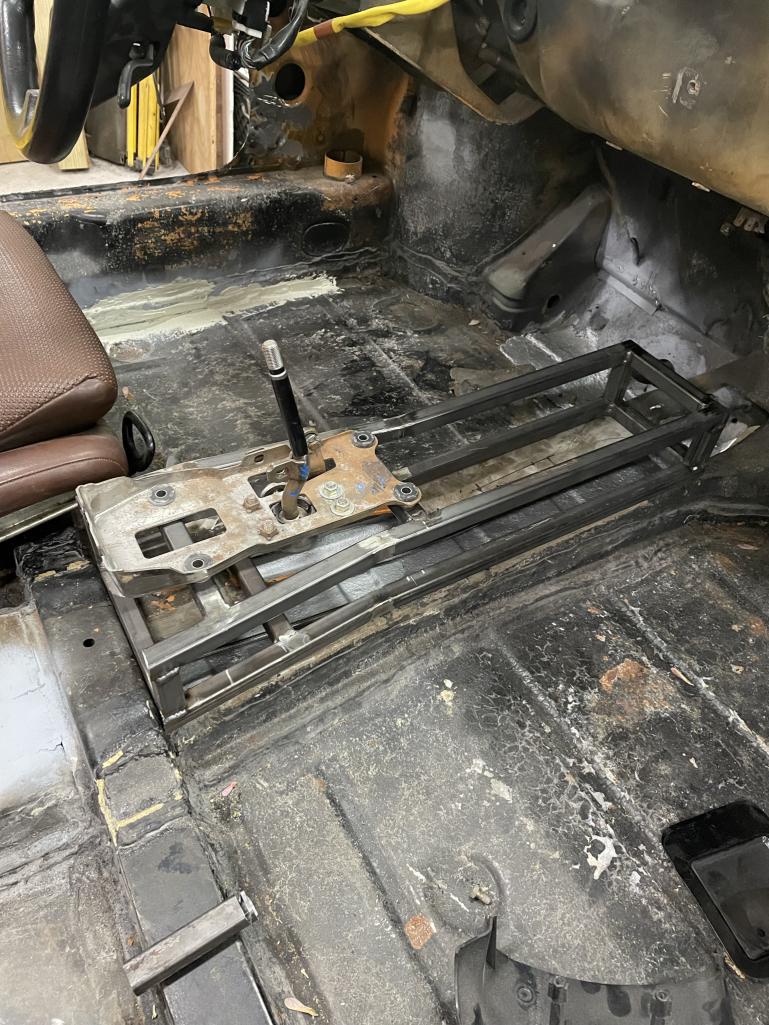
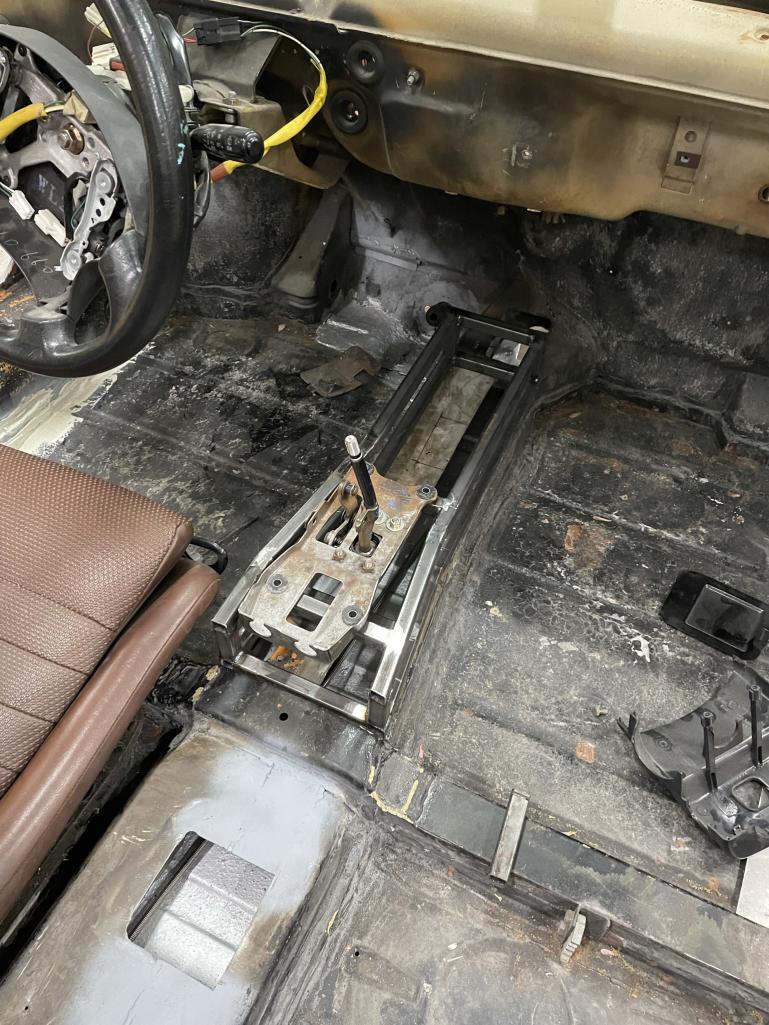
Nice console! The MR2 shift shaft is a little too short IMO so you have to either raise it up in some way or get an extender (which makes the shift throw longer). that should be the perfect height. Love the threaded mount for the base.
|
| East coaster |
 May 6 2023, 06:42 PM May 6 2023, 06:42 PM
Post
#120
|
|
Senior Member    Group: Members Posts: 1,903 Joined: 28-March 03 From: Millville, NJ Member No.: 487 Region Association: None 
|
|
  |
1 User(s) are reading this topic (1 Guests and 0 Anonymous Users)
0 Members:

|
Lo-Fi Version | Time is now: 23rd December 2025 - 05:42 PM |
Invision Power Board
v9.1.4 © 2025 IPS, Inc.


