|
|
|
Porsche, and the Porsche crest are registered trademarks of Dr. Ing. h.c. F. Porsche AG.
This site is not affiliated with Porsche in any way. Its only purpose is to provide an online forum for car enthusiasts. All other trademarks are property of their respective owners. |
|
|

  |

| rick 918-S |
 Jul 6 2023, 08:01 PM Jul 6 2023, 08:01 PM
Post
#161
|
|
Hey nice rack! -Celette  Group: Members Posts: 21,147 Joined: 30-December 02 From: Now in Superior WI Member No.: 43 Region Association: Northstar Region |
I hate when that happens. 2 3/4 gallons of paint on Juergen's car but I mixed it from one gallon to another before starting. Paint is so expensive now. (IMG:style_emoticons/default/dry.gif)
|
   |

 
|
| East coaster |
Jul 16 2023, 07:36 AM
Post
#162
|
|
Senior Member Group: Members Posts: 1,903 Joined: 28-March 03 From: Millville, NJ Member No.: 487 Region Association: None |
Just posting to see if I can get a picture to come out right side up…..ok, it seems to work. I had to open the picture I took with my phone on my iPad and then screen shot it. I guess this will need to be the new process for posting to my build thread, still don’t understand why since I haven’t changed any settings on my phone and they posted correctly for the first 7 pages of my thread.
 |
 |
|
| East coaster |
Jul 19 2023, 04:54 AM
Post
#163
|
|
Senior Member Group: Members Posts: 1,903 Joined: 28-March 03 From: Millville, NJ Member No.: 487 Region Association: None |
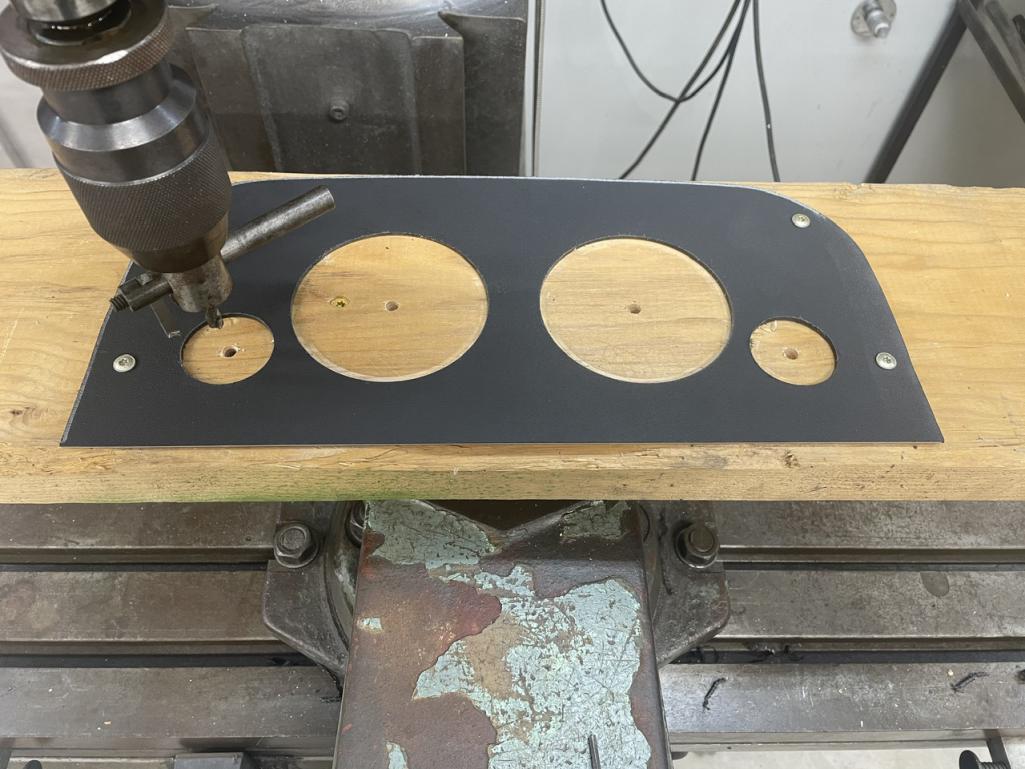
While waiting for cooler weather to repaint the tub I’ve been chipping away at smaller projects that can be done in the air conditioned portion of my shop. Since I’m running the complete Subaru wiring harness I wanted to use the Suby gauge pod as well. As anyone who’s tried this knows, the pod doesn’t fit in the 914 gauge area. I’ve seen some where they added height to the gauge “hump”, but I really wanted to keep the stock dash pad.
I was able to get the Suby gauge pod reduced in size by removing the connectors at the top of the pod and direct soldering the pigtail cable directly to the PCB. This saved me 1-1/2” to 2” that would’ve been needed at the top for cabling. I did have to cut the dash at the bottom of the pod area about 5/8” but the will not be an impact. I reduced the Suby gauges down to the bare minimum and then made a new gauge bezel and glass that matches the Suby gauges but has the outer shape of the 914. I had to relocate the mounting tabs in the dash hoop to allow them to clear the Suby pod, but I’m pretty happy with the result. 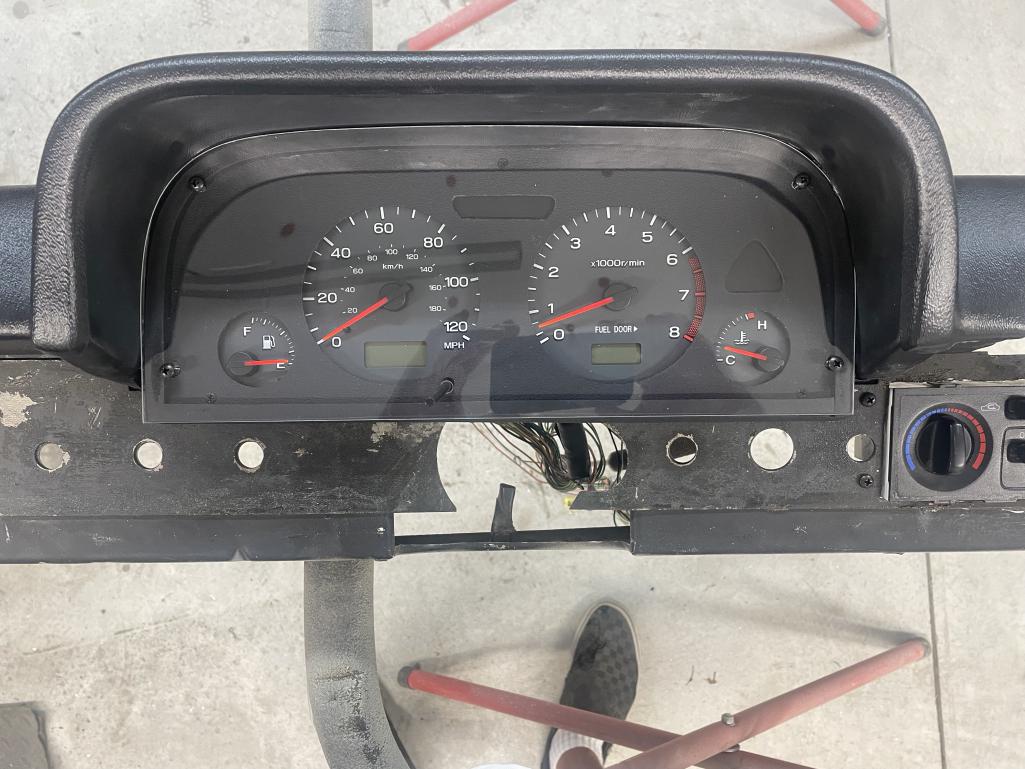 |
|
|
|
| East coaster |
Jul 19 2023, 04:56 AM
Post
#164
|
|
Senior Member Group: Members Posts: 1,903 Joined: 28-March 03 From: Millville, NJ Member No.: 487 Region Association: None |
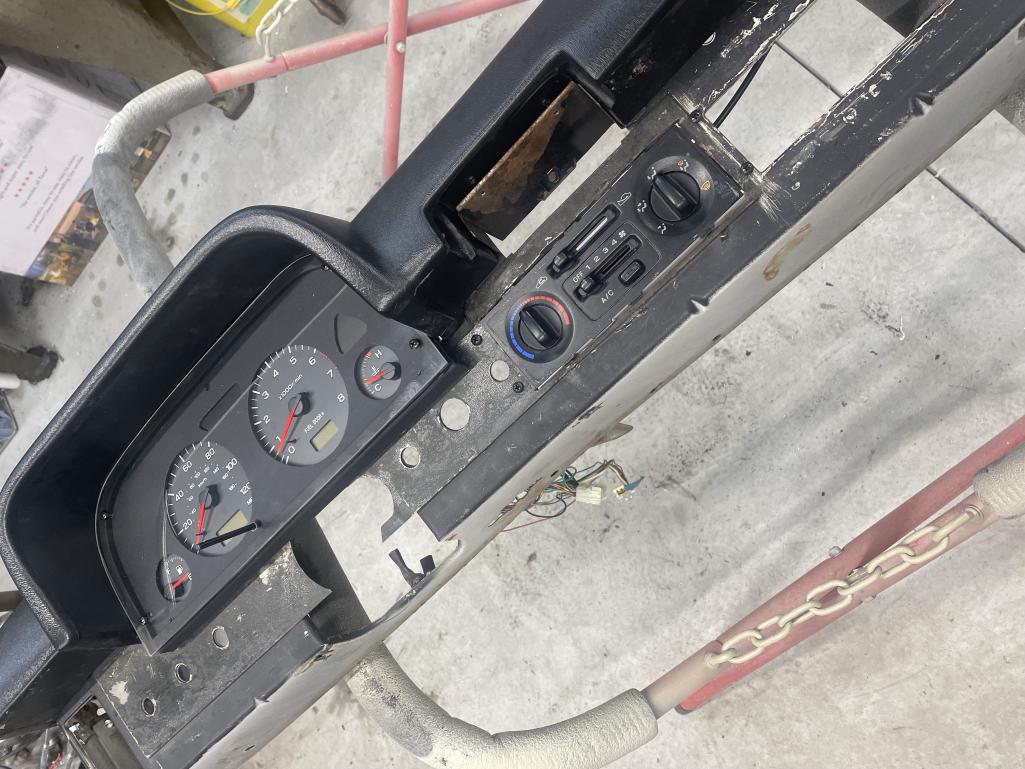
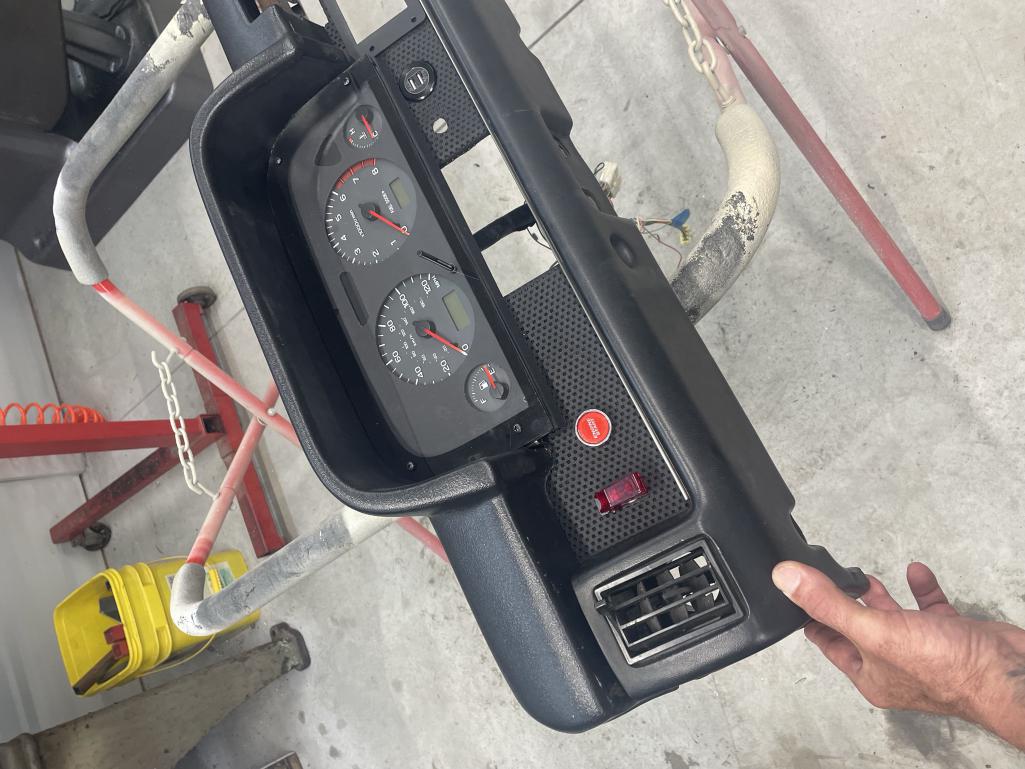
I’m also going with the Suby hvac controls and added those with a little tweaking of the factory hole.
 |
|
|
|
| East coaster |
Jul 19 2023, 04:57 AM
Post
#165
|
|
Senior Member Group: Members Posts: 1,903 Joined: 28-March 03 From: Millville, NJ Member No.: 487 Region Association: None |
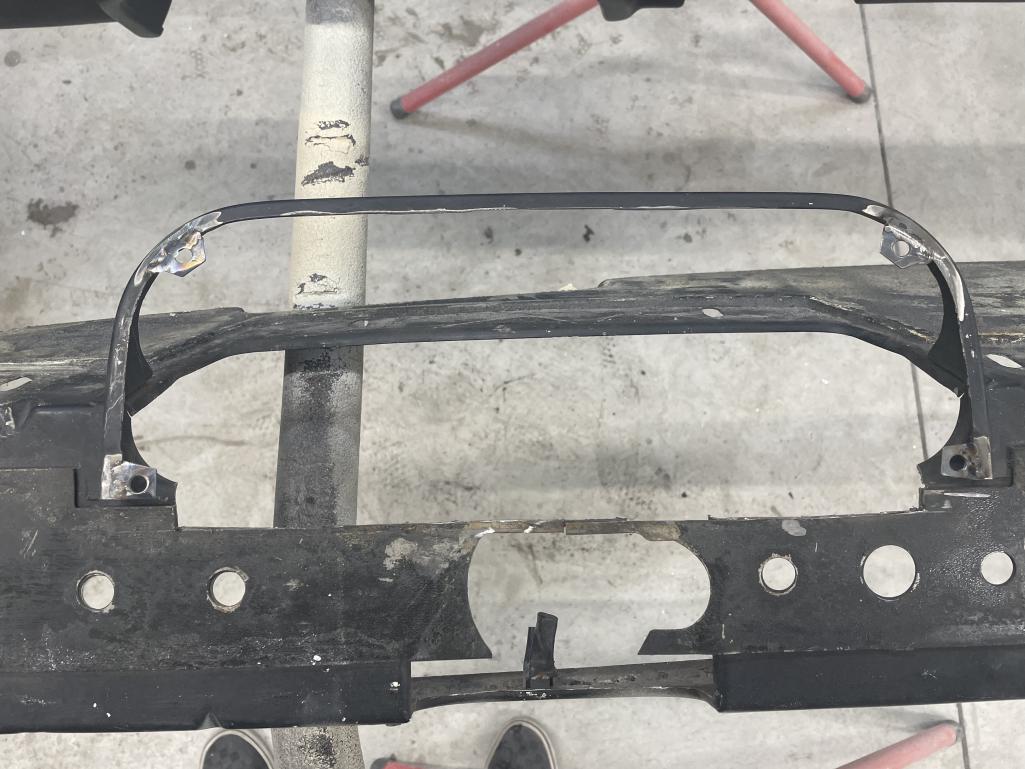
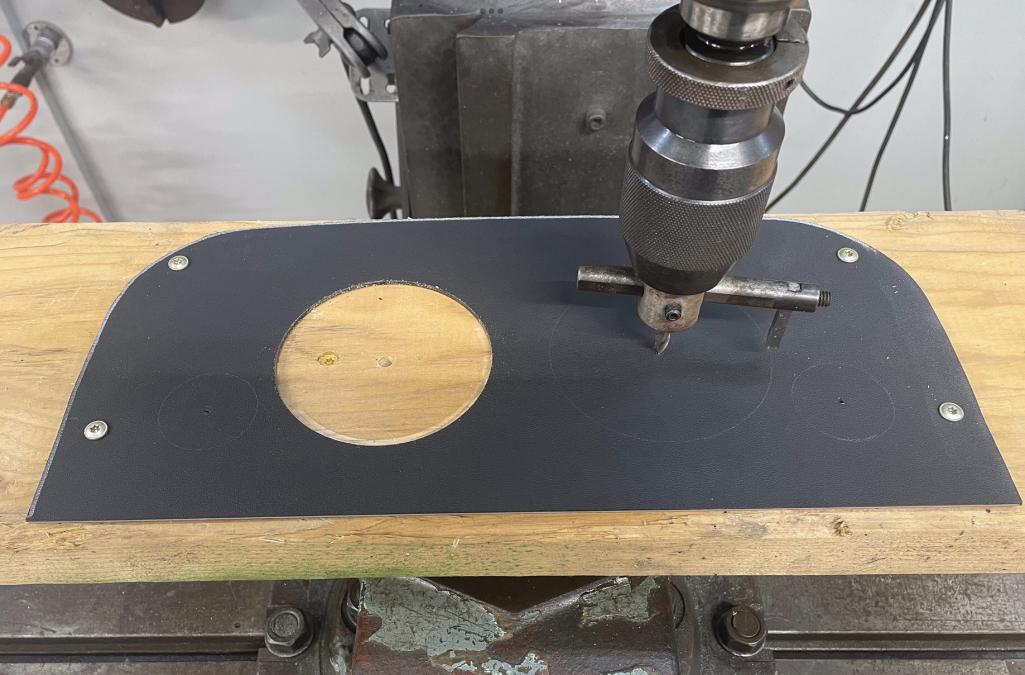
Mods to the “hoop”
 |
|
|
|
| East coaster |
Jul 19 2023, 05:10 AM
Post
#166
|
|
Senior Member Group: Members Posts: 1,903 Joined: 28-March 03 From: Millville, NJ Member No.: 487 Region Association: None |
Making of bezel……I used a textured Kydex material.
  |
|
|
|
| East coaster |
Jul 19 2023, 05:16 AM
Post
#167
|
|
Senior Member Group: Members Posts: 1,903 Joined: 28-March 03 From: Millville, NJ Member No.: 487 Region Association: None |
Hard to tell from the photos but I also removed the indicator “films” from the stock Suby faceplate and glued them behind the cuts above and to the right of the tach and Speedo. This will give me the indicator lights for turn signals, high beams, Alt, Oil, and check engine. They’re behind the little oval cutout and the guitar pick shaped cutout.
|
|
|
|
| sreyemj |
Jul 20 2023, 06:47 PM
Post
#168
|
|
Member Group: Members Posts: 89 Joined: 12-January 20 From: SA, TX Member No.: 23,821 Region Association: None |
Amazing project, love the color!
|
|
|
|
| East coaster |
Jul 20 2023, 07:00 PM
Post
#169
|
|
Senior Member Group: Members Posts: 1,903 Joined: 28-March 03 From: Millville, NJ Member No.: 487 Region Association: None |
QUOTE(sreyemj @ Jul 20 2023, 05:47 PM)  Amazing project, love the color! Thank you! It’s certainly been a fun a challenging project so far. |
|
|
|
| East coaster |
Jul 29 2023, 06:08 AM
Post
#170
|
|
Senior Member Group: Members Posts: 1,903 Joined: 28-March 03 From: Millville, NJ Member No.: 487 Region Association: None |
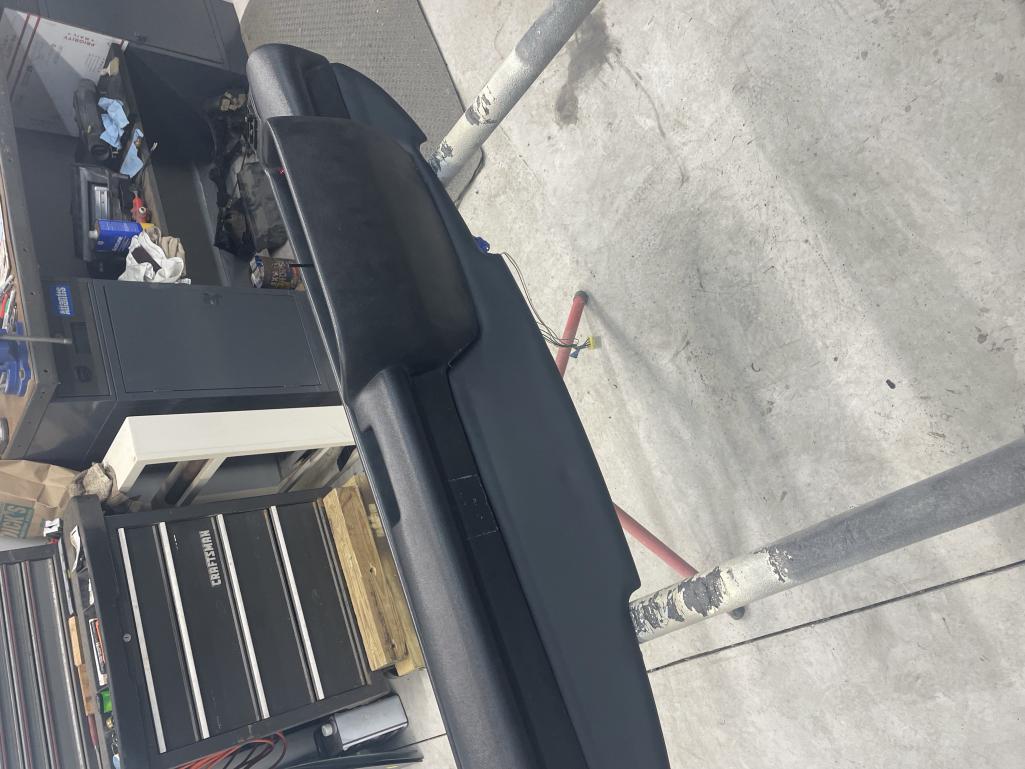
Finished up the dash. Upholstered the top and the face of the dash with pieces from 914 Rubber. Finished the gauge pod by painting a black border on the inside of the glass. I think it looks more finished that way and it hides the mounting hardware pretty well.
 |
|
|
|
| East coaster |
Jul 29 2023, 06:09 AM
Post
#171
|
|
Senior Member Group: Members Posts: 1,903 Joined: 28-March 03 From: Millville, NJ Member No.: 487 Region Association: None |
Dash top…..
 |
|
|
|
| Porschef |
Jul 29 2023, 07:41 AM
Post
#172
|
|
How you doin' Group: Members Posts: 2,180 Joined: 7-September 10 From: LawnGuyland Member No.: 12,152 Region Association: North East States |
Don’t know how I missed this either, but I’m blown away by your imagination/creativity skills that are matched by your fabrication abilities. Digging pretty much everything that’s been done. (IMG:style_emoticons/default/beerchug.gif)
Congratulations on your retirement, I was wondering how you found the time. Great color choices (you can’t go wrong with a little Nepal orange (IMG:style_emoticons/default/biggrin.gif)) and yeah, the paint problem sucks but not a dealbreaker for me if it’s consistent on the exterior. Following, looking forward to seeing it on the beach (IMG:style_emoticons/default/smile.gif) |
|
|
|
| Shivers |
Jul 29 2023, 01:20 PM
Post
#173
|
|
Senior Member Group: Members Posts: 3,214 Joined: 19-October 20 From: La Quinta, CA Member No.: 24,781 Region Association: Southern California |
That came out super nice.
|
|
|
|
| East coaster |
Jul 31 2023, 07:00 PM
Post
#174
|
|
Senior Member Group: Members Posts: 1,903 Joined: 28-March 03 From: Millville, NJ Member No.: 487 Region Association: None |
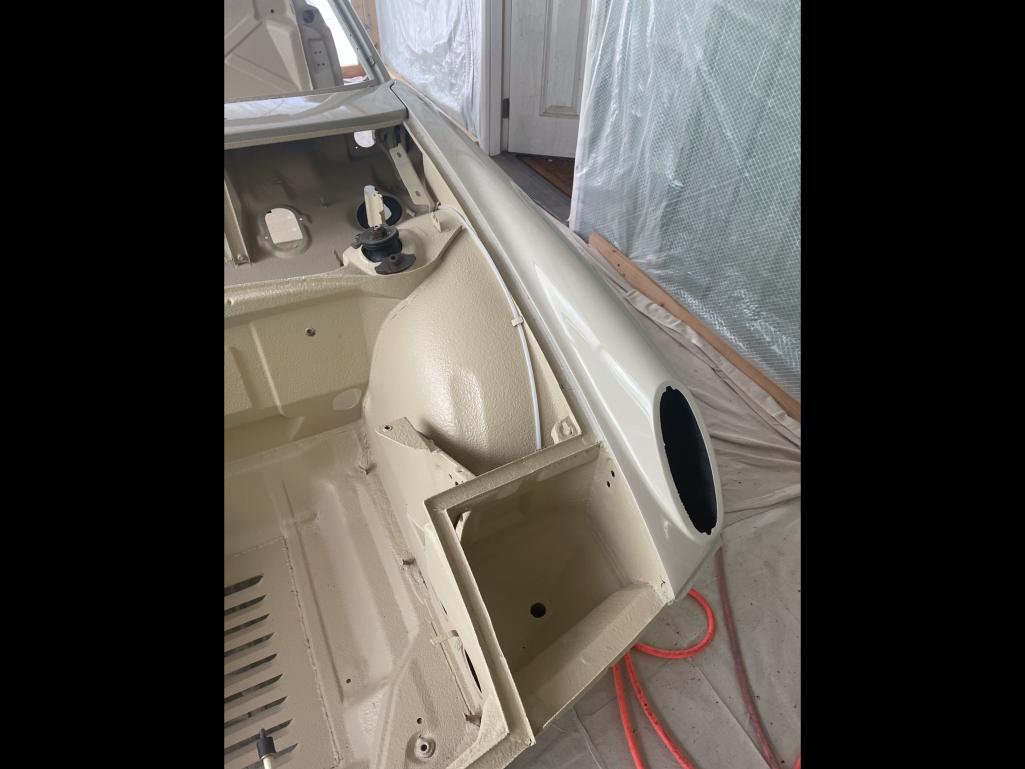
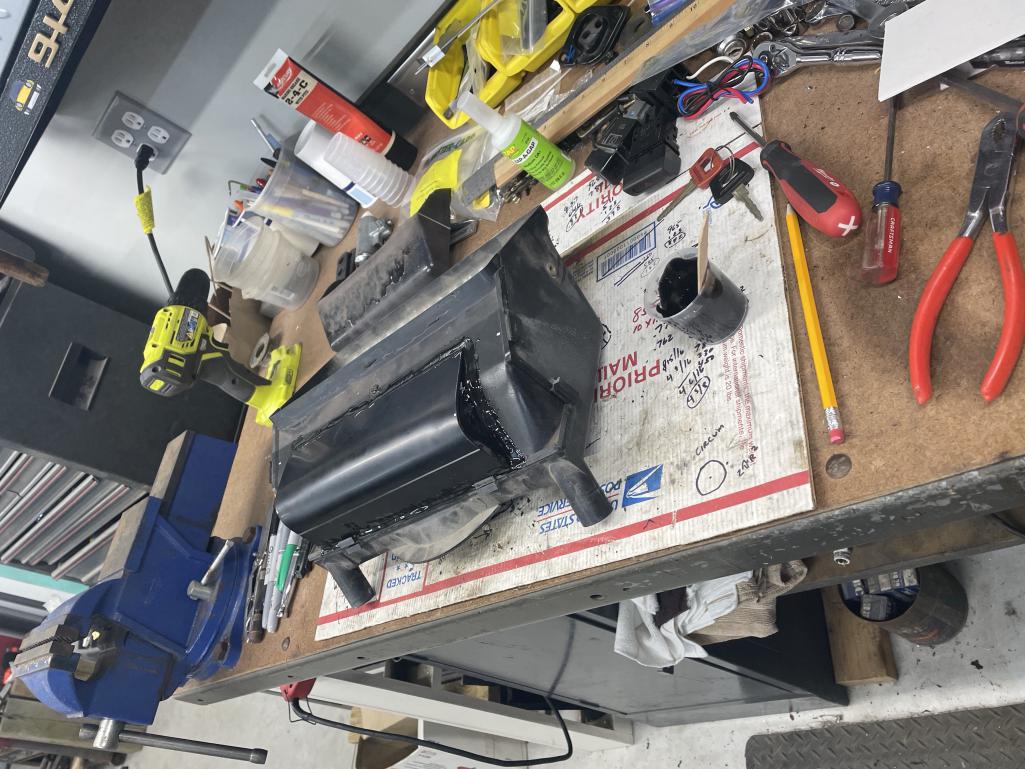
Started working on the heater core setup. I’m adding a heater core to the fresh air box for heat/defrost. I had to remove some material and then add some to the front of the box. I used ABS sheet from McMaster-Carr to make the addition. More to come, I’m just getting started…….
 |
|
|
|
| East coaster |
Aug 2 2023, 07:17 PM
Post
#175
|
|
Senior Member Group: Members Posts: 1,903 Joined: 28-March 03 From: Millville, NJ Member No.: 487 Region Association: None |
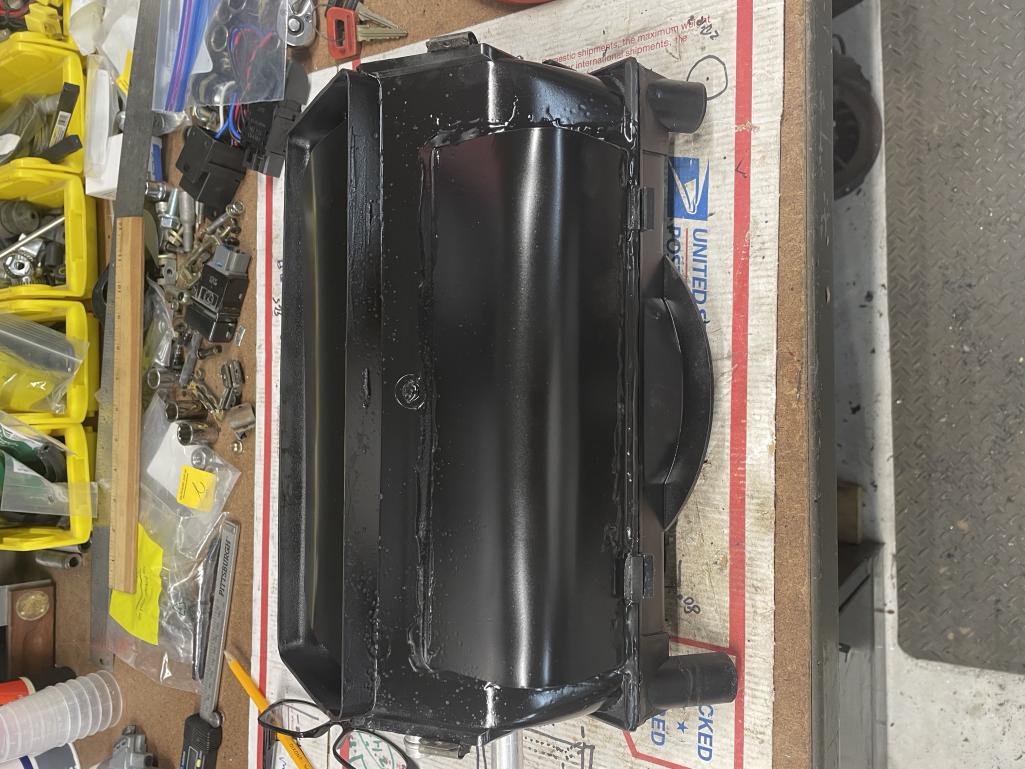
Heater core install wrapped up. I had to cut the box and add a section to the front, and had to make my own rain water diverted to go over the core.
 |
|
|
|
| East coaster |
Aug 2 2023, 07:19 PM
Post
#176
|
|
Senior Member Group: Members Posts: 1,903 Joined: 28-March 03 From: Millville, NJ Member No.: 487 Region Association: None |
Another sideways pic…
. 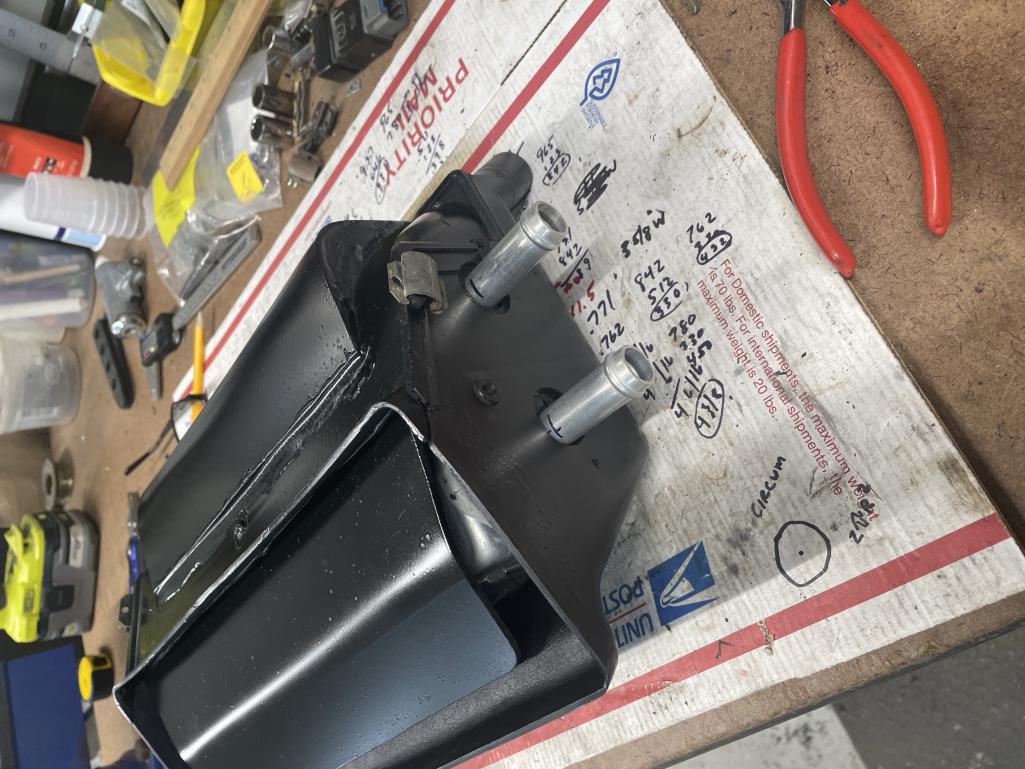 |
|
|
|
| East coaster |
Aug 2 2023, 07:20 PM
Post
#177
|
|
Senior Member Group: Members Posts: 1,903 Joined: 28-March 03 From: Millville, NJ Member No.: 487 Region Association: None |
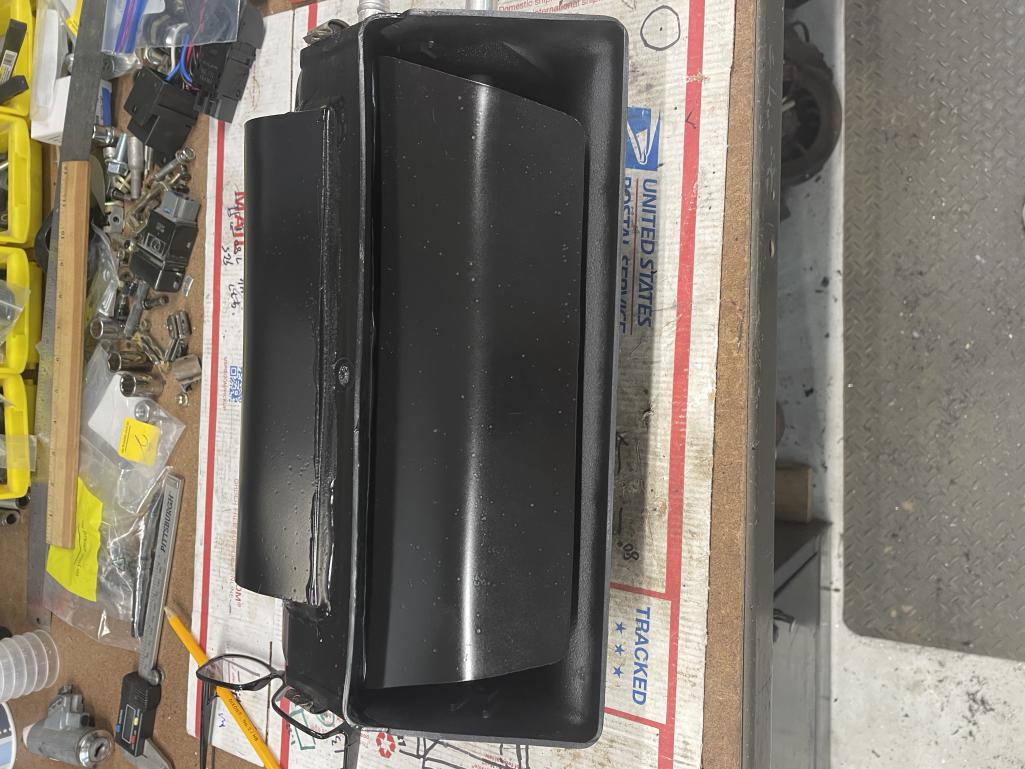
Last….
 |
|
|
|
| East coaster |
Aug 7 2023, 04:32 PM
Post
#178
|
|
Senior Member Group: Members Posts: 1,903 Joined: 28-March 03 From: Millville, NJ Member No.: 487 Region Association: None |
Started tinkering around with machining my axles for a Subaru spline at one end. I turned a piece of aluminum to the diameter of the Suby shaft so I could practice on softer metal until I nailed the process.
It came out well. I still need to adjust the tool depth out a little bit but I’m getting real close. I wanted to play with this before cutting on my real axle. 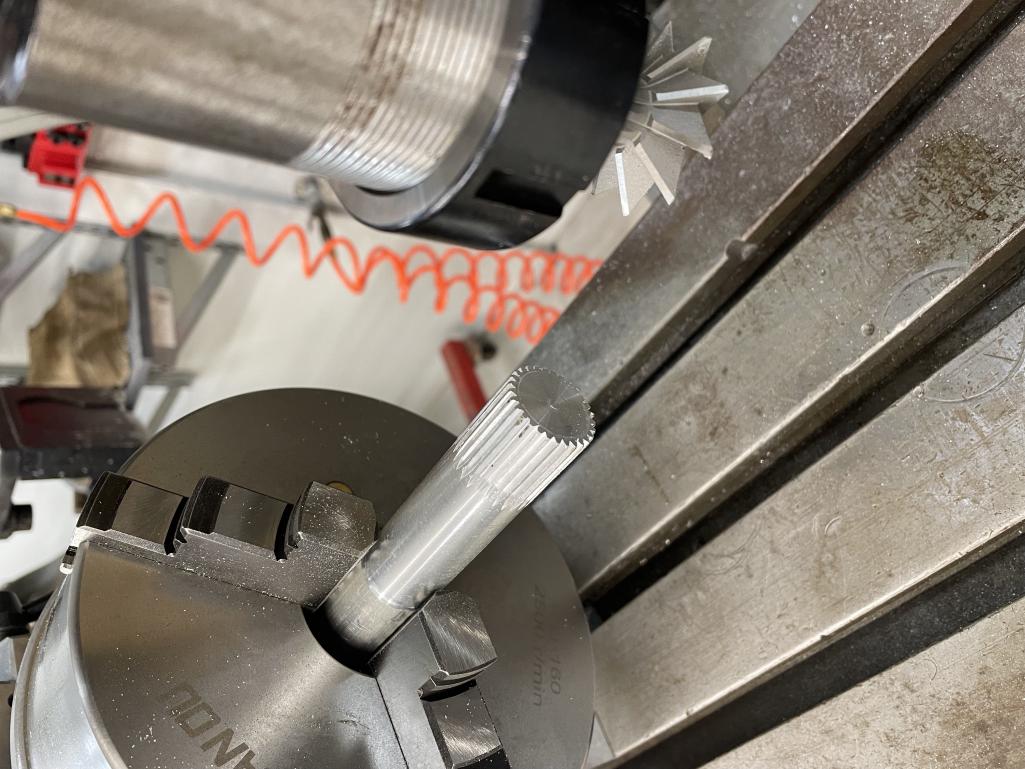 |
|
|
|
| East coaster |
Aug 7 2023, 04:33 PM
Post
#179
|
|
Senior Member Group: Members Posts: 1,903 Joined: 28-March 03 From: Millville, NJ Member No.: 487 Region Association: None |
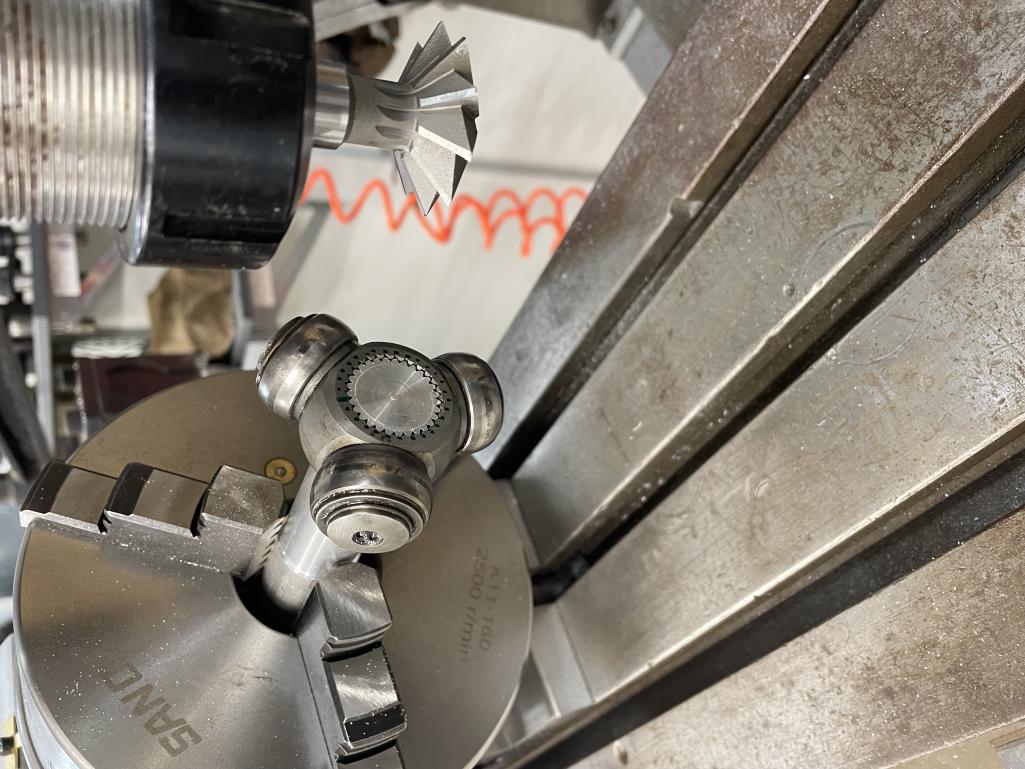
And with CV inner……
 |
|
|
|
| Shivers |
Aug 7 2023, 04:44 PM
Post
#180
|
|
Senior Member Group: Members Posts: 3,214 Joined: 19-October 20 From: La Quinta, CA Member No.: 24,781 Region Association: Southern California |
QUOTE(East coaster @ Aug 7 2023, 03:33 PM) And with CV inner…… That is awesome |
|
|
|
|
2 User(s) are reading this topic (2 Guests and 0 Anonymous Users)
0 Members:

|
Lo-Fi Version | Time is now: 23rd December 2025 - 07:25 PM |
Invision Power Board
v9.1.4 © 2025 IPS, Inc.