|
|
|
Porsche, and the Porsche crest are registered trademarks of Dr. Ing. h.c. F. Porsche AG.
This site is not affiliated with Porsche in any way. Its only purpose is to provide an online forum for car enthusiasts. All other trademarks are property of their respective owners. |
|
|


| East coaster |
 Nov 4 2022, 08:04 PM Nov 4 2022, 08:04 PM
Post
#21
|
|
Senior Member  Group: Members Posts: 1,936 Joined: 28-March 03 From: Millville, NJ Member No.: 487 Region Association: None |
I’ve been out of the 914 game for quite some time. The last 914 I built was back in 2006 and was quite a build. I’ve had about a dozen 914s over the years and my 2006 build was to be my ultimate 914 (for me at least). It was a GT flared 3.6 six conversion and was a great car. I sold it in 2015 and moved to other things. I’ve been getting the itch to build another teener for a while, but to go in a different direction. I’ve seen a couple Safari builds and that seemed interesting.
I picked up pretty well worn ‘72 914 for the base of my project. My plan is to build a budget conscious (it’s all relative) Subaru powered Safari mod. I plan to go with a normally aspirated 2.5 Subaru from a 1998 Forrester along with the Subaru tranny. I’ve been working on removing rust and getting the tub suitable for my plans. This will by no means be a concours resto type build, but should prove interesting. Here’s the base car being picked up for the project start 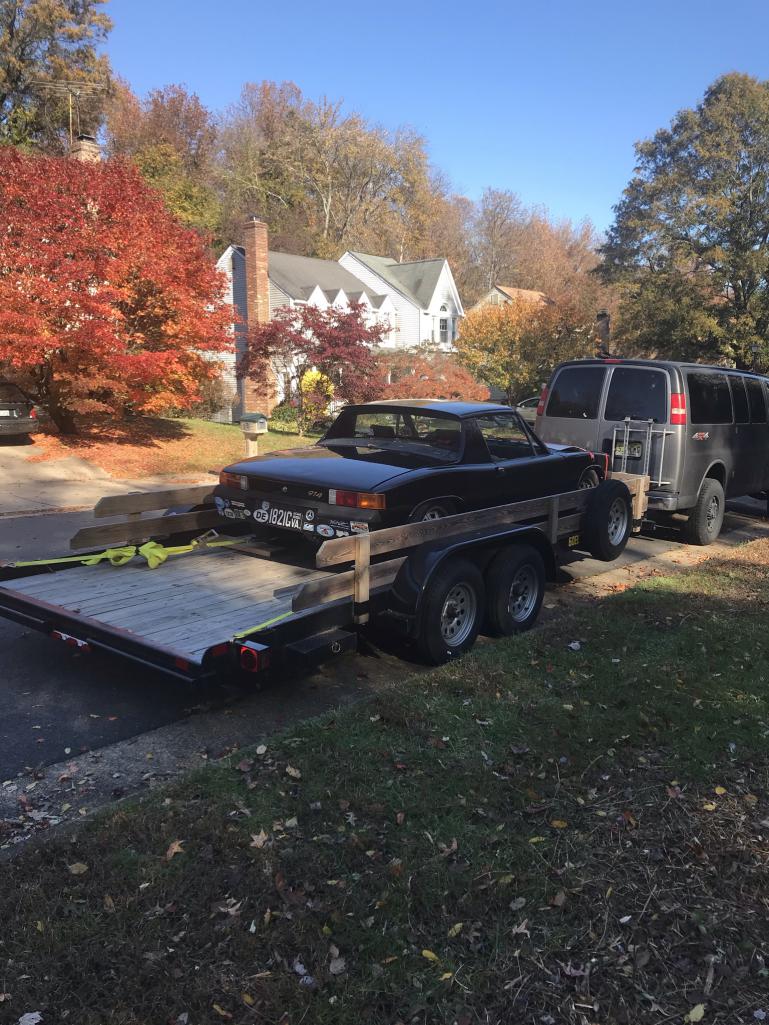 I stripped it down and sold the engine and tranny (it was a partially completed V8 conversion). Then started cutting out rusted areas a welding in new metal. Some Radom rust repair pics in no special order…. 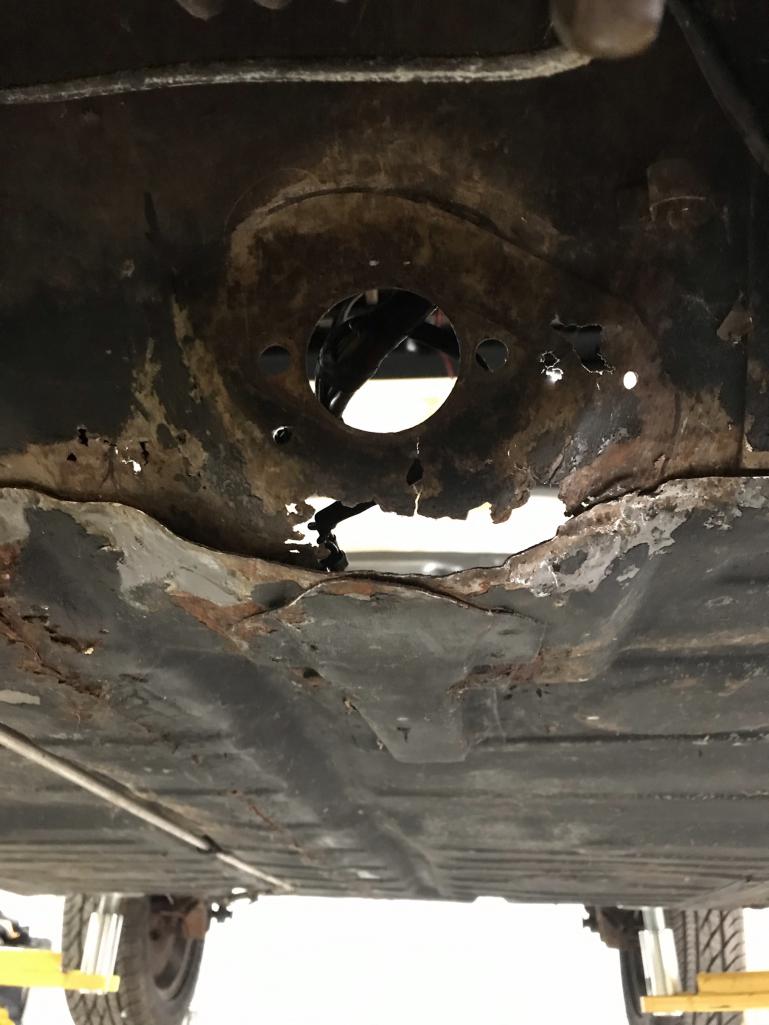 Attached thumbnail(s) 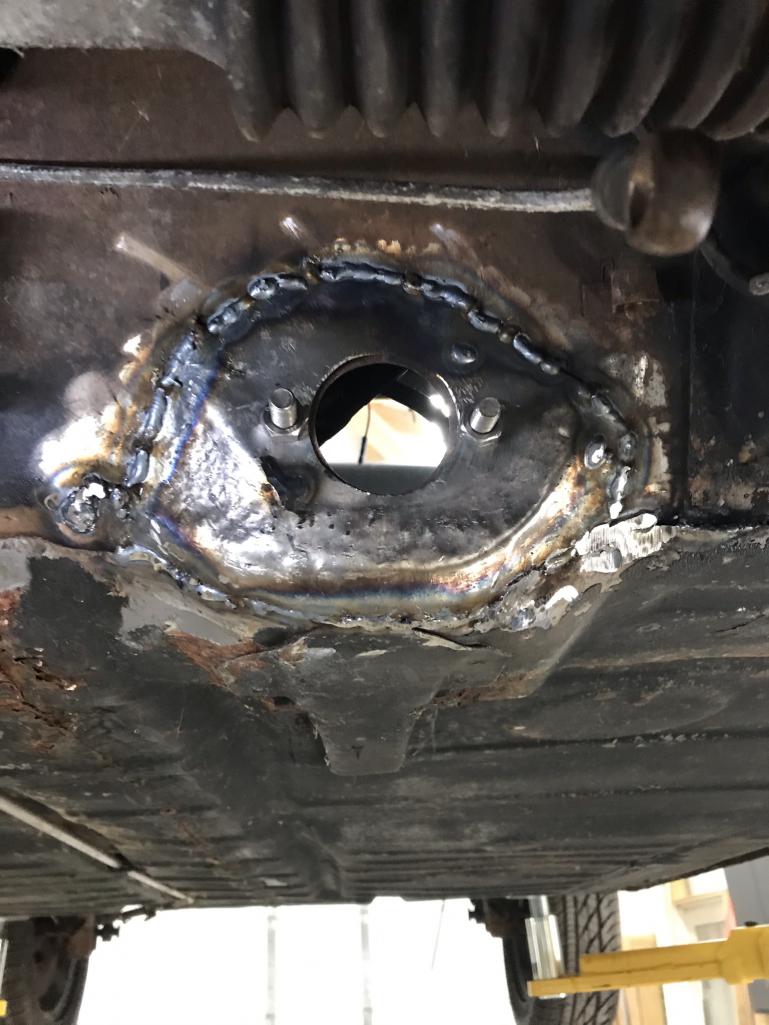
|
   |

 
|
Posts in this topic
East coaster Safari 914 project Nov 4 2022, 08:04 PM East coaster
[
Hell hole
attachmentid=856763] Nov 4 2022, 08:08 PM East coaster Closed up the tell tale V8 mod
Nov 4 2022, 08:11 PM East coaster And moved on to some suspension fun……aka Safar... Nov 4 2022, 08:15 PM
East coaster
[
Hell hole
attachmentid=856763] Nov 4 2022, 08:08 PM East coaster Closed up the tell tale V8 mod
Nov 4 2022, 08:11 PM East coaster And moved on to some suspension fun……aka Safar... Nov 4 2022, 08:15 PM
 waltonsm
And moved on to some suspension fun……aka Safa... Nov 6 2022, 05:10 PM East coaster Working on the radiator install. I plan to vent ou... Nov 4 2022, 08:18 PM East coaster Machined rear hubs and rotors for 5 lug….
Reb... Nov 4 2022, 08:51 PM Tjmrfe Looks great. Looking forward to following your jou... Nov 4 2022, 08:58 PM mb911 Will you finishing the welds on the floor pan? Loo... Nov 5 2022, 08:32 AM East coaster
Will you finishing the welds on the floor pan? Lo... Nov 6 2022, 06:21 AM jhynesrockmtn I don't get the safari trend thing but your sk... Nov 5 2022, 09:11 AM 914sgofast2
I don't get the safari trend thing but your s... Nov 5 2022, 02:42 PM 914e
I don't get the safari trend thing but your s... Nov 5 2022, 03:08 PM infraredcalvin Do you really want a hole on the bottom of the car... Nov 6 2022, 07:33 AM East coaster I guess I’ll see where I end up with camber. I s... Nov 7 2022, 06:42 AM East coaster It was hood seal channel repair day. Bent some 18 ... Nov 8 2022, 07:57 PM bkrantz Nice work! How high will the floor pan sit ab... Nov 8 2022, 08:26 PM r_towle Good to see this one saved…it needed your skills... Nov 9 2022, 08:06 AM East coaster Radiator time…..made a mount for the bottom of t... Nov 12 2022, 08:35 PM East coaster Then moved on to a means of mounting the top of th... Nov 12 2022, 08:36 PM East coaster A small diversion project to allow me to work in t... Dec 4 2022, 07:39 AM East coaster Machined a conversion part for the clutch clevis. ... Dec 7 2022, 07:08 AM East coaster With radiator mount completed, it was on to the fa... Dec 15 2022, 07:36 PM East coaster RE: Safari 914 project Dec 15 2022, 07:38 PM East coaster Purdy……
Dec 15 2022, 07:39 PM Montreal914 I am still in admiration with your fiberglass duct... Dec 15 2022, 09:33 PM East coaster
I am still in admiration with your fiberglass duc... Dec 16 2022, 06:06 AM Blue6
I am still in admiration with your fiberglass duc... Dec 15 2022, 09:49 PM slowrodent Super metal fab work.. And that plenum is wondrous... Dec 16 2022, 07:53 AM Retroracer Another nod to the excellent footwear - but adding... Dec 16 2022, 10:35 AM East coaster
Another nod to the excellent footwear - but addin... Dec 16 2022, 07:35 PM East coaster Finished up the entrance plenum. Final fitting/tri... Dec 20 2022, 06:30 PM East coaster Surfing through a sea of wires………I plan to u... Jan 29 2023, 09:28 PM East coaster I tore down my donor Suby engine and replaced head... Feb 7 2023, 07:08 PM East coaster While the engine was upside down, I started fabric... Feb 7 2023, 07:14 PM raynekat
Nice welds there...you've definitely got... Feb 19 2023, 11:20 PM East coaster
Nice welds there...you've definitely got som... Feb 20 2023, 07:01 PM East coaster Couple more pics….
Feb 7 2023, 07:15 PM East coaster Got more done on the cradle today. Bent some 1-1/2... Feb 10 2023, 07:58 PM East coaster Fabricated the trans support and incorporated the ... Feb 13 2023, 08:16 PM East coaster Took advantage of some unseasonable February weath... Feb 17 2023, 06:39 PM East coaster My focus on my project has been all over the map, ... Feb 19 2023, 07:44 PM euro911 Cool :headbanger: Feb 20 2023, 06:45 PM rgalla9146 You're in Brigantine, I'm in Paramus
W... Feb 21 2023, 10:45 AM East coaster
You're in Brigantine, I'm in Paramus
... Feb 21 2023, 06:20 PM East coaster RE: Safari 914 project Feb 22 2023, 06:54 PM East coaster Began fabricating my alternator bracket today. It�... Feb 25 2023, 08:40 PM East coaster First test fit of the engine/trans. Everything fit... Feb 26 2023, 06:29 PM East coaster Finalized alignment of alternator bracket and fini... Feb 28 2023, 07:23 PM East coaster Worked out the engine harness today. I had to undr... Mar 2 2023, 08:29 PM East coaster Started fabricating my safari rack (what’s a saf... Mar 5 2023, 07:58 PM East coaster Decided to lower the rear control arm mounts to ac... Mar 9 2023, 08:27 PM East coaster Then I re-attached the box section removed in 1st ... Mar 9 2023, 08:31 PM East coaster Then I cleaned up and drilled a new mounting hole ... Mar 9 2023, 08:35 PM East coaster The outer trailer trailing arms spacers are done�... Mar 10 2023, 08:20 PM Retroracer Some great fabrication there. Rack design coming ... Mar 11 2023, 09:21 AM East coaster
Some great fabrication there. Rack design coming... Mar 11 2023, 09:04 PM East coaster Trailing arms installed and its back on its feet�... Mar 11 2023, 09:07 PM East coaster Somethin’ brewin’…….
Mar 14 2023, 07:09 PM East coaster Picked up a stock front valance in nice shape and ... Mar 15 2023, 07:54 PM East coaster Did the same treatment to the bumper…….radiato... Mar 23 2023, 07:52 AM East coaster I saved the sh*ttiest task for last……had to re... Mar 23 2023, 06:47 PM East coaster Patch welded in…..
Mar 23 2023, 06:50 PM East coaster Passenger side was worse and required 2 patch piec... Mar 23 2023, 06:51 PM East coaster Then it was on to rear trunk hinge pivots. The dri... Mar 23 2023, 06:58 PM East coaster Tackled the battery tray next. Although I’m doin... Mar 24 2023, 05:28 AM East coaster Decided a little while back to go with 911 struts.... Mar 24 2023, 07:51 PM East coaster Safari stuff progress……still have to work the ... Mar 27 2023, 08:08 PM East coaster Miscellaneous tidbits…..
Mar 31 2023, 06:58 PM East coaster RE: Safari 914 project Mar 31 2023, 07:01 PM Retroracer Hinged at the front so you can remove the targa ro... Apr 1 2023, 09:48 AM East coaster
Hinged at the front so you can remove the targa r... Apr 1 2023, 07:10 PM slowrodent This is such a BOLD build . I really do love it. Y... Apr 2 2023, 01:01 PM sixnotfour Better reinforce windshield frame..
https://pbase... Apr 2 2023, 01:01 PM East coaster
Better reinforce windshield frame..
https://pbas... Apr 2 2023, 06:12 PM East coaster My biggest challenge in this project thus far is d... Apr 2 2023, 06:37 PM East coaster Started work on the rear rack. Hope to get it weld... Apr 3 2023, 07:00 PM Optimusglen This is giving me ideas, love the build so much. I... Apr 3 2023, 07:22 PM East coaster Looks very cool. Apr 4 2023, 05:18 AM altitude411 * Subscribed... very cool build. Thank you for pos... Apr 4 2023, 09:00 AM Van914 Saw this one in Indy a few years ago Apr 4 2023, 04:37 PM East coaster Finished fabricating and welding the rear rack. On... Apr 4 2023, 07:56 PM East coaster Finished the rear cargo rack and got it mounted to... Apr 6 2023, 08:08 PM East coaster …
Apr 6 2023, 08:09 PM wonkipop love the trunk lid hinging.
:beer2: Apr 6 2023, 08:44 PM Optimusglen Do you need a winch to lift the rear trunk? :D
ki... Apr 7 2023, 08:10 AM East coaster
Do you need a winch to lift the rear trunk? :D
k... Apr 7 2023, 07:27 PM Shivers Well, this rocks (pun intended}. The rack sure mak... Apr 7 2023, 09:10 AM Montreal914 Very nice work! :)
Based on the quality of ... Apr 7 2023, 08:27 PM East coaster Installed gas struts for the rear trunk today. The... Apr 8 2023, 07:15 PM East coaster Decided to go with something different for my head... Apr 10 2023, 07:41 PM brubou Forget Cibie's!!! Mount a couple 9... Apr 10 2023, 08:30 PM Retroracer Cool idea with the fixed 928 headlight buckets. C... Apr 11 2023, 08:43 AM East coaster A few detail pics of headlight framing….. Apr 11 2023, 08:07 PM East coaster More…. Apr 11 2023, 08:08 PM East coaster RE: Safari 914 project Apr 11 2023, 08:09 PM Chris H. Your fab skills are really next level. You're... Apr 12 2023, 04:43 AM East coaster Thanks for the kind words Chris. You’re one of t... Apr 12 2023, 05:07 AM Chris H.
Thanks for the kind words Chris. You’re one of ... Apr 12 2023, 05:37 AM East coaster Got the mounts figured out for my coolant expansio... Apr 13 2023, 07:32 PM
waltonsm
And moved on to some suspension fun……aka Safa... Nov 6 2022, 05:10 PM East coaster Working on the radiator install. I plan to vent ou... Nov 4 2022, 08:18 PM East coaster Machined rear hubs and rotors for 5 lug….
Reb... Nov 4 2022, 08:51 PM Tjmrfe Looks great. Looking forward to following your jou... Nov 4 2022, 08:58 PM mb911 Will you finishing the welds on the floor pan? Loo... Nov 5 2022, 08:32 AM East coaster
Will you finishing the welds on the floor pan? Lo... Nov 6 2022, 06:21 AM jhynesrockmtn I don't get the safari trend thing but your sk... Nov 5 2022, 09:11 AM 914sgofast2
I don't get the safari trend thing but your s... Nov 5 2022, 02:42 PM 914e
I don't get the safari trend thing but your s... Nov 5 2022, 03:08 PM infraredcalvin Do you really want a hole on the bottom of the car... Nov 6 2022, 07:33 AM East coaster I guess I’ll see where I end up with camber. I s... Nov 7 2022, 06:42 AM East coaster It was hood seal channel repair day. Bent some 18 ... Nov 8 2022, 07:57 PM bkrantz Nice work! How high will the floor pan sit ab... Nov 8 2022, 08:26 PM r_towle Good to see this one saved…it needed your skills... Nov 9 2022, 08:06 AM East coaster Radiator time…..made a mount for the bottom of t... Nov 12 2022, 08:35 PM East coaster Then moved on to a means of mounting the top of th... Nov 12 2022, 08:36 PM East coaster A small diversion project to allow me to work in t... Dec 4 2022, 07:39 AM East coaster Machined a conversion part for the clutch clevis. ... Dec 7 2022, 07:08 AM East coaster With radiator mount completed, it was on to the fa... Dec 15 2022, 07:36 PM East coaster RE: Safari 914 project Dec 15 2022, 07:38 PM East coaster Purdy……
Dec 15 2022, 07:39 PM Montreal914 I am still in admiration with your fiberglass duct... Dec 15 2022, 09:33 PM East coaster
I am still in admiration with your fiberglass duc... Dec 16 2022, 06:06 AM Blue6
I am still in admiration with your fiberglass duc... Dec 15 2022, 09:49 PM slowrodent Super metal fab work.. And that plenum is wondrous... Dec 16 2022, 07:53 AM Retroracer Another nod to the excellent footwear - but adding... Dec 16 2022, 10:35 AM East coaster
Another nod to the excellent footwear - but addin... Dec 16 2022, 07:35 PM East coaster Finished up the entrance plenum. Final fitting/tri... Dec 20 2022, 06:30 PM East coaster Surfing through a sea of wires………I plan to u... Jan 29 2023, 09:28 PM East coaster I tore down my donor Suby engine and replaced head... Feb 7 2023, 07:08 PM East coaster While the engine was upside down, I started fabric... Feb 7 2023, 07:14 PM raynekat
Nice welds there...you've definitely got... Feb 19 2023, 11:20 PM East coaster
Nice welds there...you've definitely got som... Feb 20 2023, 07:01 PM East coaster Couple more pics….
Feb 7 2023, 07:15 PM East coaster Got more done on the cradle today. Bent some 1-1/2... Feb 10 2023, 07:58 PM East coaster Fabricated the trans support and incorporated the ... Feb 13 2023, 08:16 PM East coaster Took advantage of some unseasonable February weath... Feb 17 2023, 06:39 PM East coaster My focus on my project has been all over the map, ... Feb 19 2023, 07:44 PM euro911 Cool :headbanger: Feb 20 2023, 06:45 PM rgalla9146 You're in Brigantine, I'm in Paramus
W... Feb 21 2023, 10:45 AM East coaster
You're in Brigantine, I'm in Paramus
... Feb 21 2023, 06:20 PM East coaster RE: Safari 914 project Feb 22 2023, 06:54 PM East coaster Began fabricating my alternator bracket today. It�... Feb 25 2023, 08:40 PM East coaster First test fit of the engine/trans. Everything fit... Feb 26 2023, 06:29 PM East coaster Finalized alignment of alternator bracket and fini... Feb 28 2023, 07:23 PM East coaster Worked out the engine harness today. I had to undr... Mar 2 2023, 08:29 PM East coaster Started fabricating my safari rack (what’s a saf... Mar 5 2023, 07:58 PM East coaster Decided to lower the rear control arm mounts to ac... Mar 9 2023, 08:27 PM East coaster Then I re-attached the box section removed in 1st ... Mar 9 2023, 08:31 PM East coaster Then I cleaned up and drilled a new mounting hole ... Mar 9 2023, 08:35 PM East coaster The outer trailer trailing arms spacers are done�... Mar 10 2023, 08:20 PM Retroracer Some great fabrication there. Rack design coming ... Mar 11 2023, 09:21 AM East coaster
Some great fabrication there. Rack design coming... Mar 11 2023, 09:04 PM East coaster Trailing arms installed and its back on its feet�... Mar 11 2023, 09:07 PM East coaster Somethin’ brewin’…….
Mar 14 2023, 07:09 PM East coaster Picked up a stock front valance in nice shape and ... Mar 15 2023, 07:54 PM East coaster Did the same treatment to the bumper…….radiato... Mar 23 2023, 07:52 AM East coaster I saved the sh*ttiest task for last……had to re... Mar 23 2023, 06:47 PM East coaster Patch welded in…..
Mar 23 2023, 06:50 PM East coaster Passenger side was worse and required 2 patch piec... Mar 23 2023, 06:51 PM East coaster Then it was on to rear trunk hinge pivots. The dri... Mar 23 2023, 06:58 PM East coaster Tackled the battery tray next. Although I’m doin... Mar 24 2023, 05:28 AM East coaster Decided a little while back to go with 911 struts.... Mar 24 2023, 07:51 PM East coaster Safari stuff progress……still have to work the ... Mar 27 2023, 08:08 PM East coaster Miscellaneous tidbits…..
Mar 31 2023, 06:58 PM East coaster RE: Safari 914 project Mar 31 2023, 07:01 PM Retroracer Hinged at the front so you can remove the targa ro... Apr 1 2023, 09:48 AM East coaster
Hinged at the front so you can remove the targa r... Apr 1 2023, 07:10 PM slowrodent This is such a BOLD build . I really do love it. Y... Apr 2 2023, 01:01 PM sixnotfour Better reinforce windshield frame..
https://pbase... Apr 2 2023, 01:01 PM East coaster
Better reinforce windshield frame..
https://pbas... Apr 2 2023, 06:12 PM East coaster My biggest challenge in this project thus far is d... Apr 2 2023, 06:37 PM East coaster Started work on the rear rack. Hope to get it weld... Apr 3 2023, 07:00 PM Optimusglen This is giving me ideas, love the build so much. I... Apr 3 2023, 07:22 PM East coaster Looks very cool. Apr 4 2023, 05:18 AM altitude411 * Subscribed... very cool build. Thank you for pos... Apr 4 2023, 09:00 AM Van914 Saw this one in Indy a few years ago Apr 4 2023, 04:37 PM East coaster Finished fabricating and welding the rear rack. On... Apr 4 2023, 07:56 PM East coaster Finished the rear cargo rack and got it mounted to... Apr 6 2023, 08:08 PM East coaster …
Apr 6 2023, 08:09 PM wonkipop love the trunk lid hinging.
:beer2: Apr 6 2023, 08:44 PM Optimusglen Do you need a winch to lift the rear trunk? :D
ki... Apr 7 2023, 08:10 AM East coaster
Do you need a winch to lift the rear trunk? :D
k... Apr 7 2023, 07:27 PM Shivers Well, this rocks (pun intended}. The rack sure mak... Apr 7 2023, 09:10 AM Montreal914 Very nice work! :)
Based on the quality of ... Apr 7 2023, 08:27 PM East coaster Installed gas struts for the rear trunk today. The... Apr 8 2023, 07:15 PM East coaster Decided to go with something different for my head... Apr 10 2023, 07:41 PM brubou Forget Cibie's!!! Mount a couple 9... Apr 10 2023, 08:30 PM Retroracer Cool idea with the fixed 928 headlight buckets. C... Apr 11 2023, 08:43 AM East coaster A few detail pics of headlight framing….. Apr 11 2023, 08:07 PM East coaster More…. Apr 11 2023, 08:08 PM East coaster RE: Safari 914 project Apr 11 2023, 08:09 PM Chris H. Your fab skills are really next level. You're... Apr 12 2023, 04:43 AM East coaster Thanks for the kind words Chris. You’re one of t... Apr 12 2023, 05:07 AM Chris H.
Thanks for the kind words Chris. You’re one of ... Apr 12 2023, 05:37 AM East coaster Got the mounts figured out for my coolant expansio... Apr 13 2023, 07:32 PM  |
2 User(s) are reading this topic (2 Guests and 0 Anonymous Users)
0 Members:

|
Lo-Fi Version | Time is now: 27th May 2026 - 07:59 PM |
Invision Power Board
v9.1.4 © 2026 IPS, Inc.